Door Bench
As an Amazon Associate, I earn from qualifying purchases.


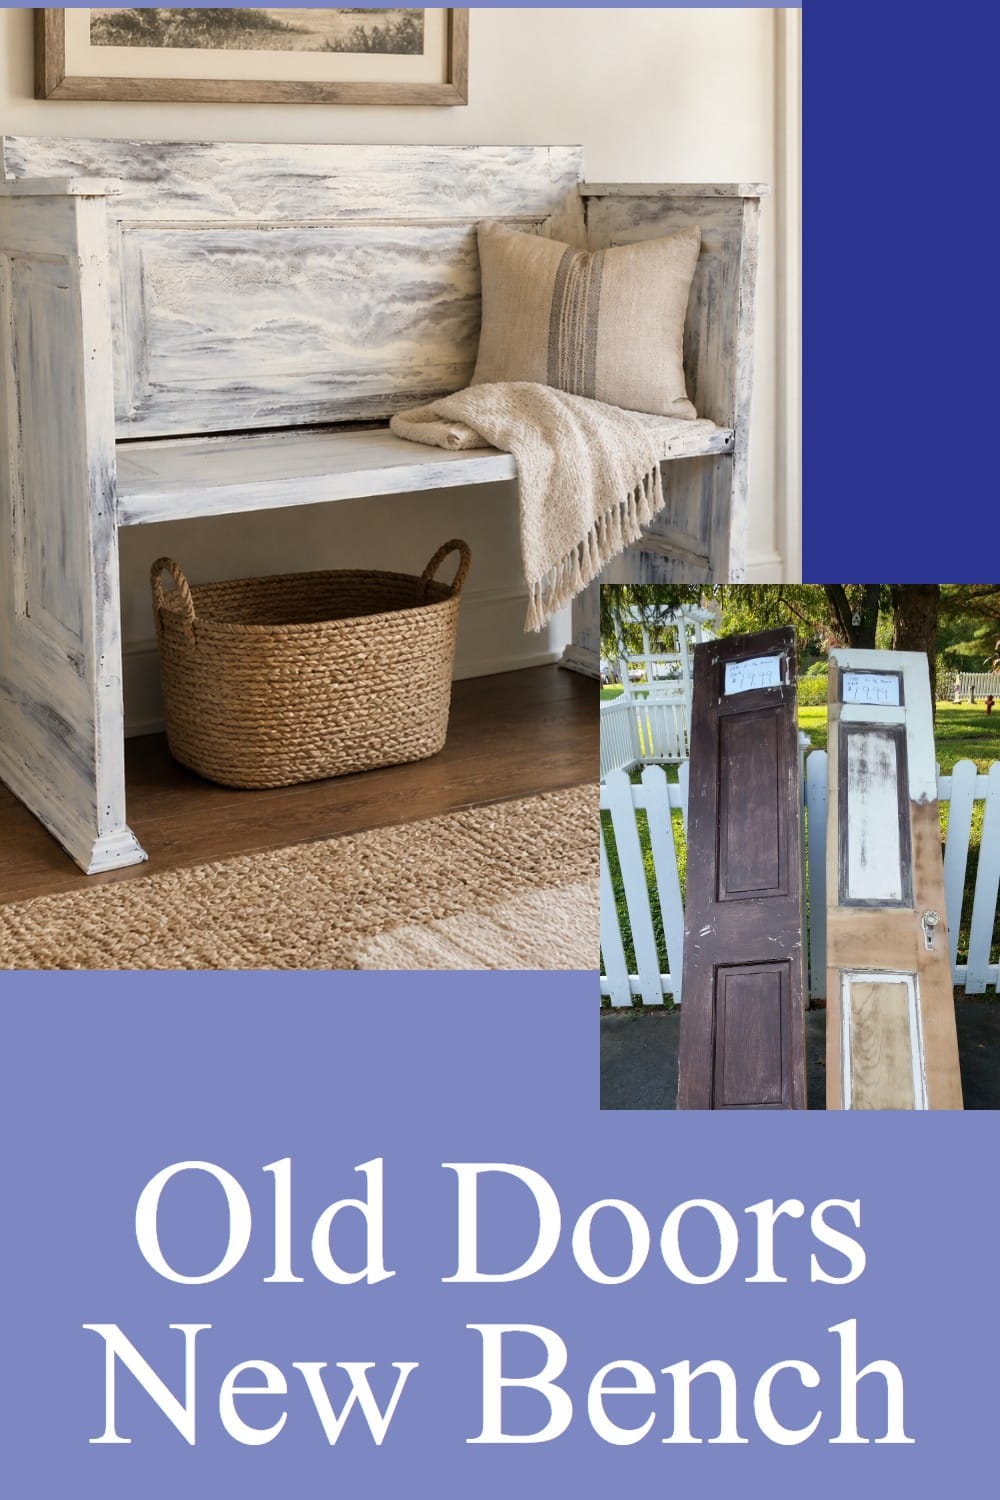
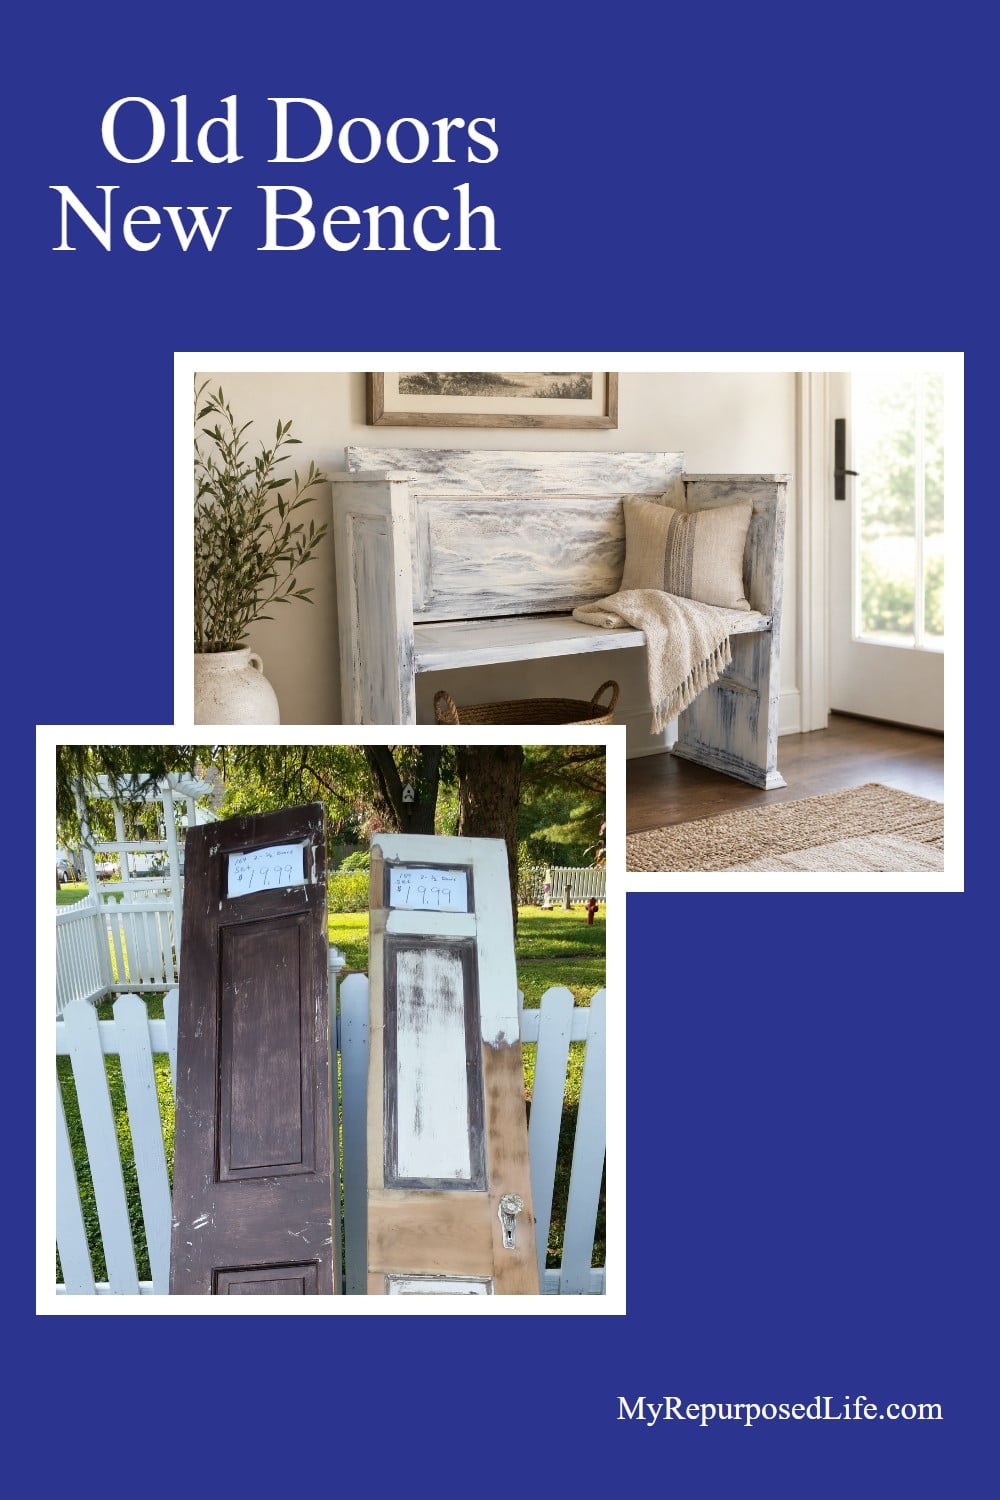
A thrift store door may not look like a bench at first glance, but that is exactly what makes this project fun. These narrow door sections had the right size, the right character, and just enough old hardware charm to make me take a second look. With a few cuts, some pocket holes, trim, armrests, and a crackle paint finish, those old door pieces became a small bench with church pew vibes.
I have always wanted to make a door bench. I’ve done a lot with door projects, including this small doll bench made from a door. I saw some doors at the Vendors’ Village and passed them by. I couldn’t stop thinking about them, so I went back within a couple of days, and luckily, they were still there.
Thrift Store Doors
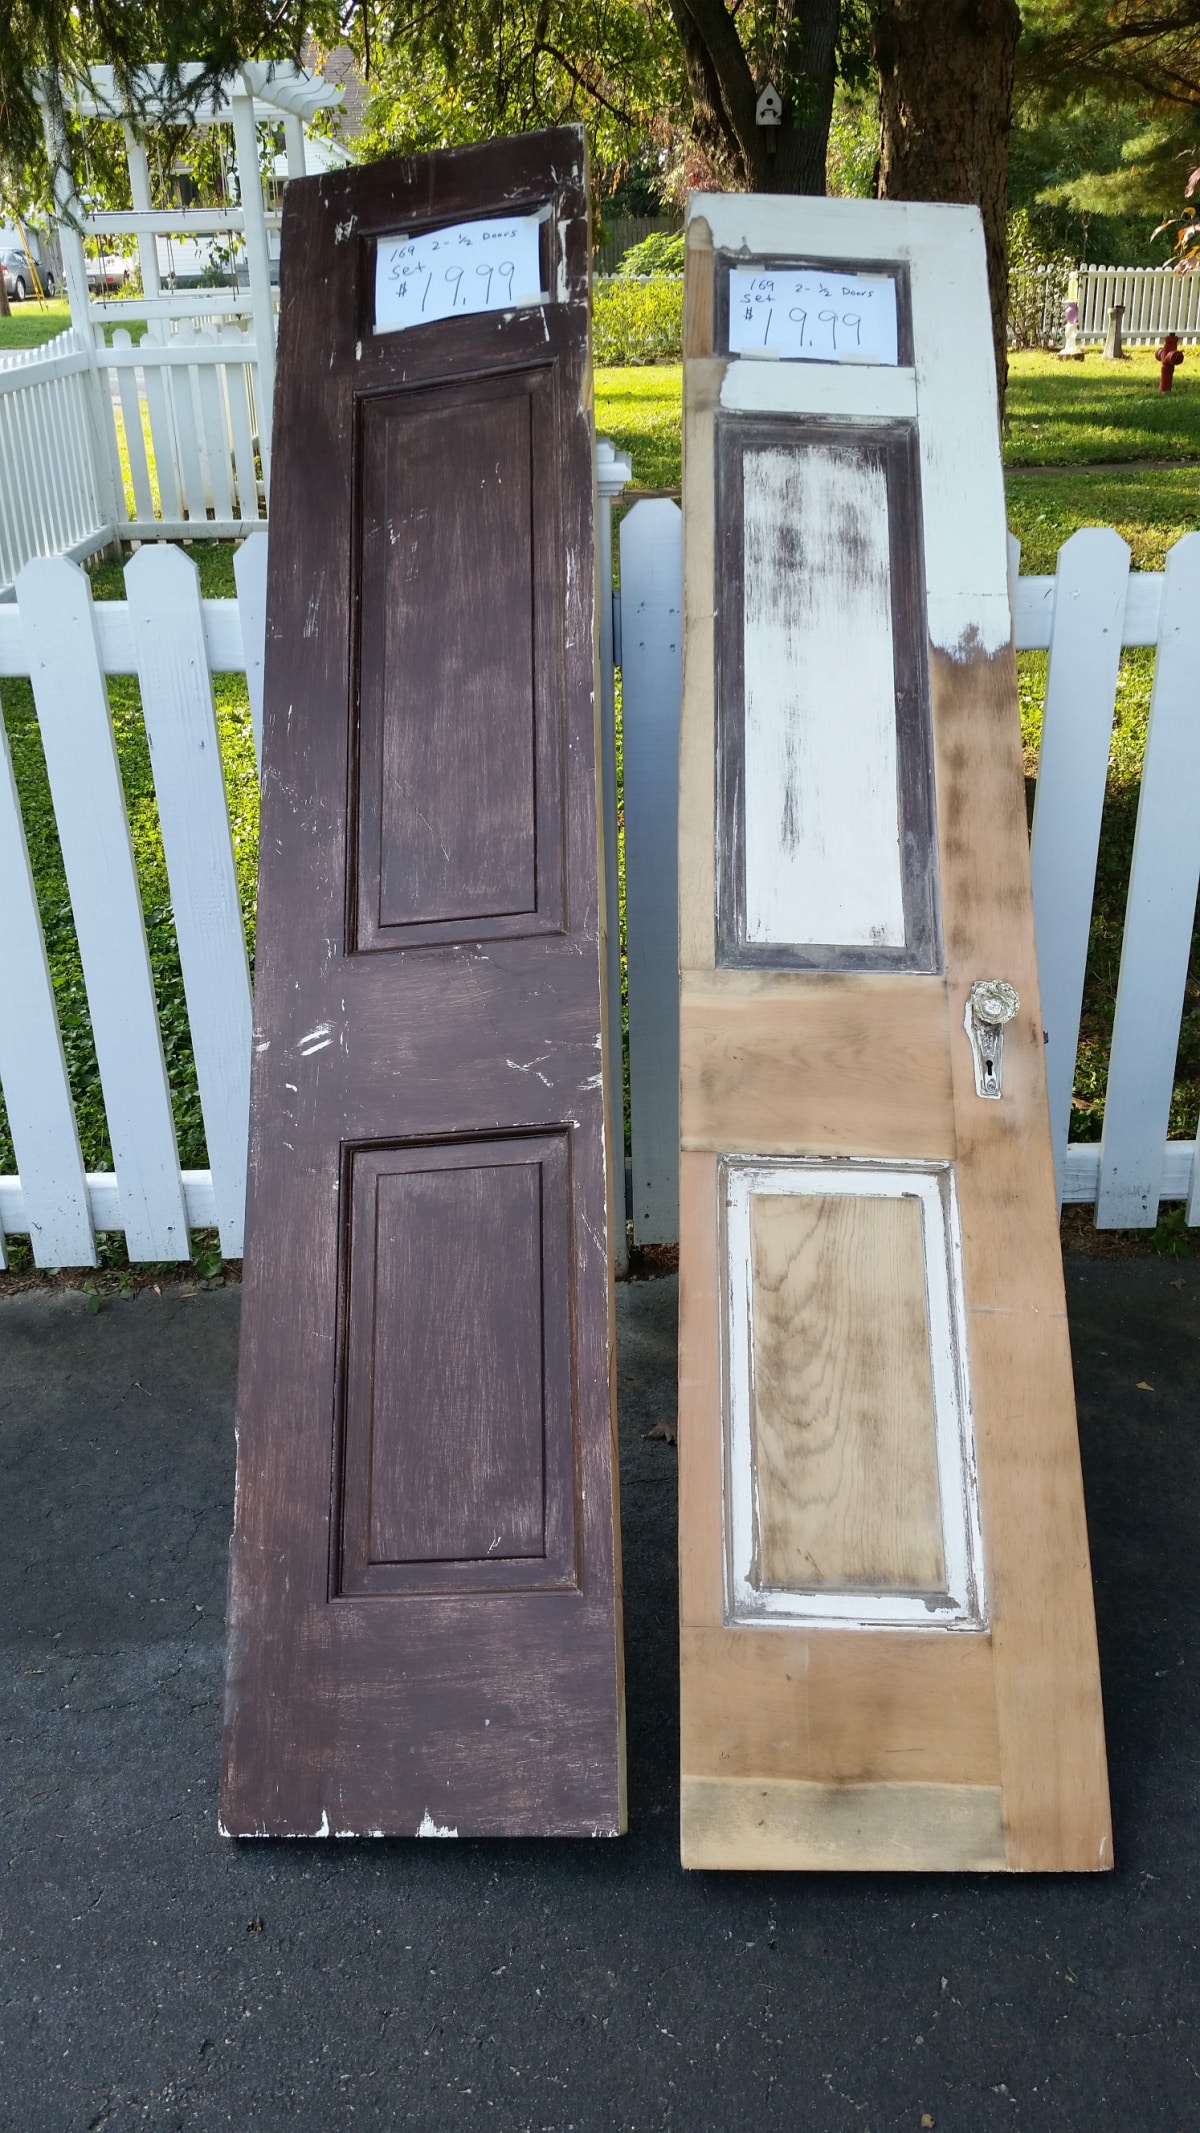
Of course, I scooped them up and hauled them home without really looking at them to find out that they had been ONE door ripped in half! Heck, I could have done that with one of the many doors in my stash. I just fell in love with their size, color, and hardware, which is why I paid such a high price for them.
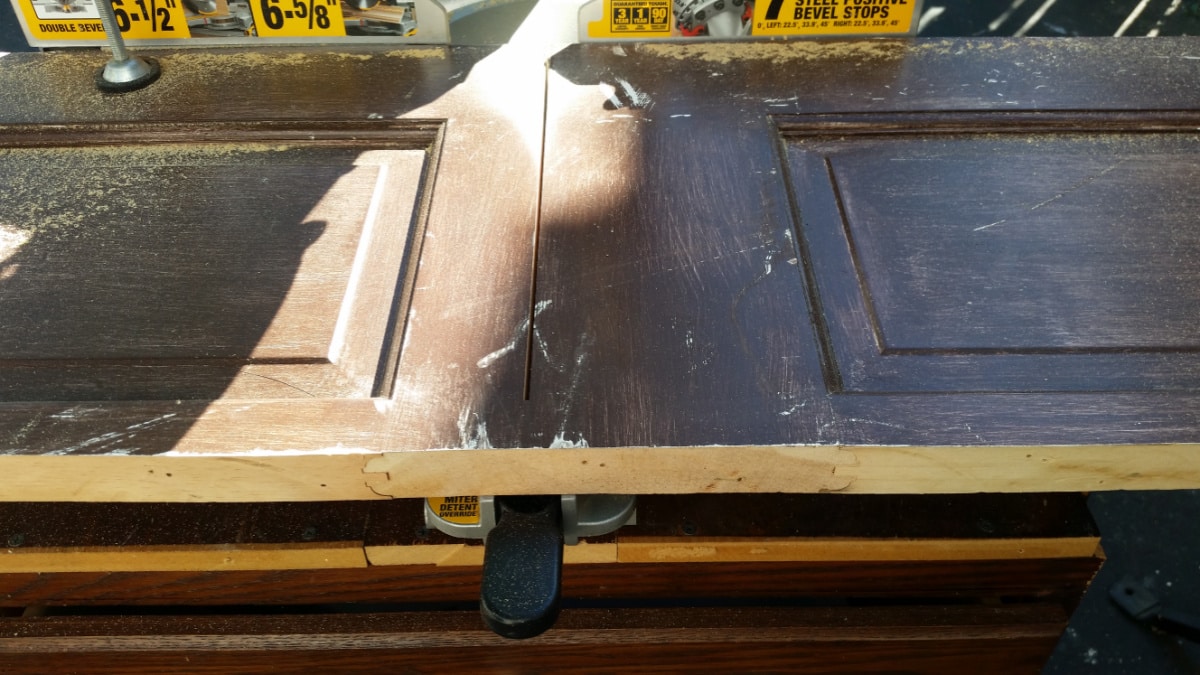
Saw Door Sections to Make a Bench
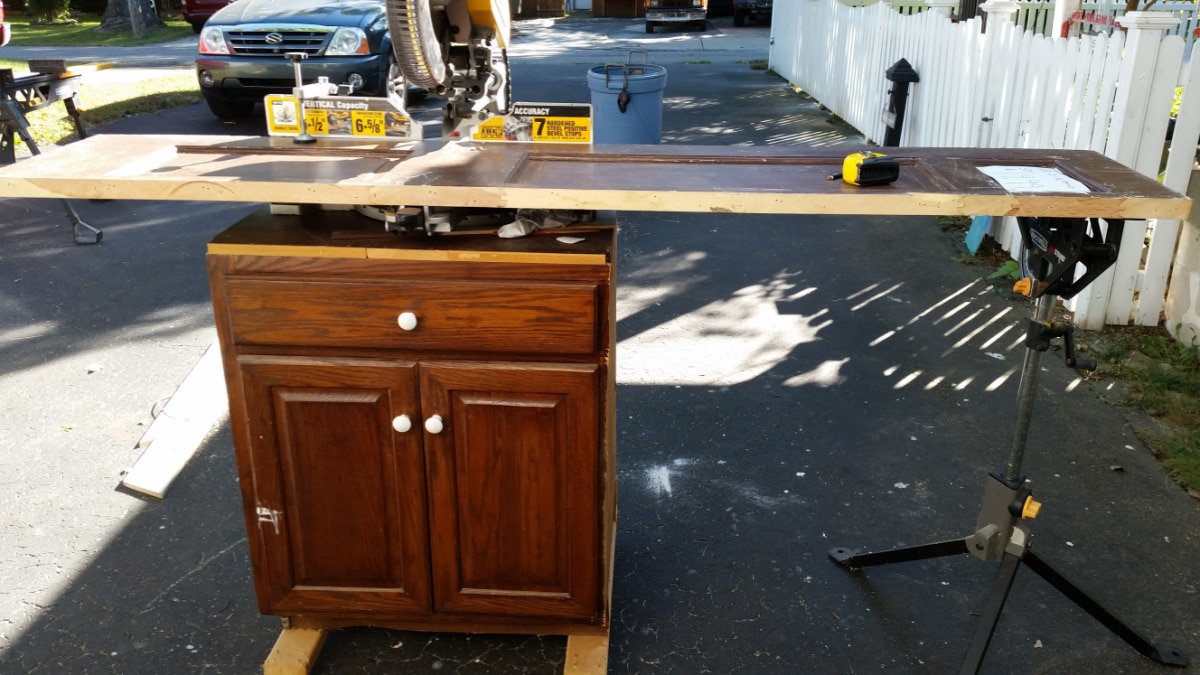
Because they are about 16”, I decided to use my sliding compound miter saw to cut them into the pieces I would need to make a door bench. My Rockwell jaw stand came in handy to support the door while I was cutting it.
I could have moved the fence out of the way, allowing me to cut the full width of the door, but I chose to leave the fence in place, cut as much as I could, and then flip it over.
Even up the Crooked Door on the Table Saw
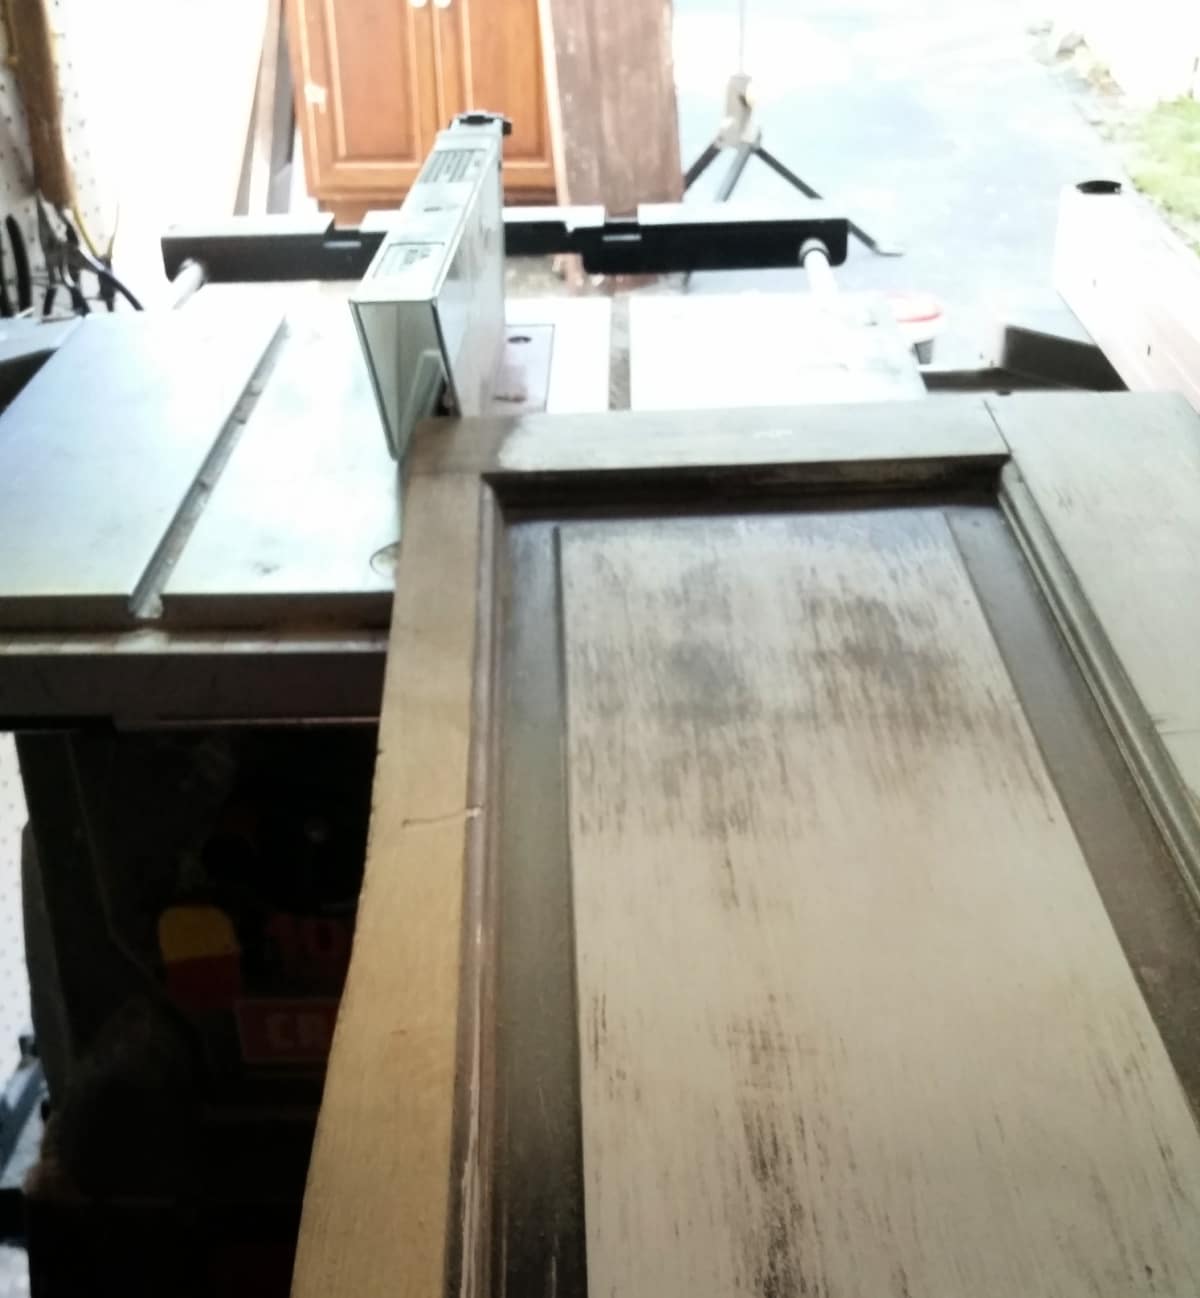
One of the half doors wasn’t cut very straight, so I used the table saw to straighten it.

I sorted through my screws and decided to use the extra-long pocket hole screws for as much of the construction as possible.
Make Necessary Repairs
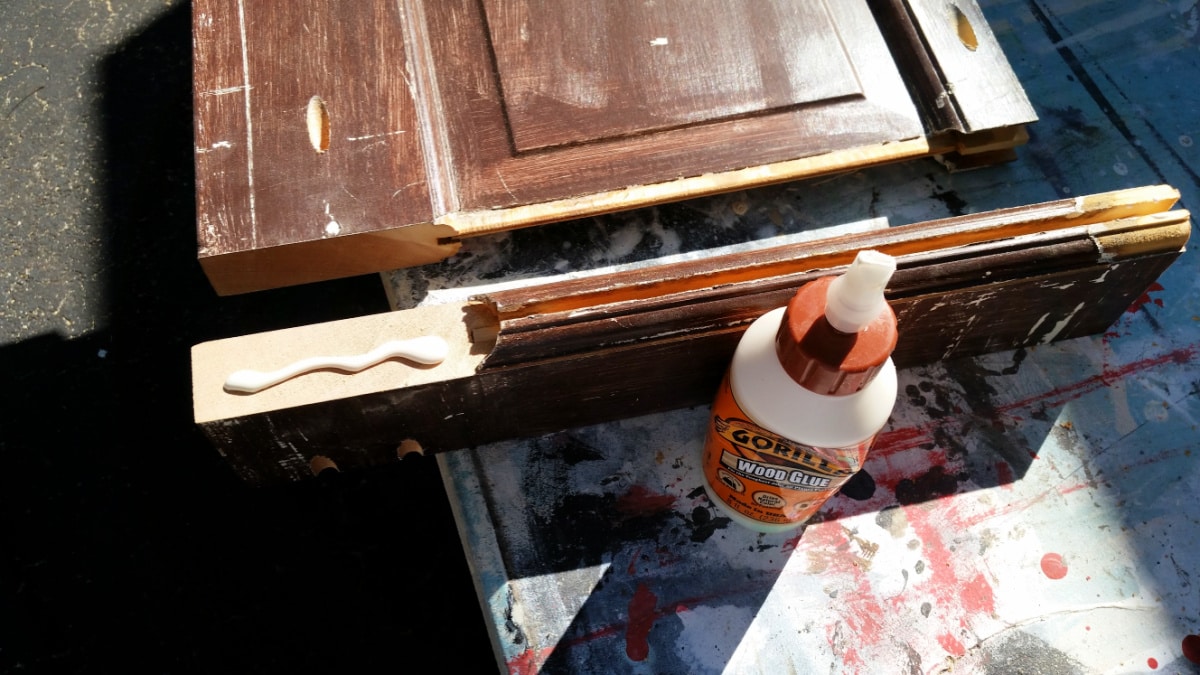
FULL disclosure! My mind (thoughts) drifted, and I cut the second 1/2 door in the wrong place. I pondered what to do and decided that I couldn’t use it for the “seat”, but if I repaired it properly, I could use it for the back of the bench. Enter some Gorilla Wood Glue and my Kreg Jig and pocket-hole screws.
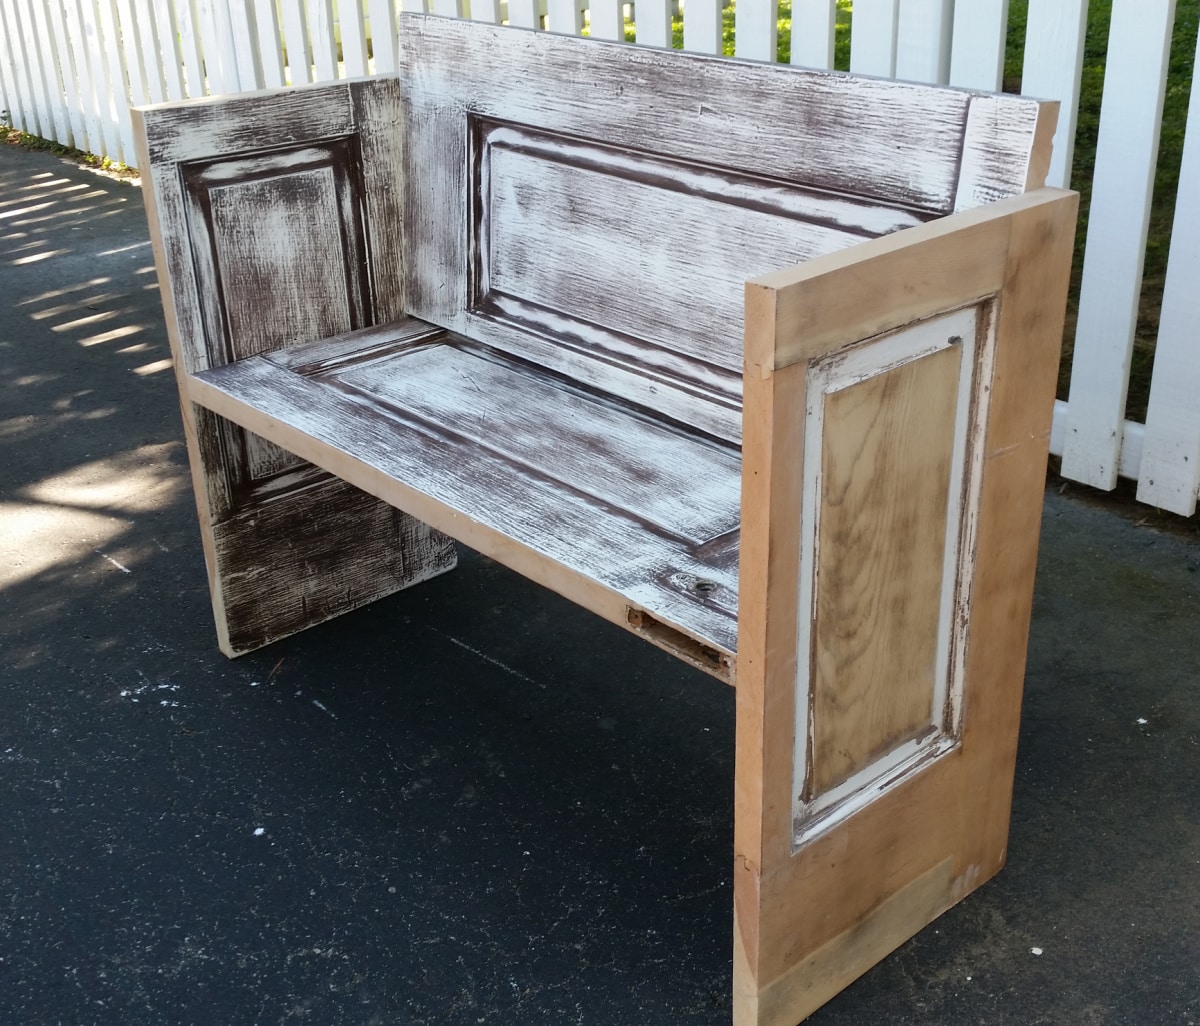
Design Your Door Bench
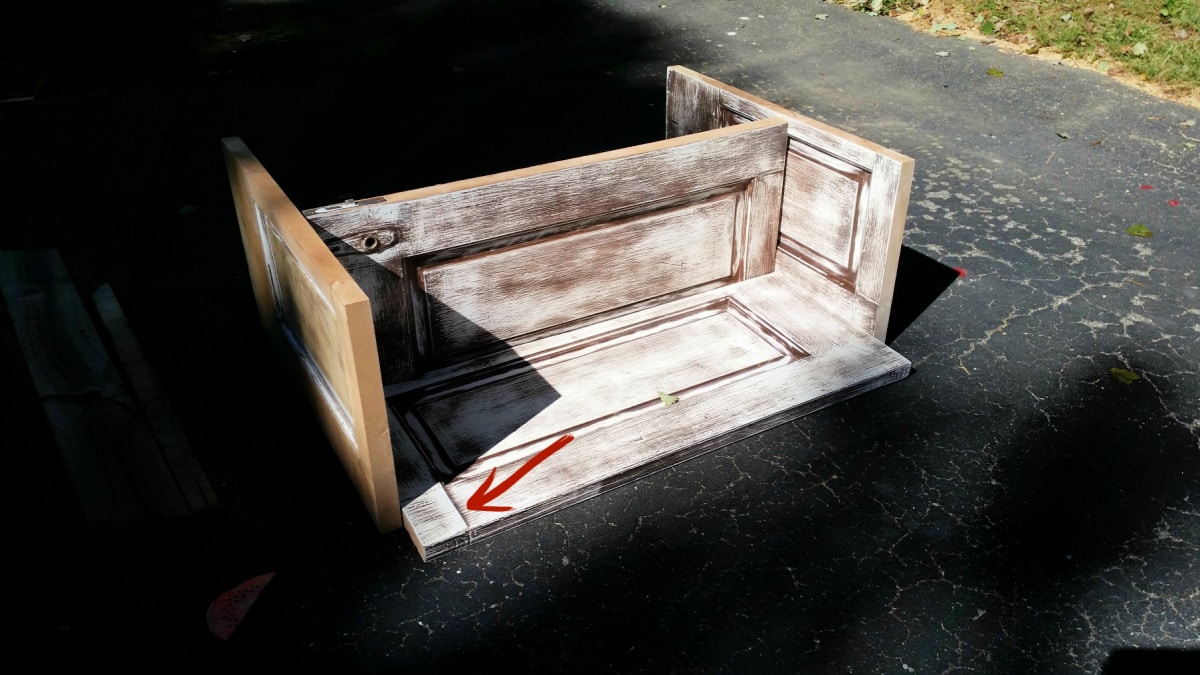
This is the design stage of the door bench. Lying it on its back on the driveway seemed like the easiest way to get my measurements right. The red arrow points to the accidental cut I made.
Not shown: I sanded half of the brown door parts. During the design stage, I placed all of the brownish parts toward the center and the bare wood parts toward the outside.
Construct the Door Bench With Pocket Hole Screws
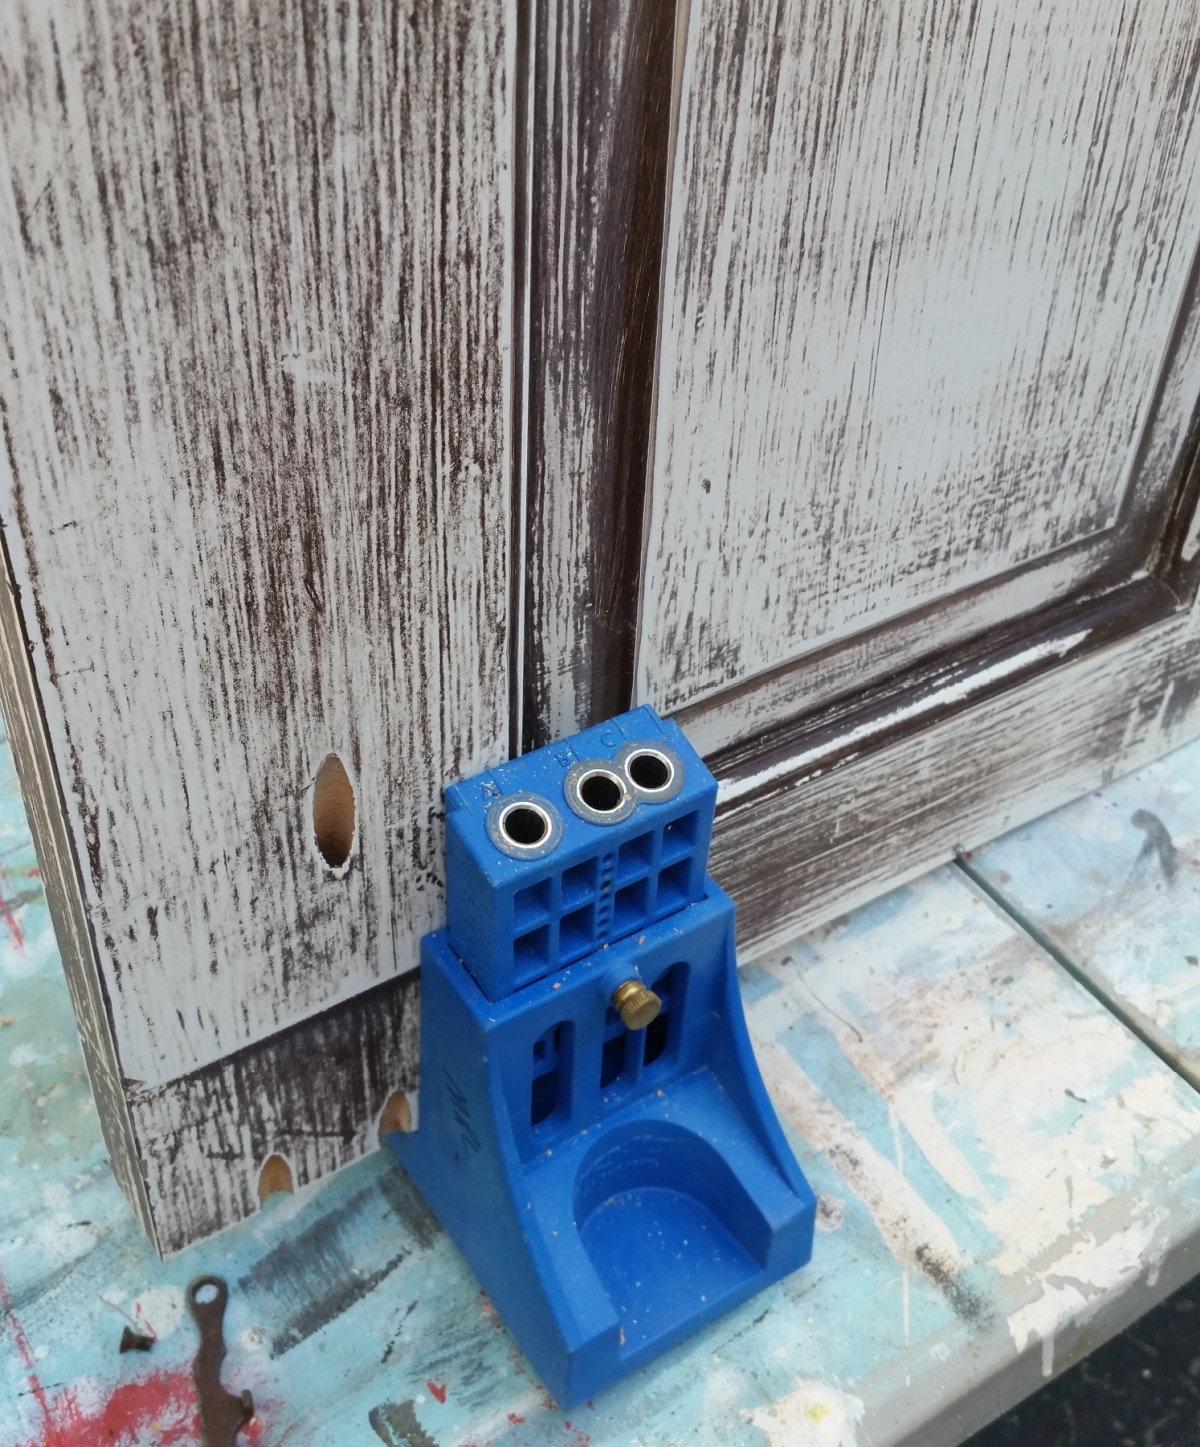
‘In this image, you can see the existing pocket holes—the bandaid for the oops cut.
The Kreg Jig is in place to drill the pocket holes to secure the back of the bench to the sides.
If you don’t have a pocket hole jig, you can use “L” brackets or mending plates. However, if you do many projects, I highly recommend investing in one of these jigs. For more details, see my post How To Use A Kreg Jig.
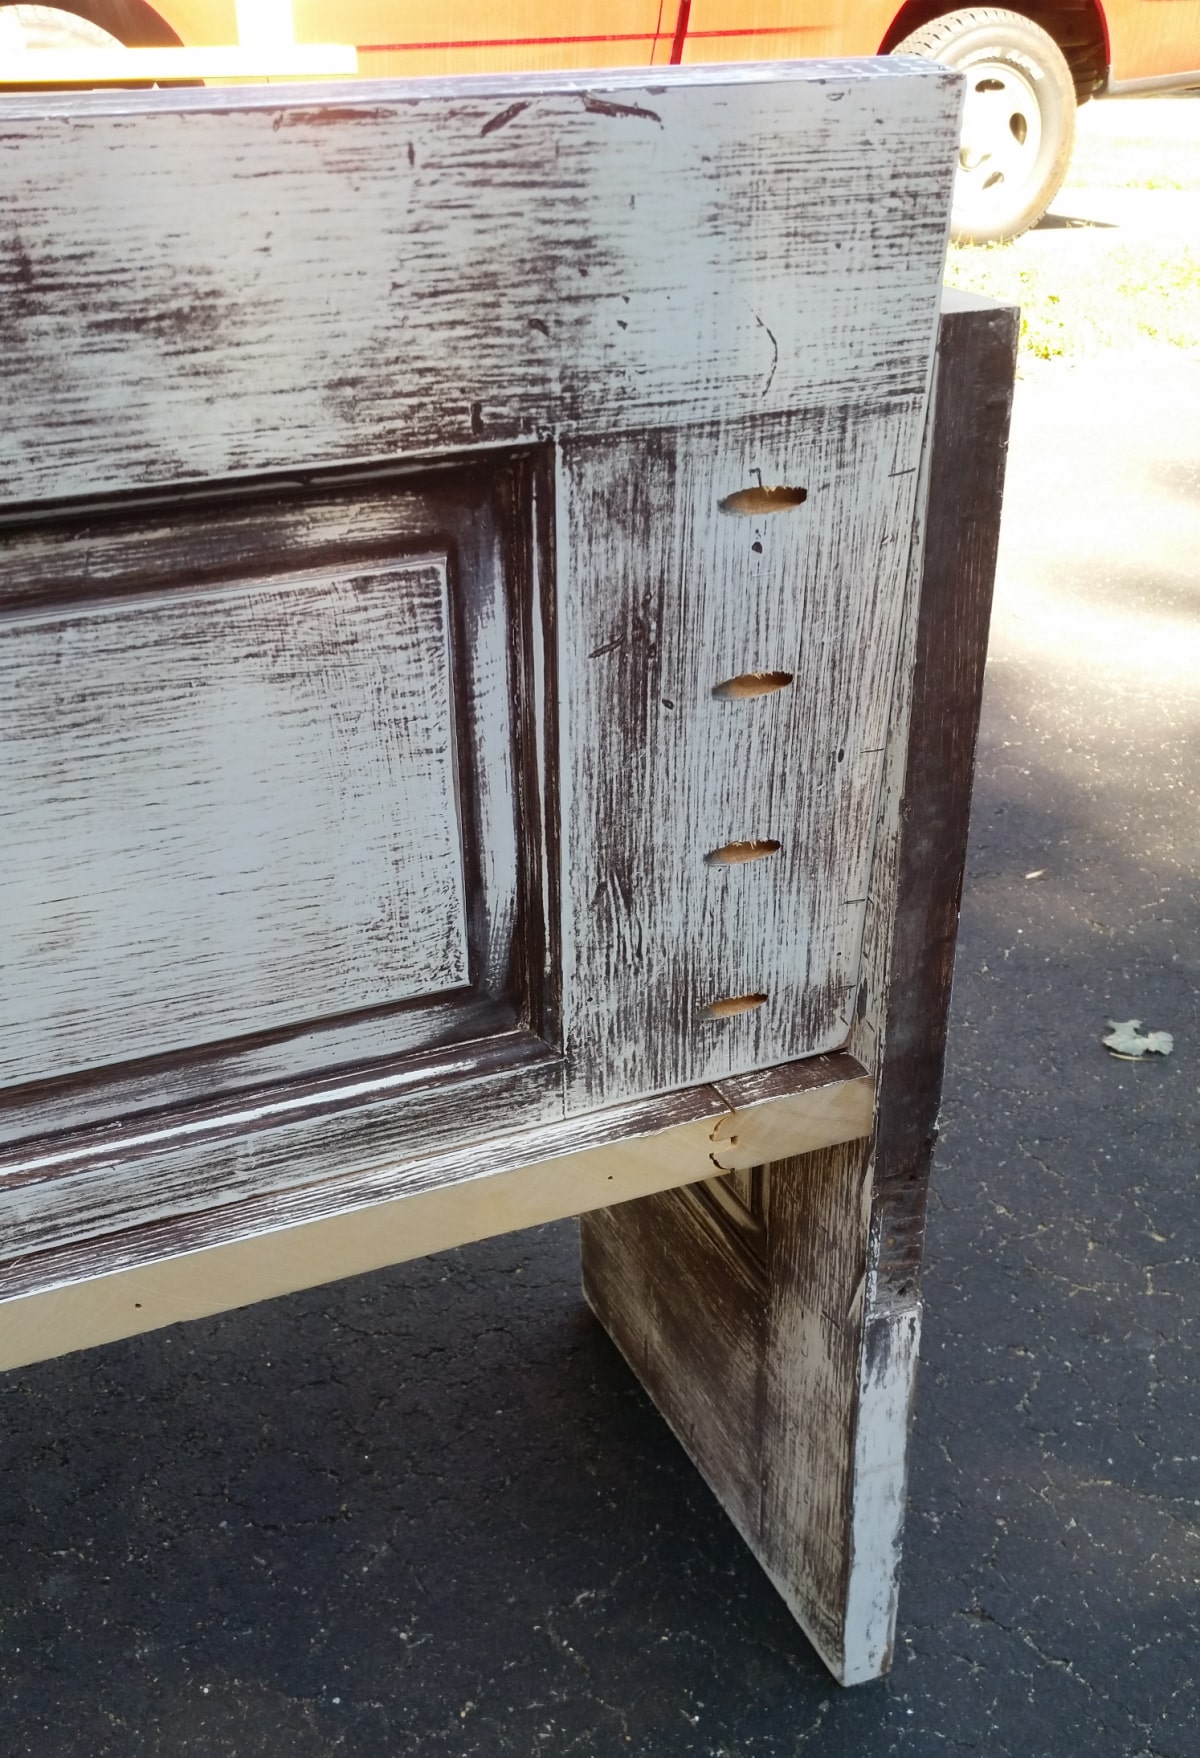
These are the holes I drilled in the above picture. Notice that the back is slightly slanted, making the bench more comfortable to sit on.
Even with the “oops,” the bench went together very quickly. I could have called it done here, and maybe you would have thought I should.
Add Trim to the Door Bench
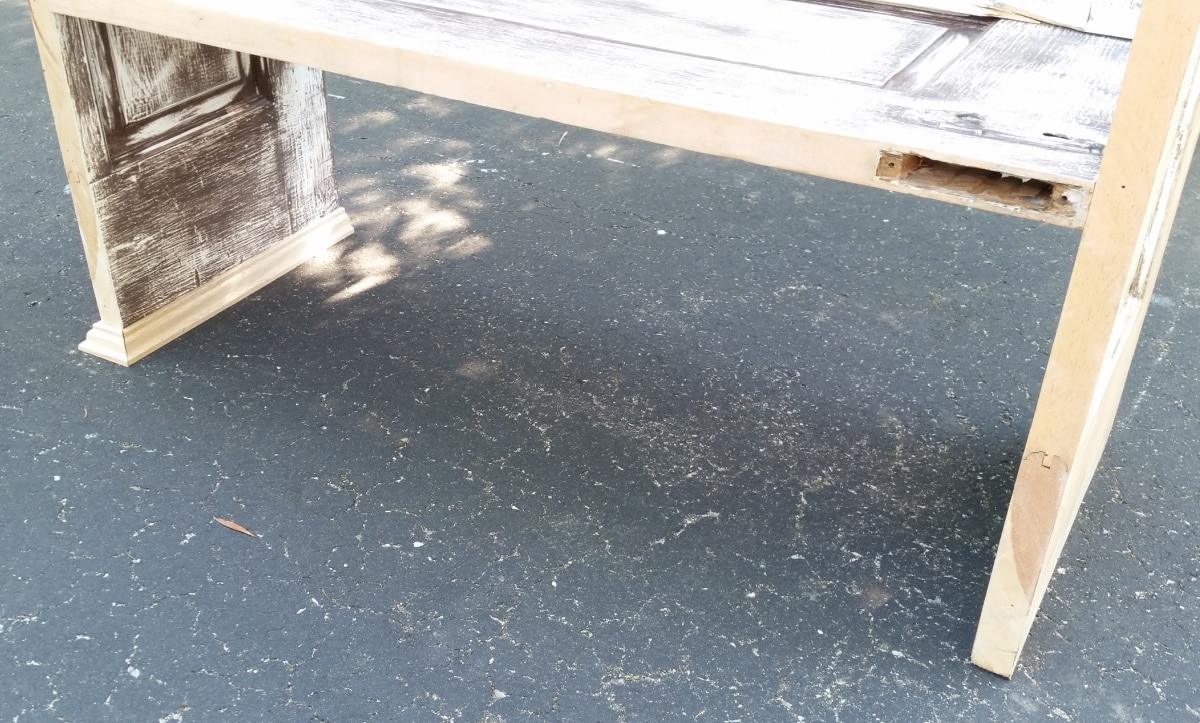
I had some molding in the garage and cut it to fit around the bottom of the bench (left). Next, I did the same thing for the right side. Then I thought it needed a little something more.
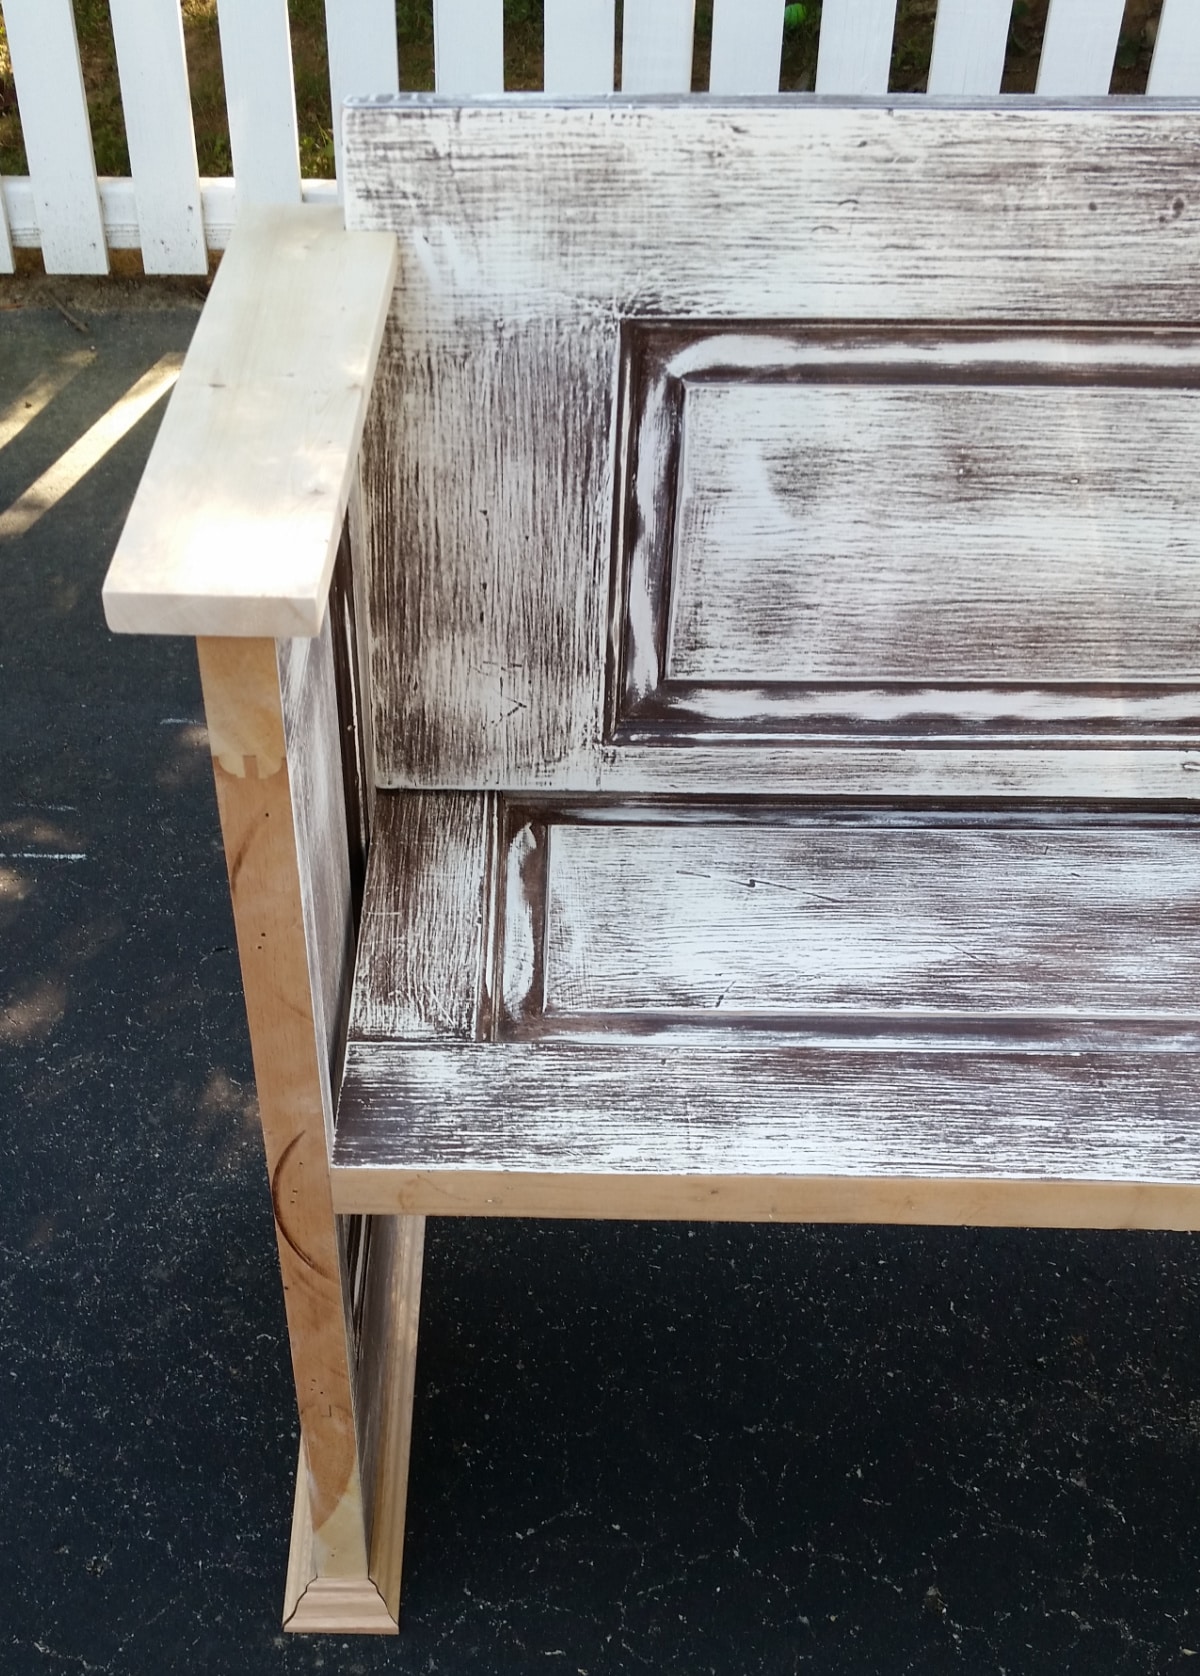
Armrests for the Door Bench
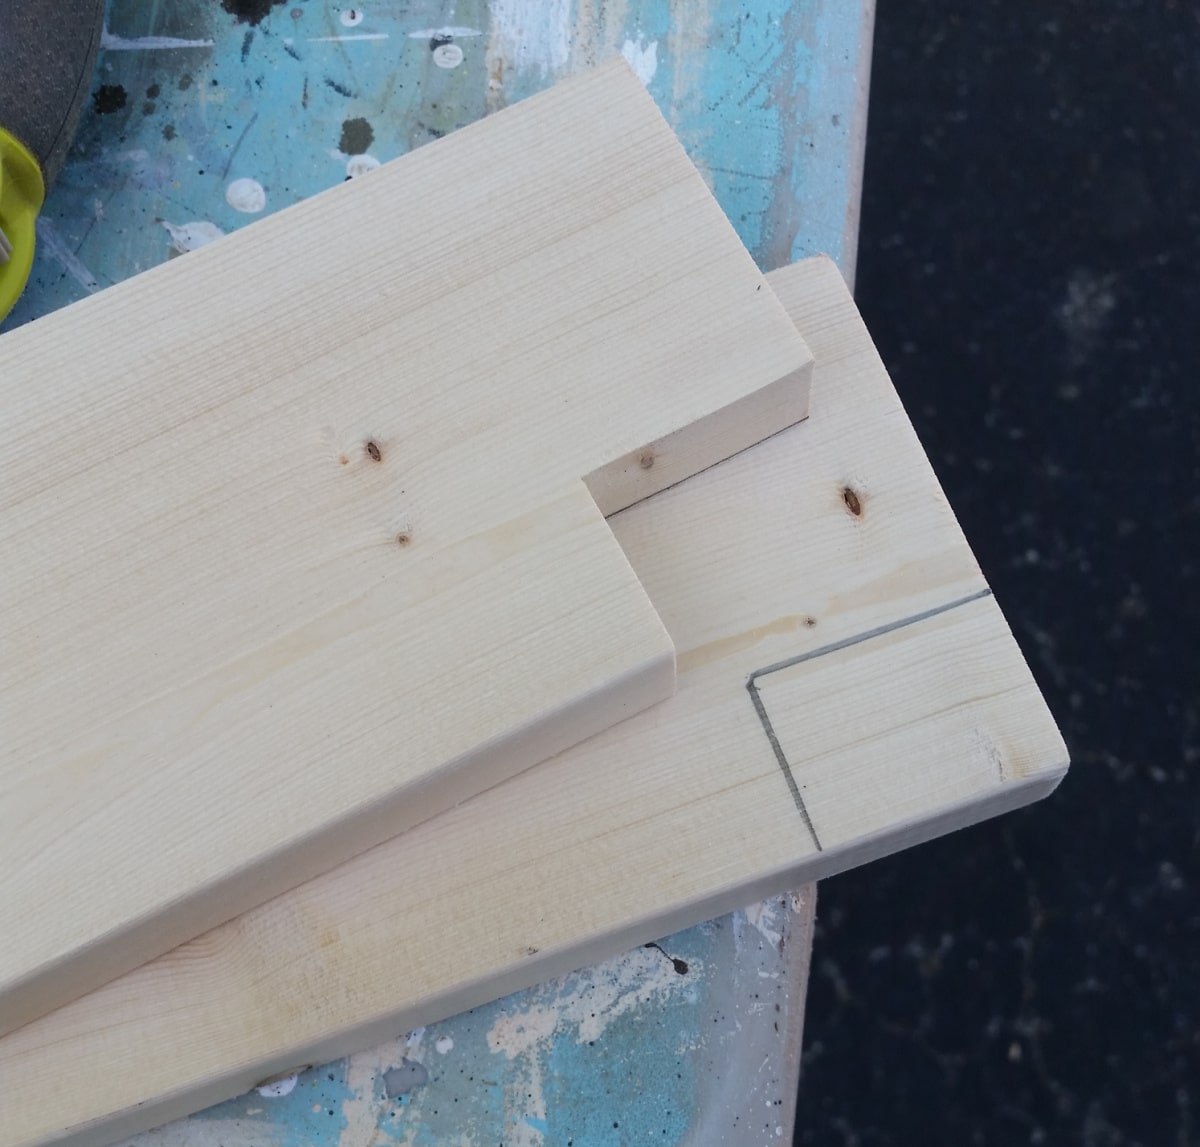
Scrap 1×4’s were notched out to fit the back of the bench to make armrests.
While doing the dry fit with the armrest, I decided that it was a little too wide.
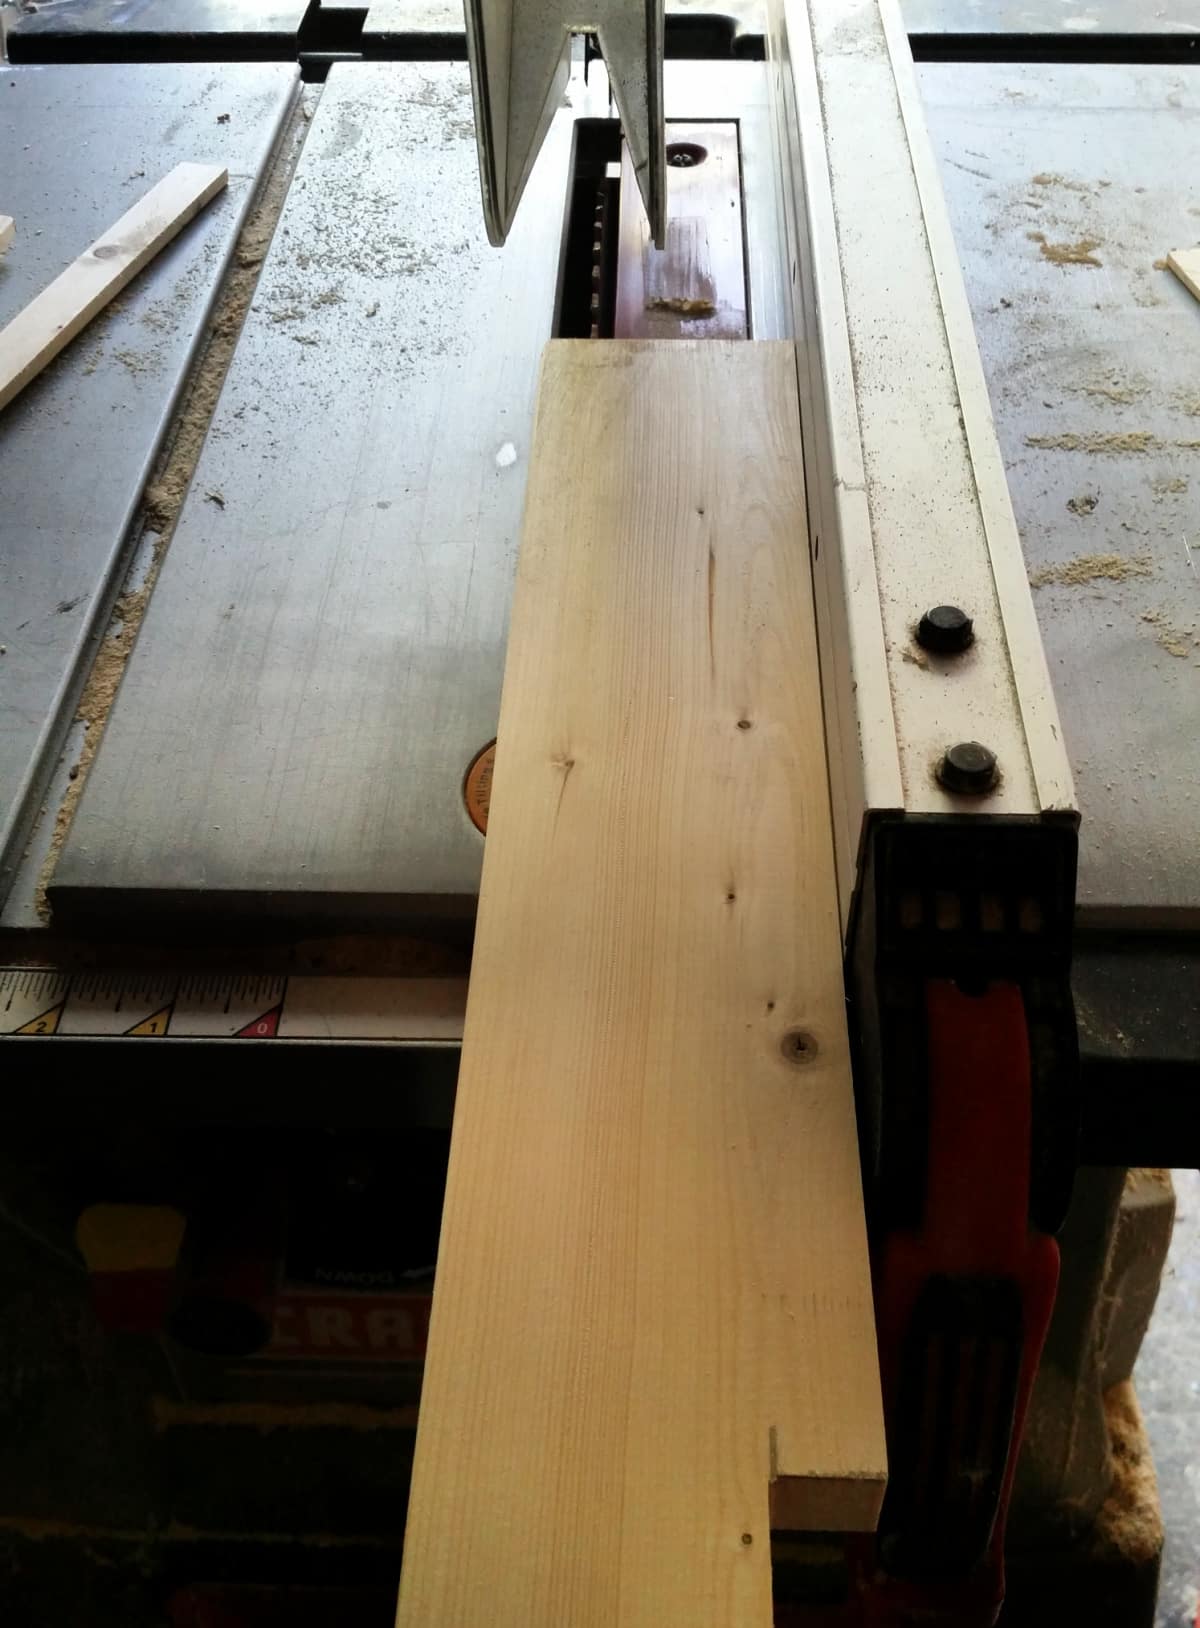
An easy fix with a trip to the table saw.
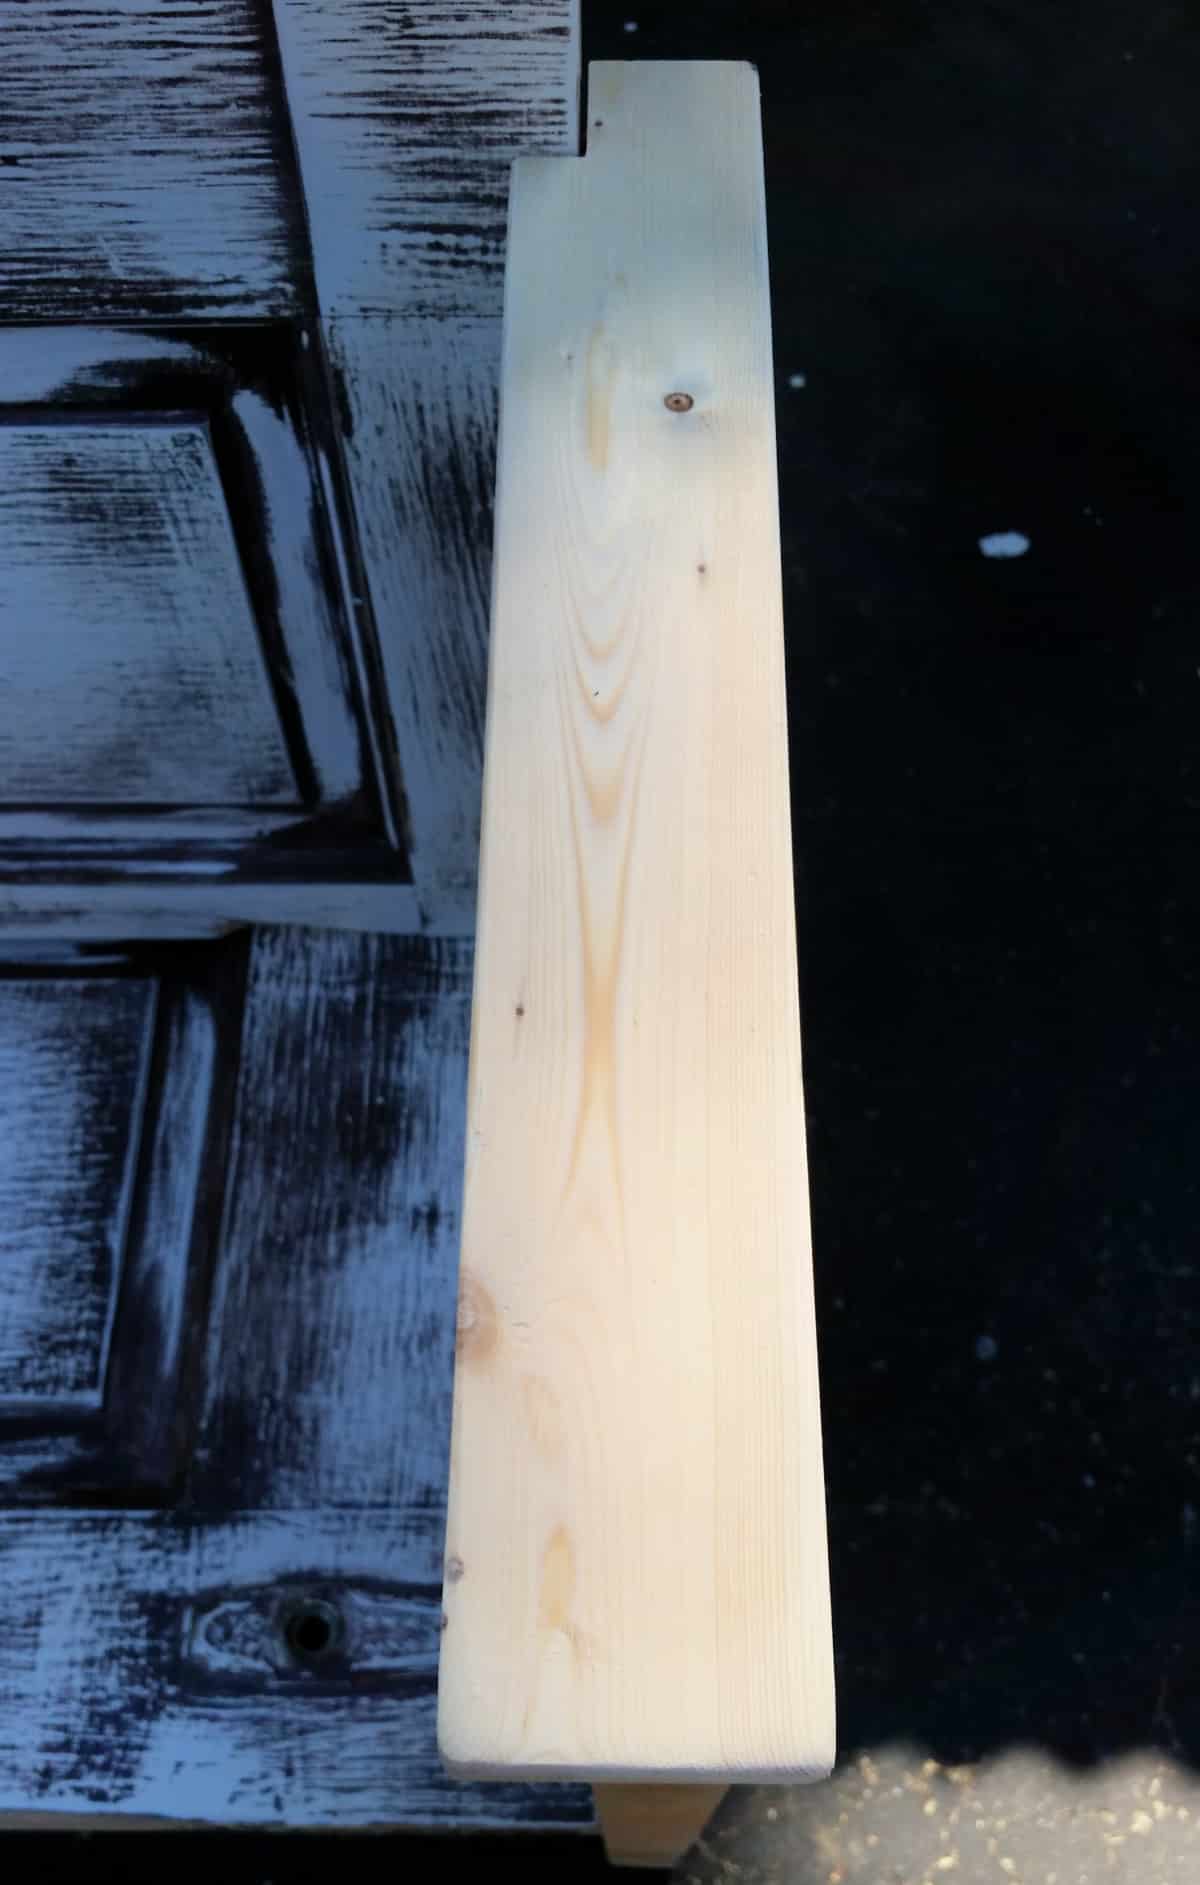
I prefer to round over the edges to give the armrest a more “worn-in” look.
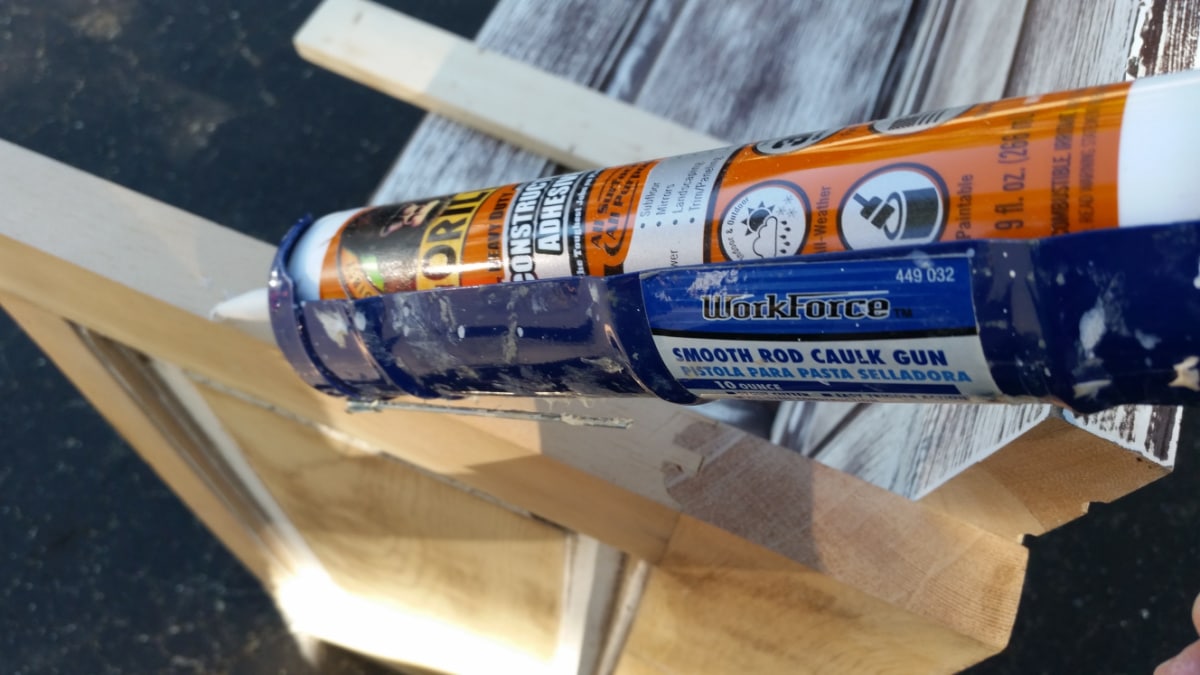
I used Gorilla Construction Adhesive and my nail gun to secure the armrests and the molding at the bottom of the bench.
Time to paint
Although I really wanted to keep the original finish of the doors, it just wasn’t working.

My neighbor Rodney (DIY picket fence) gave me a brand new gallon of Behr Marquee brown paint. I used it to mix up some diy chalky paint primer using plaster of paris for my Homeright Finish Max.
Notice the mesh paint strainer, I always use it with my Finish Max.
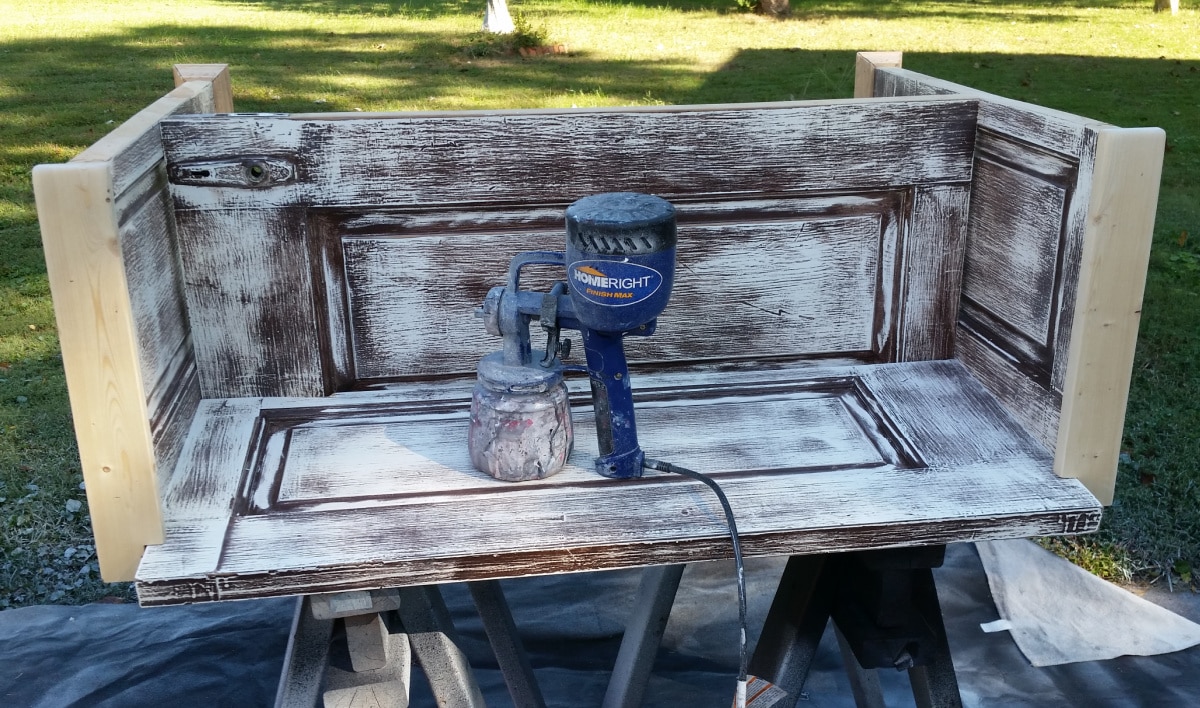
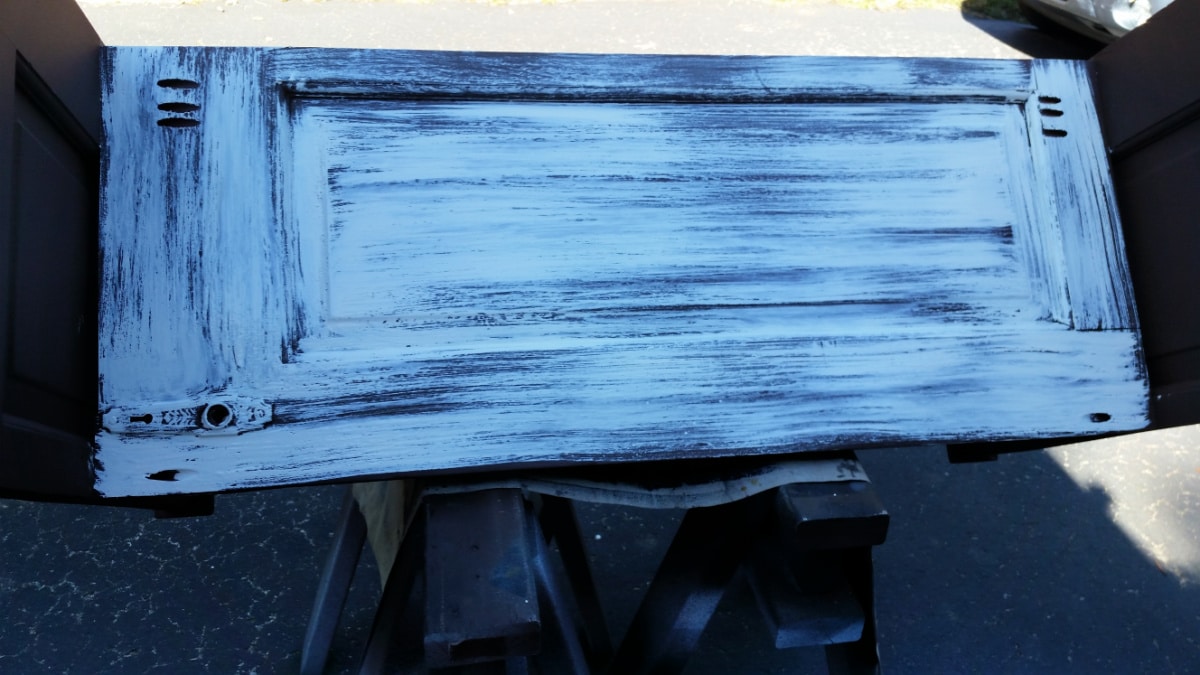
Raising the bench on my easy DIY sawhorses makes painting easier. I always paint the underside first.
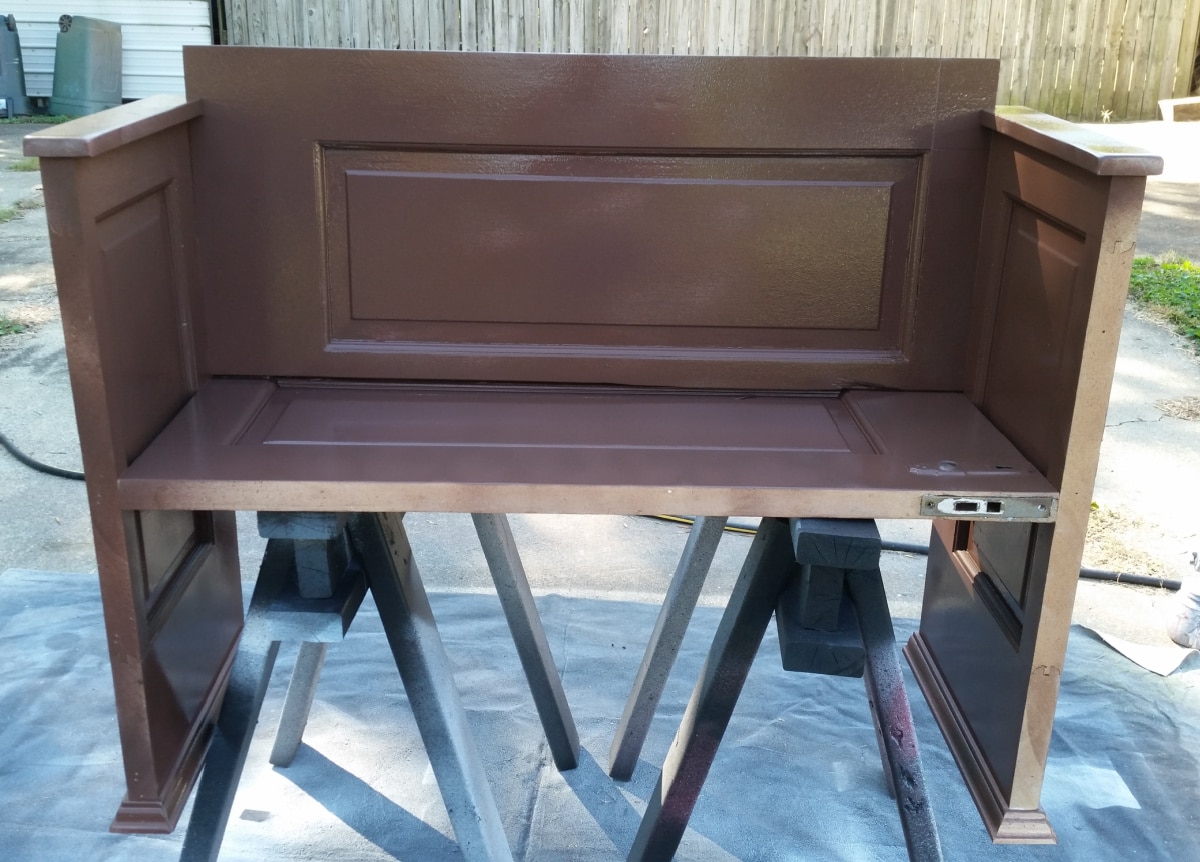
See? After I painted the underside, I was able to pivot the bench so I could easily paint the rest of it. I did two light coats of the chalky paint primer. I did not use any of the Marquee paint straight out of the can. (which I typically do to seal the chalky paint)
The brown is pretty, but this is an old door, and I think the bench should look old.
I’ll spare you the gory details of how I tried to do a crackle finish by spraying diluted glue through the Finish Max. I have successfully done a crackle finish by painting the glue on and spraying the paint through the Finish Max. But it was a smaller chalkboard project. Because the door bench is so large, I knew the glue would dry too quickly if I tried to brush it on and then spray the paint.
Crackle Finish for the Door Bench
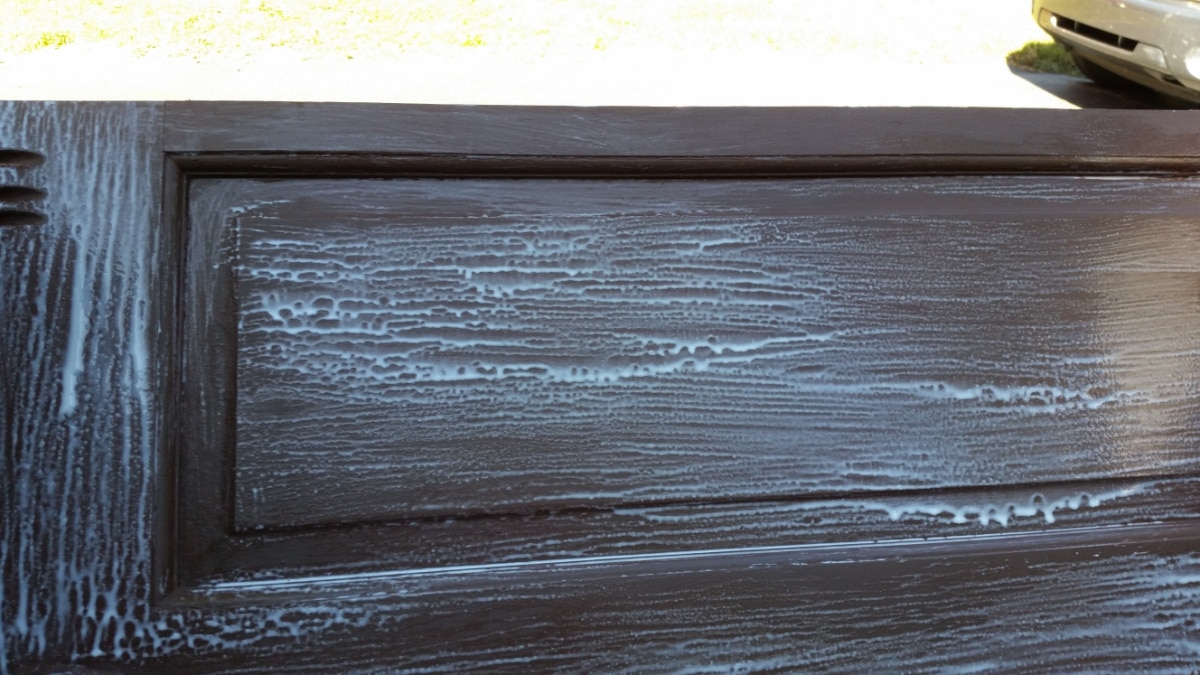
So, I went old school with this and painted on some slightly diluted white school glue.
There is a very small window of opportunity to get the correct look. I worked in small sections, and it took a long time.
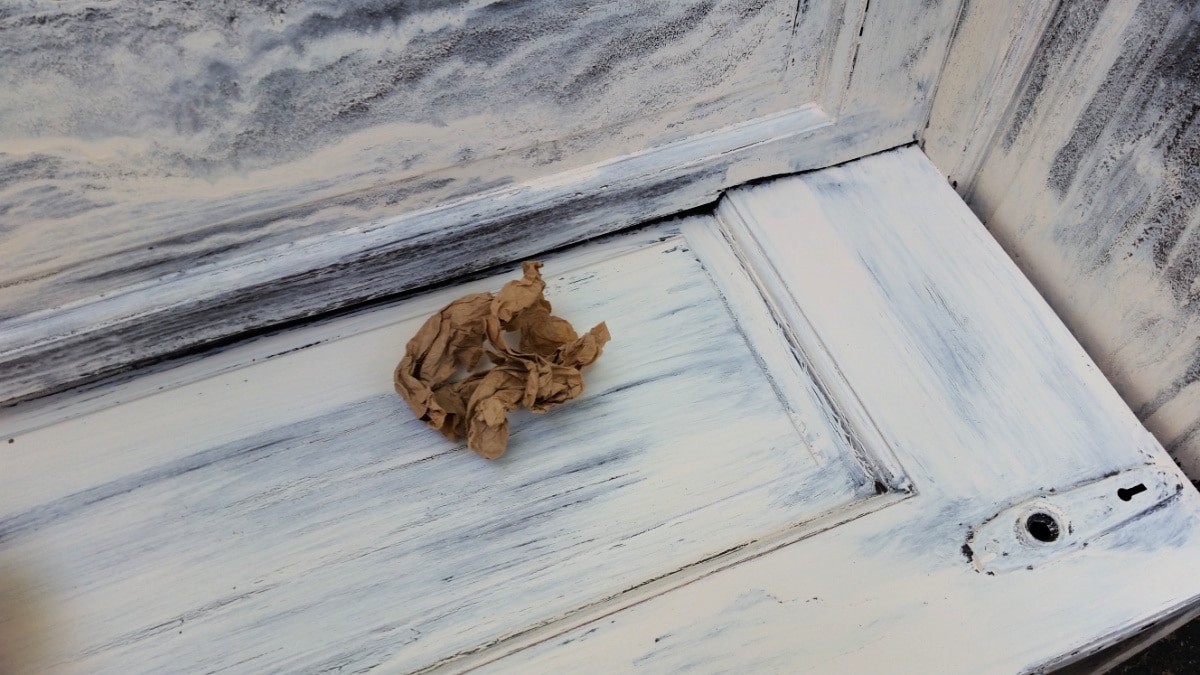
After the paint dried, I sanded it with some brown craft paper to give it a really smooth, well-worn finish.
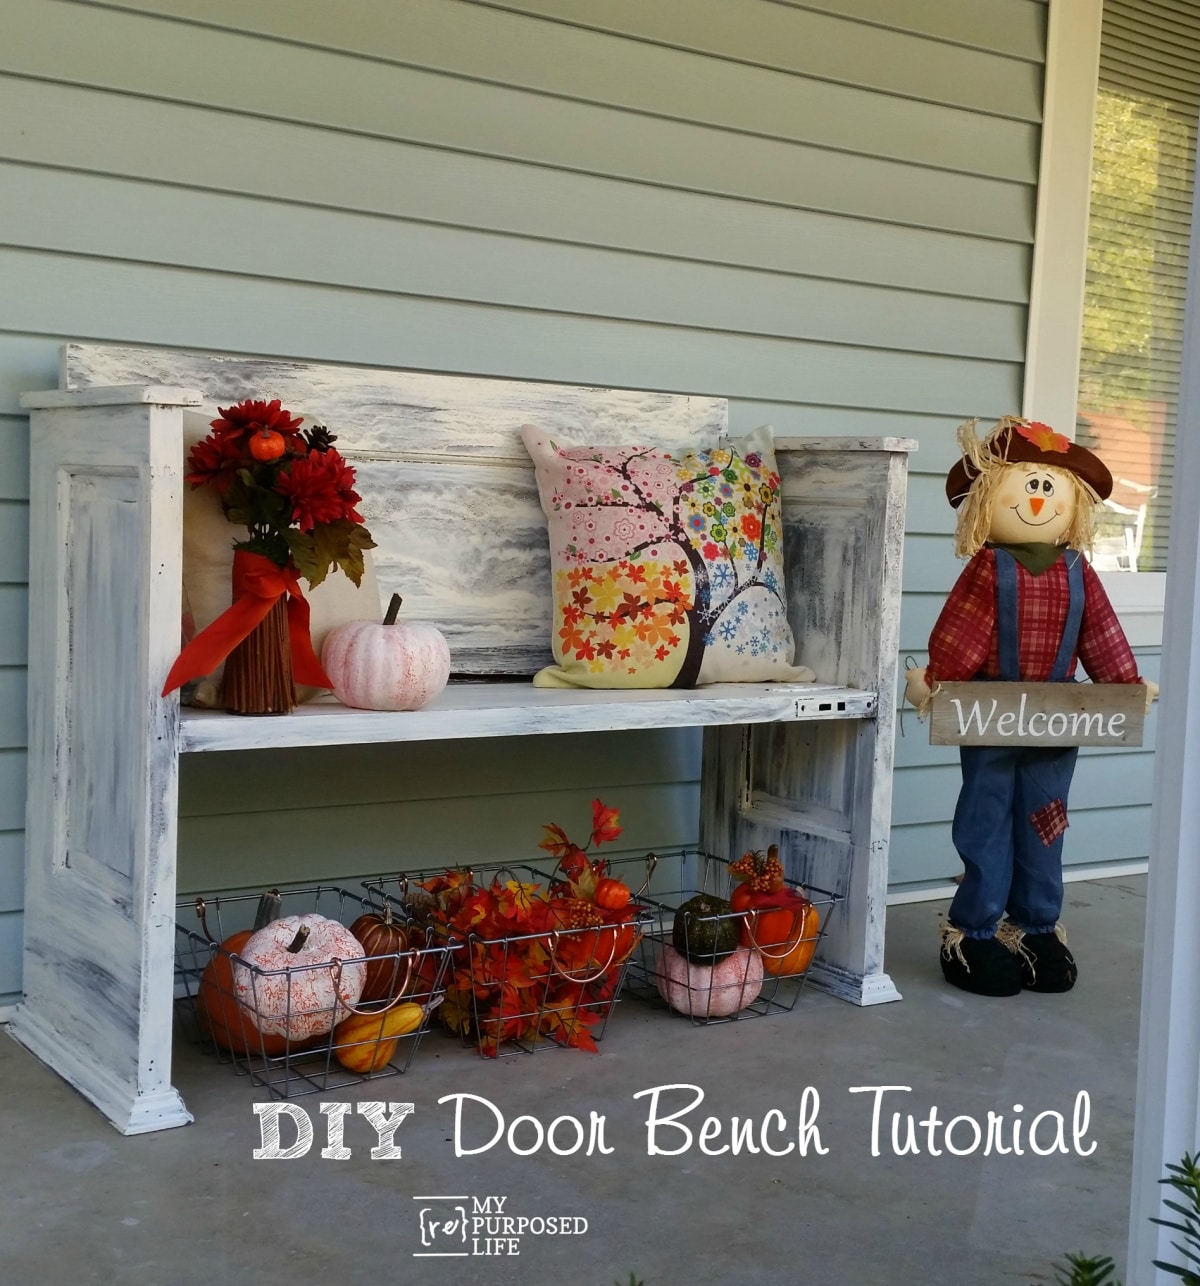
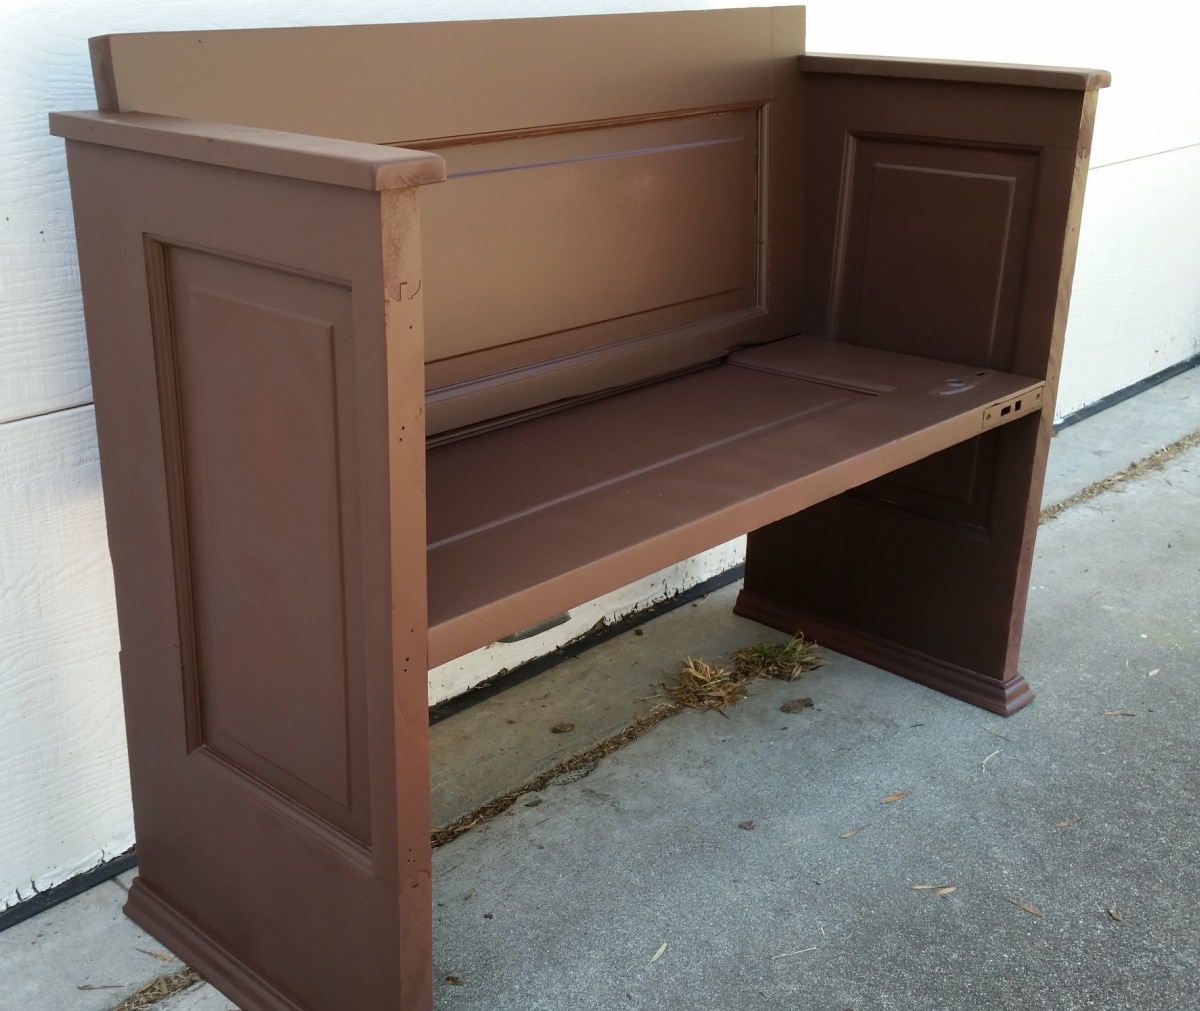
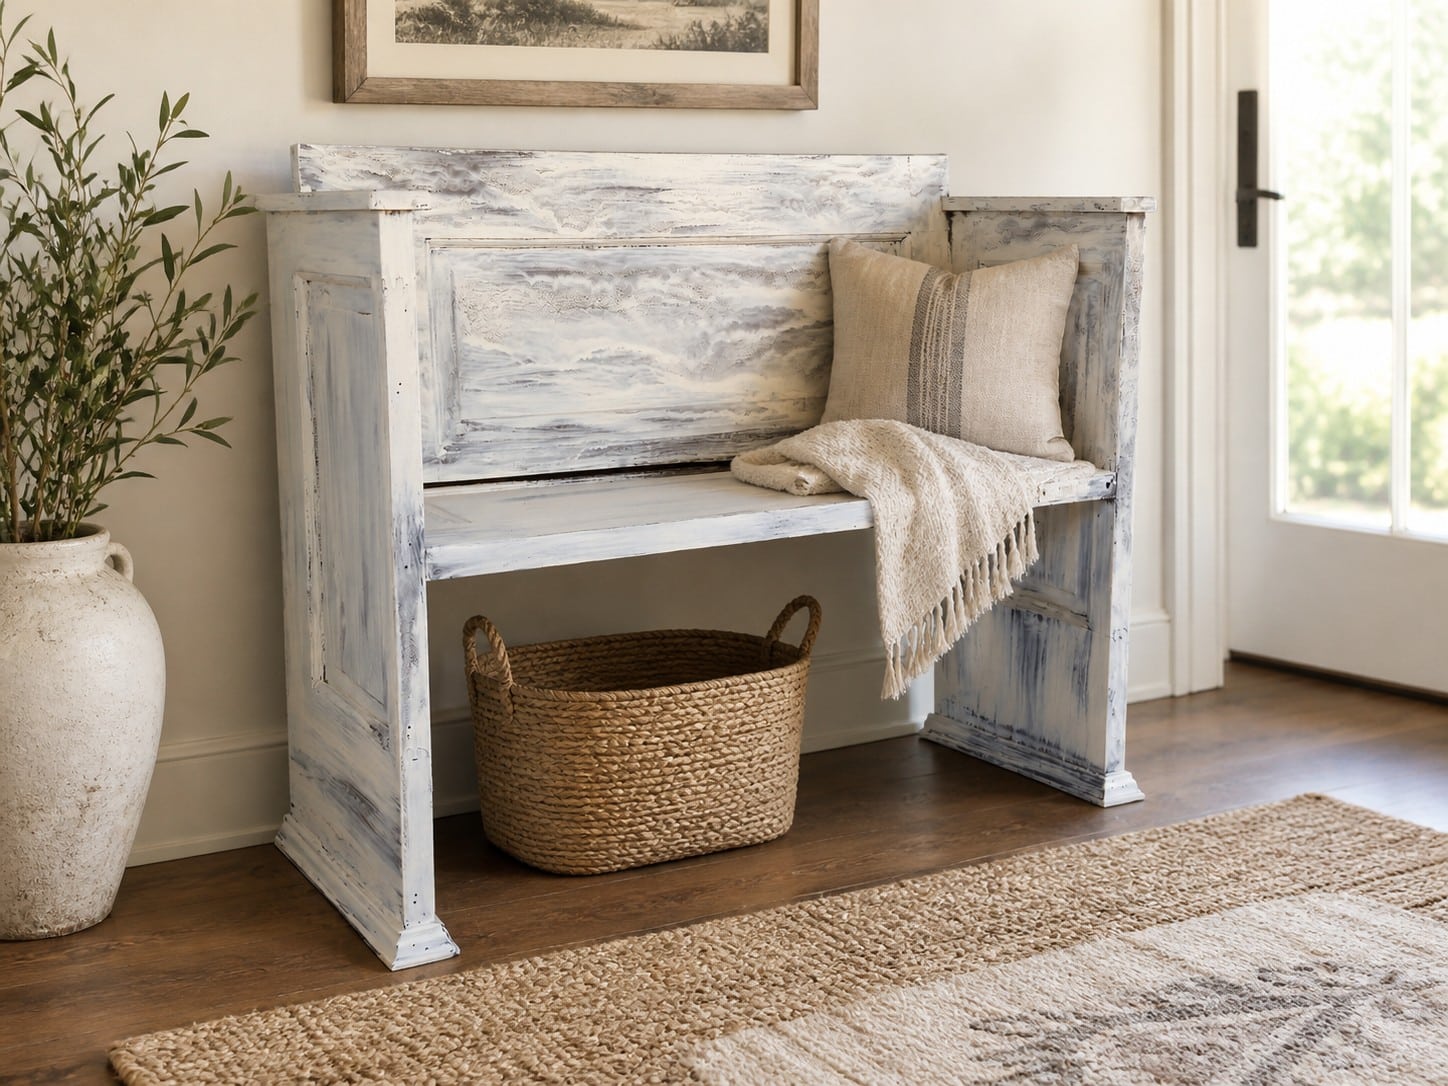
I totally get that the paint finish isn’t for everyone. Personally, I love how it turned out, and I think the addition of the molding and the armrests really make it look more like a church pew.
Styling Suggestion for the Old Door into a New Bench
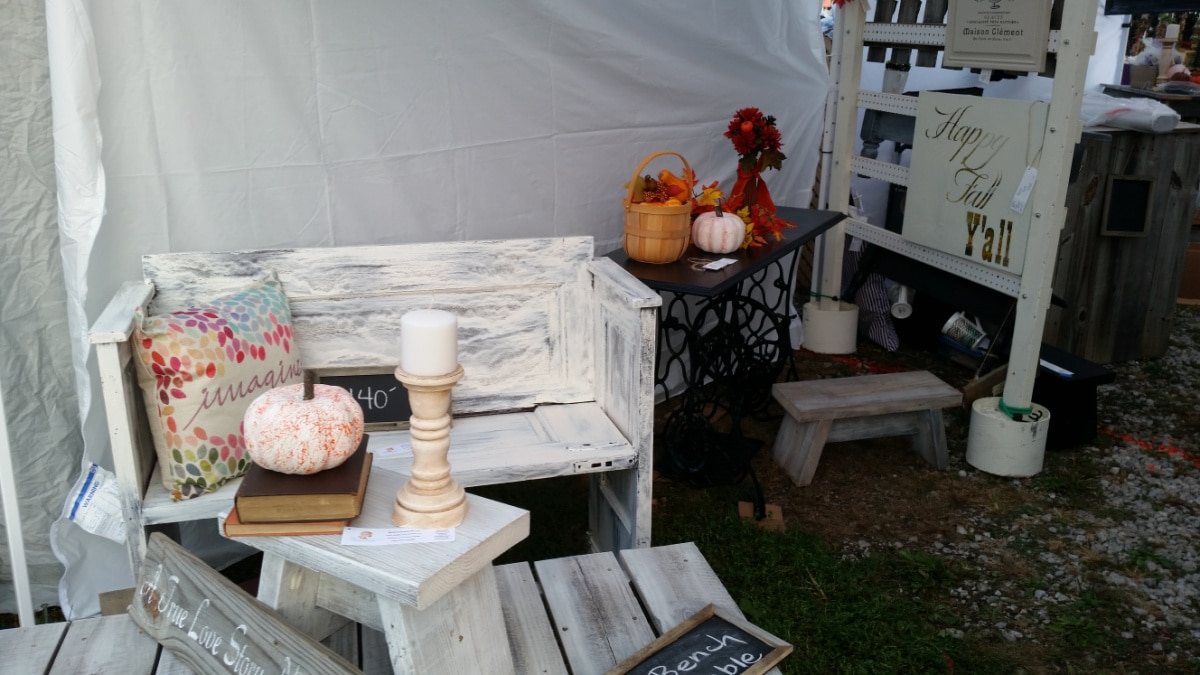
Here is the bench at Glendale 2016. It did sell to a lady who really wanted a small church pew. She looked around the craft fair AND the antique shops, and came back to the booth several times before finally taking it home. Everyone WAS drawn to the Imagine pillow, which I purchased on Amazon.
Related Content: More Door Project Ideas
Where would you use this bench? If you love this bench, won’t you Pin It?
gail
Gail, this is so cool, I love it.
When people go to a salvage yard or re-store they need to make sure that the door is solid wood. If they’re newer doors they could be solid core (MDF) with veneer. They’re beautiful, weigh a ton, and you would need trim or veneer for the edges. These come as a flat door and 6 panel doors. If it’s an interior door, it’s most likely hollow core (honey comb cardboard) and can’t be used. Most everyone will probably know this.
I’m new to this site & have absolutely loved seeing all your ideas. Do you sell your finished creations? Also, do you do all the carpentry/building or do you have a helper? I want badly to do all of this but I’m an ideas gal & have never built a thing beyond an IKEA shelf, terrible. The idea of using a tool beyond a screw driver or hammer is foreign yet I would give anything to learn. My dream job would be doing what you are & making money at it. Maybe i need to find a carpenter.
Heather,
I’m a one woman show. I buy it, change it, build it, blog it, all by myself. I am NOT getting rich off this gig, but I am my own boss. It sounds like you have a creative aspiration, but maybe you should start it out as a hobby. Tools to get started are not cheap. It took me years to collect all the tools I use.
Wishing you lots of luck whatever you decide to do.
gail
I Love this project! My sister and I were just talking about building a bench with an old door! The armrails and trim at the bottom are the perfect finishing touch! Pinned!!
Great minds think alike, eh Wendi? 🙂
I have a lot more doors in my stash….
I like; although, I would have stayed with the brown and distressed it. Did you make the cute pillow on the bench?
I’m thinking of making some kind of bench (headboard? door?) for my garden. Do you have any suggestions on weatherproofing it? I live in CA, so it can stay outside year round, but it does need some protection against the rain. I know using indoor wood outdoors, must need something extra. I made a firewood box out of a door, but it sits on an enclosed porch, so I didn’t do any weatherproofing.
Distressing would have been okay, but I would have still needed to pain it white because I wanted the brown to show through. 🙂
Weather proof furniture for outdoors? Marine varnish is the only thing I would consider to protect a wood project outside.
No, I didn’t make the pillow. I have added the Amazon Affiliate link for the pillows shown in this post.
good luck with your project Kate!
gail
One more vote for the finish you chose – and I love the addition of molding and armrests too.
I’ve heard of using glue for crackling, but since I usually work with smaller projects, I’ve always just stuck with the commercial crackle medium – and with great results. It might be fun to give the glue method a try. I really love how your chalkboard turned out with it.
Thanks Karen! This was such a fun project. Sometimes when I bring new stuff home, it never even makes it to storage because I have to jump right in. 🙂 This was one of those projects.
I have more doors in my stash… so hard to cut them.
Let me know if you try the glue crackle technique.
gail