Garbage Can Enclosure | Do It Yourself
As an Amazon Associate, I earn from qualifying purchases.

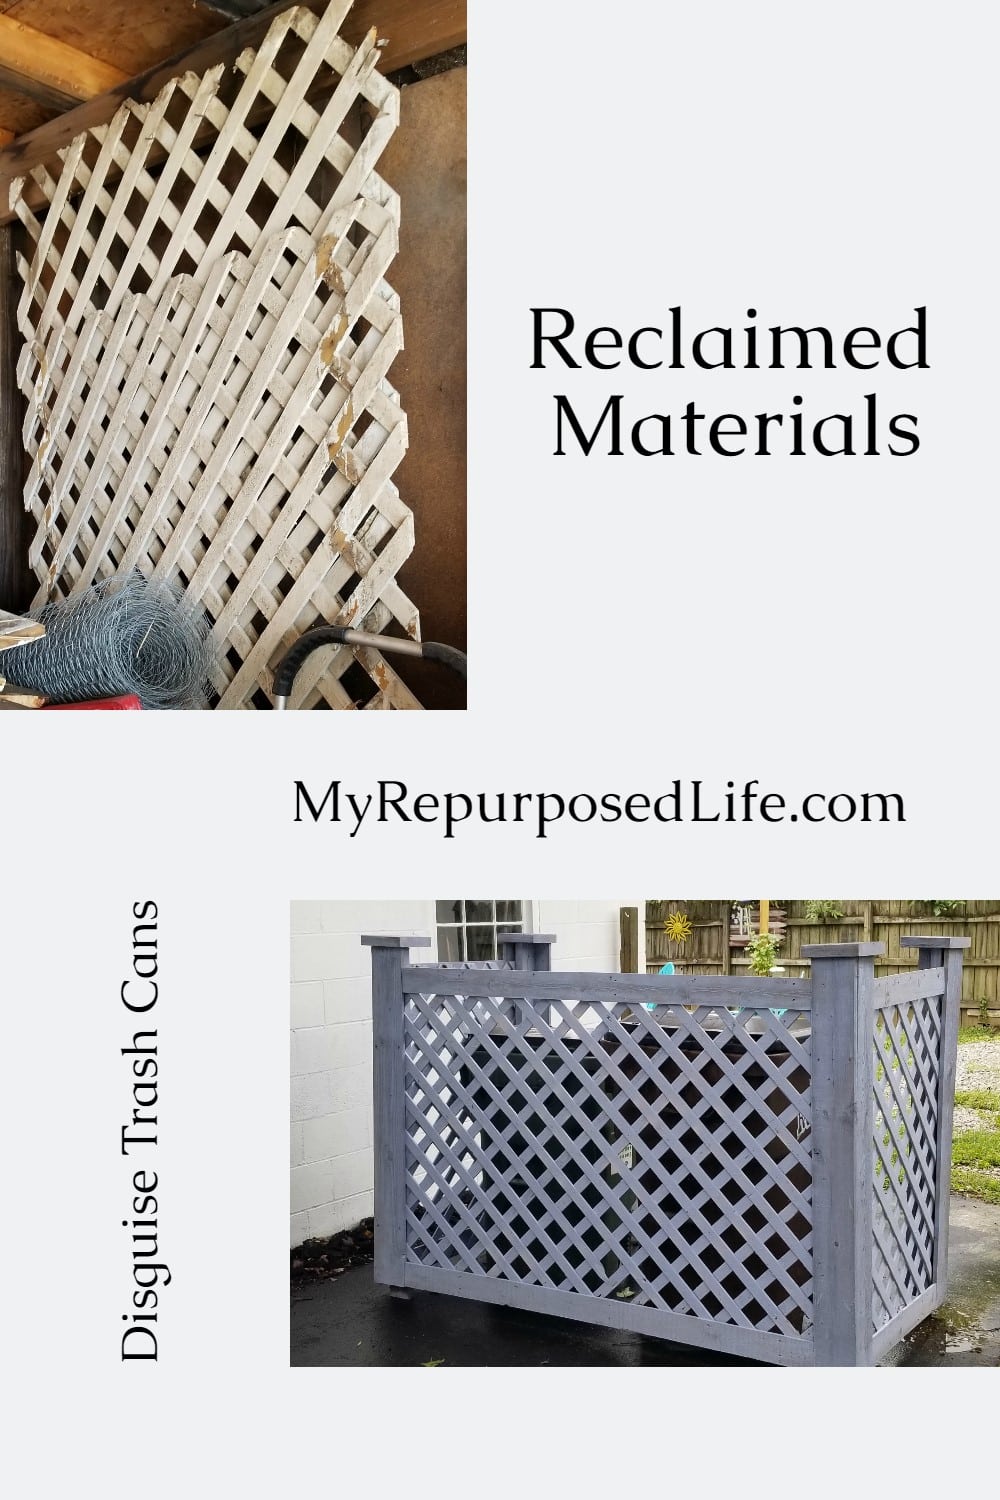
Trash cans, garbage cans, and recycle bins can be unsightly. I’ve had this garbage can enclosure on my to-do list all summer. I finally got around to putting it together. The best part? This project didn’t cost me a single dime. I used all reclaimed materials except staples and screws.

I’d love for you to share this on Pinterest!
I can’t believe how easy this garbage can enclosure was to paint! Can you imagine painting something like this by hand or spray paint?
Let’s see how the garbage can enclosure all came together.
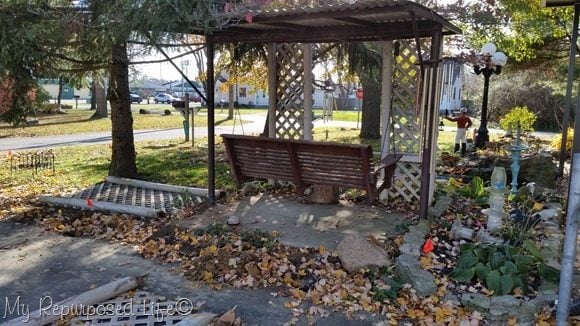
This picture is from the fall of 2015 when I started a demo on the old chain link fence while preparing for the new DIY picket fence installation.

Can you believe we installed this lattice in 1993? It has been up for 22 years and stored for the last four years. Pictured here are my niece, Missy, and our Maltese Princess.
Visit the My Repurposed Life Amazon Store to shop my favorite items.

Of course, the lattice was stored in the woodshed, which desperately needs organization!
Related Content: Hide your ugly gas meter
Using reclaimed items for garbage can enclosure

Considering its age, the lattice is in reasonably good shape. I gave it a good washing with the garden hose.
Measure and cut lattice to your specific size

To make the sides of the garbage can enclosure, I only needed half panels of the lattice. I used a T-square to mark the center line of the lattice.
Set blade depth on circular saw

My small circular saw seemed like the best option for cutting the lattice panel. Remember to set the depth of a circular saw blade to match your project. Note the safety glasses. Always be safe!

I’ve never been a fan of circular saws until I bought this small battery-operated Ryobi saw. It’s easy for me to control with no kickback.
Test fit lattice panels for garbage can enclosure

After cutting one panel in half, and trimming off the bad parts on the larger section I did a quick dry fit to make sure this DIY garbage can enclosure was really going to work.

These are the broken pieces I cut off. Afterwards I cut the 2×4 to size. I wanted it to extend a little beyond the lattice, giving it a little foot to rest on and a short section at the top.
Use brad nailer to tack lattice in place
Here’s a big tip: I chose to construct this entire garbage can enclosure with staples and my Airstrike gun, which made it quick and easy. Be sure to read through the tutorial to see how I made the structure more permanent before painting it.

You can see that I stapled the lattice to the front of the 2x4s for the large panel and the sides of the 2x4s for the smaller side panels.
Clamps are helpful when working alone

Then, using an irwin quick clamp I easily stapled the back posts of the garbage can enclosure.
Be patient when things go wrong

As I stood back to examine the structure, I noticed that it was a little askew. So, I removed a few staples and re-situated the side panel.

Because I did that, I had to trim these ends of lattice. I chose my jigsaw, a metal blade, and safety glasses! I was worried about original staples and possibly new staples I had used.

Overall, it’s still not exactly square, but it’s good enough to hide the garbage cans.
Add trim for looks and strength
To give the trash can corral a more “finished” look, I used reclaimed fence boards on the corners. The one in the background is already done. These clamps are so handy when you’re working alone!

In addition, smaller reclaimed fence boards with more staples were attached to the top and bottom of each panel. The blocks are set atop the posts to see if they will add the final details I’m looking for.
How to Hide Garbage Cans

Ta Da! I’m almost finished! It was so hot that I kept telling myself, “I’m going to stop after this step.” Finally, as the sun was beating down on me, I had to call it quits for the day. If you’re looking for perfection, I recommend that you install the fence boards on the top (inside) as well. Me? It’s just a screen to hide my garbage cans!!
Before the garbage can screen can be moved for painting, I would need to make it more permanent and sturdy than the staples I used to “tack” it together. In order to keep the lattice from splitting, I pre-drilled holes and used wood screws in all the places where I had initially put screws. If you have someone to help you build this, you can skip the staples and go right to the screws. Did you know that I like to use brad nails and staples as clamps to hold my projects in place temporarily? ![]()
Secure all joints with wood screws

First, I used 2 1/2″ wood screws on the corner posts to get a really secure hold.
Then shorter 1 1/4″ wood screws were used on the thinner, smaller fence boards. To keep the screws from protruding through the back of the lattice, I drilled my pilot holes at an angle.

Have you ever painted lattice? It’s not easy to paint by hand, so using a Finish Max is definitely the best way to go. This monster trash can corral would be so difficult to paint using a brush.
Using Furniture Dollies

When moving heavy or awkward things, use furniture dollies to make it easy on yourself.
Garbage Can Enclosure Ready for Paint

Roll your oversized project onto a drop cloth, then remove the dollies before painting.
Materials for Using a Paint Sprayer

Before I start painting, I gather all my supplies. When I use paint that may be a bit old, I always strain the paint with a mesh strainer. I also have gloves and a paintbrush for drips when pouring from the paint can. A bucket of water is a must for clean-up.

Using gloves, squeeze out the excess paint, then place the mesh strainer into a bucket of water for easy clean-up.

Notice the amount of paint in the cup. This paint was a little thick, so I diluted it slightly in the can. I did that because I figured I would be using it all for this project. When finished, I ended up pouring some of this paint back into the can!
Paint Sprayer Tips

The directional dial comes in handy when you’ve got a couple of directions to move. However, I never changed it during this project. I kept it in a horizontal direction and held the sprayer close while doing the lattice strips. I sort of followed the strips like a road. Down one, get to the bottom, and up the next one.

A Homeright Finish Max is so easy to clean outdoors with a garden hose. The first time you remove the brass nozzle, you will need to use the little wrench. Don’t let the difficulty of removing it deter you from doing so. After this, when you replace the nozzle, hand tightening is sufficient. Thoroughly clean your paint sprayer and make it ready for the next job!

And here it is mostly finished, it just needs some square caps on all the corners.
Garbage Can Enclosure
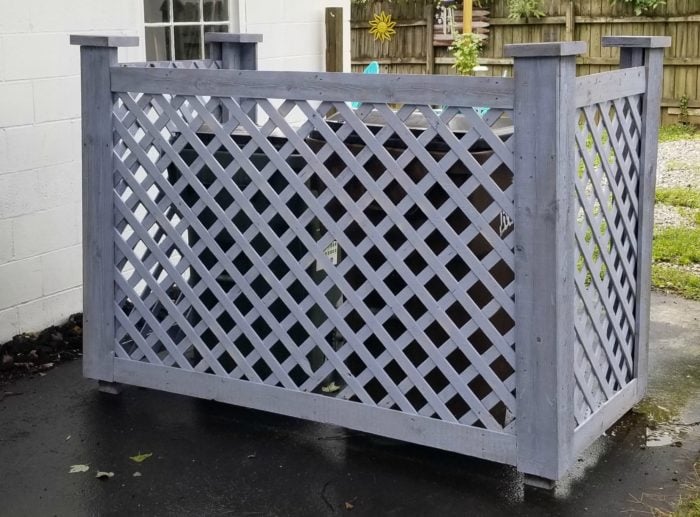
The trash can corral is handy. I can easily reach over the front to toss in trash and recyclables. Since the back is open, it’s no trouble to grab the cans. Although you can easily see through the lattice, the cans are so much less obvious from the street!
Related Content: More outdoor projects painted with a Finish Max!
gail
There are many times that I need to find one of my projects. I just google My Repurposed Life Garbage Can Enclosure and it came right up.
https://www.myrepurposedlife.com/garbage-can-enclosure-do-it-yourself/
So you can do My Repurposed Life, and any topic you’re looking for on google. Or you can use the search option on MyRepurposedLife.com.
Thanks for asking, I hope this helps!
gail