glass totem tutorial
As an Amazon Associate, I earn from qualifying purchases.

This EASY glass totem tutorial is just what you’ve been looking for. I have many tips at the bottom of this article, things I’ve learned from making countless glass totems!
Are you looking for a way to repurpose all that old, vintage glassware you have around the house?
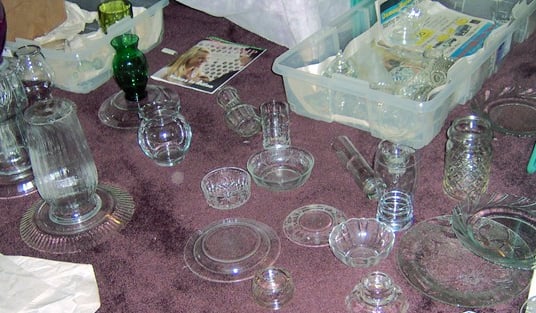
True trash to treasure people fall into 2 categories. Those of us who have never made a totem and those of us who have made tons of totems. They are sort of like potato chips… betcha can’t make just ONE! Over the winter, I shopped and shopped for glassware. I couldn’t stop! I tried really hard never to pay more than 50 cents for any one piece. My guest room became my totem workshop!
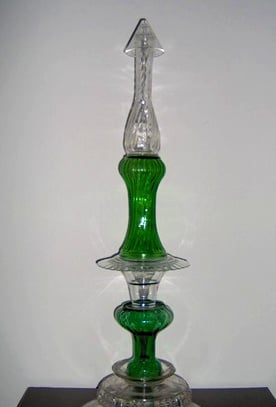
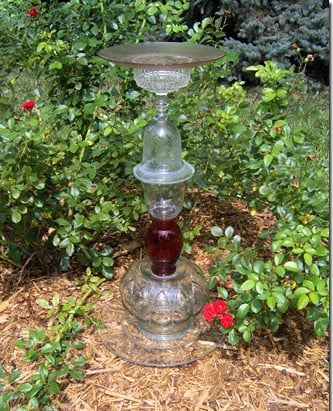
Vintage Glassware for Garden Totem
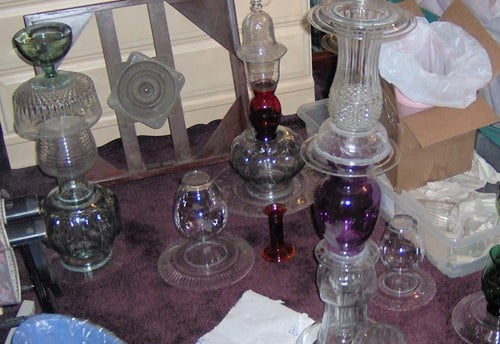
I think making these totems is the closest I’ve ever come to being artistic. Stacking the pieces and seeing what works well together is so much fun. I really like the colored pieces of glass, however they can be a little more pricey.
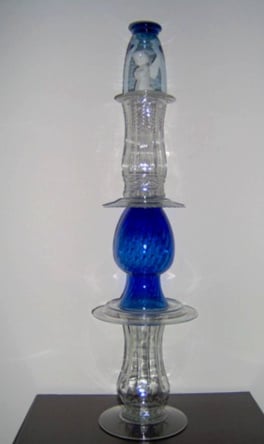
Vary Colors in your Glass Totem
I really like tucking pieces inside of other pieces. On the top of this one is a cute little cherub.
I love this green one. My friend Cathy has this one in her yard.
Glass Totem for Flower Garden
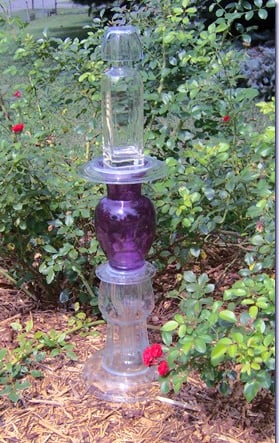
In this picture, the purple vase totem sits in front of one of my favorite rose bushes. I name my rose bushes in honor of people. This was a gift from one of my former students, so I called her Skylar. (if you look closely, you can see that the bottom vase has another vase inside of it)
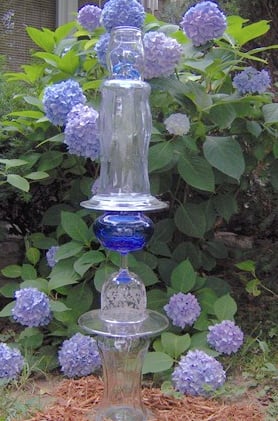
This photo shows the panda totem by my Endless Summer hydrangea.
Yes, that is some sort of depression glass on top. I got it cheap, and I thought it looked pretty on this with the red vase. My friend Cathy has this one in her yard also.

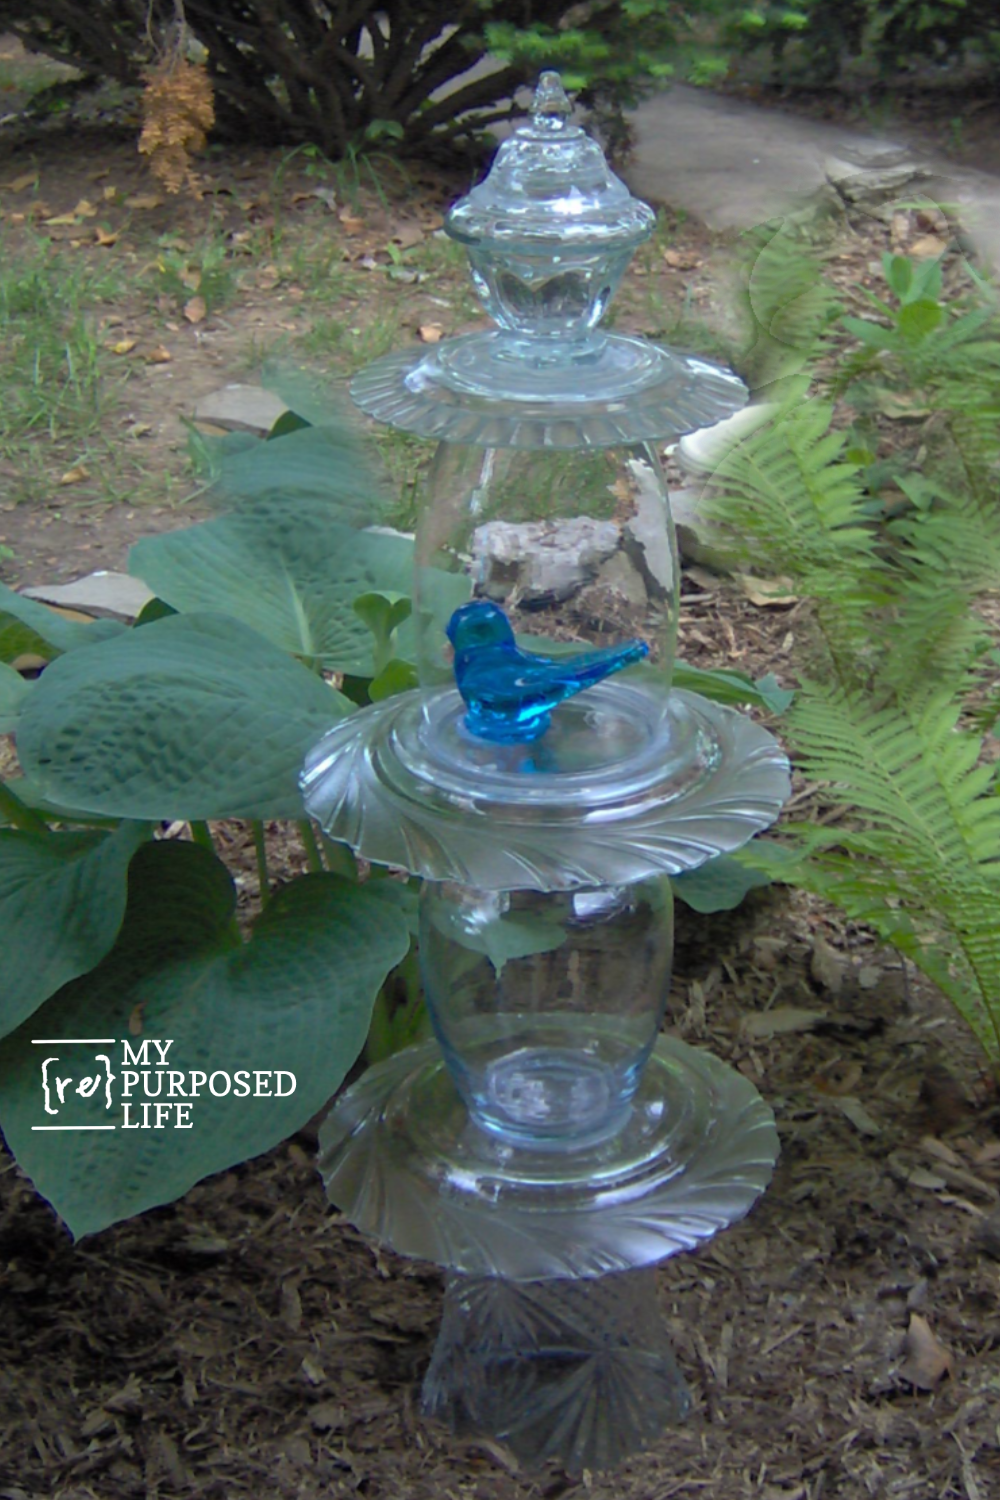
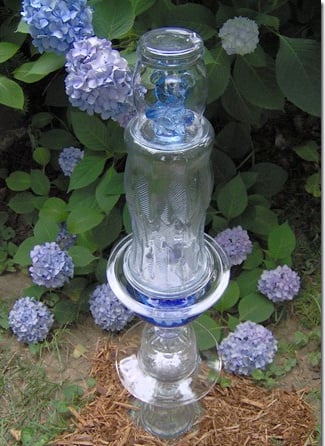
This is my “bluebird of happiness” totem. 🙂 The bottom vase of this piece is a beautiful candle holder that one of my former students gave me. Part of it got broken, but I held on to it because it was so pretty. When I started putting pieces together for my totem, I knew it belonged with these other pieces.
Glass Totem Tutorial Tips
- Thicker pieces of glassware work best
- Stemware is the most fragile. (I’ve only had one totem break, it was knocked over onto a driveway on a very windy day by a child’s tent that was being blown by the wind)
- Plates should be placed upside down so they don’t hold water
- A plate should be the base of your project. (I bury my plate a little to help steady my totems)
- If you have a very large vase, try placing a smaller vase inside
- A plate may be placed on top for a bird feeder (however, be careful because if the squirrels jump or climb on it, they can knock it over)
- I recommend moving your totem to a protected area during the winter or freezing weather.
- It’s best to wash and dry all your glassware very well. If it is extremely humid or your glassware is not totally dry, moisture will build up inside.
- I used silicone II for doors and windows. It comes in a tube with which you must use a caulk gun. After you apply the caulk to join the two pieces, release the pressure on your caulk gun, and your caulk will not ooze out.
- After gluing 2 pieces together, you can use a rag or a paper towel to wipe off excess caulk.
- I glued in sets of 2, then waited for those to dry and joined 2 sets of 2 together at a time.
- Use a level to ensure you don’t end up with leaning towers. 🙂
- If you do end up with a leaning tower, you can carefully use an exacto knife to undo the silicone. Please remember a leaning tower is better than a trip to the emergency room!
What will you make?
I hope you learned something from my glass totem tutorial tips!
Now, get out there, buy some glassware, and dig through your cabinets and garages. But don’t say I didn’t warn you. This is highly addictive! Have fun creating!
I have done some more totems-you can see them in my post Repurposed Glassware Totems & More.
Thanks!
gail
See More Repurposed Glass Projects Here

Oh my goodness! This is marvelous, I’ve been collecting glass for years and never did anything with it. Now I can reduce my stash beautifully. Thank you!
ohhhh Jane! I’m so happy you found my glass totem tutorial. I think they are so charming in the flower gardens.
Have fun!
gail
These are absolutely gorgeous!!! I have been buying up vintage glass for three or four months ago for another project but seeing your work is making me want to do a few (maybe more 😂 )glass totems too!!!! ❤️
Daphne,
Thanks for stopping by and taking the time to leave a comment. I made my first one 14 years ago, and I still love it just as much as I did when I made it. It had a little mishap with a ladder. It took off the top layer, but I still have it displayed in my yard.
Have fun!!
gail
What a fun idea, and I’ve been wanting some more yard art. These would be simple and pretty! Pinning!
Oh my goodness sakes alive! what a marvelous site! I’;m 76 and can’t do showes anymore so I’m on a hunt for things I can
do here at my home to enjoy and you have given me so many ideas as well as your other friends. I love the totems with small
figures inside of the larger bowls and vases and my idea is to make a pole with an angel inside one of the tall vases to use ans my gardian angel and also make one with a cat to use in a small garden especially for him or her with their own garden of cat nip, mints and other plants they aren’t allergic to so they can have their own special place. There are just so many ideas going through my head now it’s hard to decide which one I want to start with. Got to go to all the yard sales and thrift stores and build up my supply, my goodness will we all be busy from now on.
Thank you for sharing your ideas with all of us, so many want do that and they just don’t know how much they will be refunded when they share, thank you again and have fun creating with the blessing of a creative mind.
Phyllis
Phyllis,
Be careful, these hobbies can be very addicting. Placing these pieces together is only half the fun. The real fun is hunting for the glass items at yard sales and thrift stores. That is the part that can become the real addiction.
Enjoy, and thank you for your sweet comment, I truly appreciate sharing what I lean with others.
gail
Fabulous article! these are over 4 years old. They are Mes Belles totems.
I agree with you – it is very addictive. I have made about 20 totems – some I gave away, but most I have on a large dresser is a bedroom. And so much glass to use up – My room is big, but it is still very cluttered, and I continue to buy more – yardsales – Thrift Stores, etc. I love doing this. So glad I ran into it on pintrest. I notice you mix a color in the middle or so with all clear – I need to try that as I don’t get that many colored pieces to try to get together. Enjoyed looking at your site. Thanks
happy you stopped by My Repurposed Life Elaine. I haven’t made any of these for a while. But I still love the ones I have.
gail
Gail, I want you to know how much I enjoy seeing all your projects. You are truly an artist and so creatiive. 🙂 I have a bunch of glassware and dishes that I have received/inherited over the years from my mom, my grandmothers, my mother-in-law, the list goes on and on. I had thought about donating them until I saw your garden totems. I now know what I will be doing with the glassware and dishes. I will create them in honor of all the wonderful ladies in my life that I miss every day. They will make beautiful additions to my yard and wonderful gifts for family members..
Thank you again for all your inspiration and please keep up the good work.
Demetra
Demetra,
Thank you so much for your very kind comment. I appreciate it more than you know. It warms my heart when I can inspire people to use what they have, and the fact that you will be honoring your family members is even better.
gail
Oh Gail. I’m an indoor addict making tiered dishes. Once I started I just couldn’t stop. Yesterday’s haul brought home more than i have a place for. Now I need to be super creative. Thanks for posting about outdoor totems. I wanted to make a bird feeder but we do have a lot of squirrels.If I put it too low, the rain will pool and the blue jay’s will make a big mess, too. So I think I’ll stick to indoors. I had a thought of my bare front porch but if someone knocked it over we’d both be devastated and I’d hate to have to take a friend to urgent care, too.
~Heidi (outside Charleston, South Carolina)
I just found this I am so excited can’t wait to go looking for glass I want a totem pole !!!!!! Wish I had run across this a couple yrs ago I closed my floral business and gave away some of the most beautiful vases to friends and family. I am working in my back yard and on my patio redoing everything. I have a punch bowl I wanted to do something with think I will try to include it in my project.
Wnat more colored glass? Here is a tip-mix food coloring with Elmer’s glue and paint the inside of some of the clear vases-ones that you will be using upside down so water can’t get into them to wash out the “paint”-I have also heard that you can put clear sealer over one painted with this and keep it from washing off. Anyway -that would be a way to get colored glass cheaper and your color options are infinite! For instance mix blue and green together to make an aqua vase.