My name is Athena from The Stuff of Success and I am visiting My Repurposed Life to show you one of my favorite projects . What can be more thrilling than giving new life to something destined for the trash or some other less than desirable use. This is a great opportunity and I am in awe of Gail’s projects and her site – she and My Repurposed Life are very inspirational with so many ideas.
The Stuff of Success is a blog dedicated to living life well, inexpensively. I have crafts, recipes, repurposing, recycling/ upcycling, science projects, health and wellness information and other ways to save money in our daily lives.
I look forward to showing you all one of my favorite repurposed big screen tv projects – turning an old big screen TV into something more useful!
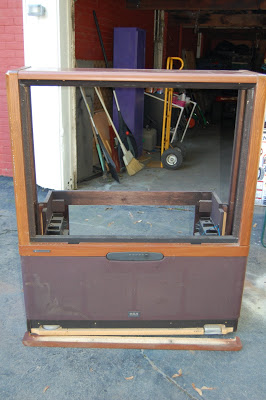
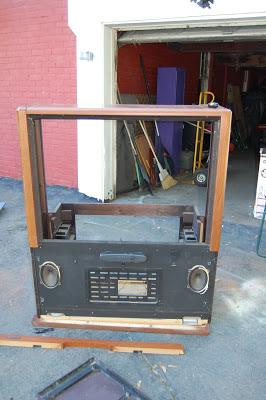
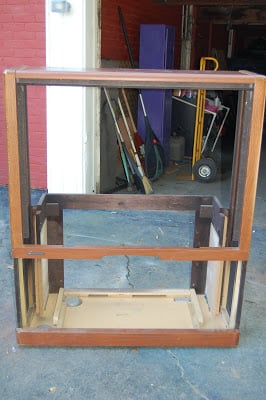
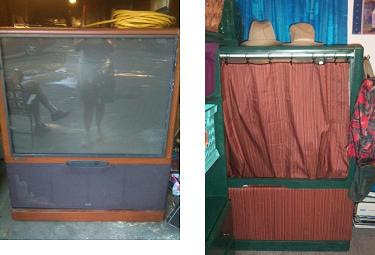
What did I do with a HUGE old big screen TV? You would never guess. I thought and thought for months – what could I do with this monstrocity. It sat collecting dust for some time. Then we finally brought it down to the garage hoping the move would ignite some spark of inspiration. It wasn’t really until I started taking it apart – with no grand plan – that a direction came to me. And for something we truly need – EVEN BETTER. The greatest part of the project was taking that crazy thing apart. Here are photos from that very time consuming process. And yes, at certain points I couldn’t figure out what was holding some pieces in and the old hammer had to demolish them to get them out. Man, did that feel awesome! When all else fails…
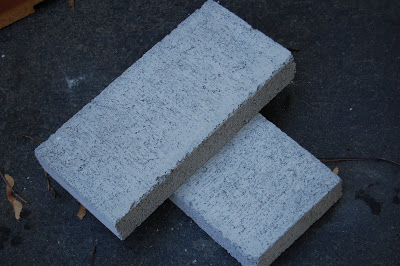
These cinder blocks were inside the TV! No wonder it weighed a TON!
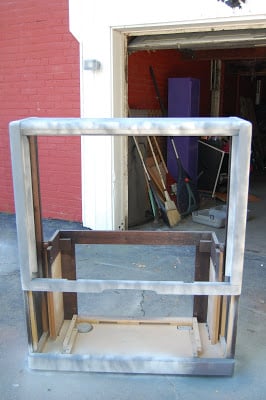
Now it is time to start building it into SOMETHING… But what?
How do you like this priming job? I ran out of white and switched to gray…
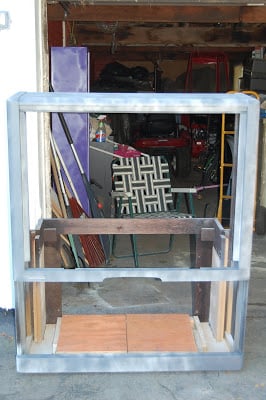
At about this point I laid it down on the ground, face first on a blanket so it didn’t get marked up – to work on it. But my newfoundland decided she was going to claim it. She climbed in and laid down – had no desire to get out. So if I hadn’t been on a mission for a certain end result – I could very easily have made it into a dog bed. But not this time. Sorry lady…
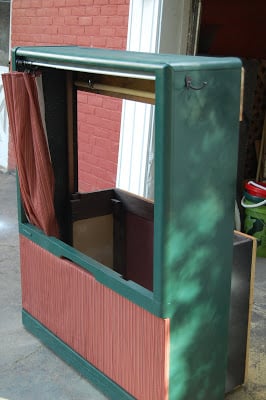
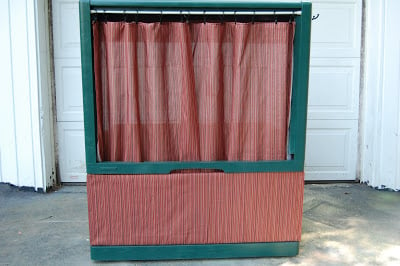
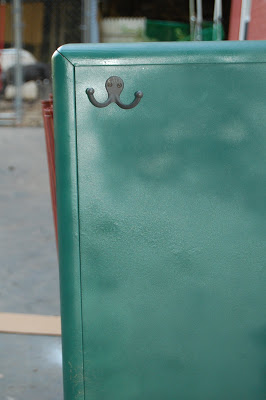
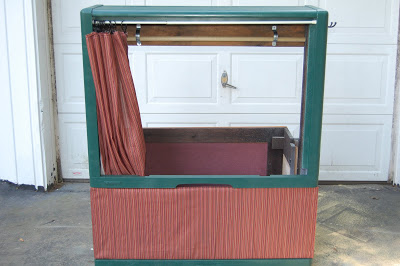
Well, here it is! I love it and I hope you do too. It is a portable closet for my son (he doesn’t have a closet in his room). The bottom section will hold shoes, hats/gloves etc… The top part (behind the curtain) has a rod to hang his clothes. There is a two prong hook on the right hand side for him to hang his backpack.
The curtain is a shower curtain that I cut down and used curtain clip hooks to hang it on a tension rod. The bottom portion of the closet is covered with the shower curtain section that I removed. It is simply wrapped like a present, stapled on and nailed to the front.
This is the two prong hook for his backpack and other.
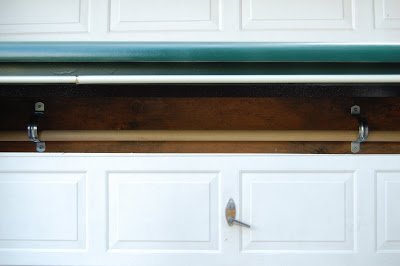
This photo looks like an optical illusion. Even though I know what I did, I had trouble figuring what this was a photo of… But it is the inside of the closet (the back is open because that is how the TV was constructed – so you see the garage door behind it) and I was trying to show you the rod for hanging clothes. I had to place a back on to attach the rod to but it couldn’t be too large or the base of the hangars would hit and not hang properly.
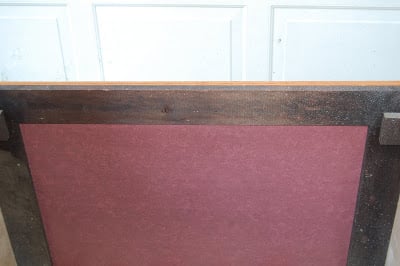
This is the bottom inside of the back. I enclosed the bottom section with plywood (behind the black TV portion) and covered cardboard with wallpaper on the inside – wedging the covered cardboard between the black TV posts and the plywood I had attached.
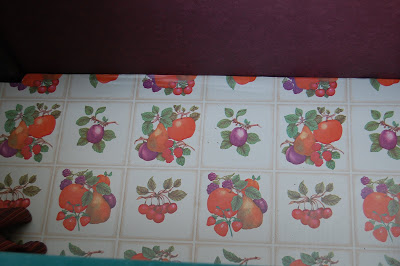
This is the inside bottom which I had filled with plywood but again covered cardboard to be placed on top of the plywood. This piece of cardboard is covered with contact paper so I can wipe it clean when the shoes get debris on it. Unfortunately, the only contact paper I had was fruit – but you won’t be able to see the contact paper at all so he doesn’t care. I just wanted something that I could wipe clean when I needed to.
And then it came time to bring it into his room. Up two flights of stairs… Originally it was huge as a TV and even had cinder blocks in it, BUT now that it was put back together with 3/4 inch plywood – Ugh – it weighs a ton!!! My husband was none too happy. He wanted me to make something out of that TV, but apparently he never intended for it to find it’s way back into the house… Too funny. And naturally it did not make it all the way upstairs unscathed. It survived enough… And I have no doubt the neighbors – who were all watching (they even pulled up chairs and poured themselves drinks) were enjoying our struggles and admiring just how we had managed to get it up there.
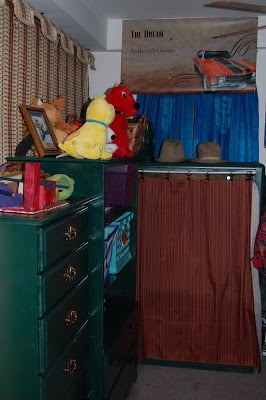
Every piece of furniture in his room was recycled/refinished. I am very proud of all the work that has gone into his room.
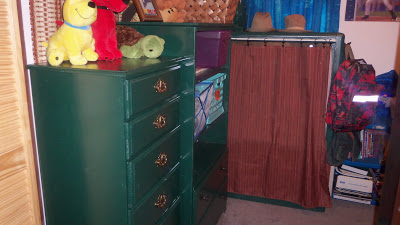
With his entire hunter green room – upcycled dressers, TV, toy shelf.
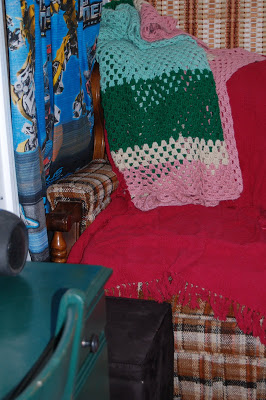
Crocheted blanket
And his hunter green desk (with two seat cushions – can’t imagine why he needs two)
So that is the grand unveil – hope you enjoyed the trip.
And here is the Before and After comparison…
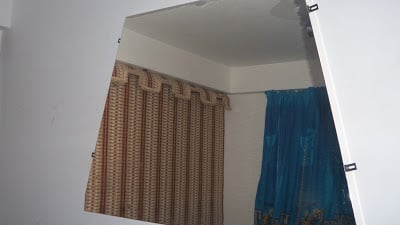
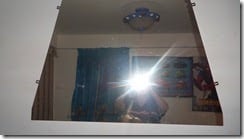
And I was still not quite done with this recycle. There were several additional parts still around that I had not found “homes” for. Then I used the reflective portion (remember it was an old projection screen TV) in Anthony’s room as a mirror. When we took down his bunk bed we were left with one very “naked” wall. He was very clear about what he wanted in that space – a mirror. But with his special needs there was absolutely no way we could hang a large piece of glass in his room. But this reflective part from the TV is Styrofoam covered in a reflective material. No matter what he does to it, he cannot get hurt. And the visibility is nearly as clear as a real mirror – although I would have preferred if it would have made things “smaller than they appear in real life” – like me…
Don’t you think Athena really was thinking outside the box? Love it! There are so many of these televisions that are going to end up in the landfill. Hopefully after seeing Athena’s great repurpose, you too, can think of a way to save something from such a demise! Hop on over to check out this great blog!
gail
I appreciate you reading my blog in your reader and/or via email.
Gail Wilson is the author and mastermind behind My Repurposed Life. She is obsessed with finding potential in unexpected places and believes that with a little hard work and imagination, any old thing can be made useful again, including herself!
Gail reinvented herself during a midlife crisis and has found purpose again. She hopes you will find new ideas for old things and pick up a few tools along the way.
10 Comments
Great job… and i thought at first that you made a little puppet theater for the kids.
Thanks Gail for having me and thank you everyone for you kind comments. I hope everyone enjoys their week and I always look forward to seeing what is next on MyRepurposedLife. Enjoy – Athena
Athena…what a great transformation!! I know your son must love all his matching furniture!! Whodathunk to use the screen for a mirror, as Gail said, you certainly were “thinking outside the box”on this whole project. Good job! Off to check out your blog, for other projects you’ve done!


Great job… and i thought at first that you made a little puppet theater for the kids.
Athena,
That is one clever idea. I bet your son loves it.
Dee
That is a really great idea!
A thought it was a puppet stage too 🙂 Super cute!
Way to be so cre8tive Athena! I can’t believe there was bricks inside..wow. Great job
Thanks Gail for having me and thank you everyone for you kind comments. I hope everyone enjoys their week and I always look forward to seeing what is next on MyRepurposedLife.
Enjoy – Athena
Great transformation. I thought it was gonna be a puppet stage for a lil’ one, but that gave me an idea : )
Have a wonderful day ~
Deanna
Athena…what a great transformation!! I know your son must love all his matching furniture!! Whodathunk to use the screen for a mirror, as Gail said, you certainly were “thinking outside the box”on this whole project. Good job! Off to check out your blog, for other projects you’ve done!
OMG!! This is a great transformation. I love it. This is height of innovation.
Athena,you did a great job. Top marks for originality. Don’t you feel good,making something from nothing? 🙂