House Cubby Wall Shelf
As an Amazon Associate, I earn from qualifying purchases.
My friend Cristina shared her House Advent Calendar for our November Woodworker’s challenge. I loved the way her house looked, and I decided to make my own house cubby wall shelf.
House Shaped Cubby Wall Shelf
 I followed Cristina’s plans for the cut list. However, I changed up a couple of things. I used 1/2” stock for the frame and 1/4” stock for the cubby boards of the house shelf.


Design Cubby Shelf

You can see I printed out her plans and followed the color-coded details. I worked a little differently than she did. My plan was to glue all the shelf cubbies together and frame them with the shape of the house. I used blocks of wood to try to keep each cubby square. That’s a good plan, but it’s not the best way to keep everything square.
I laid out all the pieces and propped them up to ensure all was well.

Because the plans are color-coded, I labeled each piece with its color and orientation. This one is green and is installed horizontally.
Visit the My Repurposed Life Amazon Store to shop my favorite items.
Clamp & Glue Sections

I clamped and glued several sections at a time, always using Gorilla Wood Glue. After a few sections were glued, I started connecting them.

The weather turned cold, so I had to move into the house. I planned to NOT glue to the frame until the end, but I got confused and ended up gluing a few of the cubby boards to the outside house frame.
Painter’s tape helped hold the joints together until the glue set up. Waiting for that took a couple of days. Full disclosure: I made a mistake with one of the very first sections I put together. The color on the plans was brown, but I mistook it for dark violet. Therefore, near the end, I had to make some different arrangements.

It got a little crazy with all the clamps! I used dabs of painter’s tape to keep track of the cubby holes so that this could be used as an Advent Calendar and a cubby wall shelf.
Using Painter’s Tape for Clamping

Again, the painter’s tape was great for holding the corners together before I glued the house frame.
I used 4x4s to square the joints of the house cubby wall shelf. Had I not taped the corners of the blocks, they would have glued themselves to the cubby. I have used this trick before when I repaired a headboard.
Sand Everything Smooth

Smooth all the edges, inside and out, using a sanding sponge. This is a necessary step before painting.
Use Jigsaw to Cut Thin Plywood

I outlined the cubby wall shelf on thin plywood and cut the shape with my jigsaw.
How to Paint Cubby Wall Shelf

Of course, I used my Homeright Super Finish Max to prime this monster. But again, the weather turned cold, and I had to work indoors. I tried to paint a topcoat by hand, and it was horrible!
I did two more light topcoats outside with the Finish Max.
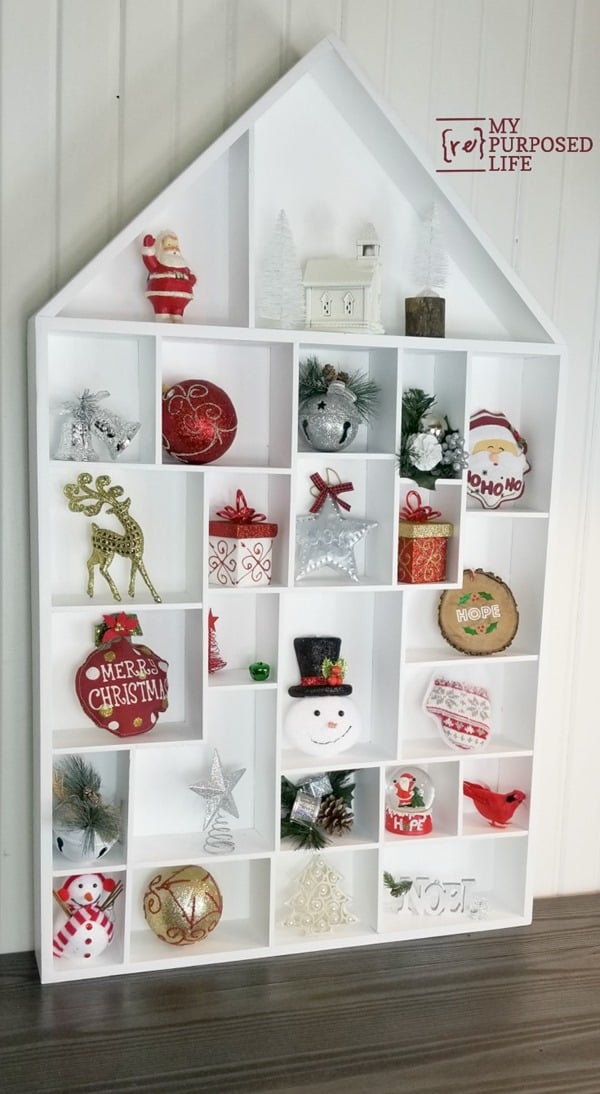
House Shaped Cubby Wall Shelf for Home Decor
 This thing is enormous. I did end up gluing and tacking the outside frame with my nail gun.

All of these Christmas decor items came from dollar stores. I staged it for Christmas, but it could be used as everyday decor for your favorite collectibles. I highly recommend that you check out Cristina’s project to see how you would like to make your own house-shaped cubby wall shelf.
Save and SHARE this on Pinterest.
Related Content: Christmas Tree Shelf
gail
This is really inspiring! Love how it’s decorated for Christmas. The shelf itself reminds me of one I might find at a flea market. Pinned.
Alexandra
EyeLoveKnots.com
Thank you for pinning!!!!
Merry Christmas to you!
gail
Great job Gail,it takes a lot of patience to put something together like this project.👍’s up on this one.Its always great to see your beginning and end project.On the 1 to 10 scale definitely a 10😁✌️
Thanks so much Rodney!
You know it was challenging at the beginning because you saw the puzzled looks on my face!
gail