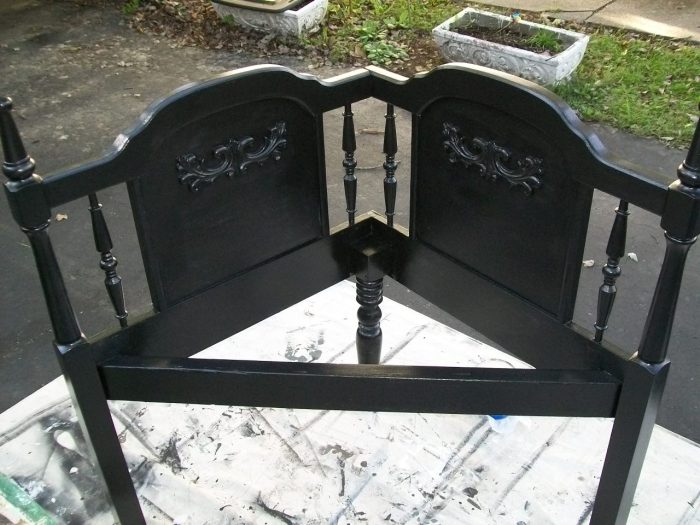
Corner Bench (headboard)
As an Amazon Associate, I earn from qualifying purchases.
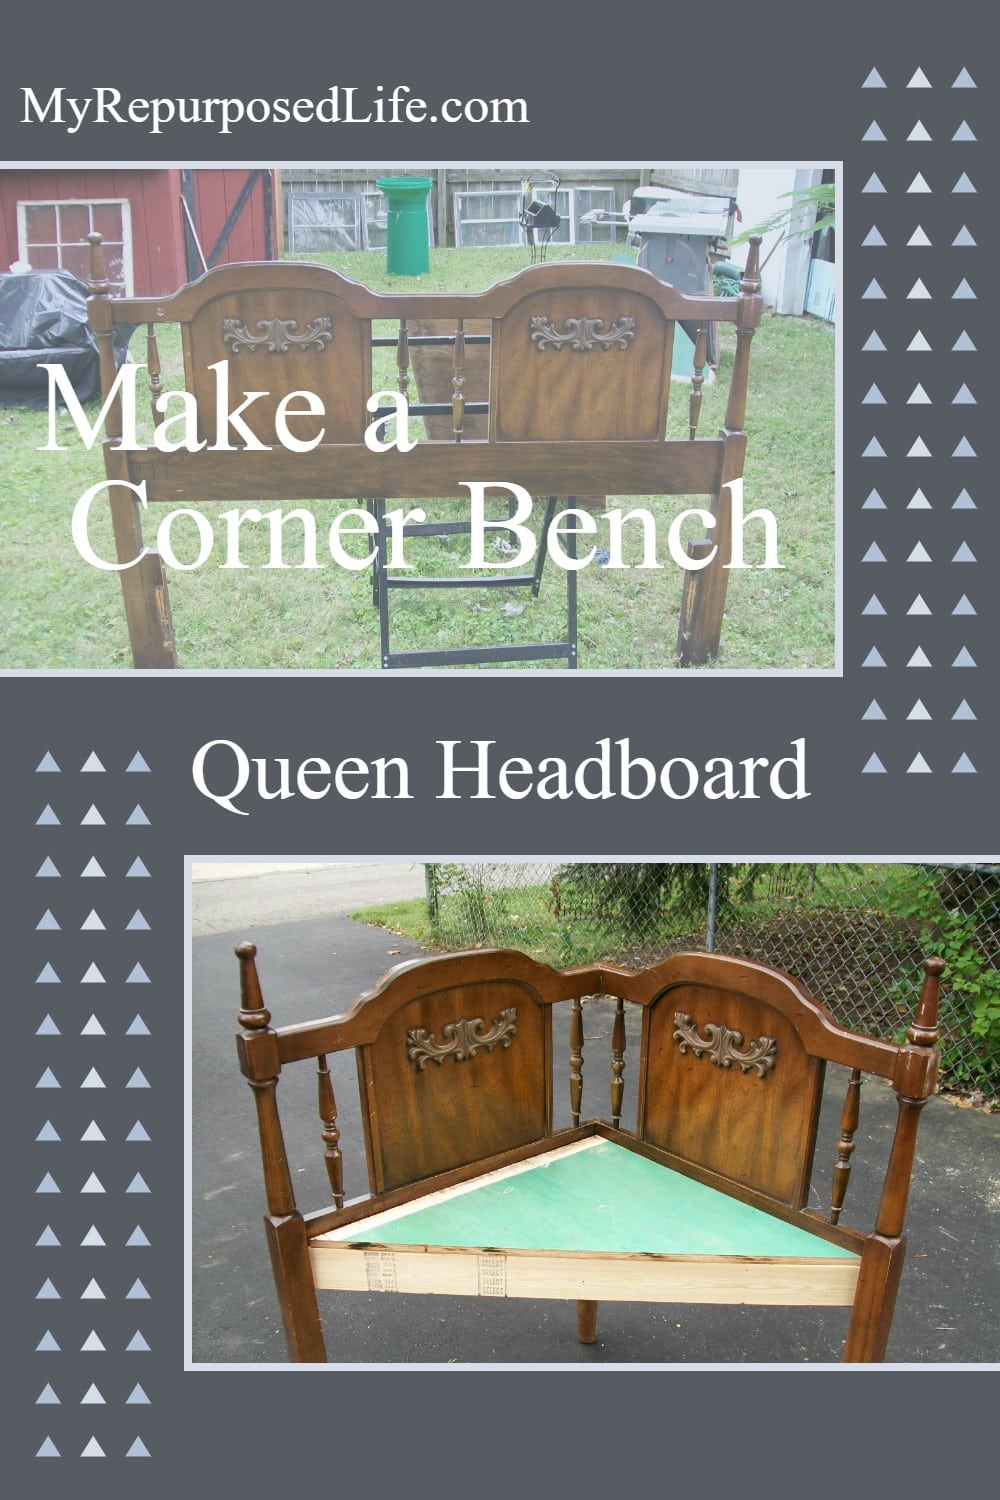
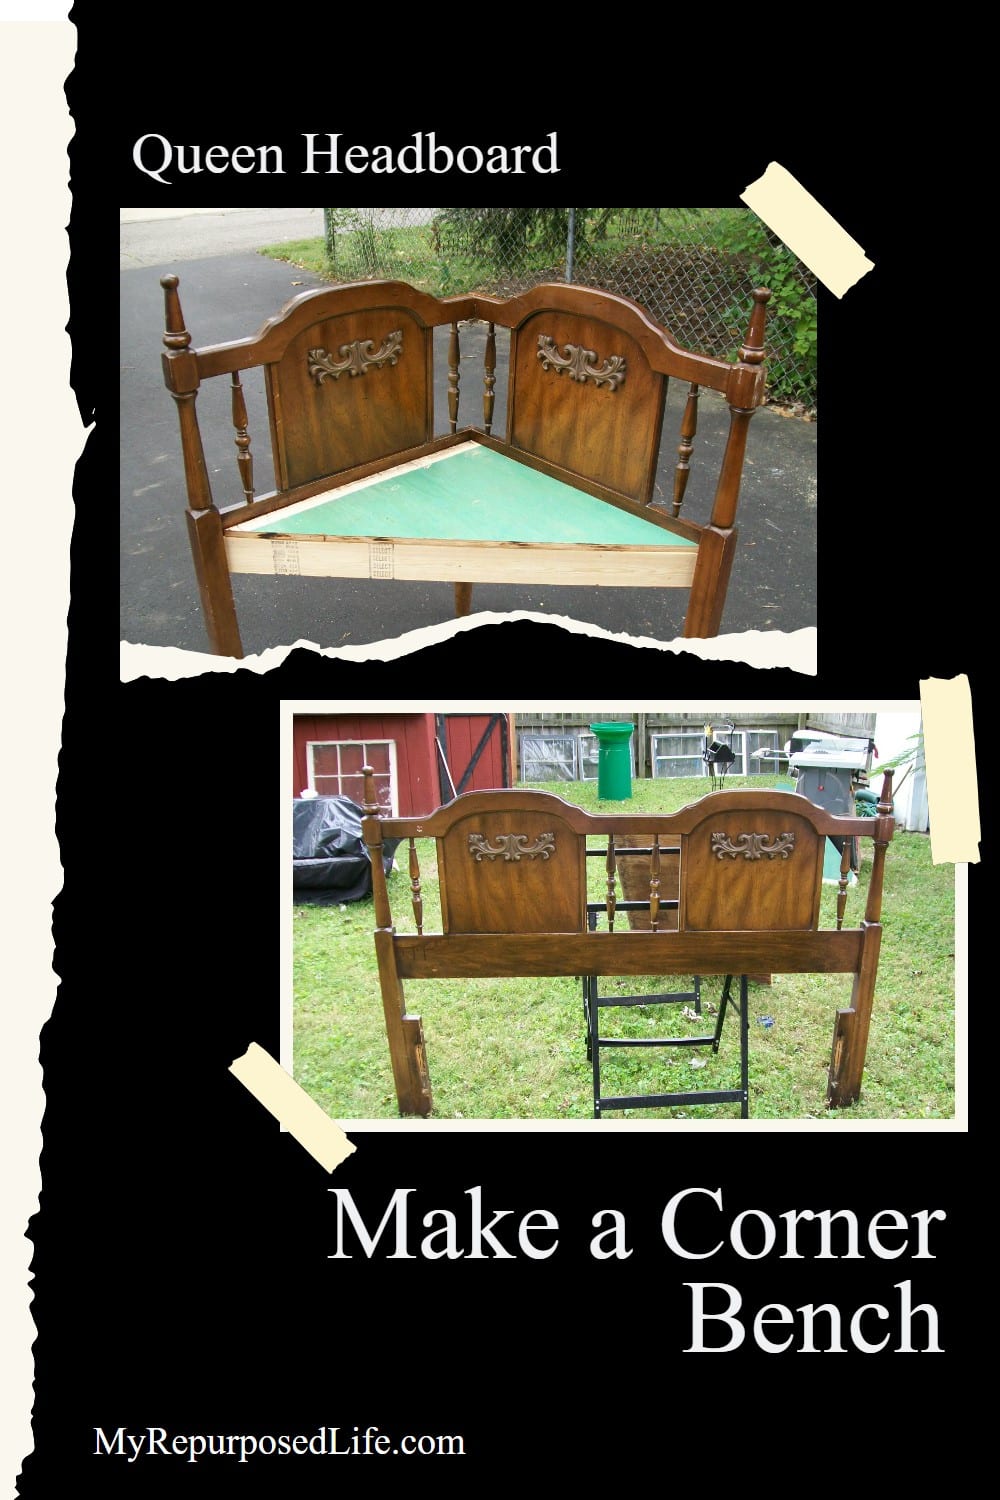
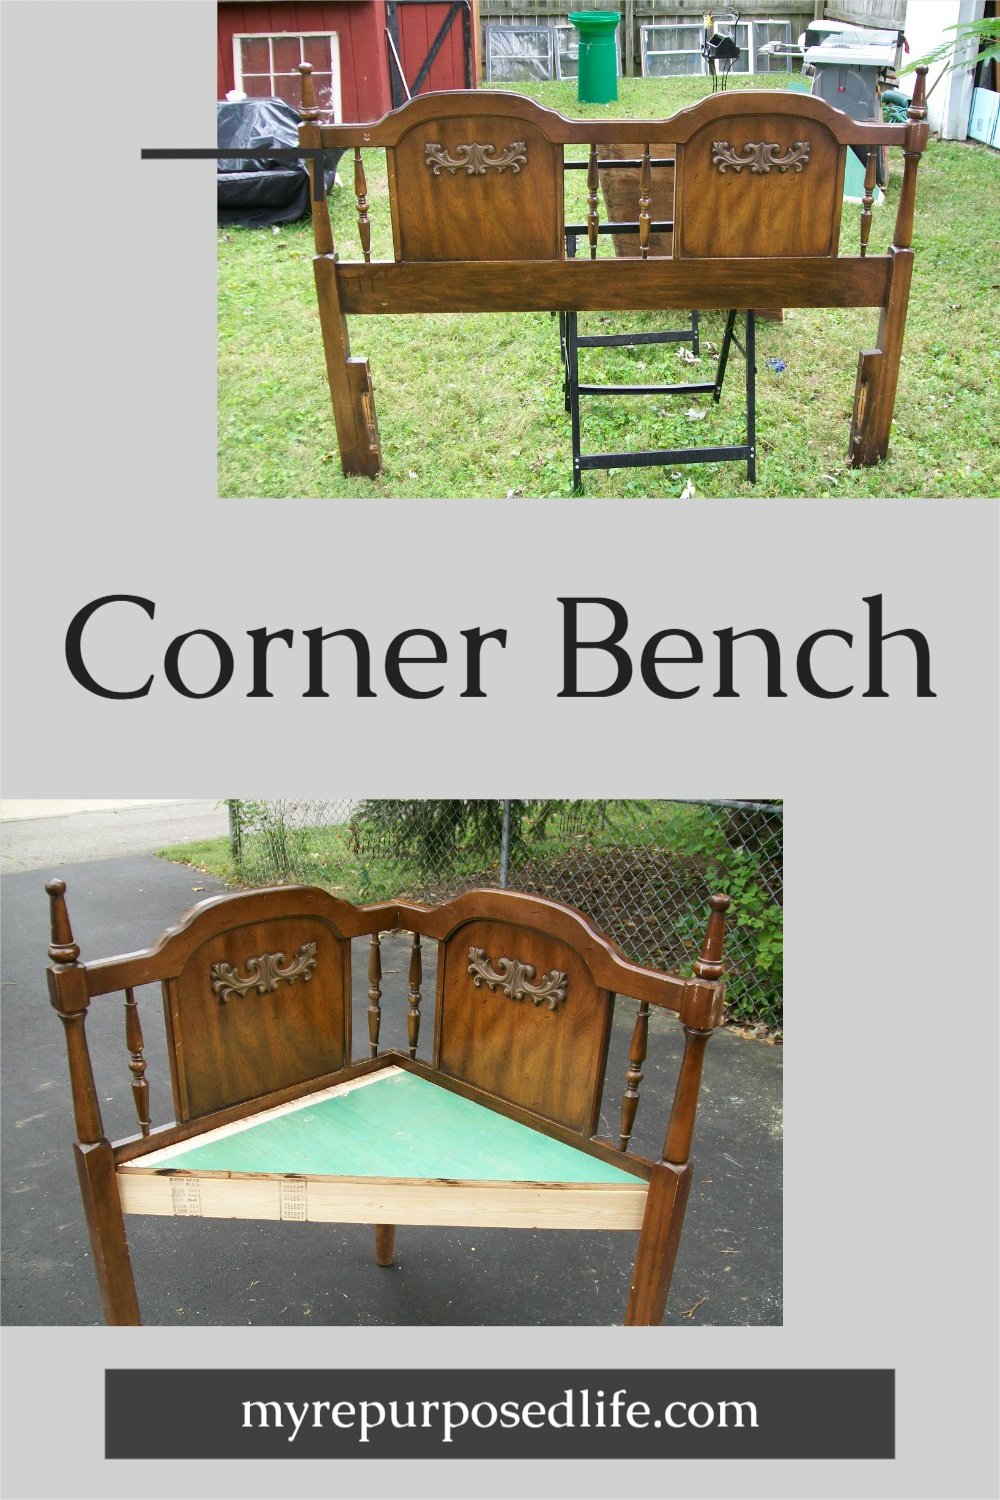
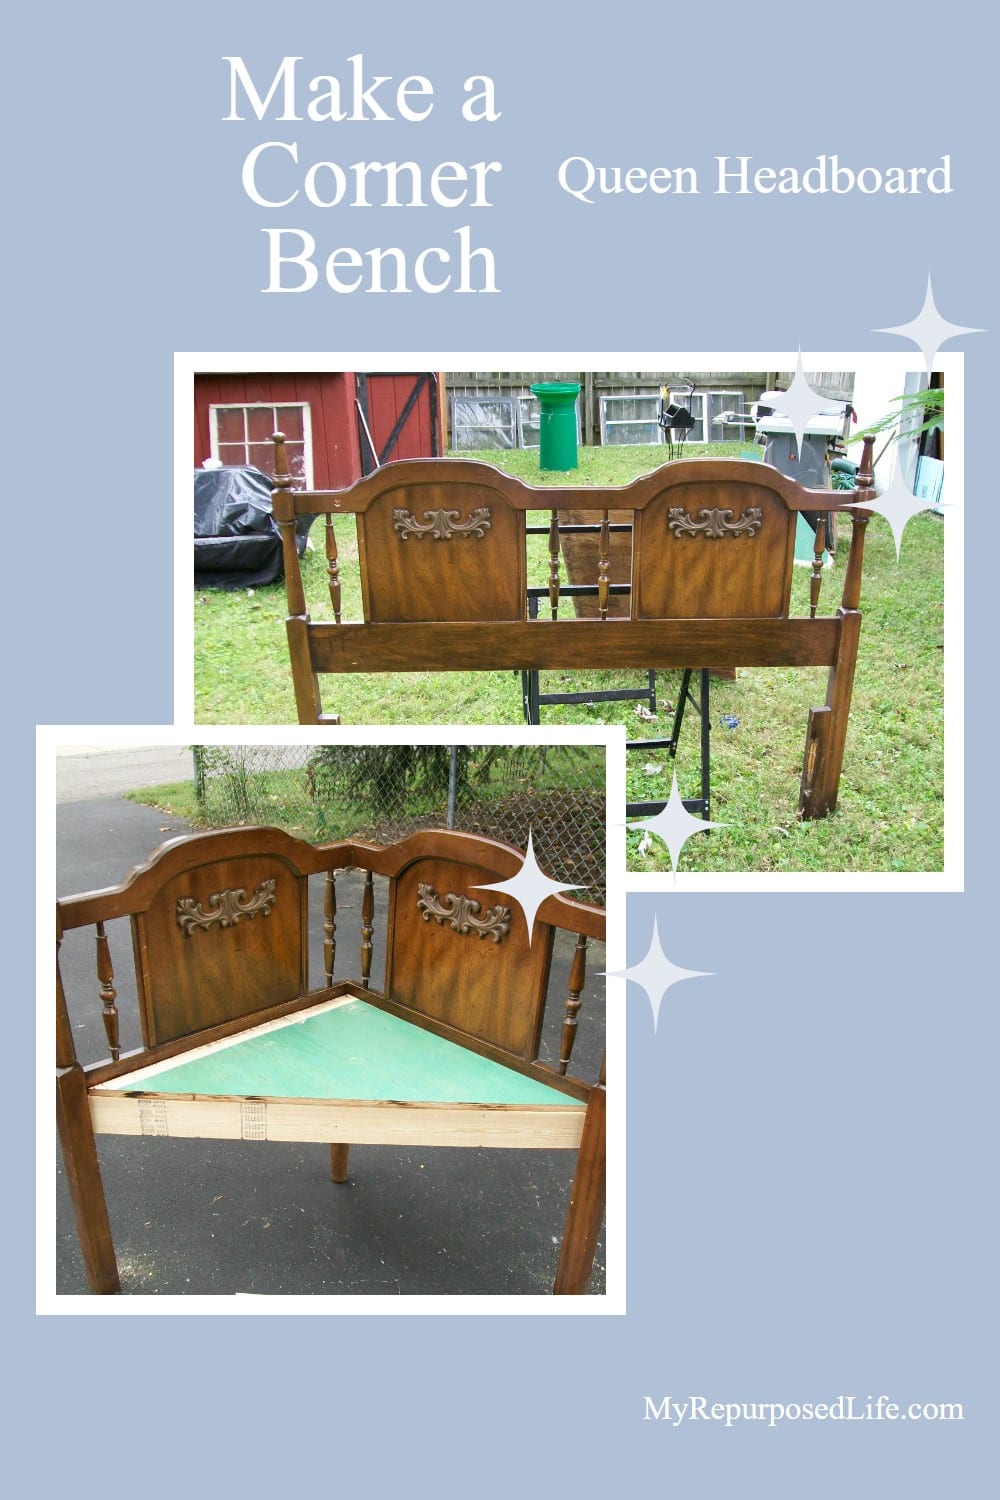
Have you ever wanted to upcycle your vintage queen headboard into a corner bench? Why would you like to? Because a corner bench makes a great statement piece in an entryway or foyer. In addition, the corner bench takes up much less room than a huge queen-sized bed headboard bench.
How to make a Corner Bench

This is our headboard “before.”
Cut Headboard in Half (almost)
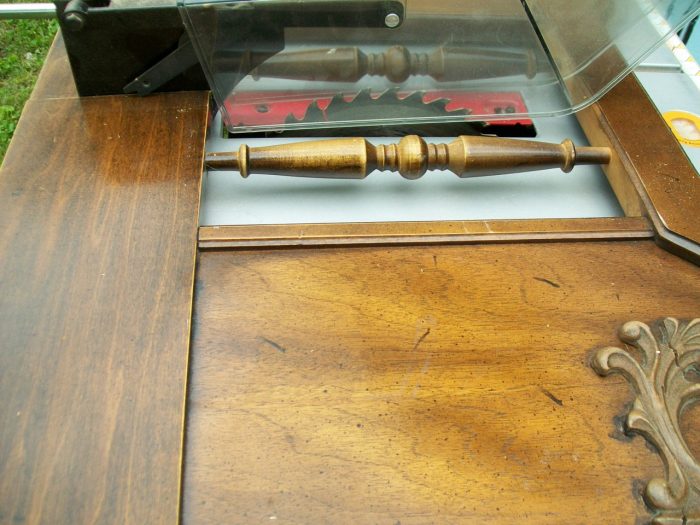
We placed it on the table saw to cut it. You saw it in half minus the thickness to get the proper size. This one was 61 inches, and it was 3/4 inches thick.
Divide 61 by 2= 30.5
Subtract the thickness of the bed 30.5 minus .75 = 29.75
One side of the bed will be cut 31.25
The other side of the bed will be cut 29.75
This can also be achieved with a circular saw or a jigsaw if you’re short on tools or experience.
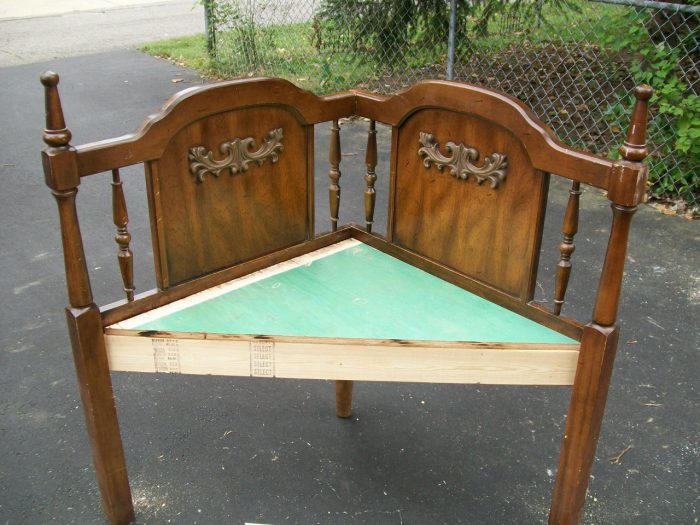
Attach Two Sides Together
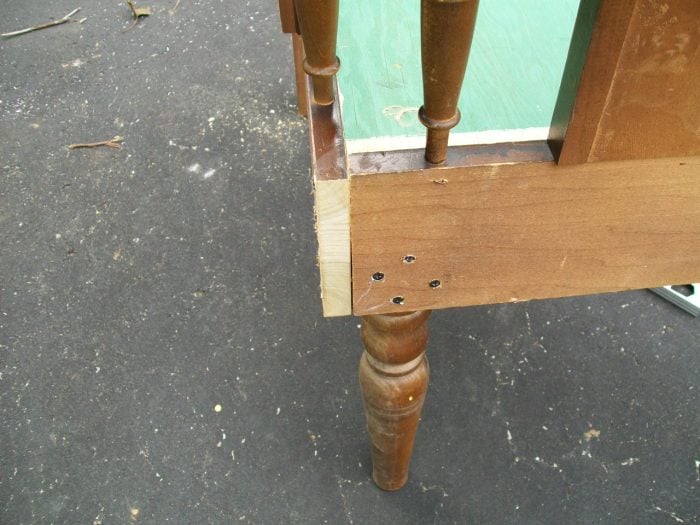
This is why you should NOT cut it in half. One side butts up against the other side.
Make sure you square the corner.
Visit the My Repurposed Life Amazon Store to shop my favorite items.
Add Front Brace
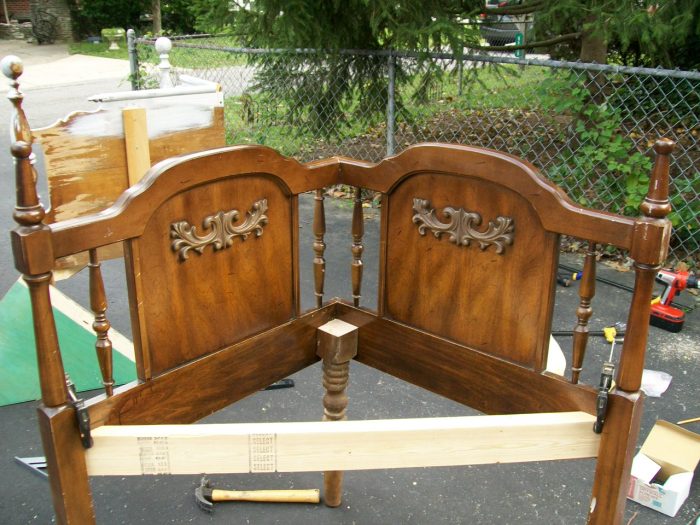
We try to find a “third” leg that matches, but sometimes we must go with what we have. A 3×3 or 4×4 would probably have made more sense in this case.
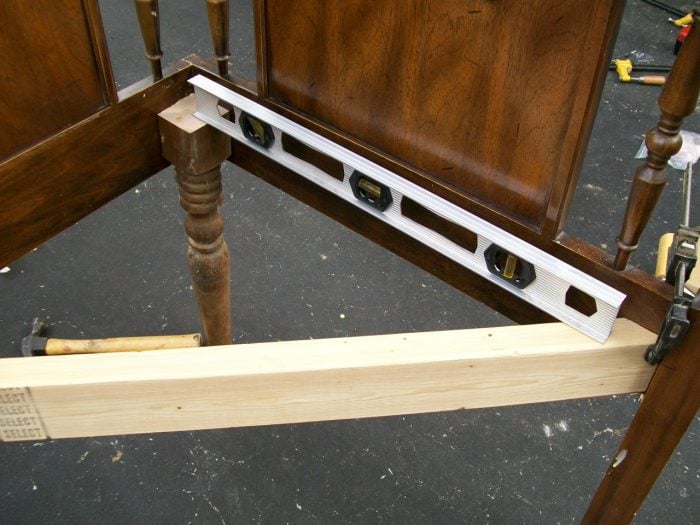
We attach a 2×4 for the front brace, using a level to make sure that it isn’t cattywampus (Gail’s favorite word)
Multiple Drills Make Things Go Faster
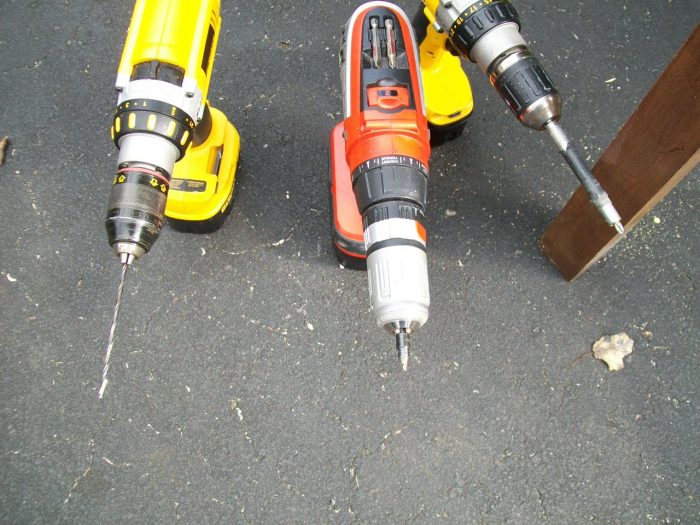
This is our arsenal. One drill to make a pilot hole, another to sink the screw head, and the third one to actually drill the screw in. Having three drills makes the work go a lot faster!
Measure and Cut the Seat for the Corner Bench
Cutting the plywood across the front is a challenging task for me.
Homemade Painting Jig
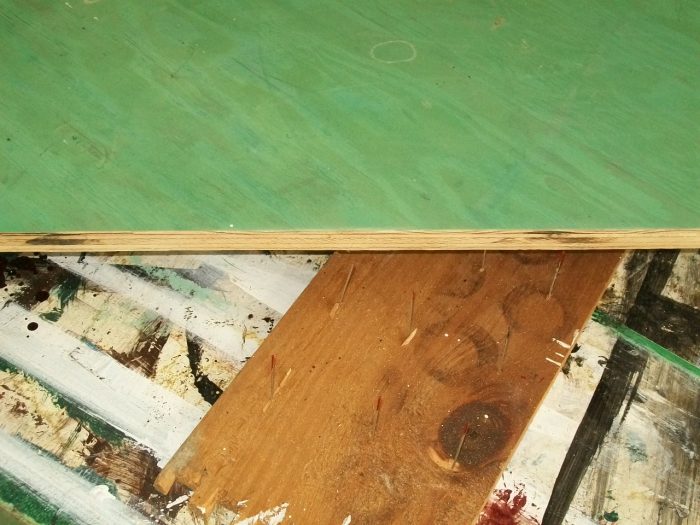
Someone can probably tell me what this kind of thing is called. I know what it’s used for, but I do not know the technical name. So, I made my own by using some old dresser drawer pieces and my battery-operated nail gun. I shot some long nails through a thin board.

It keeps the plywood raised off the table to make painting easier. As I said, I don’t know their real names, but I have seen them on HGTV.
Paint Corner Bench
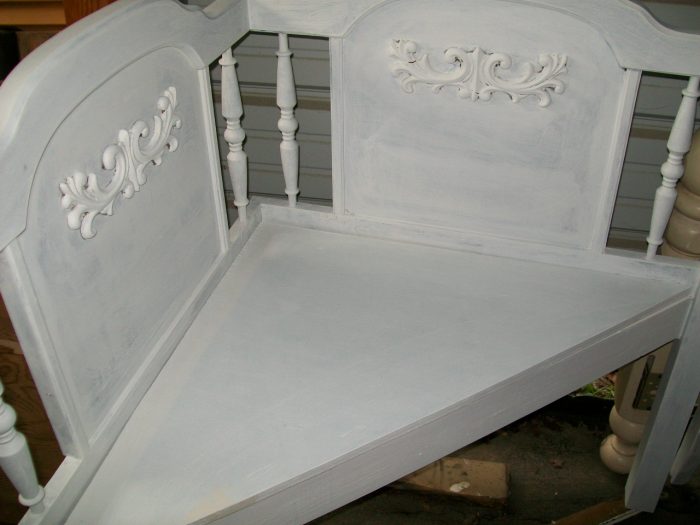
In general, I like to use two coats of primer.
I applied about 2 1/2 to 3 coats of black paint to this bench. I used a brush. However, I used some spray paint to ensure I got in all the grooves of the appliques.
I was so busy preparing for our show that I forgot to take an “after” picture.
I used silver rub-n-buff on the appliques. It highlighted the details.
You can see it in one of my pictures from our show in Glendale.
Over the years, I’ve changed how I make headboard benches. See my favorite Mission Style Headboard Bench with Storage-The Complete Tutorial
gail
Related Content Designed Decor
See other fun bench projects here
I’m a little dubious about the math – 60.5 / 2 = 30.25 – if the width is .75 then also divide that by 2 add half of it to one and subtract half from the other
i.e. 30.25 – .375 = 29.875
30.25 + .375 = 30.625
then when you ‘butt’ them together they are both 29.875 from ‘inside’ corner to end…..
Hi, May I ask how much this would bring at a craft sale?
Ted,
I would sell this kind of bench for around $125.00 Some people may ask more, some less.
gail
That is just… wow… stupid cool.
What a great idea.
Amazing! Thanks!
So good, and your how-to is excellent, as always. Stan
This comment has been removed by the author.
Oh my goodness!!!!! I am officially impressed!!!!! That is absoulutely beautiful! Even without the ‘after’ photo!!!
Hi Gail…
Just checking out your delightful blog since I’ve become a follower!
My friend, I love, love, LOVE your little corner bench…it’s gorgeous! What a fabulous idea for repurposing an old headboard…I love this idea!!! Thank you so much for sharing it with us and all the “how to’s” as well!!!
Warmest wishes,
Chari @Happy To Design
That bench turned out fabulously!!
I love it as a corner bench and I love it painted black. You did such a beautiful job. Thanks for sharing and thanks for the visit. Have a wonderful weekend.
What a great idea to make it into a corner bench. Love it!