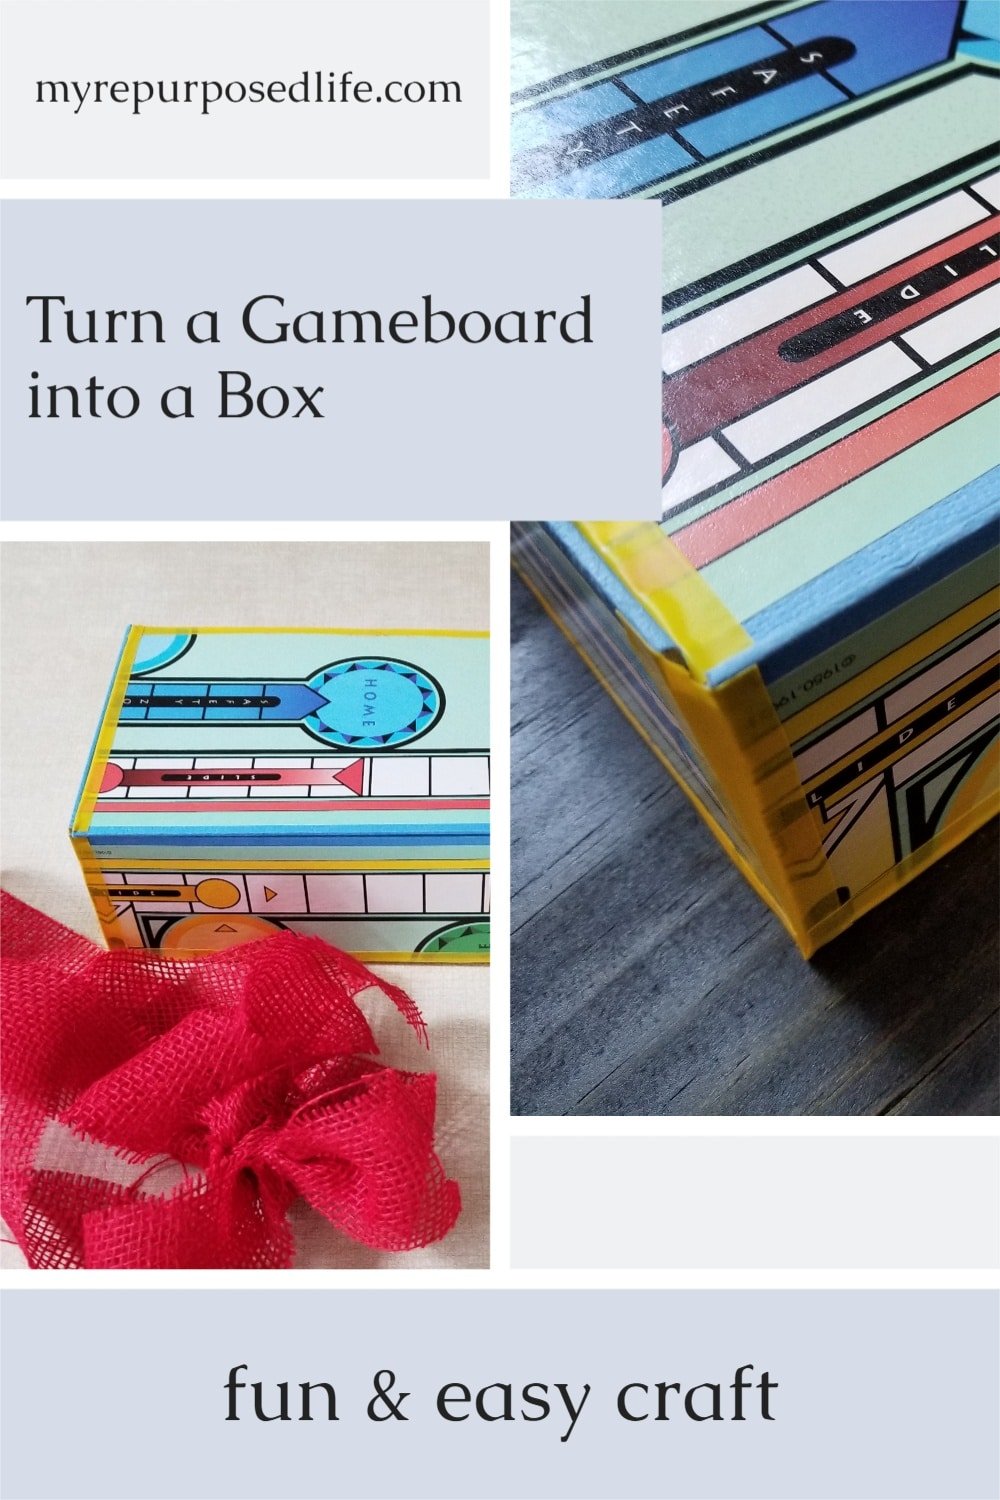
How To Make a Repurposed Sorry Game Board Box
As an Amazon Associate, I earn from qualifying purchases.

Hi, I’m Gail from My Repurposed Life, and I love finding new uses for old items! When I came across a Sorry! Game board in my stash; I knew it had the potential to be something fun and creative. Instead of letting it collect dust, I transformed it into a unique and functional piece. If you enjoy thinking outside the box—literally!—you’ll love this repurposed project. Let me show you how I did it!

See the game board stored in the back of the kitchen island? After digging it out, I decided it would be perfect for this month’s Thrift Store Décor Project.
See the kitchen island update.

This is our Thrift Store Day. Be sure to check out all the projects below.
Materials you will need to make a Sorry game board box
- Game Board
- Straight Edge (I used a yardstick)
- Tape Measure
- Utility Knife
- Cutting Mat
- Pencil
- Tape
- Hot Glue Gun
- Hot glue
- Electrical Tape
- Ribbon
- Shred
I have no idea where I got this; I only had the board, not the box or any of the pieces.
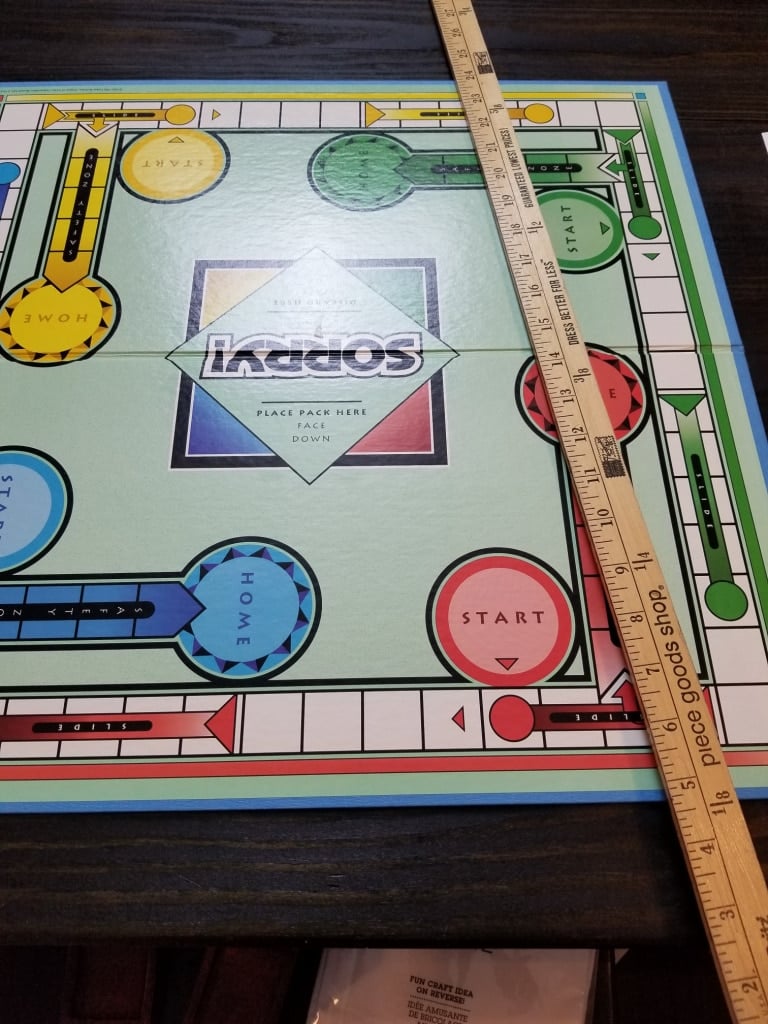
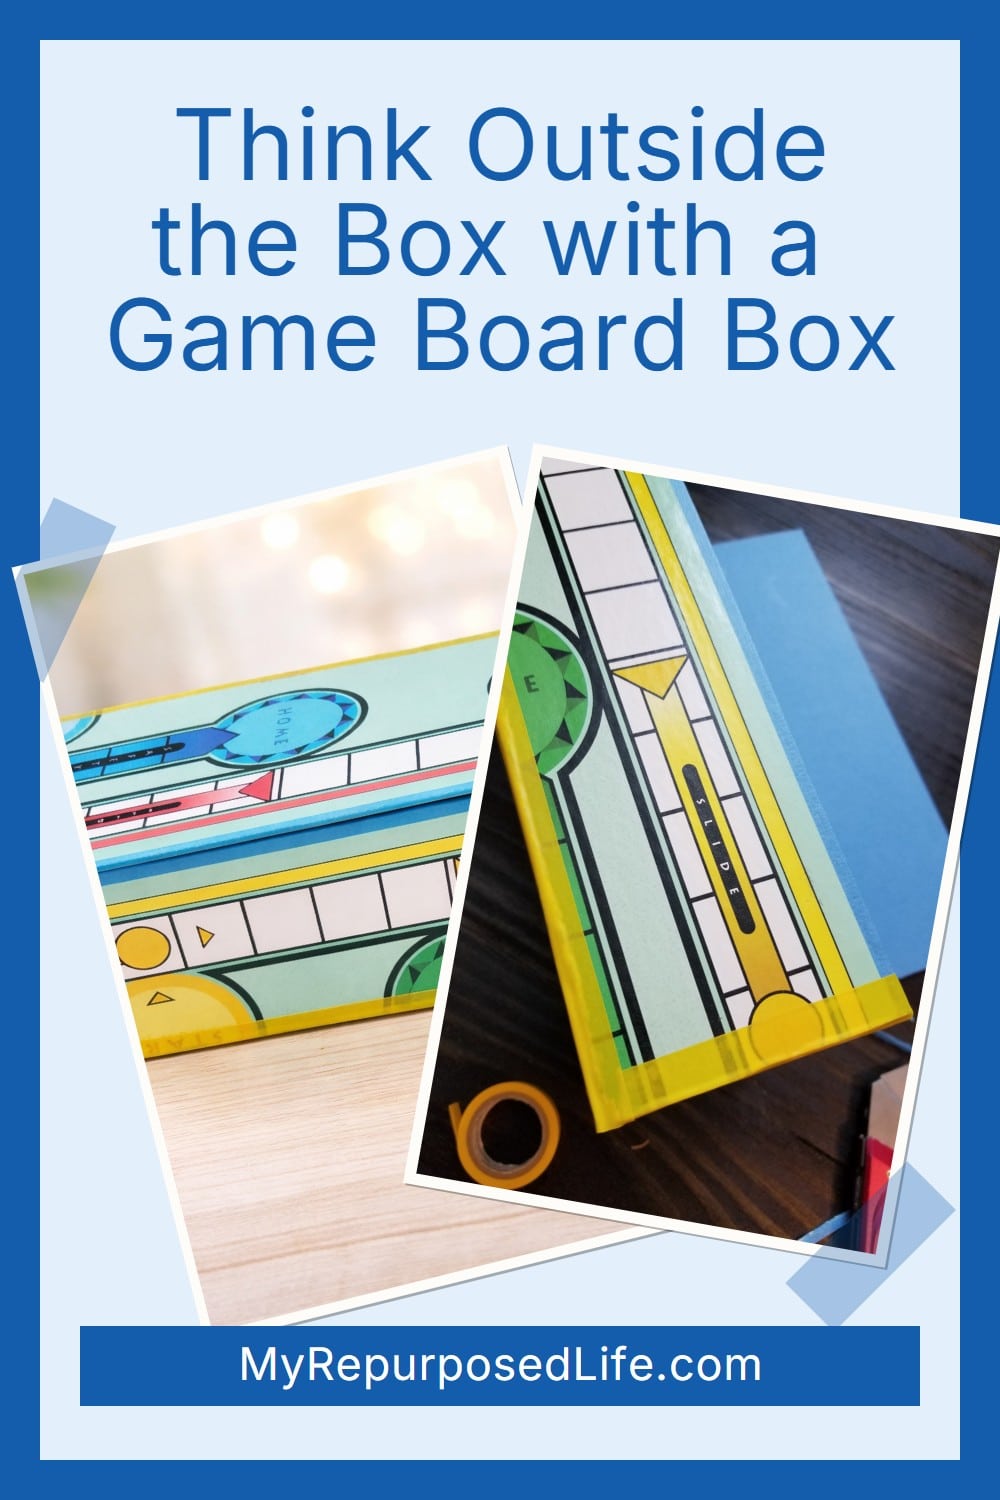
I measured and marked my lines on the board. They may be a little faint, so I made an image to help you see them. (see below)
Mark and Score Your Game Board
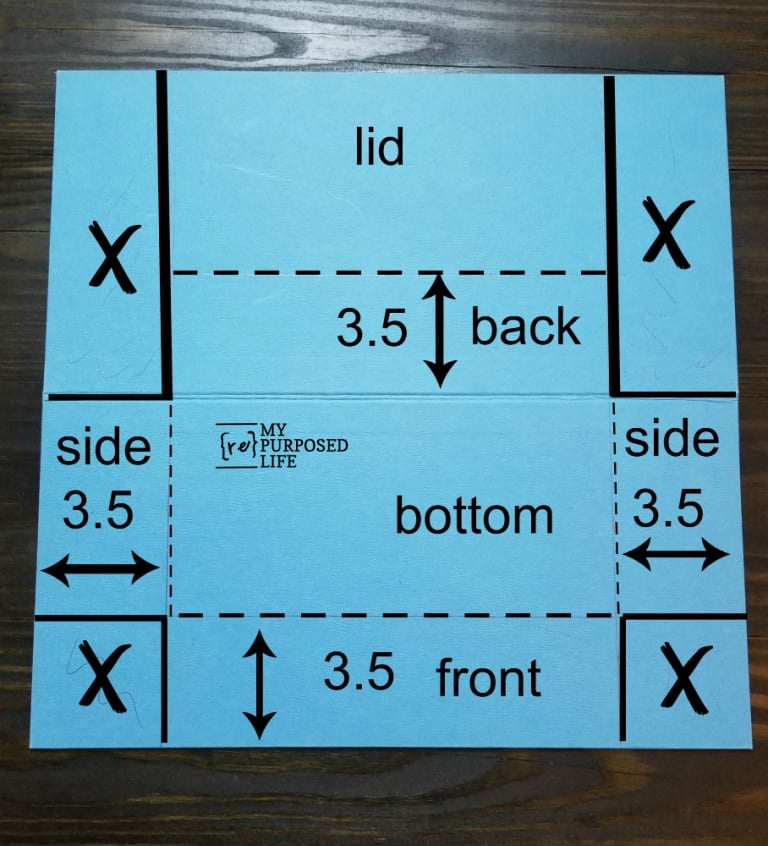
I hope this helps you visualize how you draw, cut, and score the lines to make your game board box. The solid lines are for cutting, and the dashed lines are for scoring. (more details on scoring/folding in a minute)
Visit the My Repurposed Life Amazon Store to shop my favorite items.
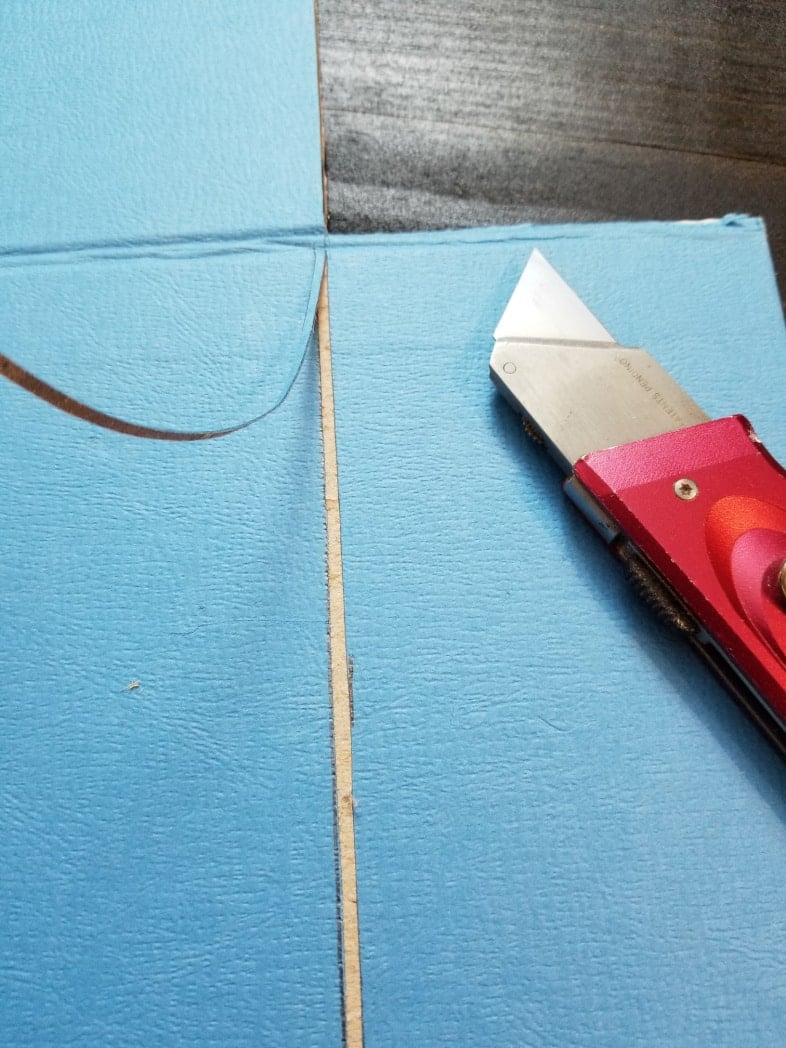
Cut the Game Board on Solid Lines.
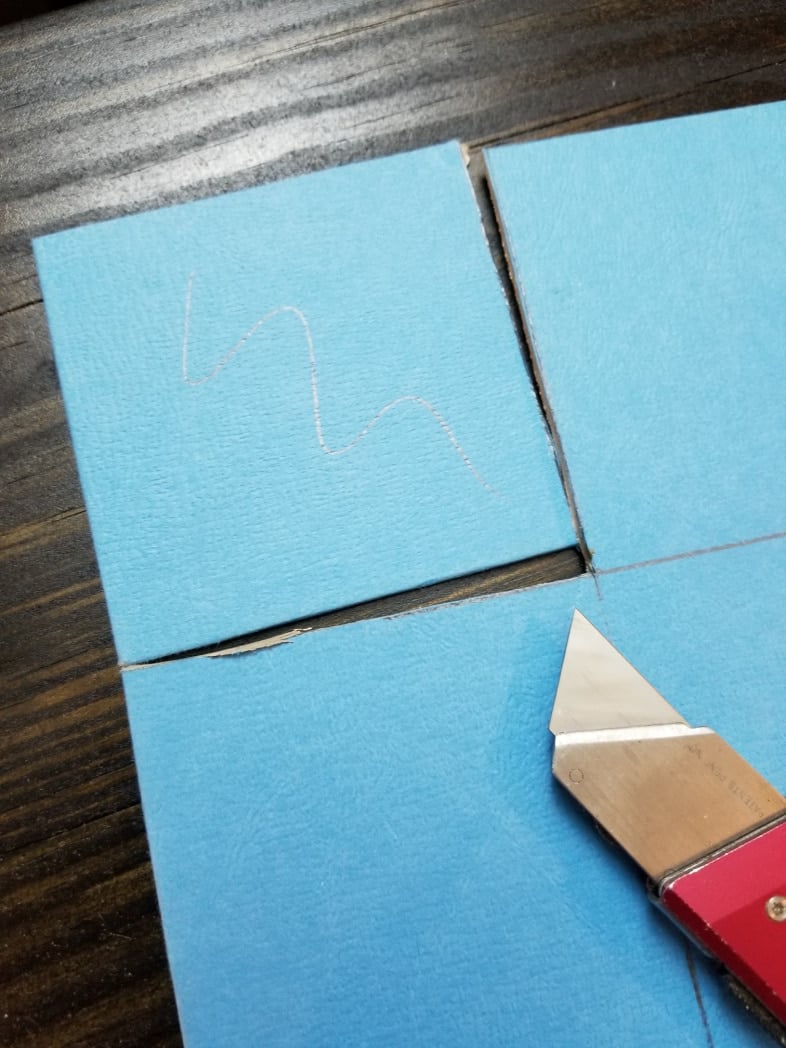
I carefully cut the game board with a utility knife. If you have a self-healing mat, I recommend using it.
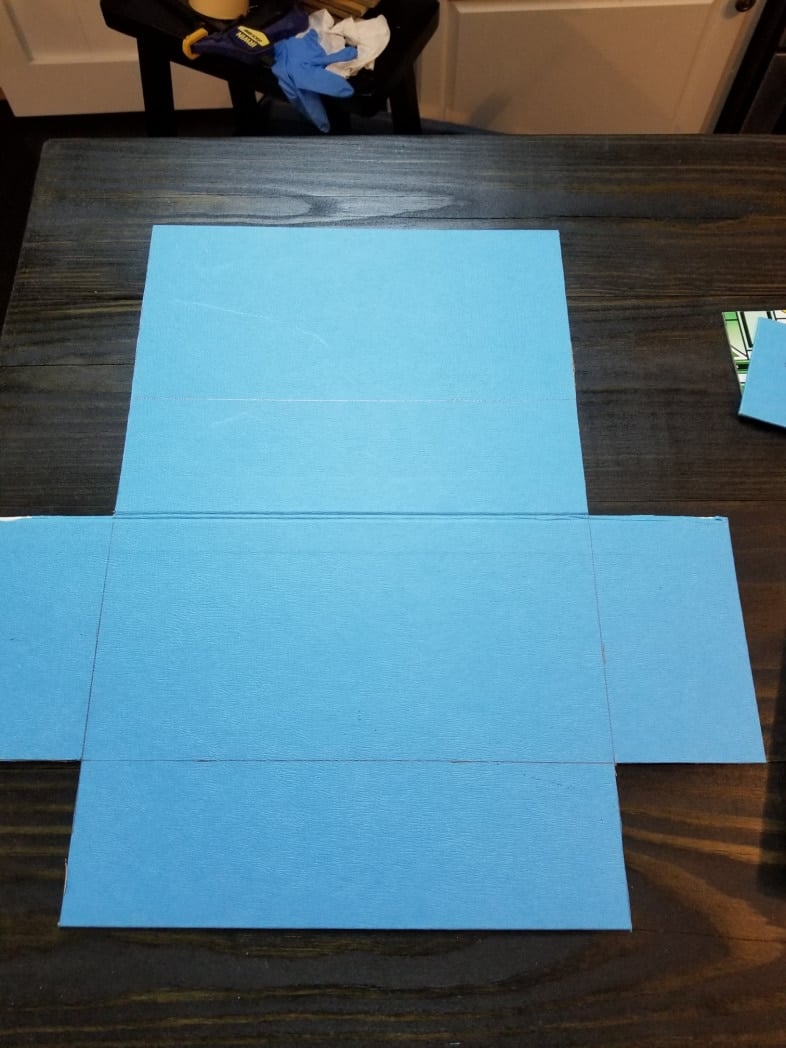
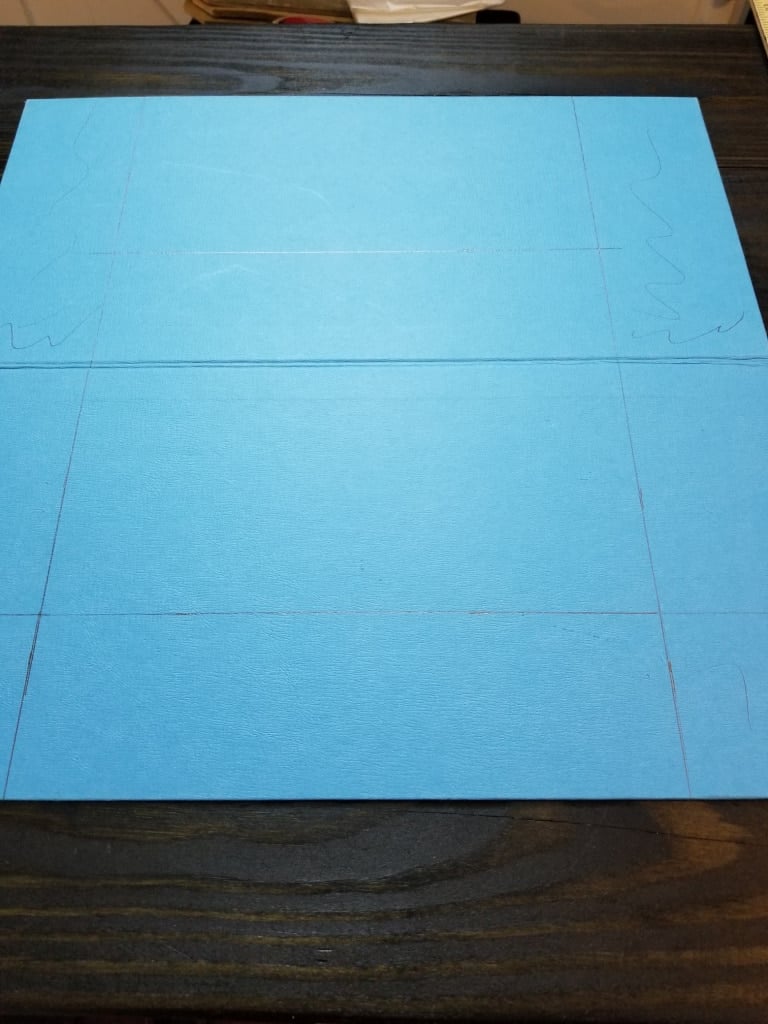
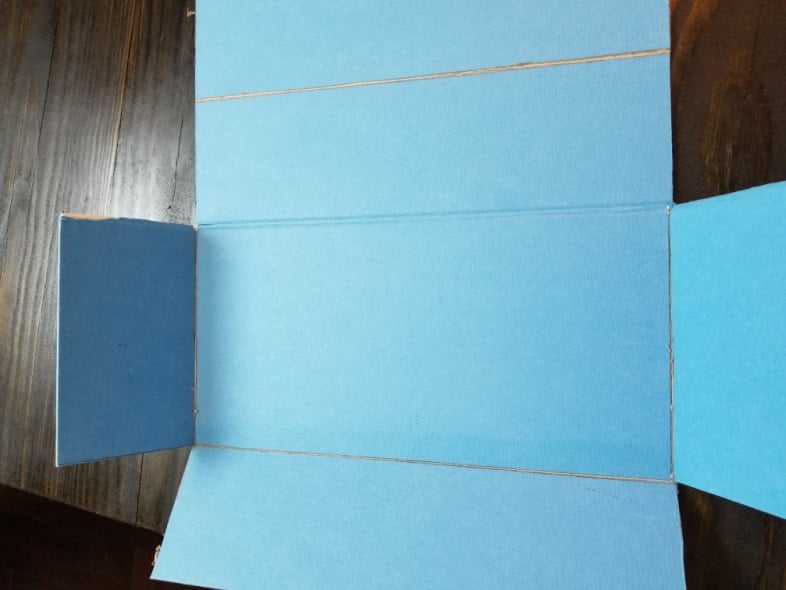
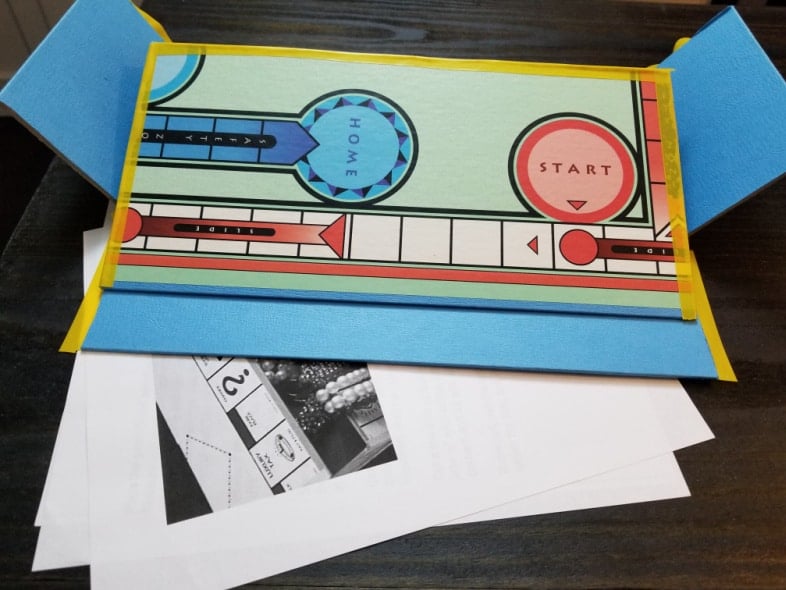
So, is it making sense now? The bottom portion is the front flap. The part at the top of the image is the lid and the back of the box.
Mark Interior “Fold” Lines
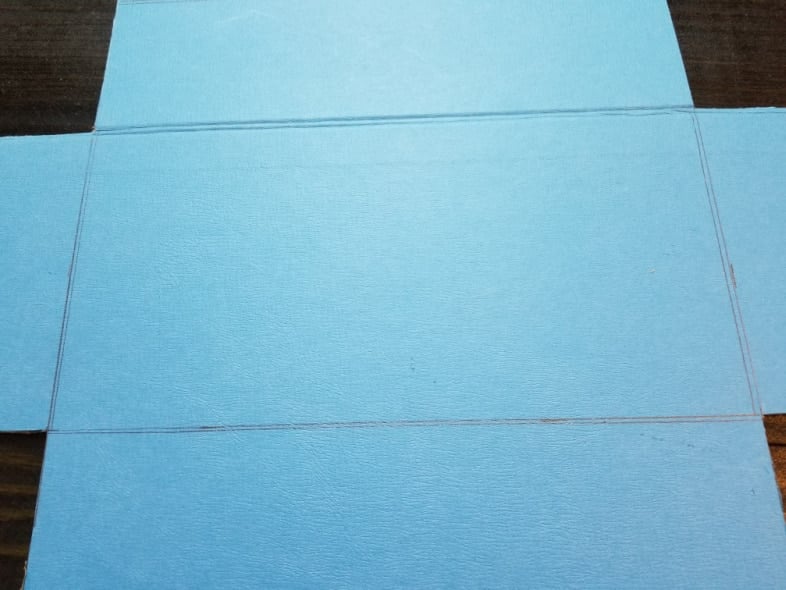
Because the game board is thick cardboard, you can’t simply fold up the sides, front, and back. Measure and mark four more lines parallel to your first set of lines.
The first line is 1/16″ below the top-marked line
Second line/16″ below the bottom marked line
Third line 1/16″ to the INSIDE of the LEFT line
Fourth line /16″ to the INSIDE of the RIGHT line
Score all eight of these lines, taking care not to cut through the cardboard. By the way, I found that making the very first pass with a light hand gives a good path to going deeper on the next pass.
Score and Peel Interior Lines
Patiently score and peel away layers of cardboard. That will allow you to fold each of the four sides to make the box. This is trial and error. If your side will not easily fold, score, and peel again. Repeat the process on all four double lines.
Fold the Game Board Box on the Interior Lines
Using the edge of a table may be helpful to get a good fold.
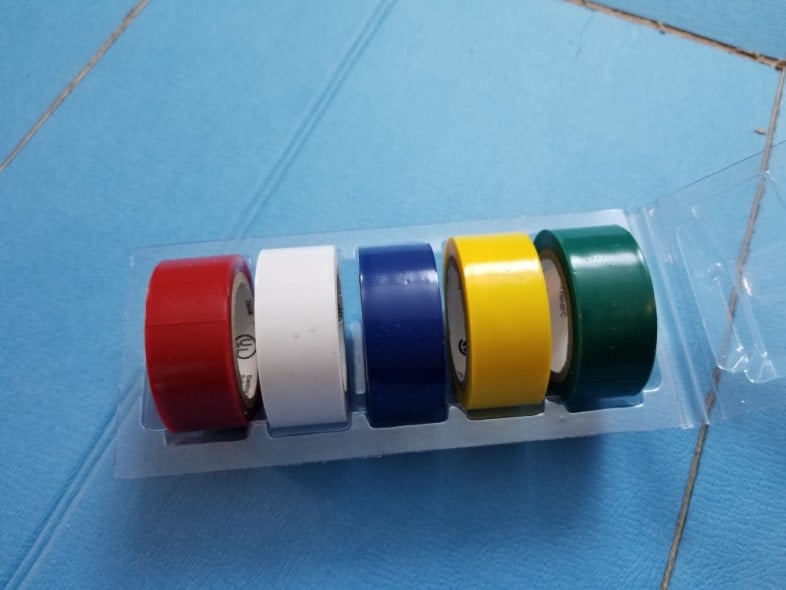
While cleaning out the kitchen island, I found this set of colorful rolls of colored electrical tape.
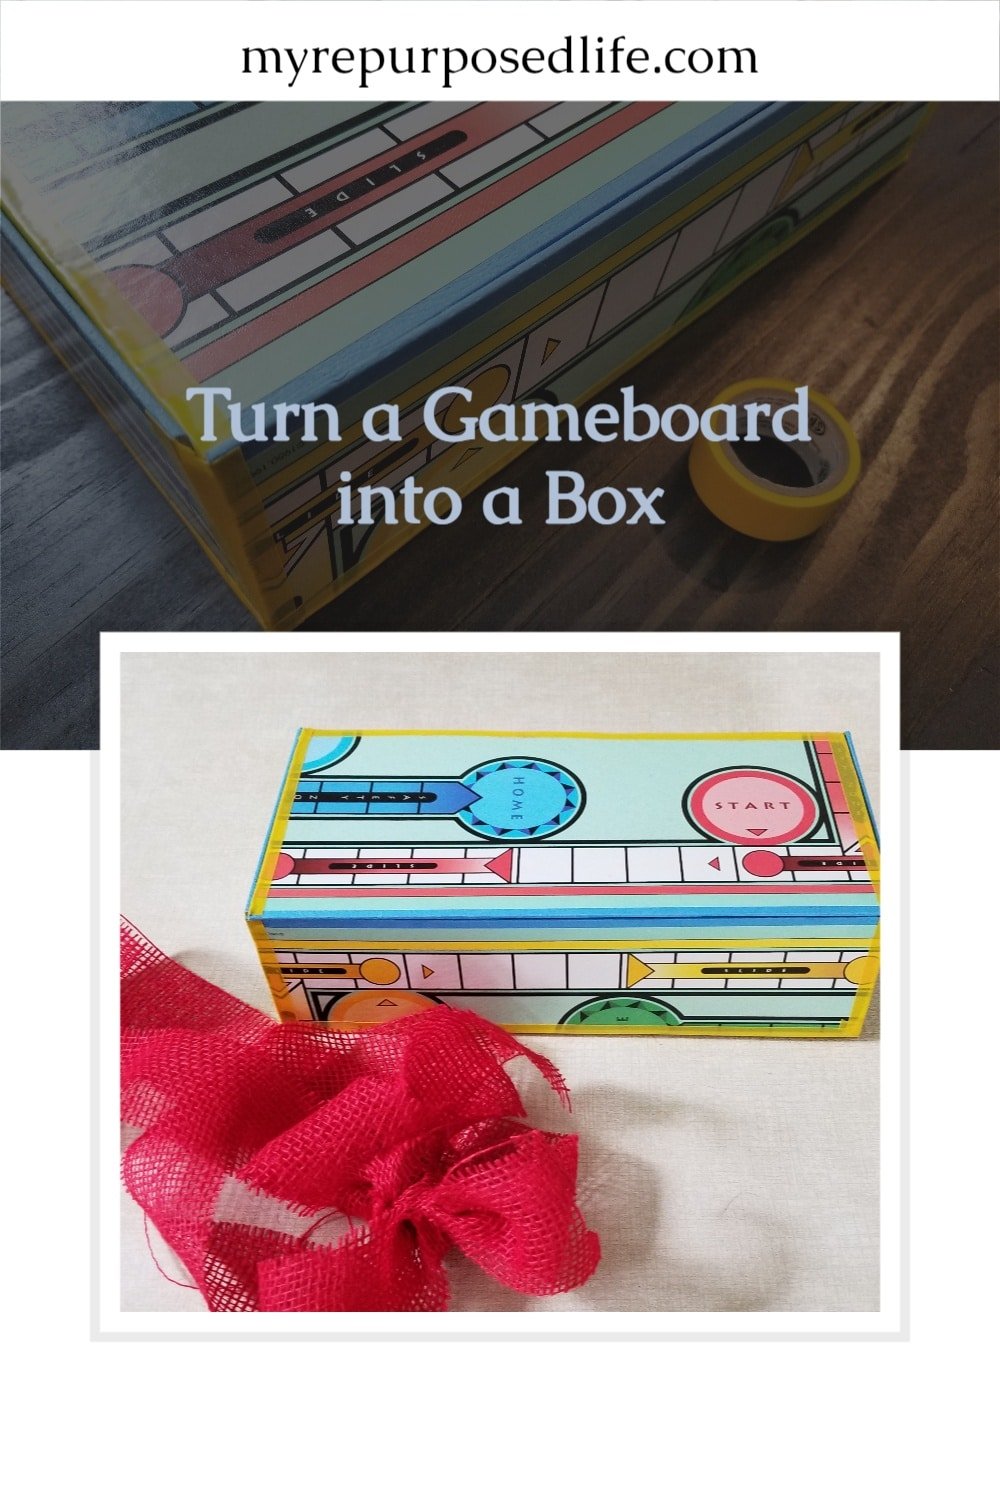
Apply and Secure Joints With Electrical Tape.
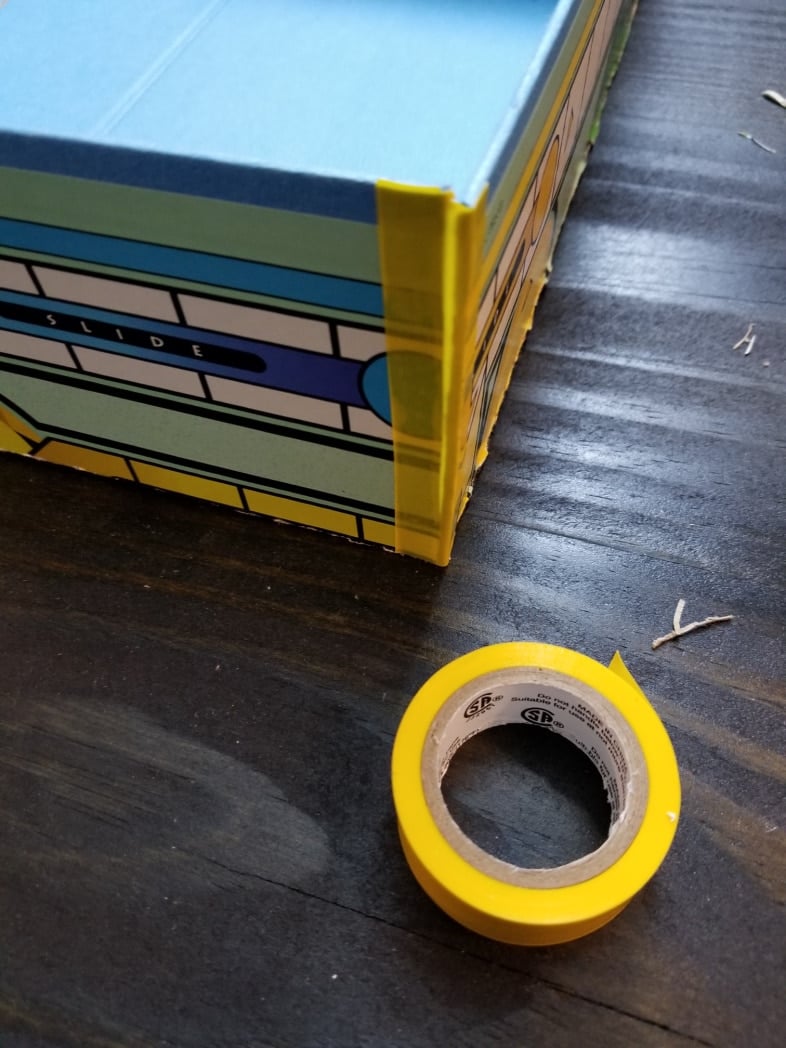
This is the left side of the box. Notice how the left side is slightly higher than the front flap? This is normal. I cut the tape and secured it to all the box’s seams.
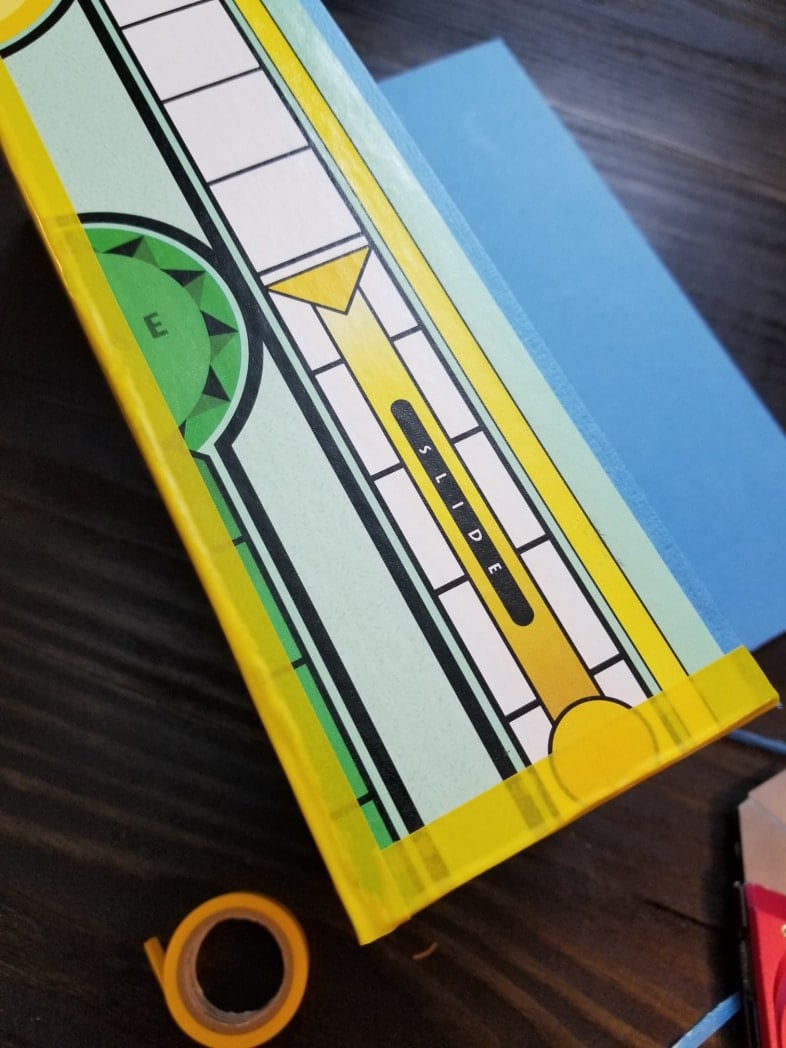
I ran the tape along all the folds and joints to make it look more cohesive.

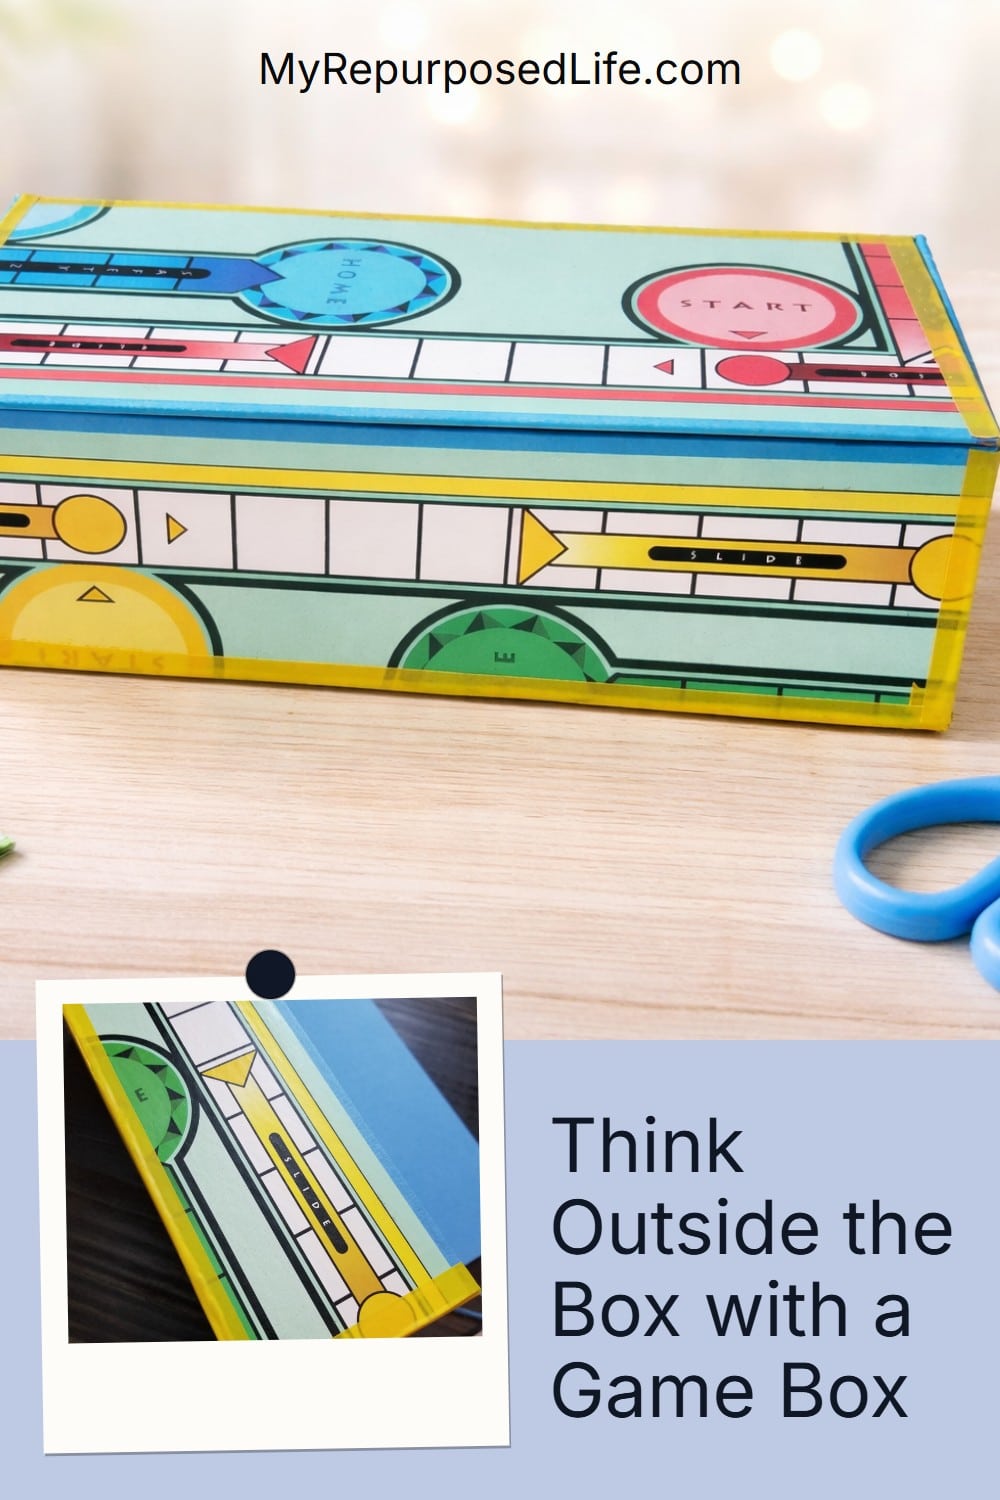
Voila! My repurposed Sorry game board box is complete! It was late, and I went to bed. . . .
This is what I woke up to. Hahaha, the box collapsed overnight, as though some little elves came out and sat on it. Those printed directions are the ones I followed to make this Sorry board box. I printed them out years ago and couldn’t find the source while writing this tutorial.
For Added Strength-Secure, all Seams With Hot Glue
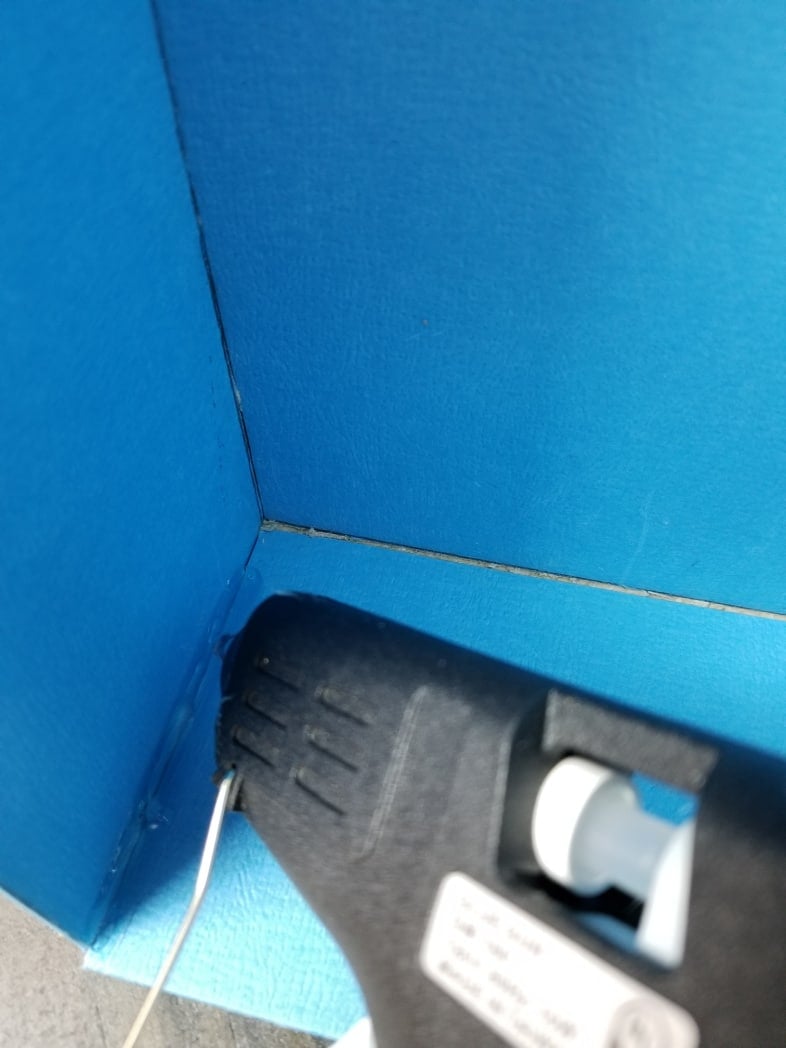
Plan B – I taped all the joints up again and then used hot glue to secure all of the joints/seams of the game board box.
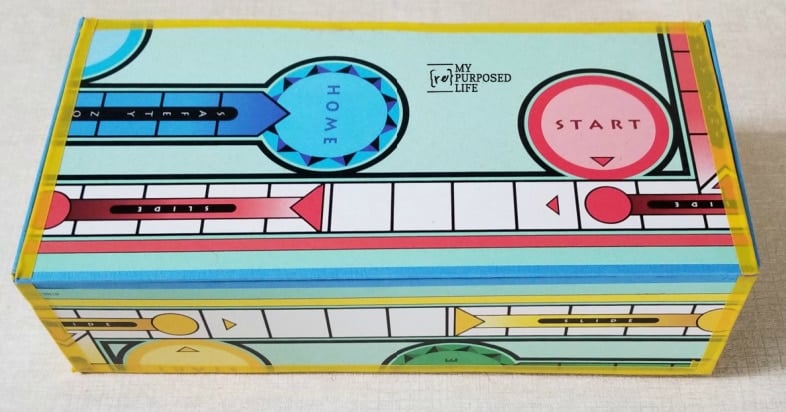
Isn’t the repurposed game board box so cute? It makes me want to make more! See how the lid closes flat but fits inside the two sides? That is because of the way the extra lines were scored.
Add shred and ribbon to use the game board box as a gift box
The game board box would be great to hold trinkets and treasures, or, in this case, a gift! Jennie won a custom engraved hammer from the Clean Up Your Act Challenge. Look how perfectly it fits in the Sorry Game Box.
Please Pin It
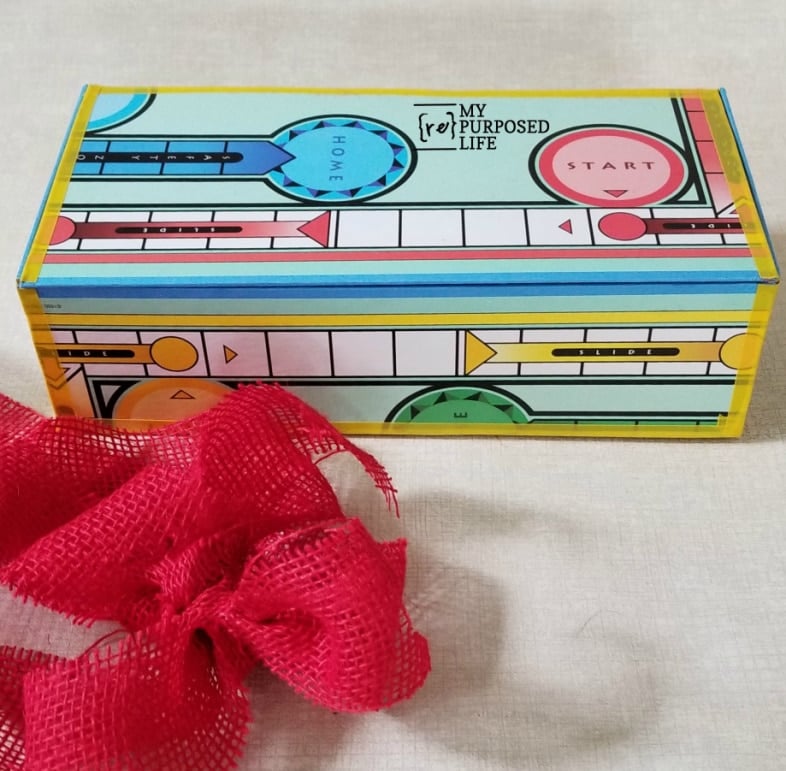
I got the burlap ribbon from The Dollar Tree.
What game board do you have at home that you could make into a box?
See over 100 Awesome Thrift Store Projects Here
I did this project for this month’s Thrift Store Décor Challenge; see more excellent thrift store décor ideas below:
Sharing at Tip Me Tuesday
Read more about Gail Wilson | My Repurposed Life
That’s adorable, and so useful. Great tutorial!
Do you happen to know the dimensions of the board? I’d like to try this with other boards as well.
Melissa,
I believe it was about 20-21 inches square. I believe the bottom and the lid should be the same size, and the sides equal to 1/2 of that size. In this case, about 7″ and 3.5″.
Hope that helps!
You could try it with newspaper or something similar first.
good luck, have fun!
gail
I did it! I made a box out of a Scrabble board. I’d love to share the photos. Thanks for the tutorial. My mom is gonna love it, just like she loves Scrabble. And I’m gonna make a bunch more. My family were big board game people so these are gonna make great gifts.
Melissa!
Awesome! I’m so happy you got your project done. I too, LOVE Scrabble! I would love to see you project. You can send the pictures to me via Facebook, or email.
ps I have a thrift store scrabble game board . . . maybe I’ll make a box too!
gail
Gail you never cease to amaze me! Too darn cute!