Kitchen Island Makeover
As an Amazon Associate, I earn from qualifying purchases.
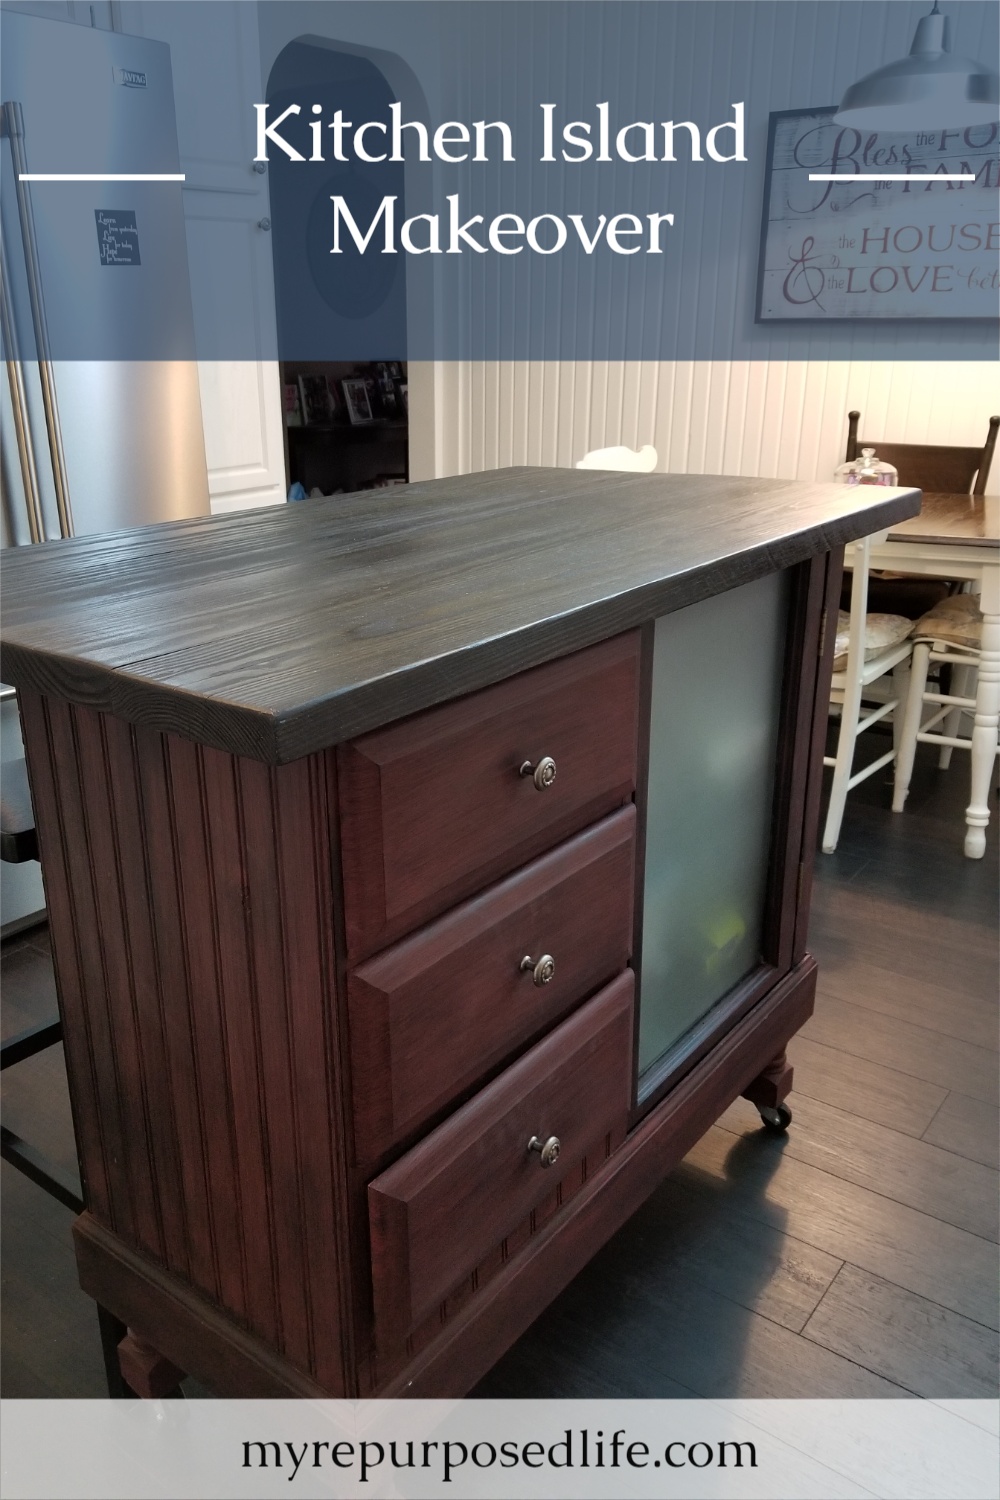
I’m so excited to show you this kitchen island makeover. I’ve sort of got Spring cleaning fever and and decided it’s time to do some sprucing up, tidying and organizing. As I was cleaning out the kitchen island or should I say my craft station. Yes, it looks like a kitchen island, but you won’t find any cooking utensils there. It houses tools, paint brushes, screws and hardware!
The kitchen island has had some updates over the years, but these new changes were really overdue.

You may not know, but this is actually a repurposed desk and the kneehole is covered with a small curtain to hide all the clutter inside.
See an awesome Black Kitchen Island makeover by clicking that link.

This is the view I’ve shared most on the blog. However I don’t think you have seen my kitchen island with the new laminate flooring.

You can see that the poor thing has gotten a little dinged up over time.

Those are NOT worm holes. Those are places that have been damaged from using my drill to make signs for my Etsy Shop. You’ll also notice the gap between the boards that I fondly refer to as “crumb catchers”.

And now you’ll see the ugly truth and why I needed to do some spring cleaning! Most of the items in here are for crafts and projects I do in the kitchen. What a mess! It’s in dire need of a kitchen island makeover.

Keeping it real, here are the three drawers. I told you there were no kitchen utensils in here! So, there you have it, all the reasons that I need to clean out and update my kitchen island/craft station

I find that the best way to clean out a messy area like this is to empty the drawers into a plastic tub. Only put items you intend to keep in the tub and arranging similar items together will help when you have to put in everything back in the drawers. This tub ended up holding the contents of all three drawers. After I got the entire island empty of the contents, it was time for the fun to begin!

I’m terrible about forgetting to finish a project. This “temporary” shelf has been in place since I first built this kitchen island in 2010 and is held up with scrap wood pieces. Hiding in the back of the kitchen island is a forgotten Sorry game board. I made it into a fun gift box.

Although I painted the exterior of the kitchen island, I never painted the interior. I removed the top so I could easily reach the kneehole to paint it. A small foam roller and a chip brush were the best tools. I like to pour paint into a small lunchmeat container so that I can seal it in between coats. TIP: you really should paint from the can.

I really wanted the island to match the repurposed sewing desk that I am using as storage in the kitchen. I used the peppery-colored paint to do a dry brush effect over the original black paint on the island.

After the pepper paint dried, I applied some smoked glaze to give it an aged look and added a protective coat of sealant.
Project ideas and a video of “how to glaze painted furniture and more”

Isn’t the kitchen island makeover awesome? I made some additional changes with the top and removed the little curtain. I’ll share those details next week.

The drawers are so much better. I put all the tape, paint brushes and sandpaper in the top drawer. The middle drawer has screws, hardware and other random stuff I use on a regular basis. The bottom drawer ended up collecting all the extra “stuff”. Not only does the island-diy craft station look better on the outside, it also looks better on the inside.

Installing a more permanent shelf in the kneehole really ups the storage game as well.

I built this island to a custom height so I could work at it standing up. I think I may enjoy being able to sit to work on certain projects. I’ve already broken it in with a small project I’ll be sharing tomorrow.
Now that I have the kitchen put back together, I’m ready to work on a few remaining updates, stay tuned!
Watch my video of How To Glaze Painted Furniture
gail
awesome! love its new, fresh look!
Love that color, really looks great with the new floor and maytag set. Everything is really coming together.
I love the color. Did you put the beige curtain back up? I wonder if they make fabric in the peppery color. I really like that it’s has wheels.
Thanks, Jennie, but I’m disappointed that it doesn’t quite match the desk in the corner that holds the t.v.
The wheels! I LOVE that it has wheels too.
I didn’t put the curtain up, I installed a window instead. All those details coming next week. It was way too much information for one post. 🙂
gail