Kid’s Chalkboard Desk using Repurposed Nightstand
As an Amazon Associate, I earn from qualifying purchases.
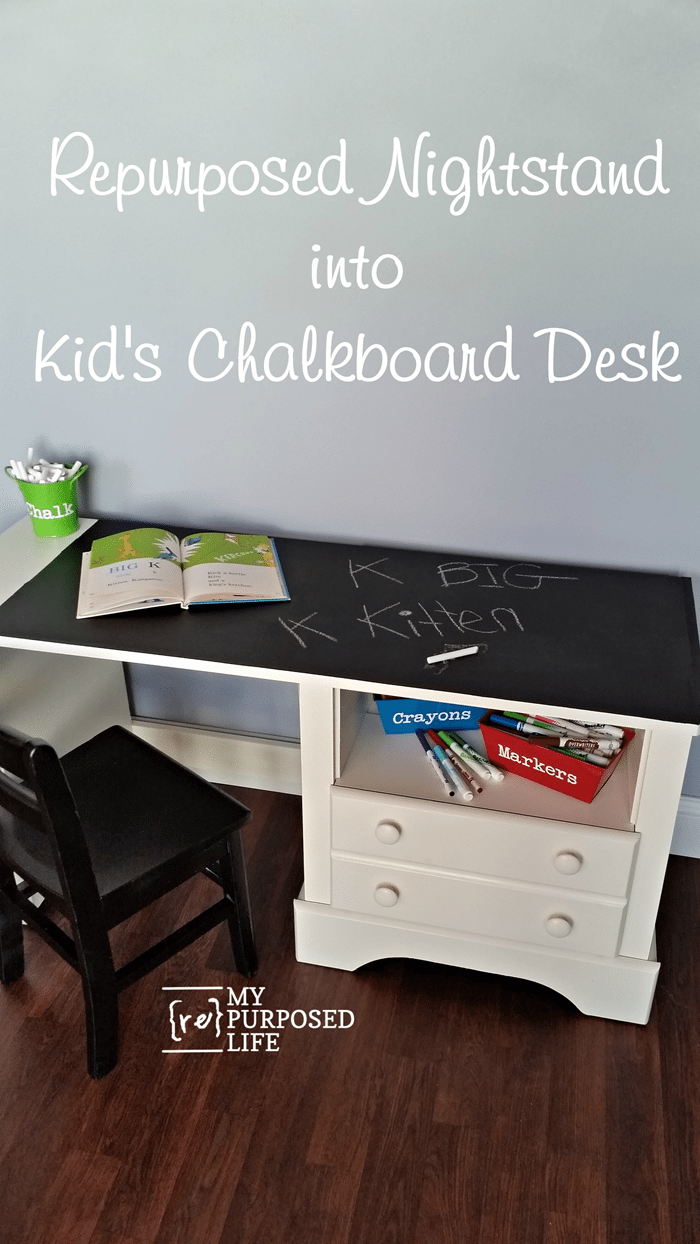
This old nightstand was far from exciting—until it got a creative, kid-friendly makeover! With a few simple tweaks and a chalkboard top, it’s now the perfect little desk for homework, doodles, and all kinds of imaginative fun.
This was a fun project once I figured out what I wanted to do with it. I once made a chalkboard desk a long time ago. I called it the Smurf desk.
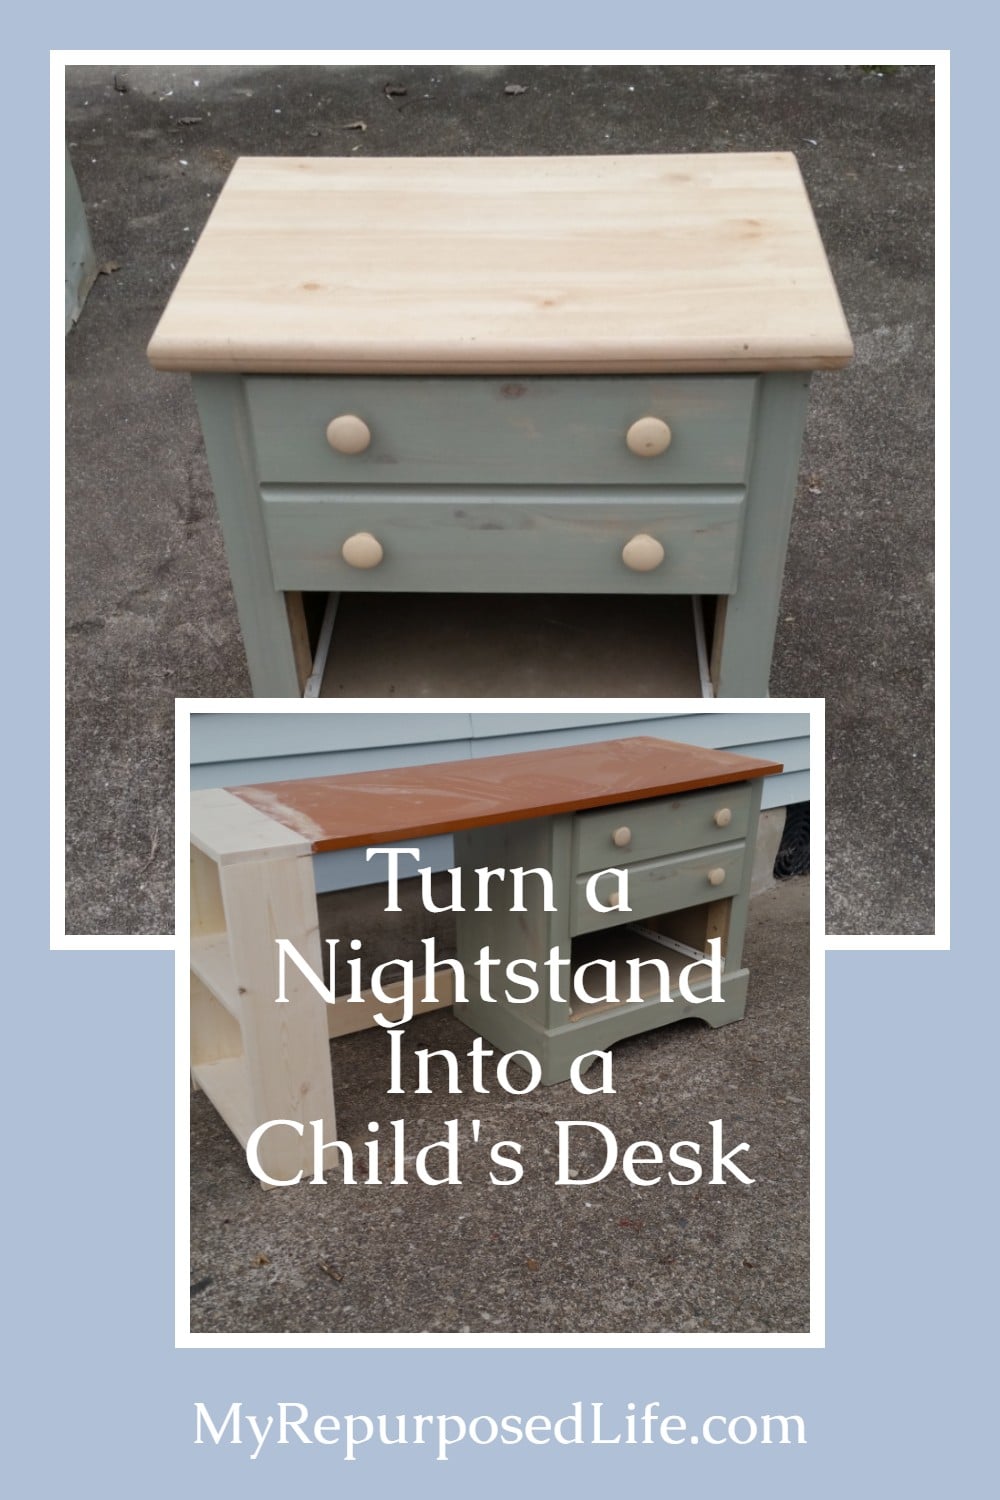
Free Nightstand
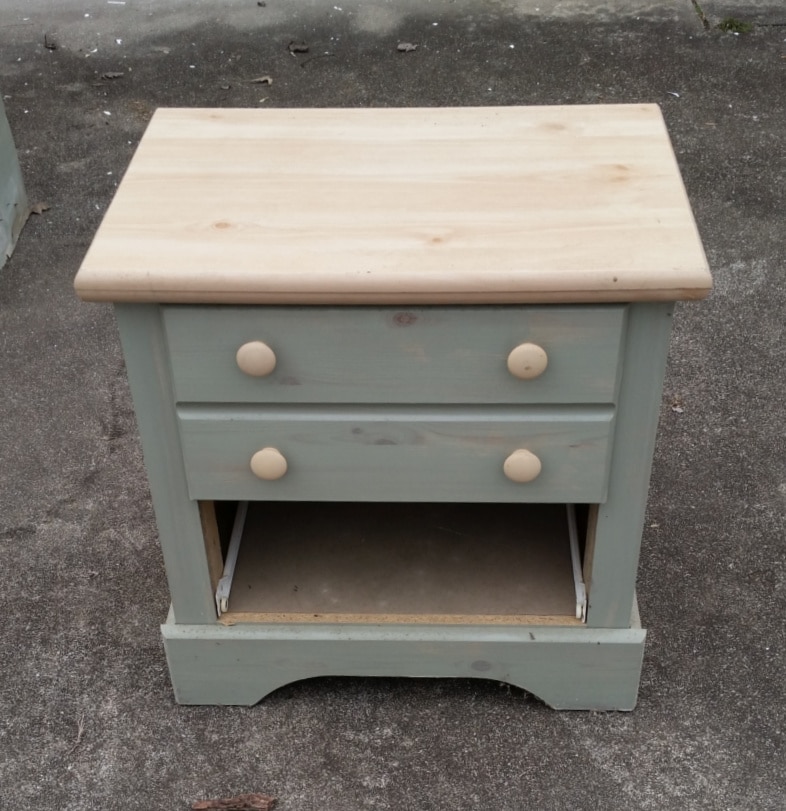
Here’s the lucky guy right here! Many times, I demolish a lot of my pieces, but this guy got off easy.
Designing a Kid’s Chalkboard Desk with Storage
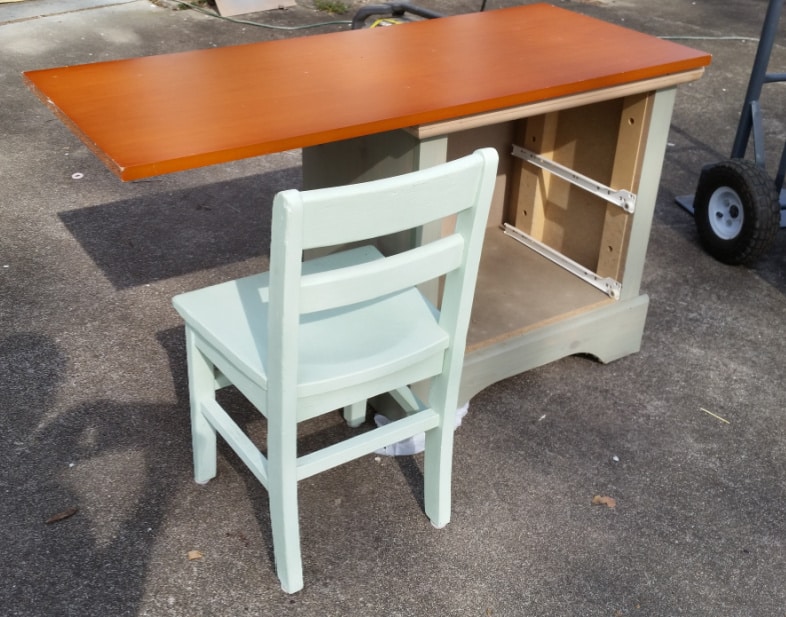
I dug out this piece of MDF that was dismantled from an old chest of drawers. It was the side section. On the Smurf Desk, I attached legs, but because the “top” I’m using is sort of on the short side, I knew I didn’t have room to spare for legs.
Sometimes these things just “come to me”. I decided to build a small bookshelf on the end of the kid’s chalkboard desk to support the left side of this reclaimed top.
Building a Bookshelf for a Chalkboard Desk
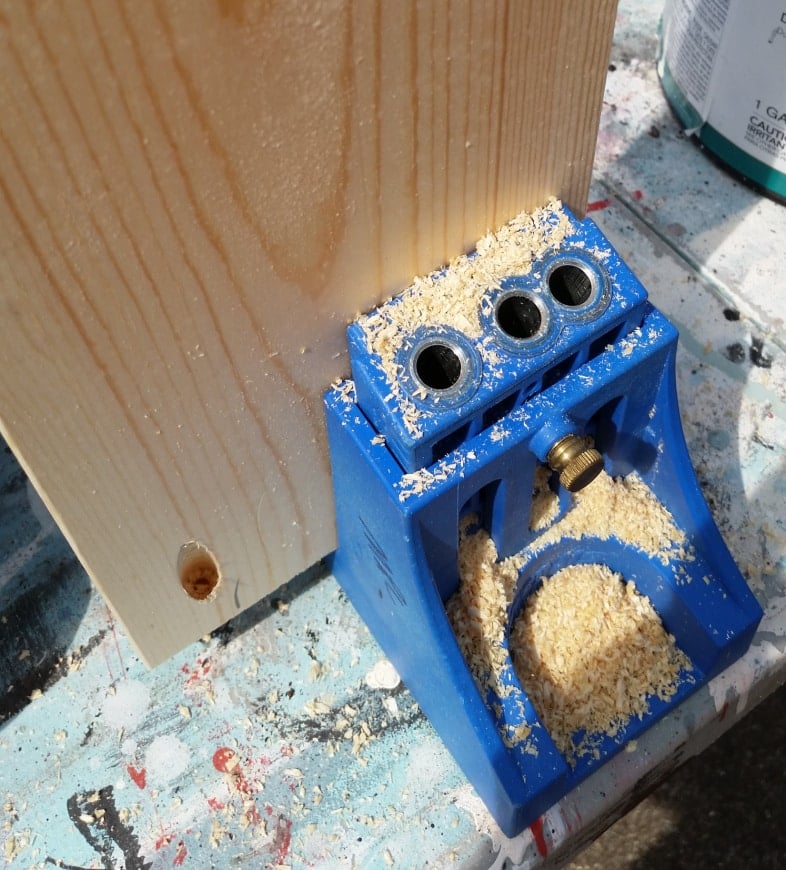
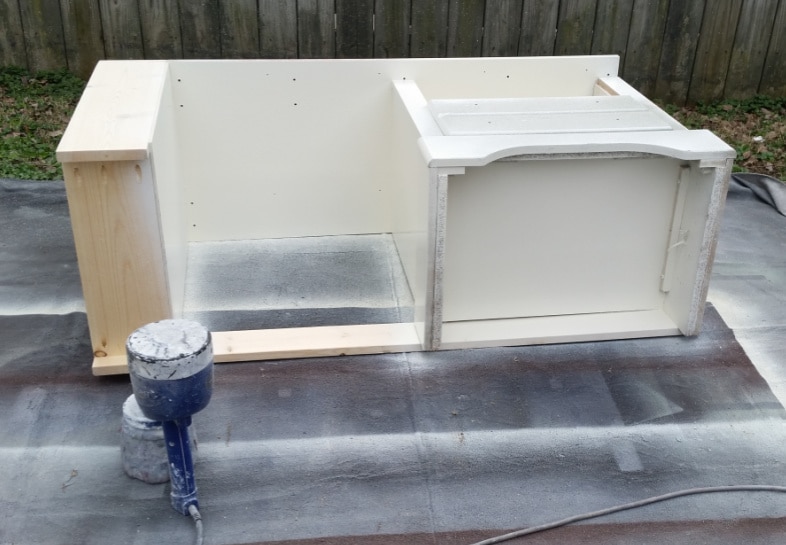
To do that, it would take four pieces of lumber for the shell of the shelf. A top, a bottom, and two sides. My favorite way of building such a frame is with my favorite Kreg Jig.

This photo shows me attaching the bottom shelf (frame). I wanted it to appear as if it had legs instead of resting right on the floor. I used my Kreg multi-mark tool for spacing.
After completing the construction, I drilled pocket holes on the top of the new bookshelf in order to attach it to the top of the desk.
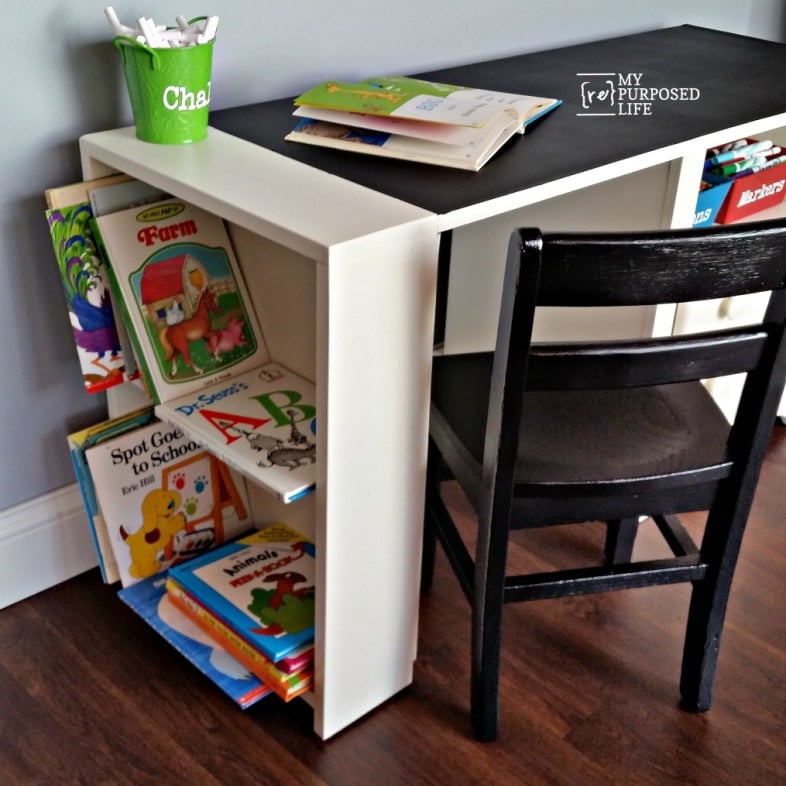
How to Make a Kid’s Chalkboard Desk
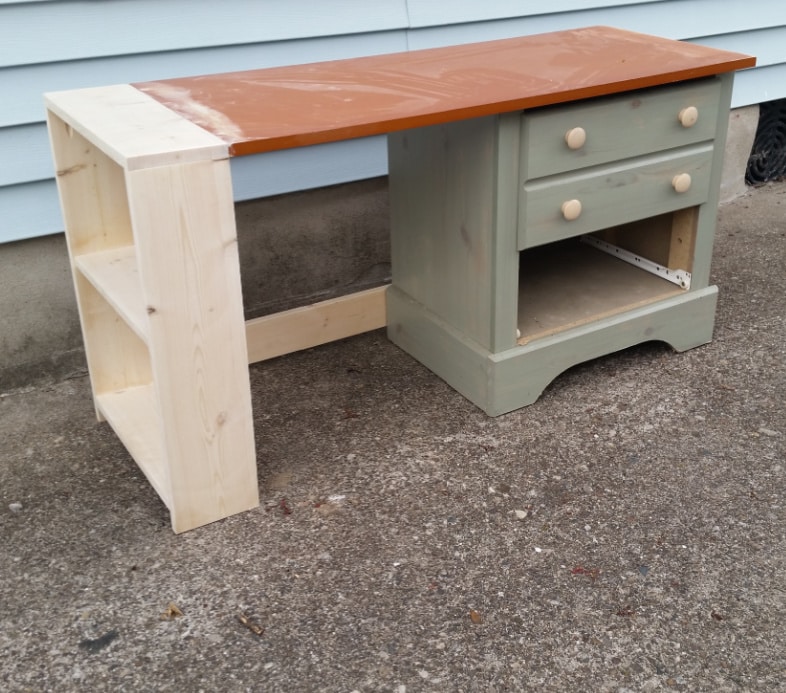
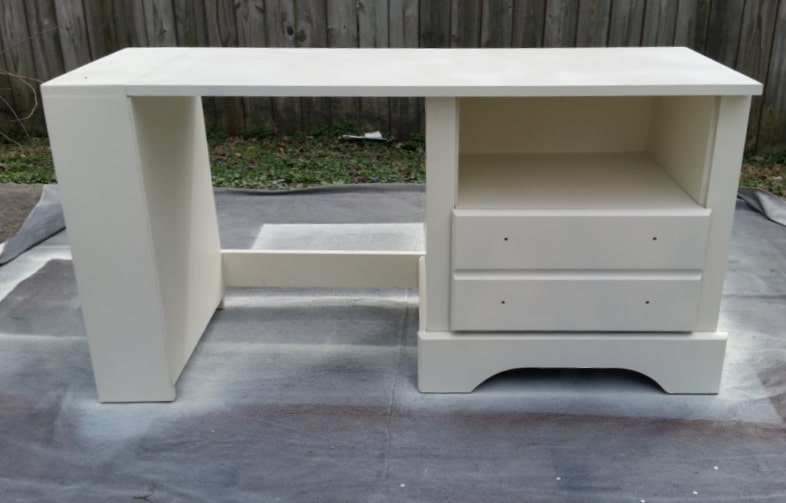
The pocket hole screws extend from the top of the bookshelf to the left side of the desktop, as well as from the left side of the desktop to the small shelf unit. If you look closely, you can see where I patched the pocket holes on the desktop. You can see that I added a support brace in the back to help stabilize the bookshelf.
Not shown: The top of the nightstand was removed to allow the new desktop to be secured using the same pocket holes that held the original top in place.
NOTE: The drawer is incorrectly positioned in this picture; it should be located at the bottom. This nightstand arrived missing a drawer.
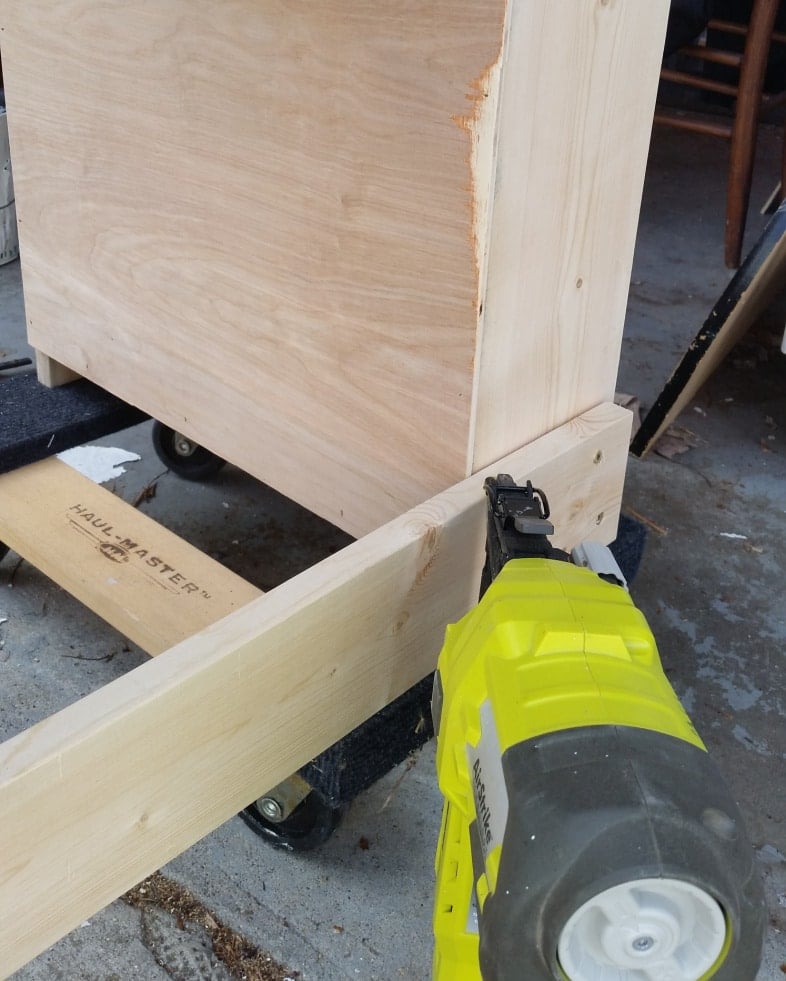
This view is from the back, where you can see how I attached the brace. I cut a thin piece of plywood to close off the back of the bookshelf. I secured it with my nail gun.
Remove a Drawer | Make a Shelf
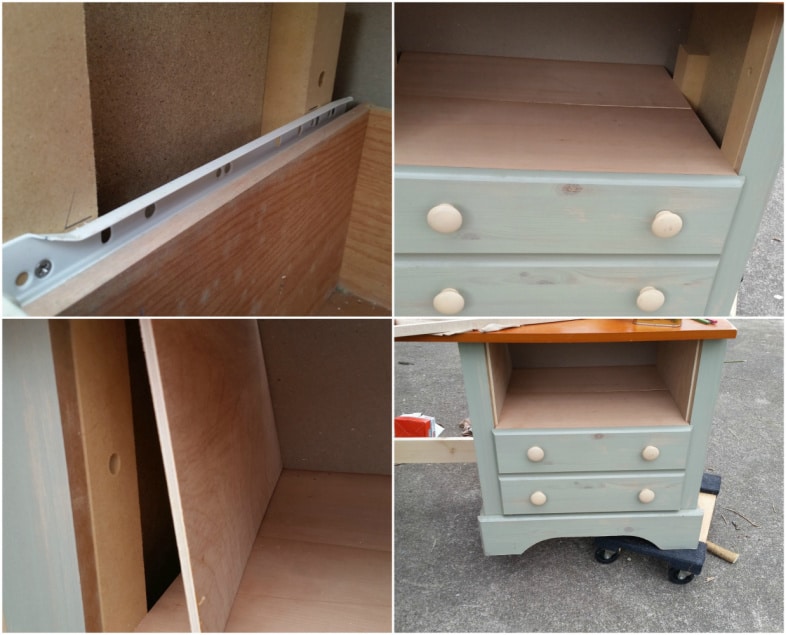
 To replace the missing drawer with a shelf, I marked the position of the shelf before removing the drawer guide. I cut two scrap boards to make the shelf and added cleats to secure it in place. Then I had to deal with the dead space that is now visible. I cut two pieces of thin plywood to cover the area and installed them with my nail gun.

The new chalkboard desk will feature a shelf and a drawer.
Time to Paint the Kid’s Desk
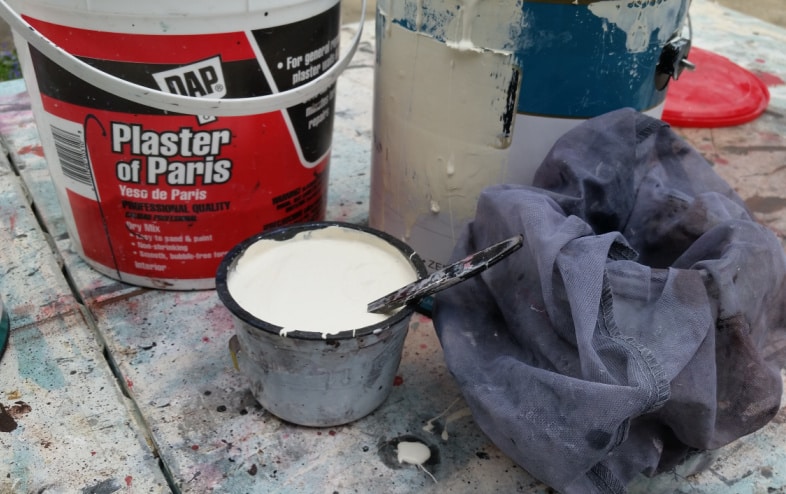
Time for paint! I mixed up some diy chalky paint primer using Behr Polished Pearl and plaster of Paris.
You probably know that I always start painting my projects from the underside, because generally, when someone loads their new furniture piece into their vehicle, they need to lift it and lay it down. ![]() I took the easy way out and used my Homeright Finish Max to get the best finish.
I took the easy way out and used my Homeright Finish Max to get the best finish.
Don’t you love how it’s going?
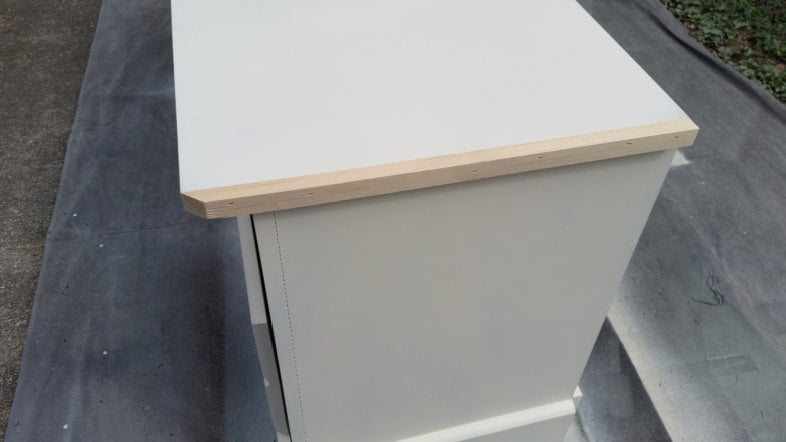
A small scrap piece of wood was added to the right of the desktop using a nail gun.
Large Paint Shelter
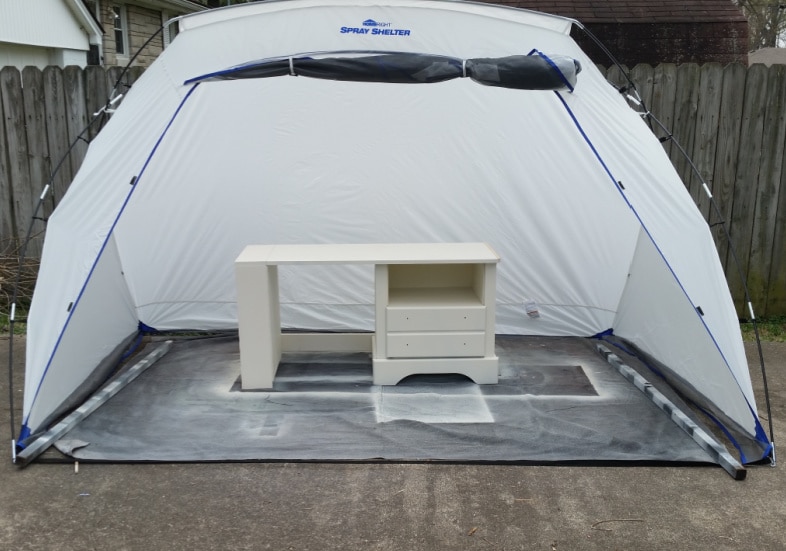
While I was applying the final coats, a lot of buds and debris were falling from the trees, so I used my new Homeright Spray Shelter to keep the top smoother and free of debris.
Can You Use a Chip Brush for Chalkboard Paint?
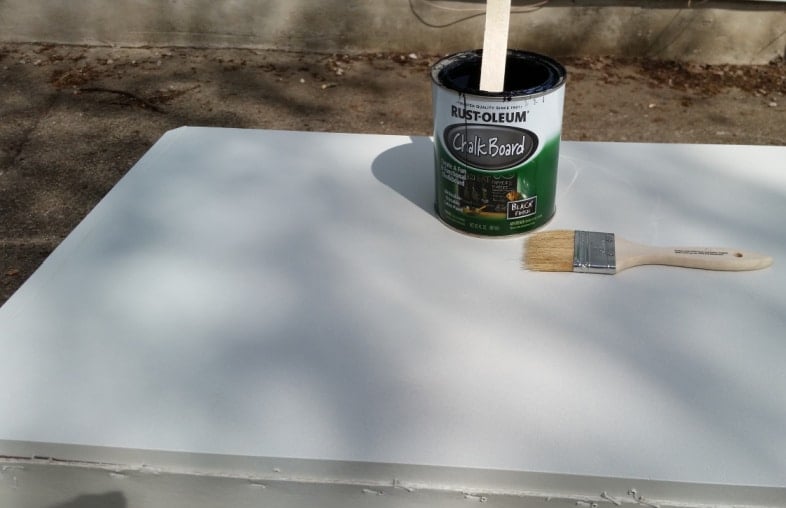
I think it was a no-brainer to make the top of the desk a chalkboard. Generally, I prefer to spray chalkboard paint with my Finish Max. I couldn’t spray on this day, so I used a cheap chip brush, which is generally okay, but this surface was too large for that type of brush. You can see how wonderful the chalkboard paint looks when it’s Finish Max sprayed as shown in my post Finish Max Chalkboard Paint.
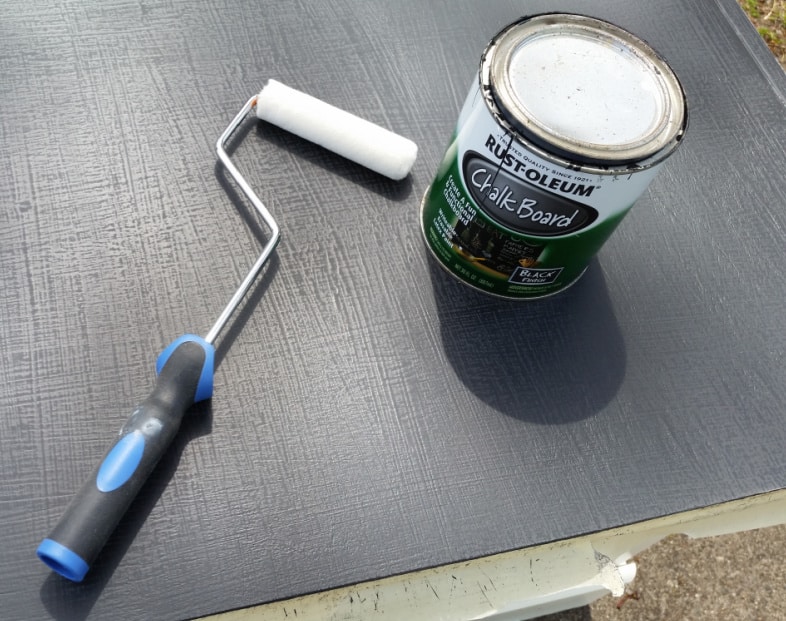
Plan B. I sanded down the top with my orbital sander and chose to use a roller for the subsequent two coats.
Kid’s Chalkboard Desk with Storage Needs a Chair
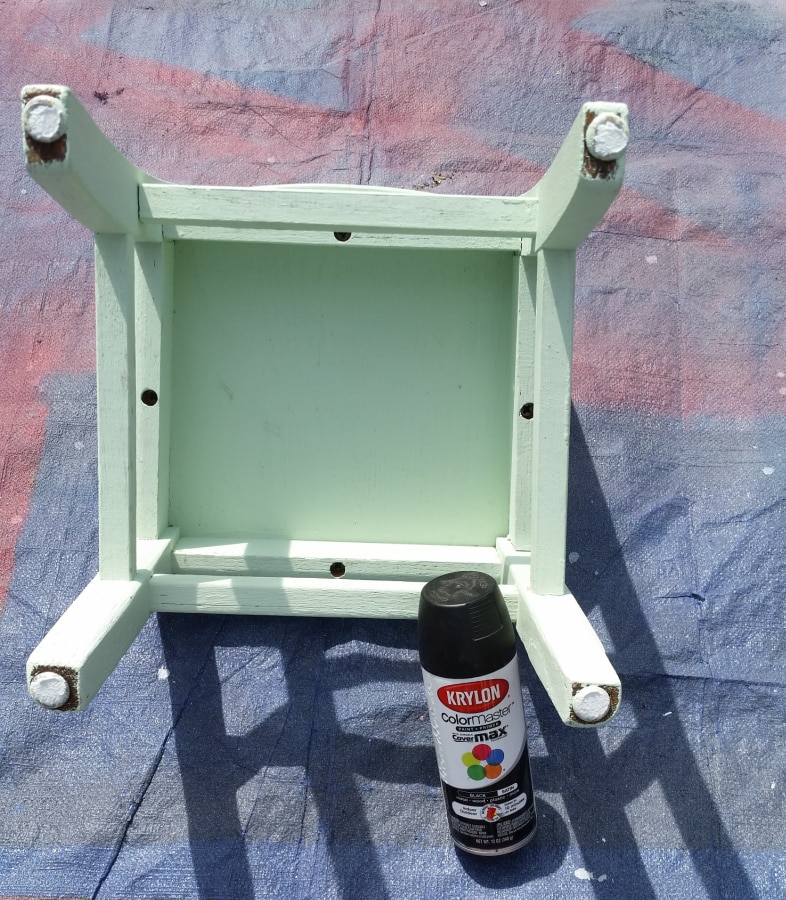
The best option for seating was a green chair. I chose to give it a quick makeover with some black spray paint.
Kid’s Chalkboard Desk With Storage
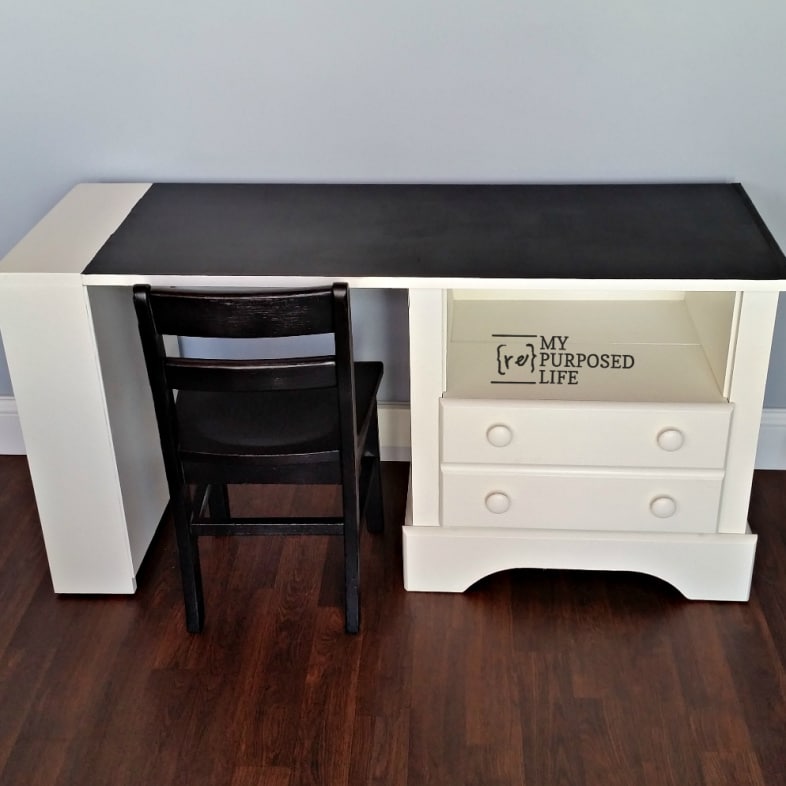
The wooden knobs were painted to match the desk. To add a bit of whimsy, you can decoupage the knobs similar to what I did with this old chippy dresser.
I think this DIY chalkboard desk with storage is perfect for kids around 5-7 years old. The cost for me was minimal since I used reclaimed wood and mostly scraps of lumber.
PIN IT!

What do you think? Would you have found a better use for this unwanted nightstand?
gail
Related Content:
See More Nightstand Projects Here
Love your work! Beautiful addition for any child’s room. Thanks for sharing!
Thank you Nancy, this piece was a head scratcher for a while. I really had to think hard about what to do with it.
gail
There isn’t anything GAIL CANNOT repurpose ! love love reading about all her ” projects,,!
Thanks so much! I love what I do!
gail
Hi Gail,
I am loving that chalkboard desktop. Such a good idea for a kid’s desk! I am sure it will be well-used!
I like it
I think it turned out really well. The perfect repurpose for the night stand.
Another fabulous repurpose! I won’t be passing up any old nightstands that I come across in the future! My grandchildren would love this desk!
What a great idea. I needed a chalkboard desk top when I worked, my desk calendar always looked so bad but with this I could have cleaned off my messages, phone numbers and etc when done. Great job.