Pedestal Stand Knockoff
As an Amazon Associate, I earn from qualifying purchases.
Wow, sometimes projects are so easy, they barely even need words to explain the details. Yep, projects like this pedestal stand can be done even by beginners if you just take your time and follow my directions.
Remember “always measure twice, and cut once”.
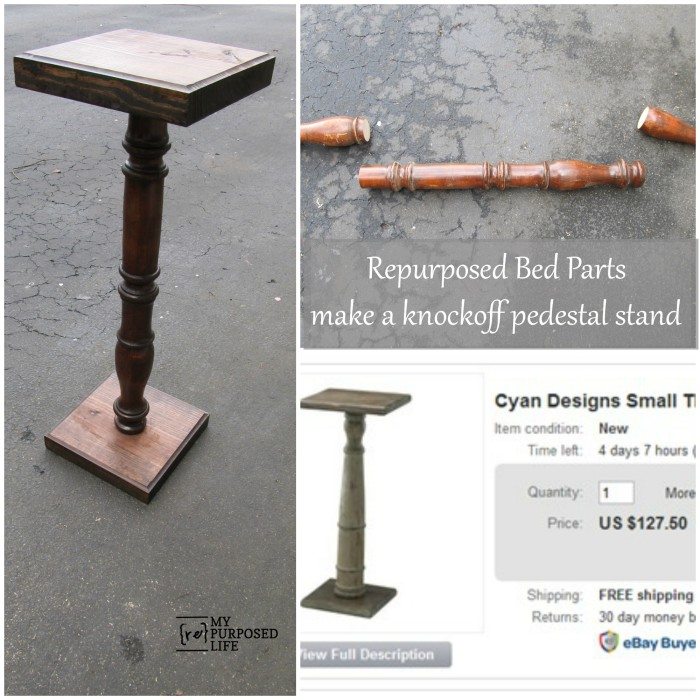

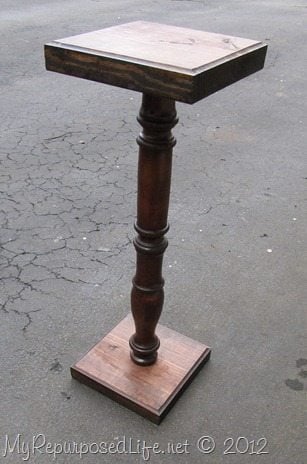
When I saw this pedestal stand, I was shocked at the price. I had parts laying around to make something nearly identical. (for FREE)


I dug out this old bed piece from my stash. Doesn’t everyone have such random items in their stash? I knew right away it would be perfect to make a pedestal stand.

First, I cut the large bed rail down to size with my compound miter saw.

Then, I cut some scrap 2×10’s into squares.

To make the pedestal stand have a more “finished” look, I routed the edges with my router.

After applying some stain, a combination of Jacobean and Mahogany, both from Minwax, I drilled a hole in the middle

To get a good tight hold I used Gorilla Wood Glue

I attached the pieces with drywall screws and allowed it all to set up. Generally you would use wood screws for a project like this. But I didn’t have any on hand.

As I said, I used the combination of Jacobean and Mahogany to get the top and bottom pieces to match the original bed part on this pedestal stand.
It is SO MUCH FUN putting bits and pieces together. I did it with my Photo Display Stands, Candlesticks and More, and my Small Red Porch Post
As I’ve said before—I don’t think I got to play with blocks as a child!
What would you use this little baby to display?
Fabulous! LOVE IT!
How often do we come across material we could use for this?
all.the.time.
I’m posting this on Pinterest!
Norma’s Kentiques
The first thing I thought of was a fern stand. Very cute and a great way to use spare parts. Another great Gail project.
Hi Gail! Another fabulous idea!! Hey what kind of blade are you using on your miter saw? I have some maple pieces that look like the legs you’ve used, but I don’t want to wreck them…
Cheers!
You did an outstanding job. I would use it for a special picture of my grandchildren.
I have a feeling I would be painting something on the top! What a wonderful thing, thanks for sharing!
http://paintingbyeileen.blogspot.com/
Your stand looks lovely. It would look cute next to a chair to put your coffee on..or in a dark corner with a small lamp on it. Great use of your wood bits. And you can’t beat the price.
Holly
Great job…isn’t it gratifying to build something so cute out of miscellaneous parts? Not to mention the price of the one shown is ridiculous anyway!
Wonderful creation! I love it when all the pieces fall into place.
I love to see people recycle and re-purpose their bits and pieces. Your stand is very lovely.
That’s great Gail! I can think of 100 places and things I would put on top of it! You should sell them. I would scoop one up if I saw it in a store. Too cute!
Jeannie
It’s a perfect fern stand (very popular in the late 1800s and certainly great today to add greenery to a room without taking up a huge amount of floor space). I love it!
Nice work. Your carpentry skills impress and inspire me!