More Pedestal Photo Display Stand
As an Amazon Associate, I earn from qualifying purchases.
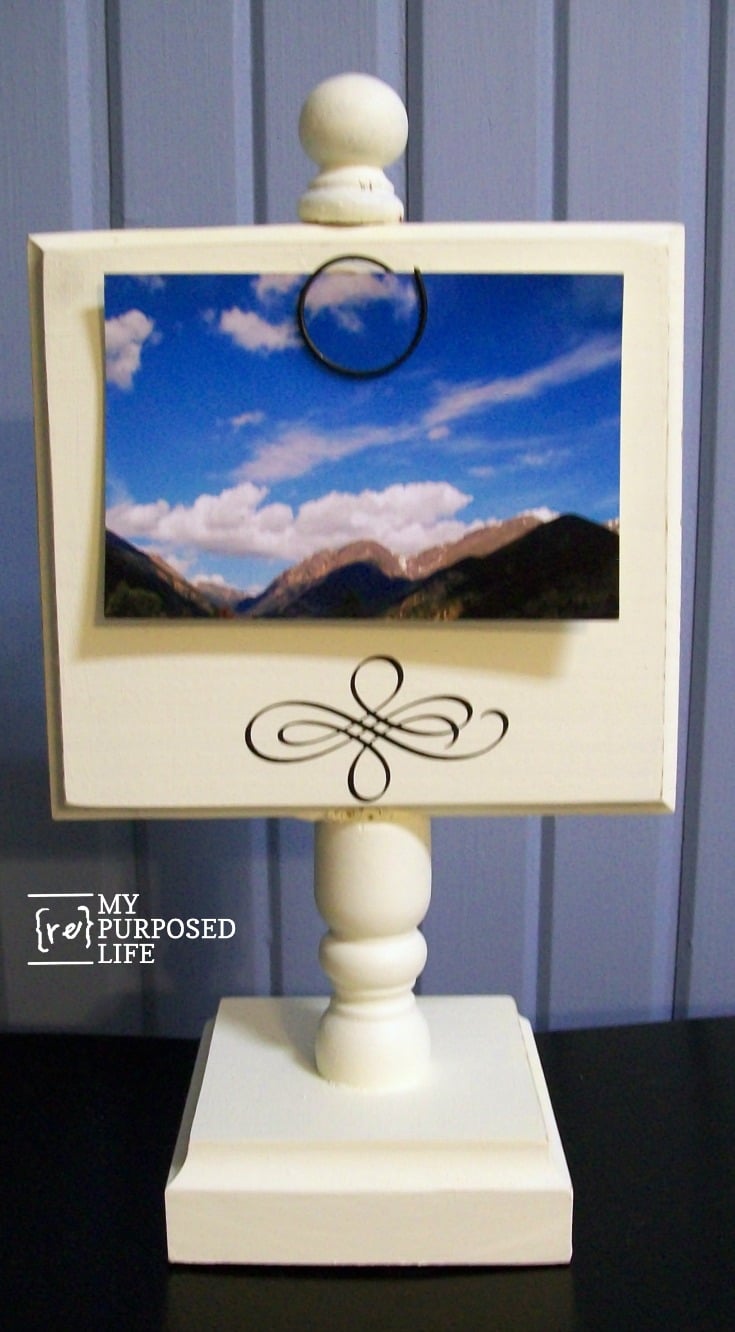
You’re going to love this photo display stand made from old chair spindles. Do you part out old chairs, beds, and cribs to save the spindles? I do! I have tons of those items in my stash!
Thanks for Saving & Sharing on Pinterest!
Materials to Make Photo Display Stand
- Spindles
- Scrap Wood
- Glue
- Wire

I used some former chair legs as the base of my stand. You could also use chair spindles, porch posts (railing) anything that has a pretty shape to it in order to make your photo display stand.
Carefully Cut Spindle on Miter Saw

I cut the chair leg (spindle) on my compound miter saw. It is best to clamp it if you can, I have had a spindle get chewed up, “jump” away from me and land across the other side of the garage. Please use caution and always wear eye and ear protection when sawing.
Use Scrap Wood for Photo Display Stand Base

I also cut some scrap 2×6’s into squares with the compound miter saw. You can see that I used my router to give it some detail. Did you know the router may be my least favorite tool? It seems so powerful, and I only use it attached to the router table.

Cove Bit on Router

Designing Your Photo Display Stand
 I grabbed some finials off of a chair, but you’ll notice in the after pictures that I didn’t use them. They are cute, but I felt they were too small for these chunky pieces that will make up my photo display stand.
Proper Use of Gorilla Glue

To attach the pieces together with Gorilla Glue you need to dampen one of the pieces. I find it’s best to dampen the larger of the two pieces–
 –and squirt the Gorilla Glue on the smaller piece. Remember that this glue expands, so less is more!
To Clamp or Not To Clamp?
 I did not clamp these pieces because there was really no way to do it. The large piece is pretty heavy and I felt that it was sort of “self-clamping”.
However, it did end up falling OFF of the little spindle about three times. One of those times, it fell against my leg and on my foot. The other two times it landed on my kitchen floor. It did not bother the paint job, but it DID dent the floor. In hindsight, I suppose I could have used some painter’s tape, or drilled a small hole in the pedestal and the block–to insert a small dowel.
Would You Add the Finial?


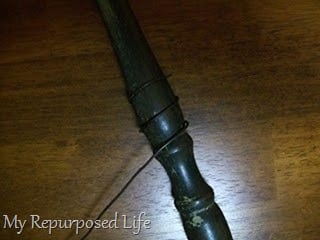
 So I applied one of my favorite flourishes. How do I make the spiral wire photo holders?
Coil Wire for Photo Display Stand


Chalkboard Display Stands


 I will tell you a little secret. I did not use chalkboard paint on this project. Yep, I used Peel and Stick Chalkboard. It really makes this project so simple! I have to tell you that I LOVE the way the chalk and marker write on this and wipe off. The decal has a smooth surface, it doesn’t feel like a typical chalkboard.
These three pedestal display stands cost me nothing! I love putting these things together!
Here’s my question for you. Which kind do you like better? The thinner ones made from 1x’s or these chunky ones made with 2x’s or the one I made with bead board? I’ll refresh your memory:


See other great chalkboard ideas here
see more bits and pieces projects here


Such a fun idea! I love the chalkboard. This would look great on my kitchen counter as a dinner menu.
Oh I love this idea! I made the photo holders for xmas this past year and I think I’ll chalk board this year! I’d love to have you link this to my VIP party today! http://designergarden.blogspot.com/2011/03/vip-party-9.html
Love the chalkboard ones! Super awesome tutorial…if only I had power tools…hahaha!
Ohhh-I love the chalkboard and beadboard pedestals-creatively adorable! I’m your newest follower-stop by for a visit-Claire
Loving the newest versions! The vinyl scrolls I like better than the wood appliqué . Great job Gail.
Hi,
I found you from the follow along @ Making the world cuter. I am now following you and you can follow me back. Wasnt that a great idea?? Here is a link to a post I did for the follow along. It has all my information. Thanks so much!!
http://measuredbytheheart.blogspot.com/2011/03/its-follow-along-party.html
Love the chalkboard one…
You make the most awesome items! Makes me want to do some also but alas I don’t have the equipment except for a wonderful sander. I really like the chalkboard and the one with the silhoutte swirl at the bottom.
ooh lightbulb! you could make these as table markers for the wedding! if you need them that is!
ooh lightbulb! you could make these as table markers for the wedding! if you need them that is!
I LOVE ALL OF THEM! SO CUTE! Awesome Job!
Jennie {Cinnaberry Suite}