Mid Century Hutch | Thrift Store Makeover
As an Amazon Associate, I earn from qualifying purchases.

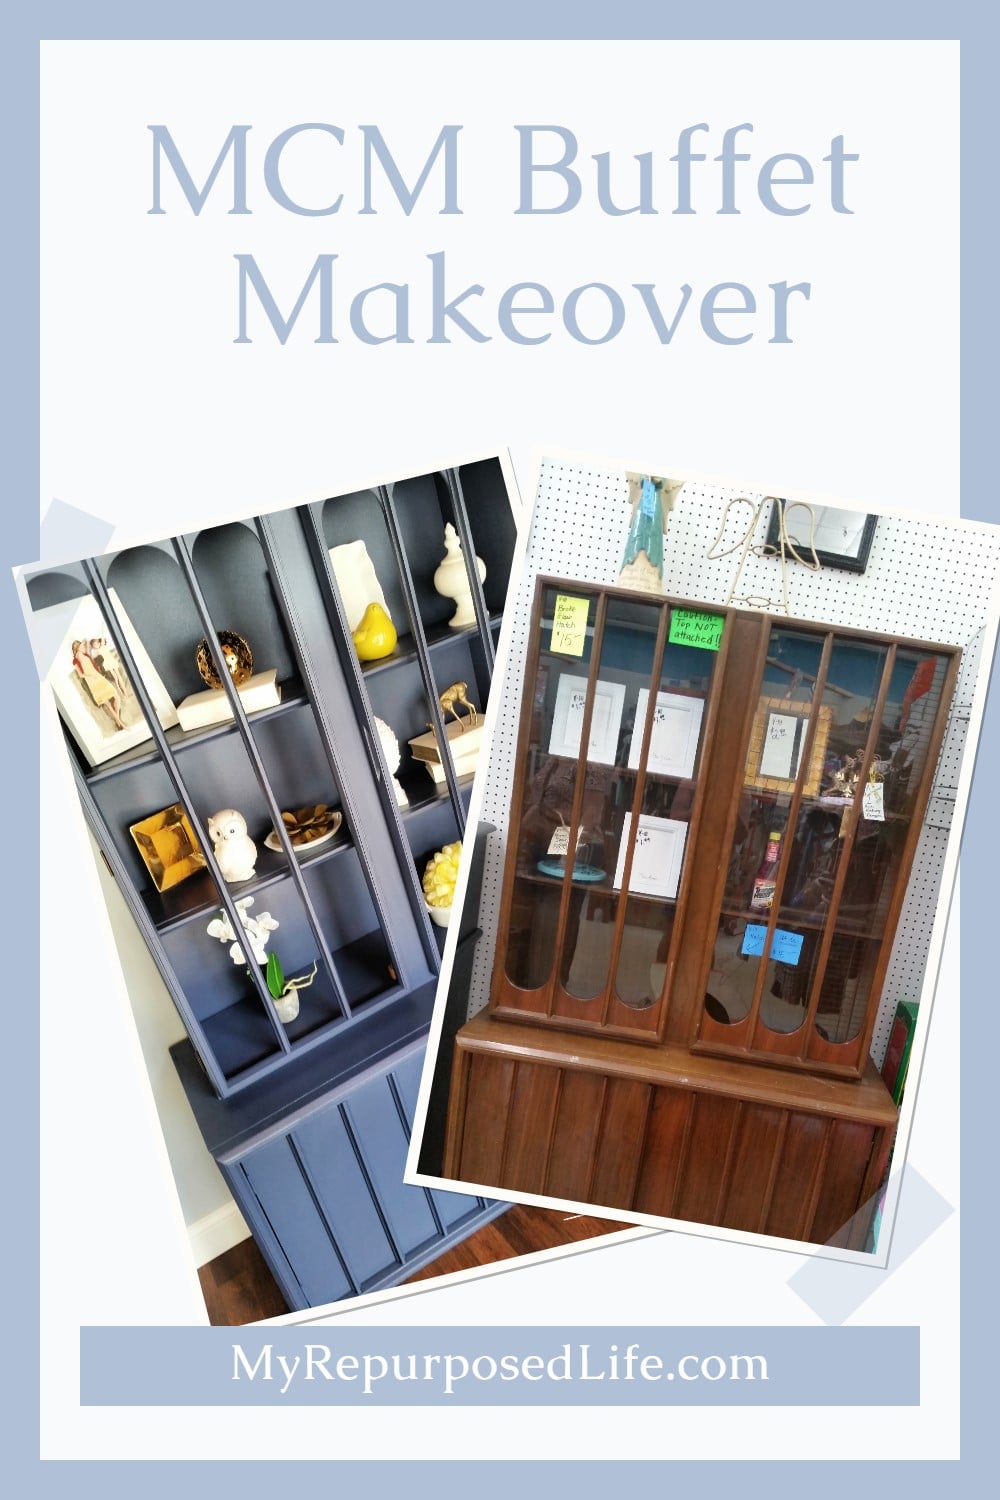
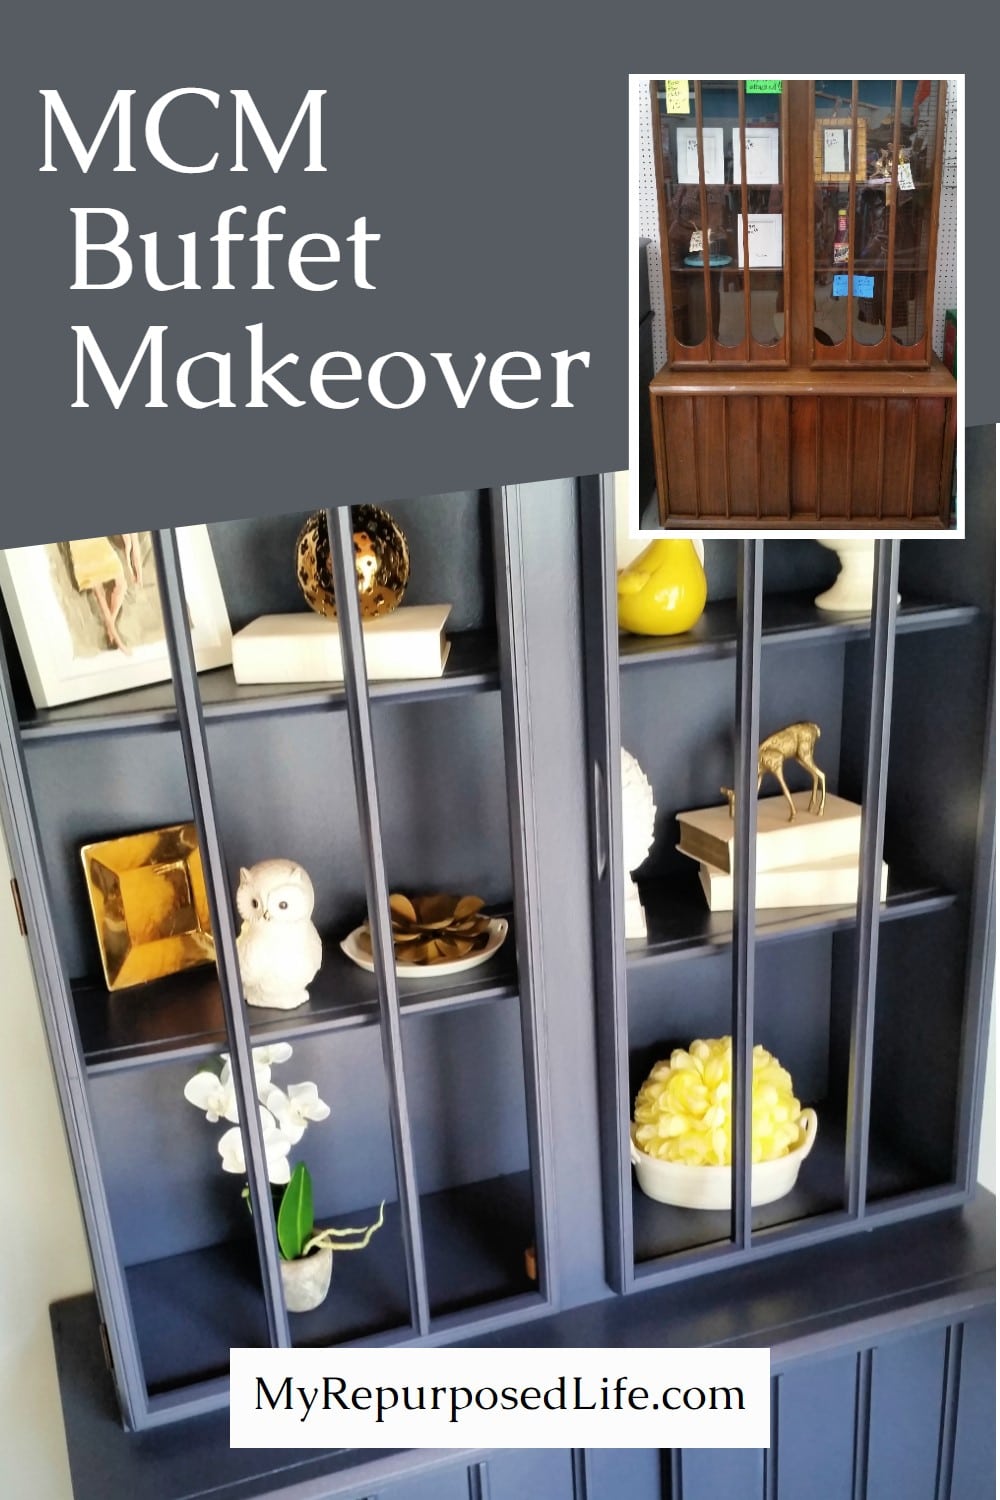
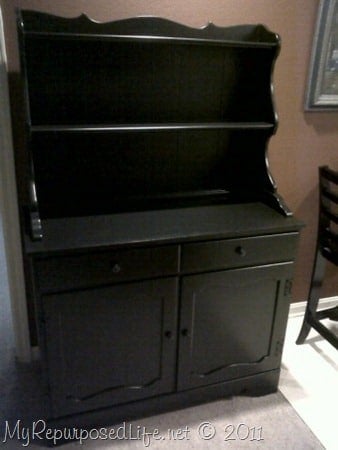
I spotted this mid-century hutch at the thrift store for $15, and I could not leave it behind. The catch was simple. One pane of glass was broken, and the bottom edges had the pressed-wood-under-veneer condition that does not play well with refinishing. So I did what I do best and gave it a paint makeover, plus a few practical fixes along the way.
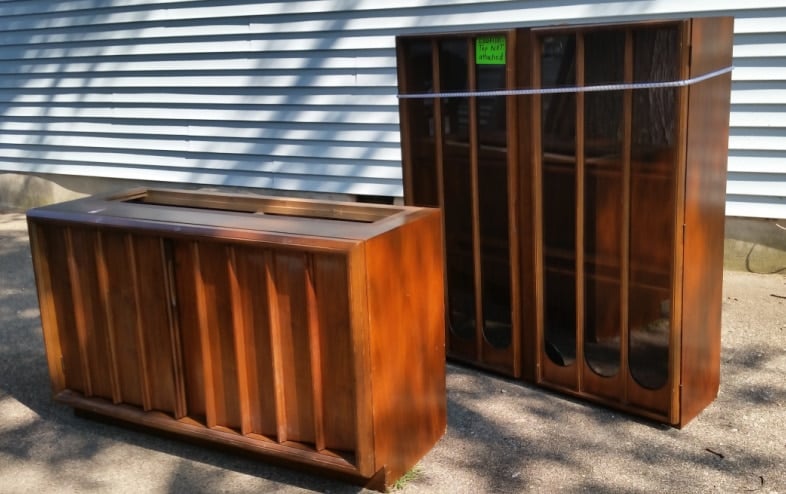
Thrift Store Mid-Century Hutch
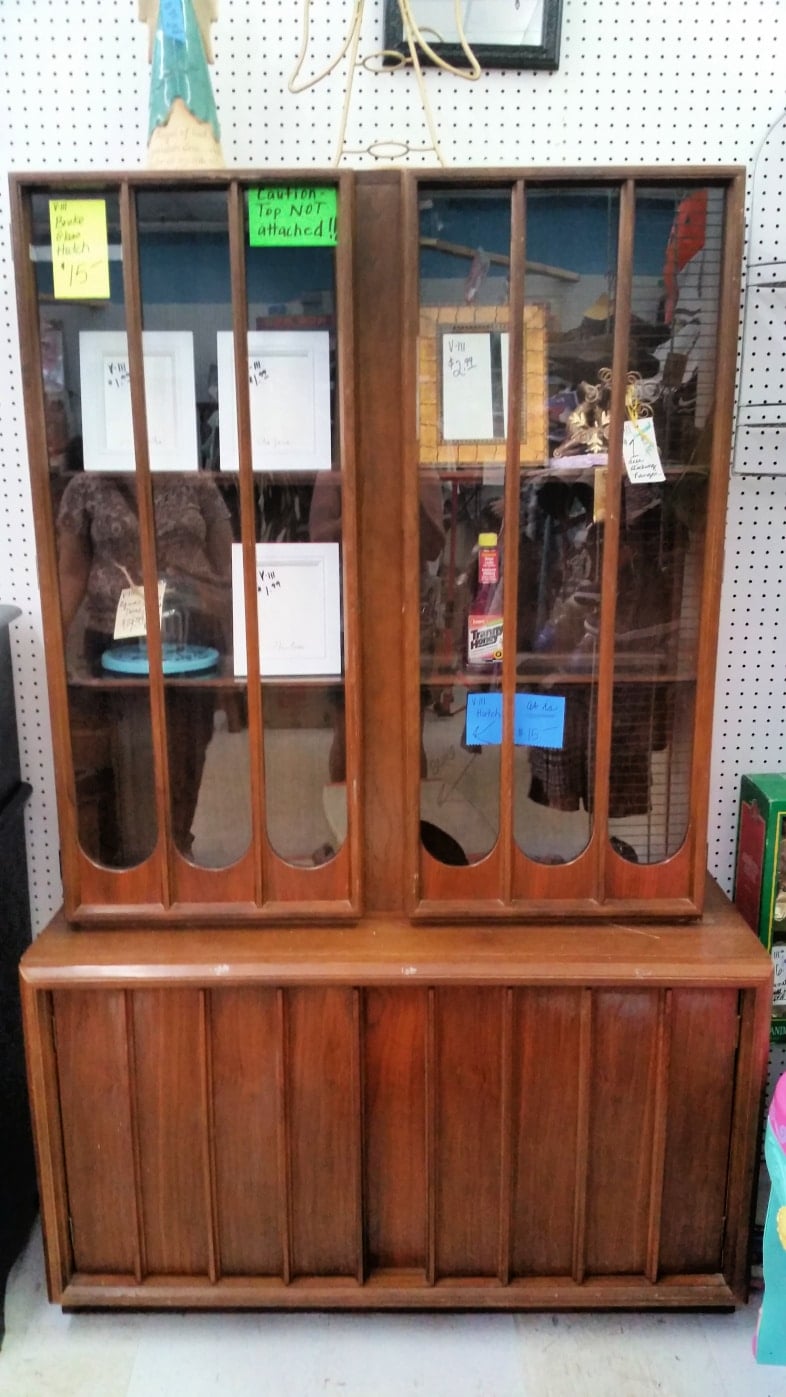
Other than that, it was in good condition, except for the side edges of the bottom. This is pressed wood under veneer, so refinishing it wasn’t an option.
Can you see the bottom edge here? And the broken pane of glass?
Preparing to Paint MCM Hutch
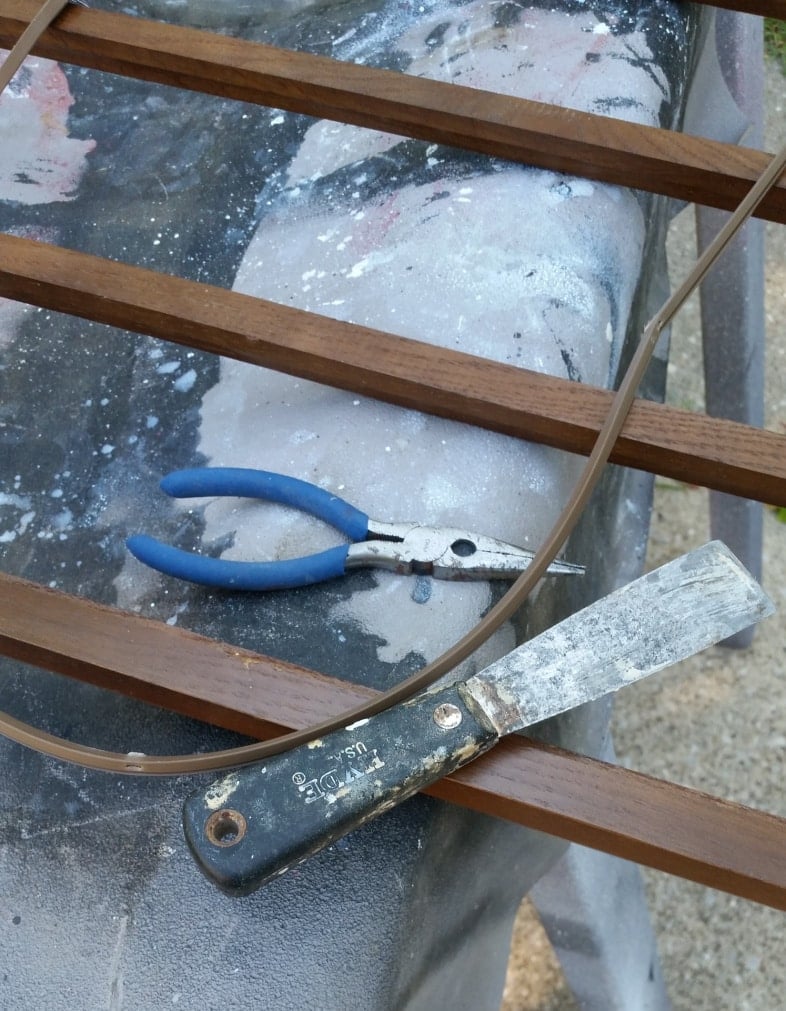
A putty knife and needle-nose pliers were used to remove the glass from the mid-century modern hutch.
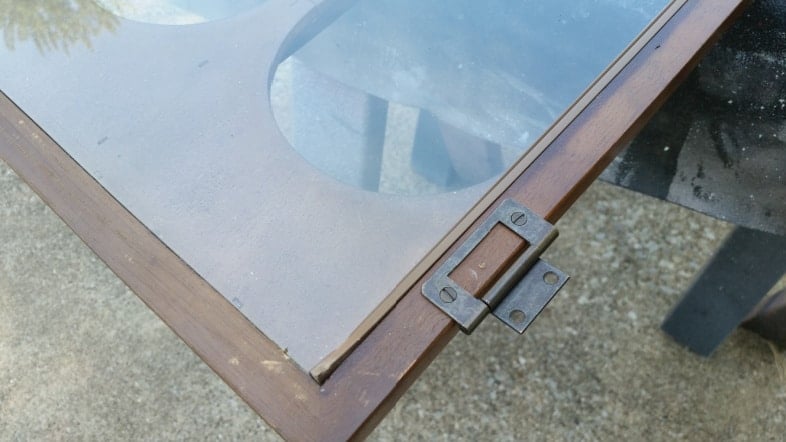
This is how the glass was secured in the cabinet. I took a picture of the hinges to know how to reattach them when the time was right. Tip: Take photos that will enable you to reassemble your project.
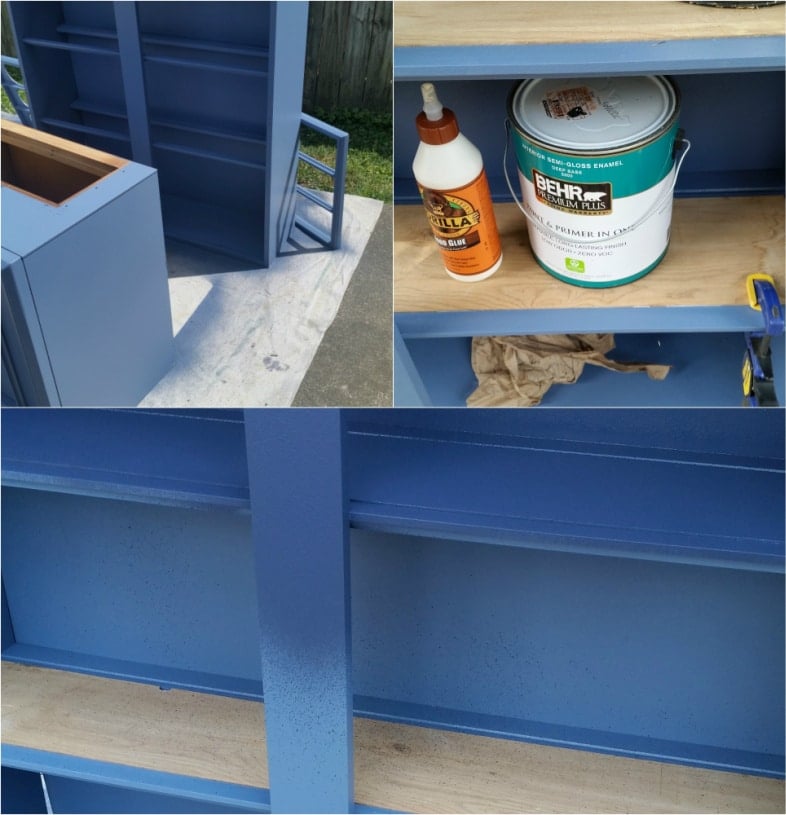
Step 1 Clean and Degrease
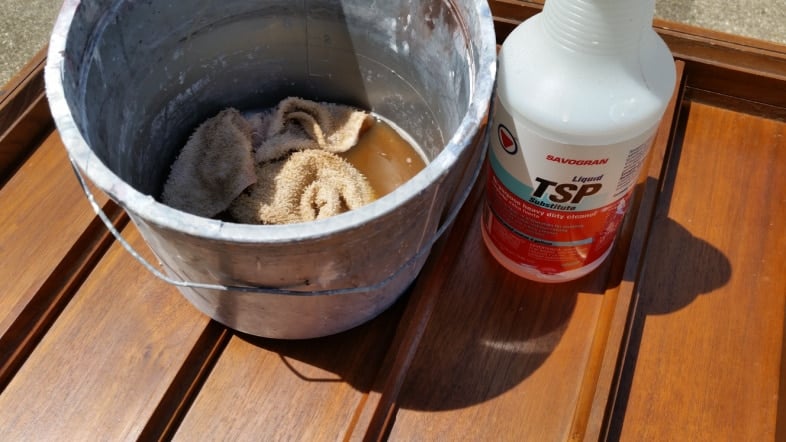
When you buy thrift store furniture, you never know what it’s been through or where it has been stored. TSP is an excellent cleaner/degreaser to remove grease, grime, and nicotine. Look how dirty the water is in the bucket.
Excellent All-Purpose Paint For Thrift Store Projects
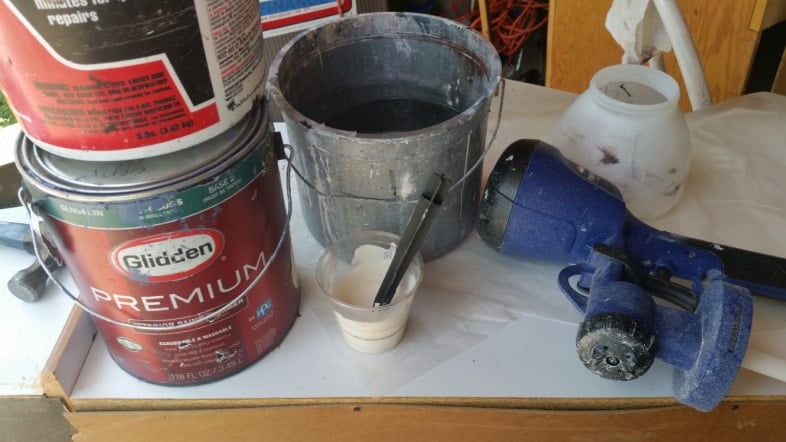
My new best friend, the Homeright Finish Max Super, is becoming well-loved and broken in. I mixed up some DIY chalky paint primer using some blue oops paint and plaster of paris.
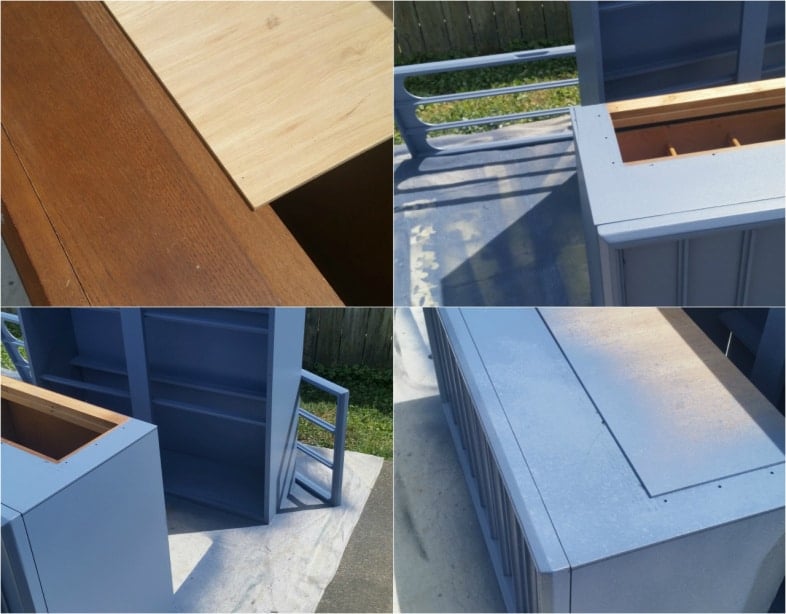
Leaving the original inside the bottom cabinet wasn’t a difficult decision for me. When a cabinet is used for storage, paint can be scratched. For this reason, I prefer not to paint the inside of storage pieces. I used a scrap piece of thin plywood to prevent overspray inside the lower cabinet.
Thinking that I would leave the MCM hutch a dark blue; however, it wasn’t the color I intended. I got the color mixed up with another, oops, blue.
Replacing Glass Shelves With Wooden Shelves
Did you notice that the buffet was missing shelves? They were glass and were broken upon arrival at my home. Honestly, I have no idea whether they were already damaged or whether they broke during a “load” shift in the truck. I had no idea the shelves were glass when I bought the furniture piece, or I would have transported them separately. In the bottom image, you can see the difference in the blue paint color.
Related Content: Navy Blue Furniture Projects
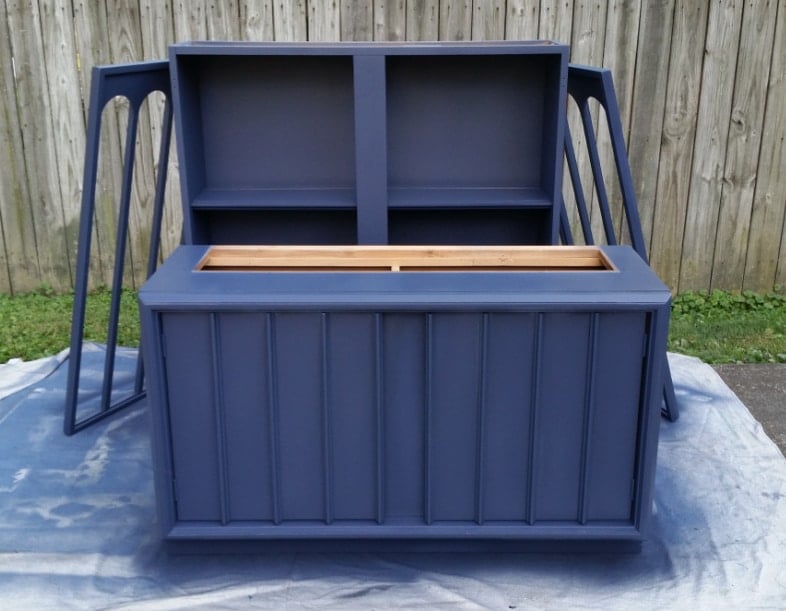
The buffet is beautiful after two light coats of the chalky paint primer and two light coats of the navy (dark denim) top coat!
Replace Hardware
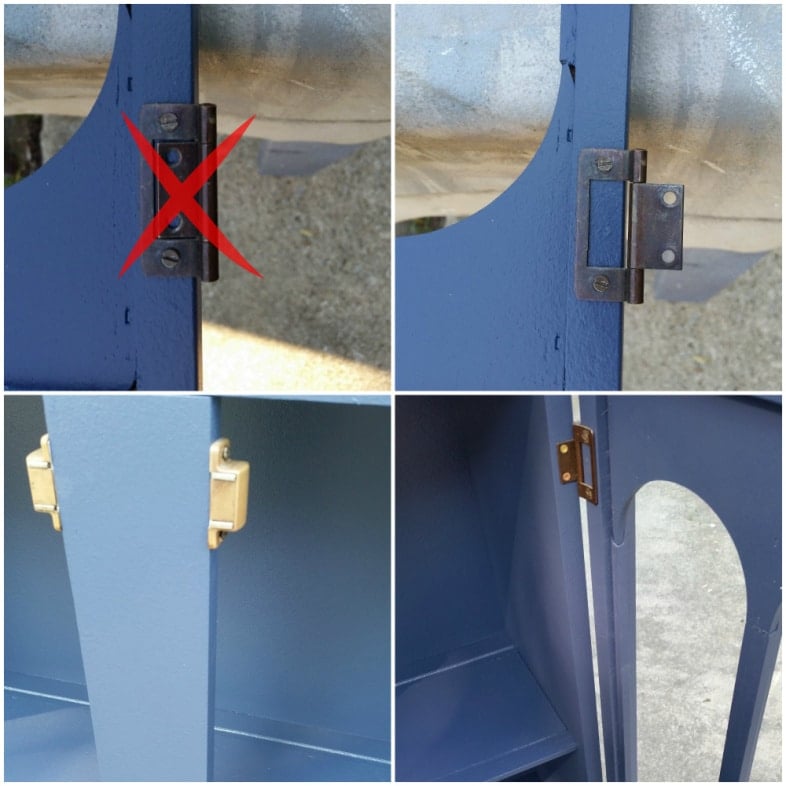
It’s time to reinstall the hardware. The top-left photo shows that I installed the hinge incorrectly, even after looking at the picture. I was not paying attention to the knuckle. It needed to rest beside the edge of the door. I also added the magnet closures and the plates that line up with the magnets.
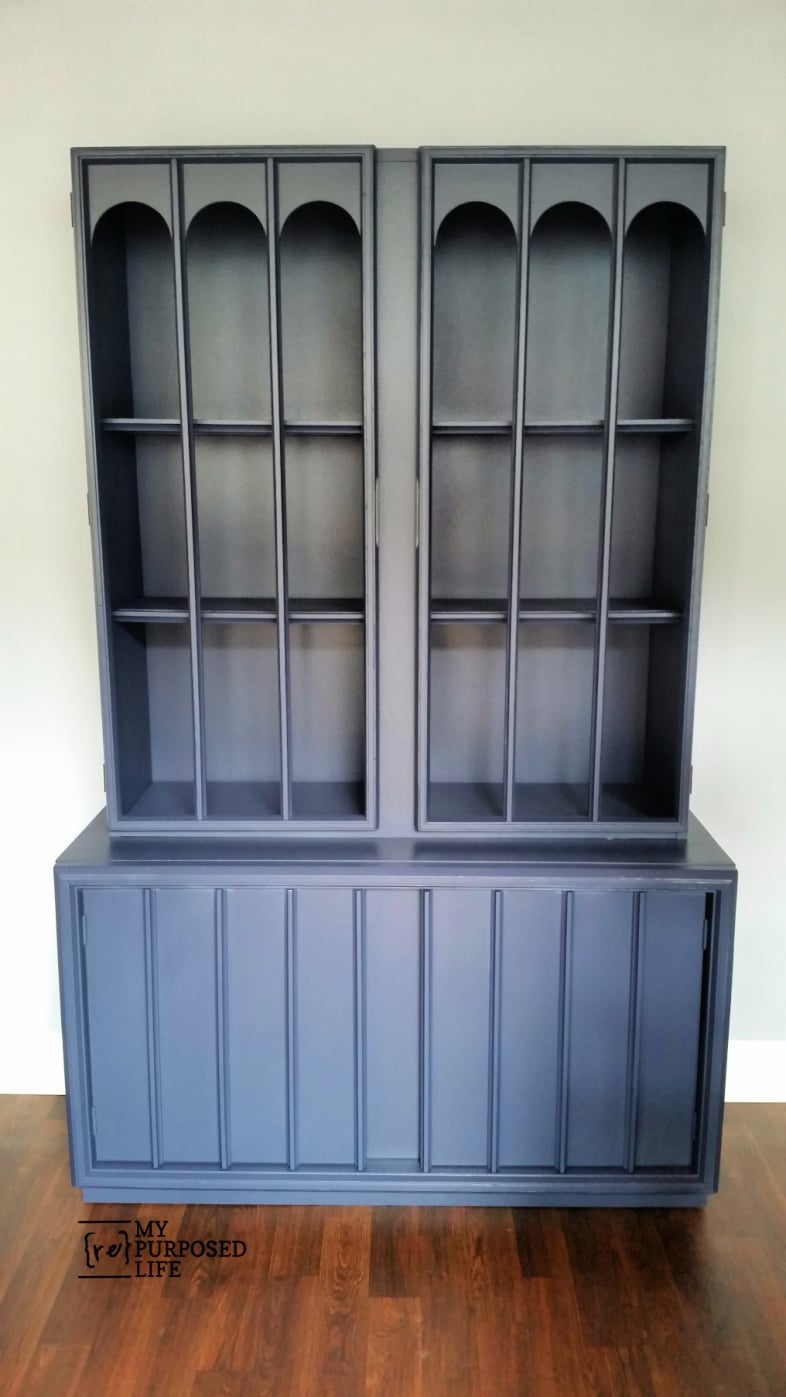
The plan was to add some decorative brass metal where the glass had been. The pieces I had were not large enough. I didn’t want to invest any more money in the buffet at this time. I’d love to hear your thoughts on what you would do with the naked hutch doors.
EDITED TO ADD: Melanie on FB said, “I liked the doors hung the original way. But besides that, it is awesome.” Too funny! I didn’t even realize I hung the doors upside down. So, now I have another question for you . . . should I FLIP them back?
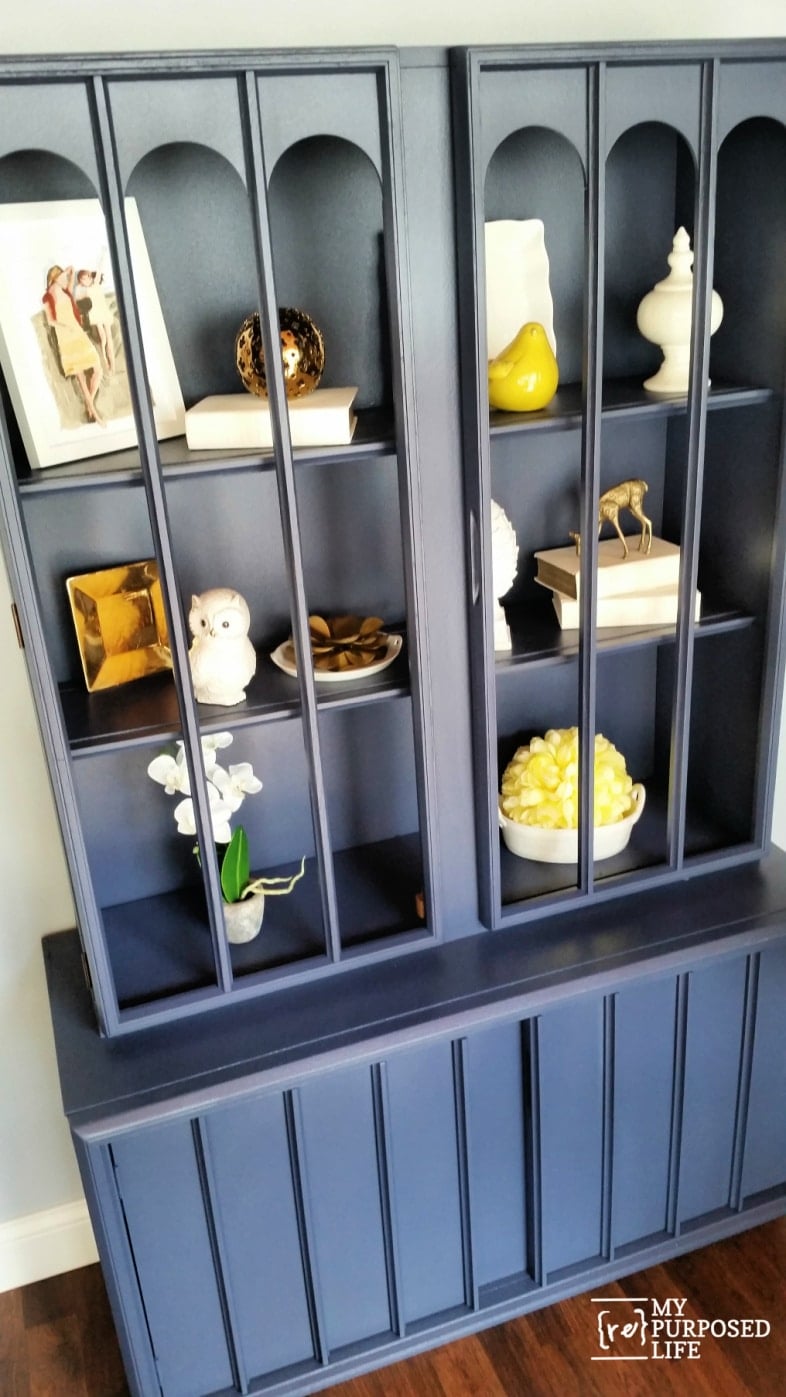
For now, I added some pieces to take pictures, and being without glass made it much easier to photograph.
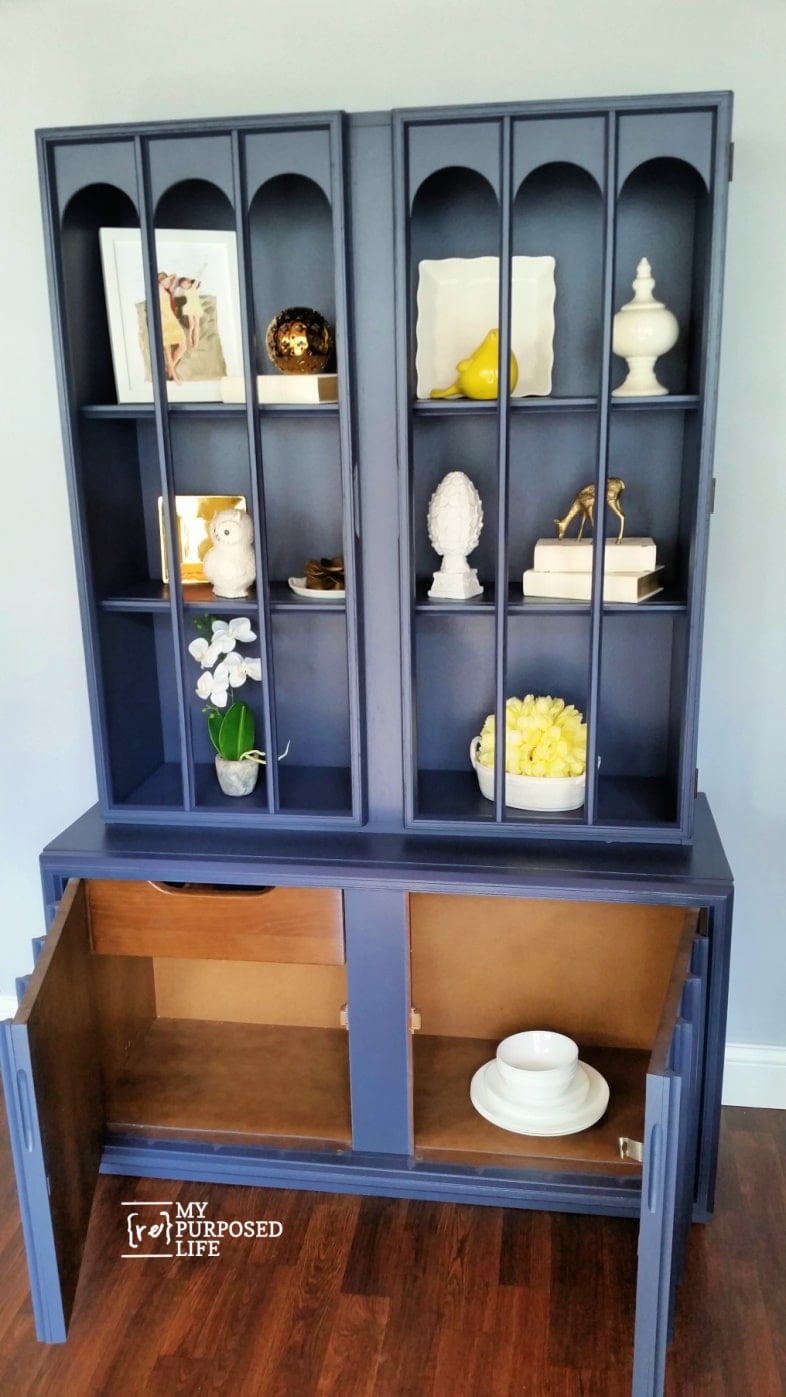
You can see that I didn’t paint the inside of the bottom cabinet.
I would love for you to PIN IT!
This navy blue mid-century hutch turned out so pretty, but I am still torn about those doors. Do you like the “no glass” look, or would you add decorative metal, replace the panes, and call it done? Either way, I hope the prep and paint steps help you feel brave enough to rescue a flawed thrift-store find. Leave me your vote in the comments, and if you want to save the idea for later, go ahead and pin it.
gail
See other buffets I’ve done below:
Love the color and for sure arches on top. Hope you post a picture later of what you finally decide.
I love when a piece gets finished and is actually designed better than when it was new. The scallops are definitely better on top. It’s like a crown. I love the color. I love that it’s an open shelf hutch now. Less glass to wash. I love that I’m not the only one to take photos before I take things apart.
Thank you so much!!! This thing is a monster. I don’t know how I’m going to get it to my booth. 😉
gail
I think the arches belong at the top; maybe the last owners had it wrong. As I hate to dust, I would add the glass. Chicken wire is not modern looking enough for those lines in my opinion. You did a fabulous job. My milk glass collection would be gorgeous in it…but then so would my blue and white Staffordshire!
ohhhh Milk glass would definitely look beautiful in this piece! For now, the doors stay as they are, naked and upside down from the original orientation. Honestly–I’ve been wondering if the piece was placed on the base upside down which would of course make the doors wrong. hehehehe
gail
I agree with the majority! Leave them how you hung them. The other way covers up part of whatever you are showcasing. Why would you want to do that? As for the glass, I say leave it naked. It looks modern & fresh.
P.S. Love the white hutch makeover. So country chic.
Thank you Debbie for your sweet comment, and for checking out the white hutch. It’s long gone to it’s forever home.
gail
Naked doors, and I prefer the doors the way you put them back on.
I much prefer the doors hanging the way you have them – arched part at the top. I also think some small bun feet or similar would look great. Nothing needed in the open spaces of the top doors where glass used to be. It looks great just like this !!
Thanks Cherie! I actually have bun feet, and I also have some very short “peg” legs that might look fabulous. Not sure why I didn’t think of adding feet.
gail
I like the glass. Having purchased furniture in the 50’s, I think the glass looks better than chicken wire, but maybe I have a mental block on using chicken wire on mid-century pieces. I love the color. In the before picture I though the doors of the upper section were on upside down, so I like the arch at the top. Thanks for sharing your information. Jo
I like the idea of using the glass. Since I bought furniture in the 50’s I think the glass would look better than the chicken wire, but maybe I have a mental block about using chicken wire in this mid-century piece. Also I love the color. In the before picture, I thought the doors on the top portion were on upside down, so I like the arch at the top. Thanks for sharing your information.
I think the doors look much better this way, you can see what is on the bottom! I like the openness but if you had to put in ‘something’, how about the small gauge chicken wire? I love seeing your projects and cant wait to have a space to do my own!
I love the color! I think you need to replace the glass or take the doors off.
I love it as it is! I wouldn’t put anything else on it, I love the simplicity and “purity” of it. The colour is stunning, so much depth and warmth.
I think it is beautiful. What a wonderful color. Doors look fine upside down to me! Simple legs would add to it.