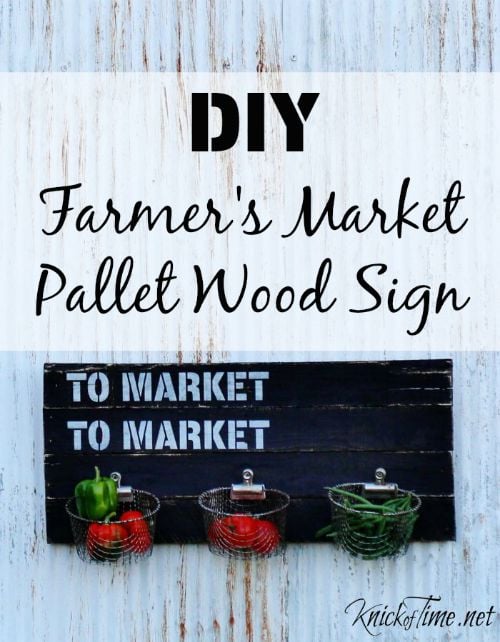
Farmer’s Market Sign | Produce Holder
As an Amazon Associate, I earn from qualifying purchases.
Hey, MRL fans, it’s Angie from Knick of Time back with a DIY project that does double-duty as a farmer’s market sign and a fruit and vegetable holder!
One of my favorite sources of inspiration for DIY projects are wedding blogs. Some people go ALL OUT for their weddings and have professional stylists put the event together, and many wedding ideas can easily translate into a projects for the home as well. On my “weekending” blog post last week, I shared the coolest wall that was a backdrop at a wedding. The entire wall was a big farmer’s market sign – complete with crates full of fruits and veggies. I was so in awe of it, I decided to create a mini version, and I’m giving you step by step directions, so you can see how to make one yourself!
Supplies Needed:
- Pallet Boards
- Scrap Wood
- Wood Stain
- Stencils
- Wood Stain
- Paint
- Small Baskets or Crates
- D-ring Hangers
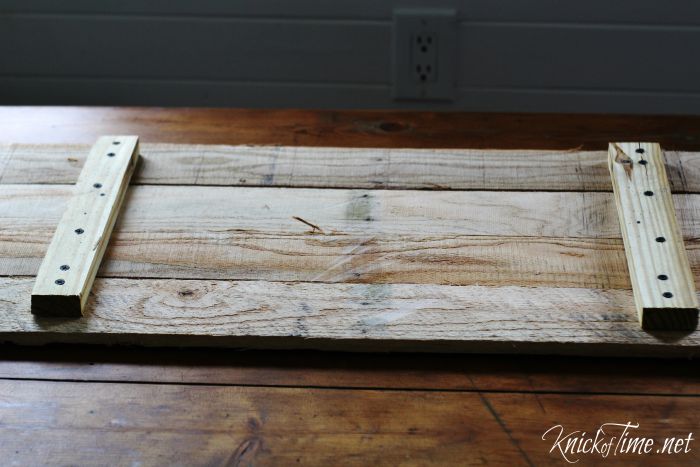
Step 1 – cut pallet boards the the length you desire the sign to be. I cut 4 boards each 31″ long.
Step 2 – use narrow pieces of scrap wood to connect the pallet boards together.
Drill pilot holes, so you don’t split the wood when screwing the pieces together. You can see I forgot when I screwed in the first screw, and the wood split. Don’t make that mistake!
Assemble the Farmer’s Market Sign
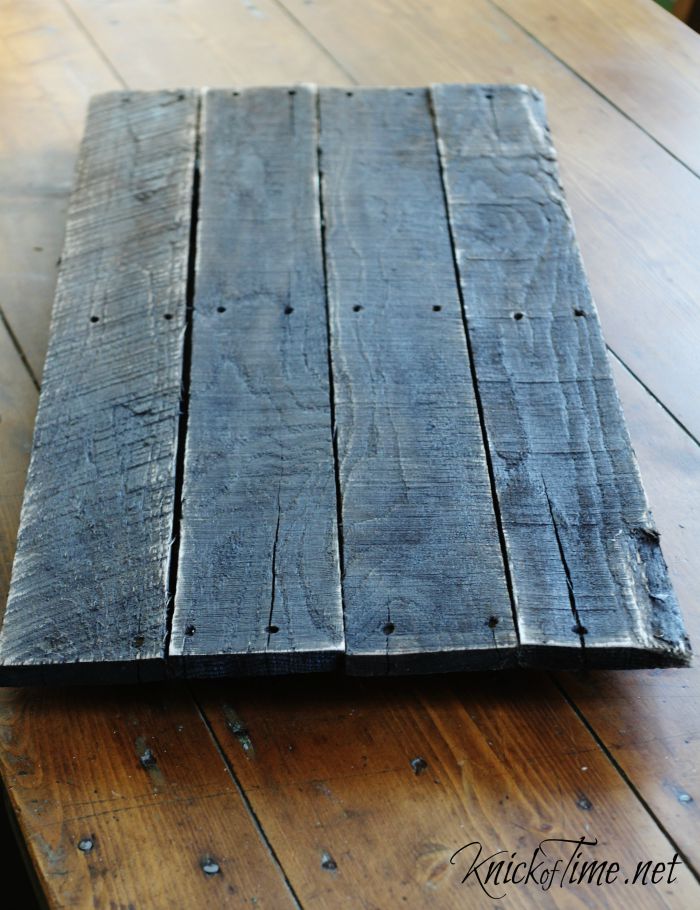
Step 3 – Stain the pallet boards. I used Dark Walnut stain from Minwax, but any shade will work. You could even leave the wood its natural color.
Step 4 – Once the stain dries, use a sander to distress around the edges and on rough spots on the wood.
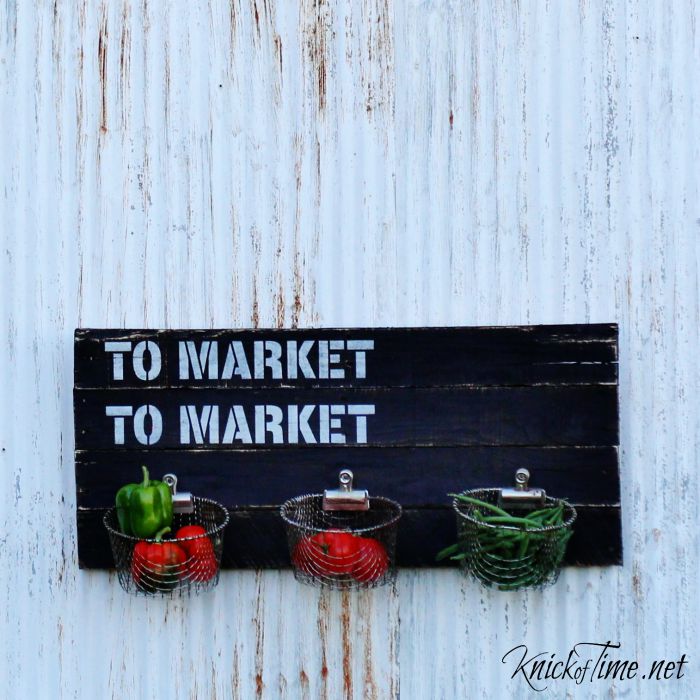
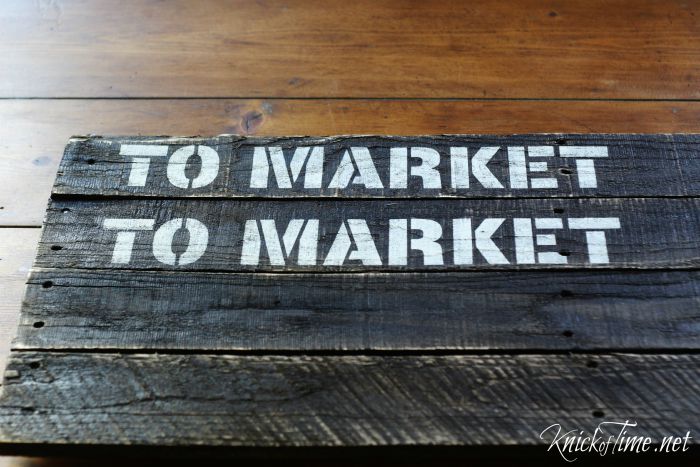
Step 5 – Paint the words, “To Market, To Market. I used white paint, so it would contrast against the dark wood, but a bright color like red would look great too.
I cut my own Farmer’s Market Sign stencil with my Silhouette Cameo, but you can buy inexpensive alphabet stencils at craft stores also.
Rustic Farmer’s Market Sign Produce Holder
Although, I didn’t have any small crates like the inspiration wall had, I did have several old metal fryer baskets, so I decided to use them.
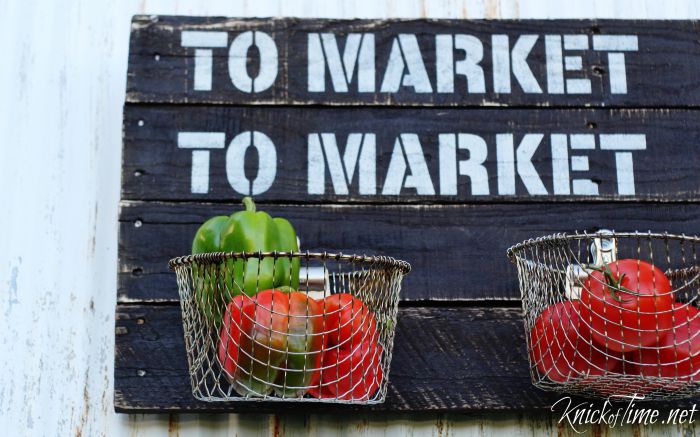
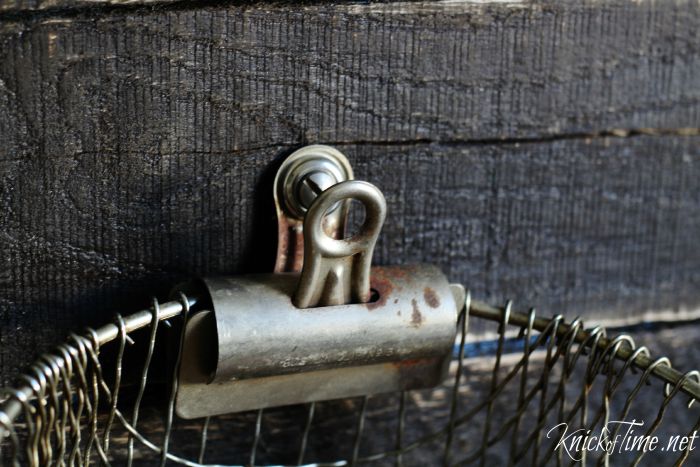
Step 6 – To hang the baskets, I screwed bulldog clips onto the Farmer’s Market Sign. The nice thing about using clips is you can switch out the baskets for other things – like notepads.
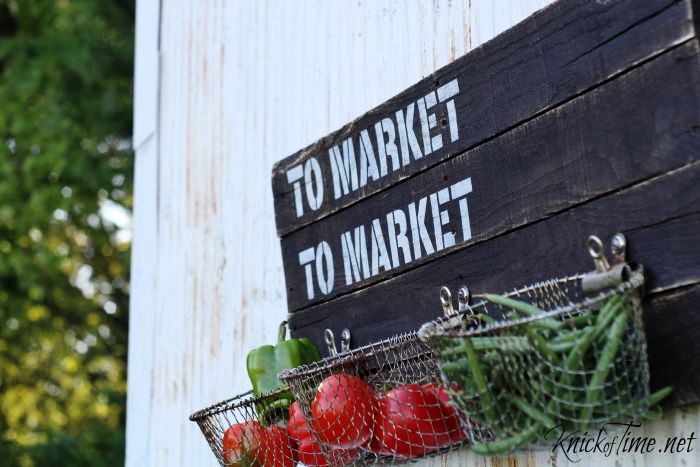
All that’s left to do is ad D-ring hangers to the back and fill the baskets with fresh produce!
Find a convenient place to hang it in your kitchen, and you’ll have handy bins for product that doesn’t require refrigeration, but you could put other things besides produce in the baskets too.
I hope you love this Farmer’s Market Sign project as much as I do! Please drop in to visit me at Knick of Time and check out my latest DIY projects and free printables!
My most recent posts include:
3 old fashioned County Fair projects
Free Antique Calendar Graphics
Until next time!


I love the rustic quality that the pallet wood lends to this project! I think the black and white makes it look extra sharp so that it would fit in with a modern vibe, as well! The clips are a fantastic idea for something a little different and I love how you styled it with the baskets! As always, another stunning project which is both beautiful and functional!
Angie,
I love your sign, and adding the baskets was just plain smart! Thanks for sharing a great project!
gail
Thanks so much for allowing me to share again this month, Gail!
What a fun piece! What is the silhouette you used for stenciling?
Ummm, this is adorable Angie! I love it!