bar stool leg Bench
As an Amazon Associate, I earn from qualifying purchases.

Last weekend was our City Spring clean up. One day a year you can take your trash, junk, whatever to the curb and the city will come and take it away free of charge. It is pretty awesome when you want to get rid of stuff. But even more awesome when you are a junker like me. 🙂

But it is triple awesome is when your friends call and ask if you want their junk. That is before they put it out, so you don’t even have to drive around to find stuff! That is where I got these bar stools, from my friend.
The tops were in pretty rough shape and I had no need for them, but the legs…oh the legs! They were high quality hard wood and over 32 years old. They had belonged to my friends mother. I knew they could live out another long life with a different purpose.
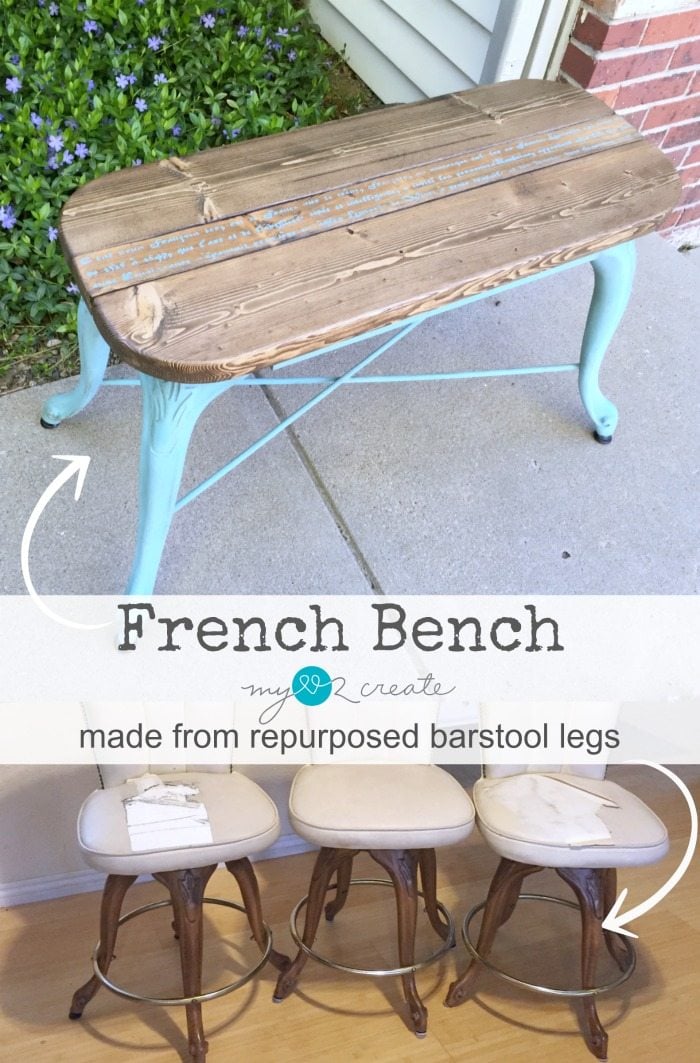
Repurposed Bar Stool Leg Bench
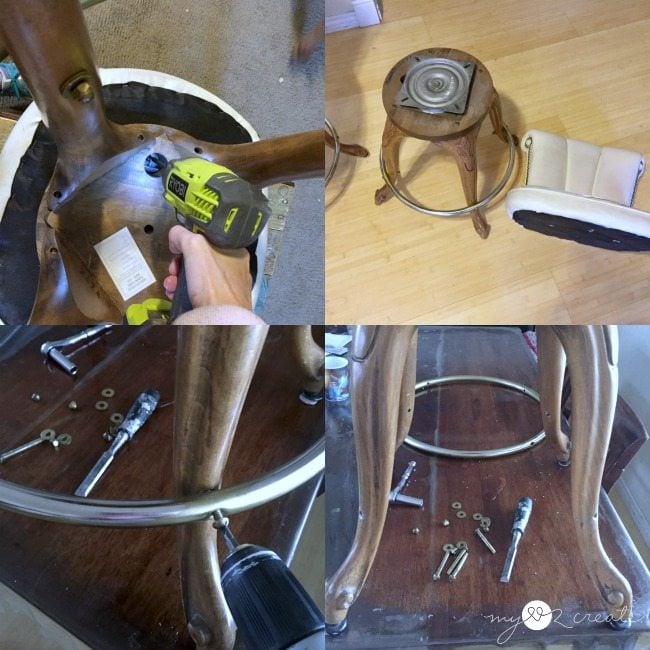
I took off the seat, and removed the swivel thing (which is great to have in my stash!) Then I removed the metal ring around the legs.
Cut top of bar stool legs in half
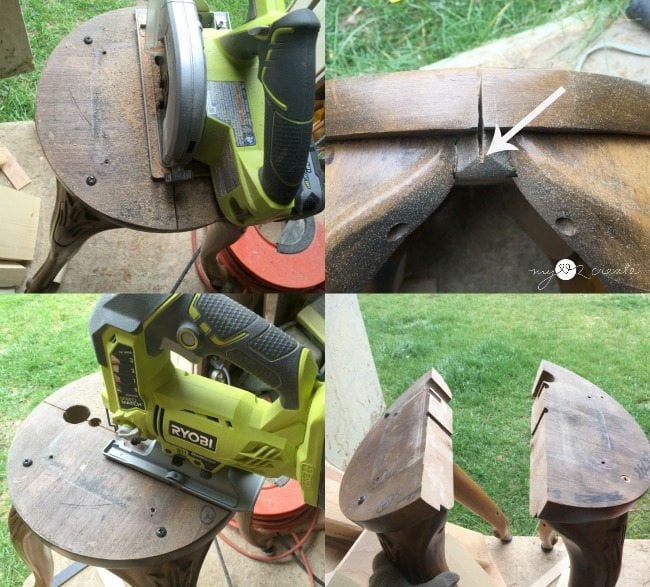
Unless I was making it into another chair or stool the legs really needed to be separated. I thought about taking off the round circle where the repurposed bar stool legs were connected. But it was glued and screwed so tight I didn’t dare remove it without damaging the wood.
So I busted out my circular saw and took a page out of Gail’s book, and cut the legs in half! It was pretty easy, except my saw blade wasn’t quite big enough to fit all the way through. It was a quick and easy fix with my jig saw to cut the rest of the way through! Done!
Design your bench
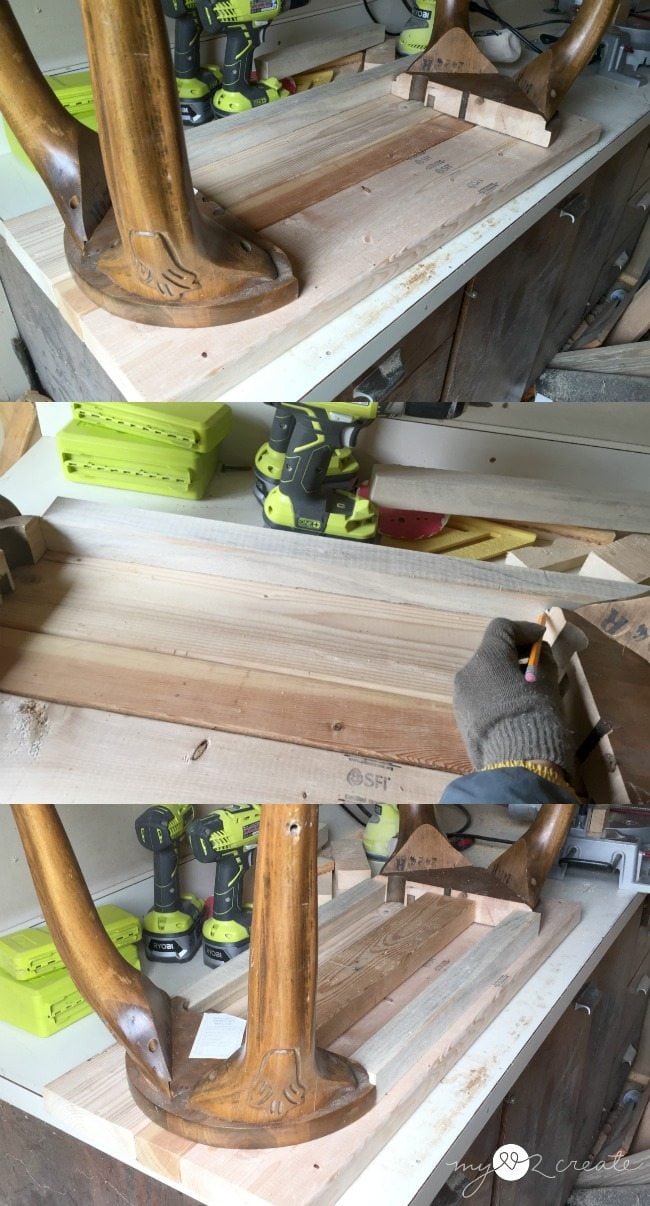
At this point I decided that the bar stool legs could be made into a bench and I grabbed some of the scrap wood left over from my X Arbor with Bench to build the top. I set the top boards down (2 2×6’s and 1 2×3) then positioned the legs so I could measure for the side supports. I marked and cut two 2×2’s for the sides (left over from my X planters) and one 2×4 for the middle.
Pocket hole construction
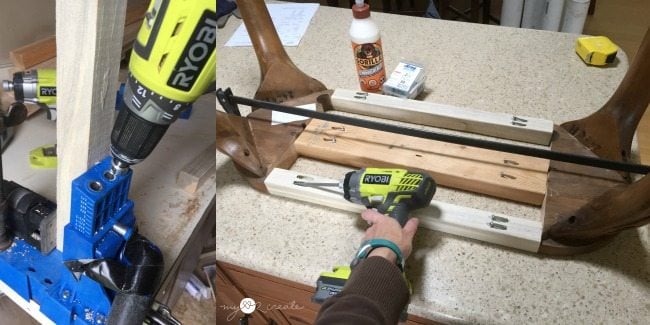
Next up I used my K5 to drill pocket holes and then attached the two leg sets together. I used my gorilla wood glue and made sure to clamp everything together to drill in my pocket hole screws.
Need more details on using a Kreg Jig? See my article How to use a Kreg Jig Pocket Hole System
New bar stool leg bench
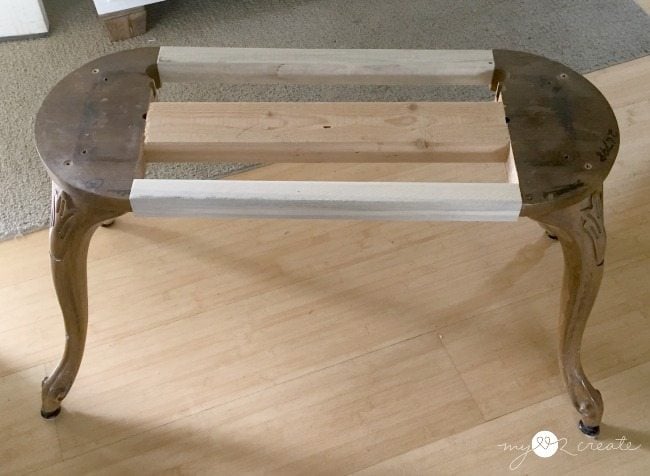
This is what I got.
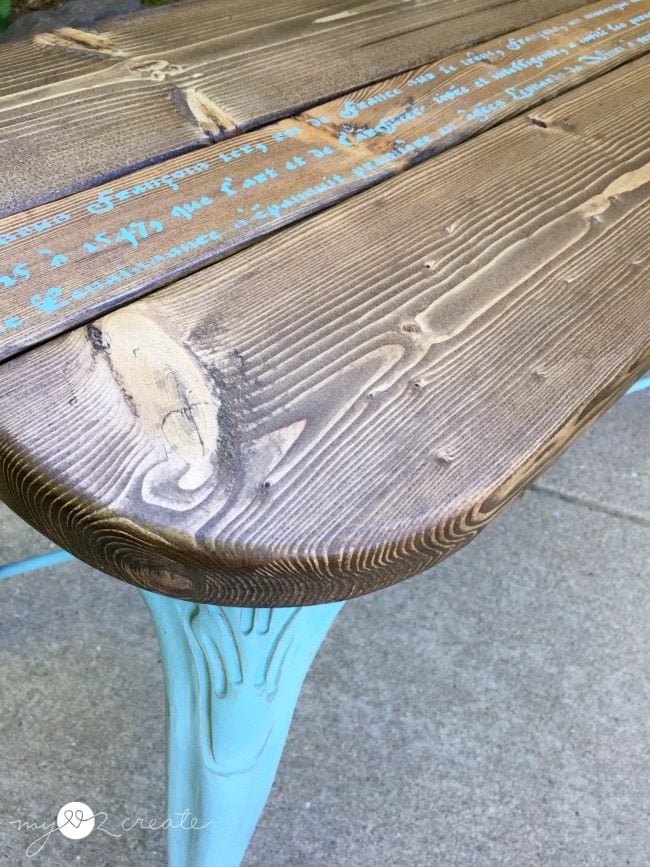
Design top of bench
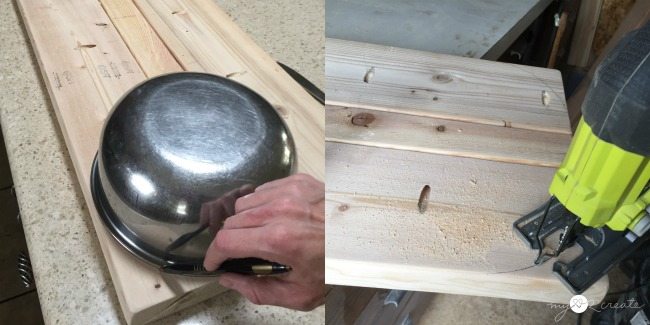
After I attached the bench top boards together with pocket hole screws I decided to make the ends curved. I grabbed a kitchen bowl to trace my curves on each end and then cut it out with my jig saw.
Stain and Stencil bar stool leg bench
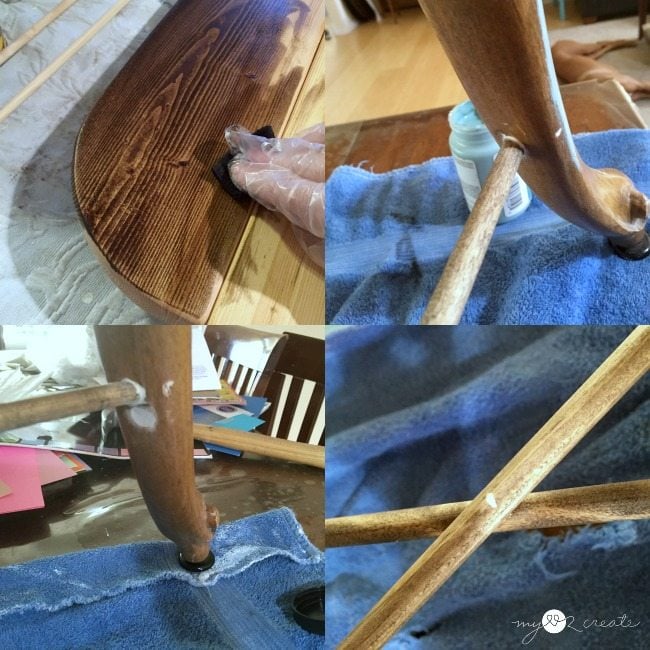
I sanded and stained the bench top (with a mix I made for my Shoe Cubby Dresser) and also some dowels that I decided to add at the last minute.
The bar stool legs had holes in them from the metal bar, and I used a drill bit a little bigger than my dowels to drill into the hole and make them the right angle for adding dowel across the length of the bench. In the bottom left photo you can see on one set of legs I had to drill higher so the dowels could cross in the center, I used spackle to fill the holes. To attach the dowels I added wood glue in the holes shot some nails through the legs to secure them. I also nailed them in the center where they cross.
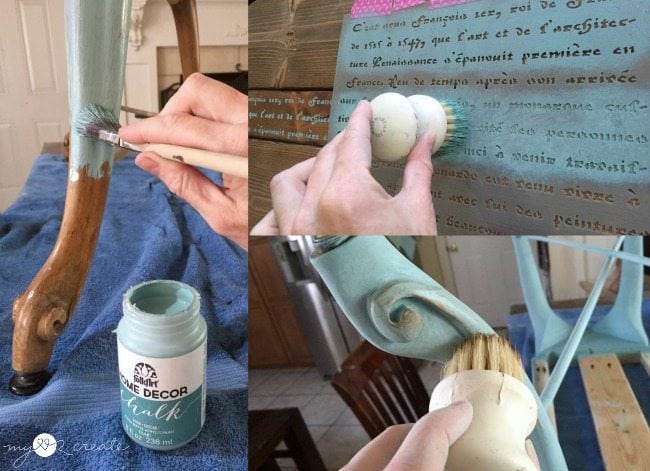
Since I have been wanting to try this Folk Art chalk paint that I got at a blogging conference. I let my daughter pick the color (I must be rubbing off on her, she picked my favorite…of course I may or may not have given her the pink option…which is her favorite). It turns out I really liked the paint it, it went on great and sanded smooth. I used a very light coating of dark chocolate wax to show off my distressing and the curves.
With the bar stool legs looking so “frenchy” I couldn’t help adding a “french type” stencil. Since I used my other french stencils on my French Inspired Piano Bench Makeover, I went with this french script stencil.
Attach legs to top of bench
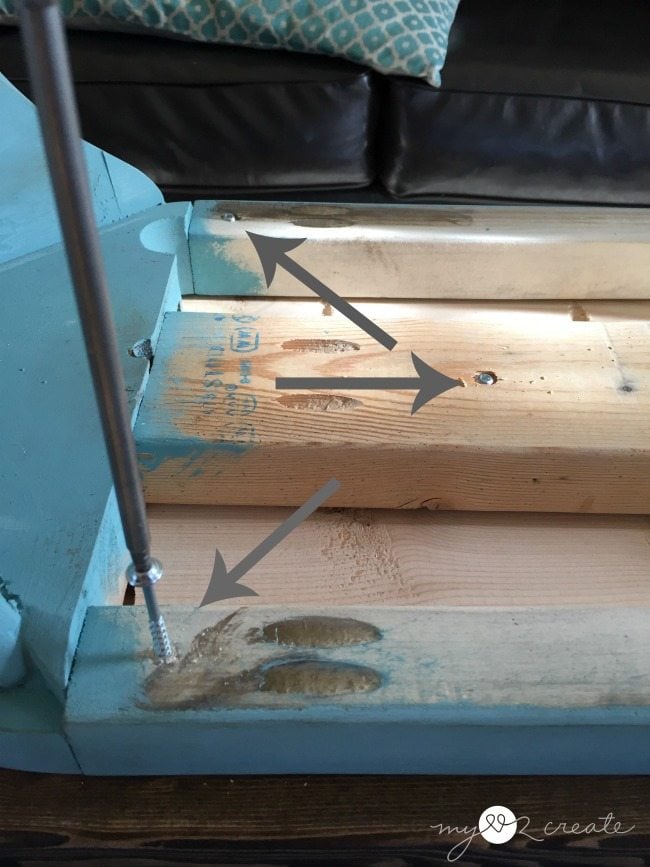
After three coats of poly on the top, I flipped it over and added the legs. I used my Kreg 2” pocket hole screws to drill through the rails, or supports, right into the bench top. Then I grabbed these screws so I didn’t have to pre drill, plus I couldn’t find my other screws, and they worked great, just like I knew they would. 🙂
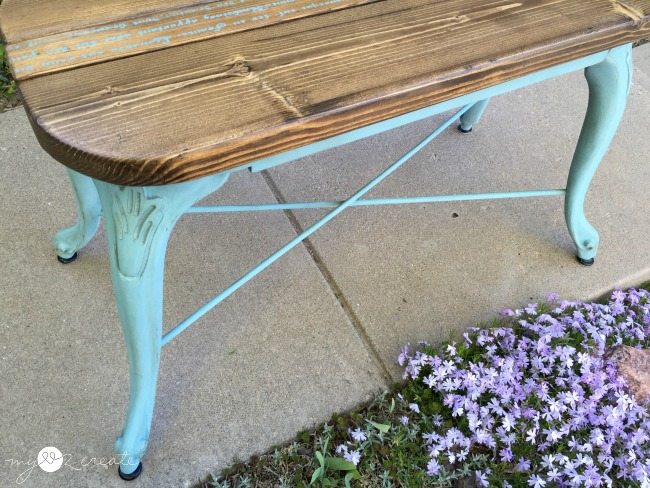
I really love how it turned out!
It is different and fun, and I love that my kids are mystified by not knowing what it says. Ha ha.
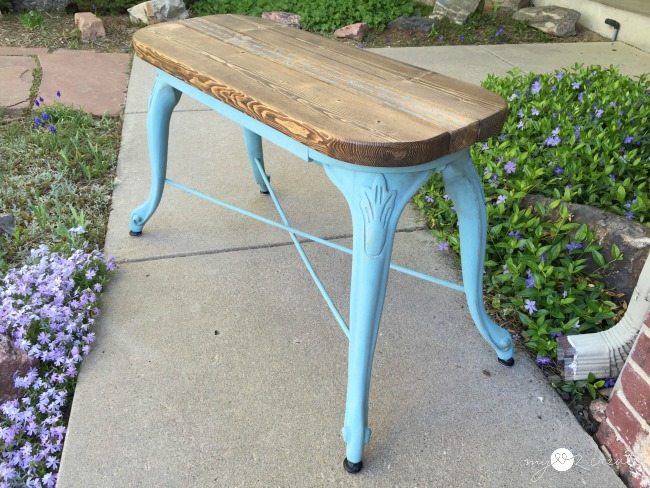
The cross bar supports would have been awesome as metal, but I couldn’t afford it. They are mostly for decorative purposes, but do add some stability for the legs.

I think it would be pretty cute at the end of a girls bed!
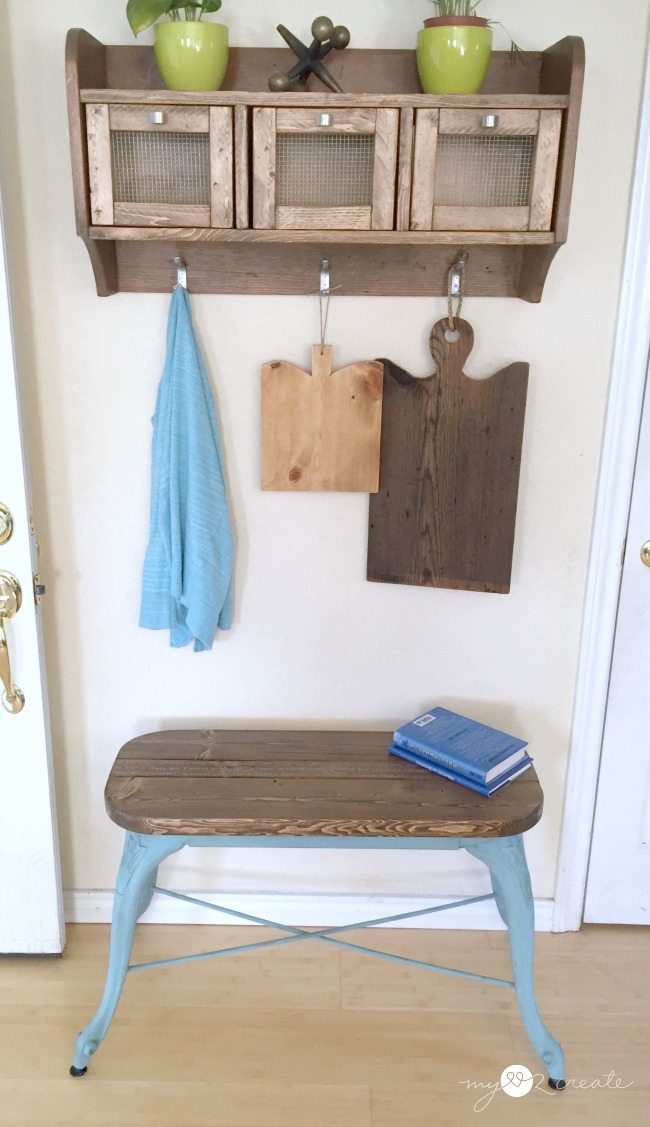
Or even in an entryway! I ended up giving it to my friend, the one who gave me the bar stools. She texted pictures to her kids, and one of them snatched it up pretty quick, after all, those legs hold some sentimental value, a good way to remember grandma. 🙂
So what would you have done with the bar stool legs? I still have two more stools! I have a few ideas but more are welcome!
Hugs!
Mindi
You are amazing! I never would have thought to chop off those legs! Beautiful fixer-upper 🙂
Super creative, Mindi! Great meeting you at SNAP last month! And oh yeah, friends are the best ones to get freebies from! Once they know you’re a junker, the handouts keep coming! 🙂
Hi Mindi! I just love the way your table turned out. I love the color too.
Beautiful and it’s my favorite color! Love it Mindi and Gail!! Pinning and hoping I can find some cool bar stools like these!
Mindi,
I love that cute new bench made from the legs of a bar stool! How fabulous that it found it’s way back to the family!
You did a great job and I’m so happy that you shared this tutorial on MRL.
Happy Mother’s Day weekend to ya!
gail