Repurposed Crib Dog Crate
As an Amazon Associate, I earn from qualifying purchases.
I am excited to share my Repurposed Crib Dog Crate. It is December! I can’t believe how fast time flies, and it just keeps getting faster. Either I am having fun or just getting old!
If you follow me at MyLove2Create you may remember when I introduced you to our new puppy Sunny. Well that was back in July and she has grown…A LOT!
Repurposed Crib Dog Crate


Dog crates can be expensive, like almost $200 dollars expensive, at least for the extra large size. Poor Sunny was so cramped in her old crate and with it being Christmas time I couldn’t afford to buy a new one. So my only option was to build it, I knew just what I needed…
An Old Crib
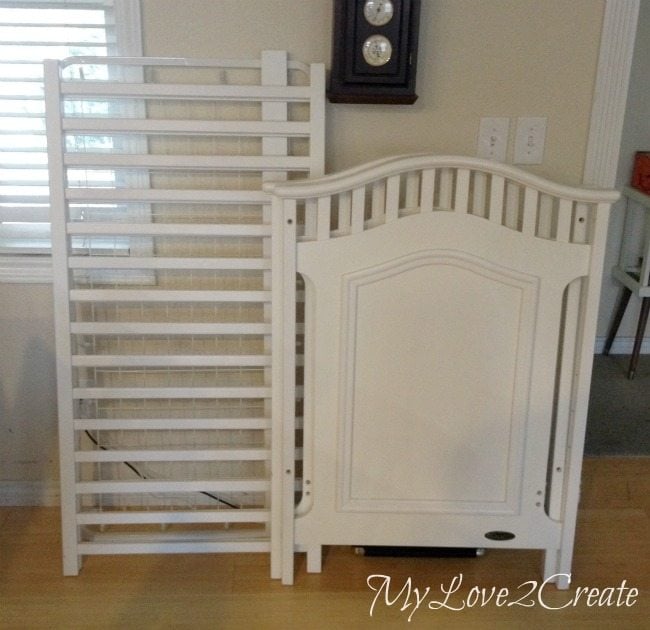
A Crib! This crib was solid wood and great quality, perfect. Thank you Craig’s list free section!
Determine crate size needed
The first thing I needed to do was determine my crate size. I looked online at extra large crates to see how big they were, and let me tell you they are HUGE! Seriously. I went for the smallest XL option, because it had to be able to fit through the doorways in my house.
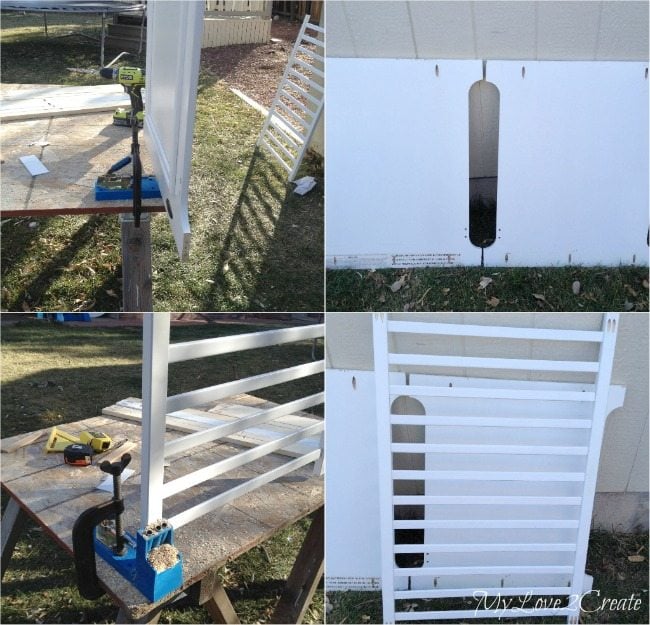
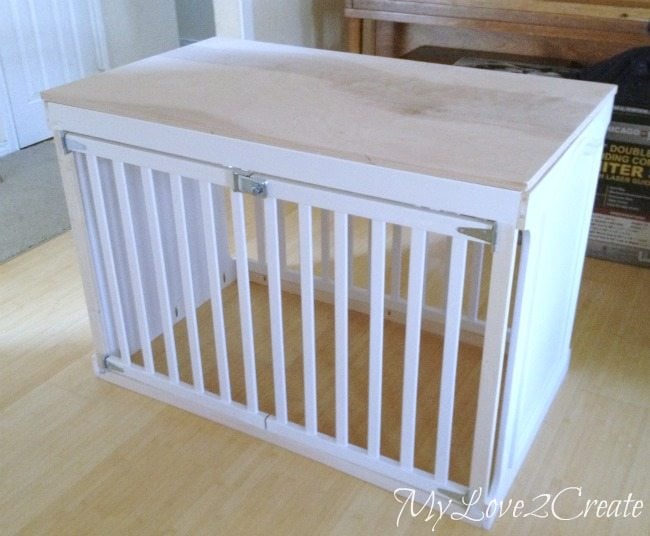
The final dimensions of the repurposed crib dog crate is 27 inches wide, 46 1/2 inches long, and 33 inches tall. The crib ends above were cut to 27 inches wide. I cut one crib top off (top left) and then measured where to cut the second (top right).
I got rid of the long side boards as well, they made it too wide to fit through the doors.
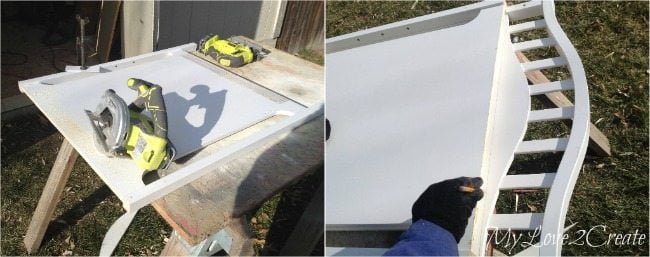
Use Side Rails
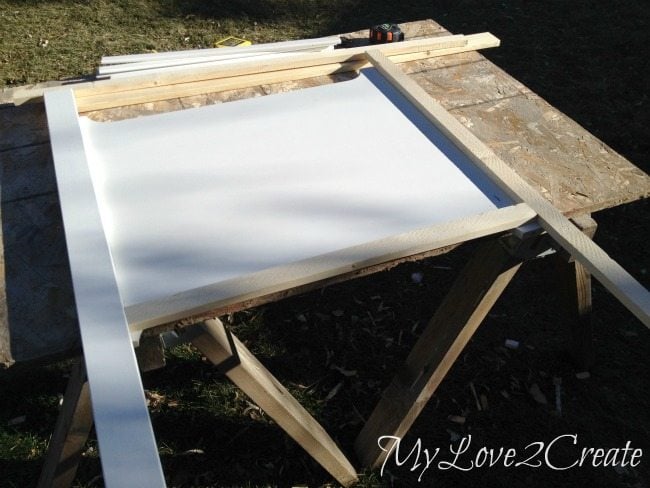
Once the ends were cut to size I was able to figure out how to make the sides. I placed a crib rail over the end piece and added boards until I had what I wanted. I was using the cut end to know how tall to make the sides, since they need to be the same height. The top white board (a 1×3) came with the crib, and then I used 1×2’s for the side and bottom. Luckily I had these in my stash.

I cut down the crib rails and my 1×2’s and 1×3’s to make the sides. I laid it out on the lawn and was so proud of my self until I realized what I had done.
Hello?!! Can you guess what I did wrong? Ok…
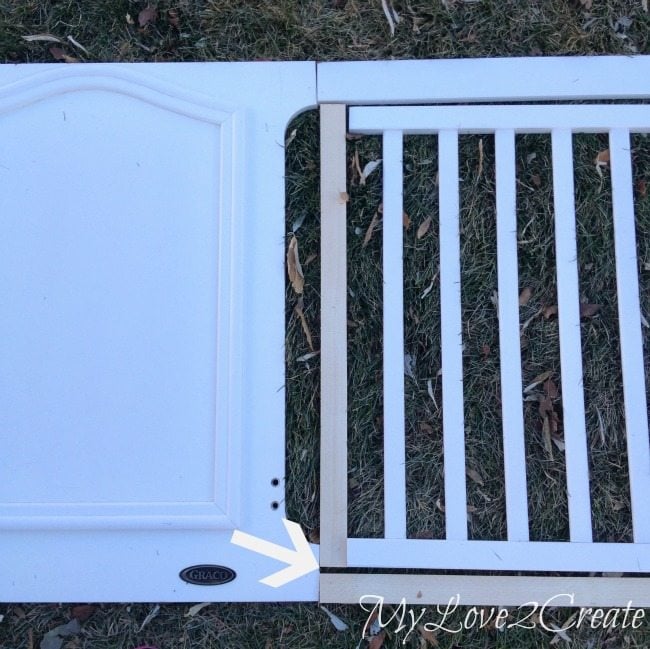
I forgot to measure with my crib end and I cut my side 1×2’s too short, see the gap. Ugh! This is why you have to be very careful when you are winging it. I thought I would have to got to the store, but I barely had enough 1×2’s to re cut.
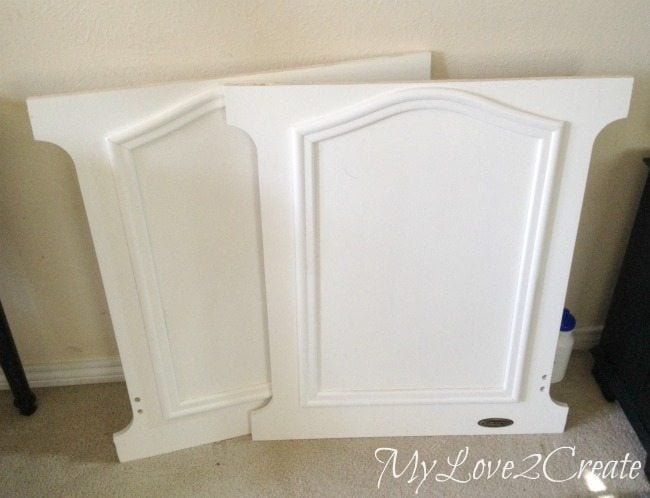
Frame Crib Ends
This is what I was supposed to do in the first place, I am using the crib end to make sure my cuts are the right height. Lesson learned. Until I forget and do it again, which I am sure I will. 🙂
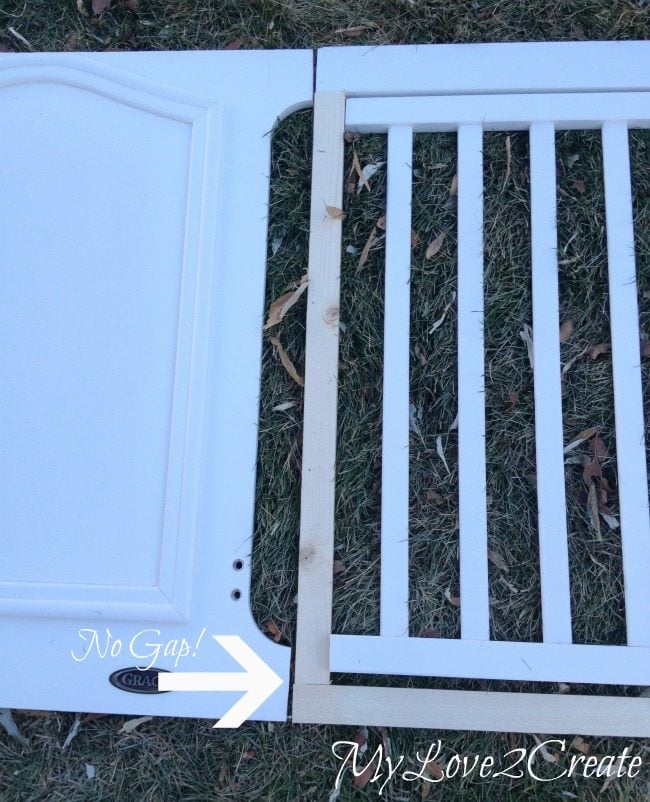
Much better.
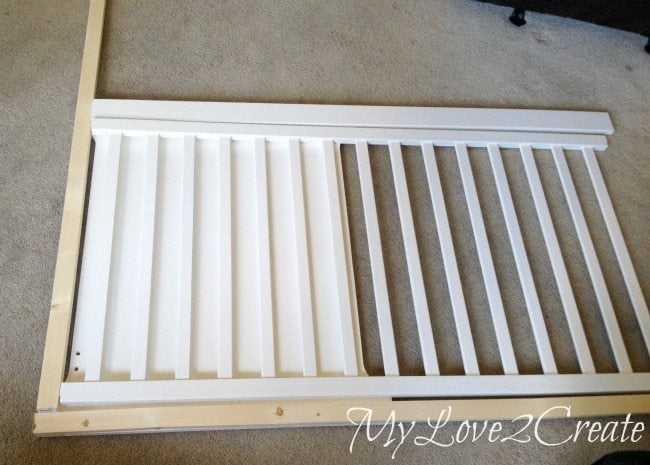
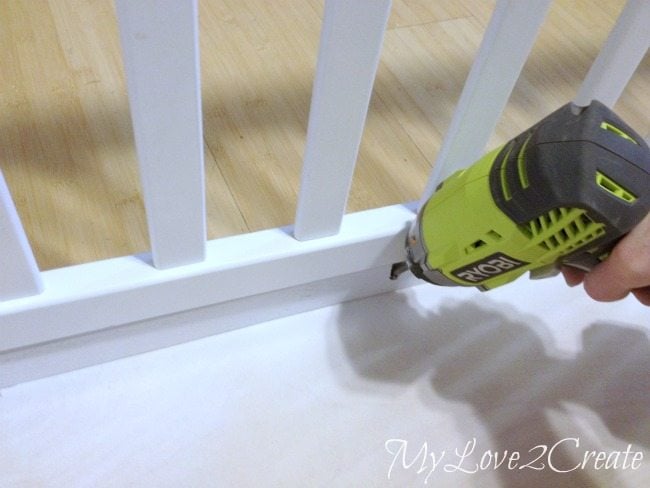
Drill Pocket Holes
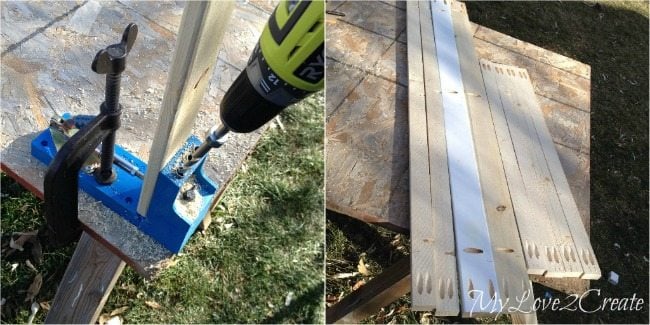
Next up? Pocket holes!! I know when I am drilling pocket holes it is almost time to build and I get excited. My Kreg Jig was used to drill all the frame pieces. I also added pocket holes on the long pieces for attaching my top and bottom boards.
Need more details on using a Kreg Jig? See my article How to use a Kreg Jig Pocket Hole System
Then I drilled some in the crib ends and the crib rails. I love my Kreg Jig , it totally makes me happy.
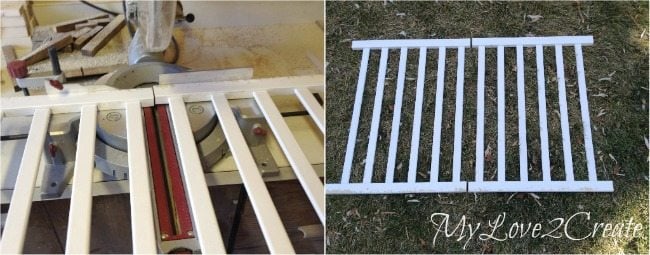
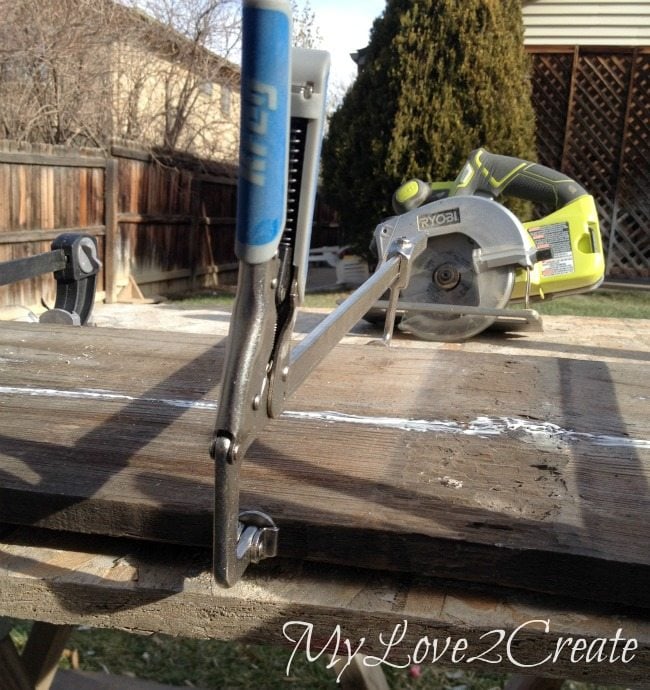
I only drilled pocket holes in the back crib rail. The front rail will be on hinges so it didn’t need them, but it did need to be cut in half. I measured and used my miter saw to do the job.
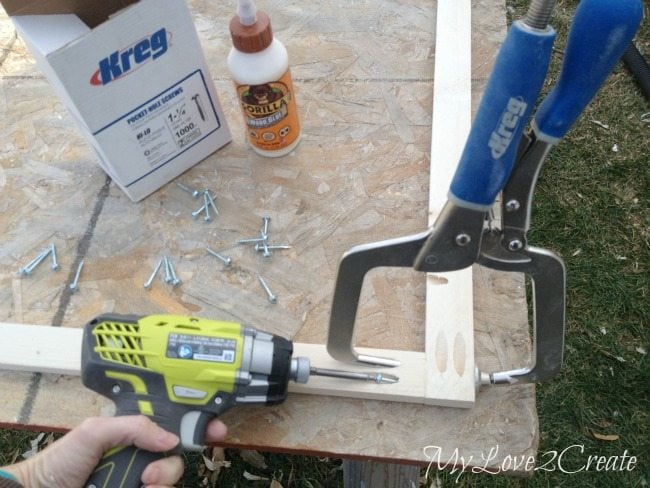
Using my Kreg Right Angle clamp to help me out, I attached the frames with gorilla wood glue and 1and 1/4 inch pocket hole screws.
I have done this so many times and rarely have my wood split, but this time I had several splits. I’m pretty sure these furring strips were the reason, they were scraps and weren’t in the best condition. I had to do some gluing, clamping, and waiting…not fun.

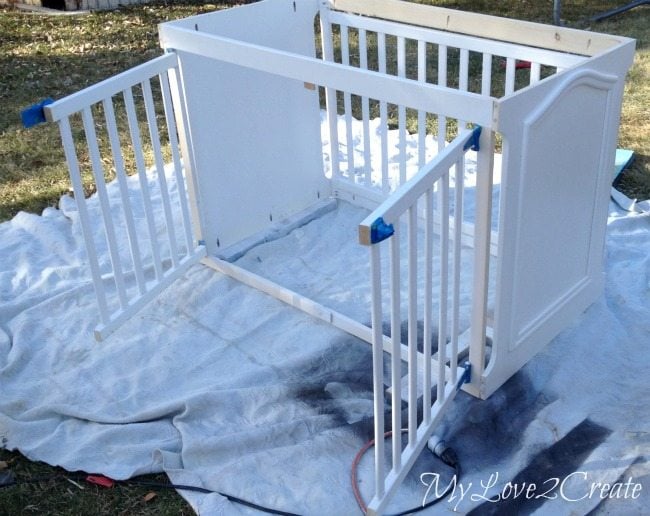
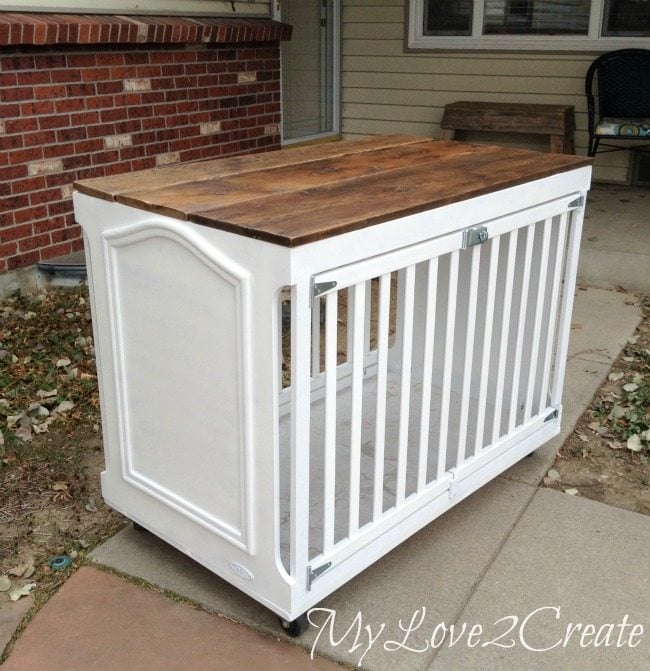
Here I am adding the crib rails. The photo on the left is the back piece, and the right photo is the front with the gate. I added hinges on all four ends, so both sides open.
Attach sides of crib dog crate

Next, I attached my sides to the ends, again using the right angle clamps. Not sure how I used to build without these!
I also had some wood splits here too, but in the crib wood, more gluing and clamping. I always check my settings when I drill pocket holes, so I know that isn’t the reason. Hmmm maybe the cold weather? Who knows… thank goodness I could fix it.
Plywood for bottom of crib dog crate
My father in law gave me some free plywood that his neighbor was throwing out and I used my biggest piece for the bottom of the crate. I set the crate on top and traced my cut lines.
After I cut it with my circular saw I brought it in to see how it fit. I just popped it on the top. I guess if I didn’t want a bottom for the crate I could have been done…
Fashion the top of the crate
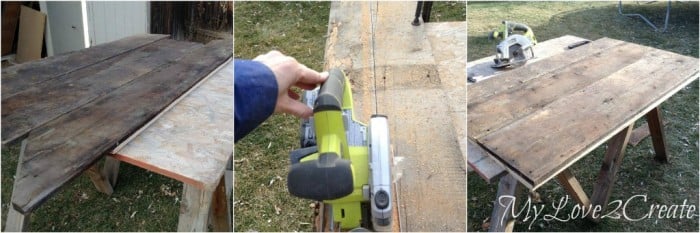
Since I didn’t have any wood big enough for the top of the crate, I had to improvise. I’m sure some of you recognized my barn wood top.
I know, I know, you are probably sick of it! It’s been used it in several of my contributor posts, My rustic industrial kid chairs, my repurposed cabinet doors into a desk, and my cubby shelf makeover. I can’t help it… becauseI love it! (plus I have it and it was free)
Anyway, I used it for this crate too. I made sure to cut my pieces to the same size as my plywood bottom. I had to cut one piece in half to make it fit (middle photo).
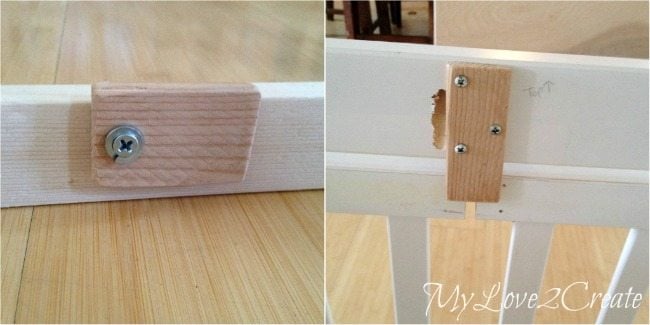
For my gate I needed a way to make it so the doors didn’t swing in or out. I put a piece of wood on the bottom with a screw and washer (left) so I could turn it up to help keep the doors closed. I also put a stopper on the top inside to keep the doors from swinging inside the crate (right).
Time to paint
Then I painted it white.
While the paint was drying I glued and used bar clamps on a couple of my top boards that needed some TLC. Oh the joy of working with reclaimed wood. It is totally worth it. 🙂
Secure plywood bottom with pocket hole screws
Here I am attaching my plywood bottom piece with the pocket holes I had previously drilled. I painted the edges of the plywood but not the middle.
Peel and stick tiles line bottom of dog crate
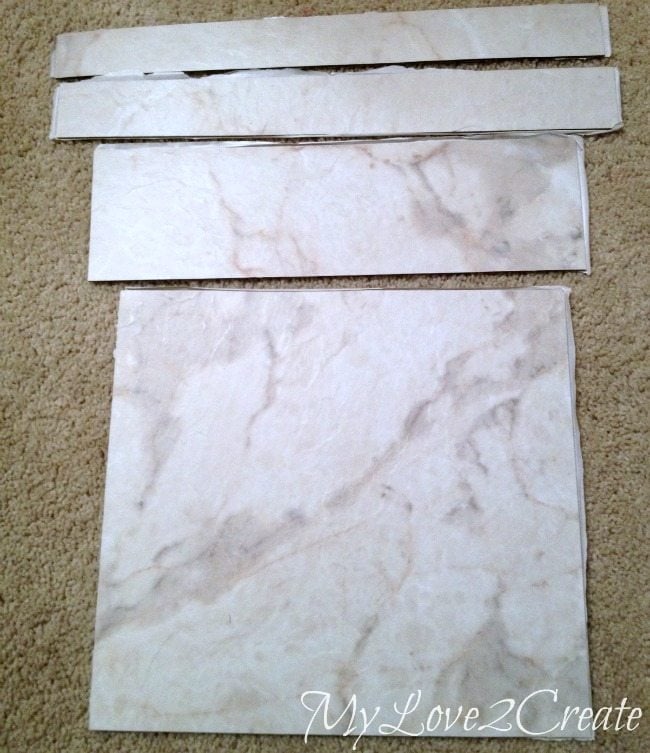
I could have just painted the crate floor with floor and porch paint like I did to my sister’s Closet/Laundry room makeover subfloor Here. But, A friend of mine said they had lined the bottom of her puppy’s crate with peel and stick vinyl to cover the wood. It not only protects the wood, but makes a quick clean up if there was an accident. I knew Sunny wouldn’t have an accident, but wanted to have the nice surface for easy cleaning.
I got these at Home Depot for 99 cents each. There were some that were cheaper, but I wanted the thicker vinyl so I splurged. 🙂 Nine dollars total wasn’t too bad. I simply placed them in the crate on the plywood, super easy!
Attach wheels to diy crib dog crate
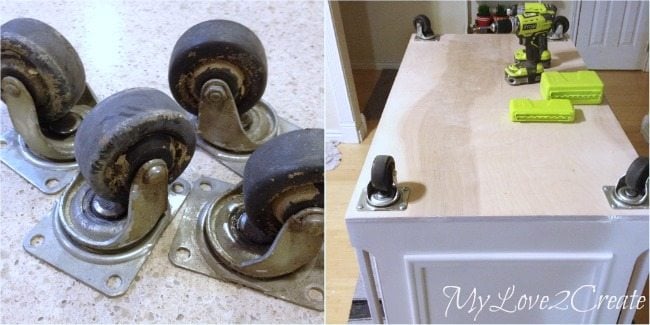
At the last minute I decided to add casters. I have had a stash of them hiding in my garage for almost 2 years. I found them on the curb in my city’s spring clean up, sa-weet! They just needed a good scrubbing before I attached them to the bottom of my crate.

They look much better! And it is so easy to move the crate where I need it, I am glad I added them. See the Graco symbol? I couldn’t get the dang thing off! Because of that, I ended up just nailing the top wood pieces on.
Sand & Seal barn wood top
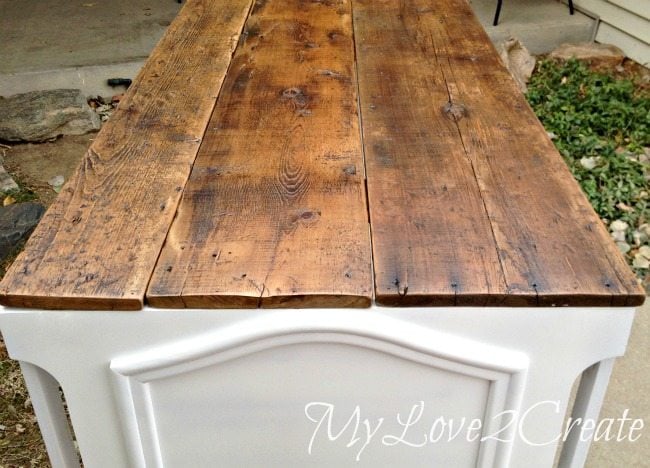
I sanded them and sealed them with 3 coats of poly, no need for staining on this old wood. I also nailed support boards on the underside to attach them together like I did on the boards in this project. Can you blame me for loving this wood? Plus for now, this crate will be in my room, so I wanted it to be pretty.
Details of Repurposed Crib Dog Crate
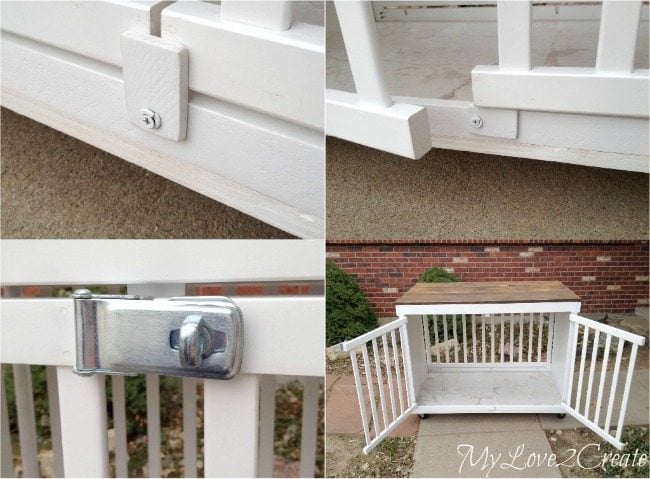
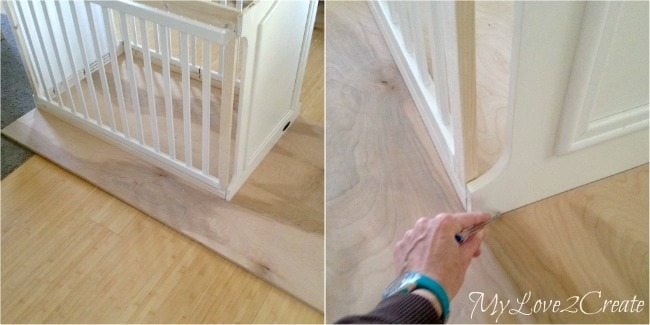
Here are some shots of how we get Sunny in and out. I spent less than fifteen dollars for the hinges and this bolt thing. So I guess my total for this crate was just under $25 dollars. I am actually loving the bottom piece of wood that I just turn, it would have been fine to have one on the top too, that would have saved me 5 or 6 bucks.

And a close up of the nice marble vinyl floor! It is super smooth I am really glad I put it in, even if I can’t lay it totally straight, lol! I filled in the small cracks with spackle, an easy fix. 🙂
large dog in crib dog crate
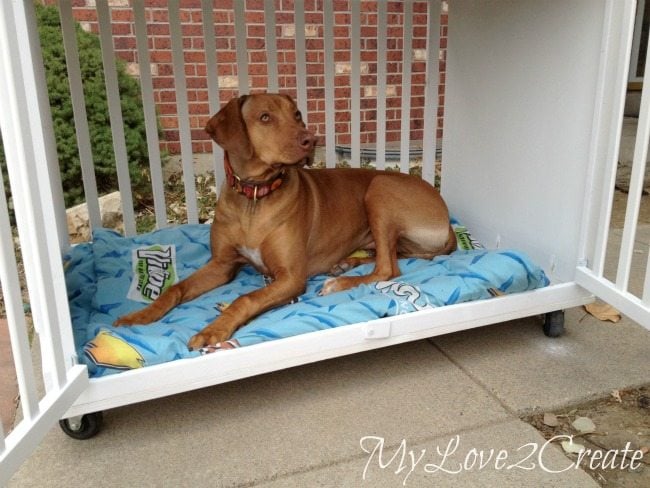
Sunny LOVES it! She can stretch out, stand and…
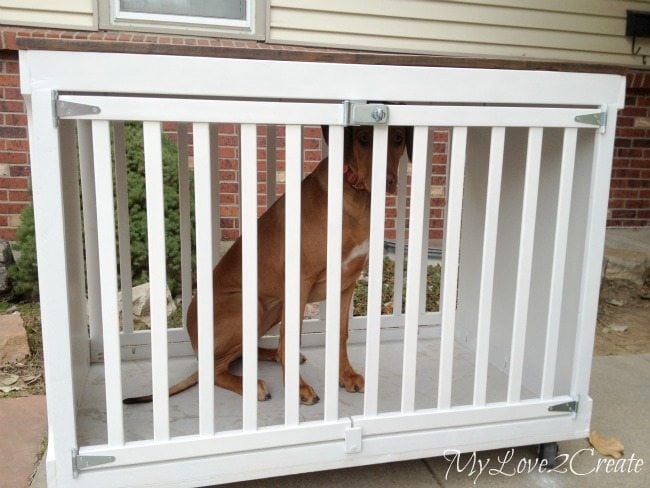
Sit! So much better than that tiny ugly wire crate. (Sorry no before, should have thought of that)
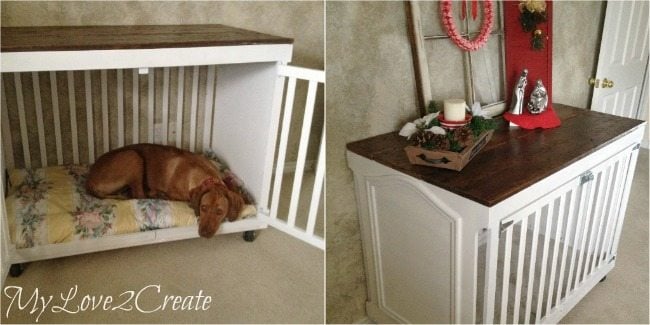
I just have to make a nice pad for her, but an old comforter works for now. Here it is in my room, I was excited to do some decorating for Christmas on the top! The top would also be a great place to put a TV or hutch…oh, and don’t mind the walls, over 4 years since we moved in and I still haven’t painted them. I was planning on doing it after my Master Closet Makeover, which is my favorite project to date, but it kind of wore me out. So I took a break, and never got back to doing my room! Such is life.
So what do you think? We love it, and my kids had fun locking each other inside, this thing is a beast. I guess you have to have a beast crate if you have a beast dog. I personally think it kind of looks like those old circus cars from the old days…lol!
If you like this repurposed furniture project using an old crib, I would love it if you came to visit me at my blog, MyLove2Create! I have lot of fun ideas and tutorials on my Project page. I hope to see you there!
Hugs!
Mindi
sharing here:

see more of Mindi’s posts on MRL here
Related Content: Dog Bowl Holder
Hi there! I know I’m pretty late to the party, so not sure if you’ll see this 🙂 I would love to make a couple for both my dogs(70 pounds and 60 pounds) but I don’t have access to many tools. Do you think it would be okay safety-wise to just use a drill to attach a piece of plywood onto the top of a crib and do the same with a thicker piece of plywood to help reinforce the bottom? I could use a handsaw to cut off the legs of the crib prior to this and then attach casters as shown. I’d love to hear your thoughts!
Annette,
I read all of my comments (eventually) I didn’t make this project, my good friend Mindi made it. You may have to use some brackets to secure the plywood to the crib rails. Maybe some metal plumbing (pipe holders) ??? The screws into the crib may not hold. But I think it’s definitely doable. Not sure if it would work for such large dogs.
If you get into it and have any questions, let me know. 🙂
gail
I just love this project! Absolutely stunning!! I just had a quick question before I attempt to recreate it, how thick did the bottom piece need to be so that you don’t risk it sagging or snapping? And was curious if over the years if you’ve had any trouble with either? Thank you 😊
Hi Brooke! I am so glad you like it! You will need a piece of 3/4” thick plywood for the bottom piece, anything less wouldn’t be sturdy enough. It has been almost 4 years since I built this crate for Sunny, and it is still as solid as the day I built it! Sunny loves it, it is her safe place, and she sleeps in it every night. I would love to see your crate when you finish, good luck! Thanks!