Repurposed Crib Legs Plus a Tabletop
As an Amazon Associate, I earn from qualifying purchases.

If you have an old crib headed for the trash, stop right there. Those turned legs and little “L” brackets are basically begging for a second life. In this project, I’ll show you how I turned Jenny Lind crib legs and a leftover tabletop into a cute, sturdy little table using simple cuts, a basic 2×4 skirt, and the crib hardware I was smart enough to save.
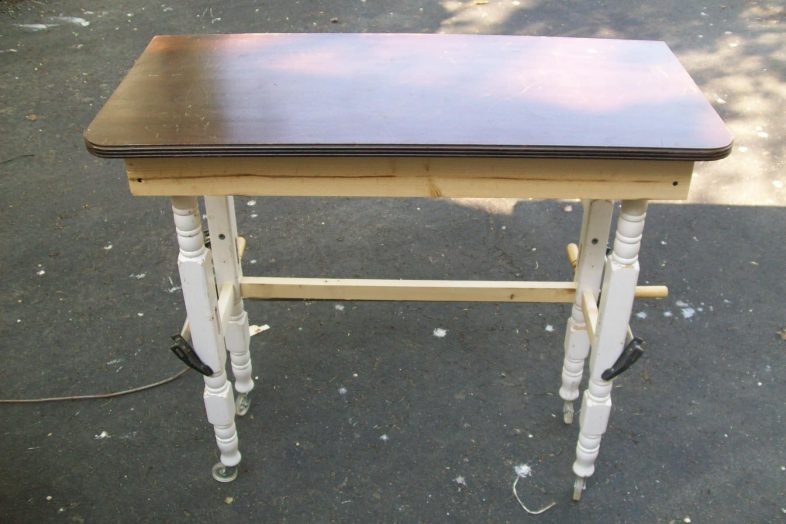
Repurposed Crib Legs Table
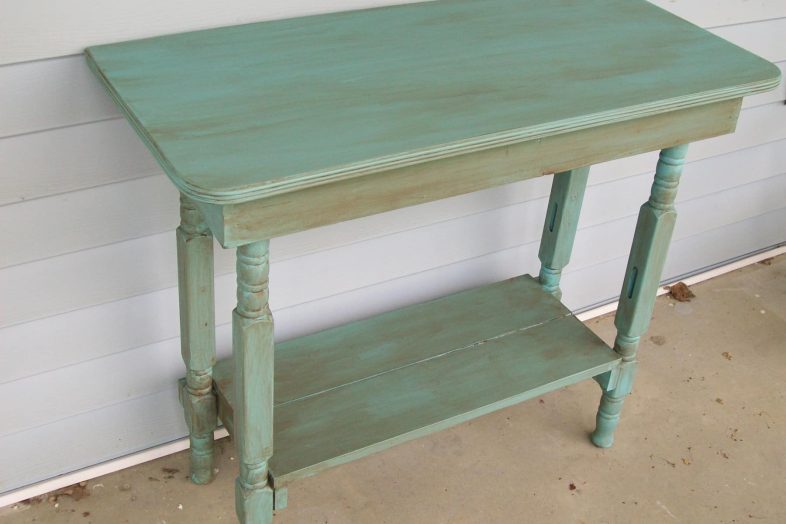
I love this repurposed crib leg table! It’s easier than you think.
Dismantle the Jenny Lind Crib Legs
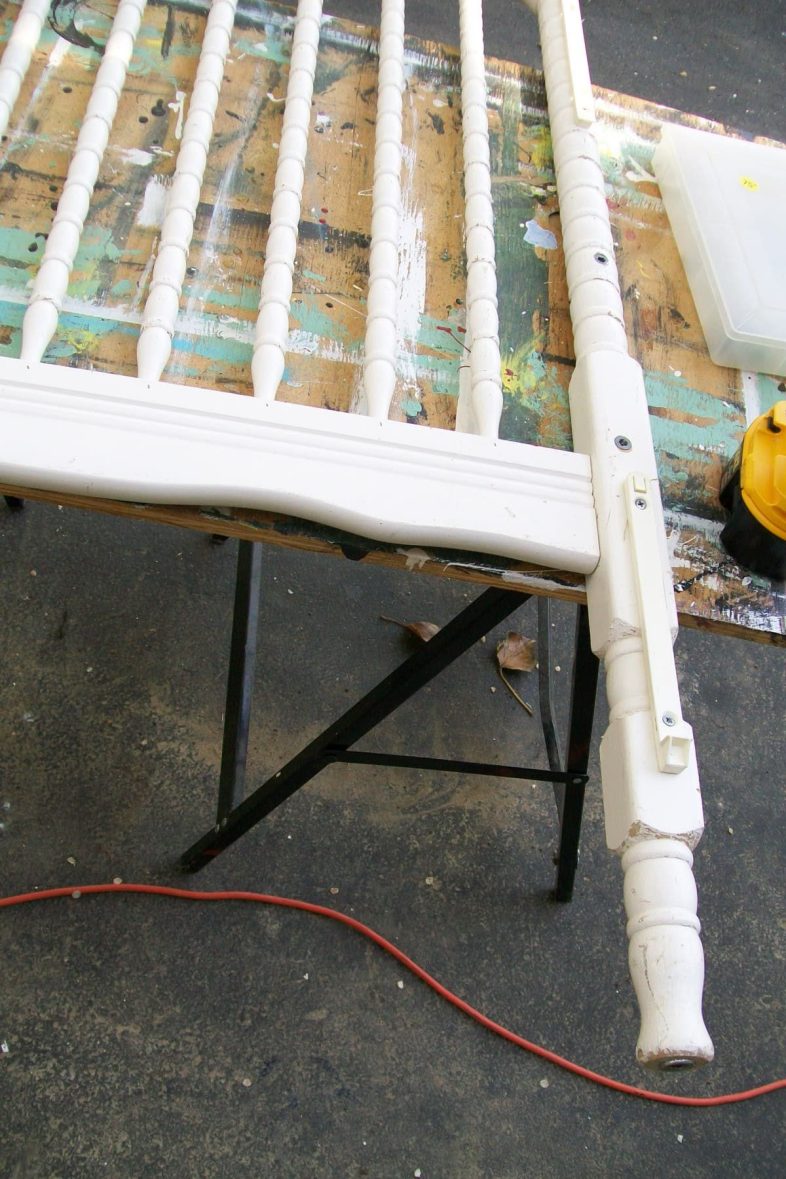
Sometimes, when I get too many furniture items, I part them out and discard the few pieces I don’t need. It’s a good idea to save the hardware for future projects.
Cut Crib Legs to Size
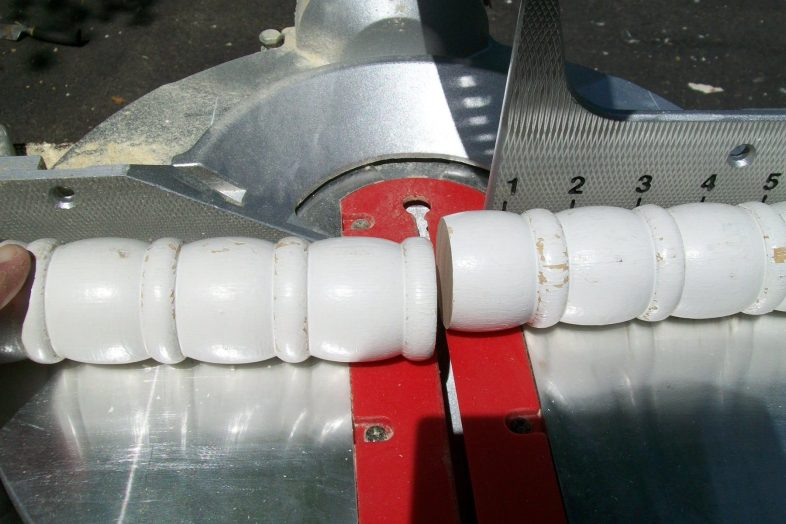
Consequently, the original legs were too long. So, I shortened them using my compound miter saw. Please use extreme caution when cutting repurposed or reclaimed wood. Examine for screws, nails, and similar items.
Construct a Simple 2×4 Box
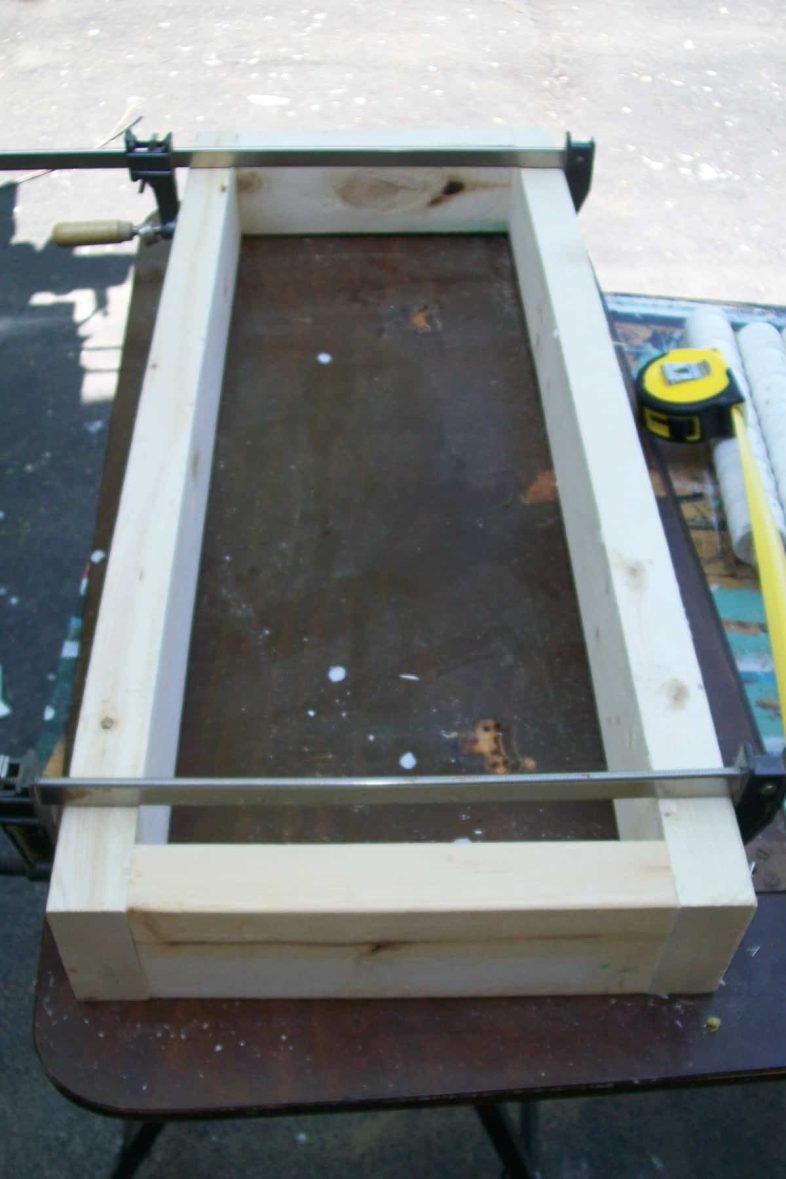
A simple 2×4 box was constructed as the table skirt using bar clamps.
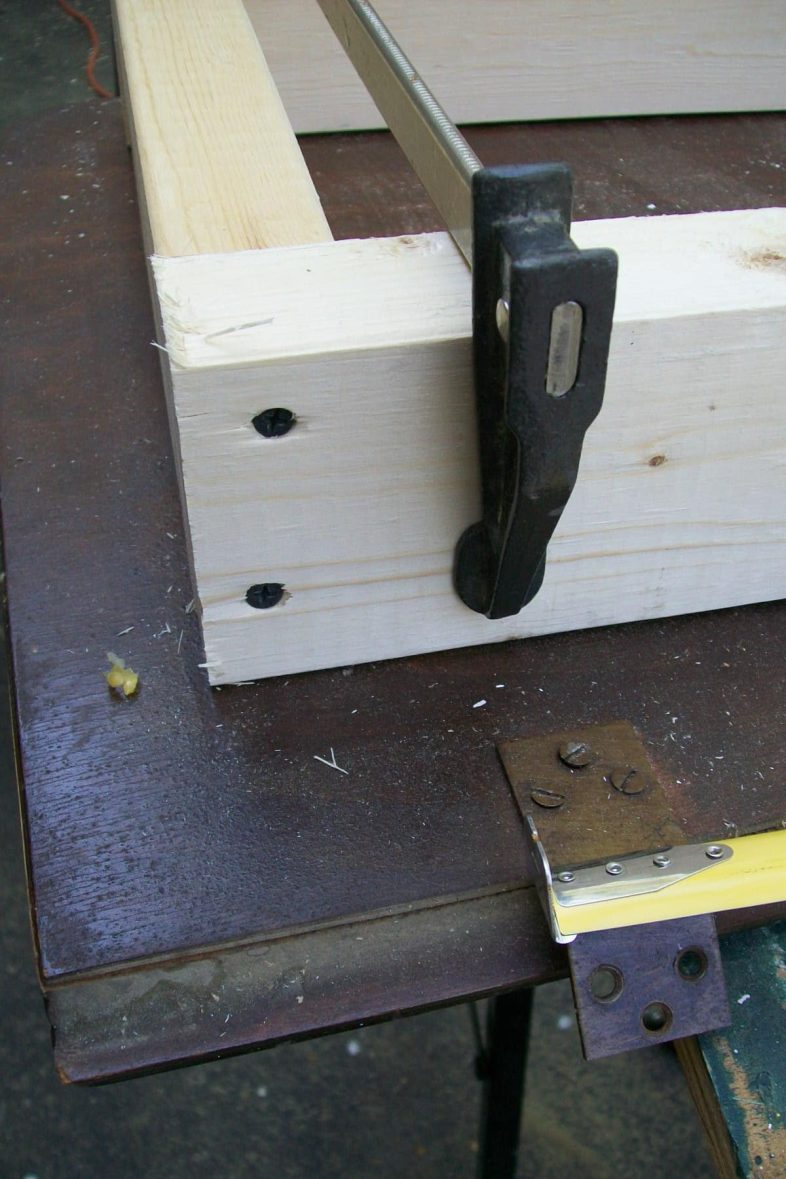
Attach the box pieces with wood glue and screws.
Visit the My Repurposed Life Amazon Store to shop my favorite items.
How to Add Legs
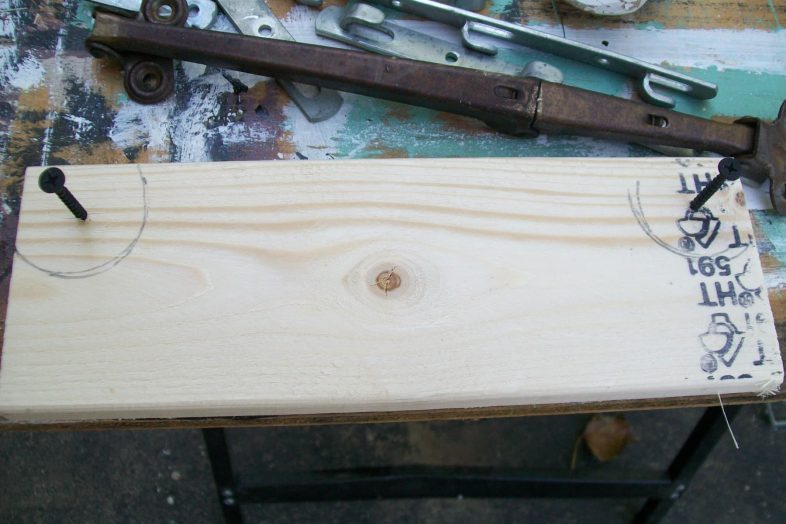
I cut a scrap board to attach the legs. The legs were traced on the board, and pilot holes were drilled. Finally, screws were started and secured into the top of the crib legs.
Once the legs were attached to the board, I glued and screwed the board to the bottom of the tabletop.
I used the “L” brackets from the crib to attach the tabletop to the box. You can also do this using pocket holes and screws.
Add Leg Braces
So, I tried making some leg braces. They didn’t work well, so it was time to call it a day and start fresh the next day.
Construct Lower Shelf

I guess I got so busy with the new version of the leg braces that I didn’t stop to take pictures. The back brace runs along the outside of the legs.
The side braces run along the inside of the legs.
The shelves are just random scraps of wood.
I used my nail gun to fasten the shelves to the leg braces.

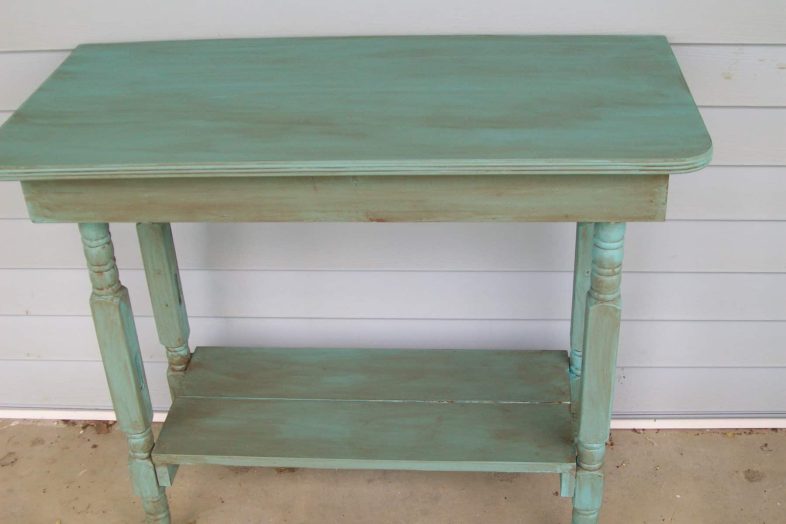
The repurposed crib-leg table was painted in the aqua/turquoise I used on this window cabinet.
Easy Table Build using Crib Legs
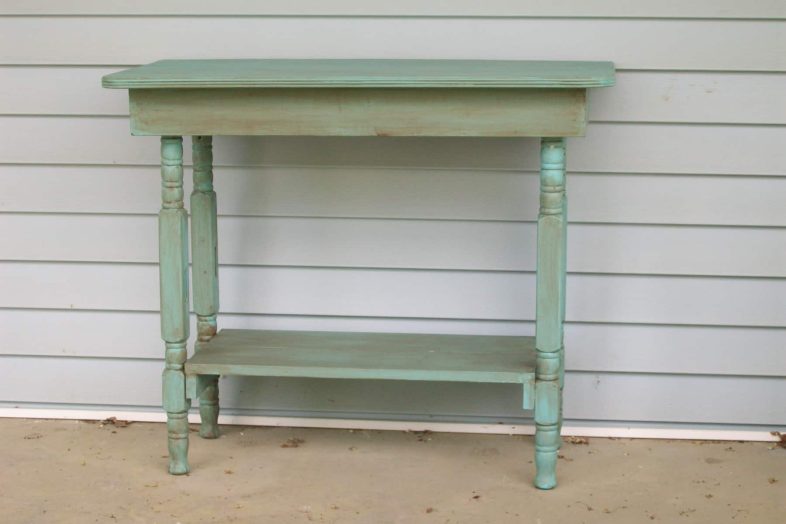
The table was a little bright, so I used some brown “oops” to glaze it. Do you like it toned down? Or would you have left it in its original turquoise color, as you can see peeking through on the top-right leg?
Do you see how the side braces were added to hold the lower shelf?
This is an excellent project for a beginner. You can make a new table if you have random table legs.
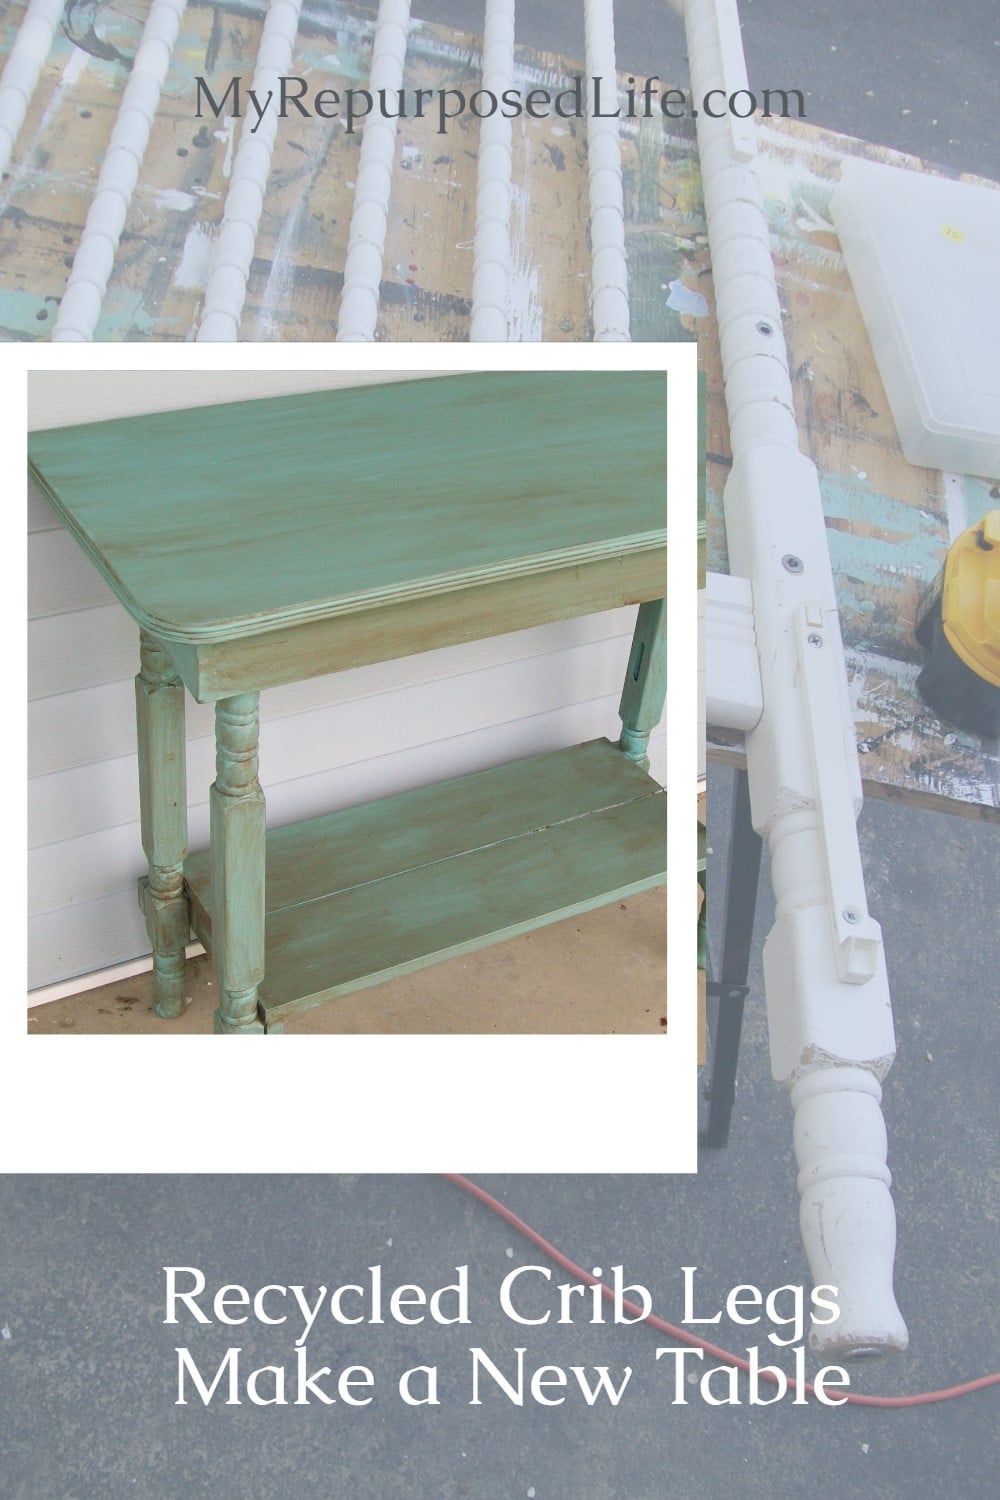
This is one of those builds that proves you do not need fancy lumber to get a solid piece of furniture. If you have random legs, a spare top, and a few scraps for a shelf, you can make your own version. Bonus, since the crib legs still have that little hole in the bottom, this table can easily become a rolling cart or even a small kitchen island with casters. And if you’re like me, you’ll probably paint it a fun color first, then decide whether to tone it down with a little “oops” glaze. I’ll link my matching console table and my other crib projects below so you can keep the crib-parts ideas going.
Please Save & Share on Pinterest!
I still have one more project from the table from which this top came. Check out the Console Table
Check out my other repurposed crib projects.
Related Content: Make a Quilt Rack Out of a Crib
Great little table. I want one! I’m glad to see the instructions include simple drilled holes and screws instead of a Krieg jig, which I don’t have.
I’m happy you like this project. 🙂 Thanks for taking the time to let me know.
gail
You do such awesome work. Guess I’m not smart enough to think on my own. Sure can copy though. Just one question. When do you determine to use pilot hole versus the glue and screws? Thanks
JoAnn
I believe this project was before I found out about the fabulous Kreg jig pocket hole system. I always use it now, it joins wood pieces together so tight. It’s a little strange, and hard to get the hang of at first. A new user should do a dry fit, and mark the boards that need to be drilled to keep from getting mixed up. (in fact I still do that)
thanks for stopping by and taking the time to ask a great question!
gail
LOVE this table, Gail!
I love this little table!! I also like your idea about adding wheels to use in the kitchen!! I have been looking at sofa tables to convert, but i do have a crib sitting in my garage! Yay!! Thanks for sharing – Love it!!