Repurposed Door into Bookshelf
As an Amazon Associate, I earn from qualifying purchases.
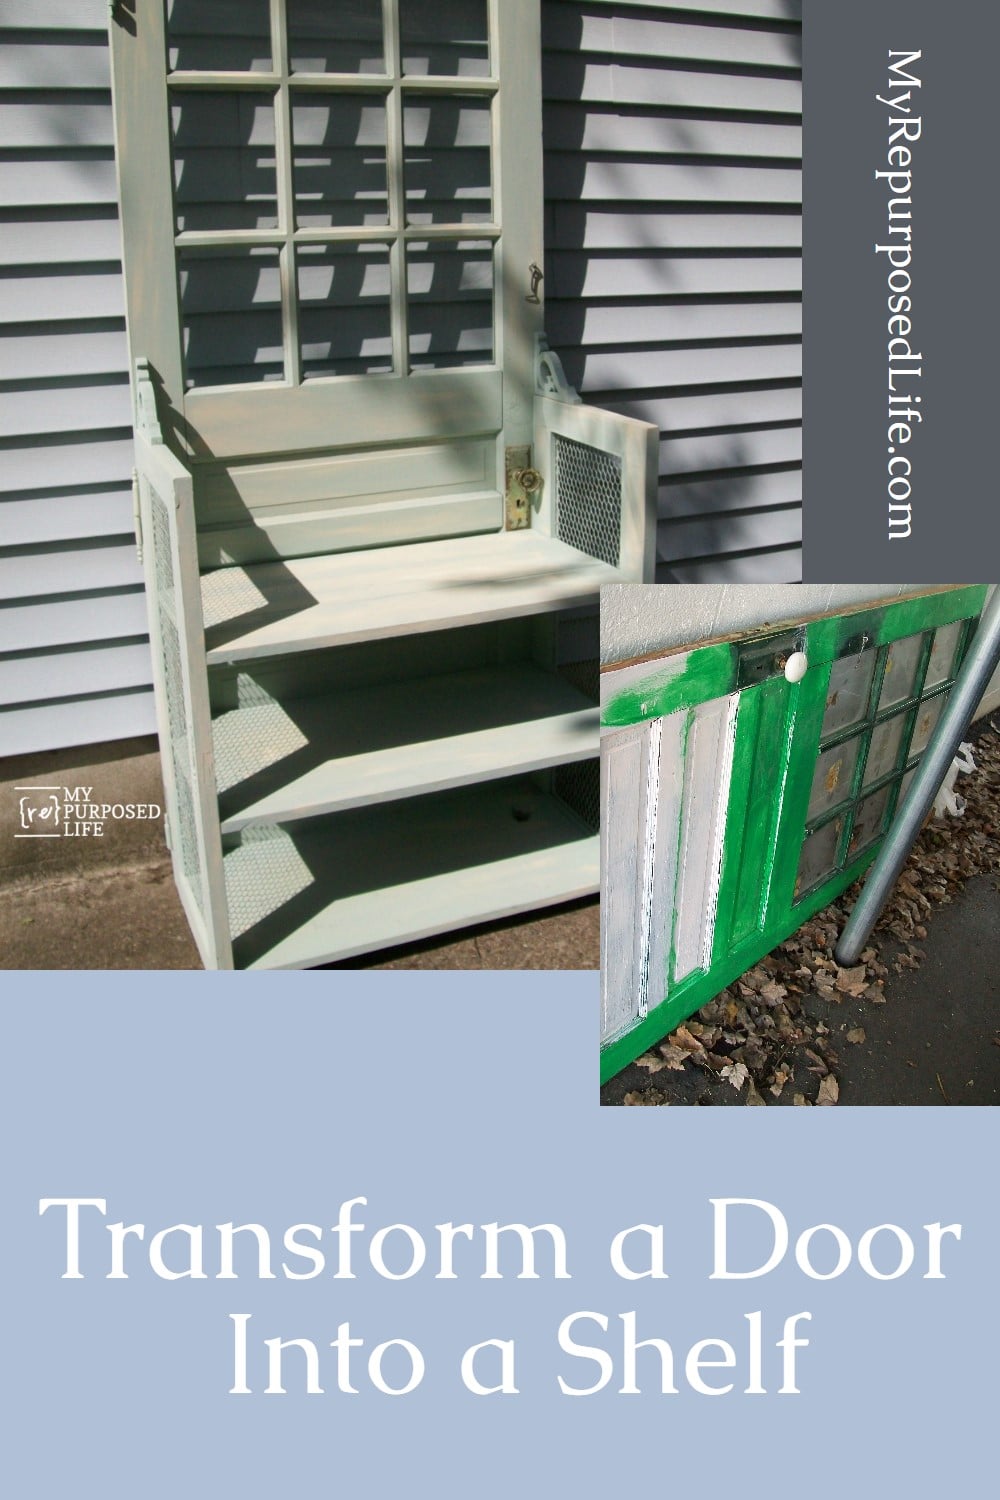
Old doors always catch my eye. They hold so much history and possibility. This one had just the right amount of wear to give it character, so I decided to turn it into something useful again. With a few simple cuts and some imagination, it became a charming bookshelf that adds personality to any space.
How to Repurpose a Vintage Wooden Door

I have made several things from doors. Did you see my toddler bed and my bookshelf?

The inspiration for this repurposed door project comes from Brittany @ Pretty Handy Girl.
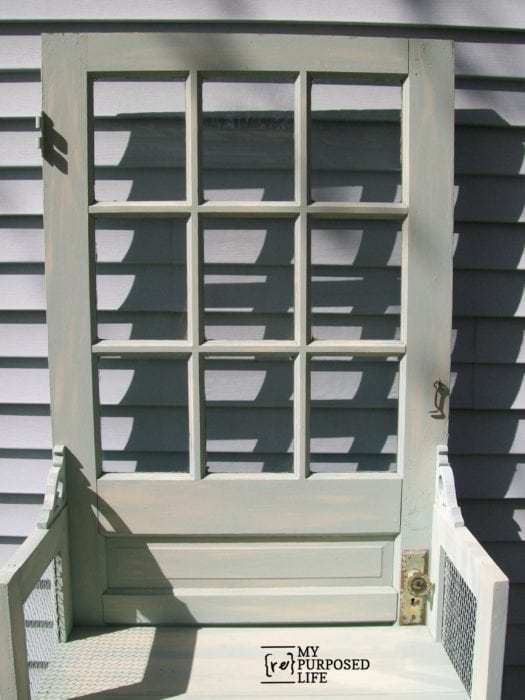
Add Sides to Reclaimed Door Bookshelf

I opted for small screened pieces since I didn’t have picket fence pieces.
Clamps Are Helpful When Working Alone

Holding the small cupboard doors with clamps to see if they would work is an excellent way to do a dry fit on a repurposed furniture project when working alone.
Pocket Holes Make Connecting Small Doors Easy

I used my Kreg Jig to make pocket holes for joining the cupboard doors to the old door. Being very portable, this jig is handy for all sorts of projects.
Need more details on using a Kreg Jig? See my article How to use a Kreg Jig Pocket Hole System.
How to Add Shelves to Repurposed Door Project

The 1x6s were connected using pocket holes, as I did for the kitchen island top. They were secured to the side of the small cabinet doors using pocket hole screws.

I notched out the shelves with a jigsaw to compensate for the mesh screen. The pocket holes are located where the shelf connects to the small cupboard door.
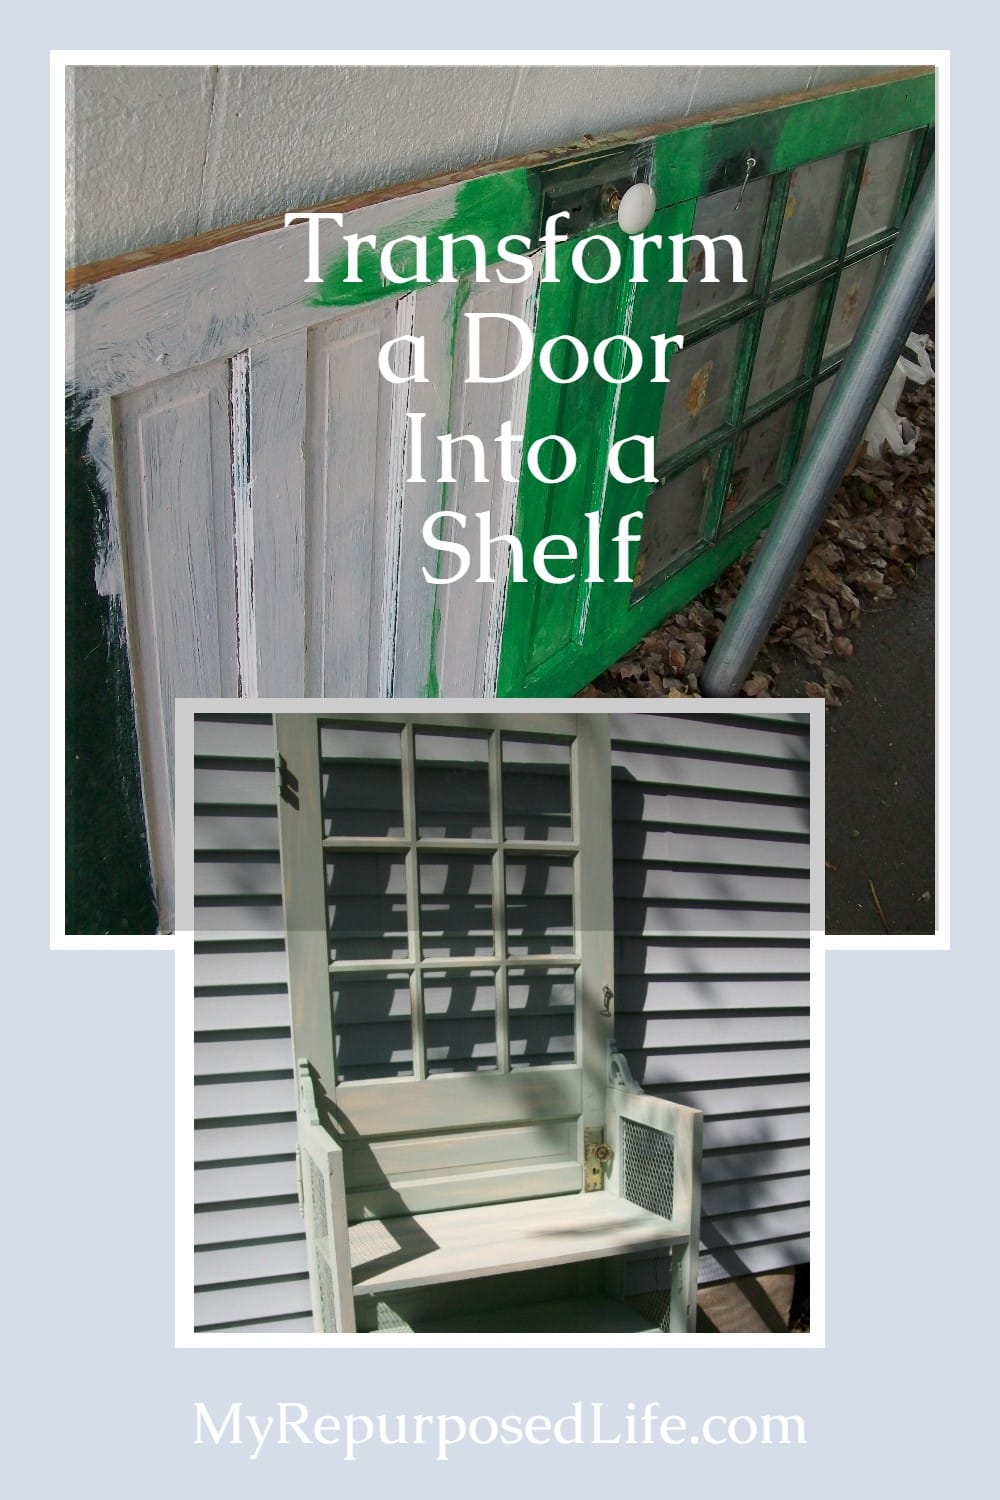
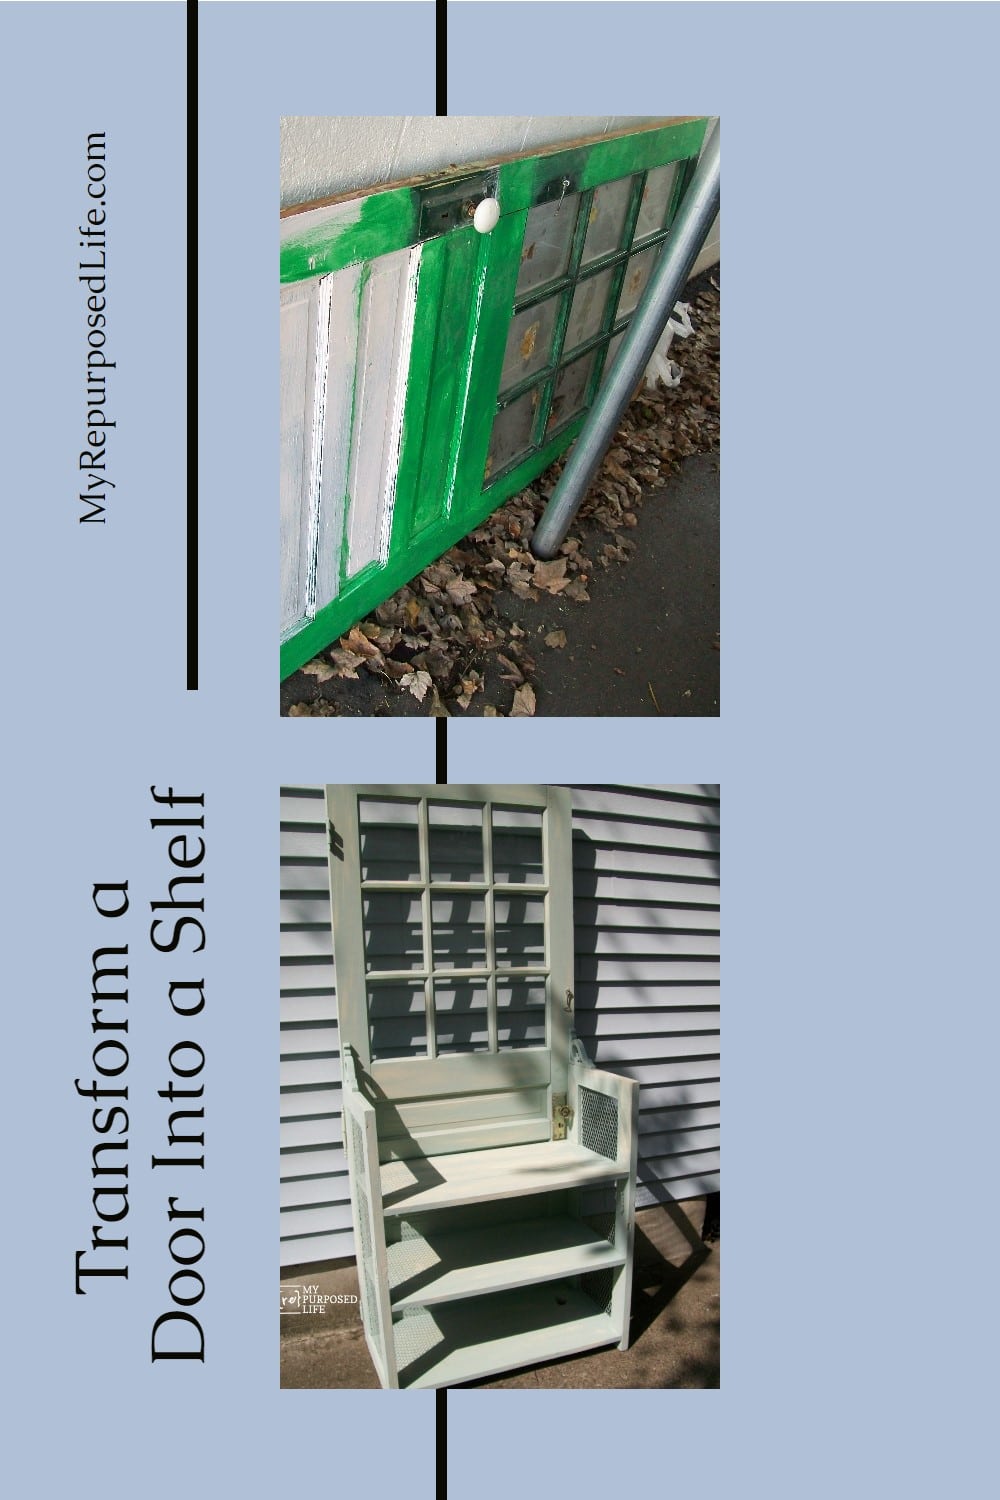
The door had some fabulous chippy paint on it. However, getting the new wood and the white cupboard doors to match the chippy door was a little tricky.
Prepare Repurposed Furniture Project for Painting

Luckily, I had some paint near the same color as the door.

Although taping the window panes is time-consuming, I won’t have to scrape off the paint on the numerous window panes.

This is the back side of the door. That’s a pretty wild paint job, huh? I’m sure you know by now the easiest way to paint a project like this is by using a paint sprayer. My favorite is the Super Finish Max Extra.

I love the new color. In fact, I love everything about the repurposed door bookshelf.

You can see that the paint sprayer is the only way to paint a project like this. Using a paintbrush would leave you with lots of runs and drips.

You can see that the paint sprayer is the only way to paint a project like this. Using a paintbrush would leave you with lots of runs and drips.
Dry-brush Furniture Projects

I used a light cream-colored paint to do a dry brush effect. This was done to give the project some definition.

In addition, the holes from the pocket screws were filled with spackling.

A light sanding helped everything blend well together.

I wasn’t sure if I should put the glass knob on.

I felt like it needed a little something where the small doors meet the large door. What do you think?
Add Finishing Touches to Repurposed Door Nightstand
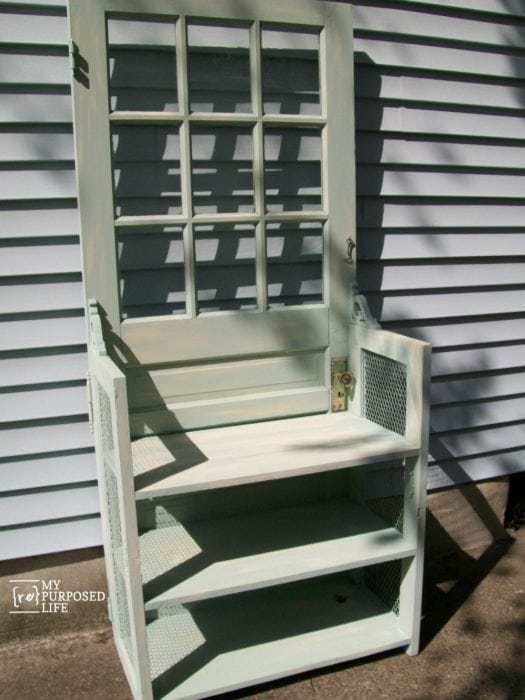
I added the finishing touches . . . door latch, door knob, and brackets in the corner.
gail
Check out other door projects here or this fun Cupboard Door Bookshelf
See More Hall Tree Project Ideas Here
Beautiful results. I love everything about the door up-cycle project. The color is my favorite!
Looks super cute! Thanks for the link to my nightstand 😉
Hello,
the link for the harbor freight sprayer you use is now just a redirect to the main site. Which did/do you use for painting the furniture pieces?
wow this turned out great!!! Great idea how to repurpose the door.
love it
That is so beautiful! I think it would be a great outdoor piece too! Maybe for a garden? Love!
Would love for you to share at Calling All Crafters, today!
http://allthingsfee.blogspot.com/2011/04/calling-all-crafters-4th-edition.html
This looks fantastic! I love door transformations, and this is one the coolest I have seen. I am new to the linky party, but I do one every Friday as well. I showcase the winners on Monday. I would love it if you would stop by and link up! Have a lovely weekend. -Karen
http://www.redoux.blogspot.com
Hmmmm, two comments on your blog in like 5 minutes! I feel like I’m stalking you! This looks wonderful, it’s amazing what you can do with other peoples ‘tat’ very inventive!
Hey Gail! Featuring this on Craft Gossip this afternoon 🙂
Visiting from FJI! This is simply brilliant. I never in my life would have though to use a door like that. And I love the color(s) that you used on it as well. And dang it…I HAVE to get me one of those jigs!! I keep seeing people use it on their projects, and it makes everything so nice and neat.
I started a weekly link party (on Sundays) over at Addicted 2 Decorating. I hope you’ll come link up!
Wow oh Wow this is FABULOUS! You always do such amazing repurpose jobs. I love the chicken wire and the color. I hope you will share this at my VIP party today =) http://designergarden.blogspot.com/2011/04/vip-party-11.html
YOu are too creative. Love this! I wish you were in my neighborhood!