Home » Repurposed Items » Repurposed Glassware Totems And More

Repurposed Glassware Totems And More

As an Amazon Associate, I earn from qualifying purchases.

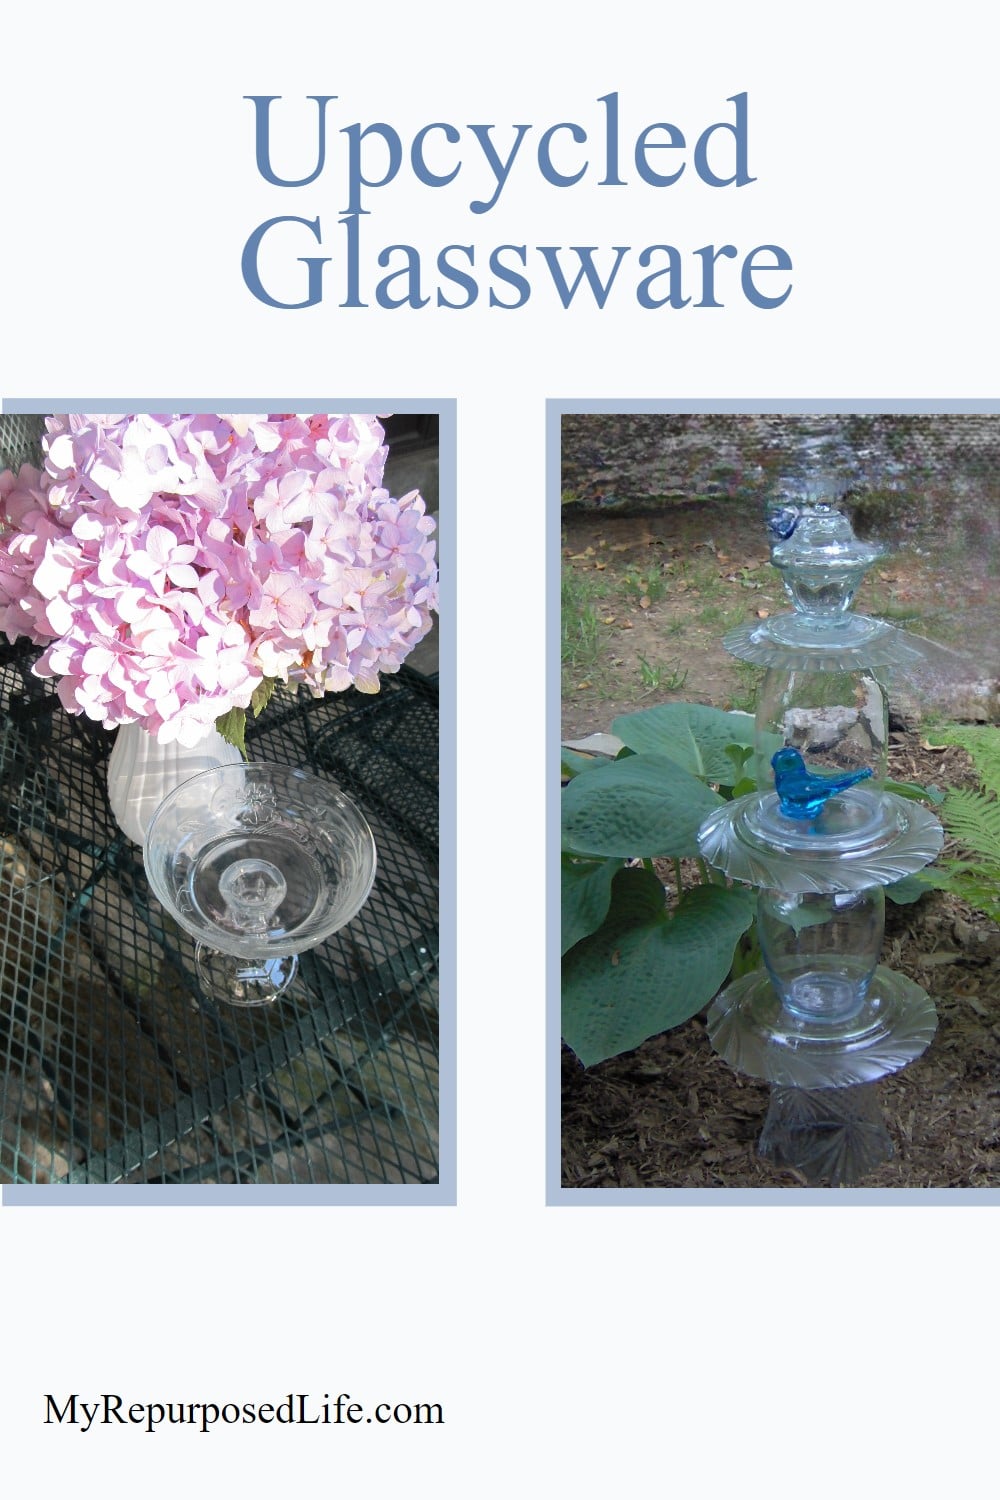
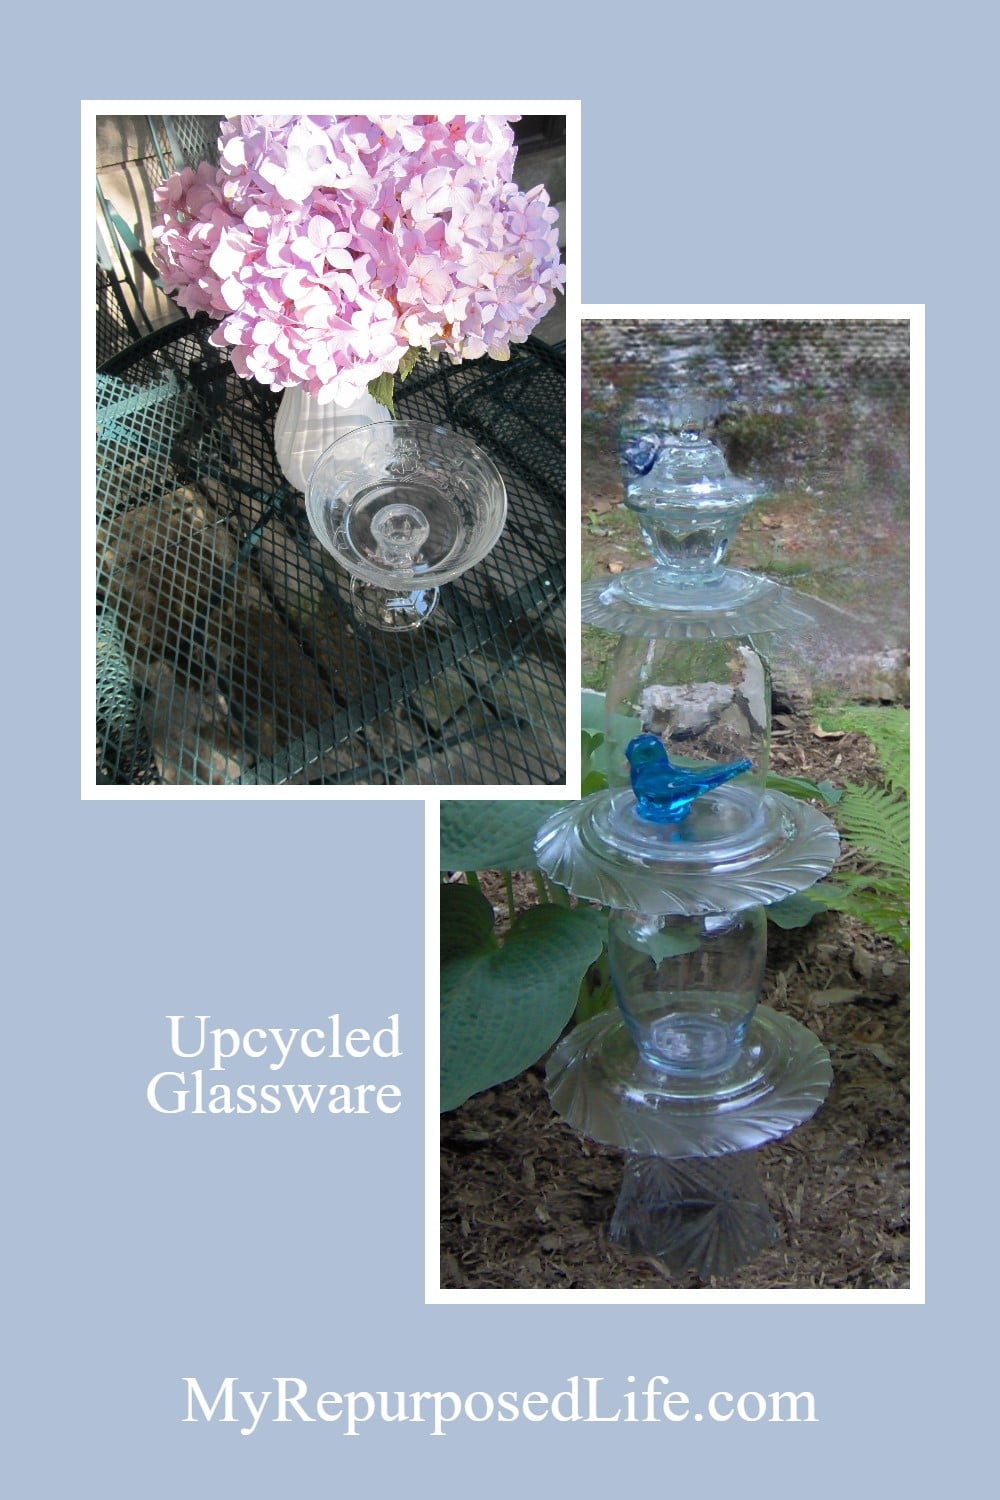
Looking for a creative way to add charm and character to your garden? Repurposed glassware totems are a beautiful and budget-friendly option! With a little imagination and a collection of thrifted or mismatched glass pieces, you can create stunning glassware garden art that sparkles in the sunlight and brings a touch of whimsy to your outdoor space. In this post, I’m sharing some of my favorite DIY glass totems, including how they come together and tips to make your own.

clear glass garden totem with a blue bird figurine

Save & Share on Pinterest!

If you are a regular reader, you know I like to tinker and design things, like candlesticks. So, I can’t paint a lick, but I can stack stuff.
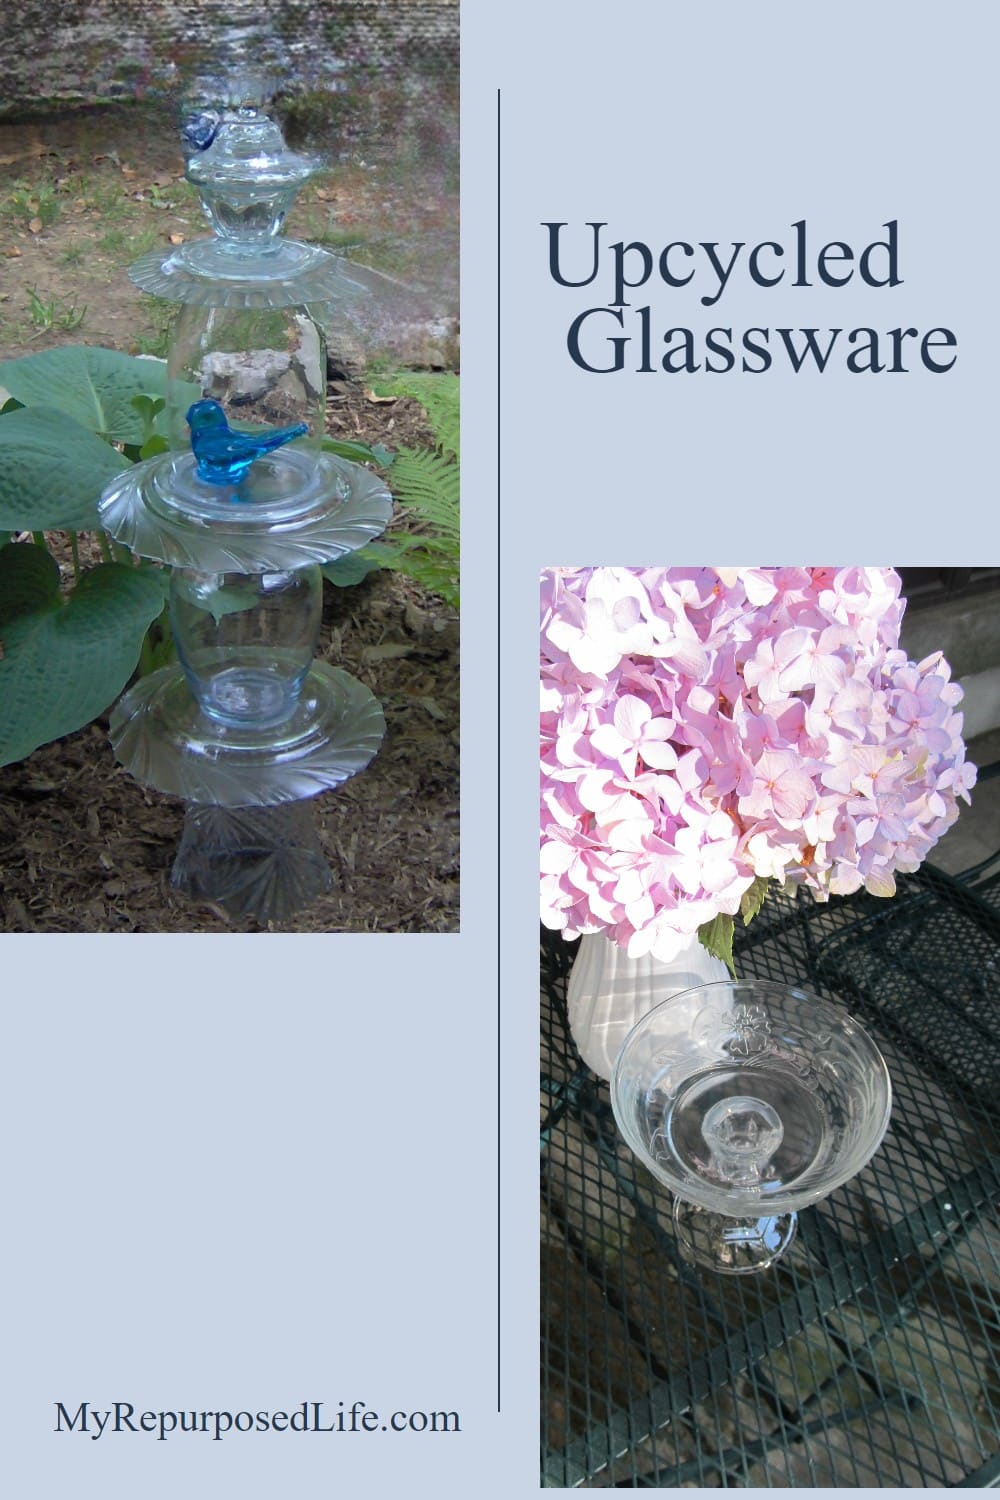
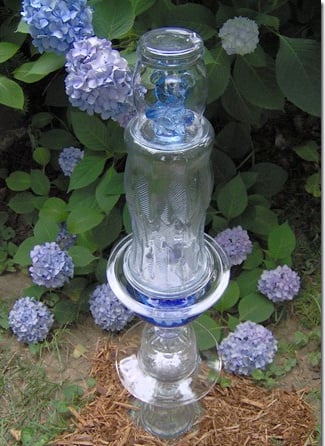
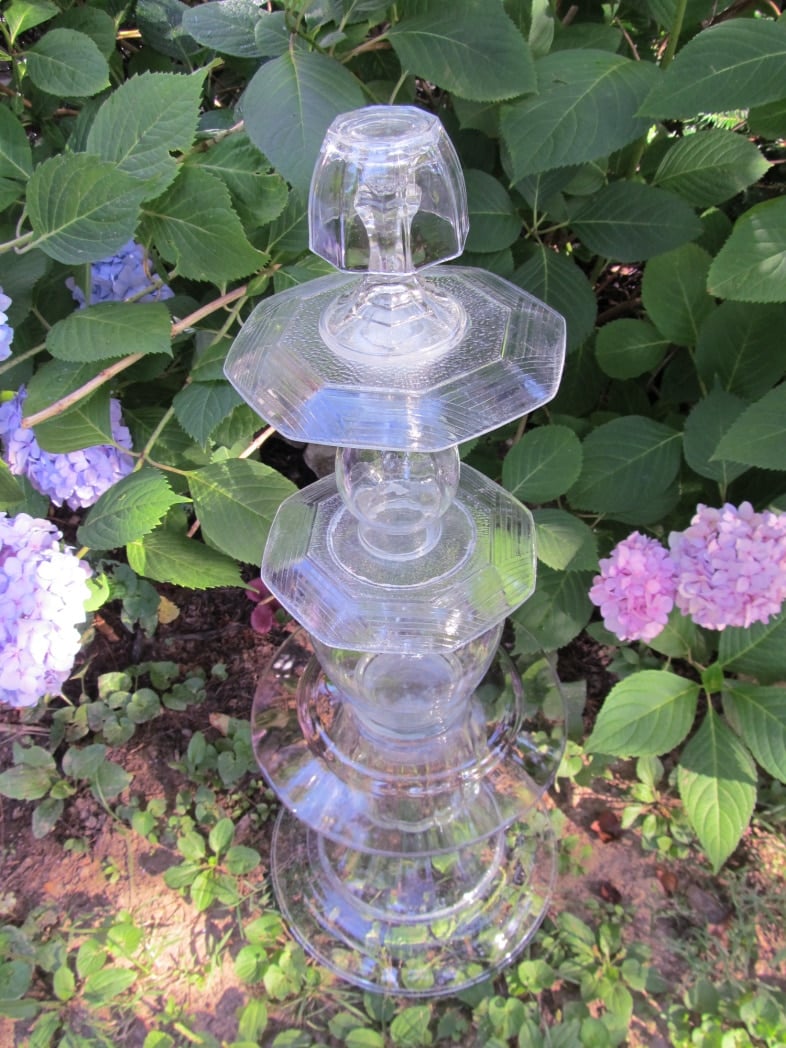
I haven’t made any totems in a long, long time. I made this glass totem for myself in May of 2008. I’m shocked that it’s been that long.

glass totoem with top broken off

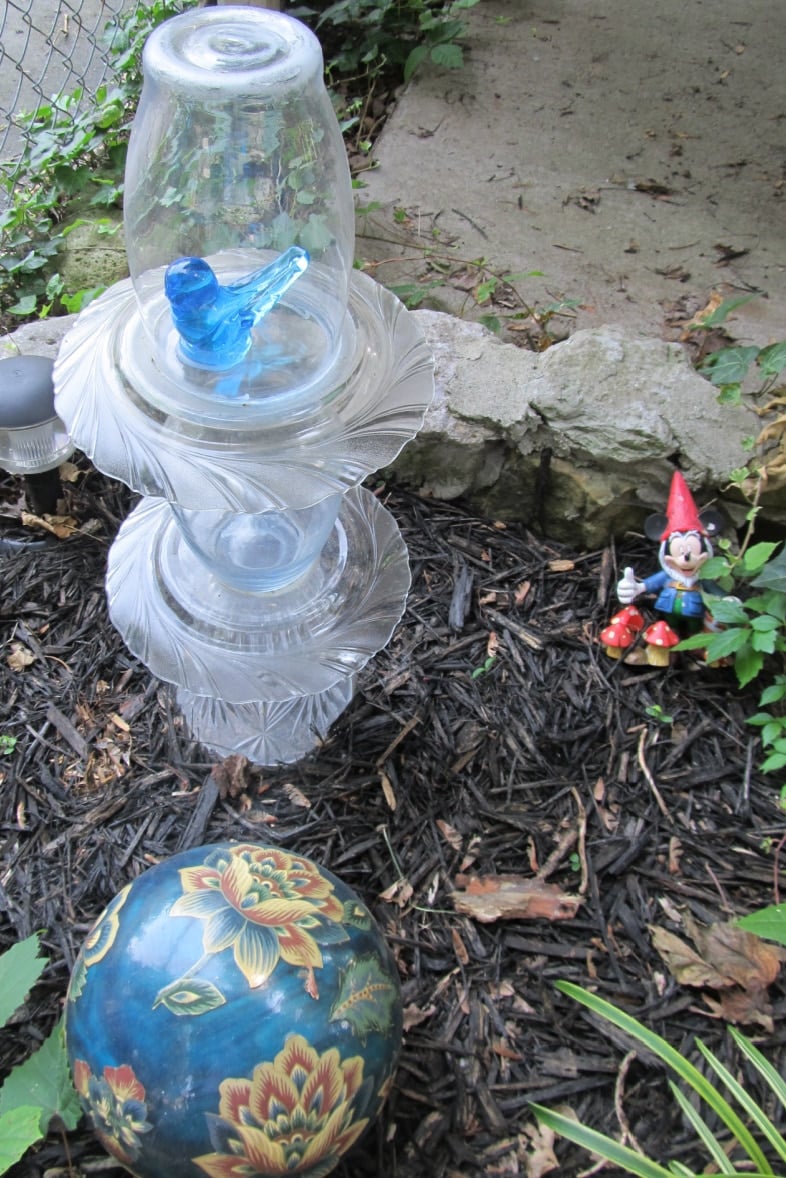
It’s held up so well, all except for an incident with a ladder last year while the gutters were being cleaned out. The top plate didn’t survive. However, the topper piece, which is vintage Avon, is fine. All these years later, it still has a home in my backyard camper retreat.

Related Content: Decorated Bowling Ball as a Gazing Ball

Be sure to check out these 13 MUST-SEE tips for making successful garden topiaries!

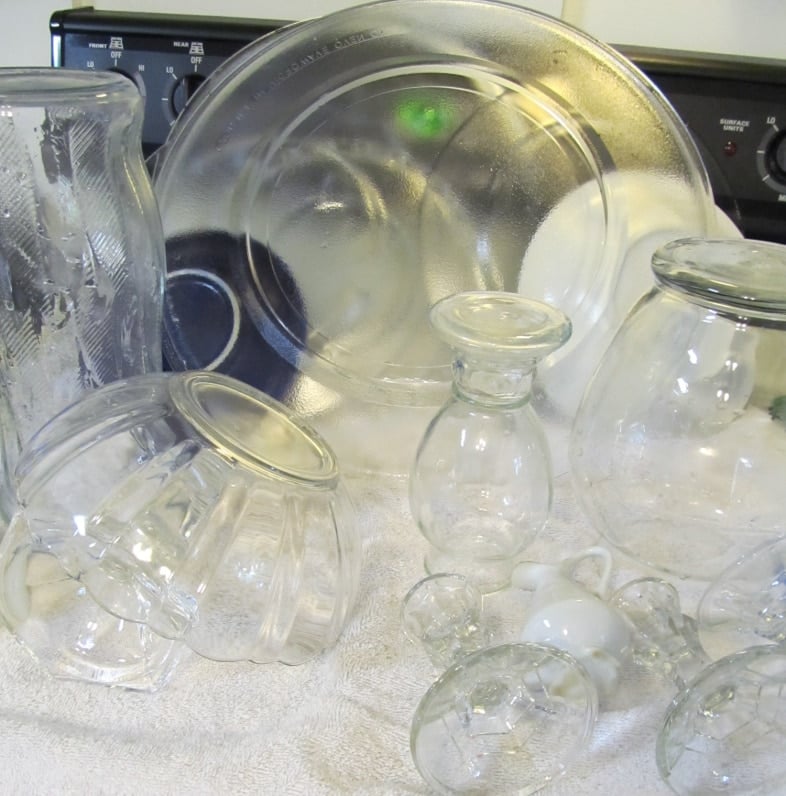
Thrift Store Glassware

dirty glassware in a cardboard box

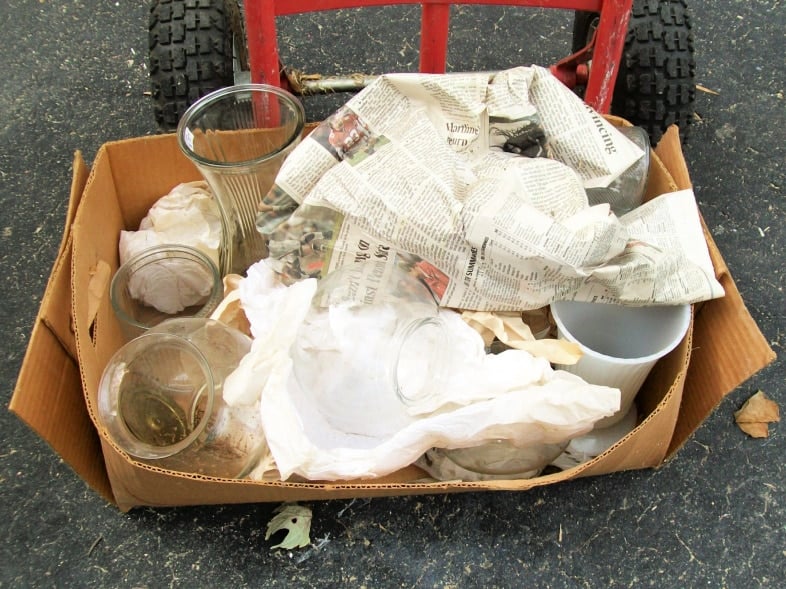
I have sold a few totems at the booth, so I decided it might be time to dig in my stash and make some more with repurposed glassware.

Wash & Dry Glassware

random glassware

The first step is to wash everything and dry it really well. (You don’t want any moisture inside any of your pieces).

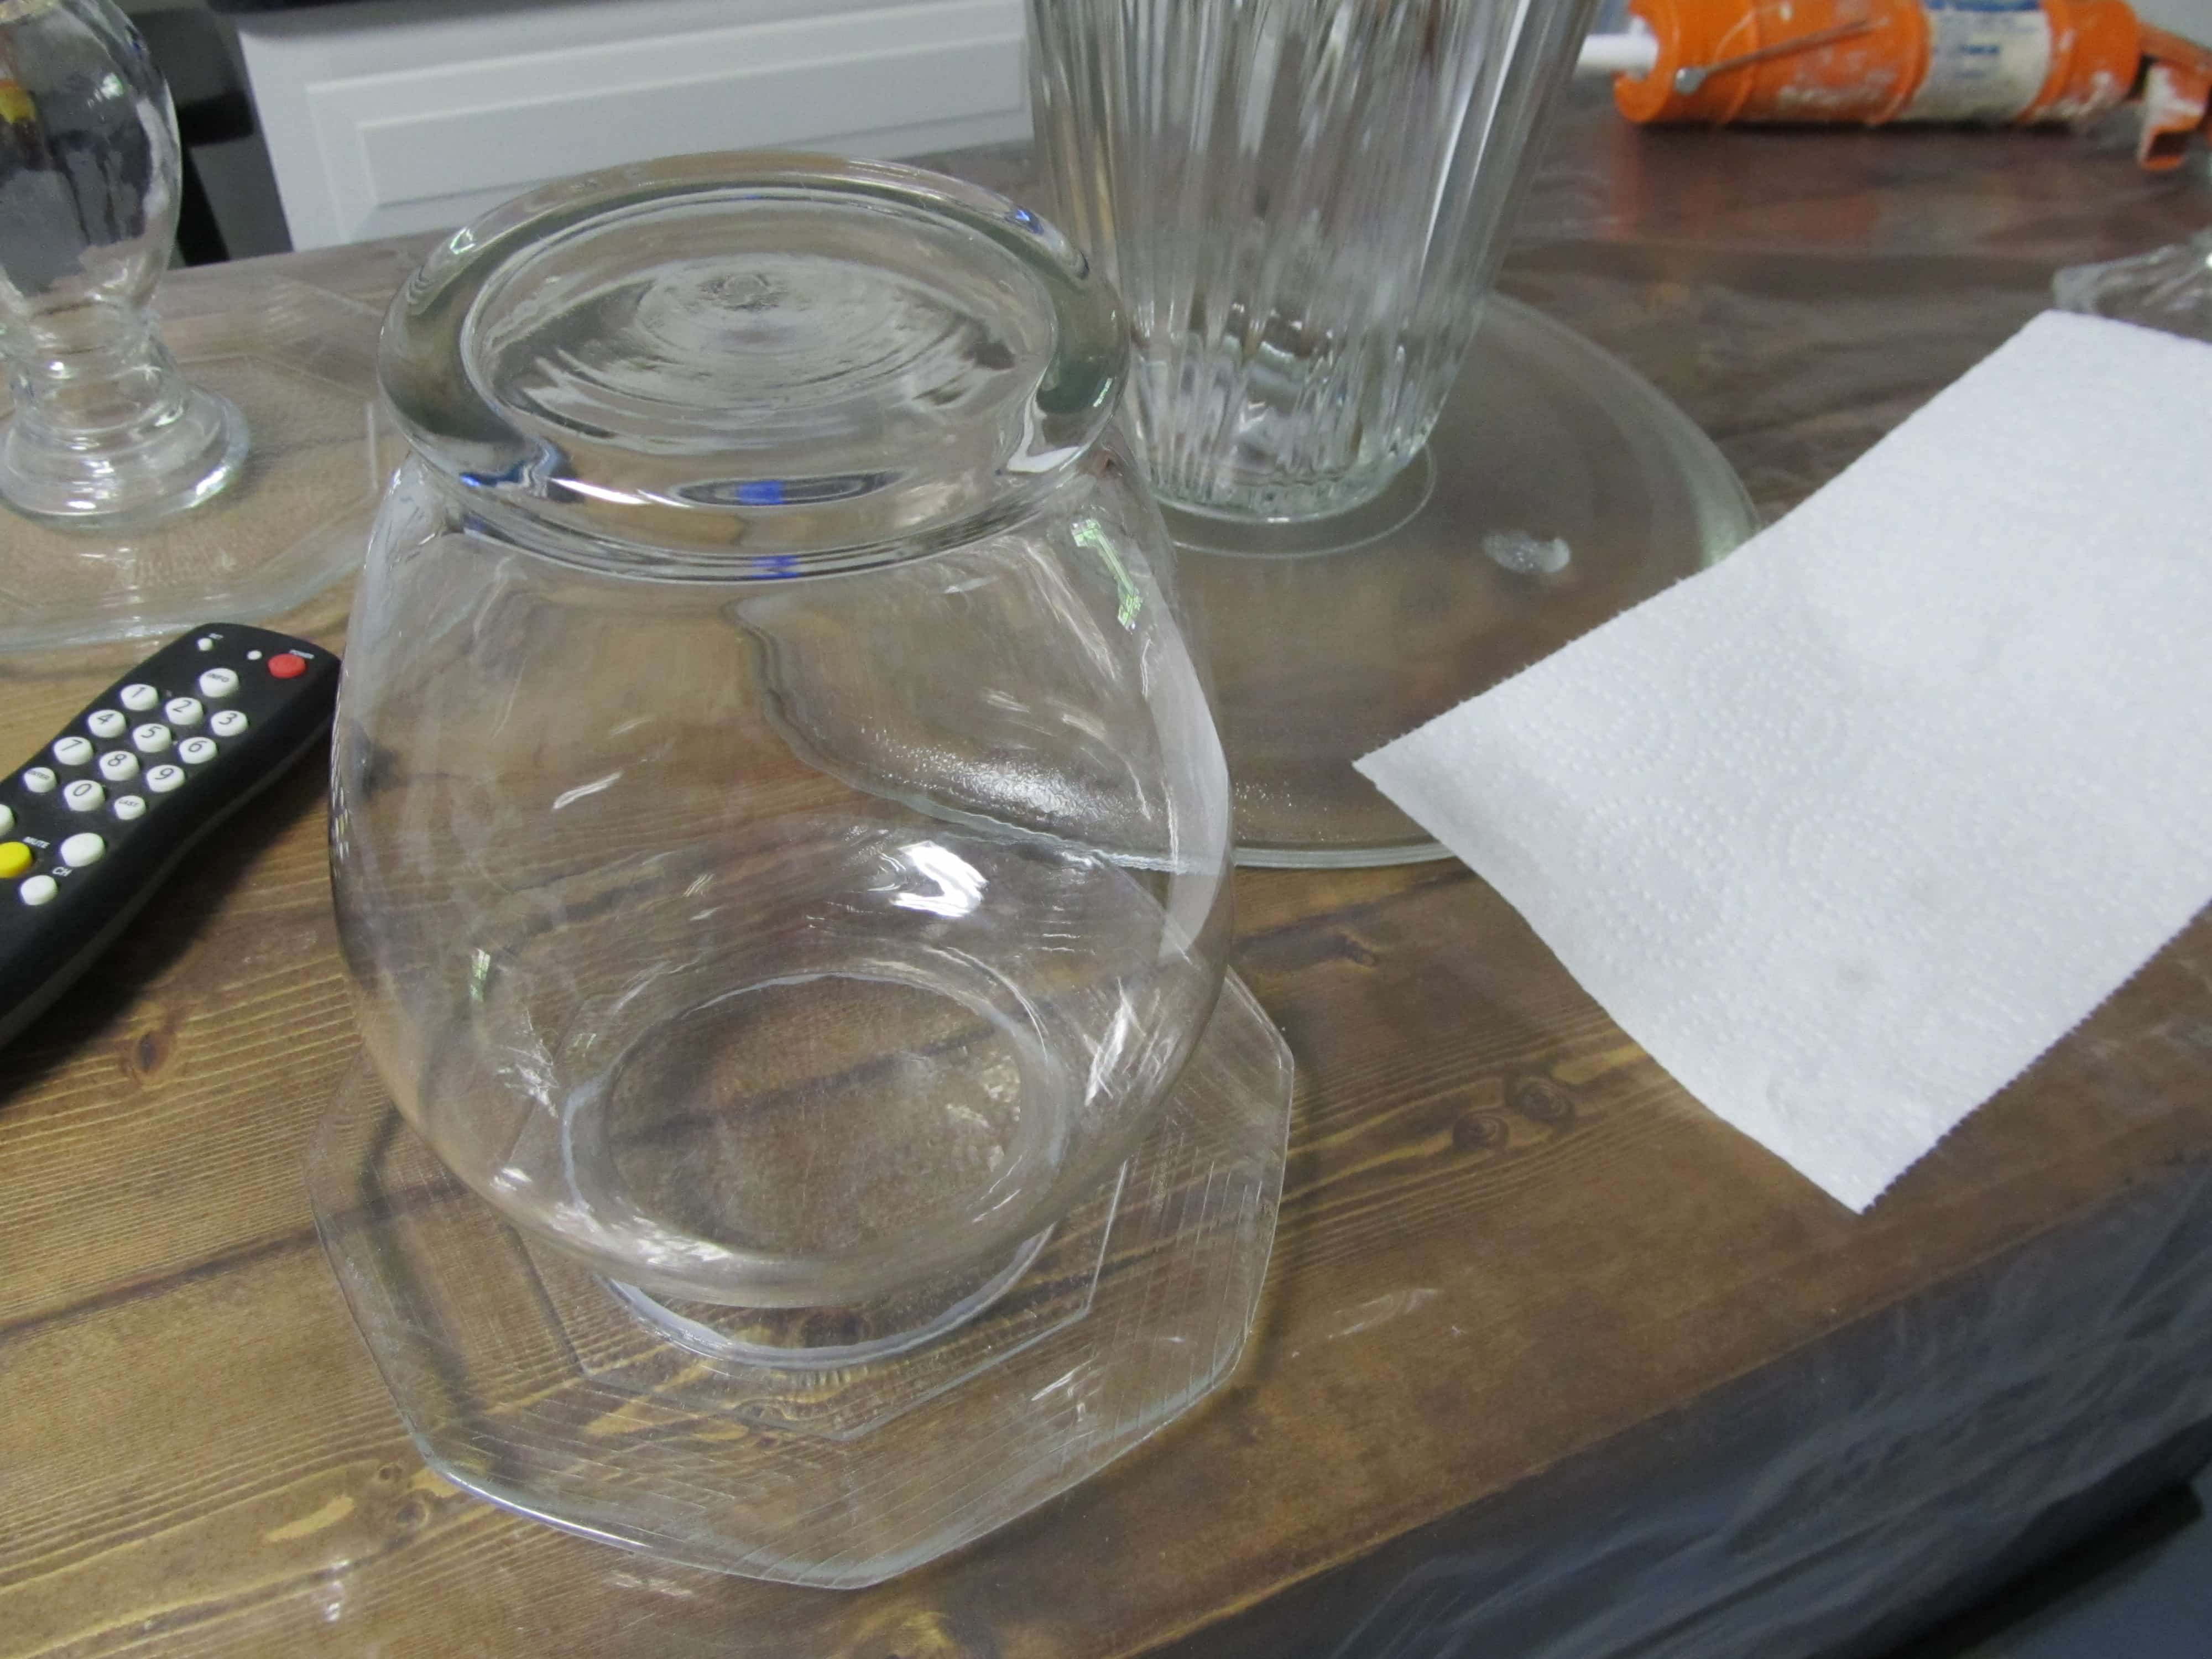
Sort Your Repurposed Glassware

thrift store glassware sitting on kitchen counter

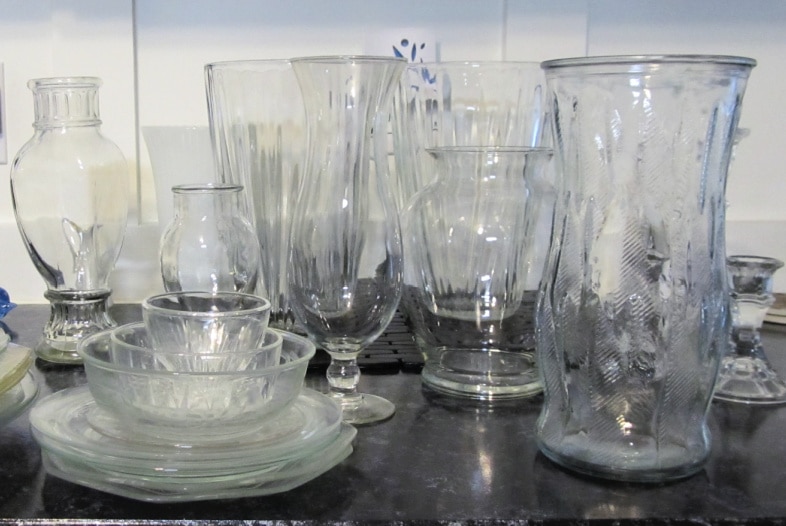
Here are all the pieces waiting to be stacked.

Begin Stacking Pieces of Glassware

platter, vase, adhesive, level and caulk gun to make glass totems

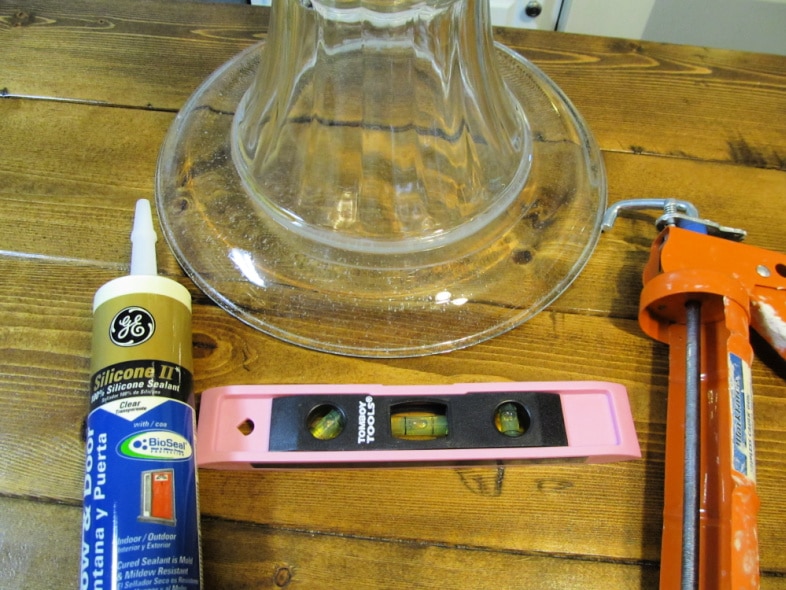
These are the tools of the trade, a small level, GE clear silicone, caulk gun. In addition, it is useful to keep a few paper towels handy.

vase with adhesive on the rim to make a totem

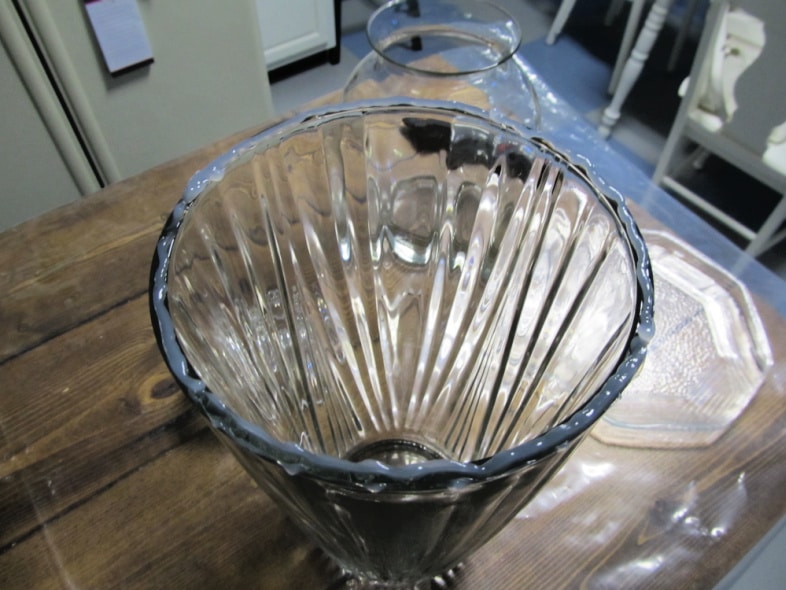
Using the caulk gun, I applied some silicone to the top of this vase.

adhesive oozing out between vase and platter

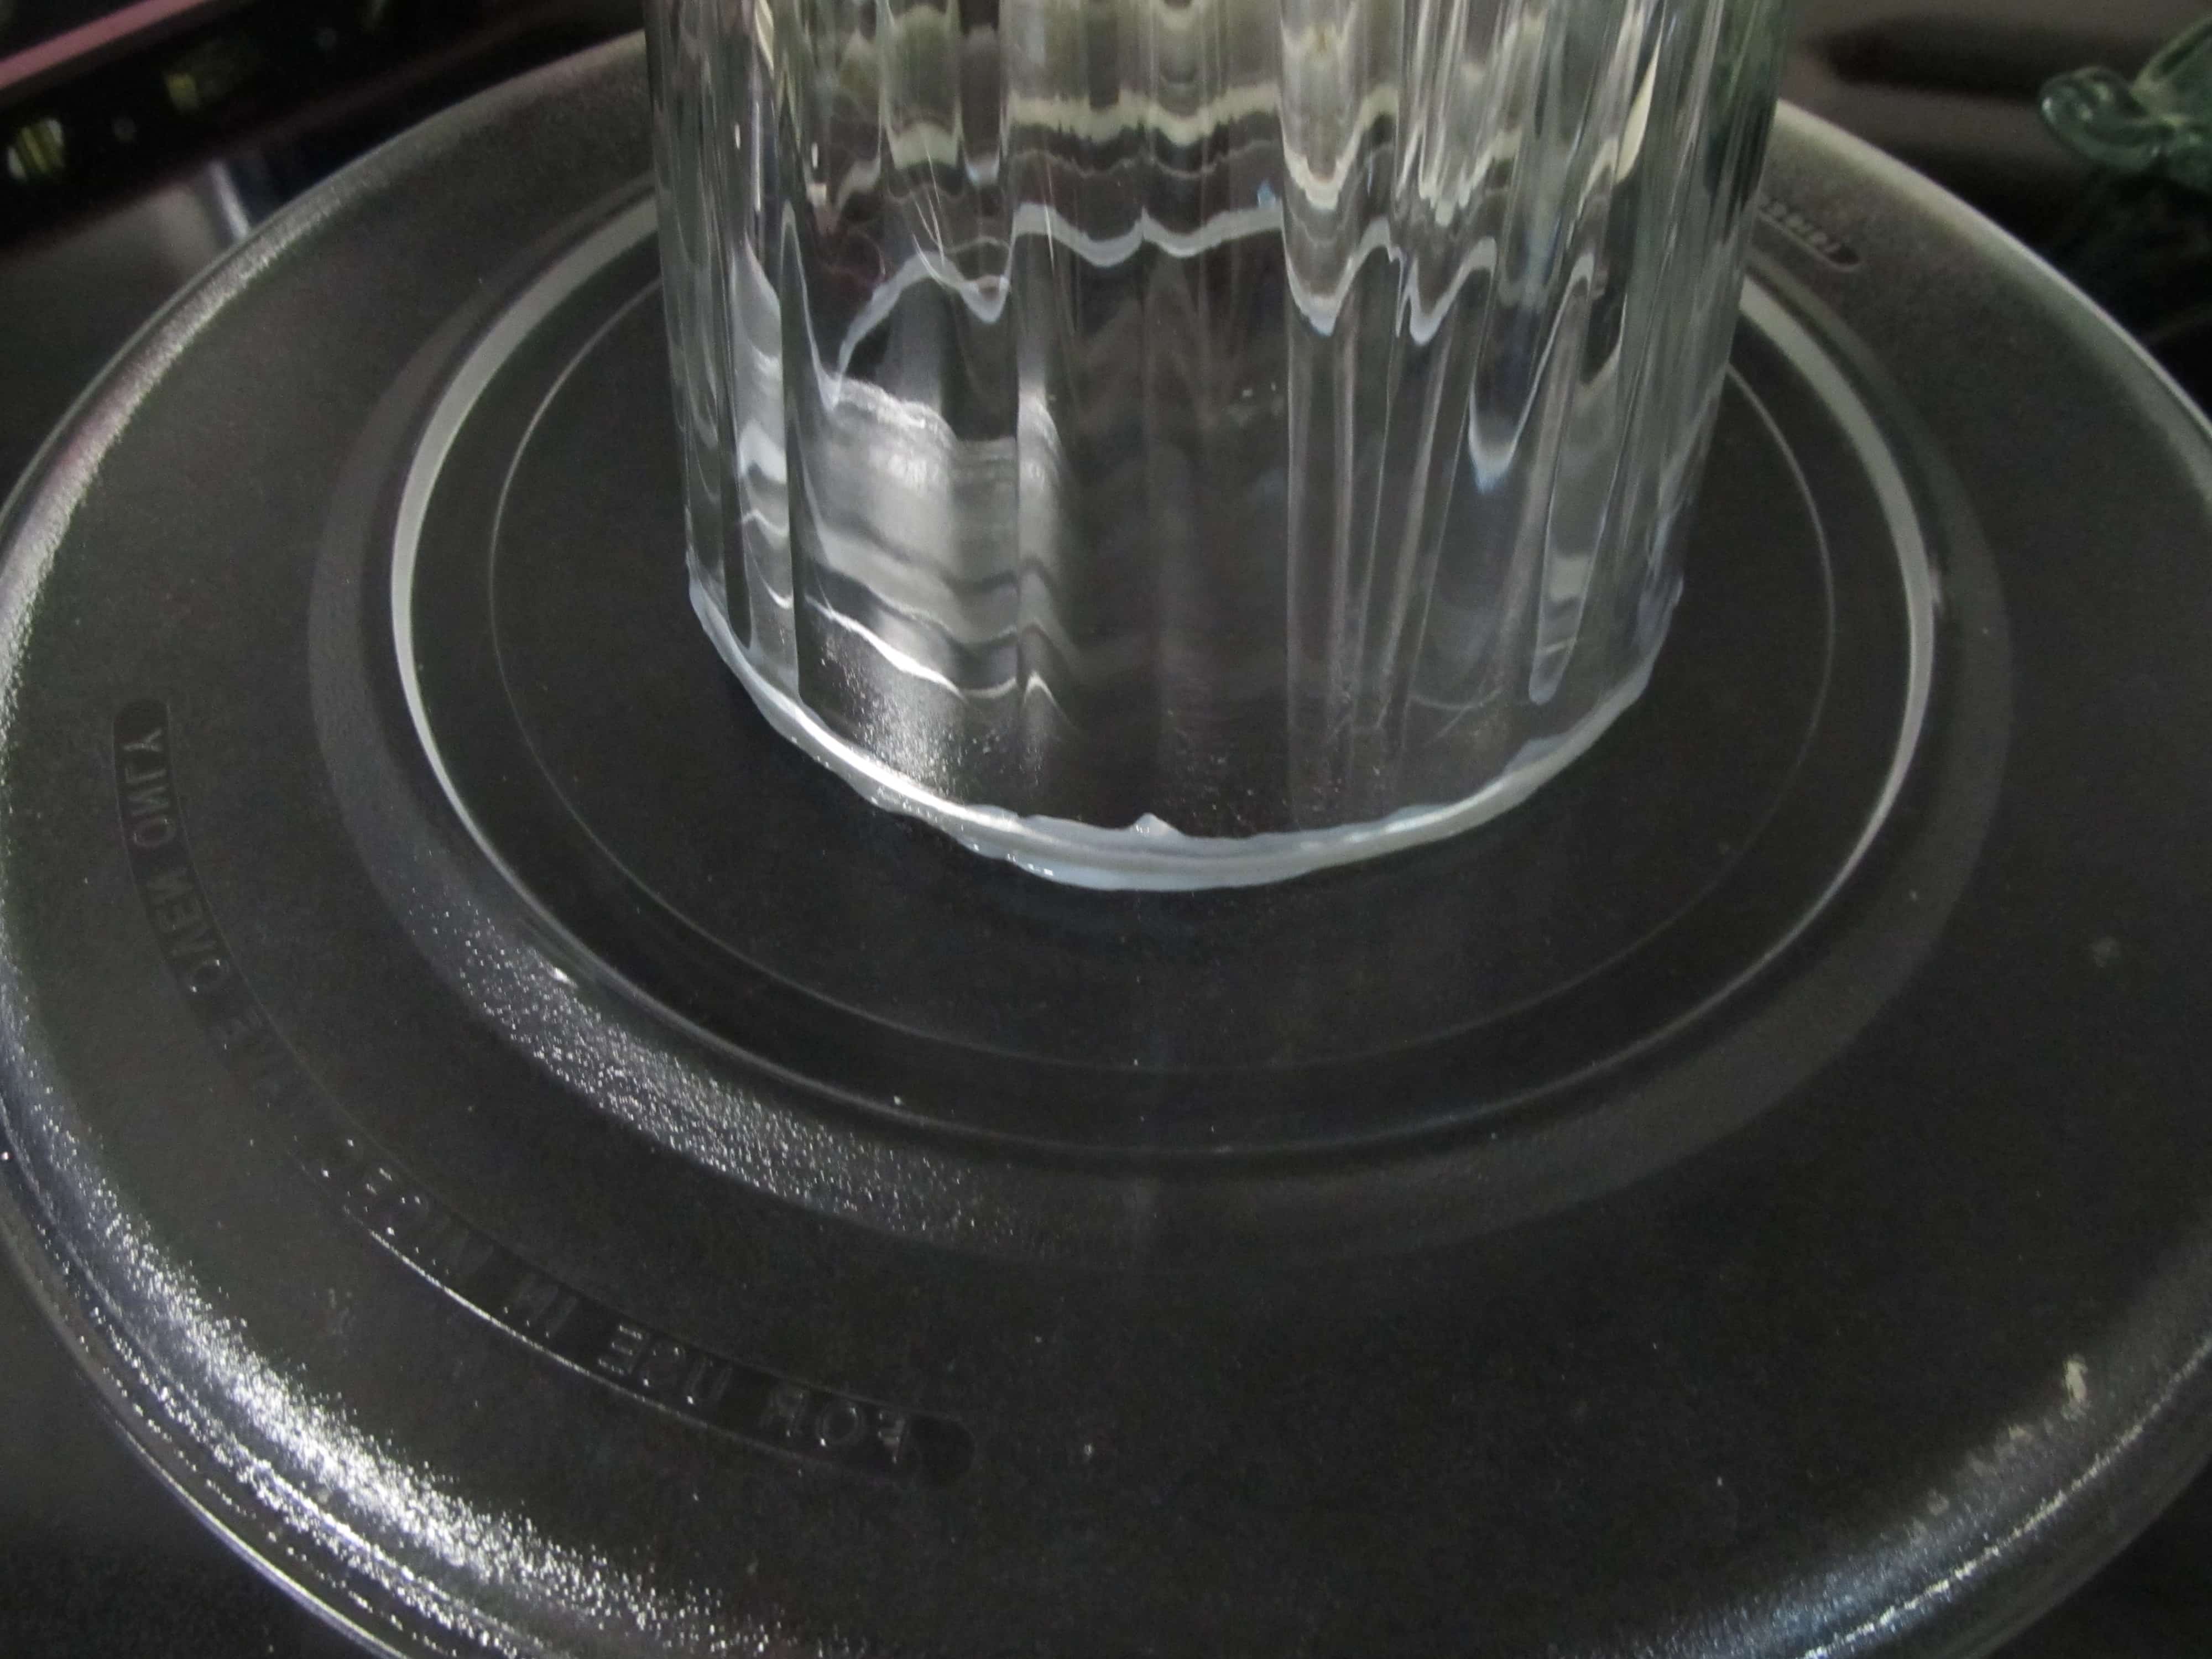
Then I turned it over and centered it on a large microwave plate. I like using substantial, heavy pieces for my base. After you place it in your garden or flower bed, you can throw a little mulch on it to cover it up.

Wipe Away Extra Silicone

using your finger to wipe away excess adhesive

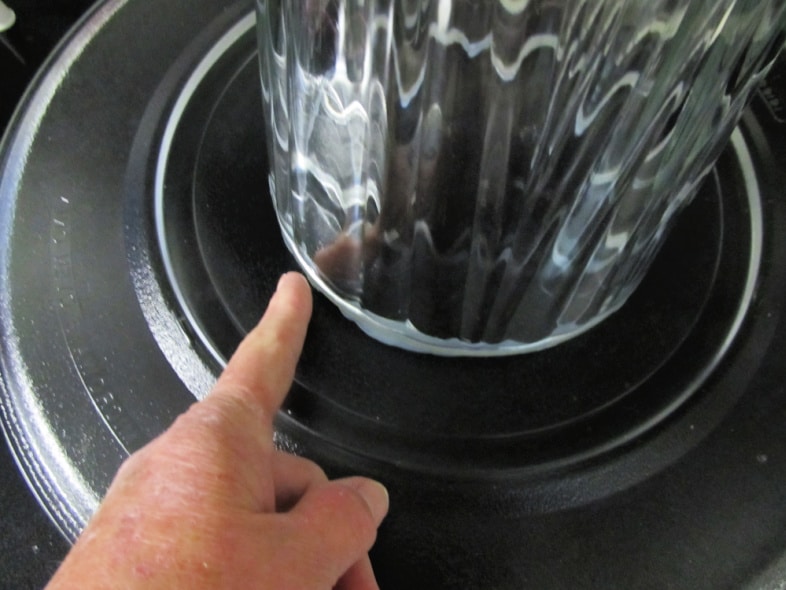
I use my finger to wipe off the excess silicone.

silicone adhesive on the vase rim

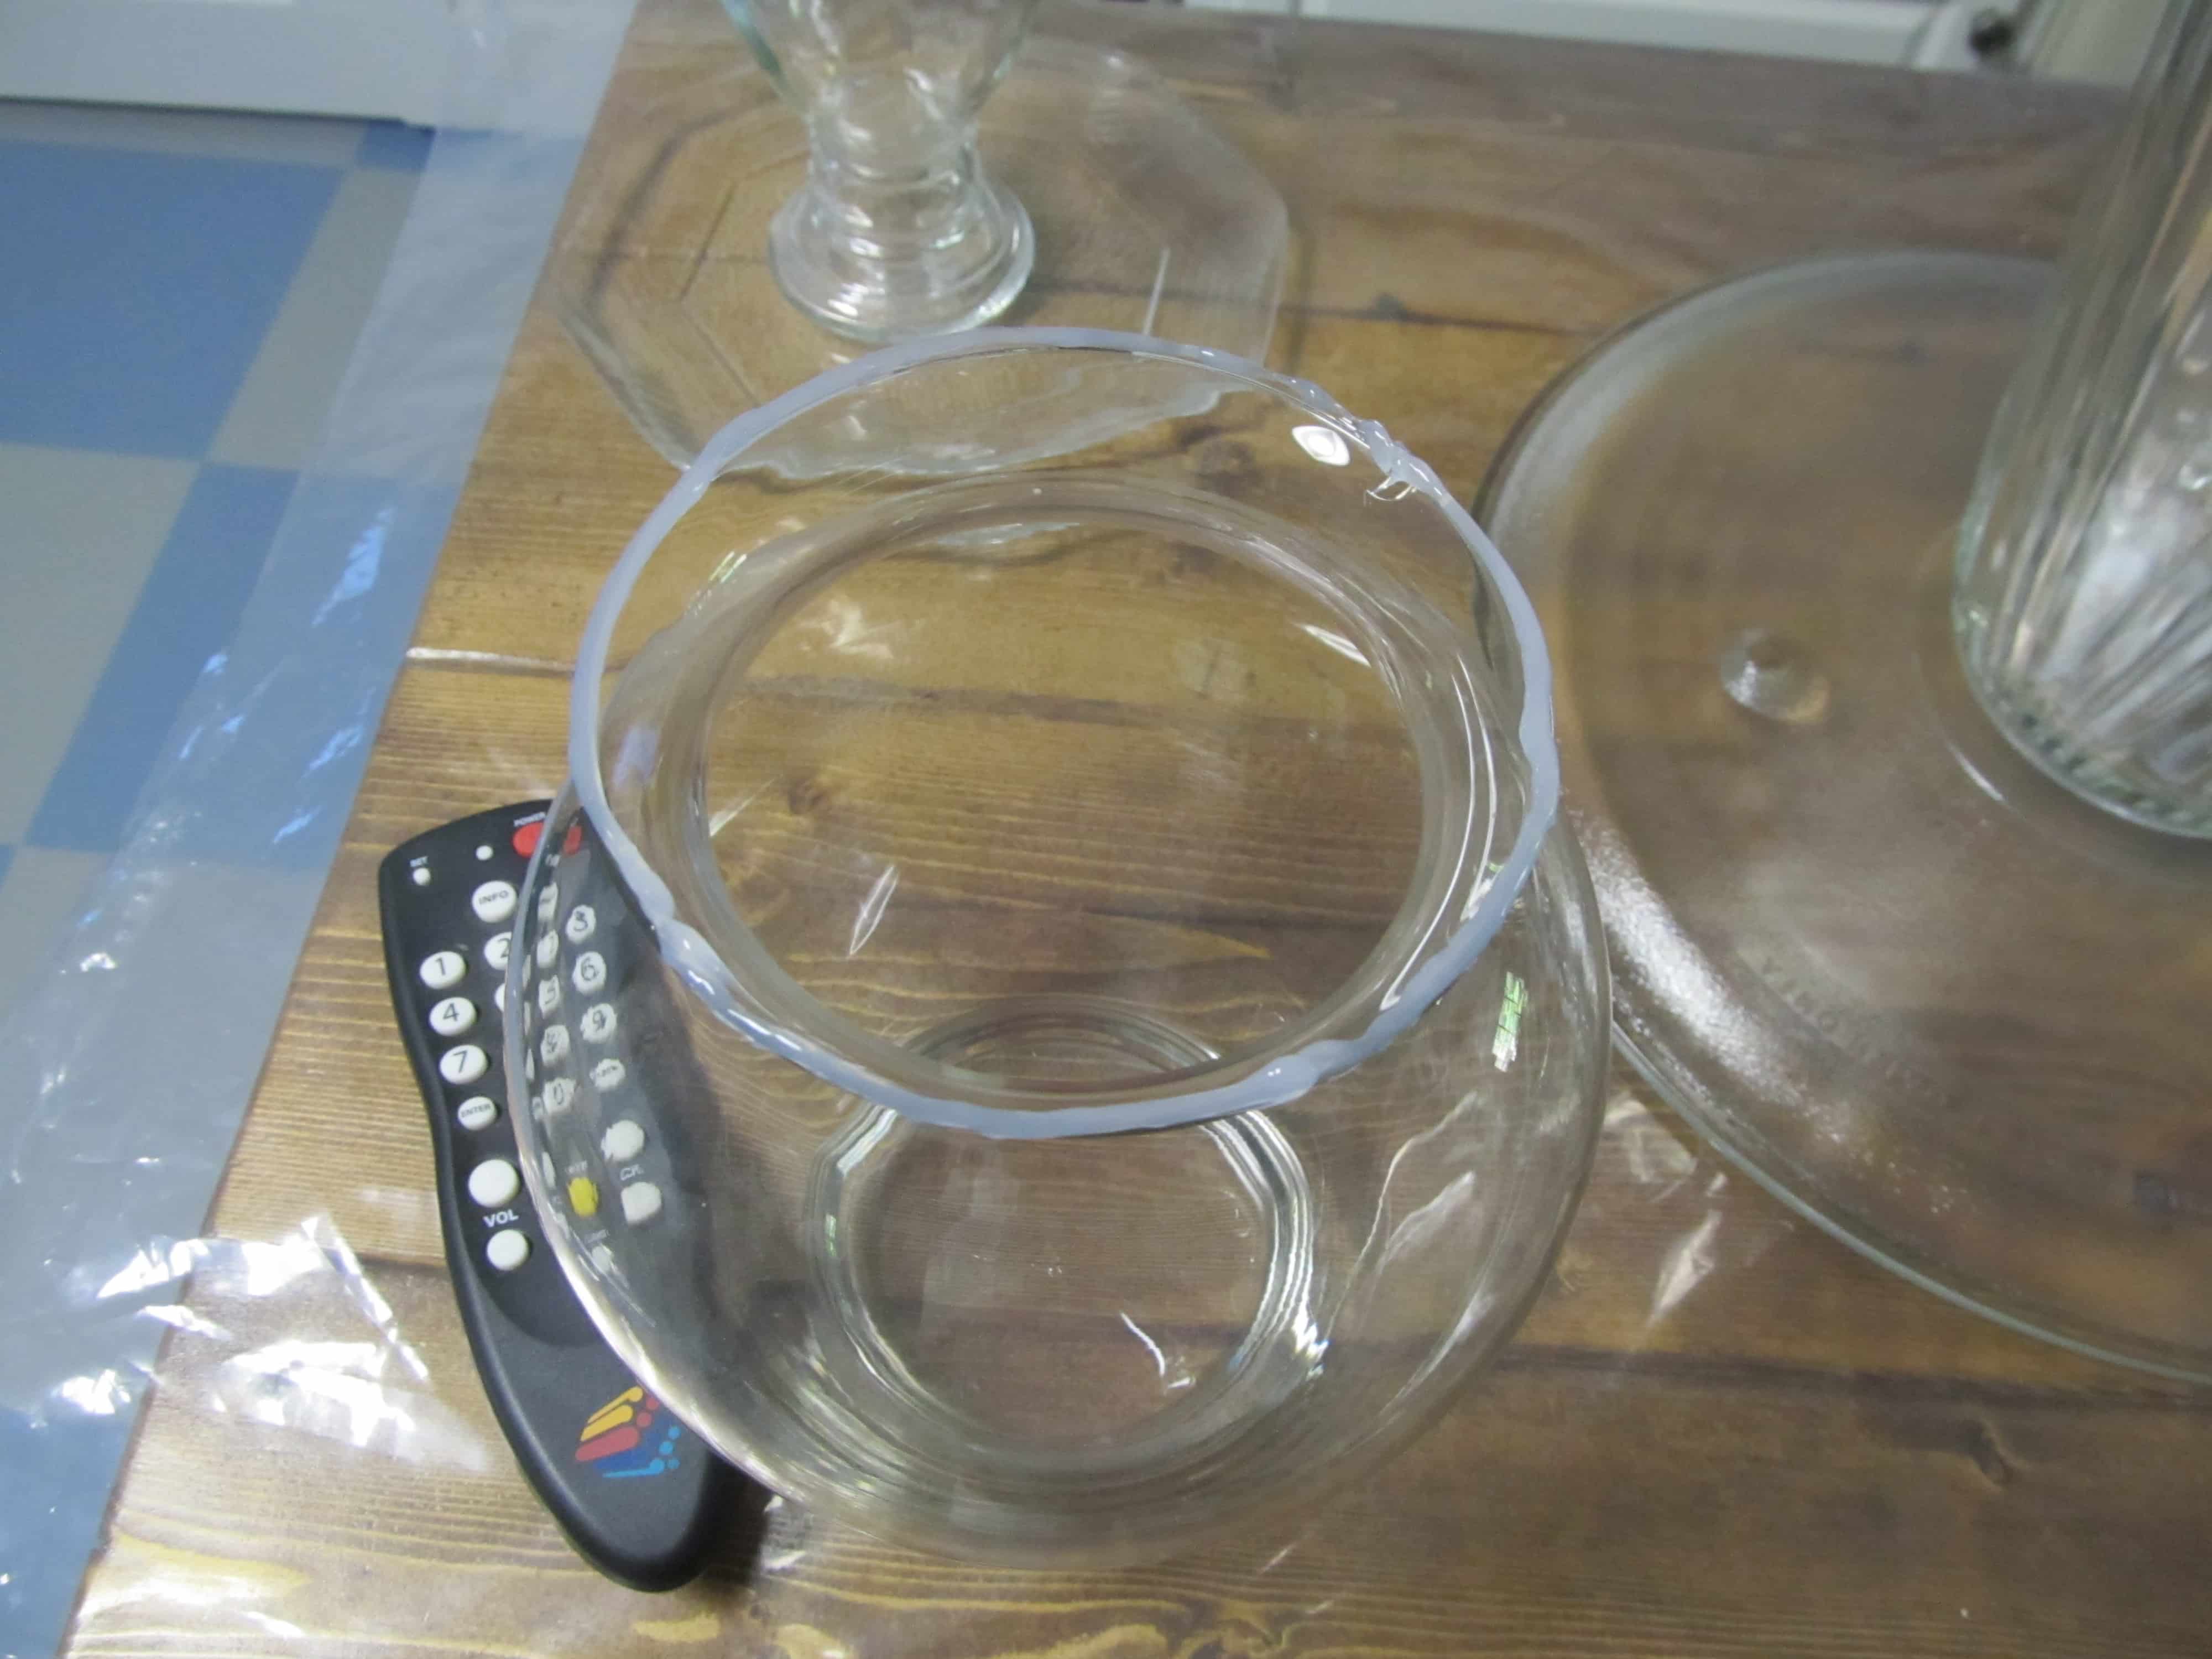
Then I apply silicone to another piece . . .

. . . and place it on a plate. After sets A and B dry and become secure, you can put those two sets together. They may slide off if you try to stack too many pieces simultaneously.

Assorted Repurposed Glassware

tall glass garden totem sitting in front of a bush

It’s very important to work on a level surface. Otherwise, after you walk away, your pieces will slide off center.

clear glass totem sitting beside a planter chair

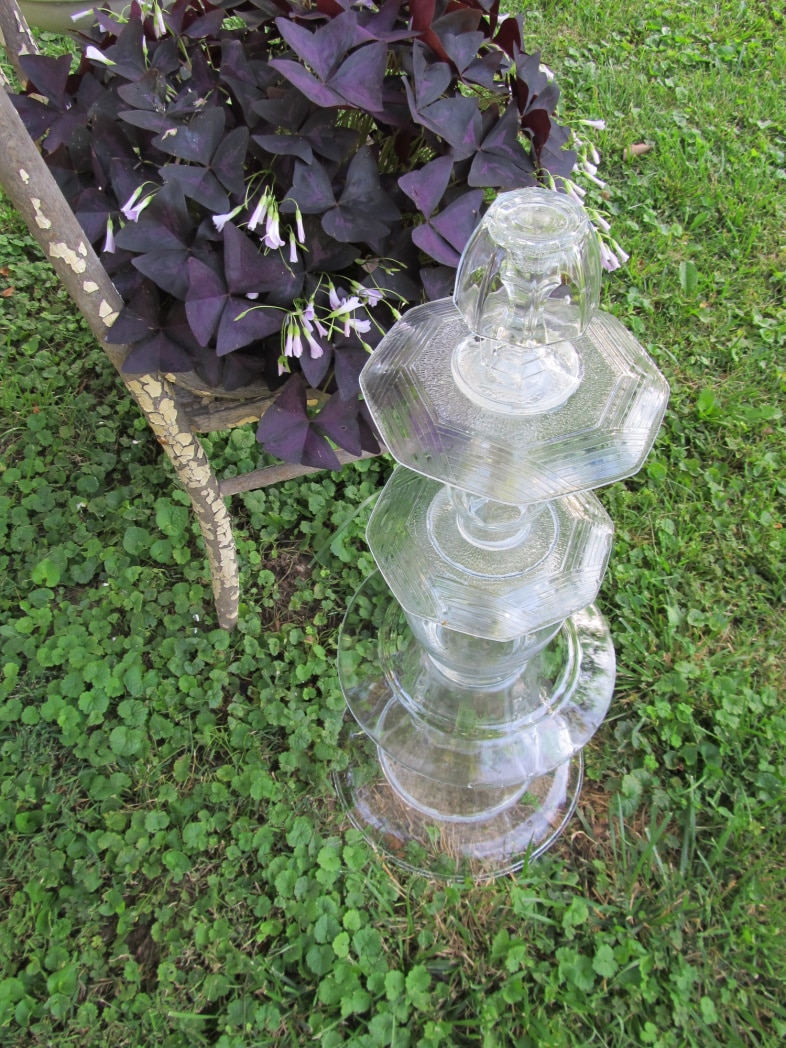
They are a lot of fun to make, but be warned, collecting the glassware can be pretty addicting! Like I said, I haven’t made any in years, but I still find myself picking up unique pieces while thrifting.

tall stacked glassware garden totem

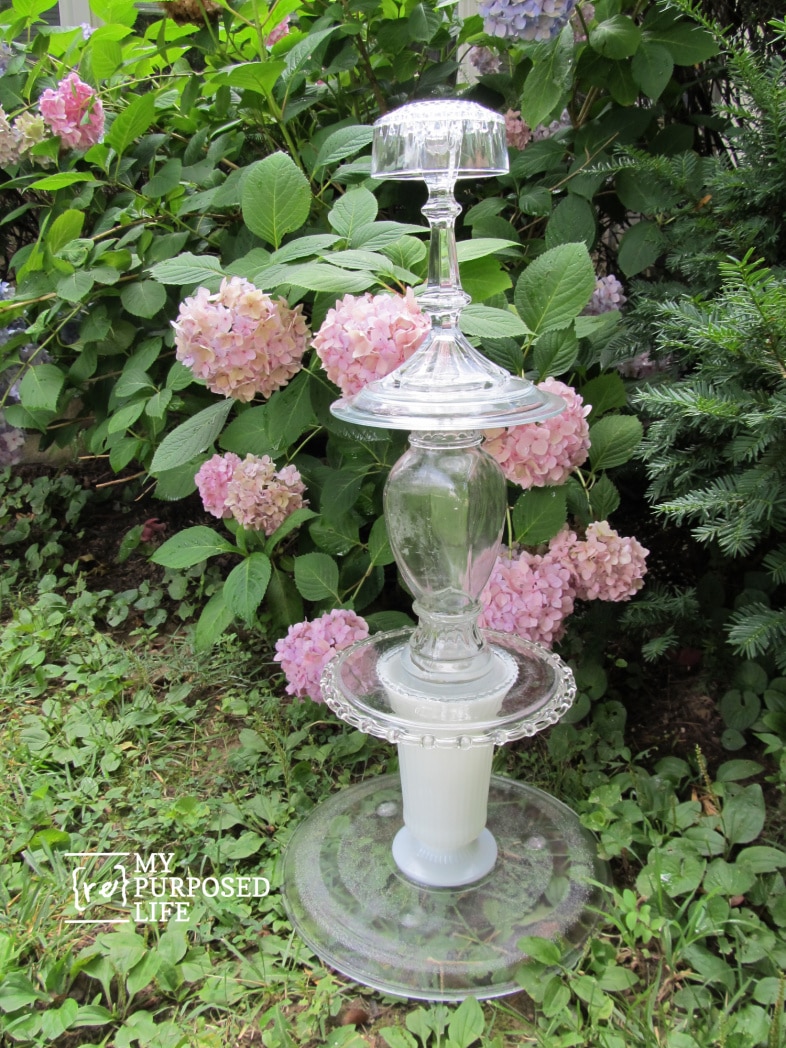
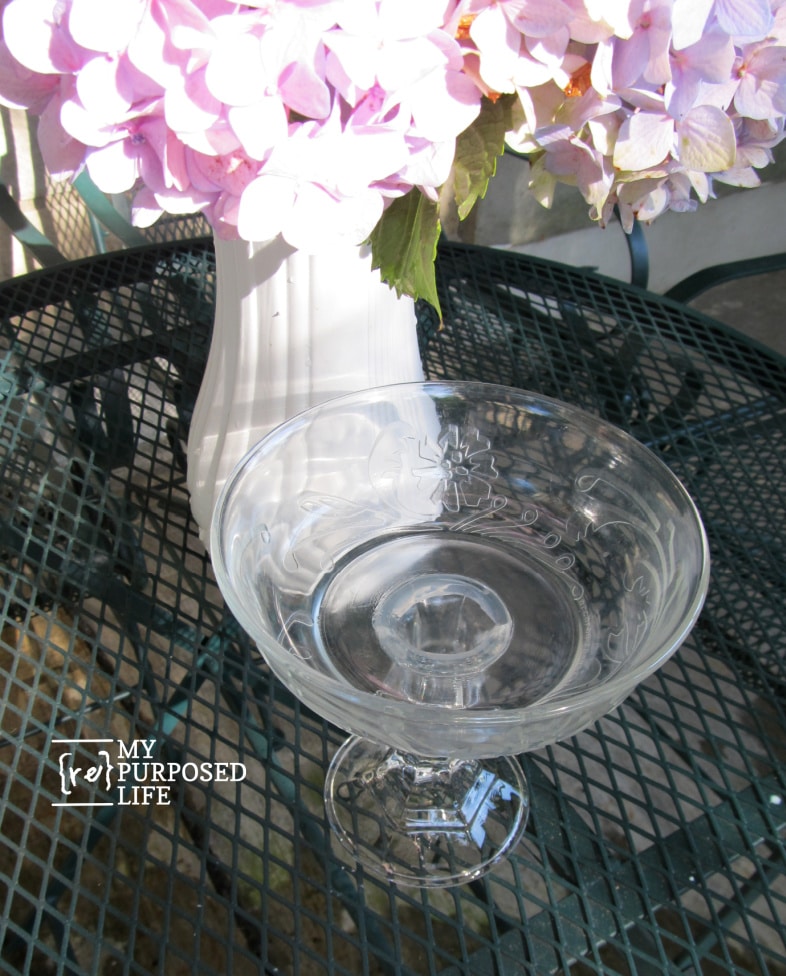
I made this repurposed glassware totem with a little bowl on top… it reminds me of a lamp.

Note the large plate on the bottom for good balance.

a clear plate stacked on a candle holer

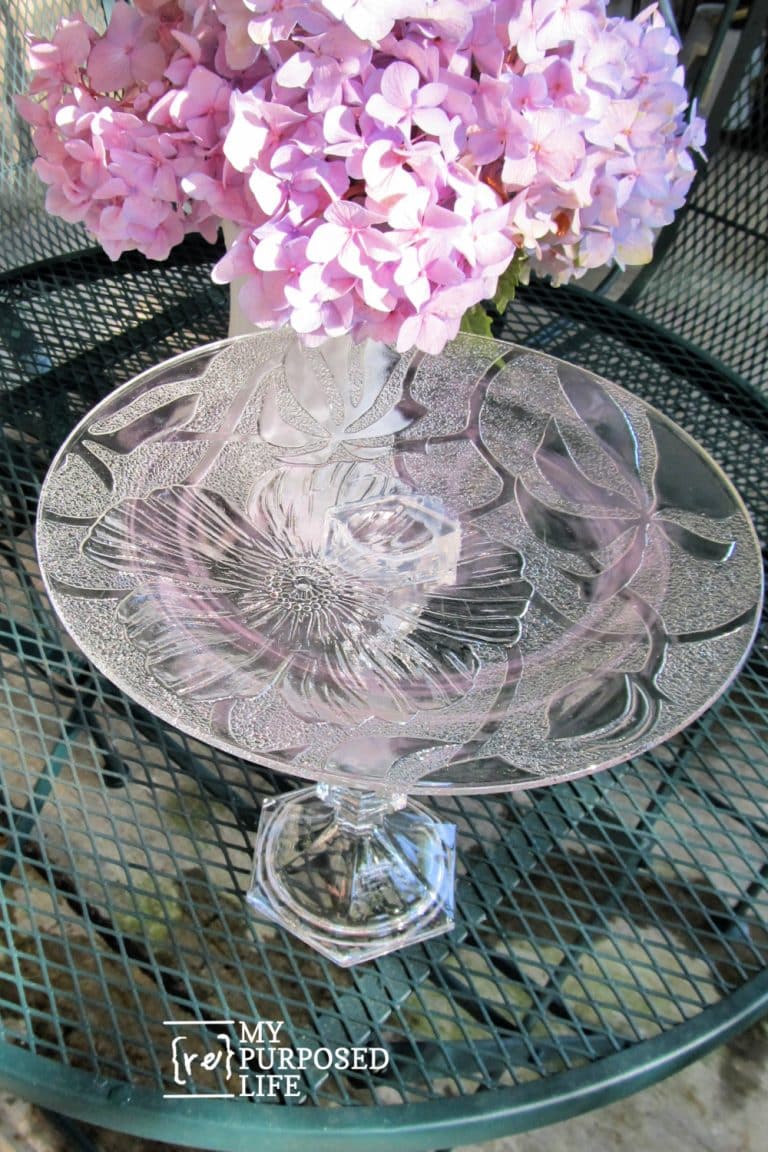
While I had repurposed glassware pieces out, I made a dessert/display stand. It would be great for goodies or even jewelry on a vanity.

small clear glass bowl glued onto a clear candle holder

I made another smaller one with a candlestick and a small bowl. It could also hold jewelry or even soap in a guest bath.

Save & Share on Pinterest!

Putting these glass pieces together was a lot of fun. Have you made anything similar? Have you made more than one? Are you addicted like I am?

For more details, check out my original Glass Totem Tutorial article.

gail

See more GREAT repurposed glassware projects here

34 Comments

  1. Gail, these are absolutely beautiful. I love all of them, especially the pedestal 2 piece. Thanks for sharing. I am anxious to go thrifting again when all of the sickness is one. Take care and stay safe.

    1. Thank you Lori! Over the years, I’ve made so many totems. If you looked back at the original post, you’ll see I had them all over the place. lol

      Things are well here, as I stay at home and are using what I have to work on projects. It’s been challenging sometimes, but I’m clearing out a lot of stuff instead of bringing more stuff home. 😉

      stay home, stay safe, be well!

      gail

  2. Ms Gail… you named a couple of things that you “can’t do”… and facts would likely show that, in fact, you were simply mistaken and that would lead to to becoming the next Michelangelo…Gailangelo…I think you are Gailangelo anyway …given that you are a spectacular sculpture designer…
    I have several teachers on my Facebook page that I was so excited to reconnect with after 30 years (the length of time between my graduation and the birth of our Facebook experience)…I, without a doubt, am certain that you have several “Velda’s” that are taken back years and so excited to see your amazing designs… especially if you happened to break something that they’d given you… and even broken it was too precious for you to simply toss… so you give it a new lease on a cherished life… with a name to show them just how important they are in your beautiful (re)purposed life.

    There isn’t one piece that didn’t made me smile… and many took me back to my 70’s childhood… for that I thank you… you are an outstanding and talented artist young lady.

    Your latest fan,
    Velda

    1. Velda,

      What a big smile you put on my face today! Thank you so much for your sweet comment. I read each and every comment and this one really made me feel so loved.

      I still have my original totem, plus a couple more in my yard. They make me happy.
      So happy to meet a new friend. Don’t be a stranger, I’m always here to help!

      gail

    2. Well that’s perfect..a smile on this Lord’s day…
      I wish that you could see my kitchen since I found you… you definitely can NOT see table or countertops… but I’ve already enjoyed the fruits of your imagination, talent and labor… so thank you for sharing your spectacular works of art. *who needs organized kitchens anyway..Well it’s simply overrated…. you can always go to Pinterest and enjoy someone’s should you just have to*

      Much love,
      Velda

  3. I am new to your site. I must say I am mesmerized by your work. You are so talented, and everything you show is so beautiful. Thank you so much for sharing your amazing talent.
    Looking forward to more of your thrift store finds and I love your glass totems.

    Thank you, I am so glad I found you,

    1. Cindy,

      I am so glad you found me as well! I’ve been doing this for a long, long, time and there are lots of projects in for you to checkout. Click (the green menu on desktop) to check them out. If you’re looking for something in particular, such as “door”, simply type it in the search field.

      I’m here if you ever have any questions.

      gail

  4. No totems yet! But I may have to try that! I’ve used candlesticks and vintage dishes and beads to make cute desert or jewelry holders.

    1. I used E6000 glue to piece together a truck bed mat around a 5th-wheel trailer hitch. I did it in 2000. It is now 2016, and it is still holding together after being outdoors year-round in Oklahoma weather. I am a believer in E6000. I have used it for projects similar to this, attaching glass together, and it also has held for many years. It is not an instant fix—you have to wait 24 hours for it to dry, but the bond cannot be broken. b

  5. I’ve been bitten by the “totem” bug. Just getting started, I have several things going at the same time. The hardest part of it decision-making. I, too, am wondering if I dare have them outside during winter. We get lotsa wet days, and some snowy and frosty days. The silicone itself created some condensation after some squished to the inside when I connected the pieces. Any suggestions in avoiding that. Thanks for your inspiration and your informative posts.

    1. Marie,

      My original bluebird totem is still outside all these years later. It has suffered a small mishap with a ladder, but the weather has not hurt it one bit. I’m in Louisville KY, so we get a mix of weather. I generally bring all of my totems under cover during the hard winter months because I’m afraid an ice storm may cause branches to fall on one of them.
      As for condensation on the inside, my best tip is to make absolutely sure that each piece is VERY dry before building your totem. I also suggest that you don’t put them together on a humid day.

      Good luck, have FUN!
      gail

  6. I was wondering if you have ever used E6000 for your totems? If so, do you think the silicon 2 is better. I have lots of glassware and want to make several of these to put in my shop. I just do not want to sell something and then it does not stay together in the changing weather. Thank you!

    1. Becky,
      I have not used E6000 for this project. I will tell you that I have had my original totems outside since I made them in 09. I live in Louisville KY, so the heat and cold are not extreme, but we get our dose of hot temps in the summer and freezing weather in the winter.

      It’s tried and tested, so that’s what I’ll stick with. 🙂

      good luck, have fun!
      gail

  7. I delivered a garden glass sculture to a friend just this morning…before I found your site and instructions. Great minds and all that. I use E6000 glue in a tube and we get extremely hot CA weather, but not many days of freezing and it hold really well. I made both a clear bird feeder, and a cutesy sculture a la Mary Englebrite style,topped with a birdhouse. My dh got so entranced, he went out a bought a huge china lamp for a base (after removing the wiring and shade) and built another sculture for the gardern, topped with a ceramic birdhouse. It is gorgeous! I counted 11 seperate pieces used on each of the three. You can start with a vase, btw, and fill it with clear marbles for stability, then add pieces. Shepherd hooks (3 are best) can be stuck in the ground around the sculpture to stabilze it if there are pets, kids or weather to endanger them.

  8. @ corn/ coffeepot I dont know why yours would not have held. I have used clear GE ll(2) silicone, with bowling balls outside , they were good for years. and It gets very hot here too. But try again!
    I have made some of these, now I make “jewelry tiers” 2 to 3 tiers. I love them. I am usng 3 right now just here in my home. so pretty with jewelry on them. My little 10 yr old friend made one for food! (Mainly candy). Yes glass ware can get addicting, I have 2 shelves in my buffet stacked with …”someday gonna make”……I love the totem up her you made, stimulating me to get back to them. I have a bunch of blue glass ware just calling!

  9. Those are so unusual! I bet they would be great for growing succulents! Since you don’t need a lot of deep soil {Jamie are you reading this?}. You could display them in your booth like that for an example. I like the small ones you made, such a great idea.

  10. Gail.
    I made these little ‘tea-cup and saucer’ bird-feeders that hung from the tree.
    The problem was… I used silicone and it didn’t hold. After a day in 110° heat…my cup and saucer were on the ground. Bird seed scattered to the 4 winds!
    Is there a particular type of silicone? One over the other that is better? Not asking you to divulge any secrets…or create a conflict of interest (especially among your sponsors) so you can email the answer if need be.
    Thanks, Pat

  11. These are so beautiful!
    I truly do not have room in my house… and we get winds that rearrange the outdoor furniture and BBQ so I’d be afraid to put them in the back yard… and the front yard… besides the winds there are also javelina that roam through the yard. They are not know for their grace. LOL

  12. These are so cute! And yes, I can see how collecting the pieces can get addicting. After making one white stacking “cupcake” stand, I continued to buy pieces to make more. To this day, I still only have ONE cupcake (which is for cookies in this house) stand.

Leave a Reply

Your email address will not be published. Required fields are marked *

This site uses Akismet to reduce spam. Learn how your comment data is processed.