Repurposed Vintage Ammo Box Coffee Table
As an Amazon Associate, I earn from qualifying purchases.
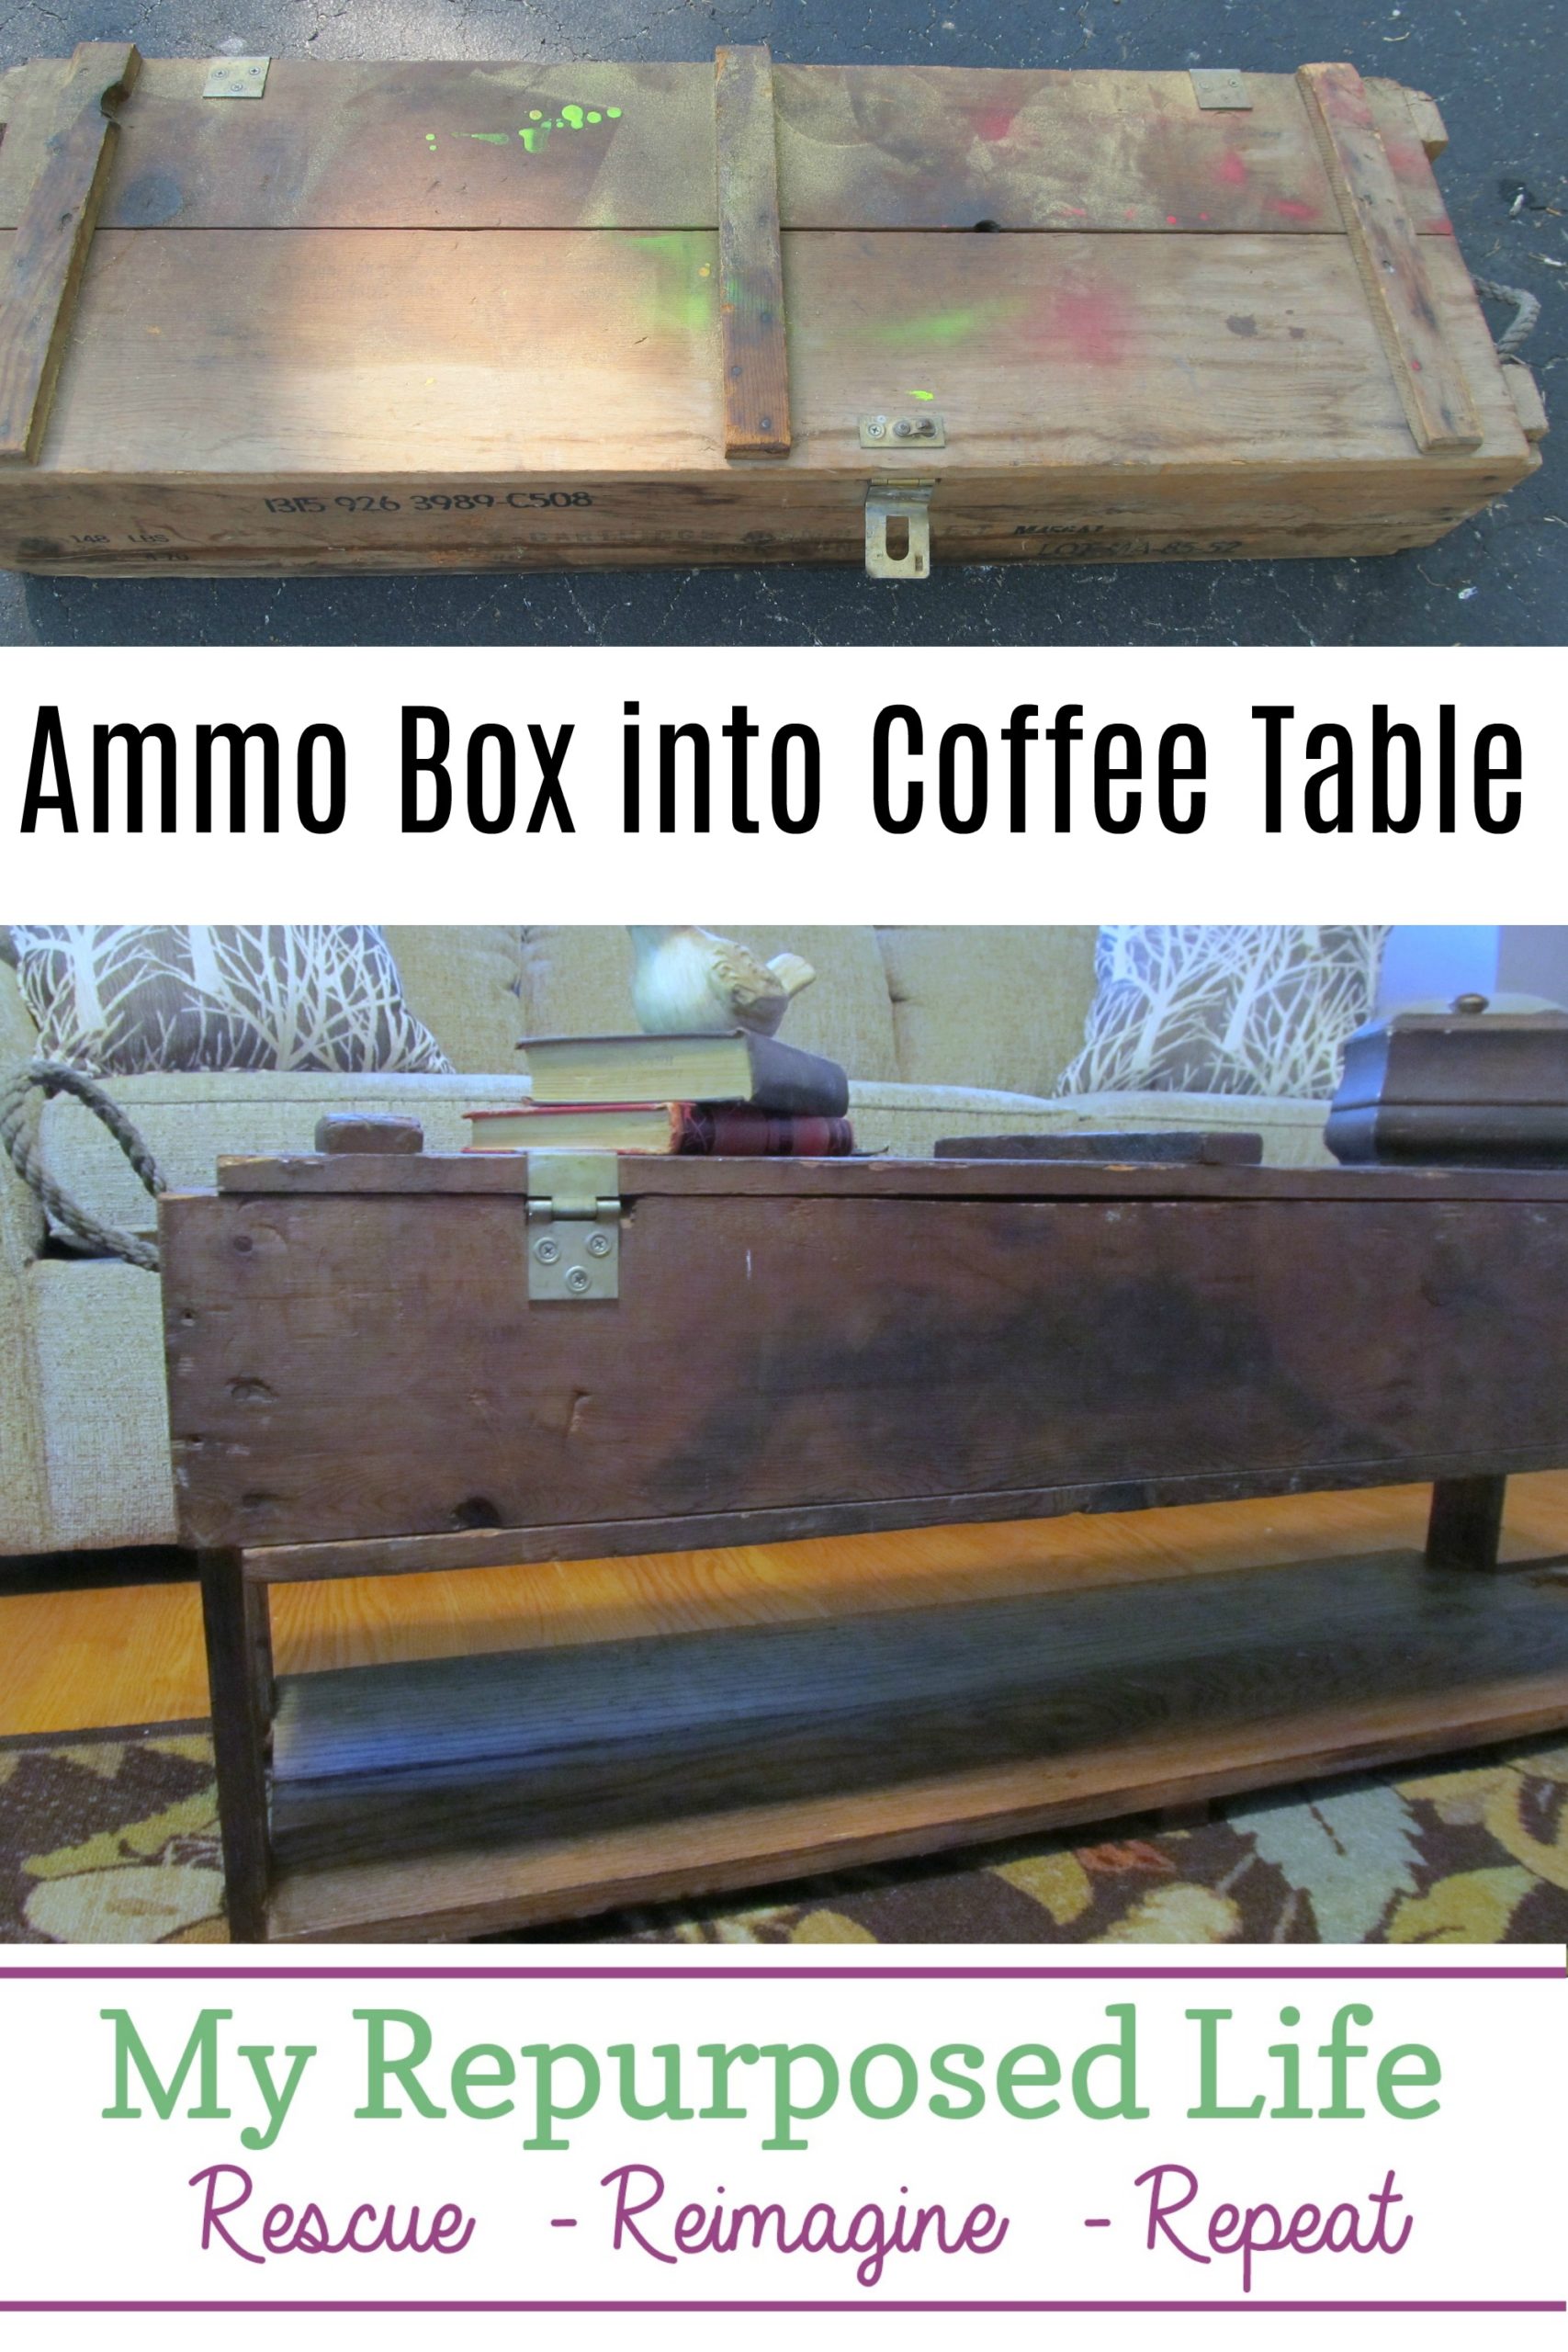
Warning! this vintage ammo box into a coffee table project is a very long tutorial post with lots of pictures.
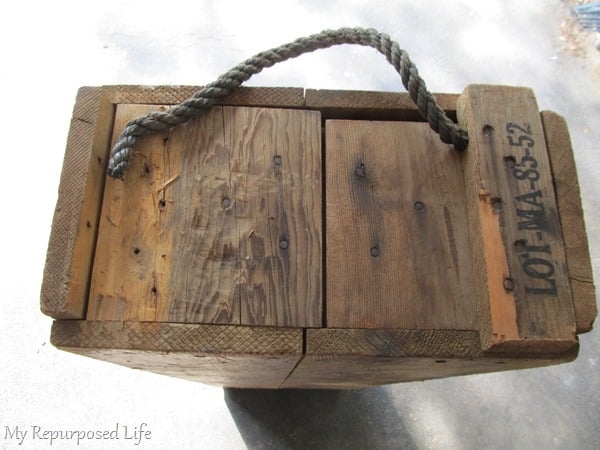
Vintage Ammo Box
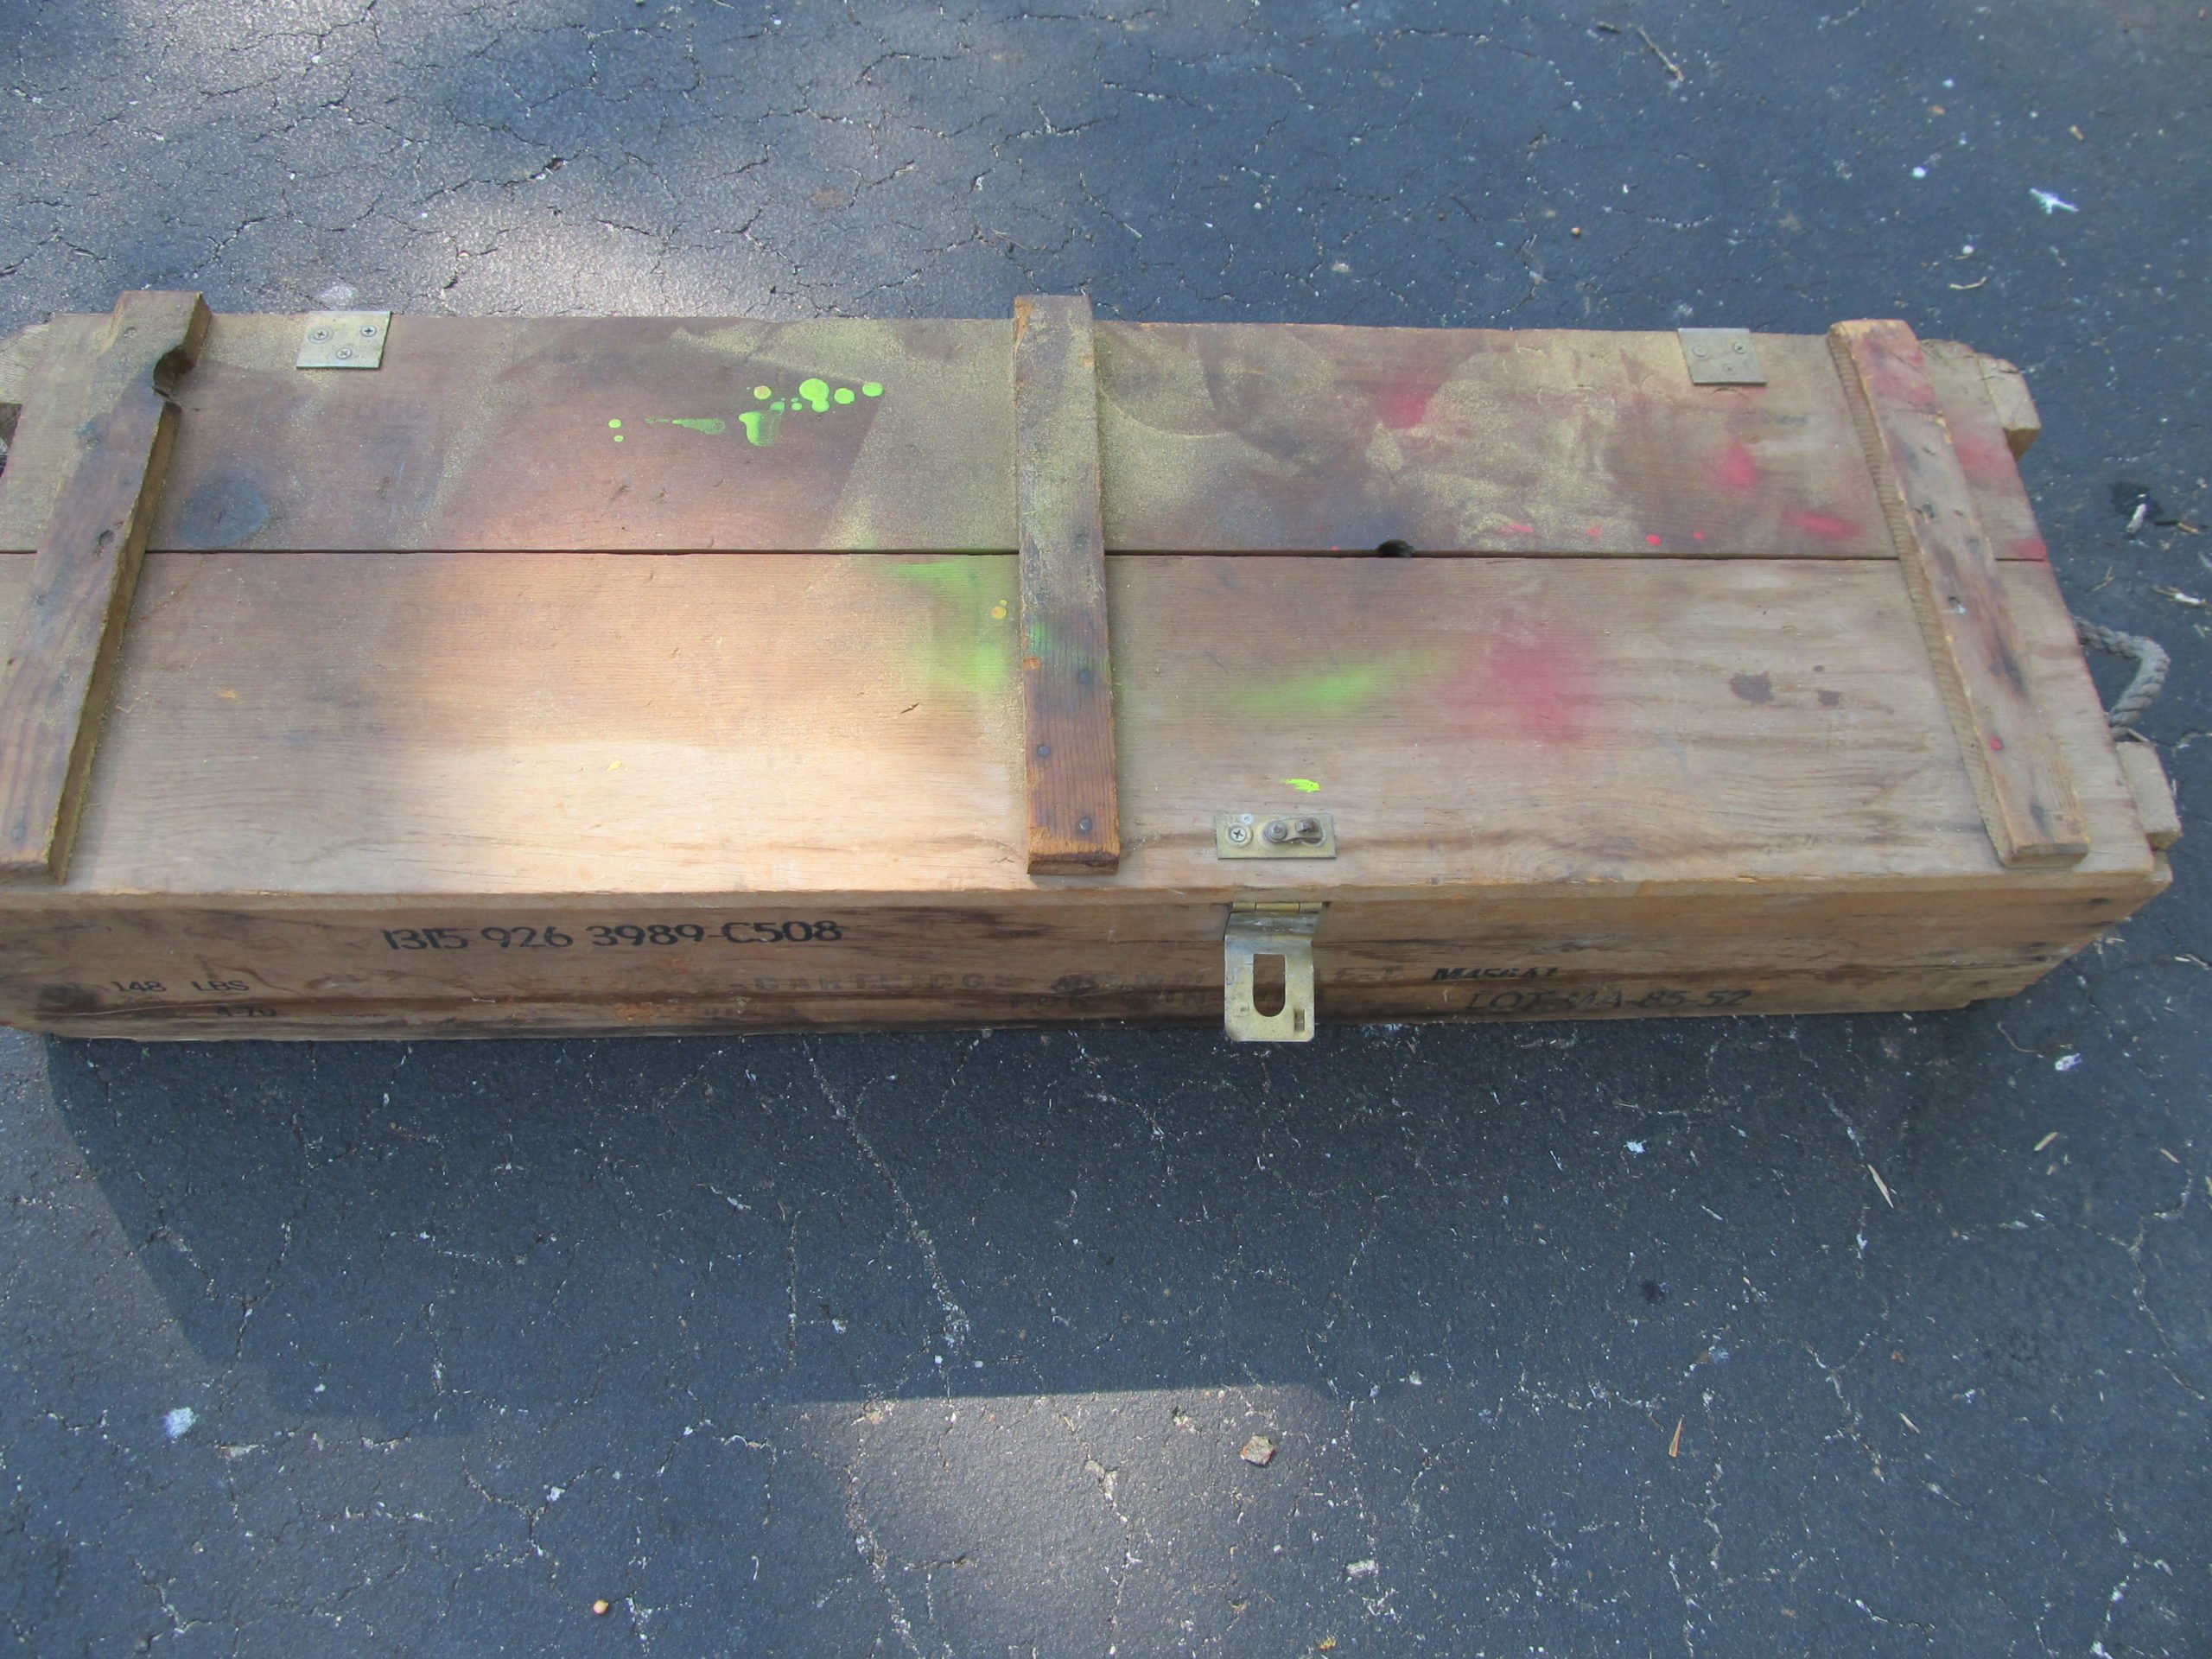
This vintage ammo box as seen better days, for sure. Someone obviously didn’t appreciate it for it’s charm.
Clean Paint off Vintage Ammo Box

I attempted to clean off the paint with some sandpaper and mineral spirits. This was a slow process, but worked really well!
Make Needed Repairs
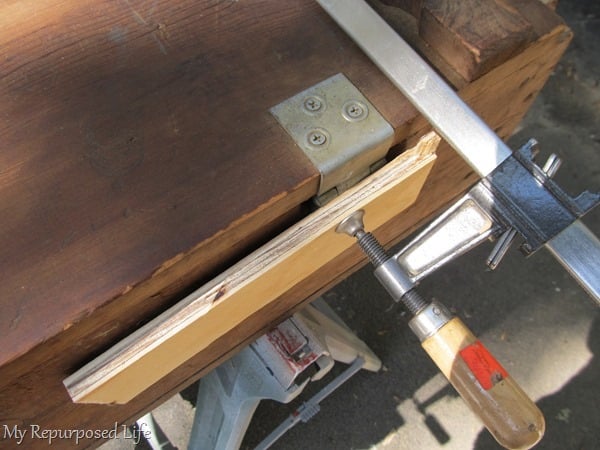
The hinges of this vintage ammo box needed some work as they had bowed.
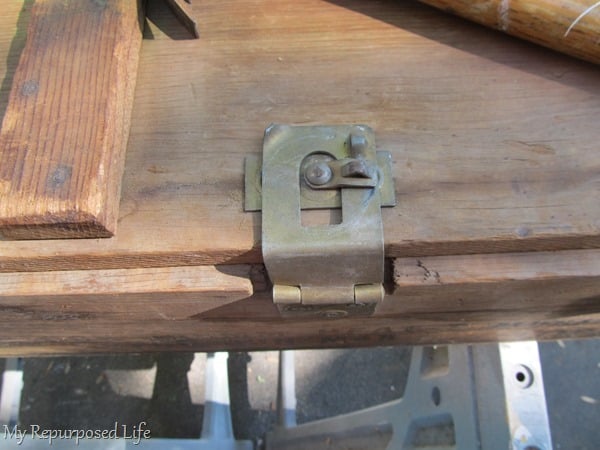
Before I worked on the hinges, the clasp wouldn’t even come near closing.
Fashion a Bottom Shelf for Ammo Box Coffee Table
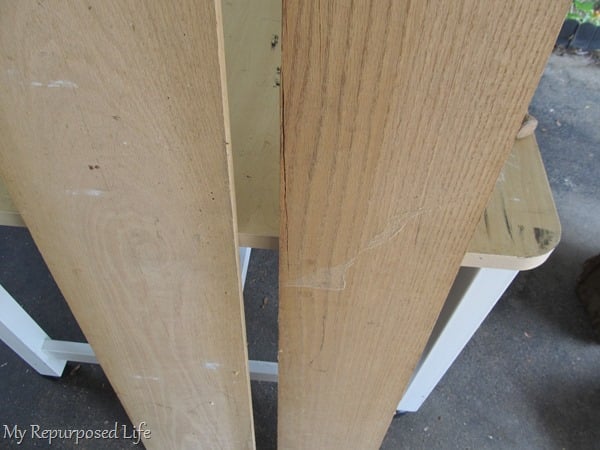
To get a bottom shelf, I found two old boards that I thought would work well.
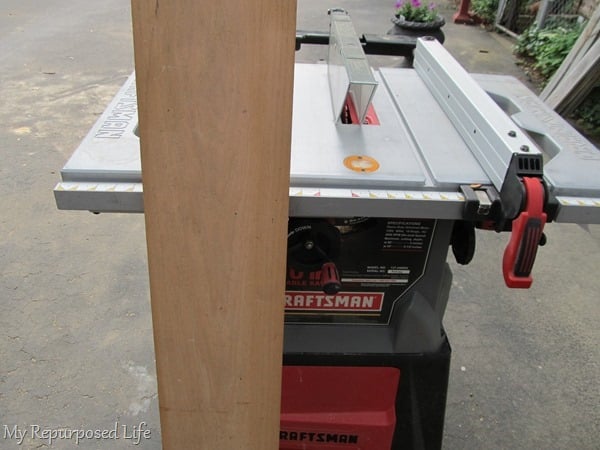
I found a third one to rip to use as the side supports.
Prepare to Build Ammo Box Frame
Then I started dismantling the box ends were the rope handles are. You can see I have removed the one on the left. This was NOT an easy task. The nails were very long, and their points had been hammered over in between a set of boards that make up each end. Plus there were nails coming from the front AND the side.

See how the nail points were bent over? No wonder they didn’t want to come out! Looking at the rope handles I see that I need a channel for this thick rope to be reused.
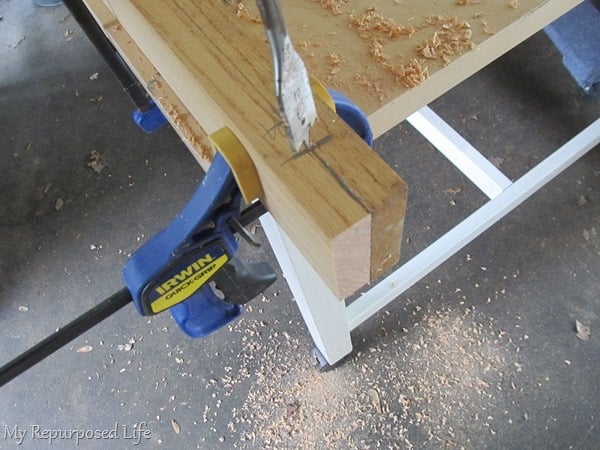
I cut four end pieces, then clamped them together in pairs using quick clamps. This pair is clamped together, and clamped to the table to allow me to drill. I used a 3/4 inch paddle bit.
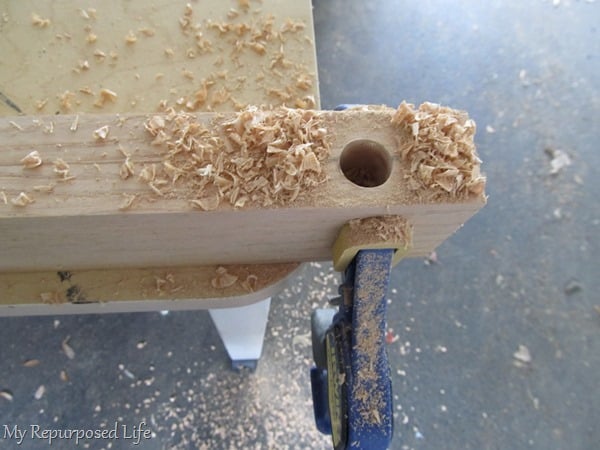
I drilled down just to where the paddle bit narrows. Nice circle?

Now you know how to drill a semi-circle!
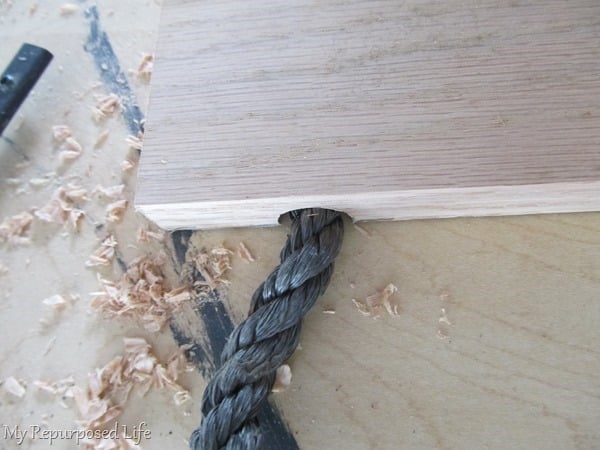
Look how nicely the rope fits in the board now.
Kreg Jig Pocket Holes for Bottom Shelf
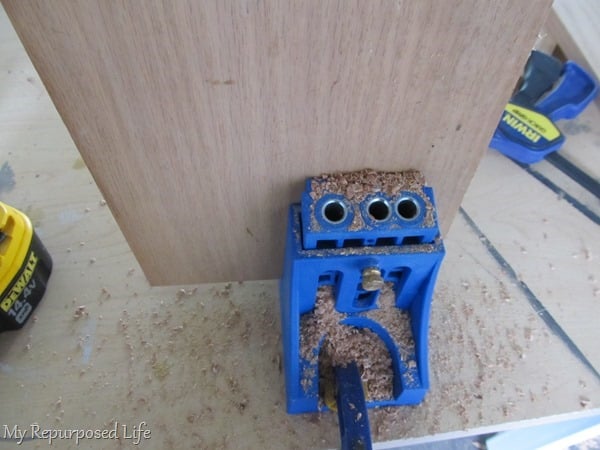
I used the Kreg Jig to drill pocket holes for the bottom shelf.
I got real busy putting it together WRONG—and taking it apart twice. Needless to say, no pictures were taken. I had to work fast because I had secured it with Gorilla Wood Glue.
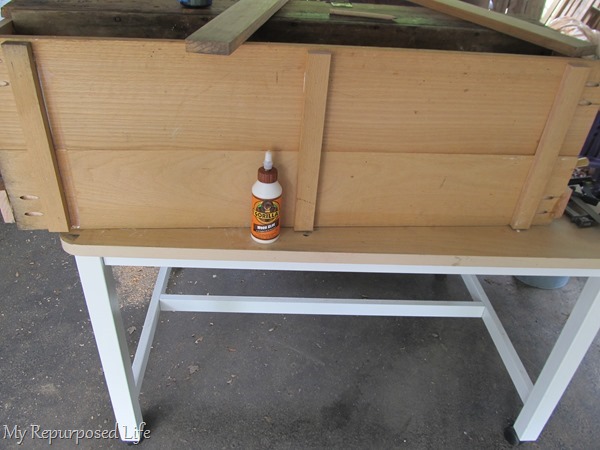
One of the things I had done wrong, was put the pocket holes on the top of the bottom shelves. After I had it together (working on it’s side) and put it on the ground, I immediately noticed I saw the pocket holes. THIS is after I got it all fixed up. I used three bottom supports to mimic the three boards on the top. I glued these and secured them with my nail gun.
Raise Vintage Ammo Box Table
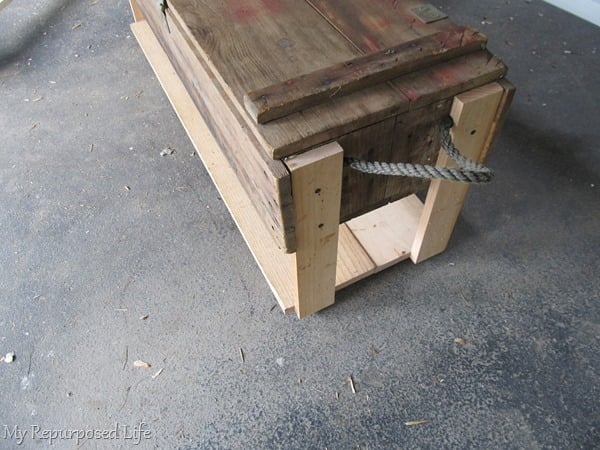
You can see how I constructed it. I used two screws in each side piece. To get to this point, I used clamps, glue, and my nail gun. Using the nail gun is a great way to give a temporary hold until I could get the screws in place. I have several nails in each rope too.
Stencil New Lumber
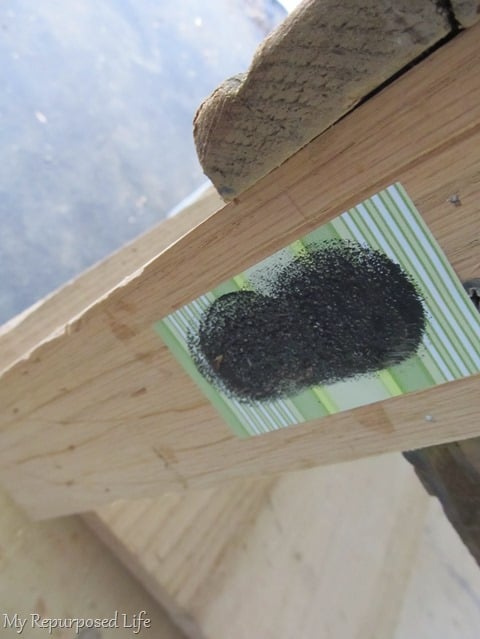
Now it’s time to replicate the numbers that were on the smaller side pieces. I used my Portrait and some contact paper to make a stencil.
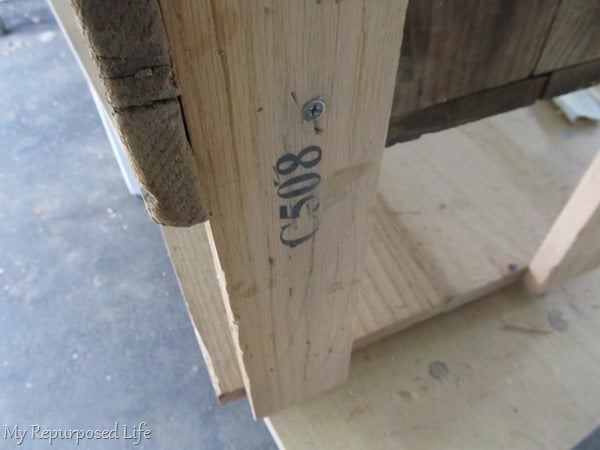
I painted it on, then sanded it back some because I didn’t want it to be crisp. You can also see I beat up the new wood pieces to age them.
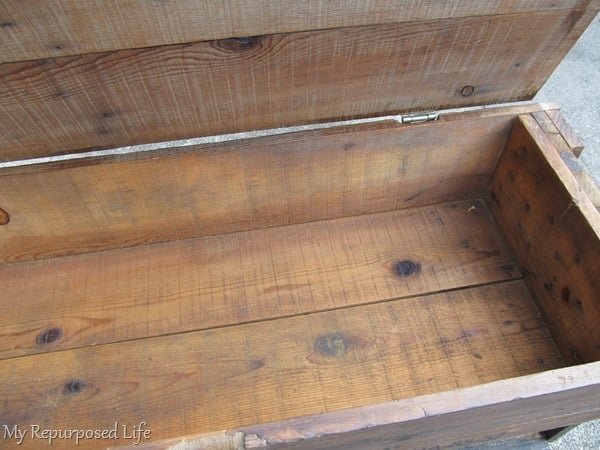
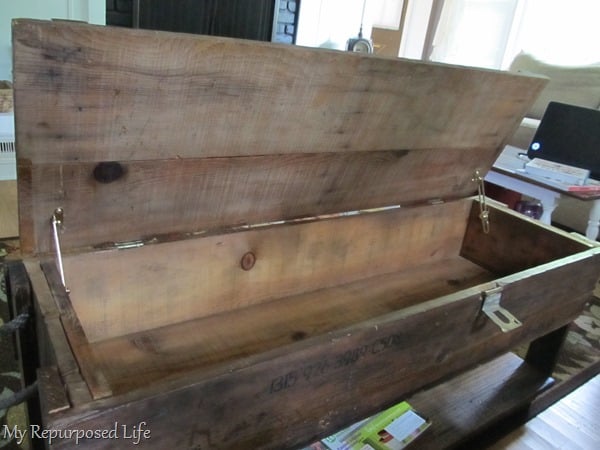
Refresh Inside by Sanding
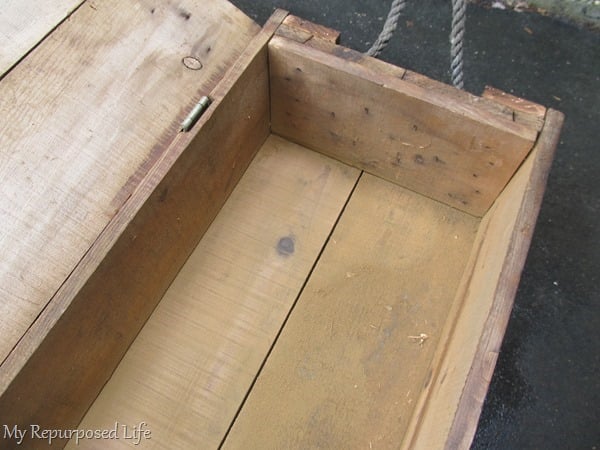
The inside of the ammo box was pretty dirty and grimy. You can see the board in the back has already been sanded. I used my orbital sander to freshen up all of the inside boards.
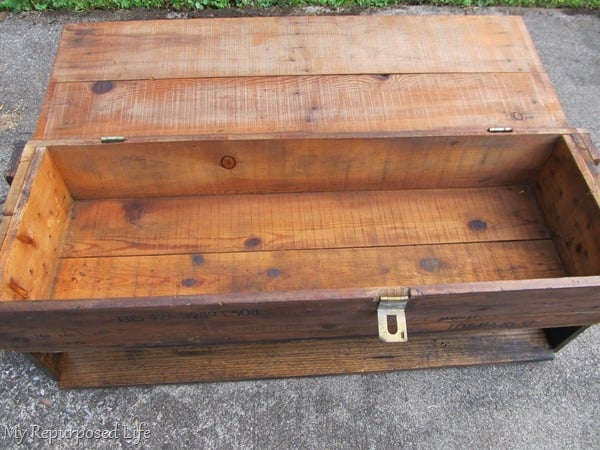
Stain Ammo Box Table
I NEVER take any pictures when I stain. Because I get so busy, and so messy, I don’t even think about it. I used a combination of Jacobean, Dark Walnut, with a touch of Mahogany. I mixed them all together, and gave a coat to everything. After that, I used some black paint to smudge the new wood some.
Seal with Wipe-On Poly
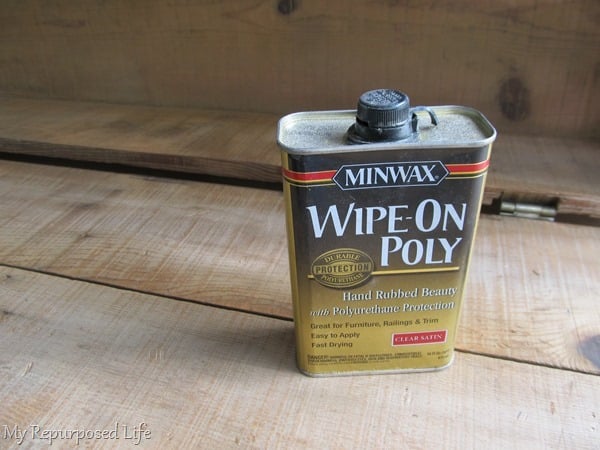
Everything got a coat of Wipe-On Poly inside and out.
I really like how the wipe-on poly gave a finished look to to the inside.
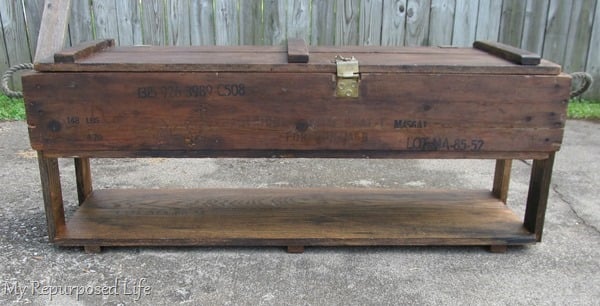
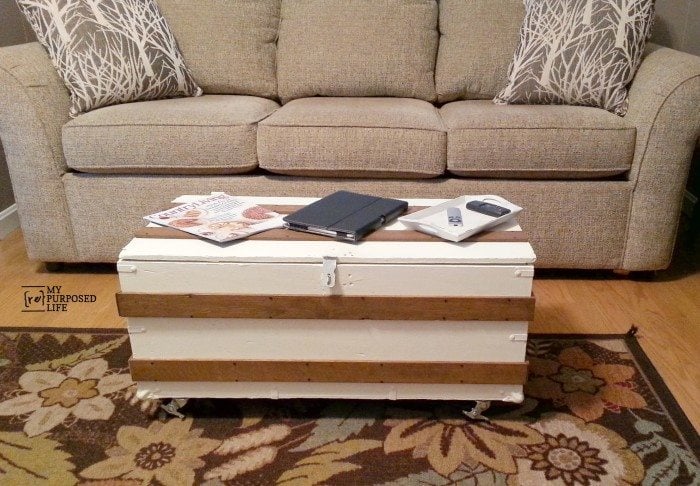
Isn’t the vintage ammo box coffee table pretty?
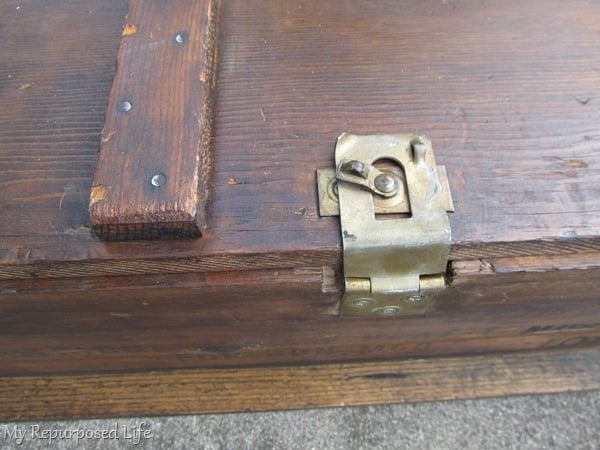
I’m loving all the original hardware!

It makes me wonder why it took me so long!
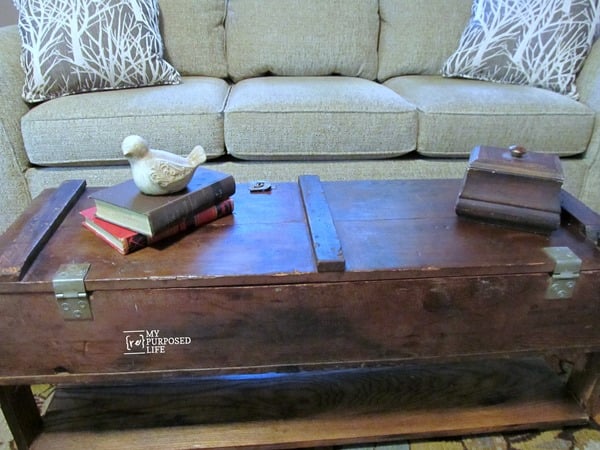
It’s a great table, WITH storage!
Does the Vintage Ammo Box Coffee Table Need Wheels?
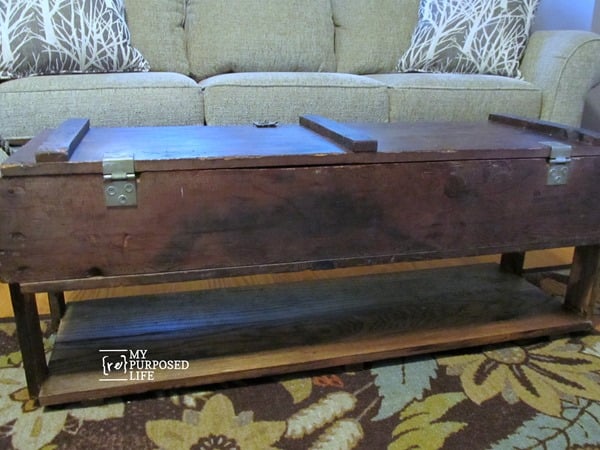
Do you love it? Do you think it needs feet? Or Wheels?
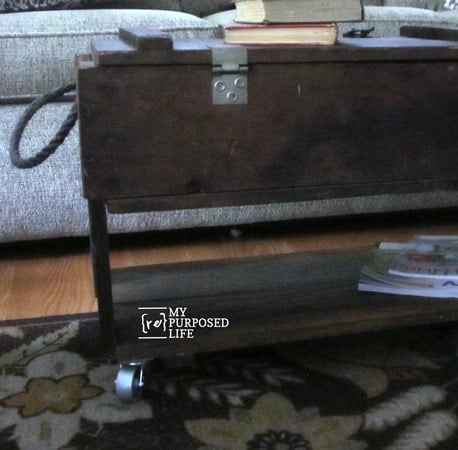
I decided to add some metal casters.
I added wheels to the ammo box coffee table. They are medium sized, which allows for great mobility and they don’t raise the height too much overall.
On the inside I added two slow closure hinges. These serve several purposes. First, won’t it look great propped open if/when I decide to sell it. Second, it won’t slam shut on little fingers. Third, it supports the lid, as the old hinges would eventually loosen if the lid were to lay open resting only on them.
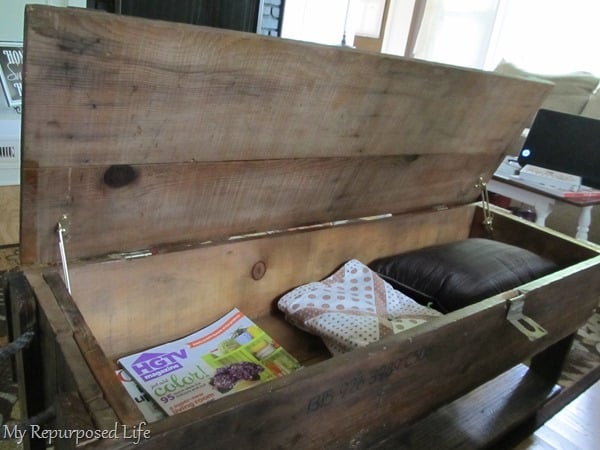
There is so much storage inside this coffee table.

 I also did a coffee table out of a army footlocker
What have you made out of a vintage ammo box?
gail
Such an awesome idea and way to add texture/history to your home 😀
Love that! As for feet.. vintage castors maybe, but no feet.
I think it’s great! I was at an estate sale this week that had a few of these, and while I thought they were cool–I didn’t know what I would do with them. Now I’m regretting that!
I like that!!! 🙂
Wow, what a transformation! Love the rustic industrial feel! I vote yes to wheels. They will raise that bottom shelf off the floor a bit and well, wheels are just cool! … Great job Gail! How is your shoulder feeling after all that?
Thanks Sharon! I hope to do some wheels. The wheels I have wouldn’t work, so I need to find an alternative.
shoulder? It did hurt a lot after a couple of days of heavy building. Time to take a few days off.
thanks so much for asking!
gail
That is SO cool. I tried wood stain for the first time over the weekend and it was a huge fail. Ugh! I’ll stick to paint.
Love your coffee table. I think it needs wheels. I think they would looks so cool with this piece. Great job!
This is amazing…I love that you made it into a coffee table! Who doesn’t love a little extra storage too! My daughter has one of these ammo boxes sitting at her house….hmmmmm!
WOW! Gail, this looks amazing!!! Seriously, I’m in love with your new coffee table!!!
Oh my goodness… I wasn’t sure where you were going with this but… WOW! That is awesome Gail! I’m pinning! It is a very cool table and I would love it in my living room too!
Susan
Oh that is so cool! Love it! Thanks for the tips on all of the stain types. I’d say no to feet – nothing cutsie at least. If you do wheels make them large and industrial-ish, but that would raise the overall height of the table – would that make it too high? It is an amazing piece as it is. Looks like your shoulder is feeling better! 🙂 Nice work! Take care! — Pauline
Pauline,
I think it can afford to be a little higher. I tried to make it a height that was flexible, with or without wheels/feet. 🙂
i think this is my favorite redo by you! LOVE it!