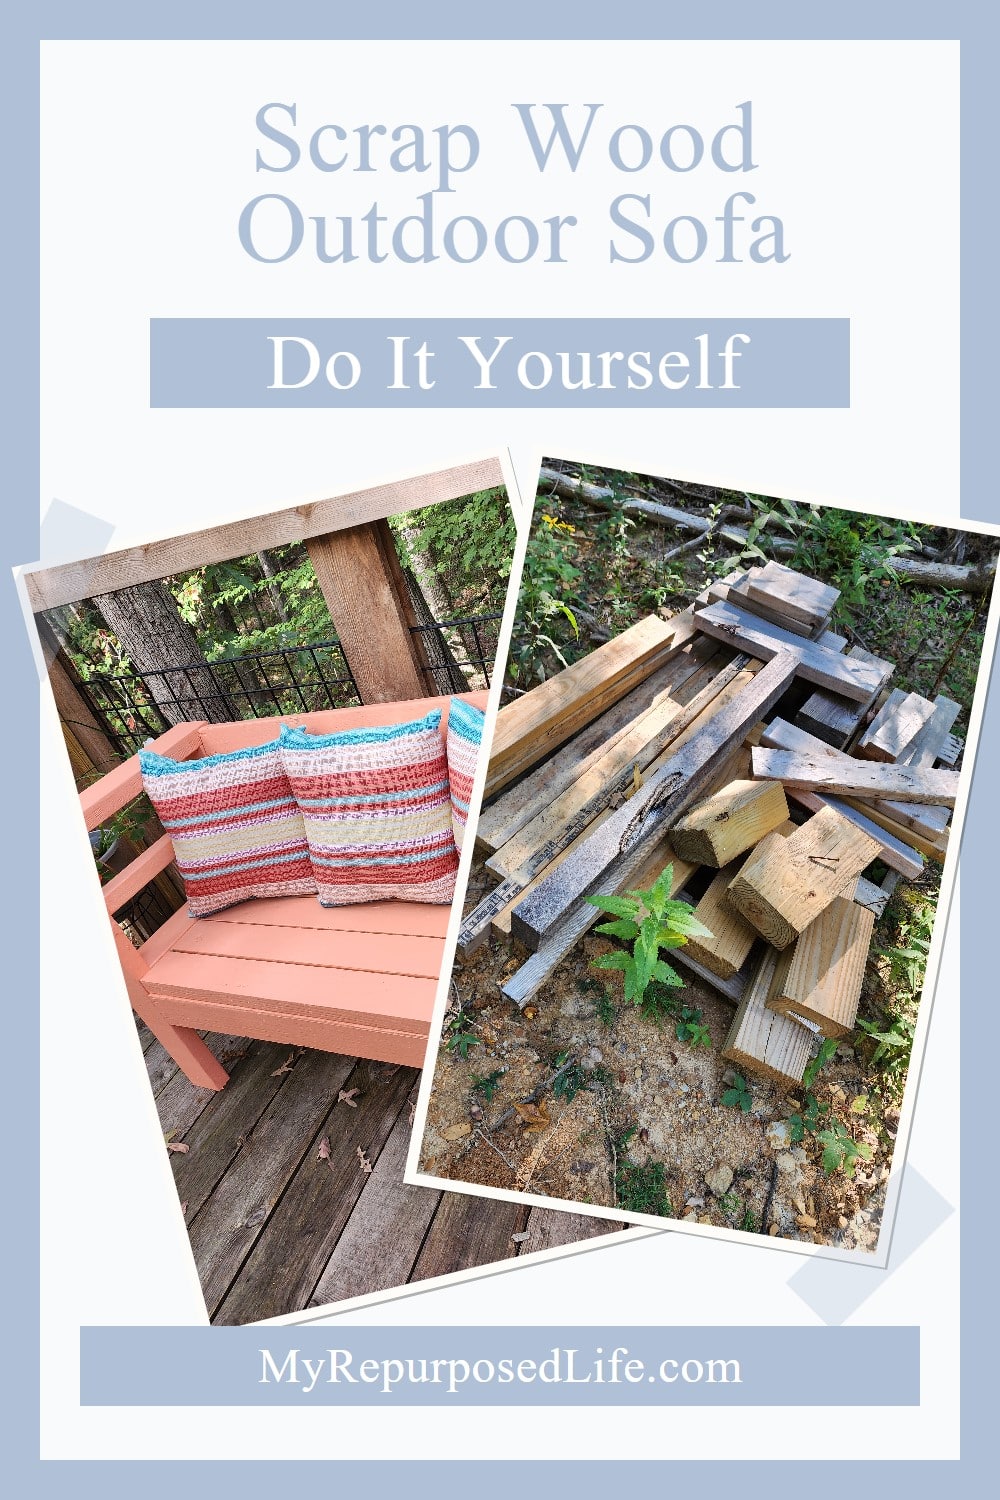
Scrap Wood 2×4 Outdoor Sofa
As an Amazon Associate, I earn from qualifying purchases.

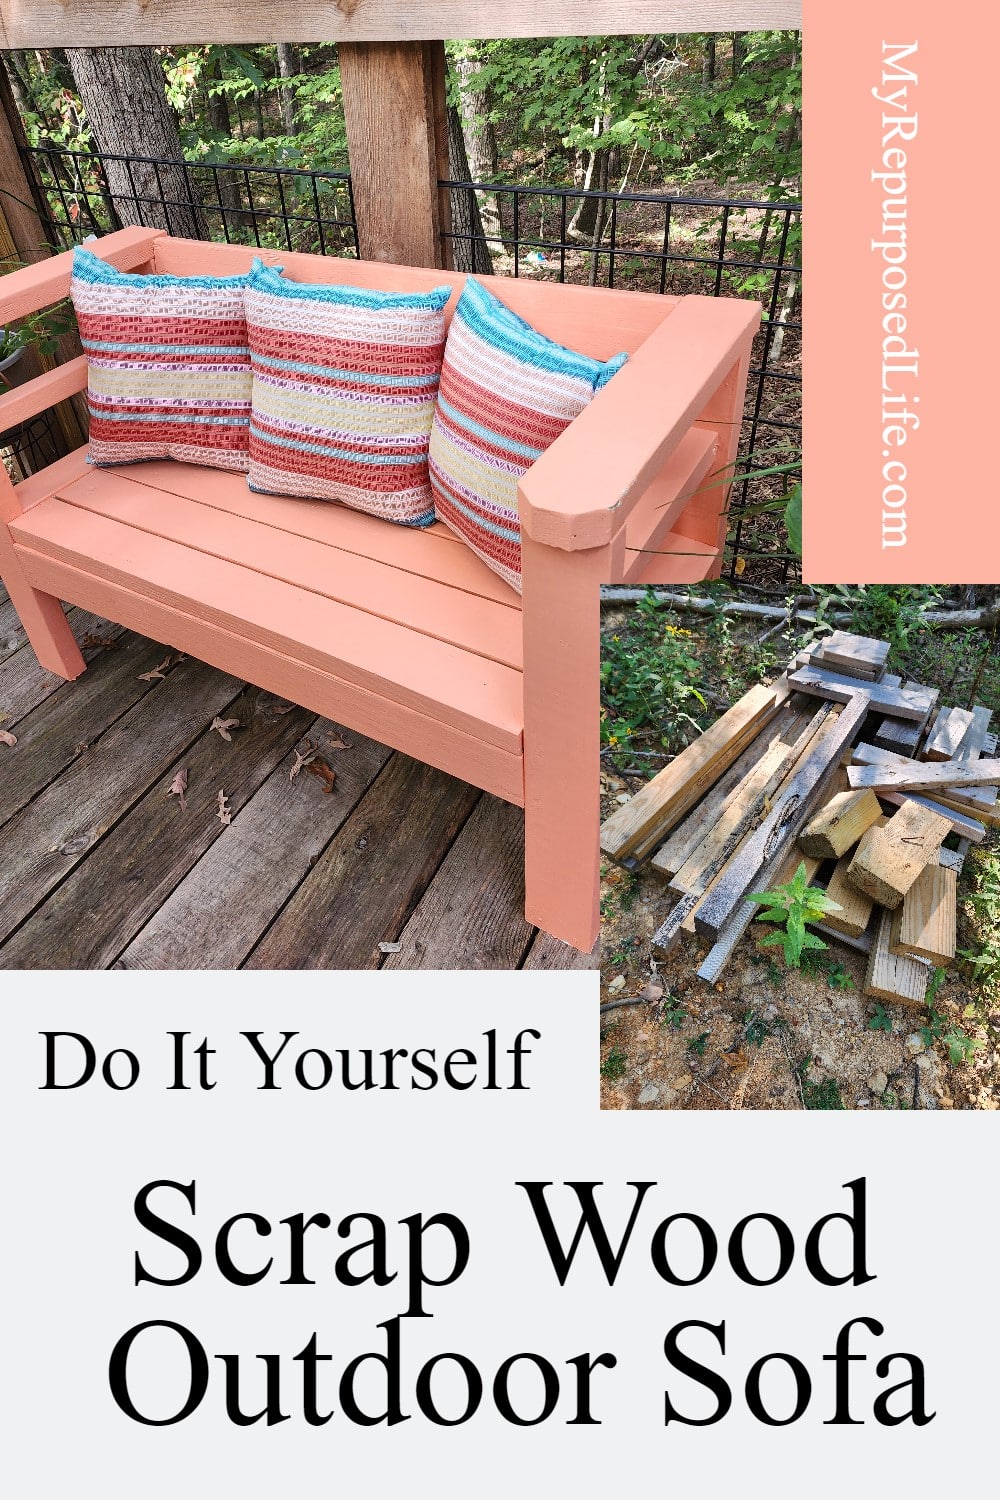
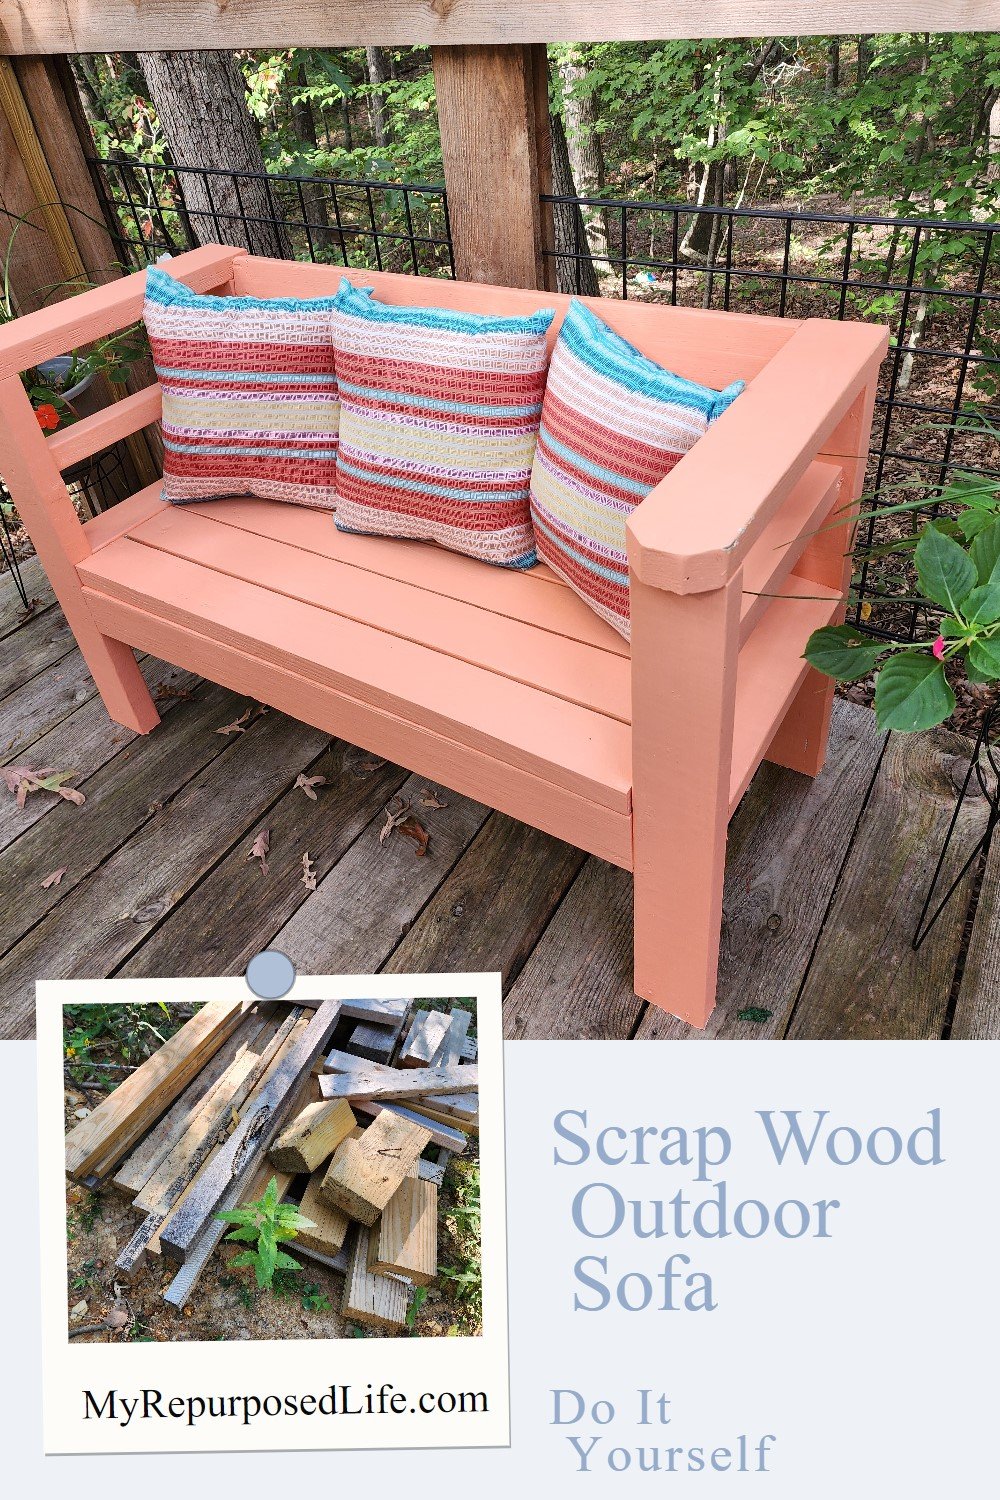
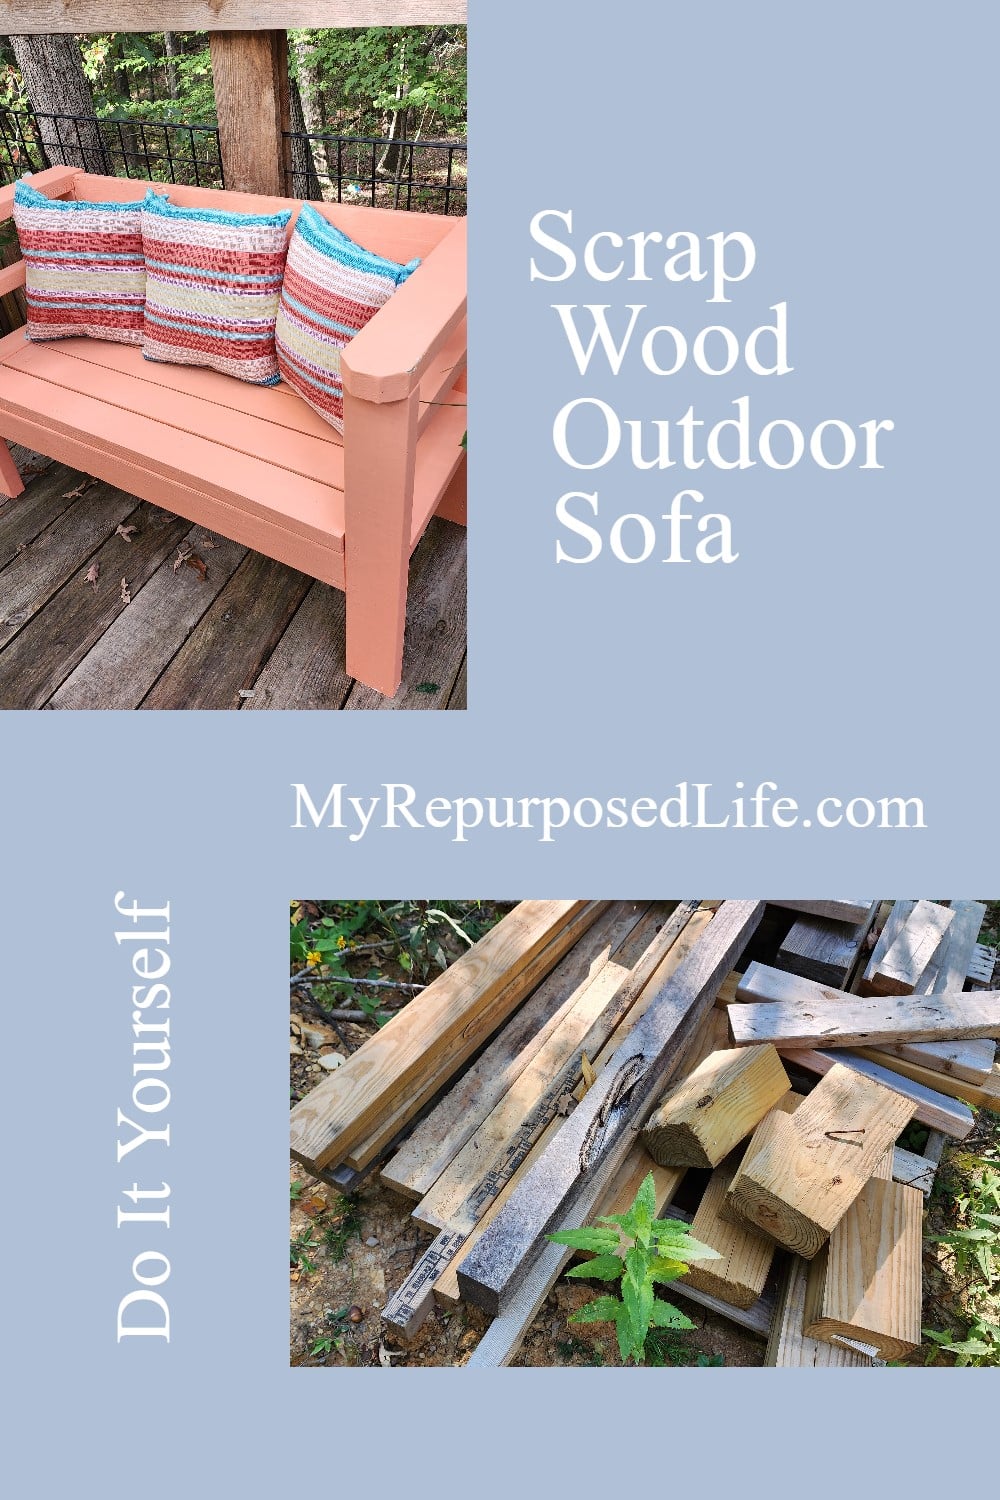
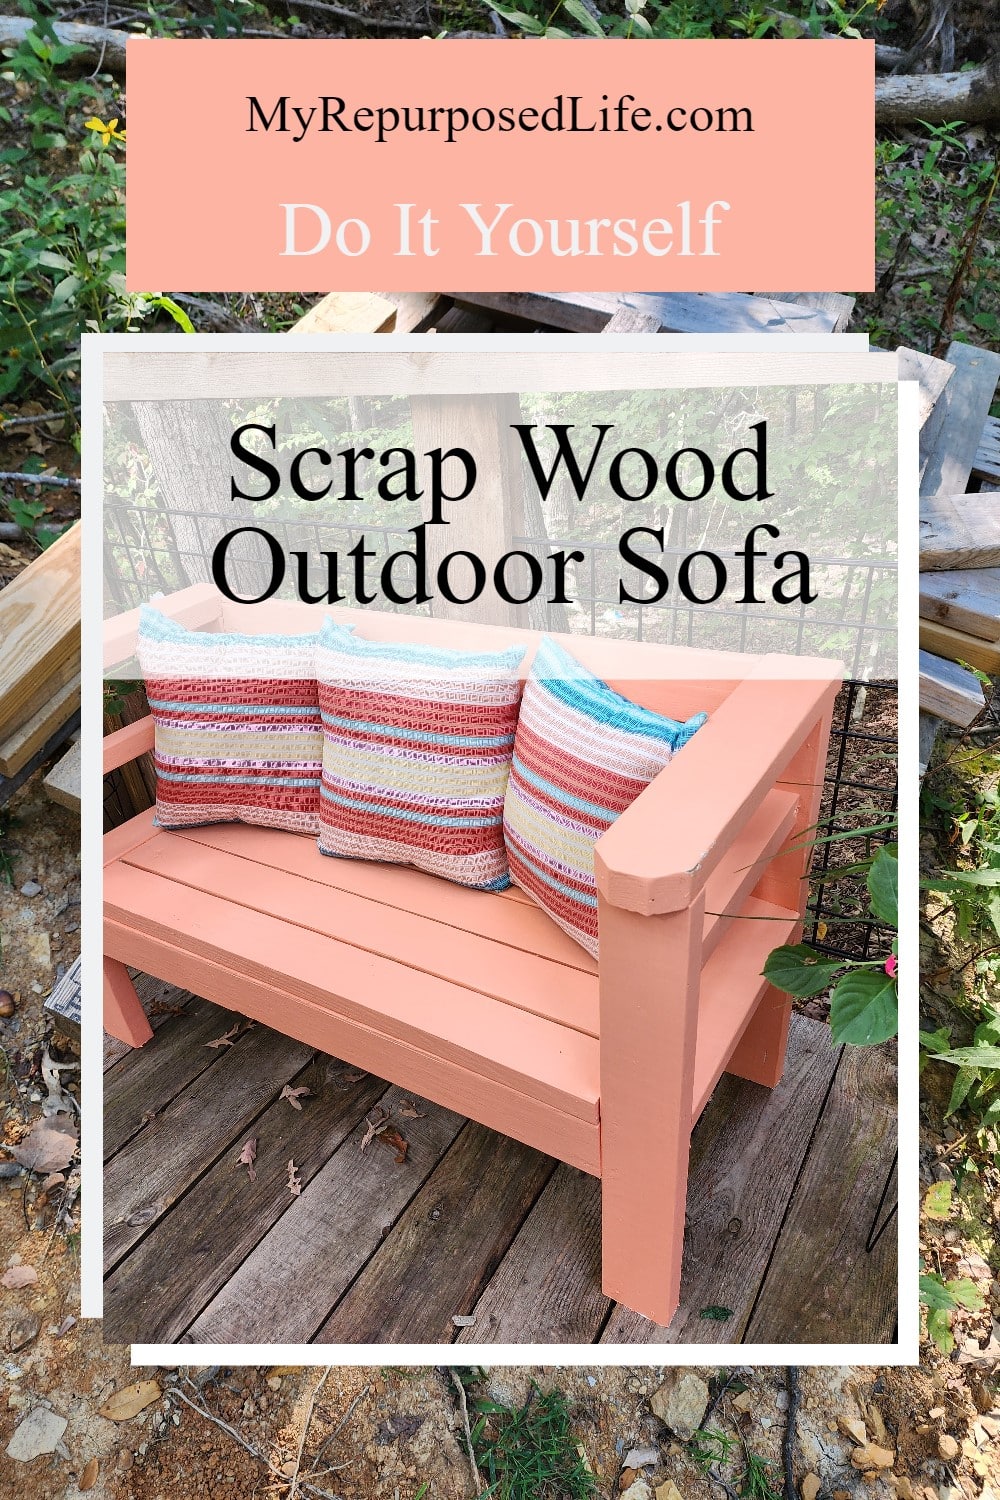
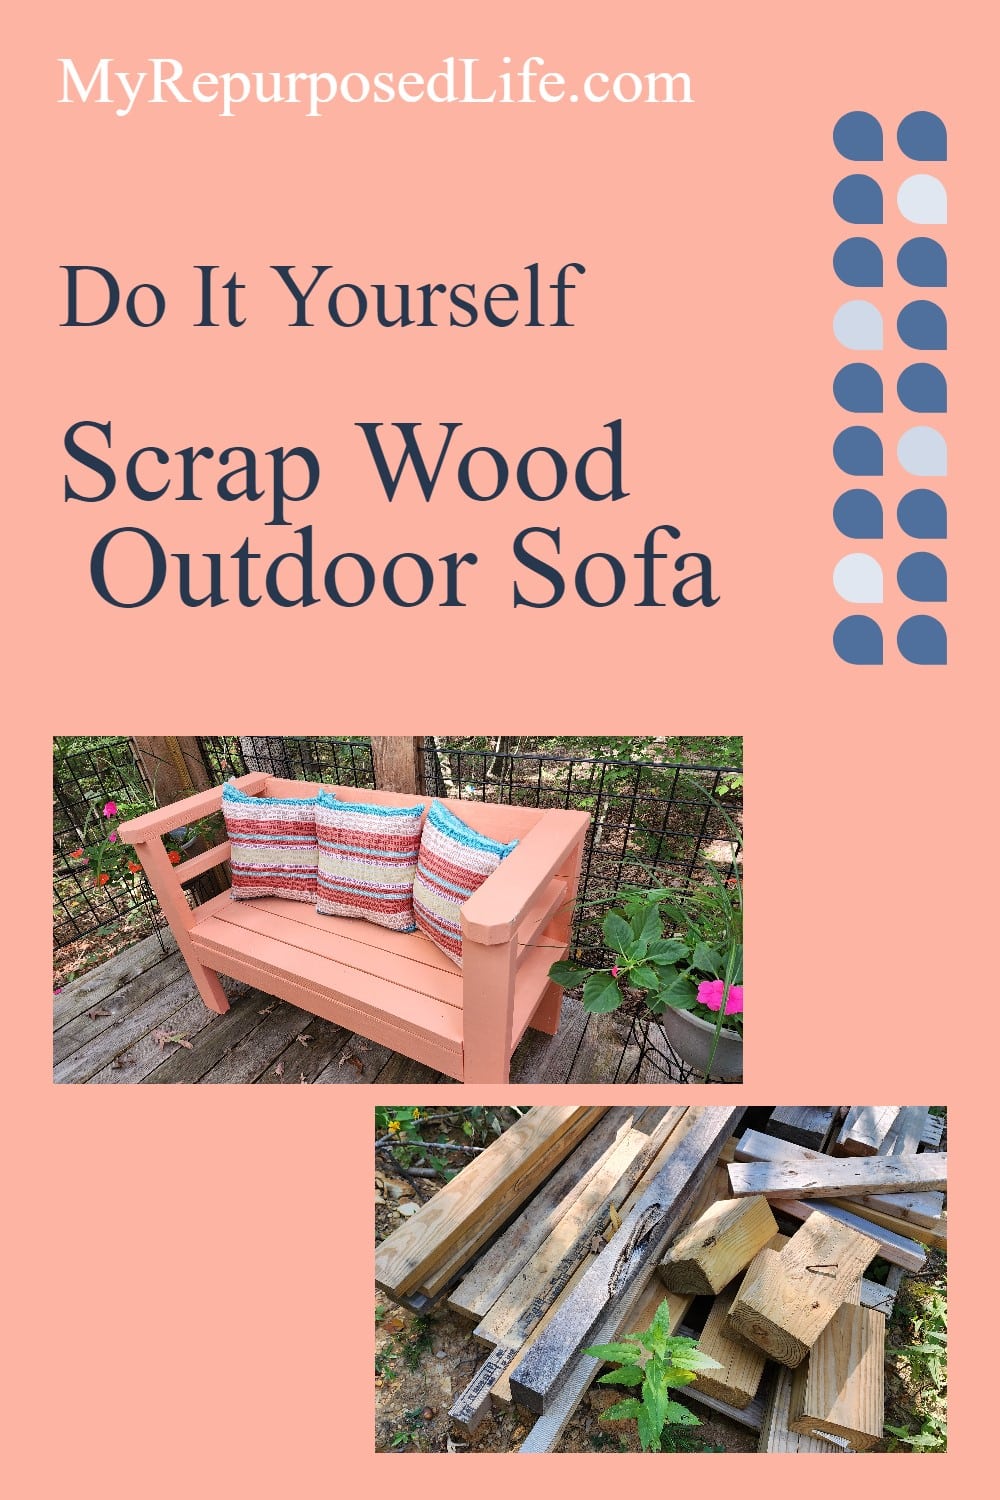
Do you have scrap wood 2x4s? I had many 2×4 pieces of lumber left over from building porches and decks. While looking for a project, I ran across Ana White’s 2×4 Outdoor Sofa plans. I knew I didn’t have the lengths to make a sofa, nor did I need such a large piece that seats so many in my outdoor space. Ana’s 2×4 sofa plans are easy to follow or adjust for your needs.
Scrap Wood Piles

The image on the left shows pieces cluttering my porch area. I moved them when I pressure-washed the camper at The Hideaway. The two images on the right are scrap “project wood” piles. They are located in two different areas of the property.
You may think you don’t have long enough 2x4s to make a sofa. You can purchase new lumber if you want to make a full-sized outdoor sofa. For me, it was a matter of using up scrap wood that was in the way.
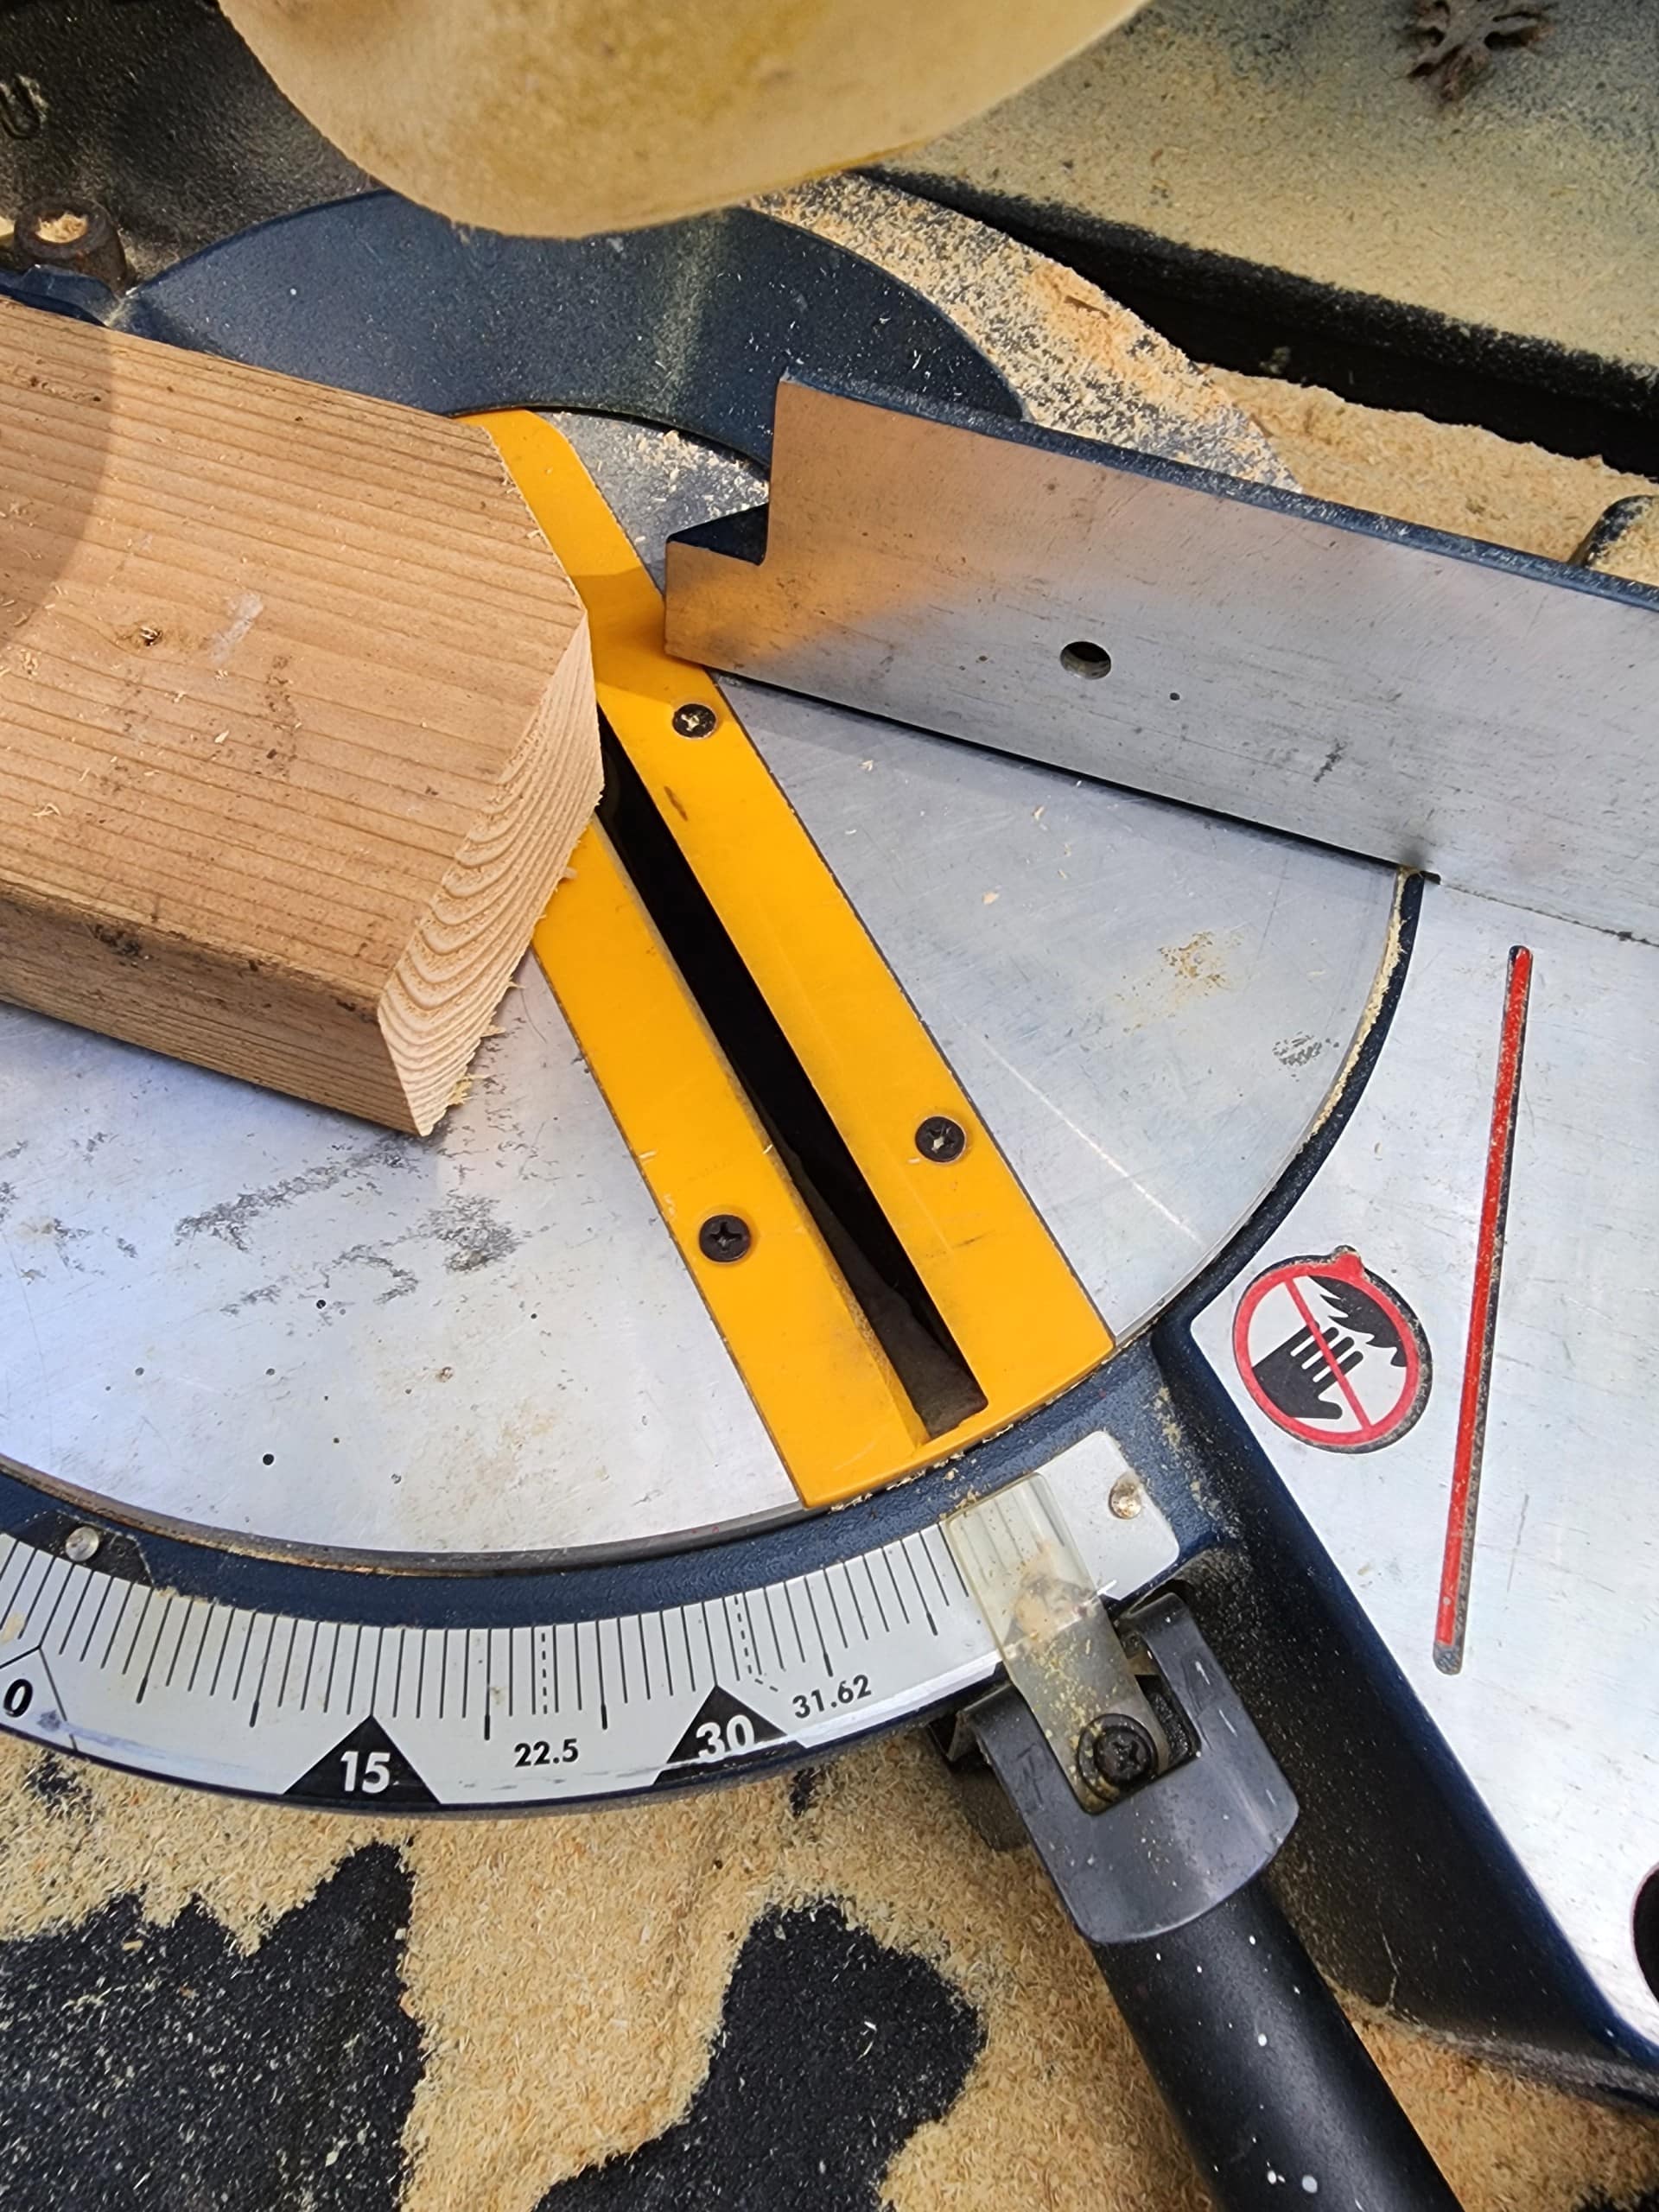
Setup Your Work Station
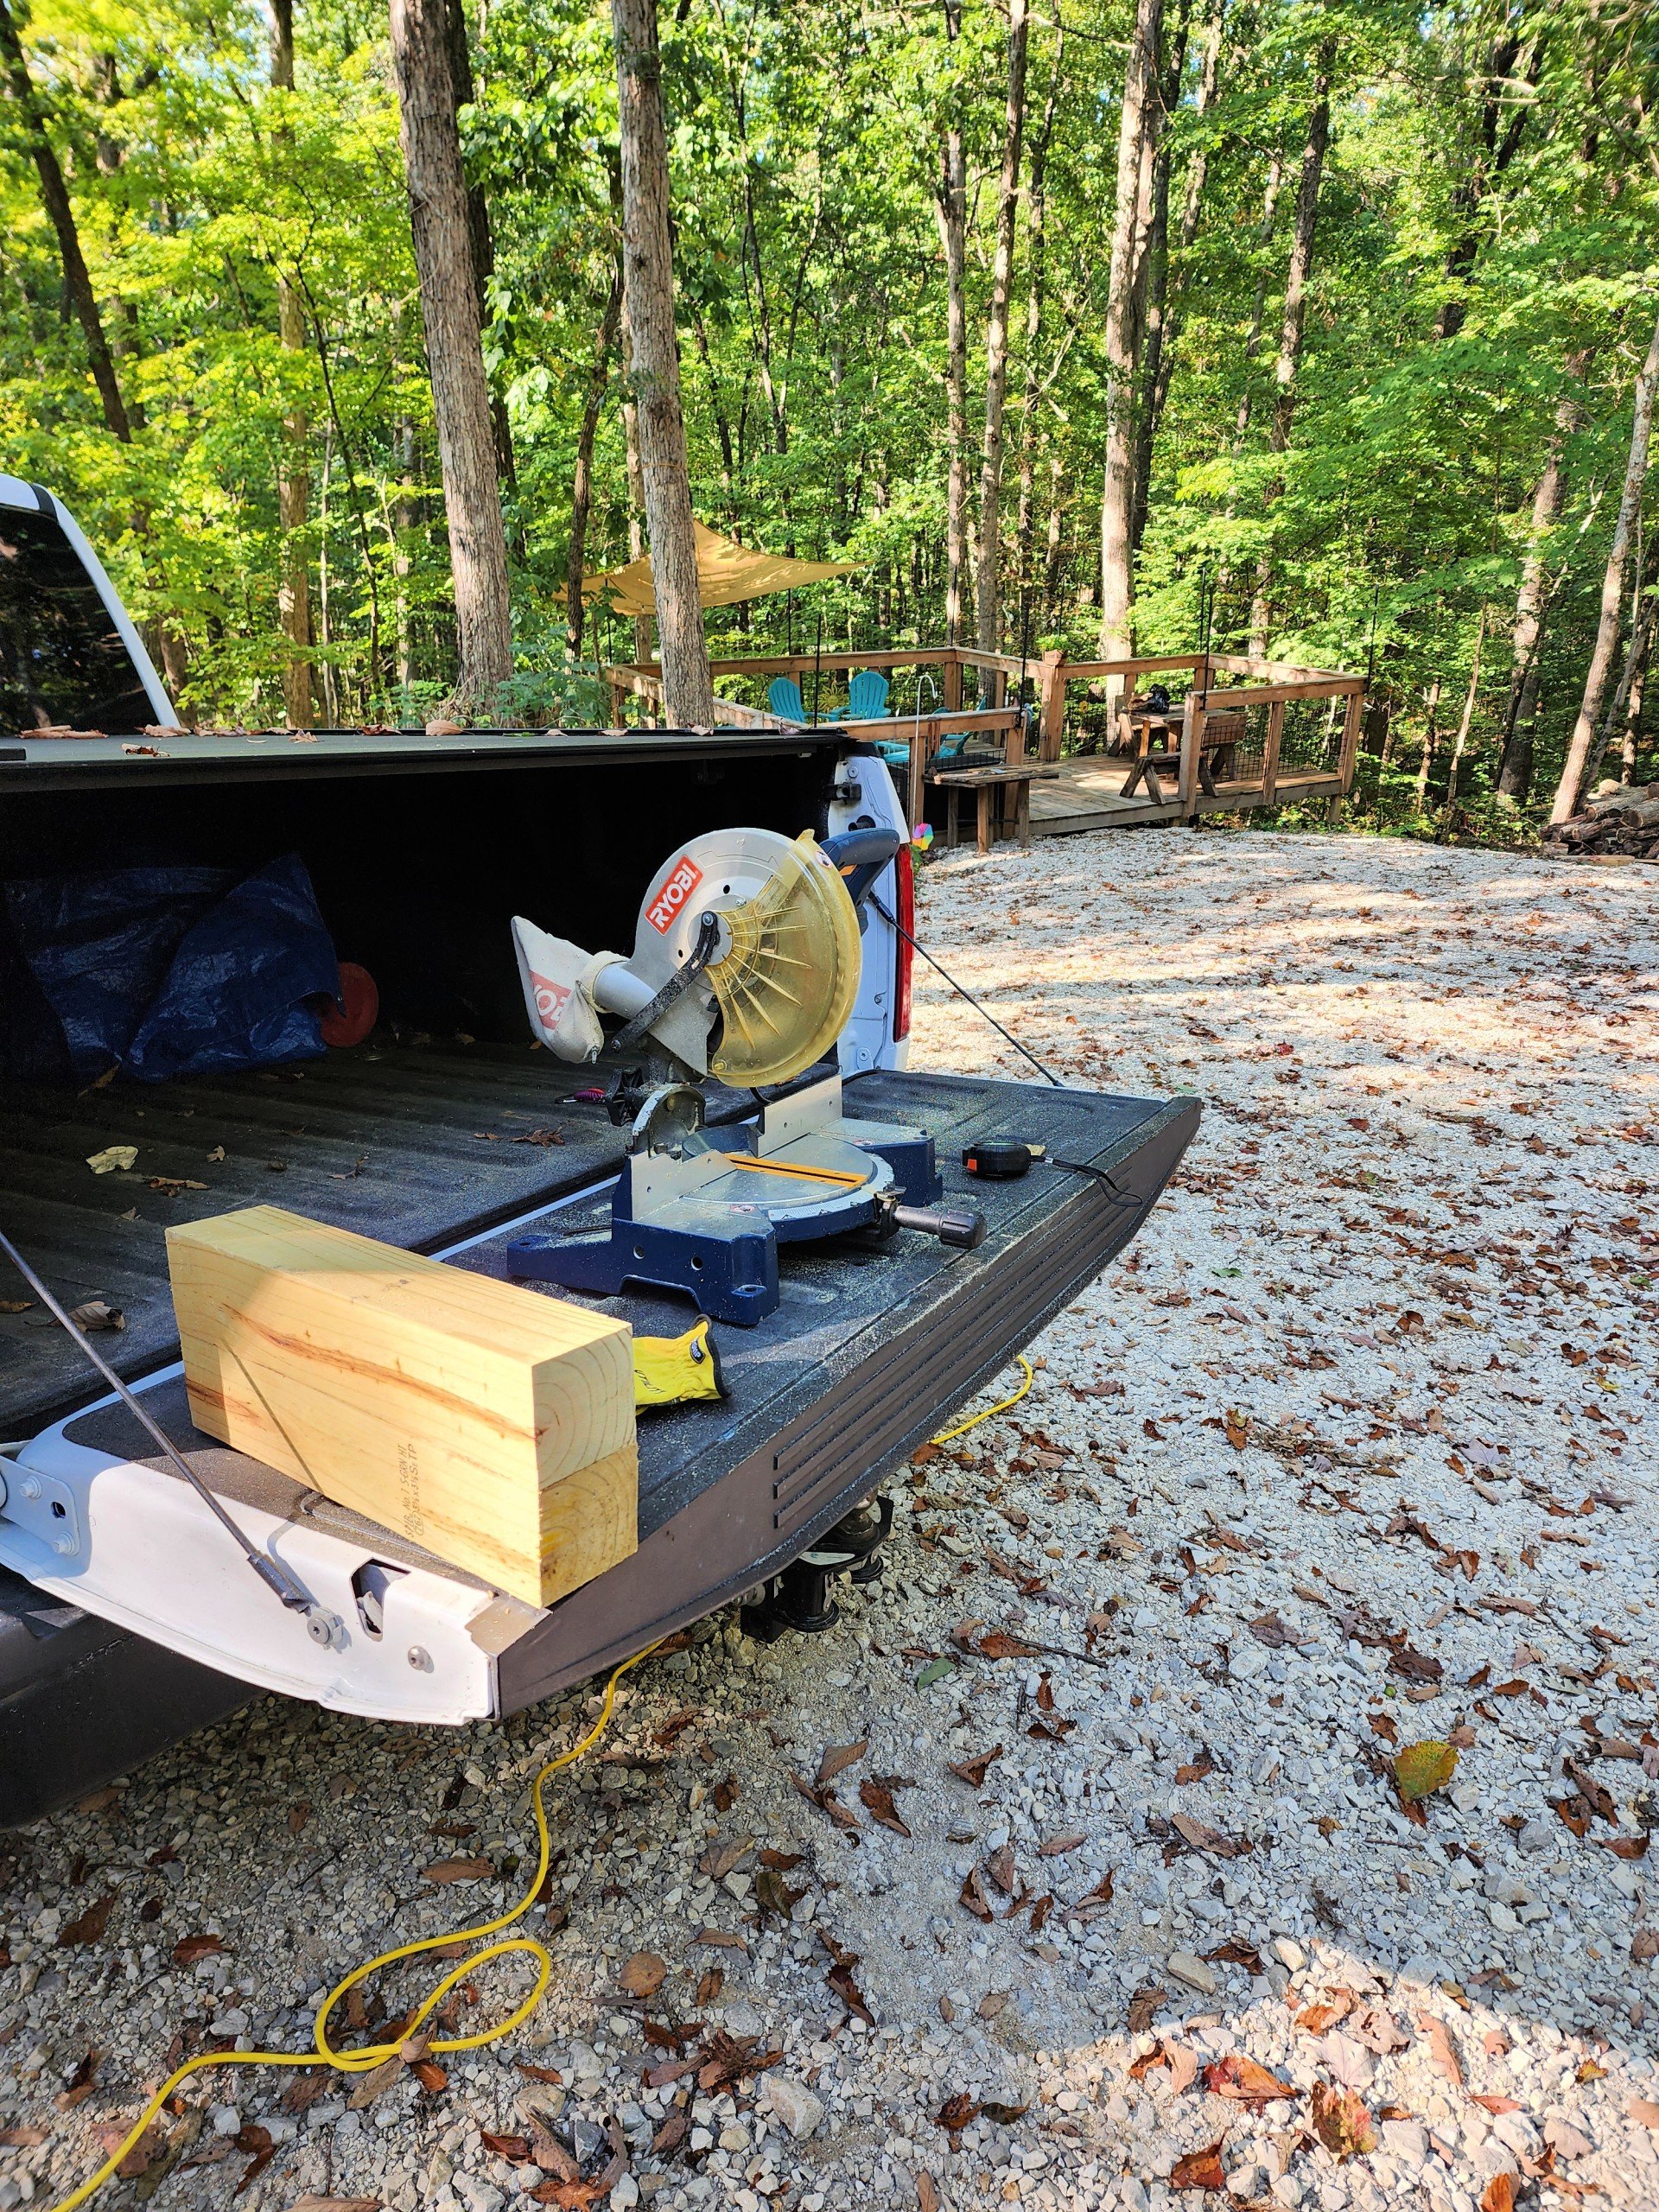
You don’t have to have the fanciest tools or an indoor workshop to build your new outdoor sofa. This small miter saw has served me well in building three decks and porches. My cousin Terry and I built three sections of the deck (in the background) and two front porches.
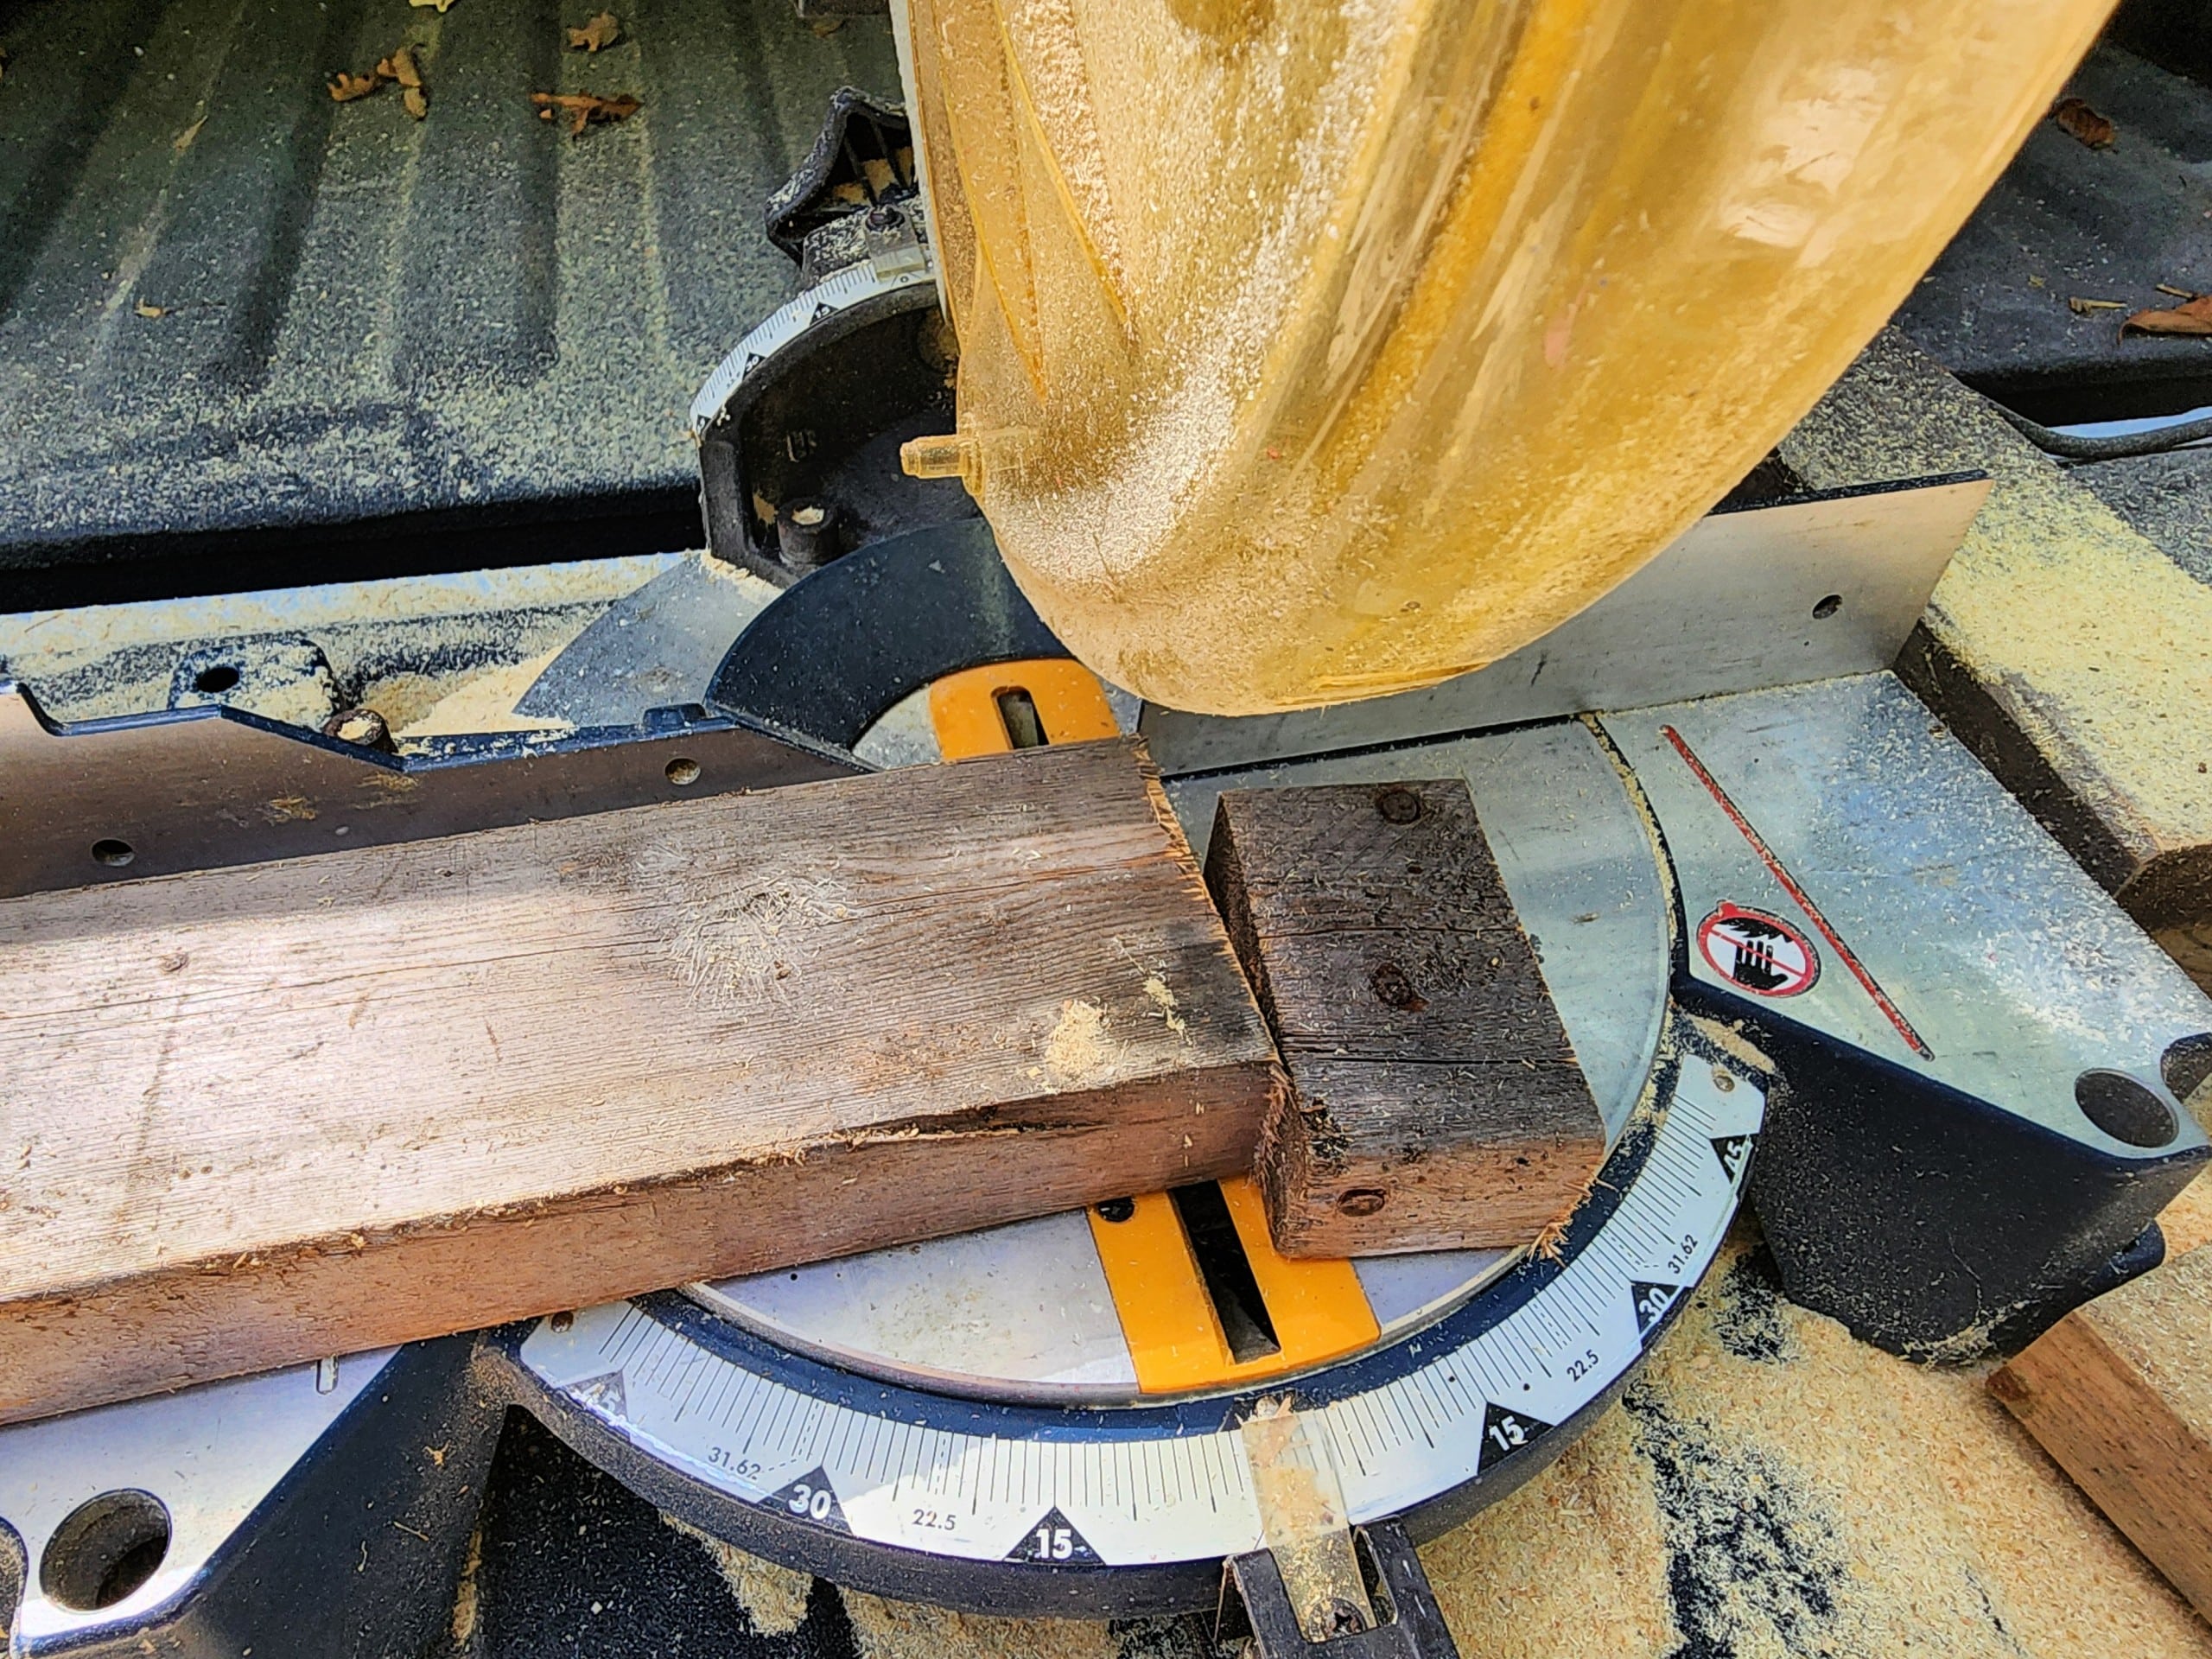
TIP: When building with reclaimed lumber, always check for random nails and screws before you start sawing.
Design Your Outdoor Sofa
Ana recommends that you build your sofa to match the size of your cushions. If you jump in and start building, you may have to purchase custom-made outdoor cushions. I wanted a two-seater sofa, which is more of a love seat than a sofa.
Cut List:
2×4 36″ (8): Two for the frame, five for the seat, and one for the back. You may want to add a piece in the middle of the back. I used scrap 2x2s instead.
2×4 15″ (8): Two for the frame and two for bracing in the frame. The remaining four will be used to make the arms.
2×4 25½” (4) These four pieces comprise the front and back legs.
2×4 20″ These two boards will become the armrests.
So, you can see that to make this outdoor sofa (love seat), many of the 2x4s are not long, and you may already have them in your scrap wood pile.
See the bottom of this article for the overall finished dimensions.
Tools & Supplies Needed:
- Saw
- Tape Measure
- Drill
- Speed Square
- Hammer
- Screws (I used 2 1/2″ deck screws)
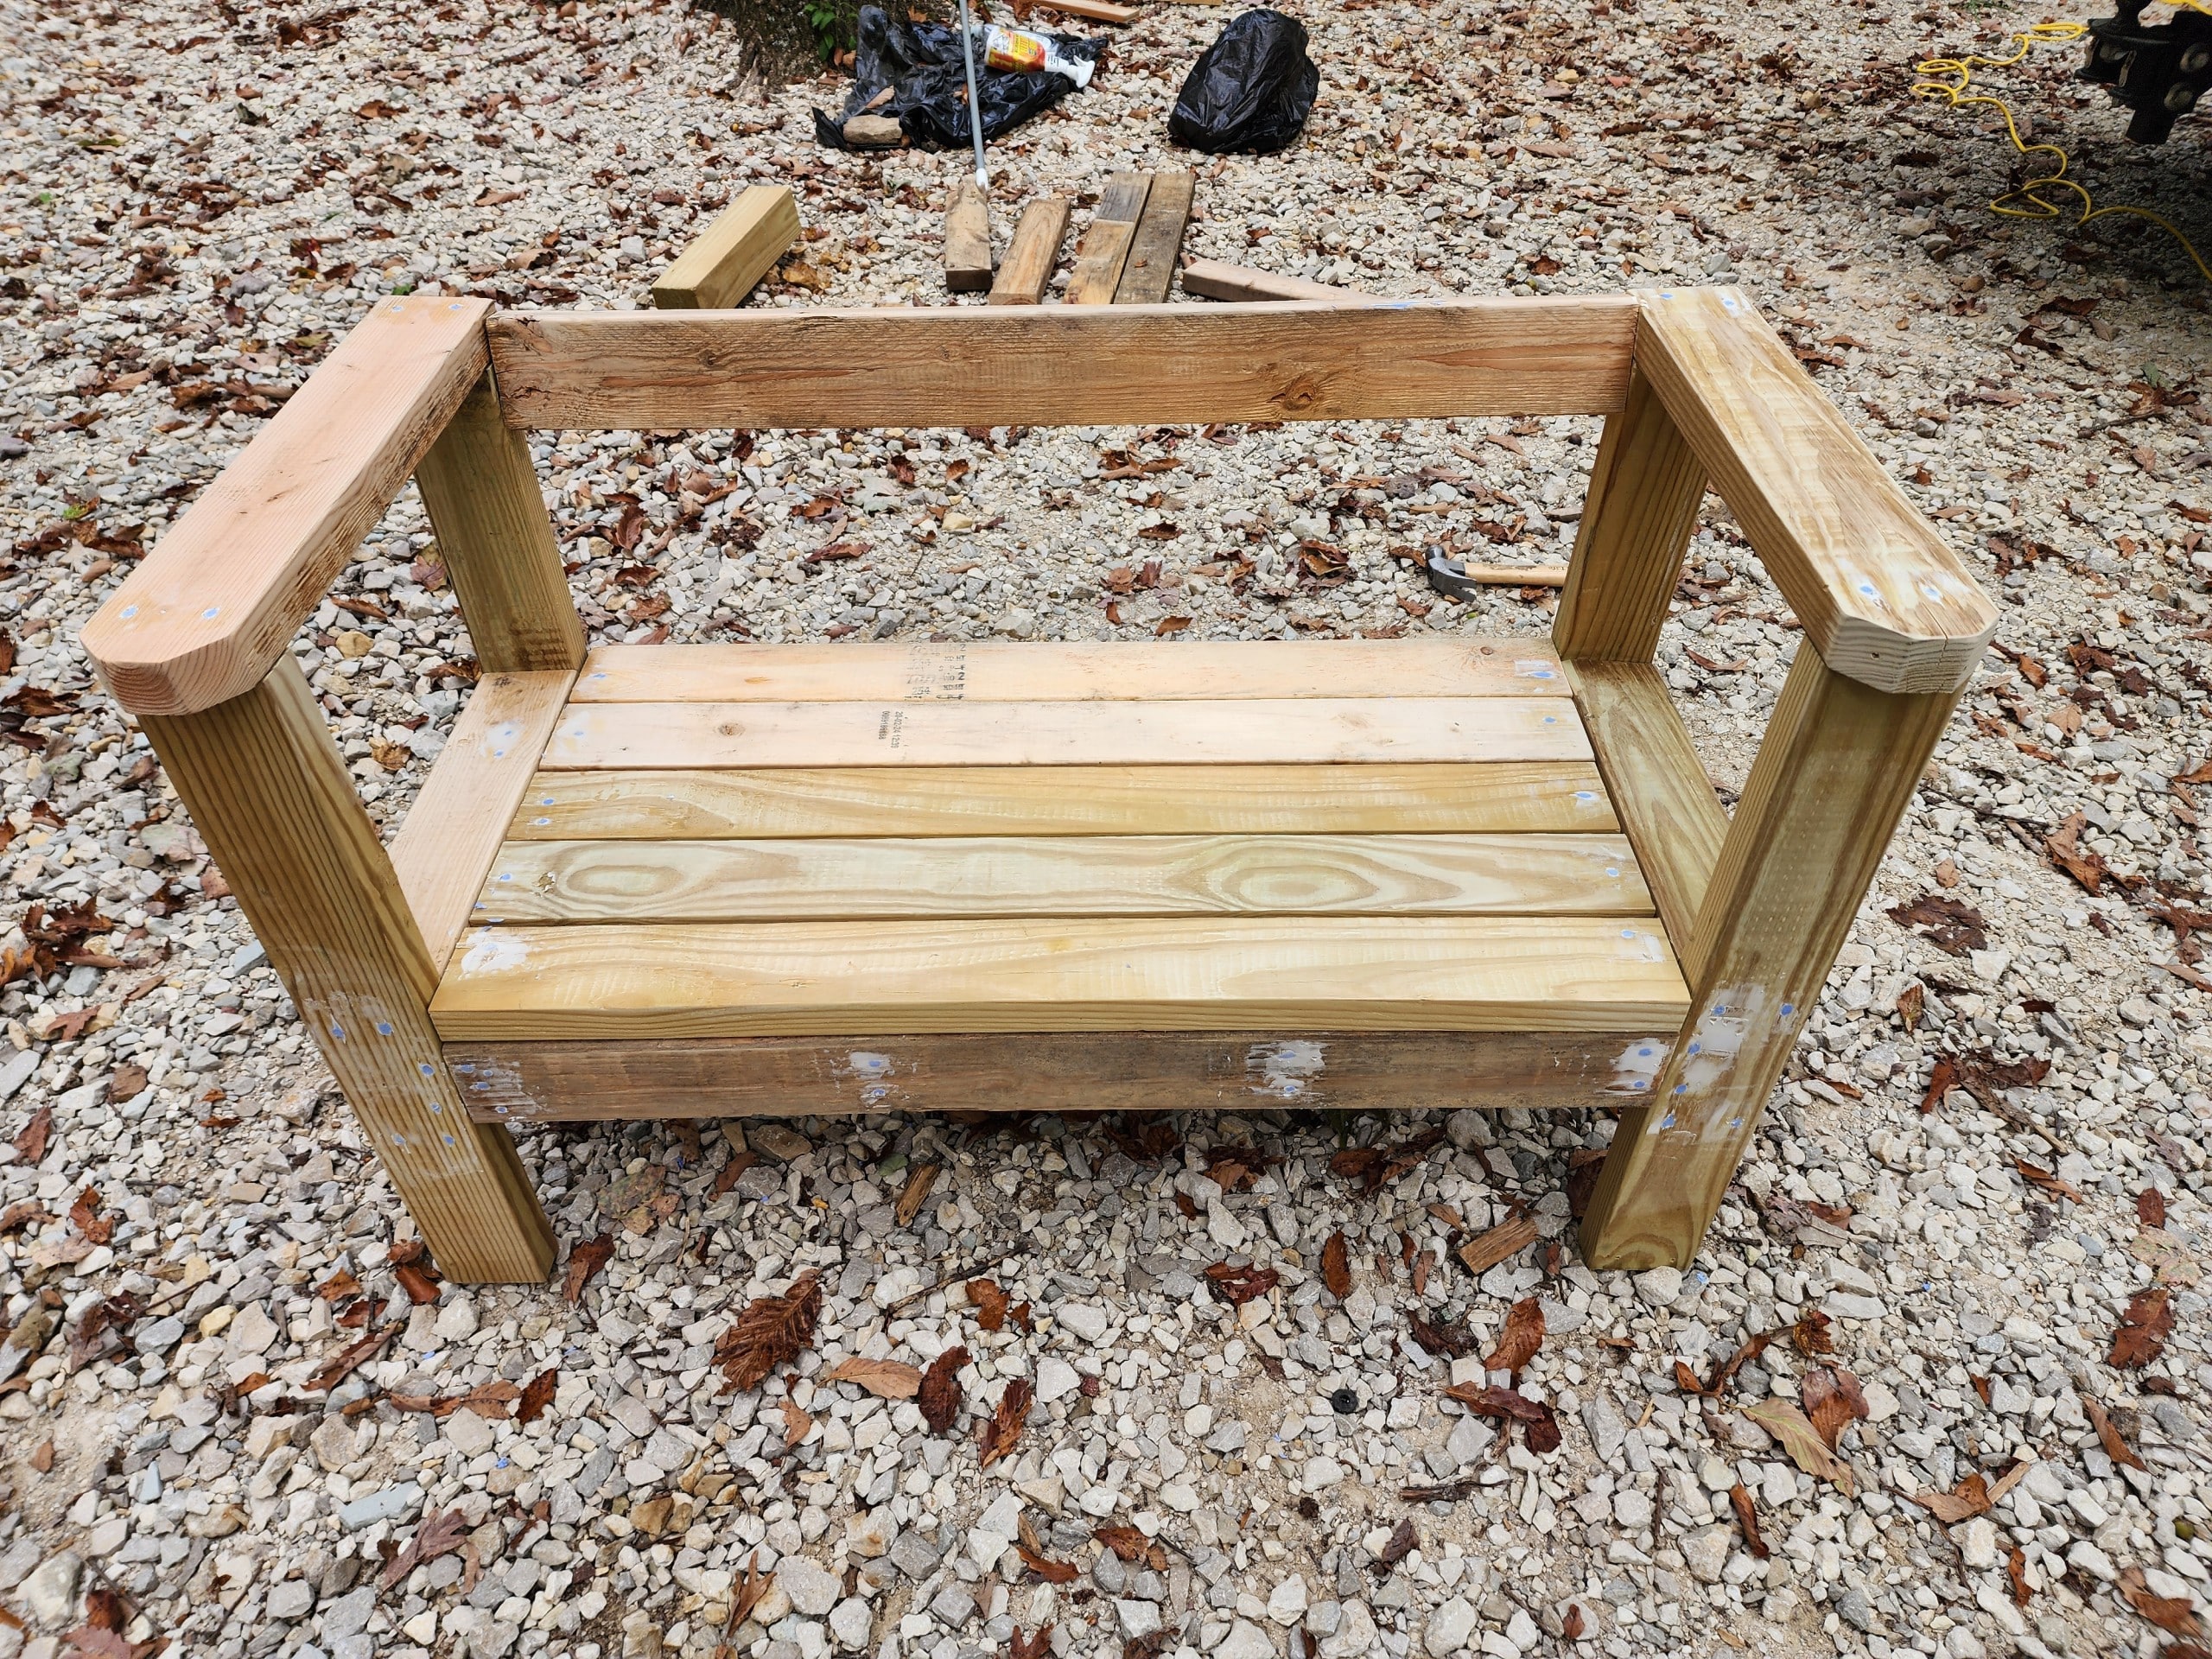
Assembling a 2×4 Scrap Wood Outdoor Sofa
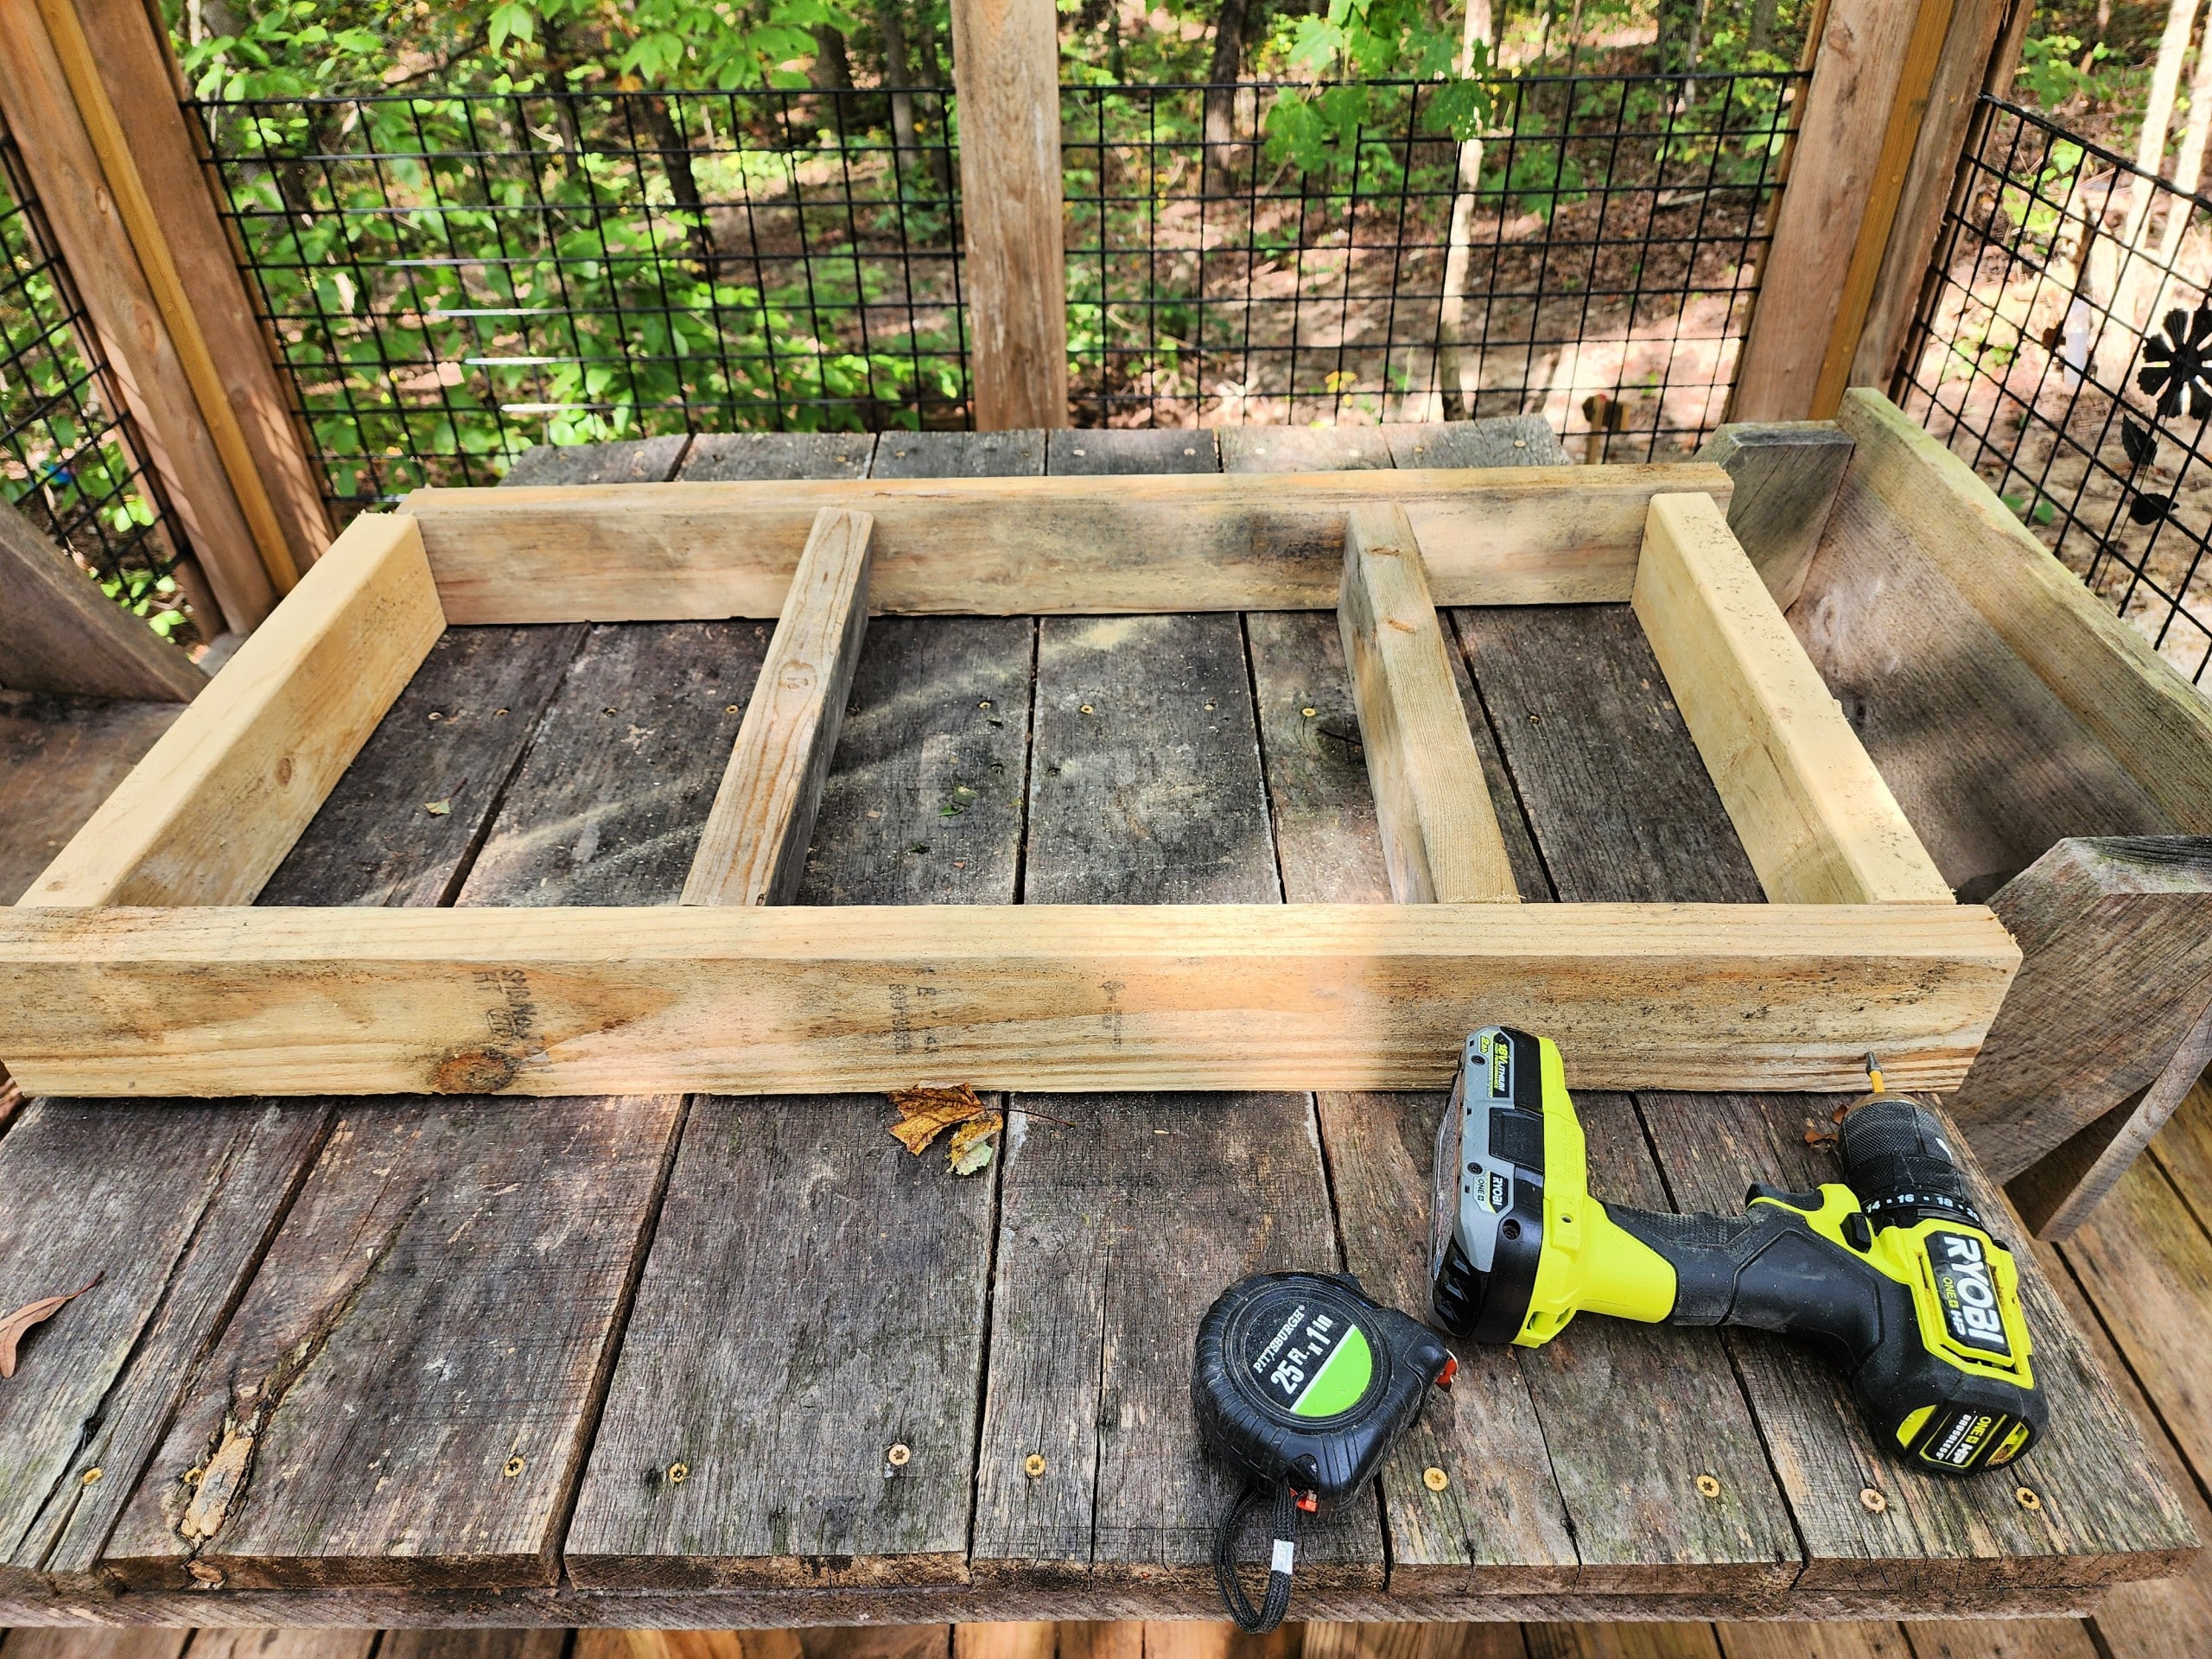
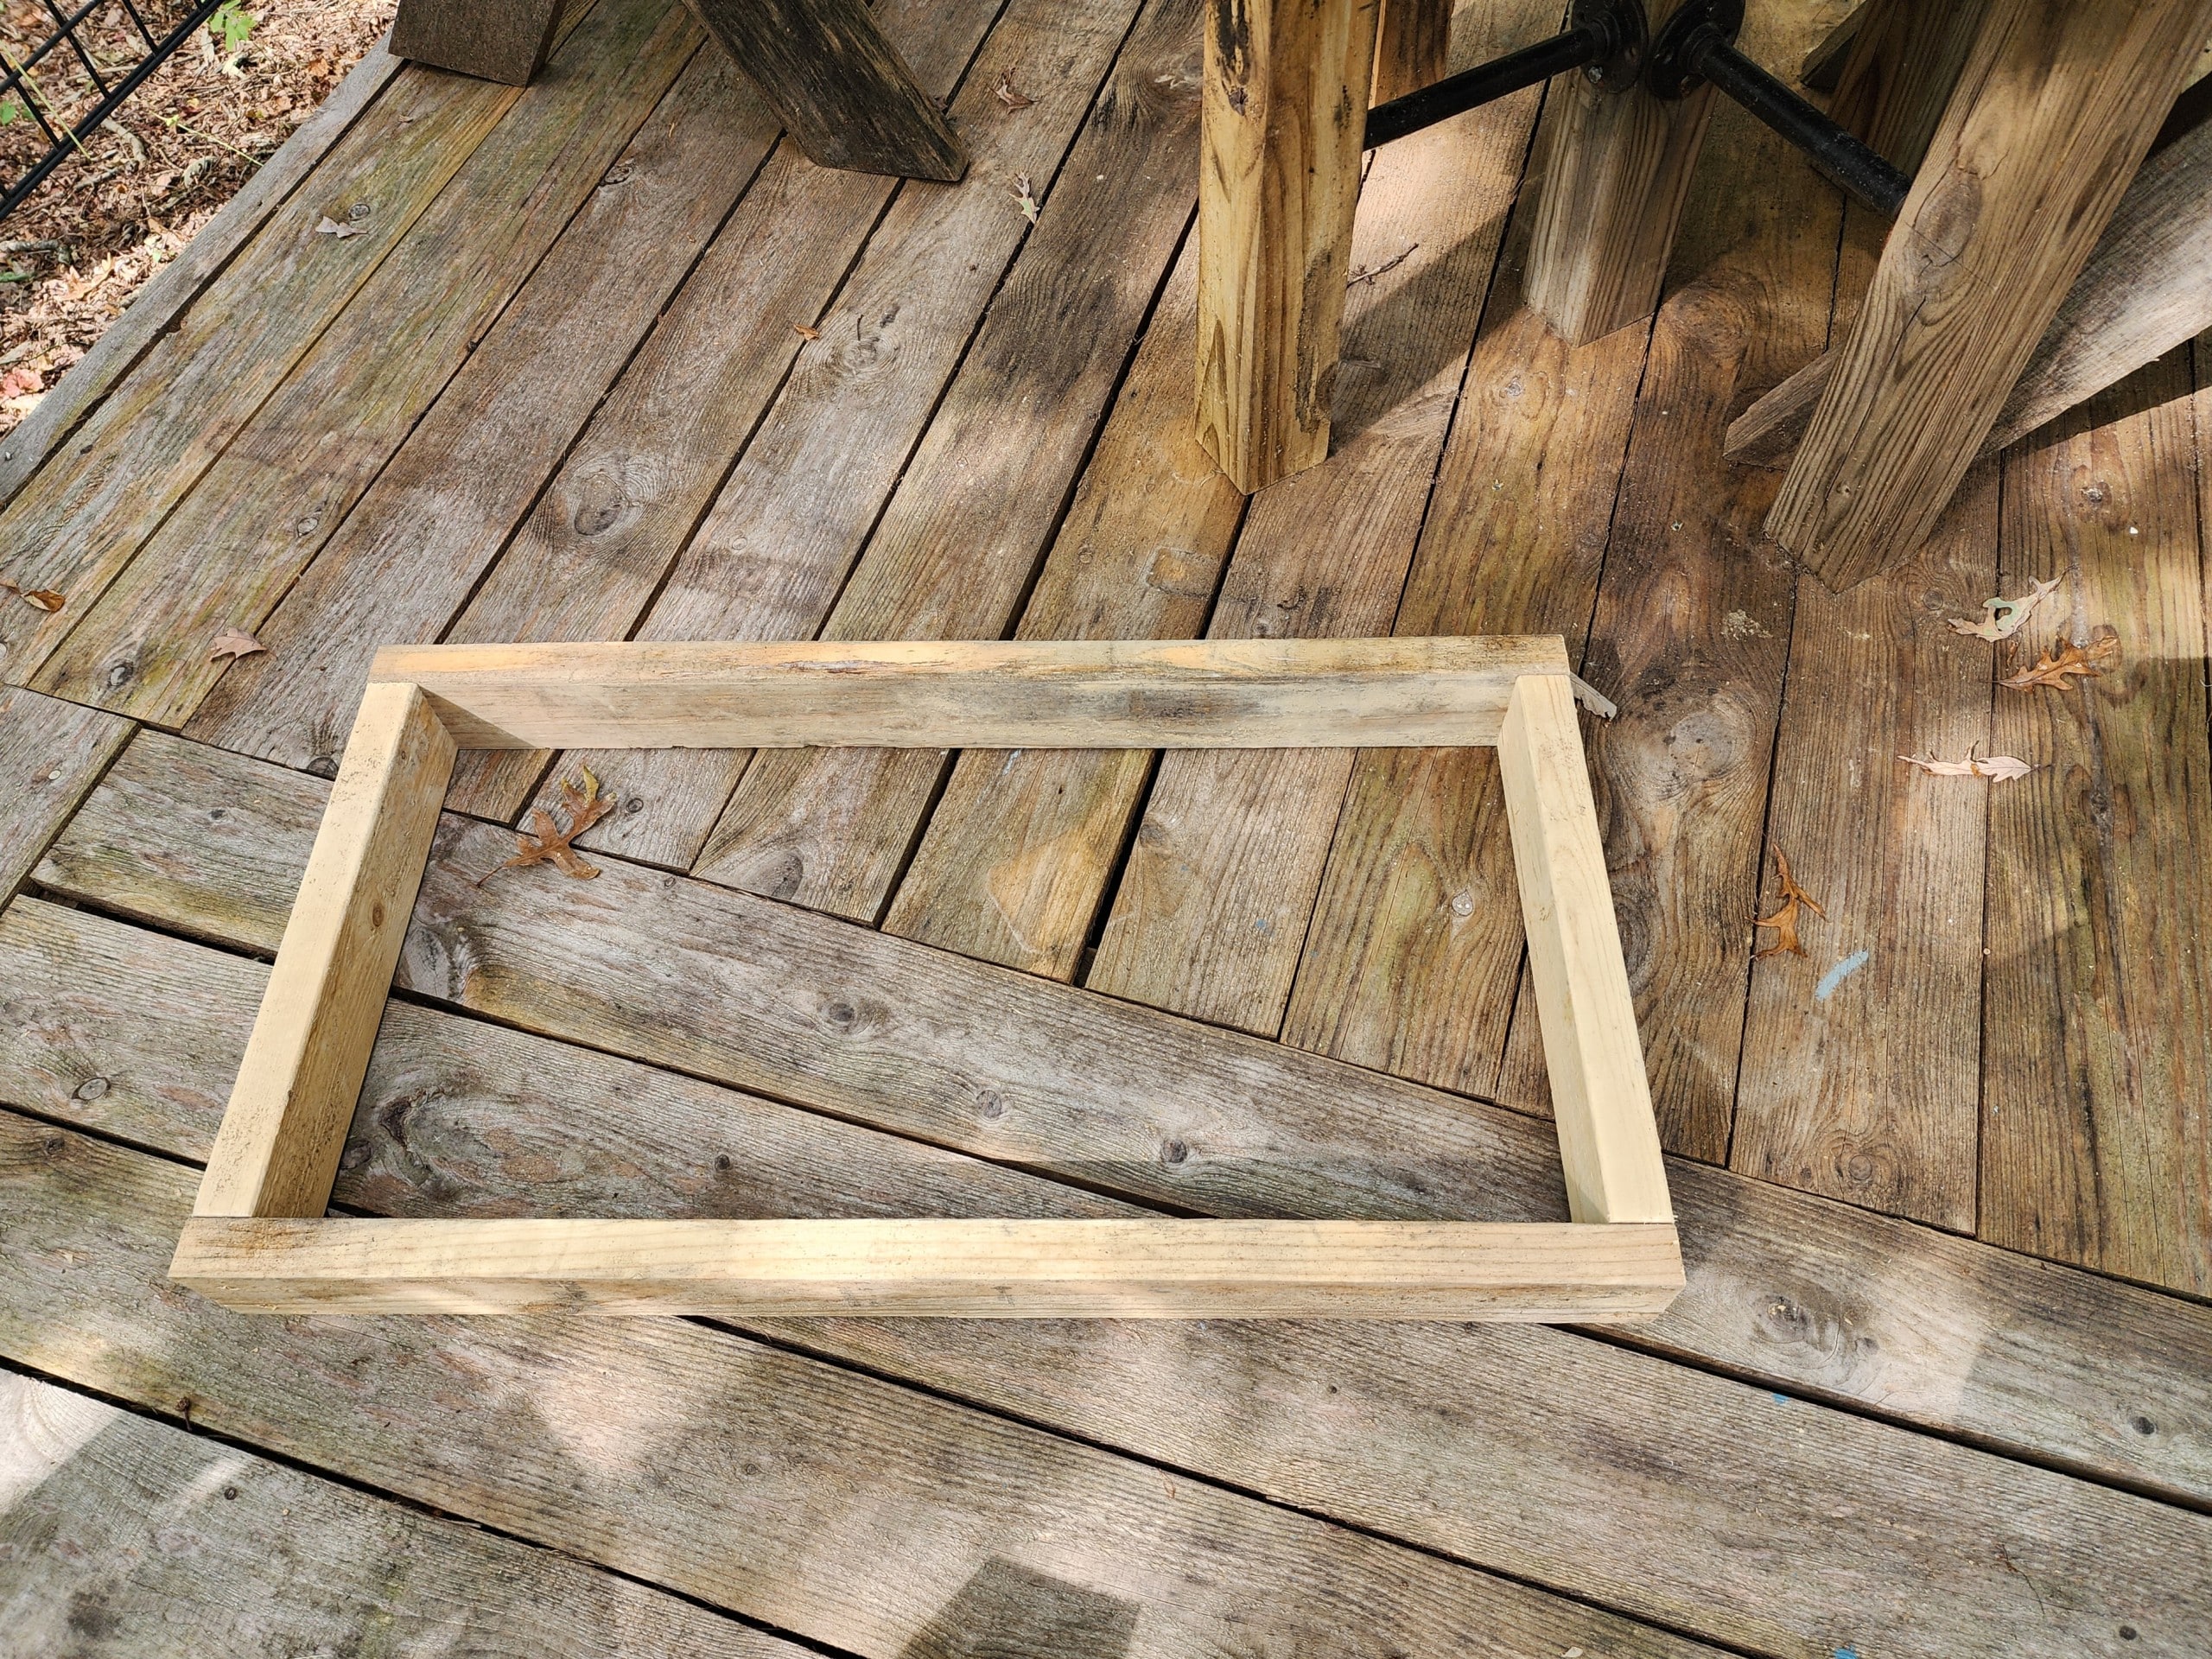
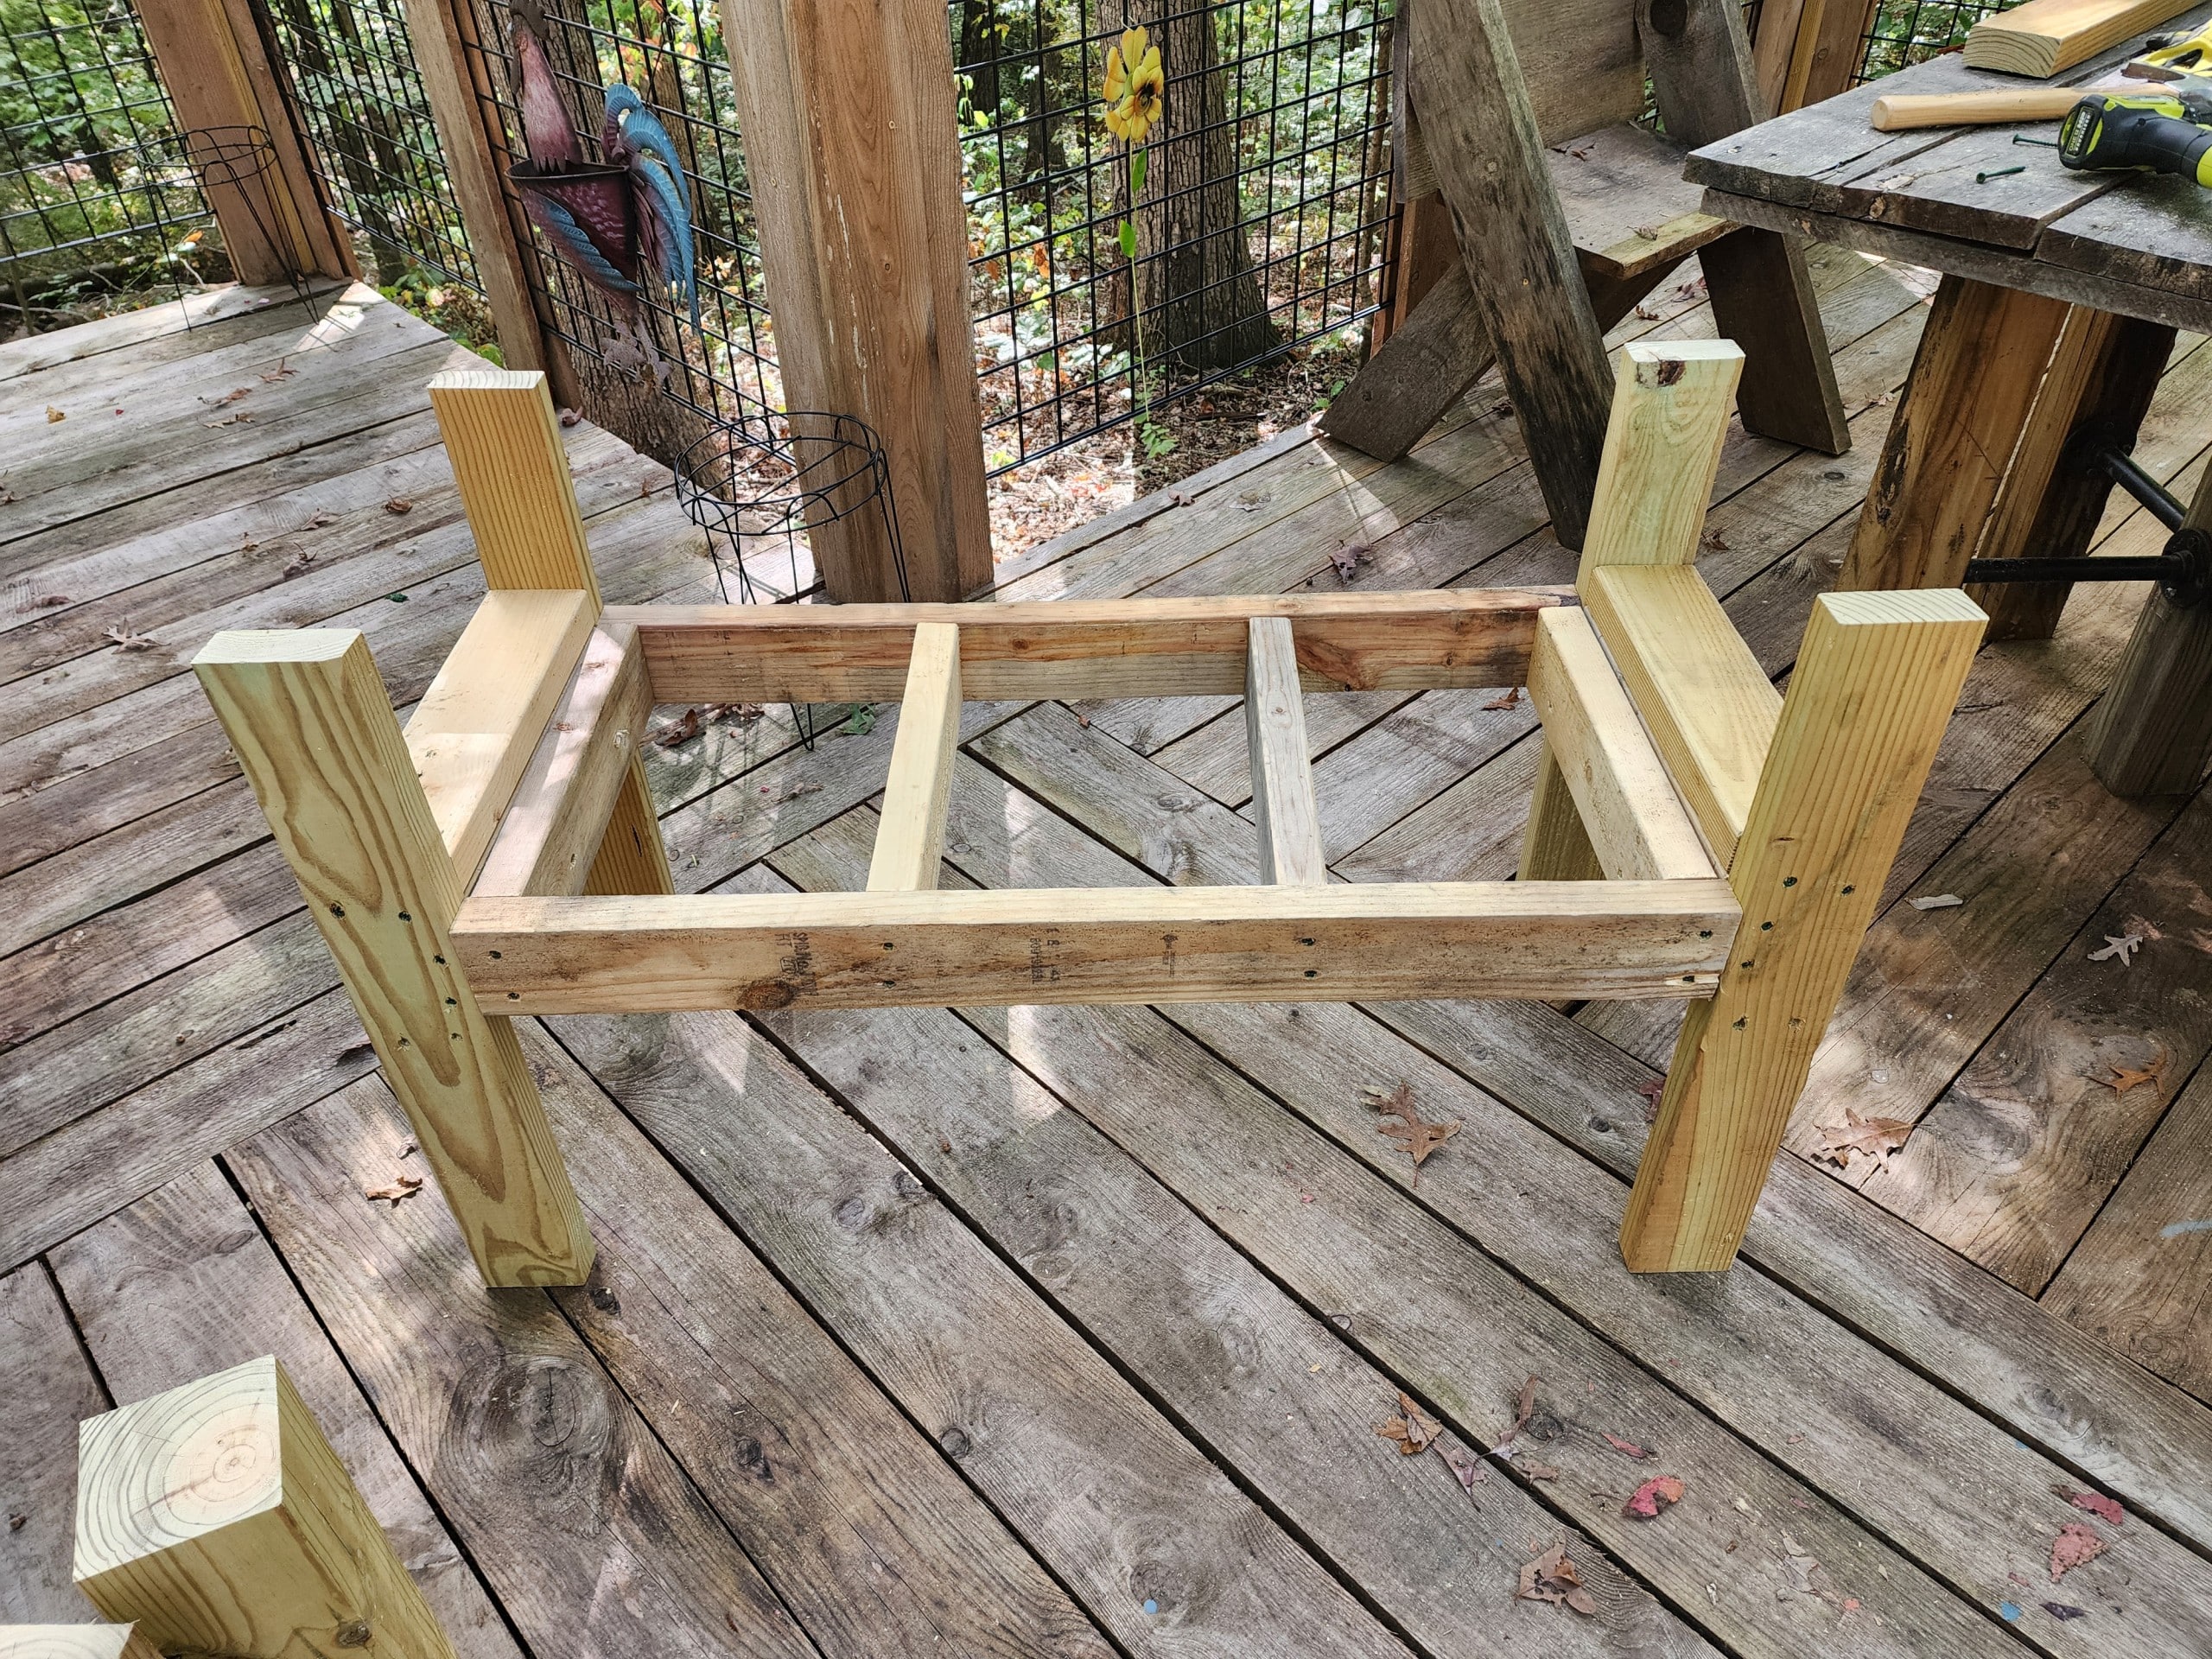
Doing a dry fit is good for ensuring everything goes as planned.
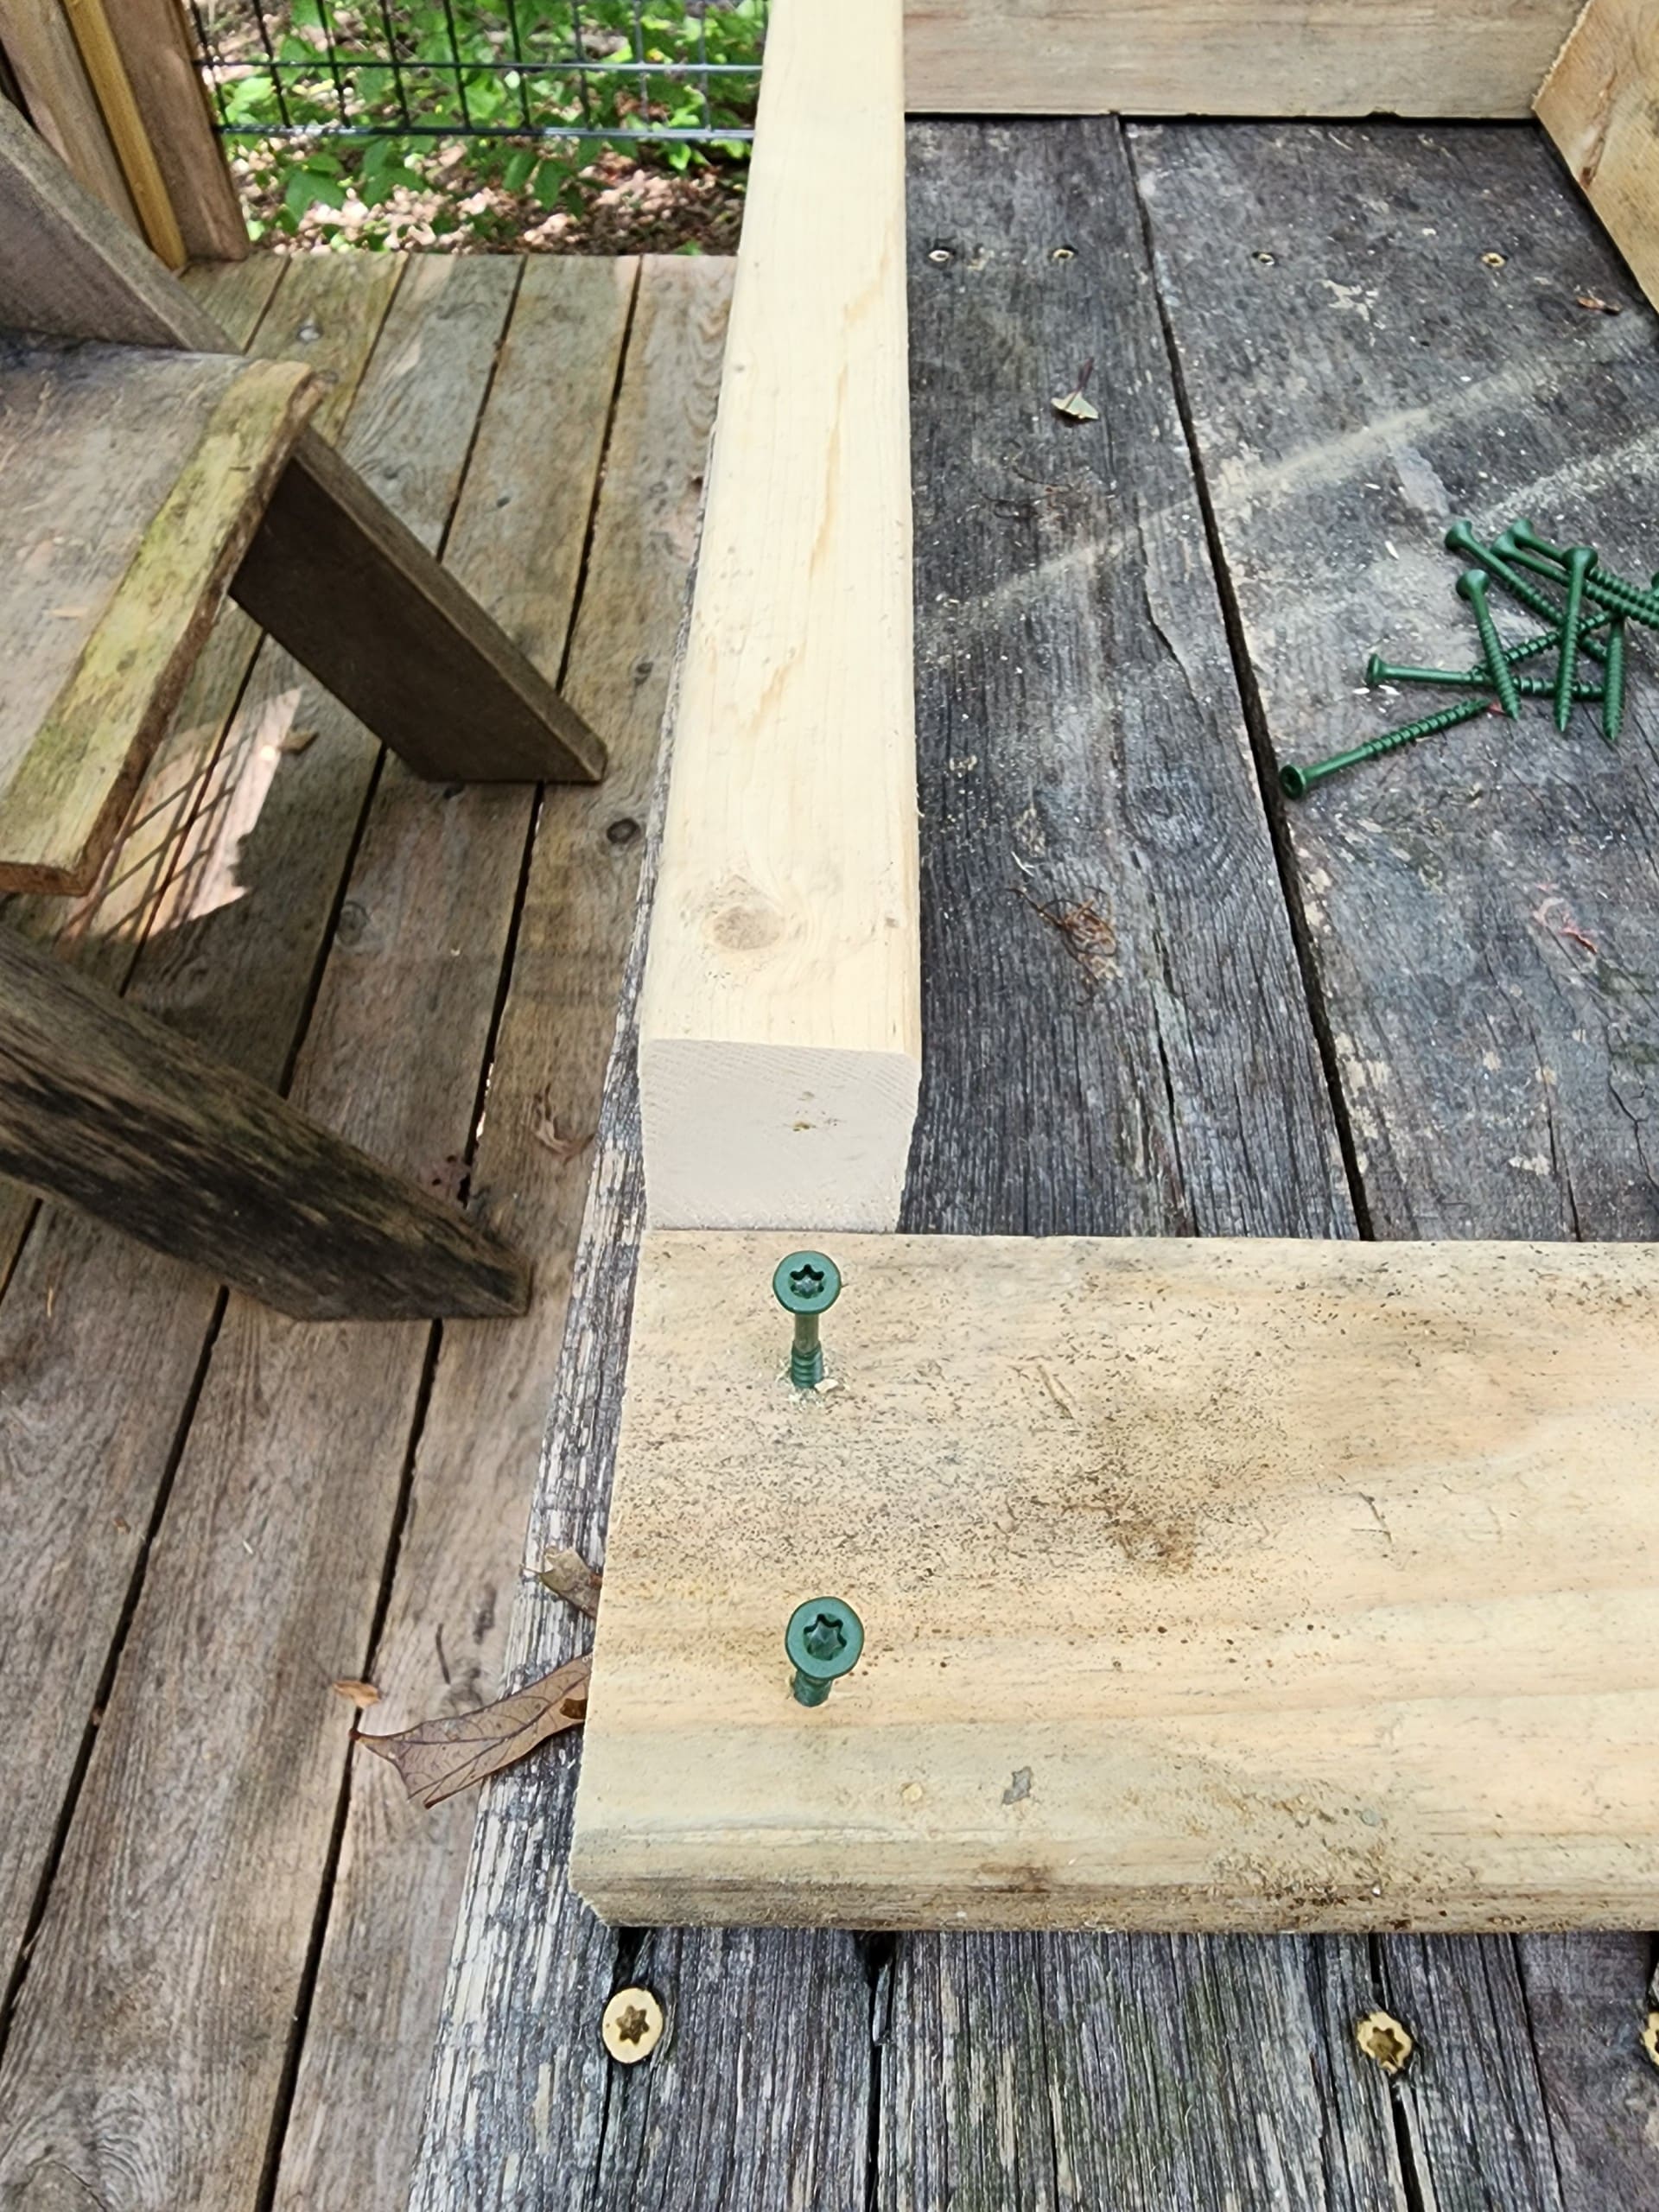
Laying the front board down allows me to see exactly where I want to start my screws to secure the boards. I did this for the front and back and secured those to the two end boards.
The speed square I used to make sure the frame is squared is not shown. (see the image below)
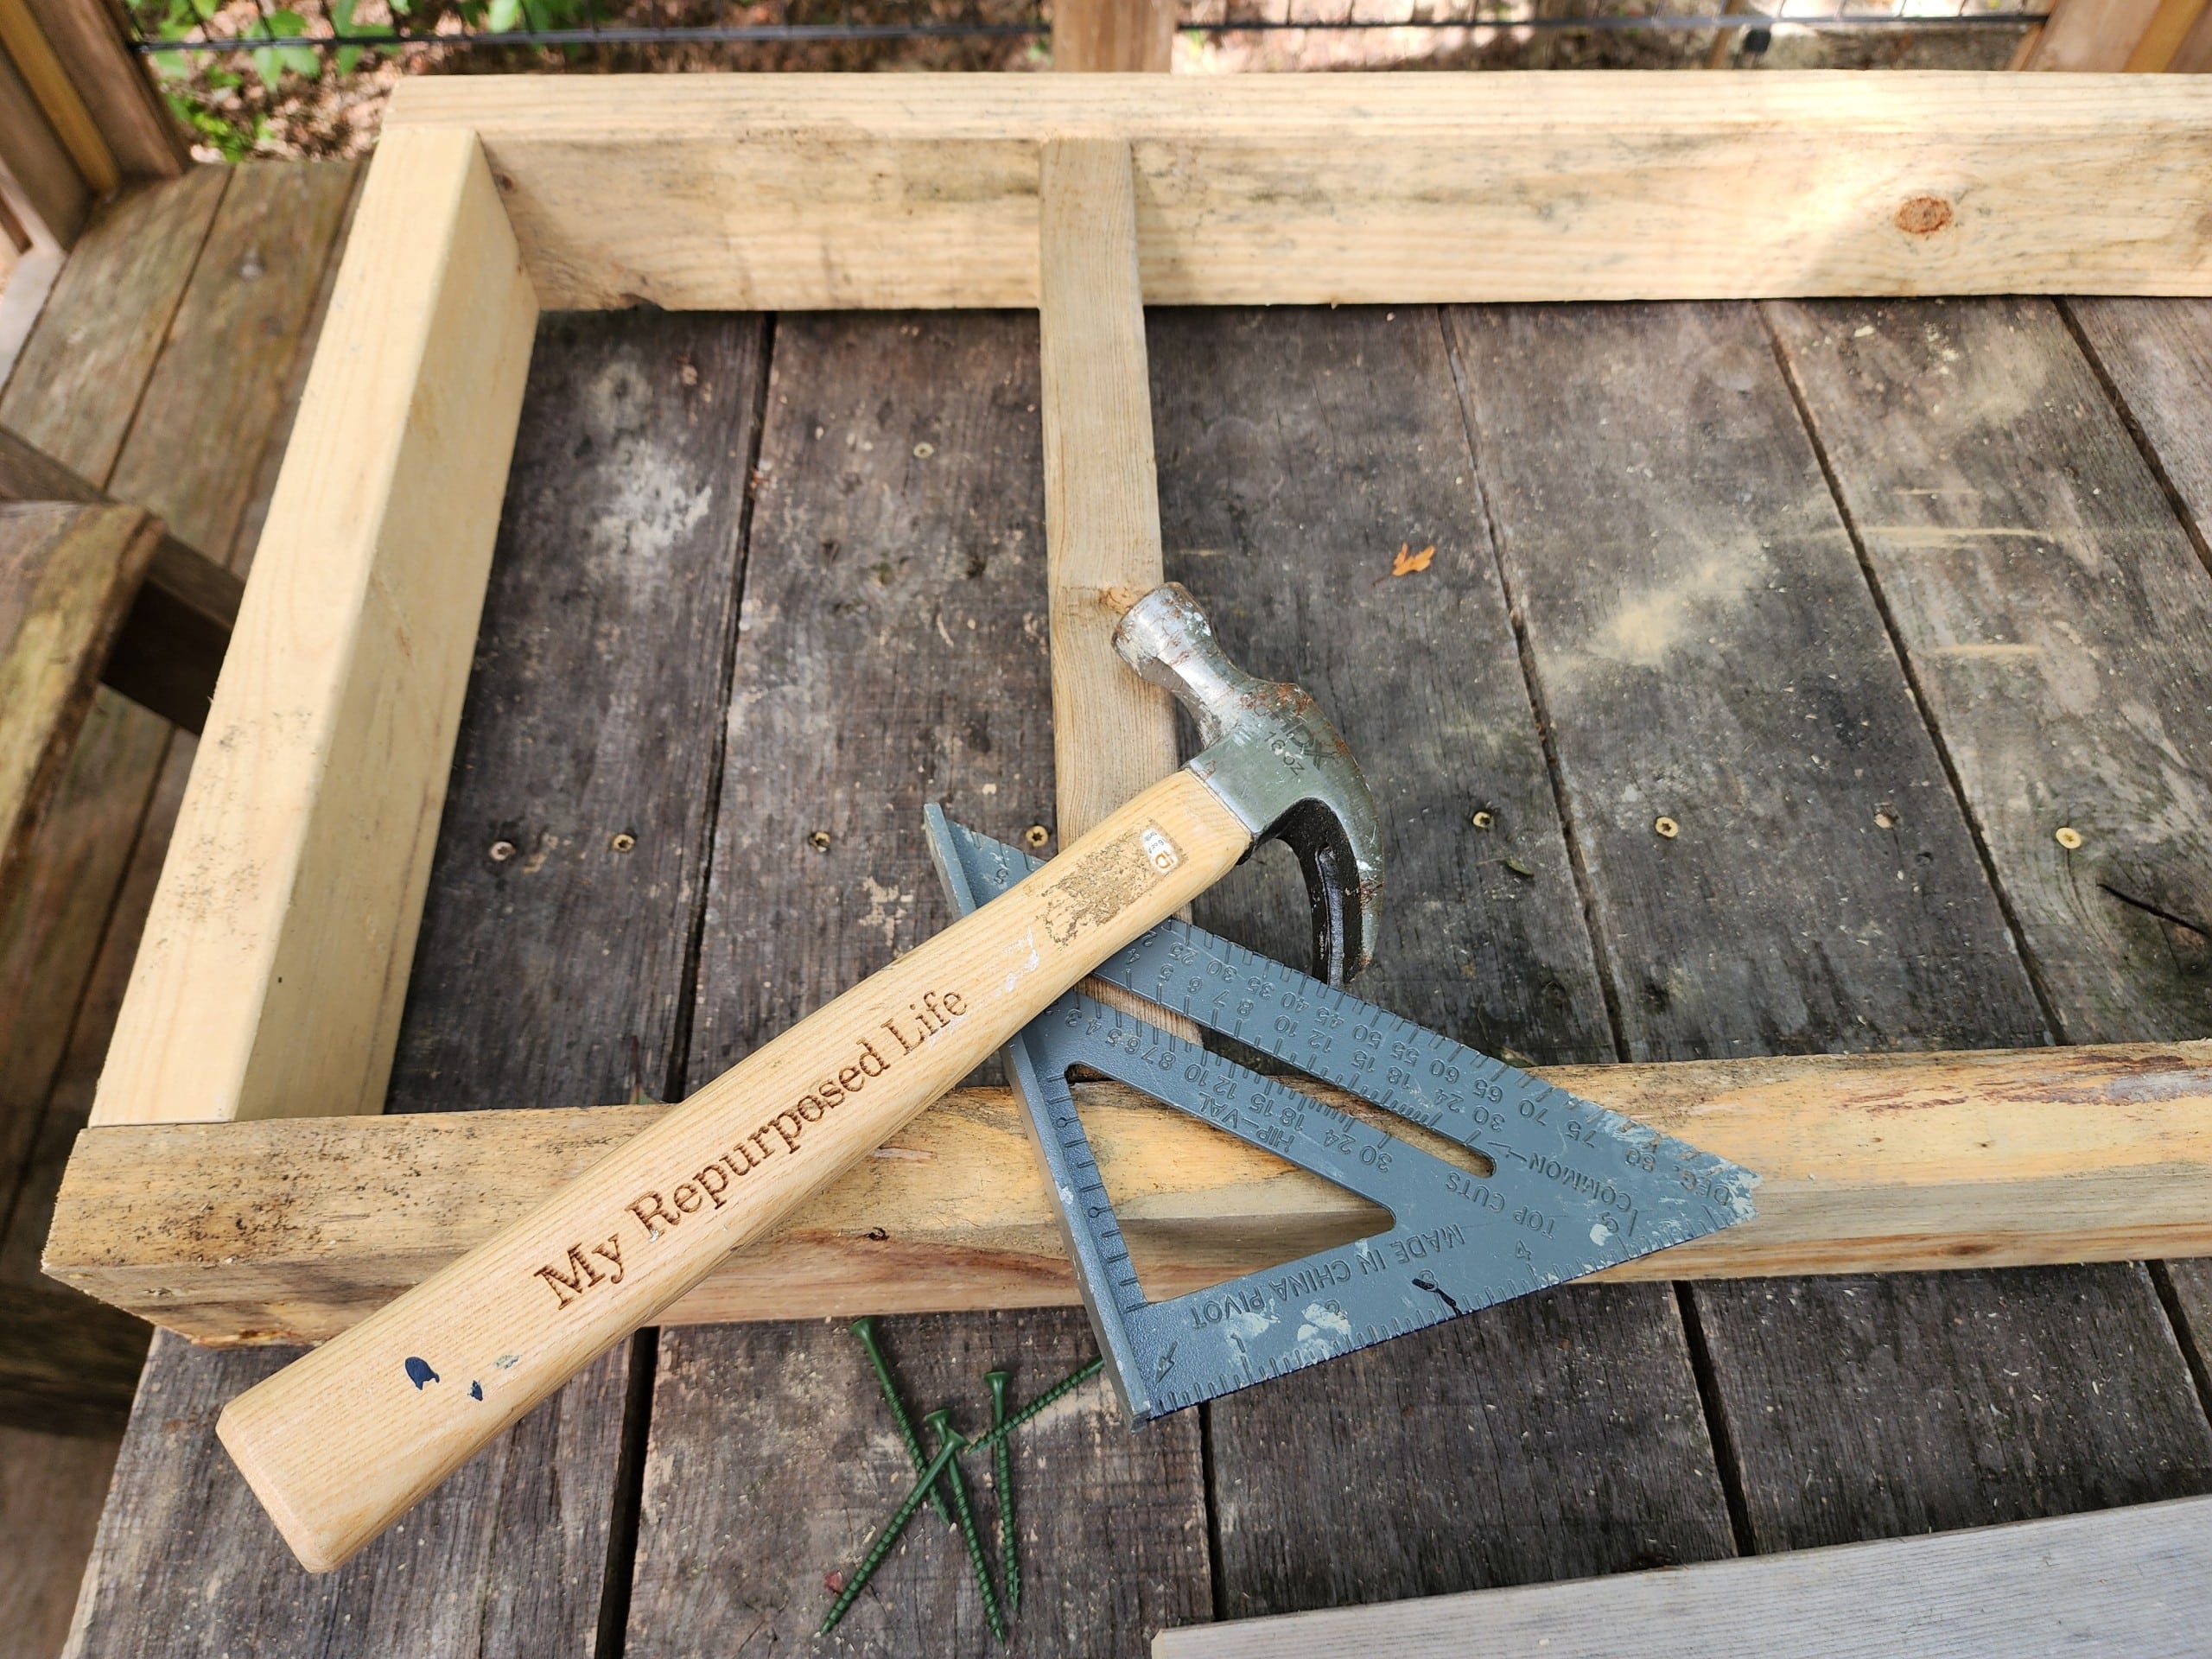
The two inner brace boards were placed on 12″ centers, using the speed square to ensure proper squaring. The hammer was handy in positioning the braces because of their snug fit.
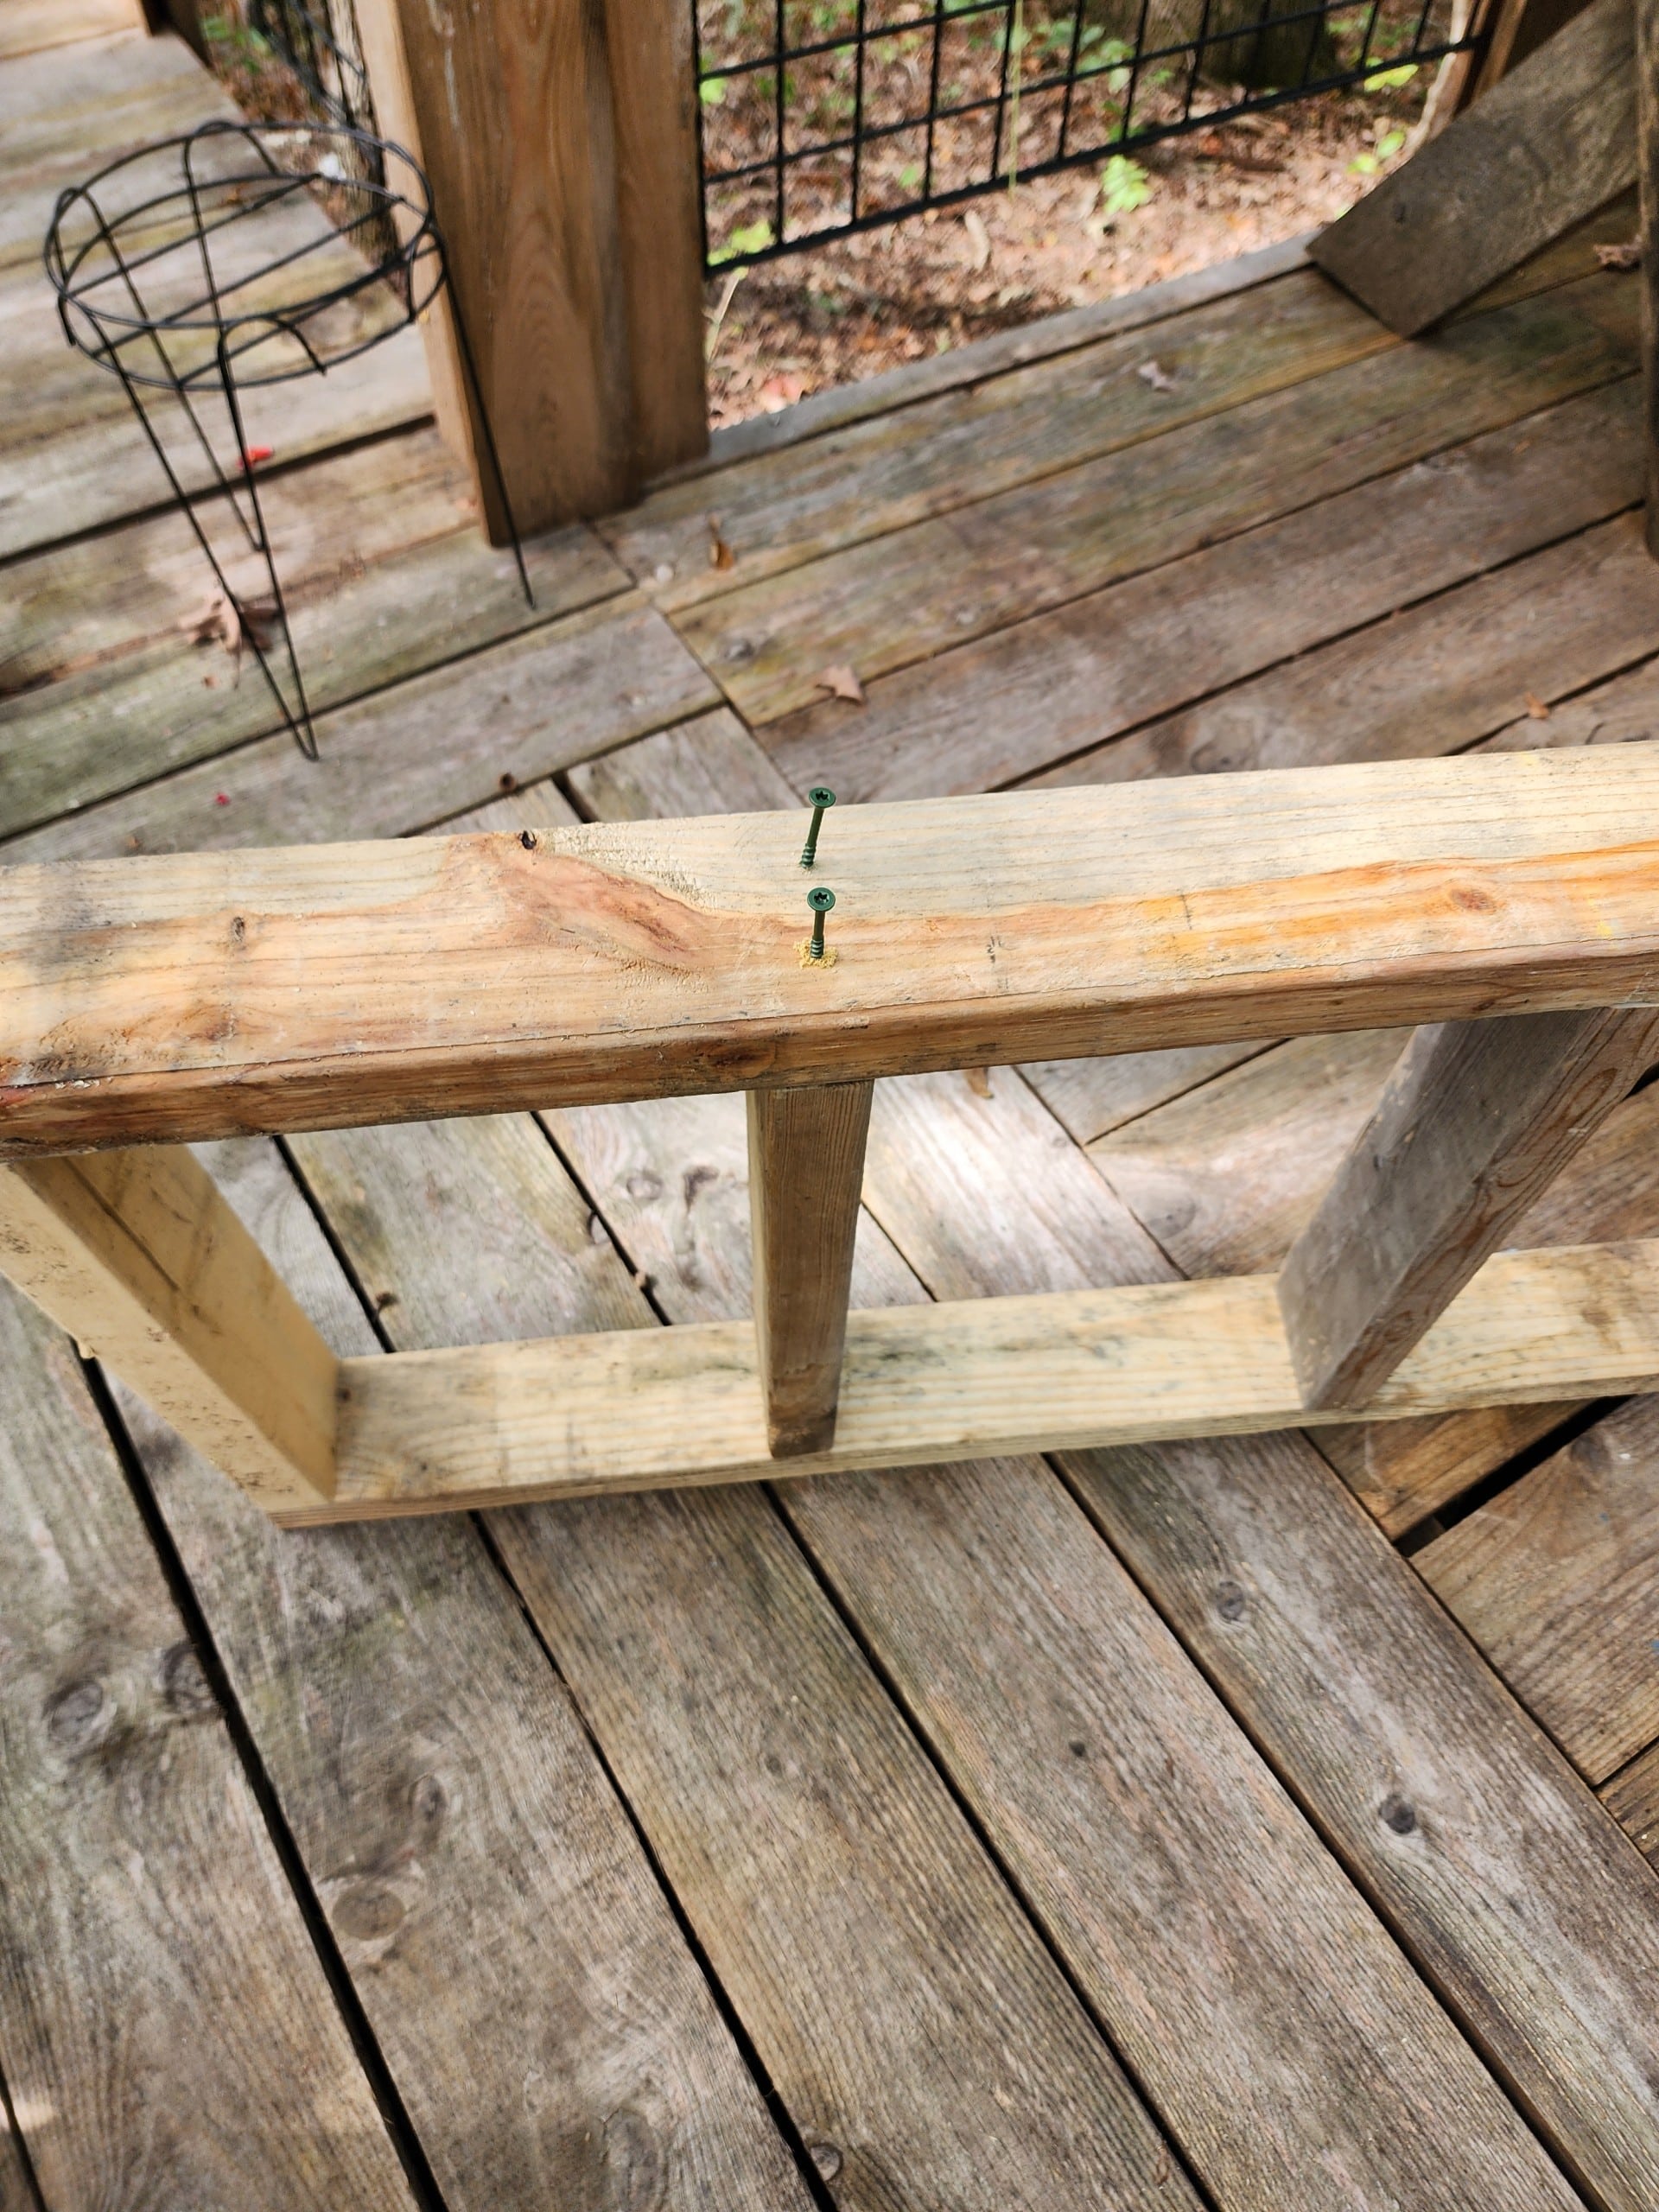
With the braces securely snug in place, I added all the screws necessary.
Don’t Believe Everything You Read Online
Are you sometimes intimidated by DIY bloggers’ skills? Do you think we know everything? Maybe you think we don’t make mistakes. I’m here to tell you I made several mistakes on this project. I hope that my photo step-by-step directions will make things clear for you. I was building my outdoor sofa (loveseat) following Ana’s Plans on my phone. There was some confusion on my part, which caused me to unassemble and reassemble it twice.
How to Build Arms for Outdoor Sofa Project
I assembled the arms of the outdoor sofa in a different order than described in Ana’s plans, which is where my confusion came in. I believe this is where I removed the side supports of the arms and flipped the sofa over, thinking it was upside down.
My first mistake earlier was thinking the “box” went in between the arms instead of from edge to edge, as shown in the image above.
TIP: Ana mentions that some builders add extra boards to help hold the cushions in place. If you’re going for that look, now is the time to add an extra board on the sides and back. I waited until the armrests and back were in place, and it was a very tight fit.
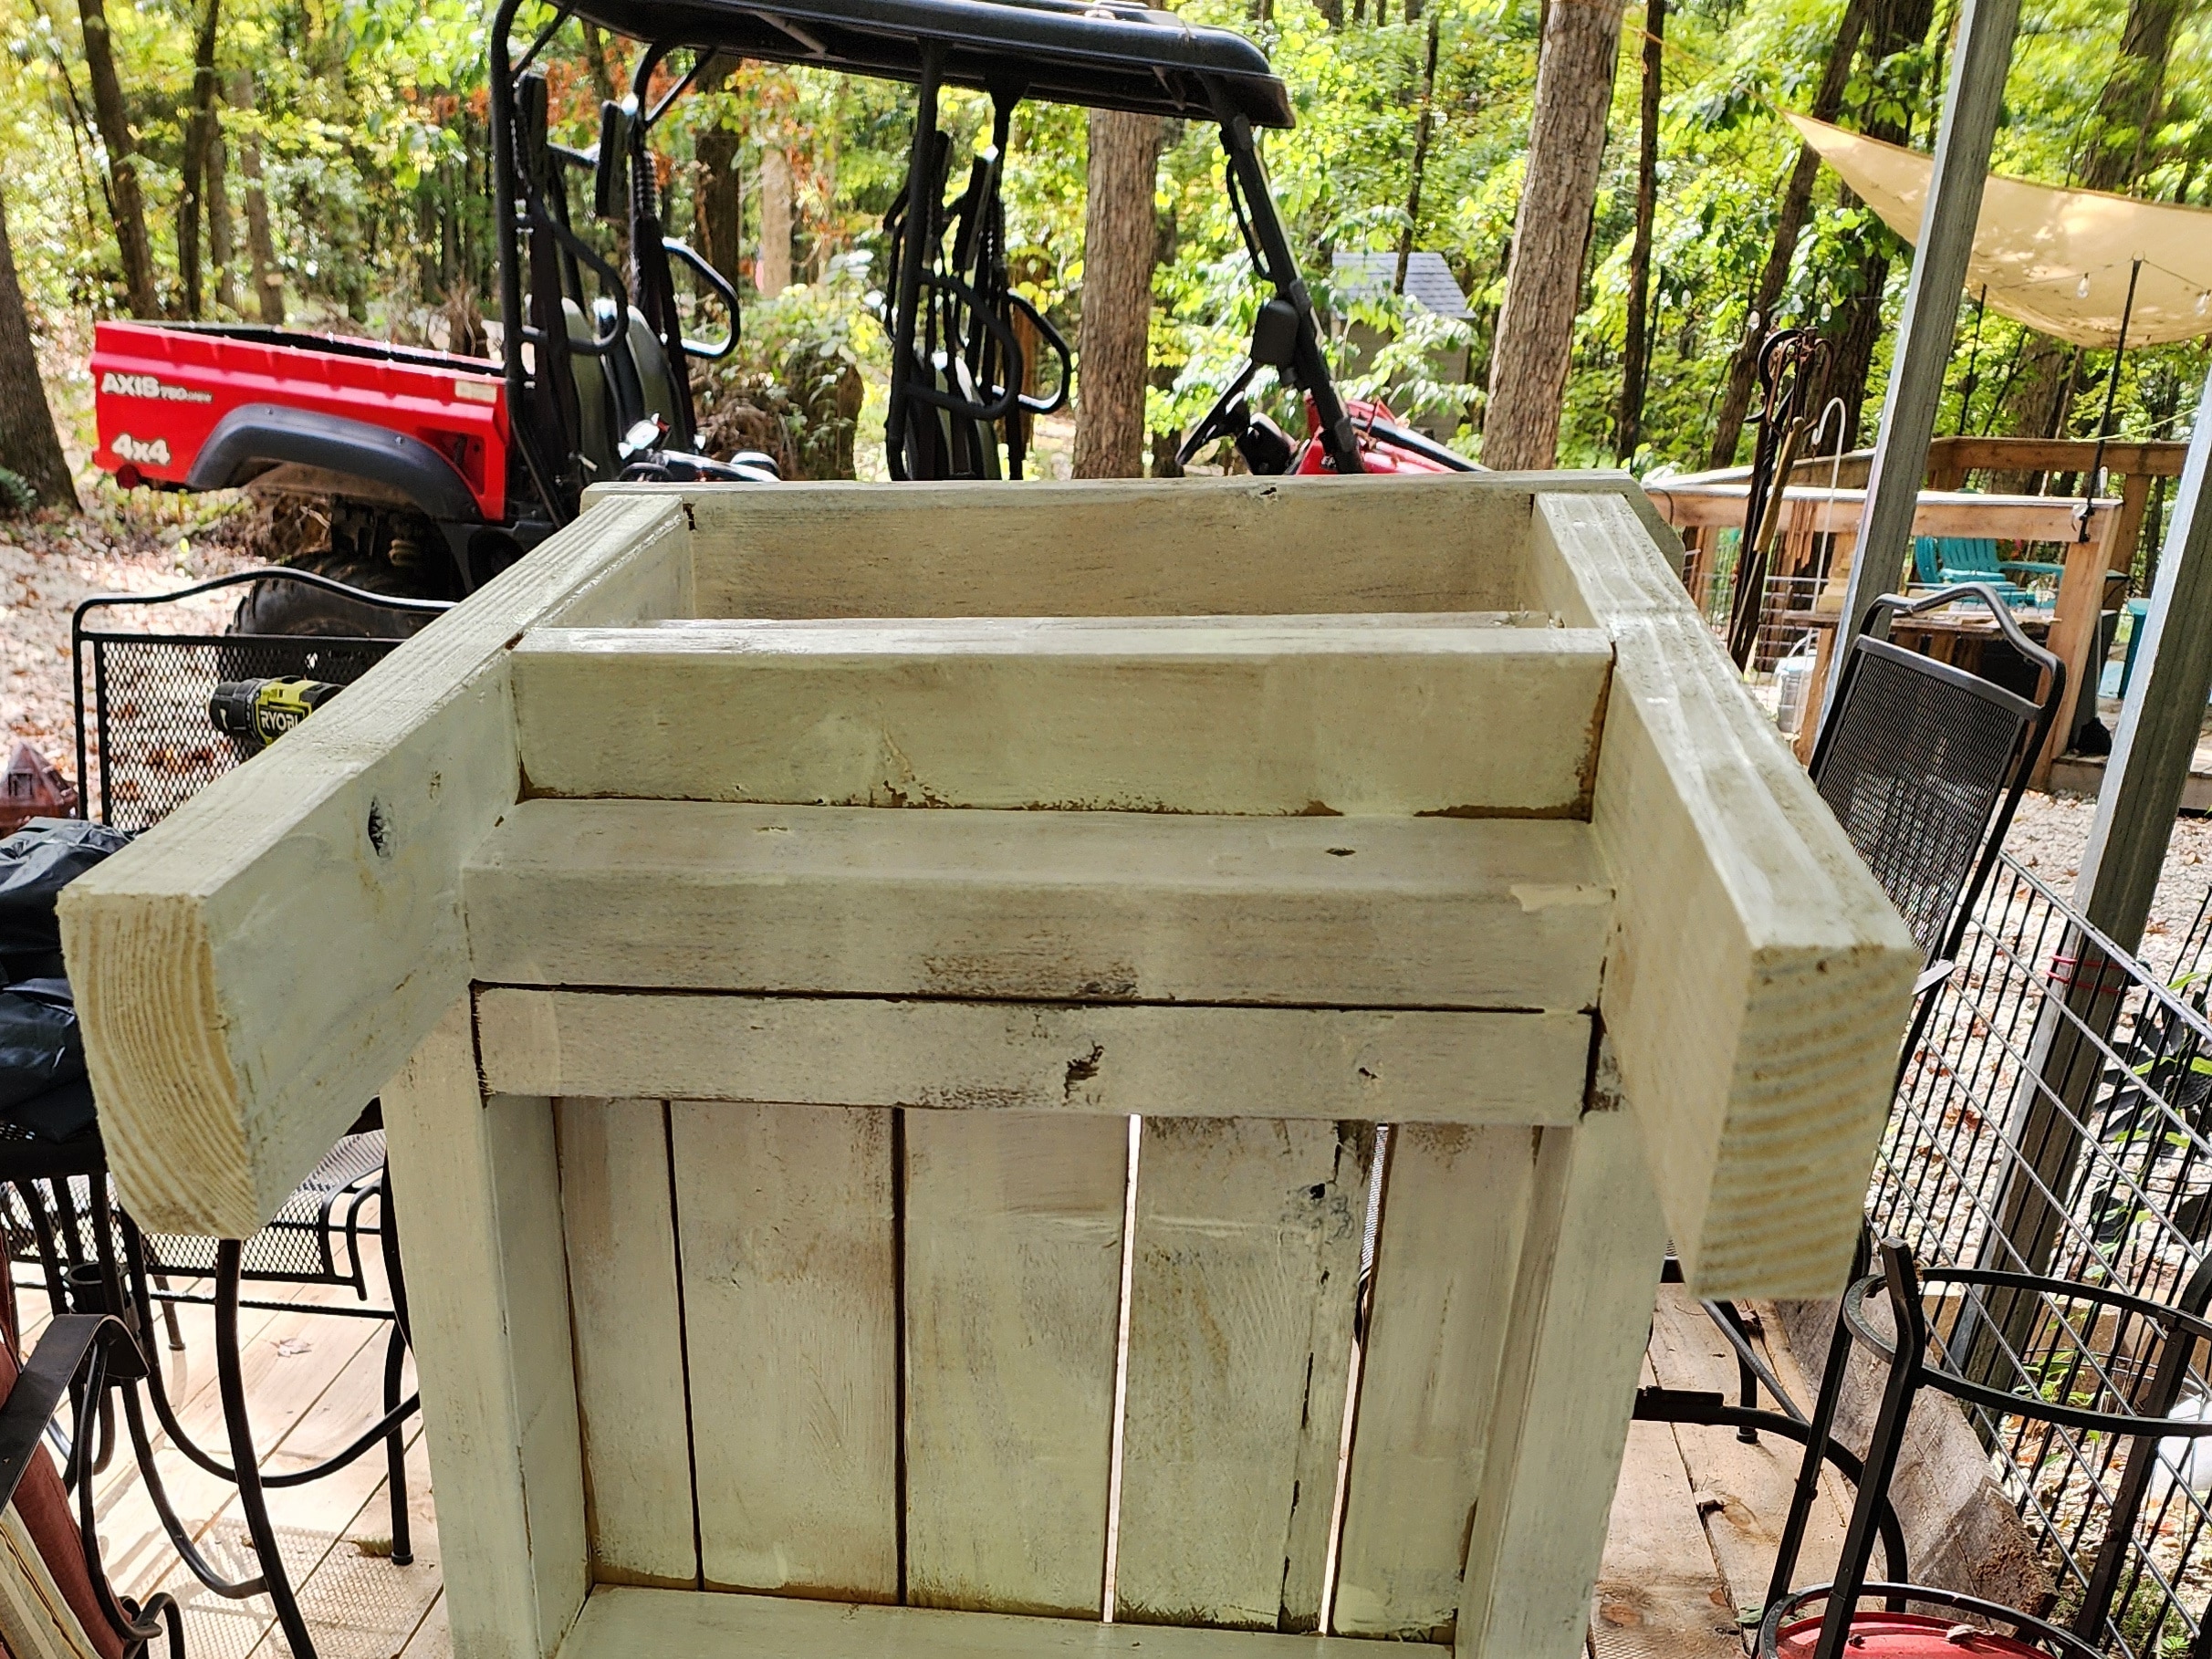
I was so frustrated with the disassembly that I didn’t photograph how I assembled the armrests. The first 2×4 fits horizontally from front to back, and the second 2×4 fits snuggly under that in a vertical position. The assembled “box” is screwed to the vertical board.
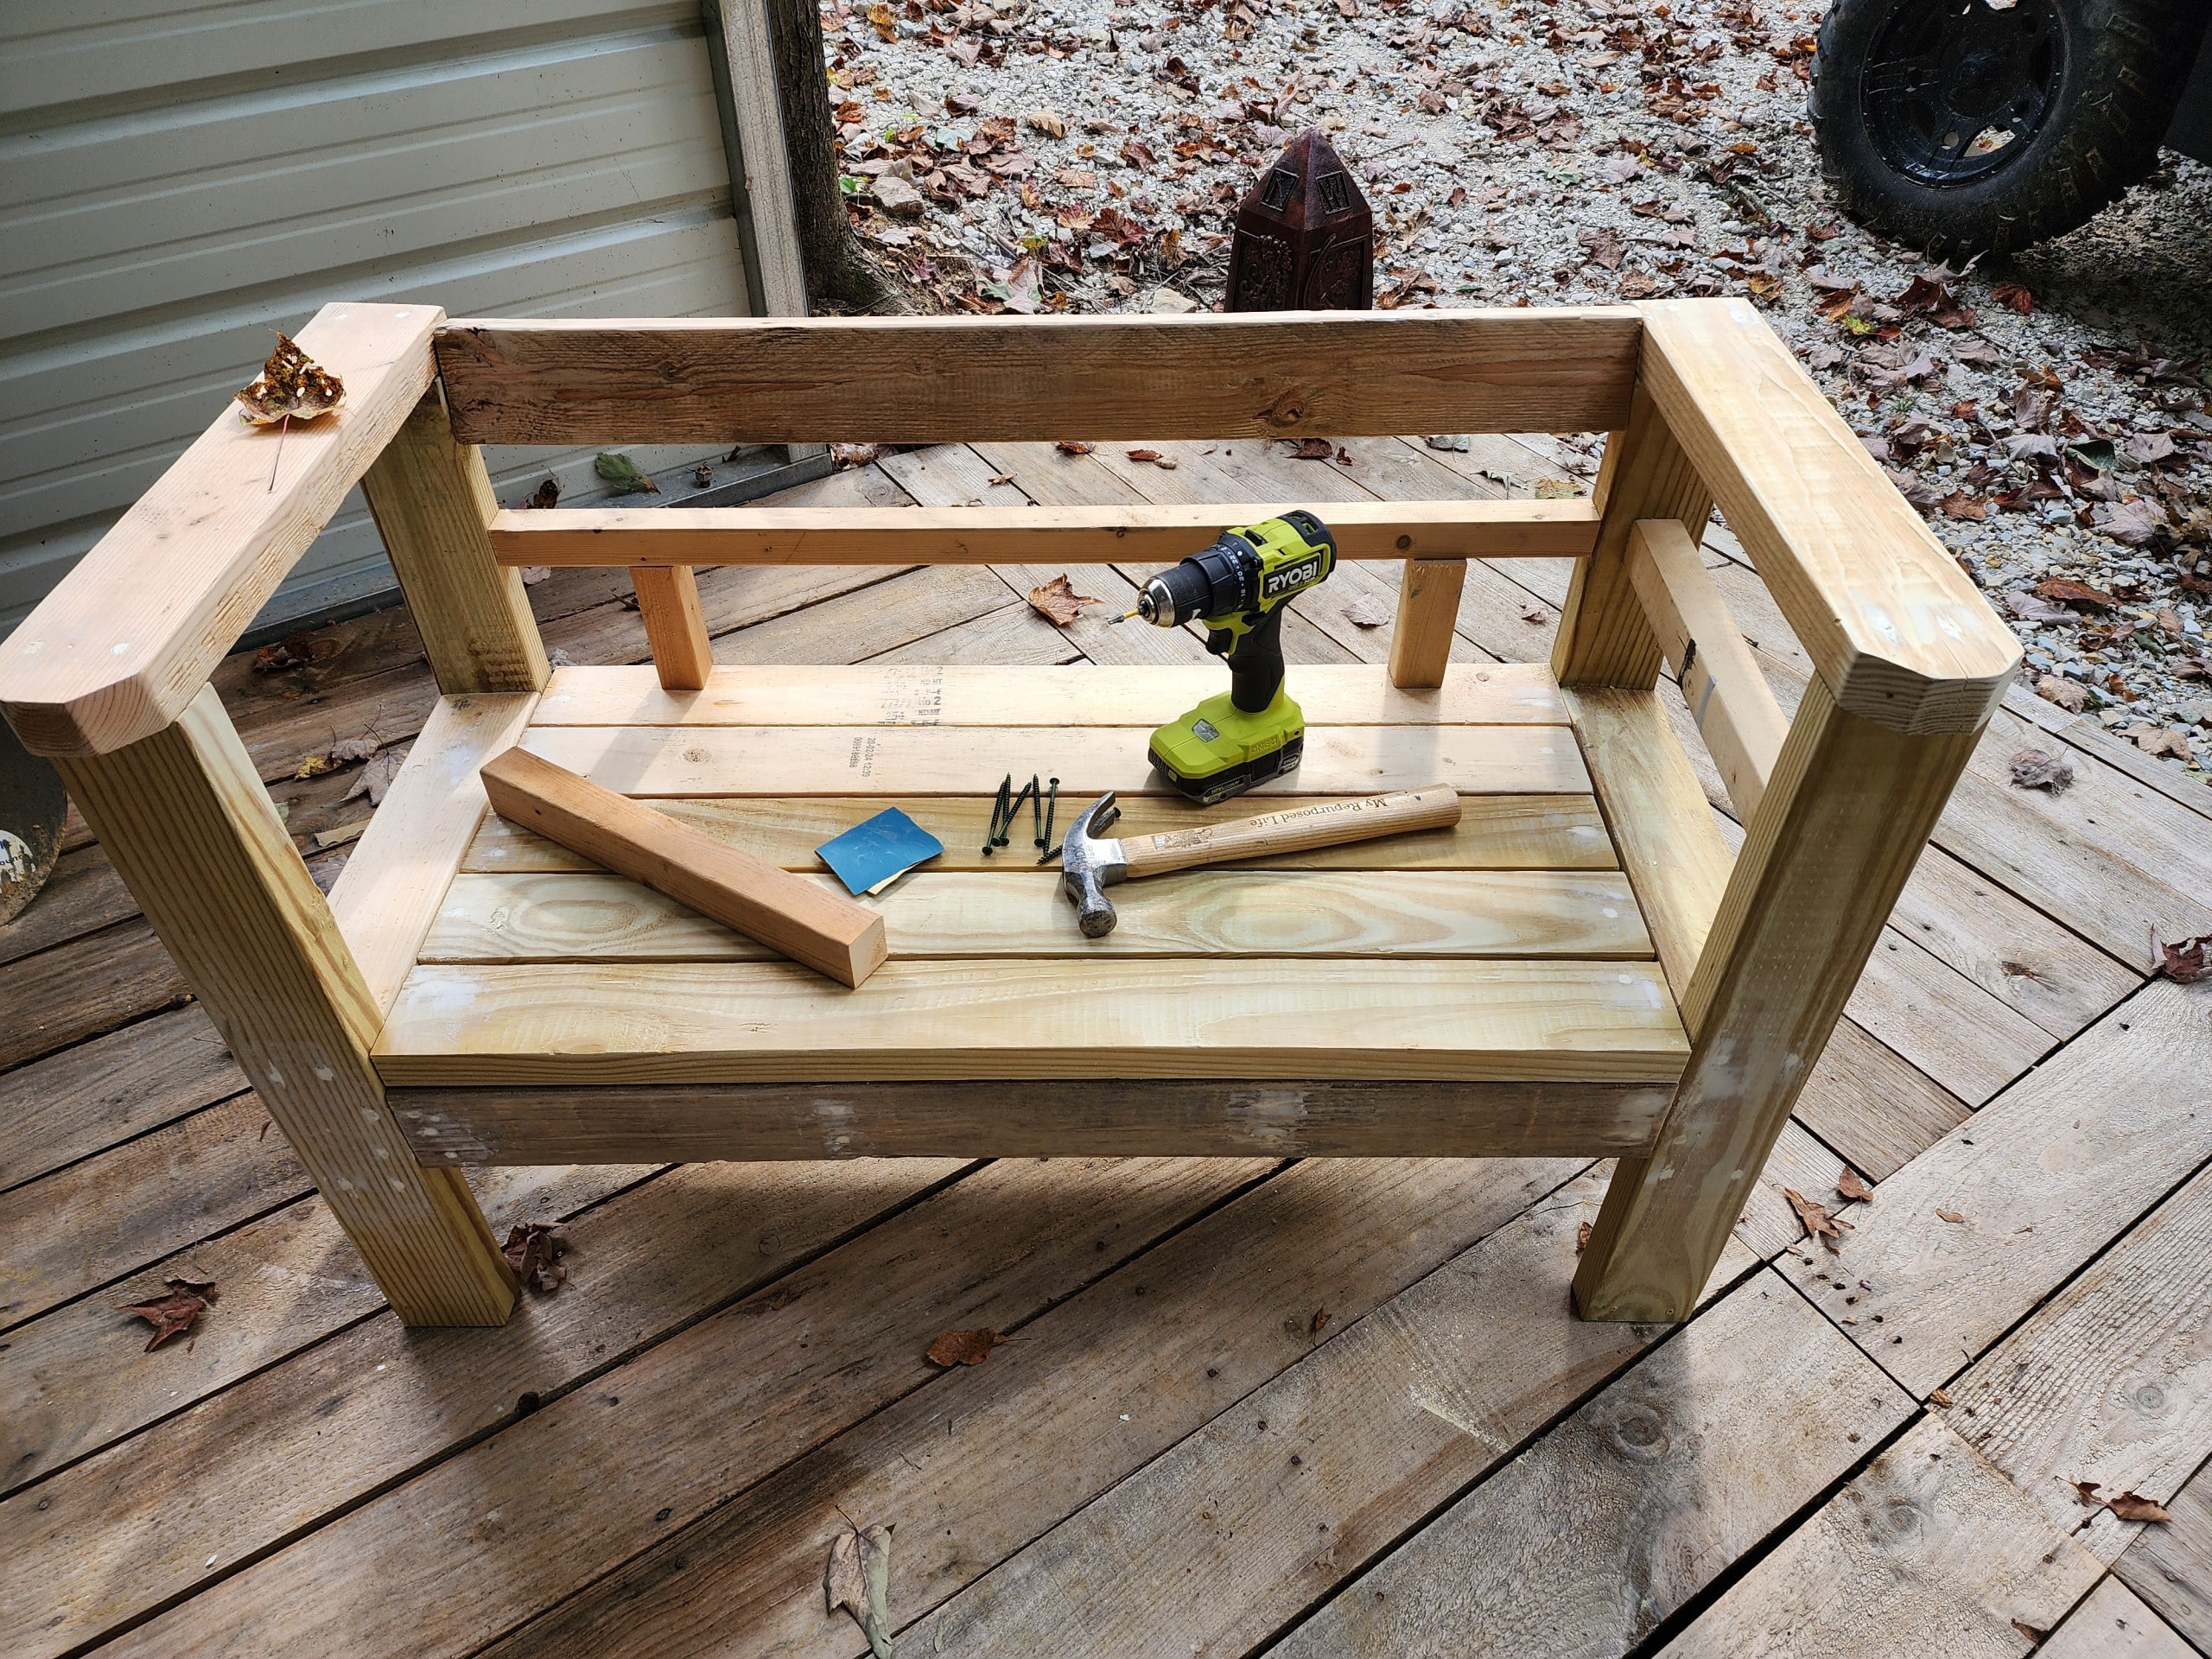
Completing The Outdoor Sofa
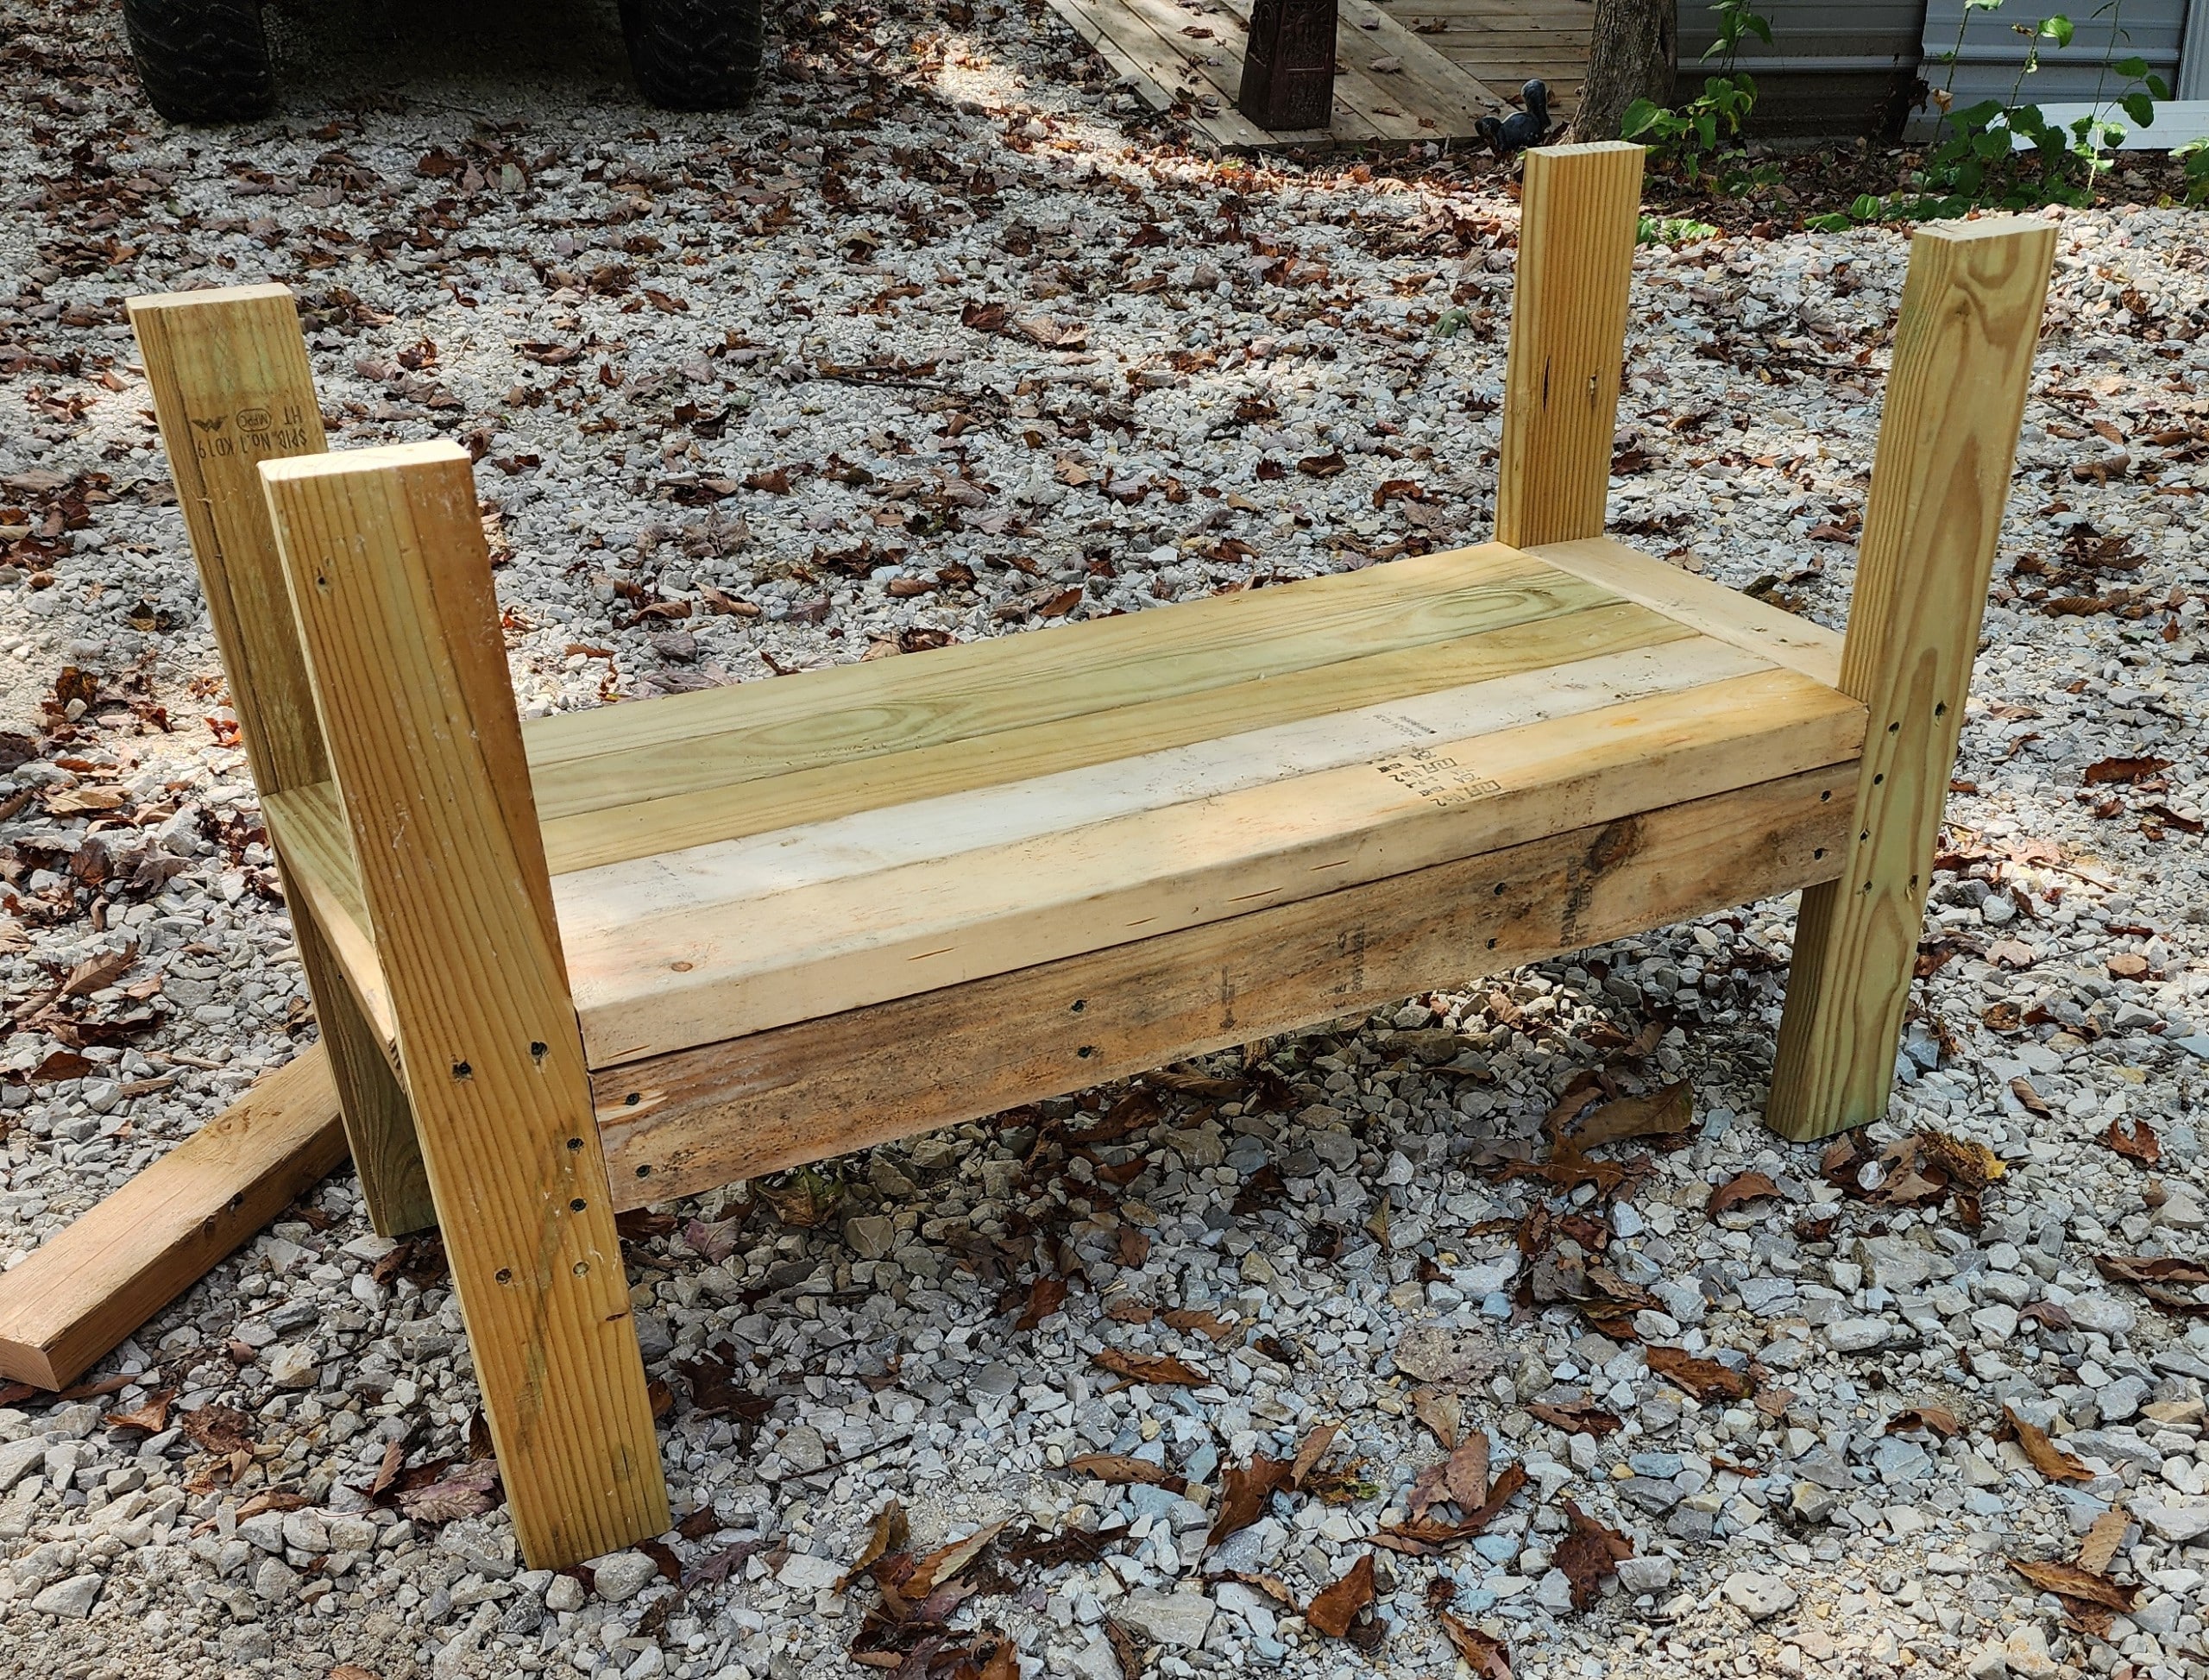
The outdoor sofa sits much lower to the ground than I expected. Realizing this would have saved me a lot of time. I’m about to add the armrests and the back. Remember my tip: this is where you should add the middle boards if you choose to.
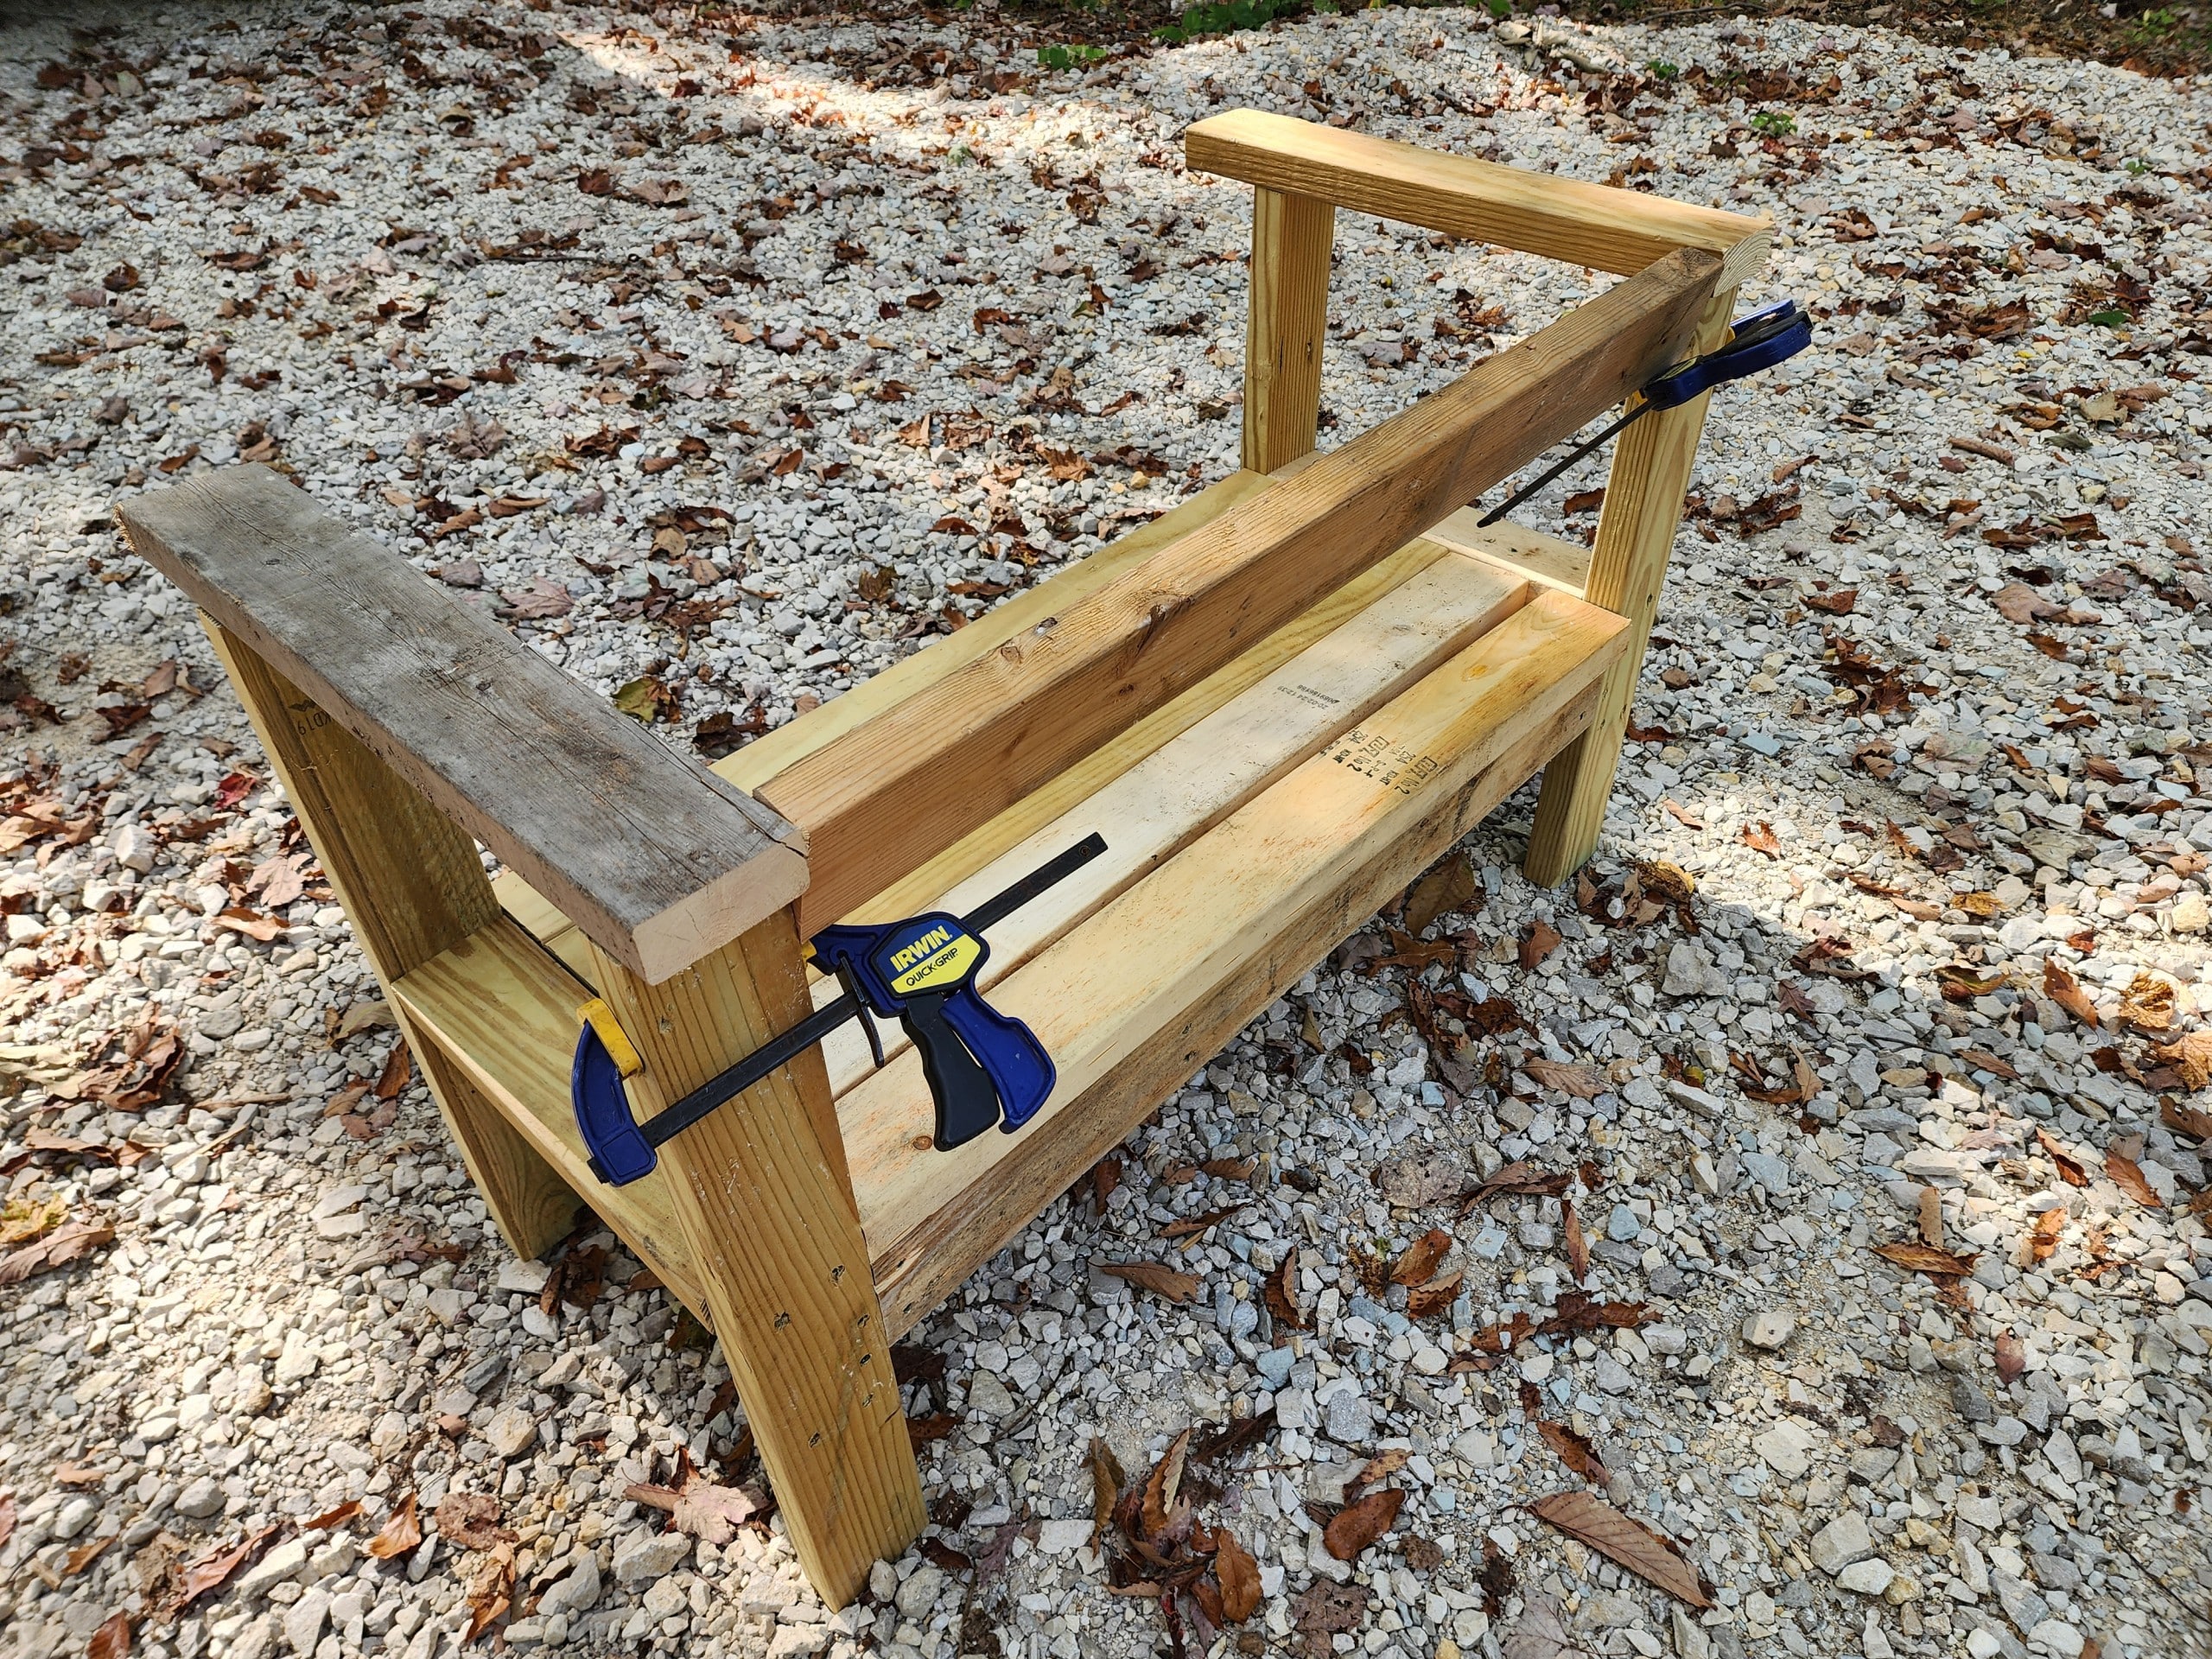
Ana White suggests putting a slight angle on the back. This is easier said than done. I struggled with this, wishing I had an extra pair of hands. Quick clamps hold the back in place to keep it falling as I try to get it right. Ana also mentions this might be an excellent time to use a Kreg Jig. I chose to toenail the screws in place, as I don’t have my Kreg Jig at my vacation home (The Hideaway).
I’m not sure angling the back was worth the trouble, and I’m not sure the pocket holes would have made it any easier.
The armrests are not attached yet. I was trying to decide whether they should match the uprights or the angled backrest. With a slight overhang on the front and the back, the armrests were cut at 20″ in length.
Adding The Armrests
To finish off the armrests, I made some angled cuts.
The angle of this photo and the small sofa sitting on a hill gives the impression that it’s unusually short. I have patched all the holes with wall spackling. (It’s what I had on hand).
Finishing Touches
As I mentioned above in the “cut list,” I used scrap 2x2s for the middle braces. Although I call them braces, they are simply for aesthetic value. The back middle board will help keep cushions or pillows in place. The small boards are solely to help keep the boards in place and ensure all the middle boards are aligned.
The back piece was toenailed in place. The left and right boards were screwed in place through the uprights. This left them a little wiggly, so more screws were toenailed in place. A Kreg Jig would have made this assembly much more manageable.
The entire sofa, including the front of the armrests, was sanded to “round them off a little.”
Paint the Small Outdoor Sofa
All of this wood is treated for outdoor use. However, I still wanted to cover the outdoor sofa with paint. I began painting the underside.
White Wooden Outdoor Sofa Bench

The white paint is trim paint. I wanted to paint it with the same paint I used on the Pallet Love Seat when I brought it to The Hideaway.

After repainting the pallet loveseat, the can of Fiesta Orange was getting low.
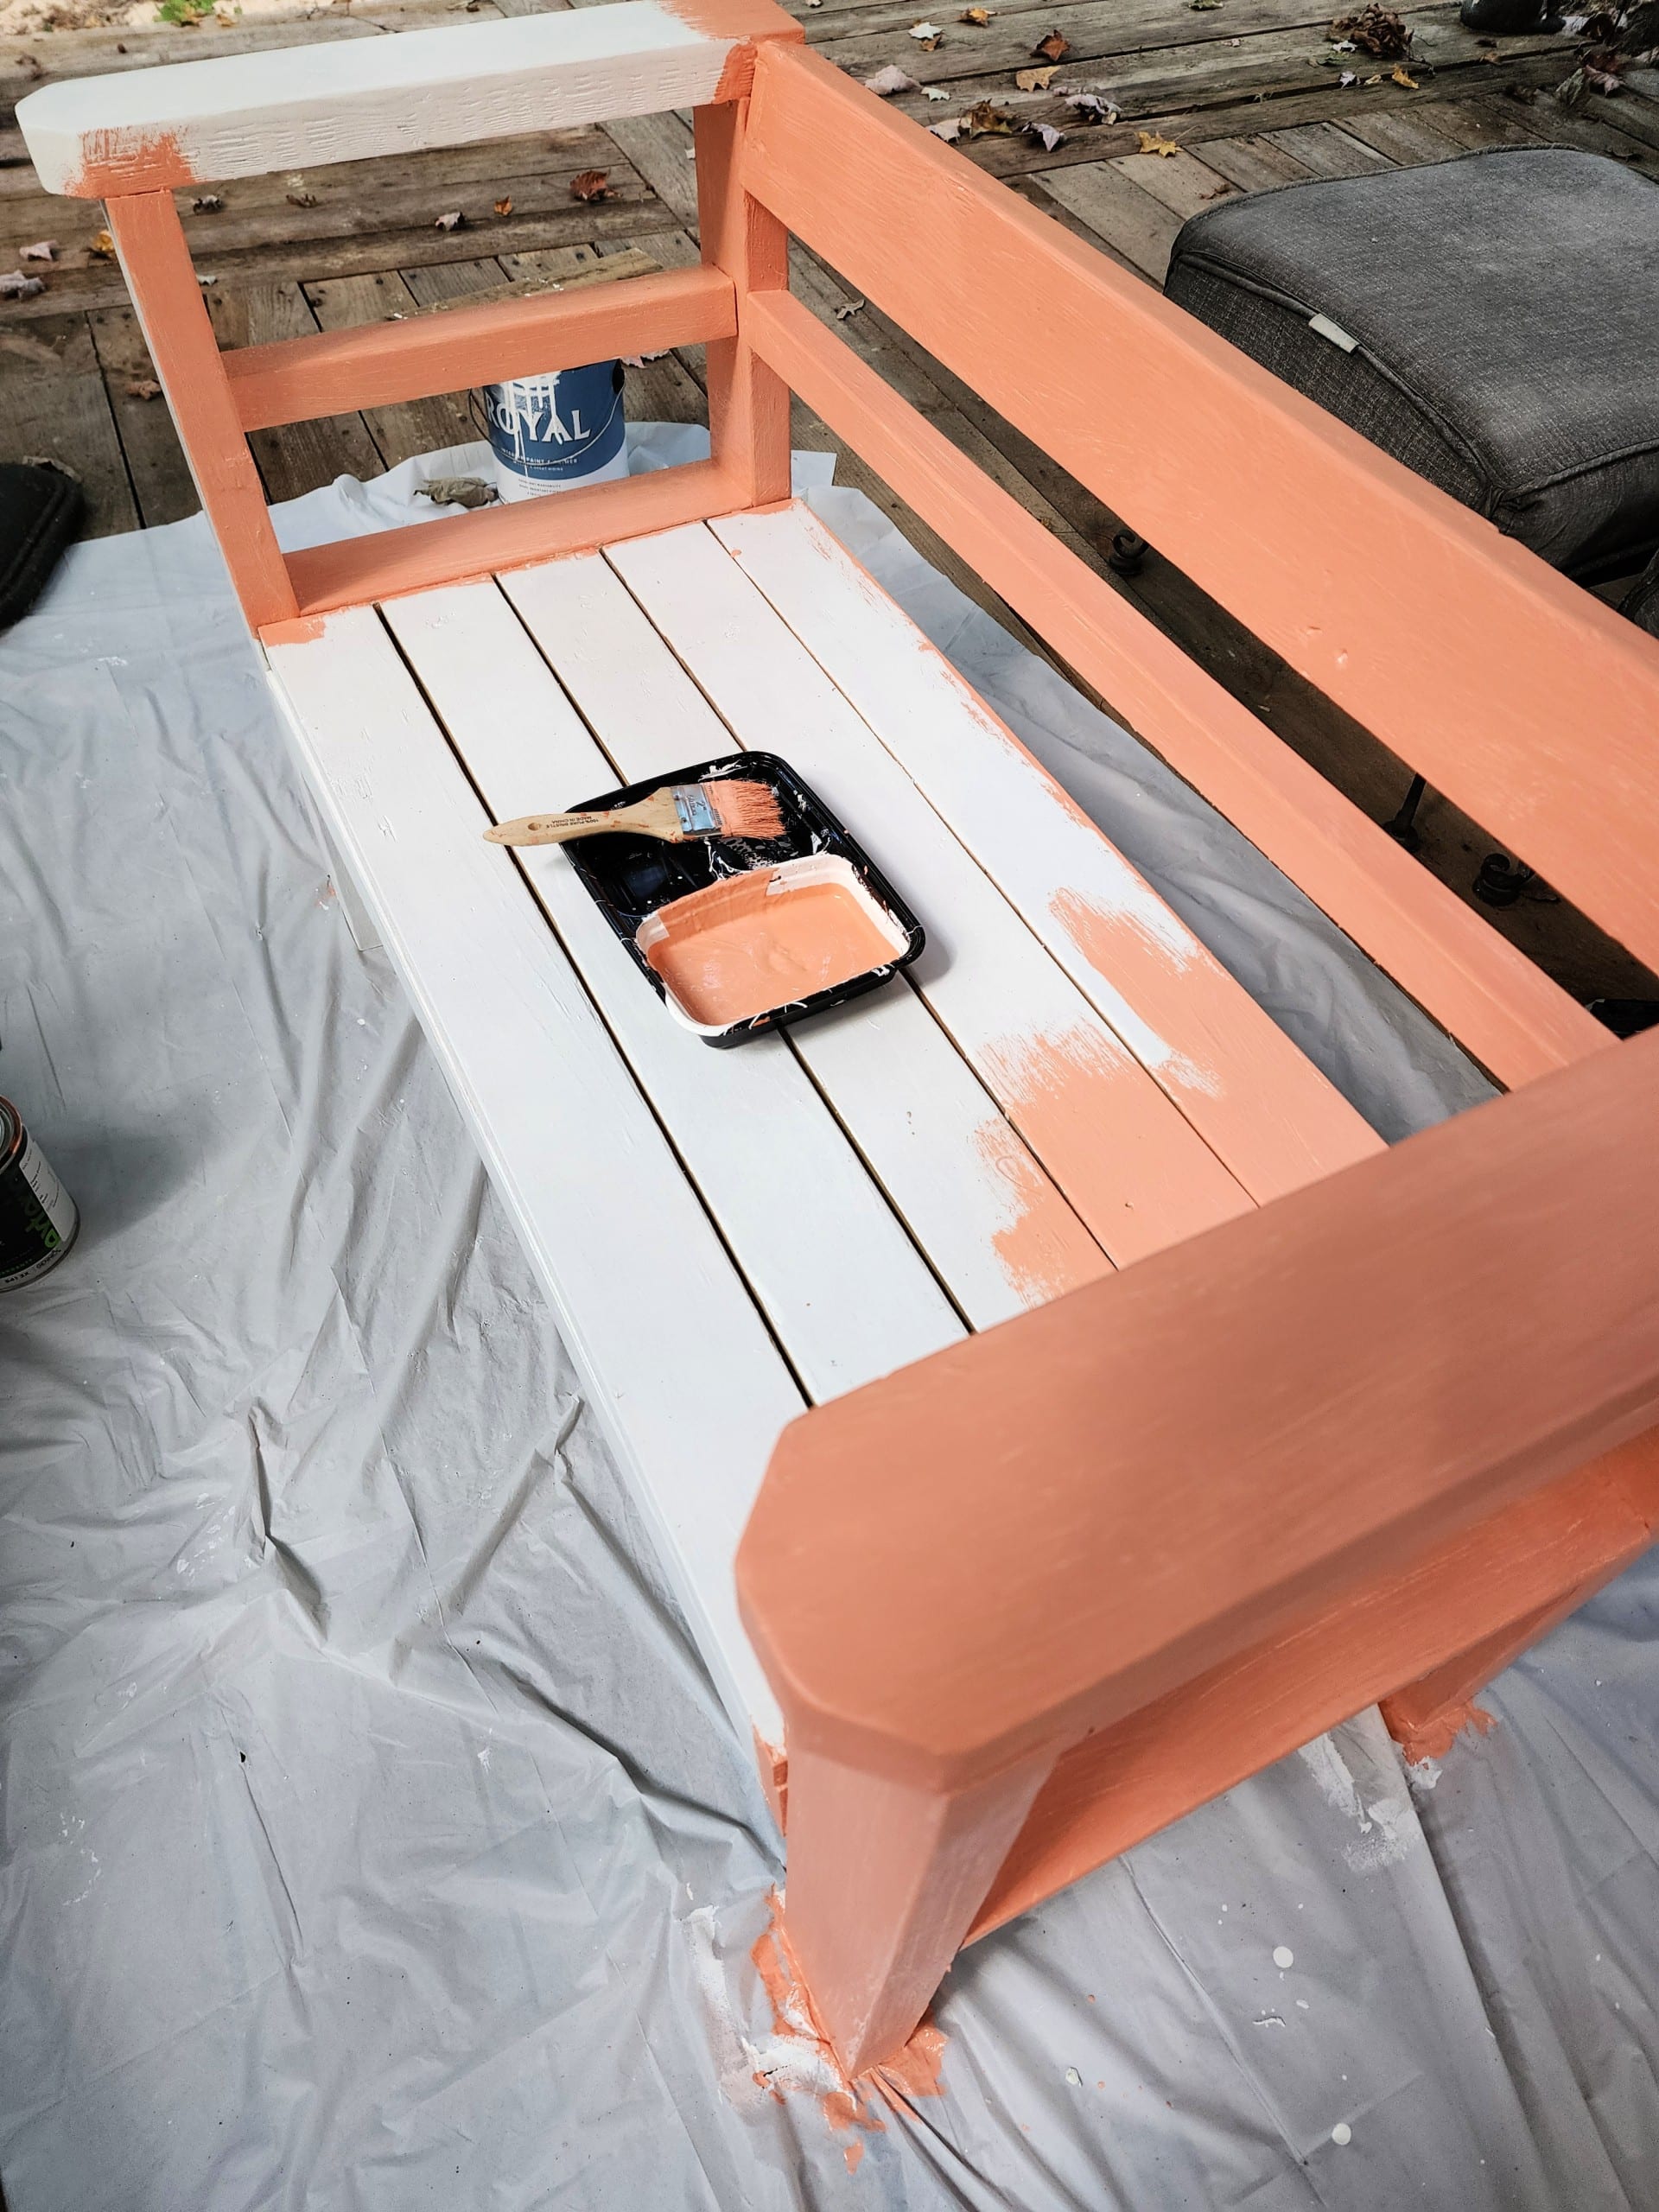
I added a bit of the white paint that I used to primer the sofa. It toned down the orange quite a bit, and I wasn’t sure I liked it at first.
Orange Outdoor Sofa

The little guy still looks like it’s low to the ground, but it’s very comfortable.
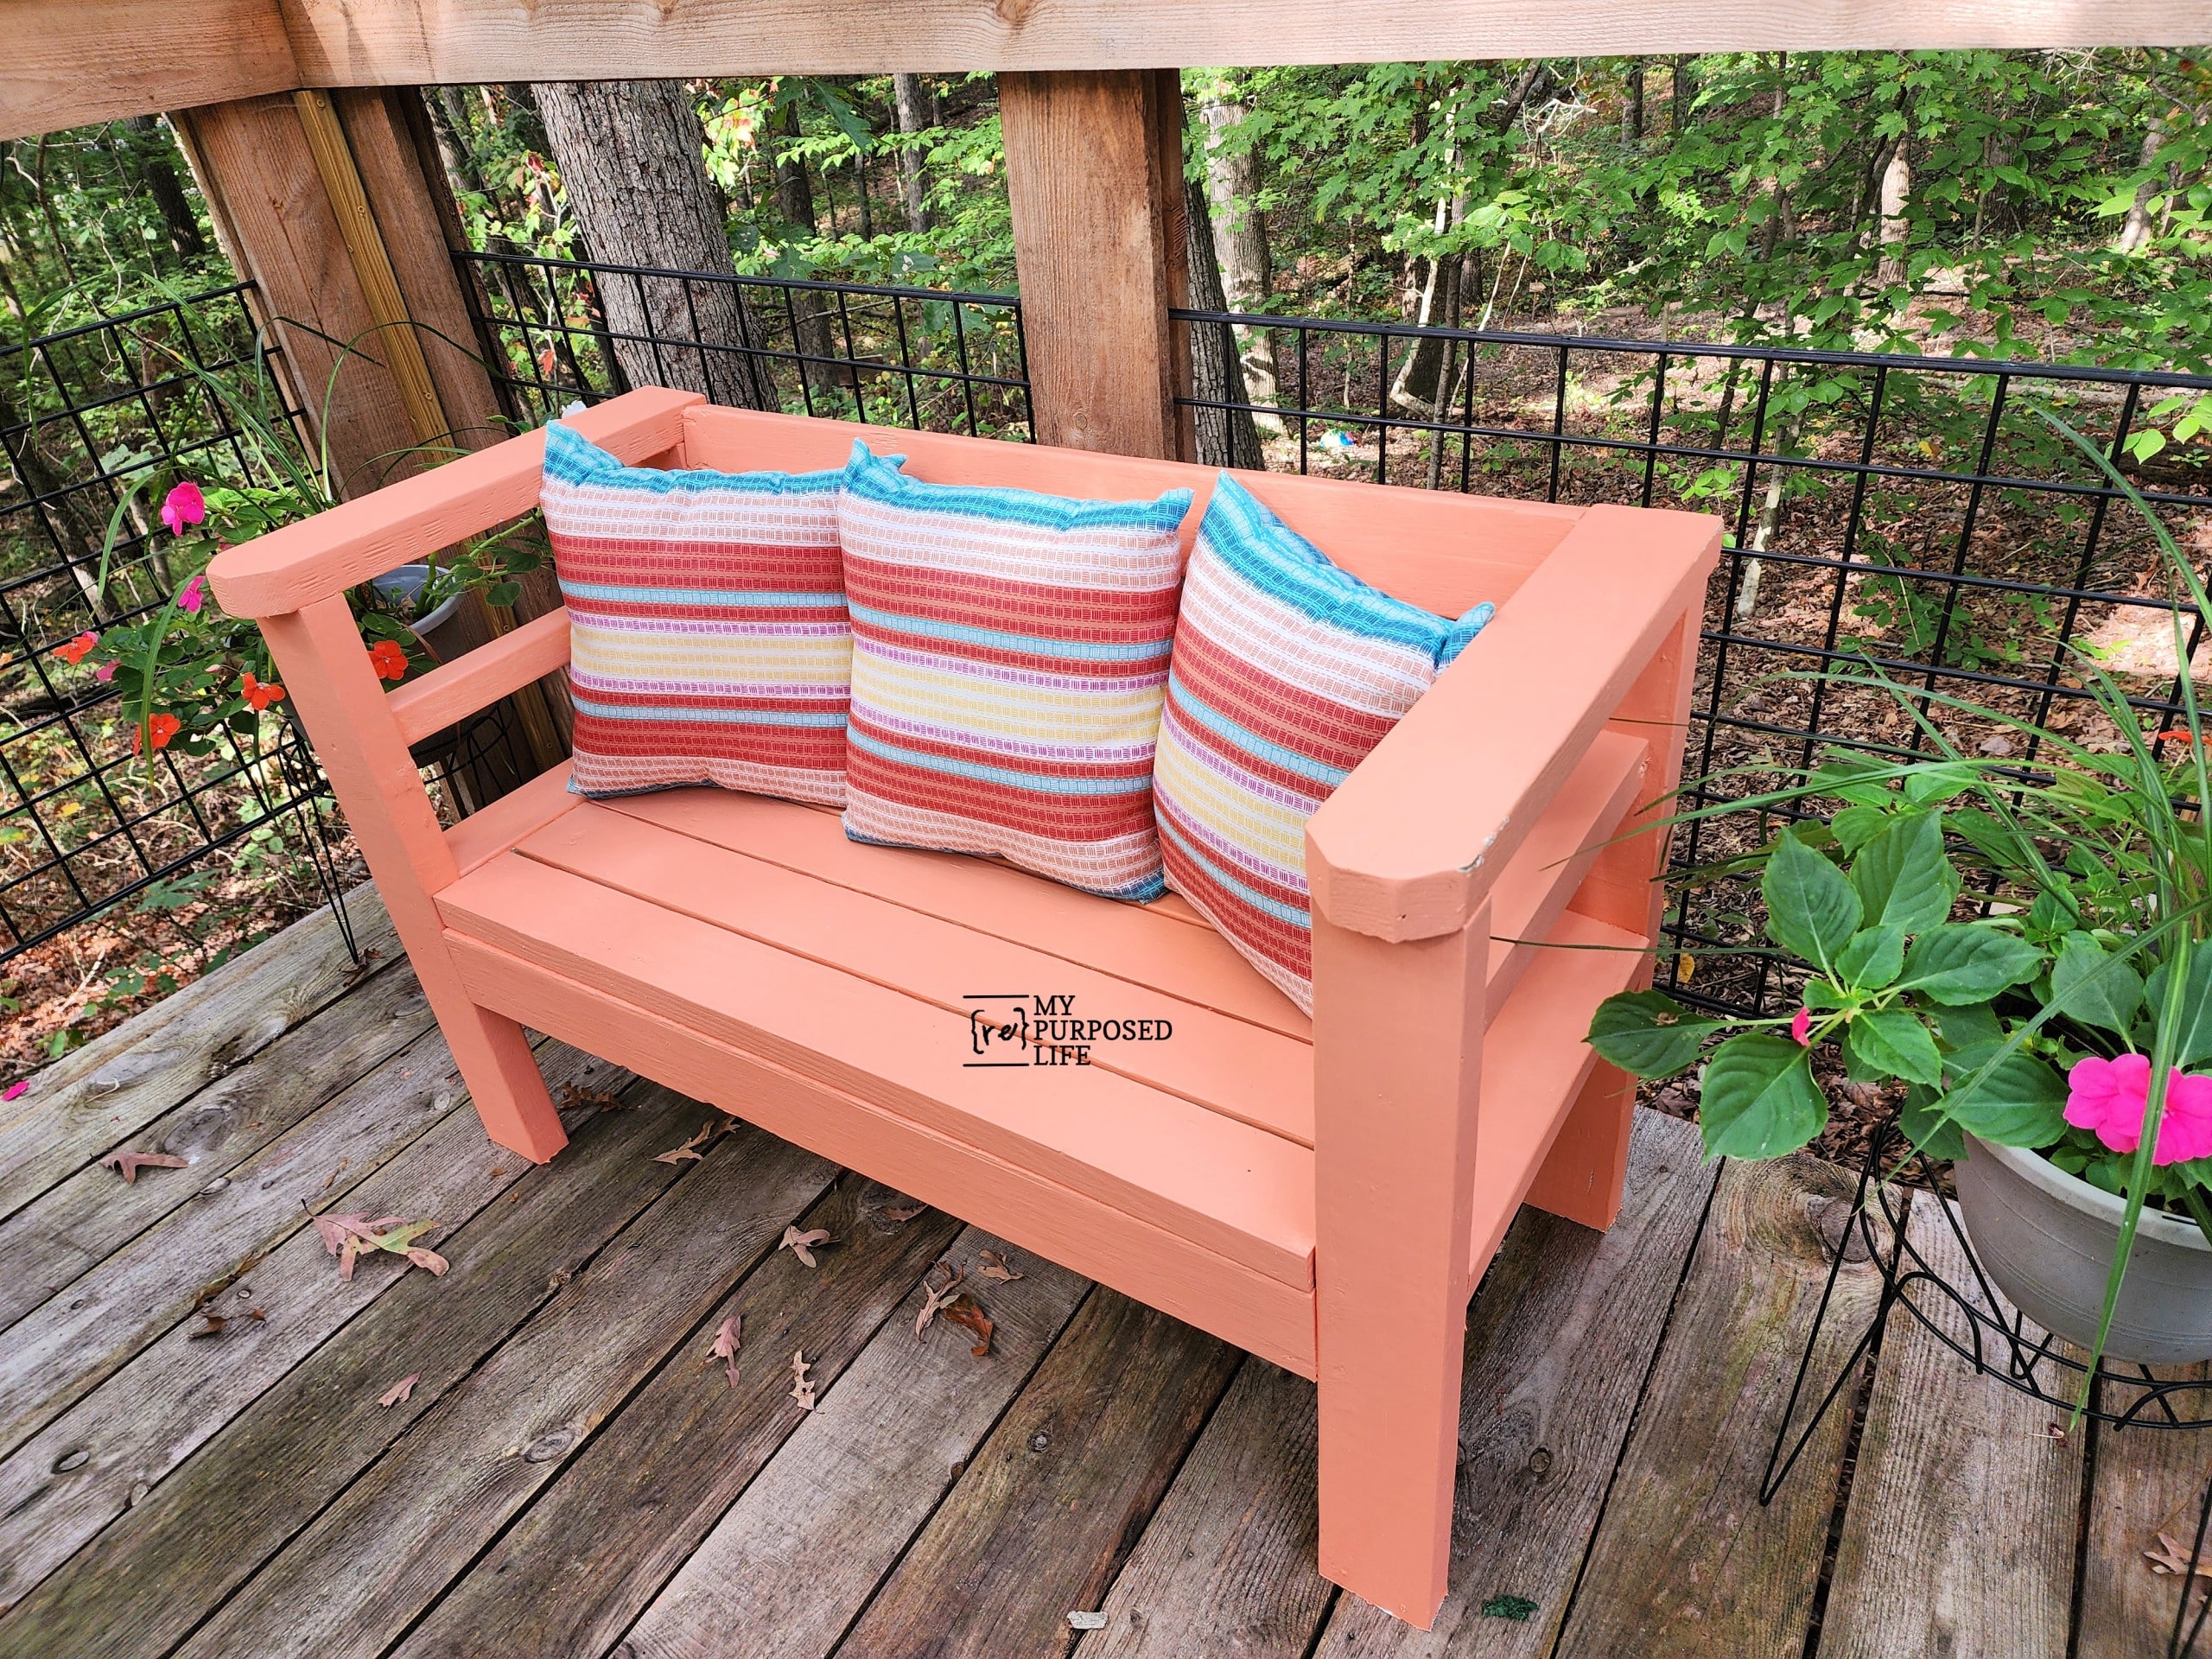
Let’s add some colorful striped pillows!
As Ana suggested, I built my loveseat outdoor sofa to fit the DIY recovered cushions I already had. They fit perfectly side by side.
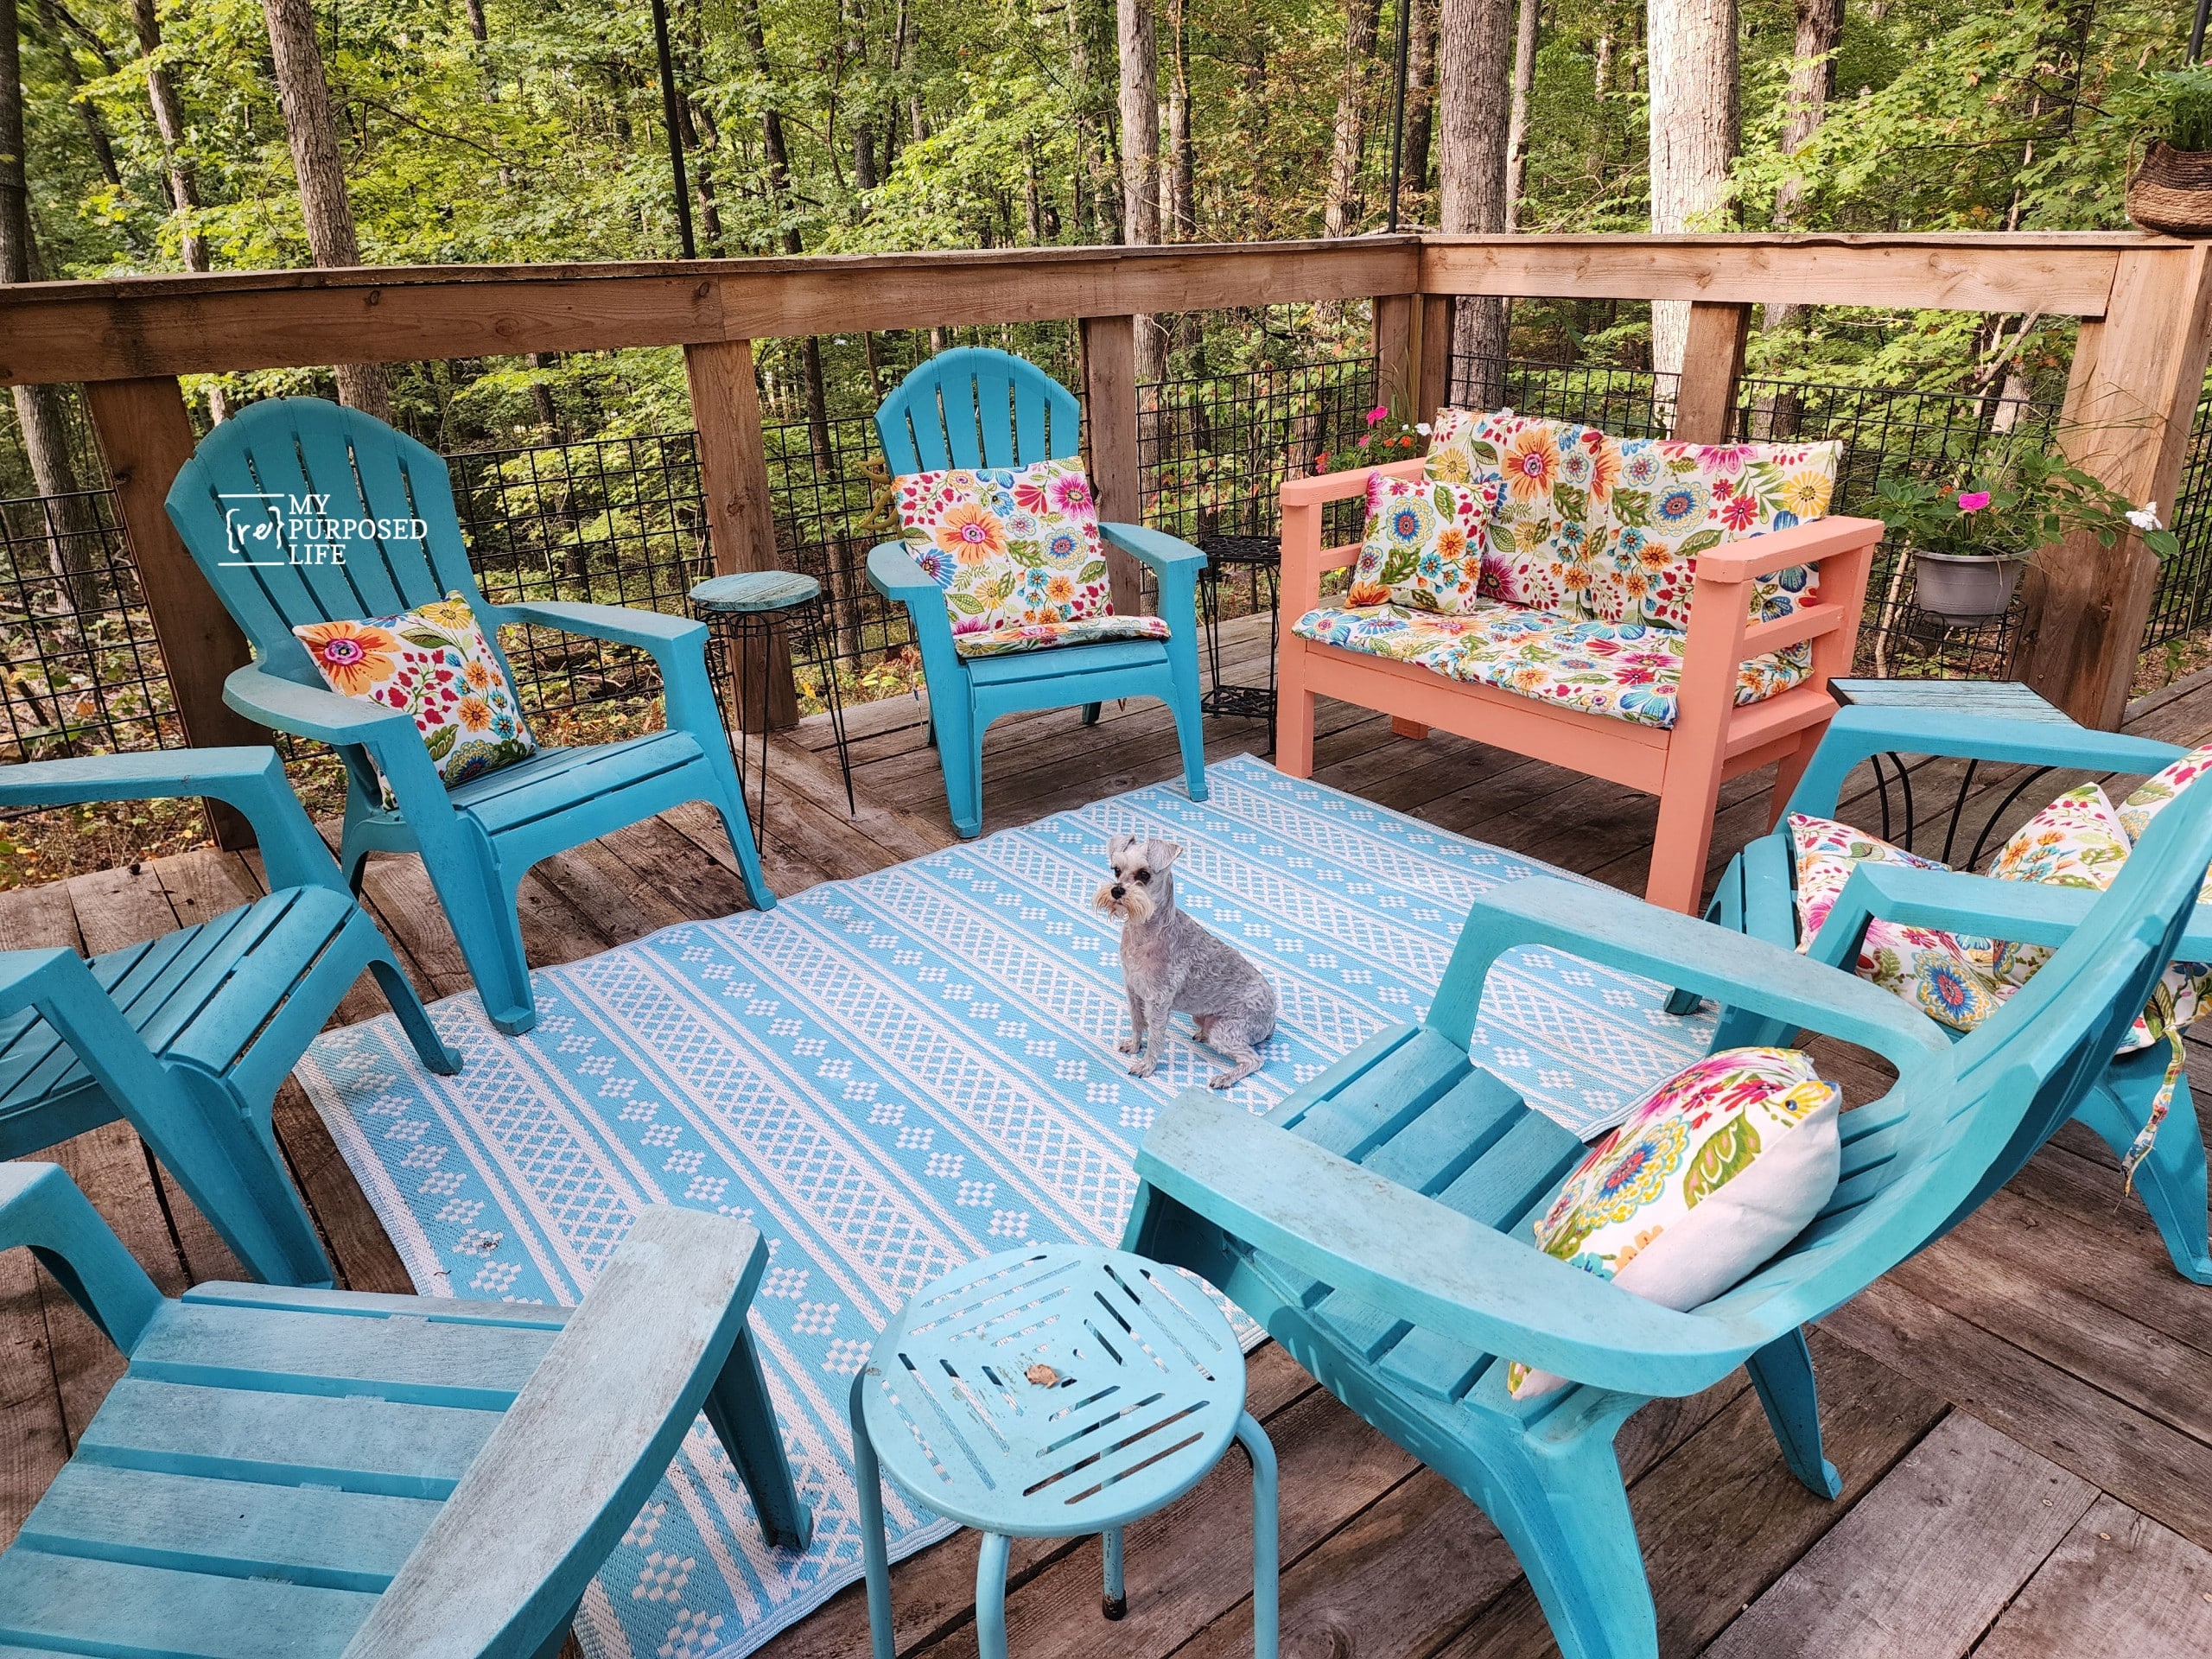
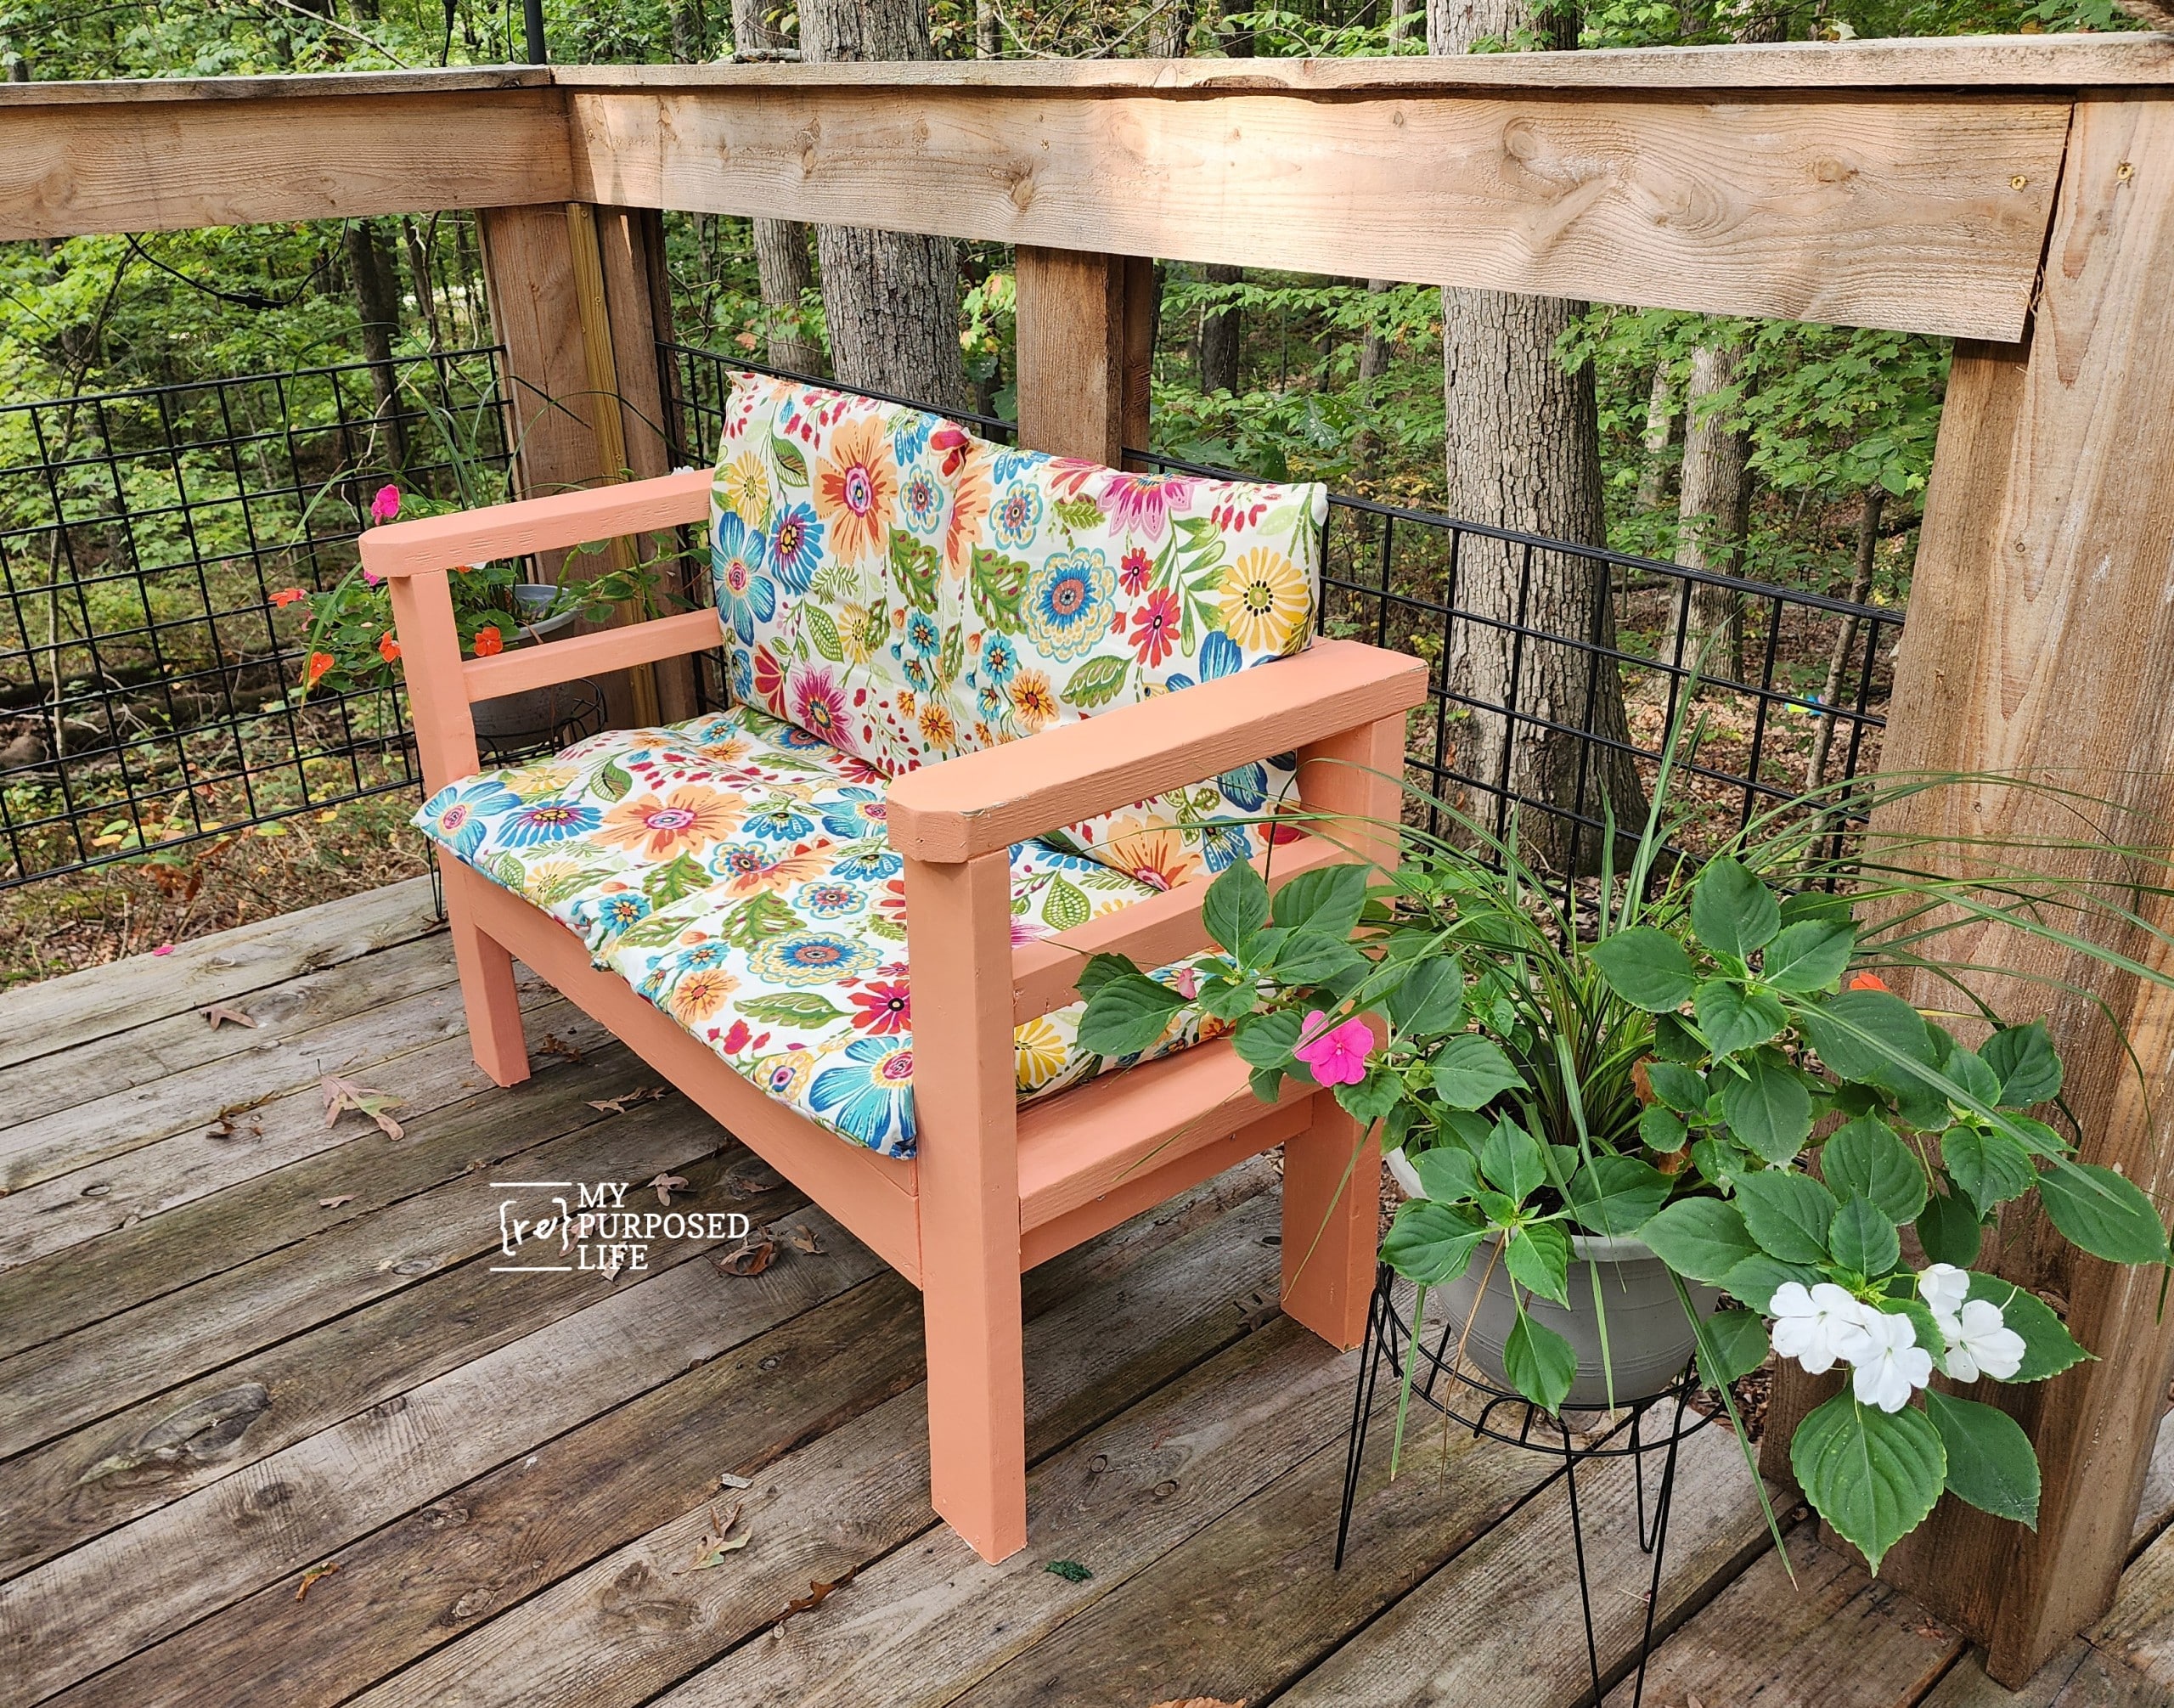
The cushions also fit the seat and the back when opened up.
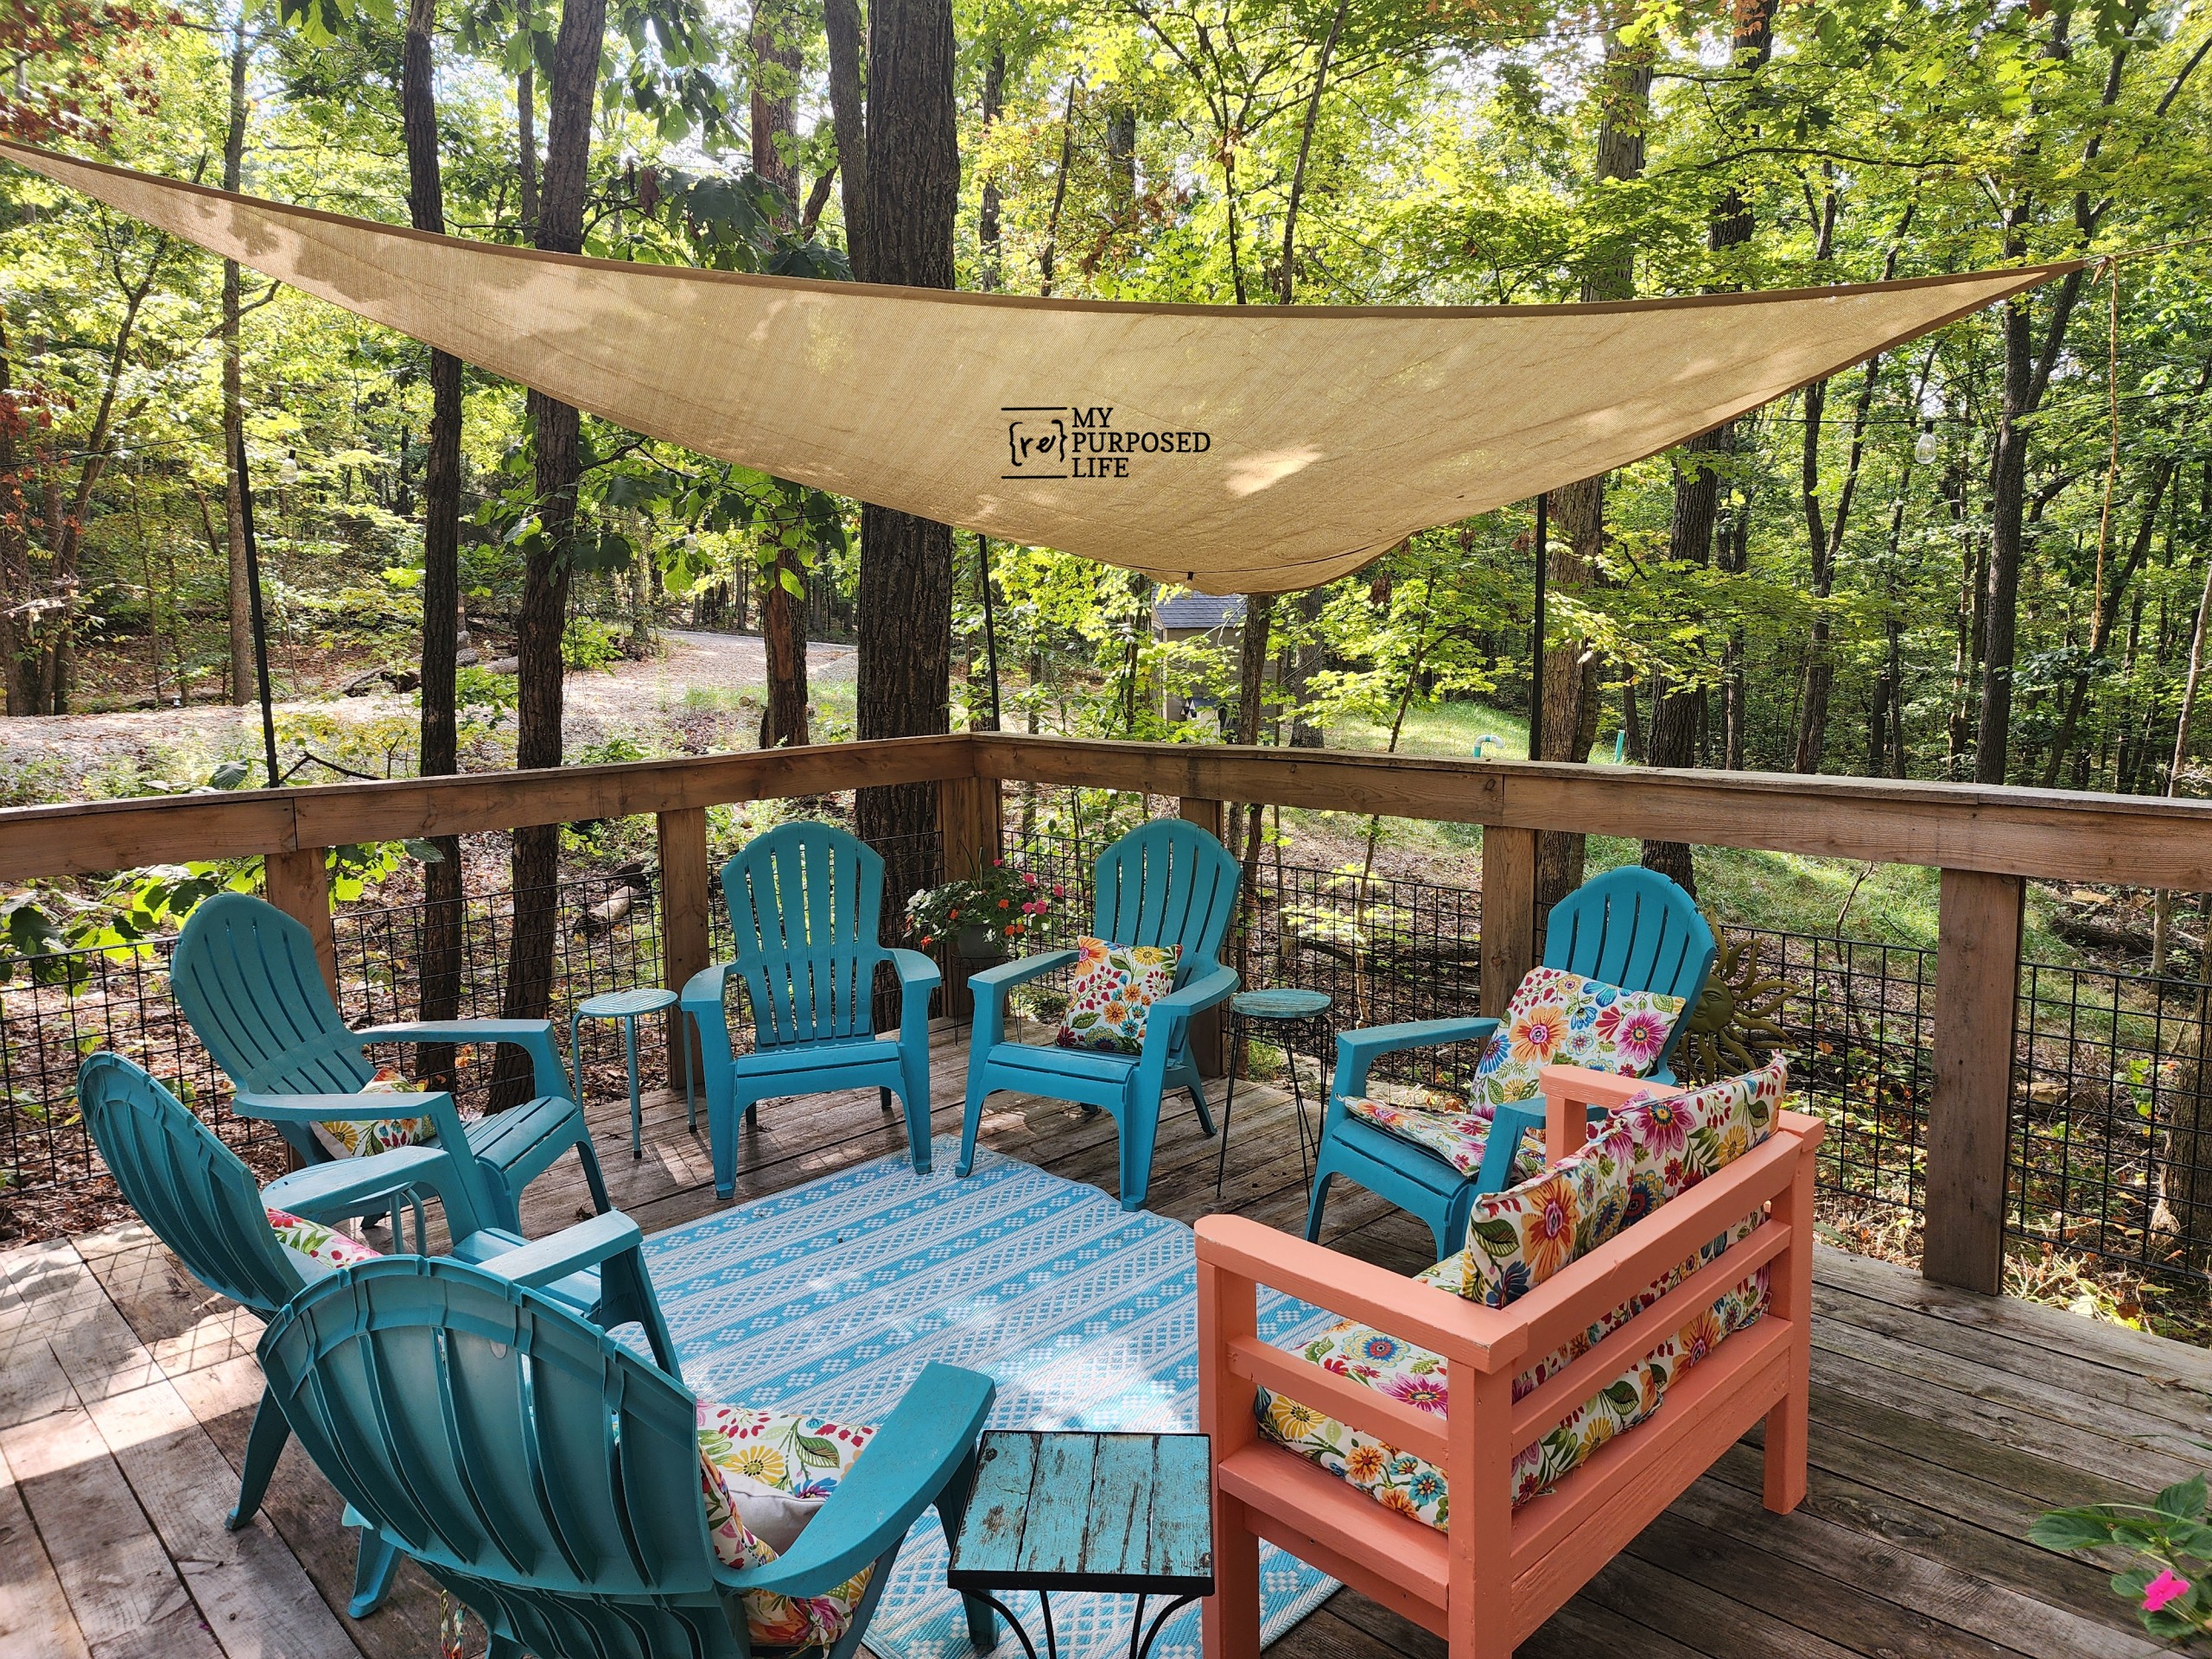
When you visit, be sure you get a seat under the sail! It’s nice and shady and will keep you safe from falling nuts!
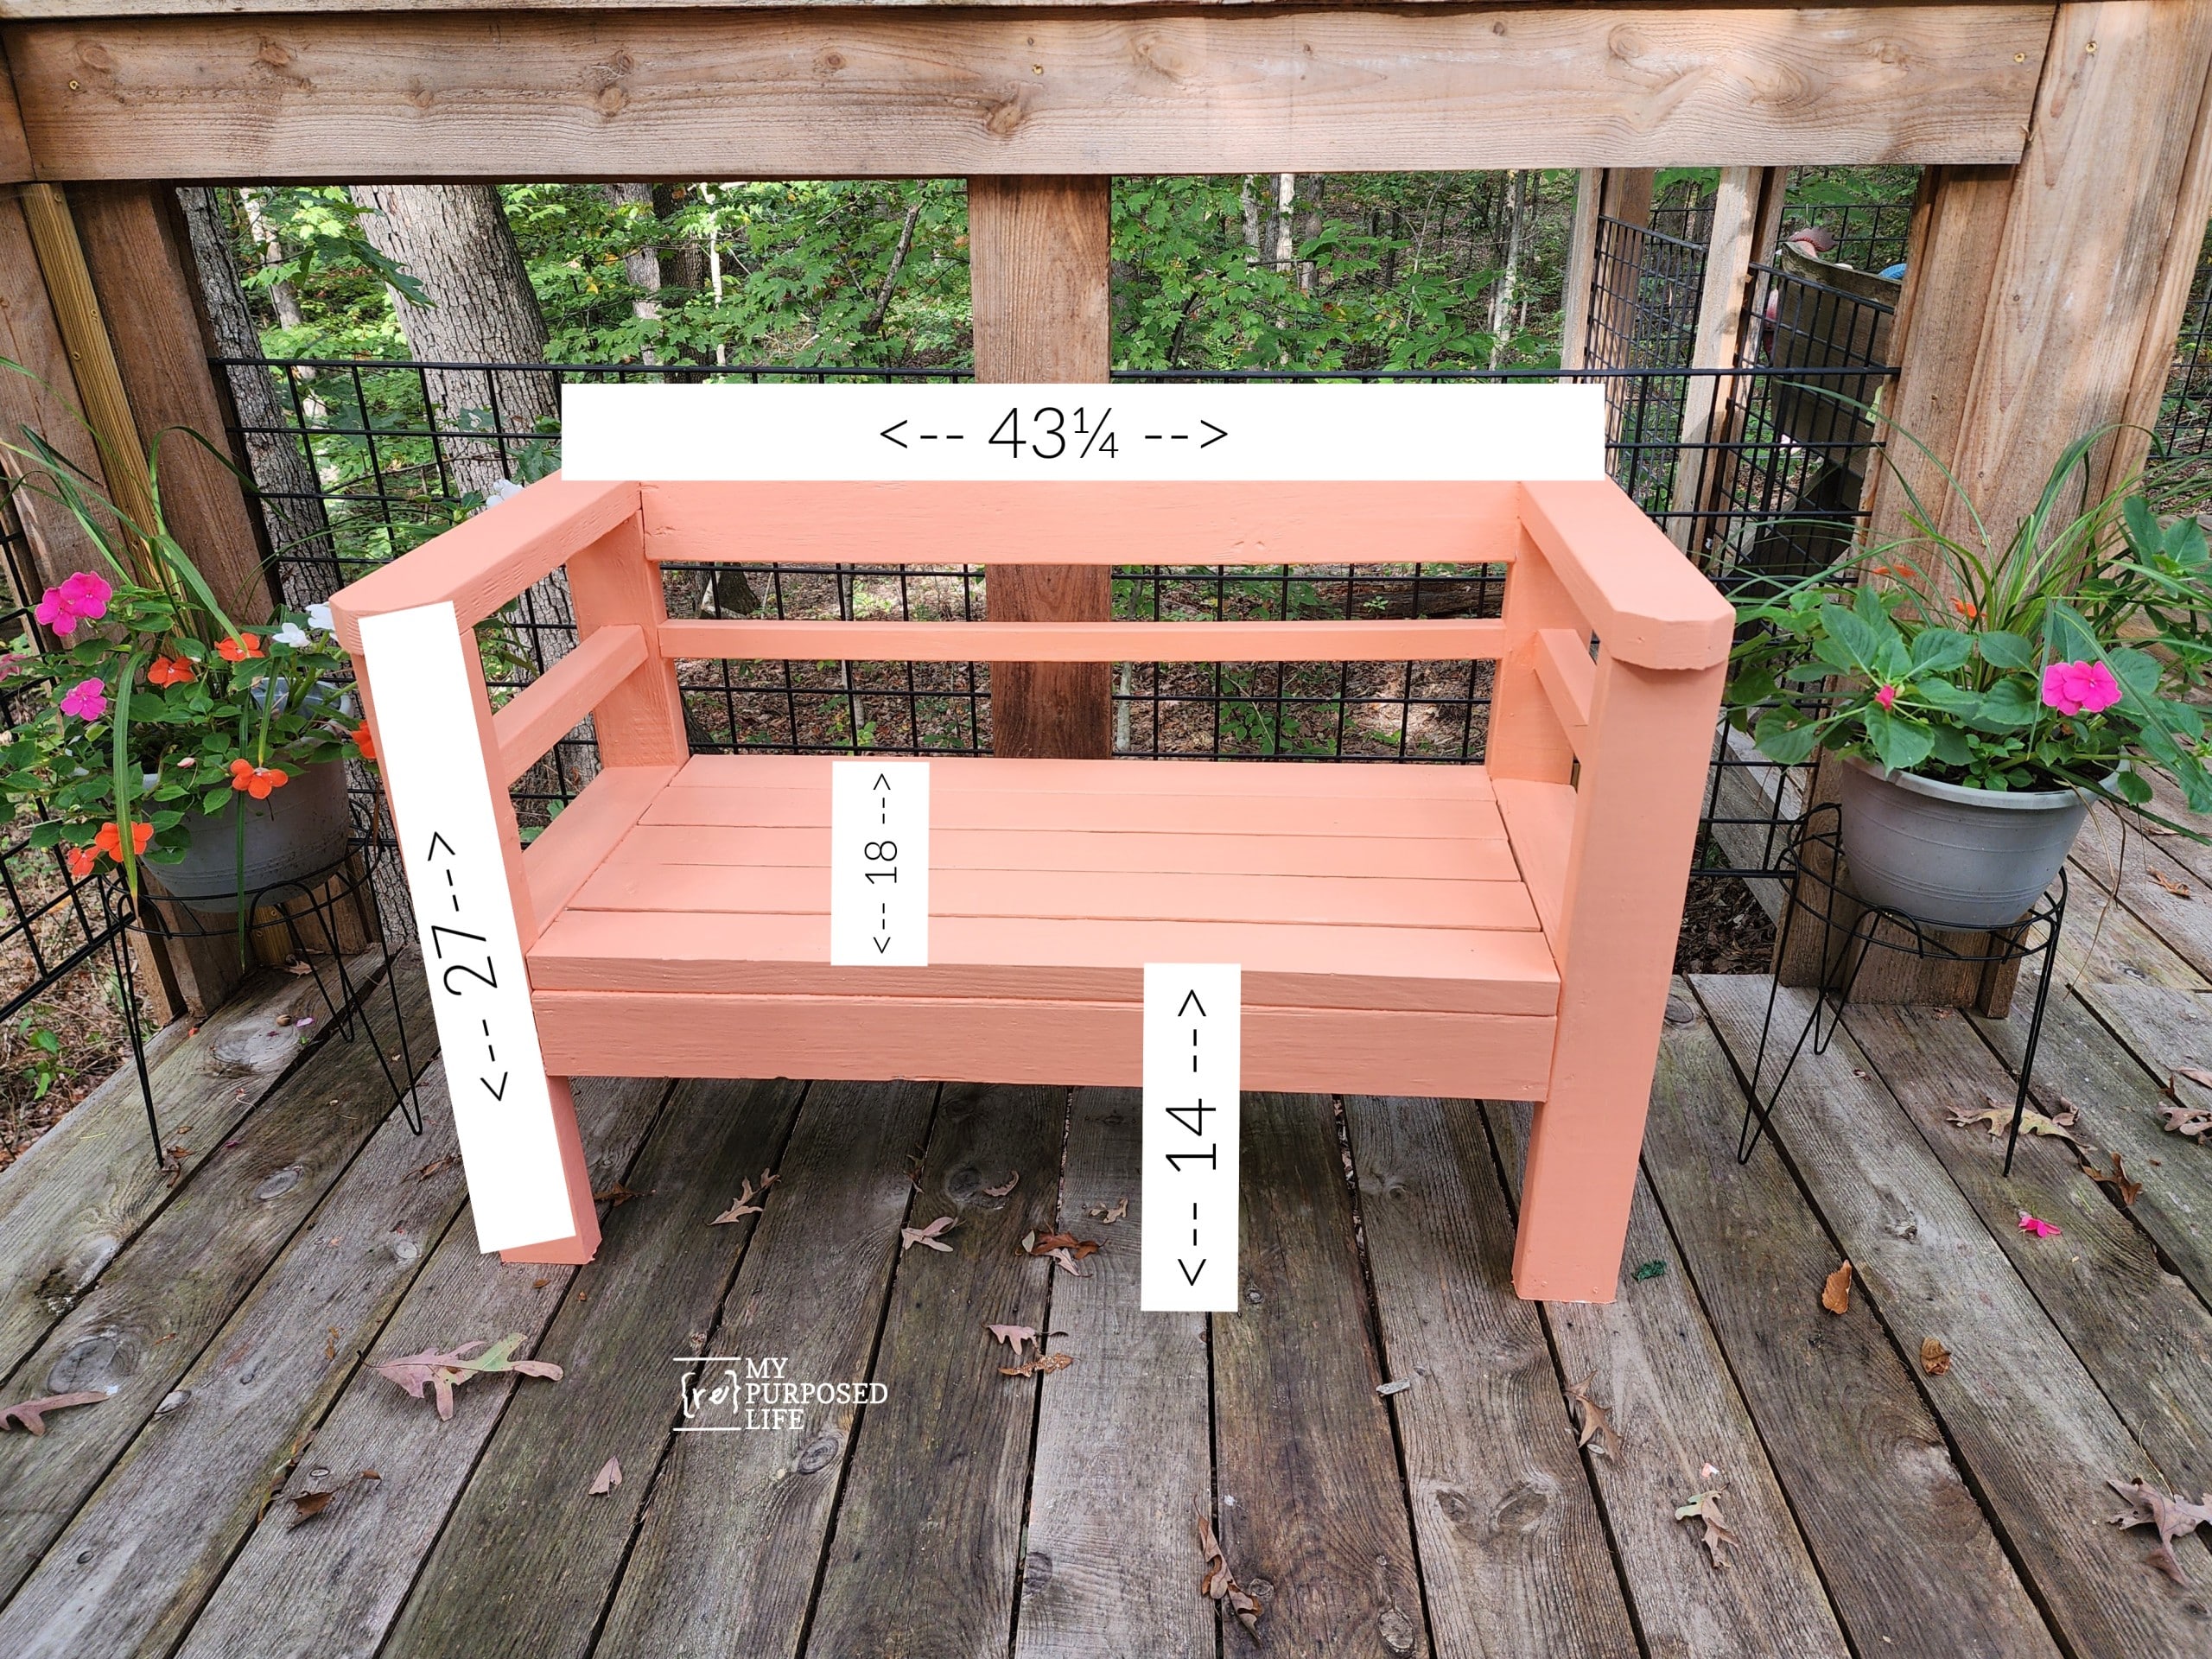
The overall dimensions are as follows:
- Width 43¼
- Height 27
- Seat Depth 18
- Seat Height 14
See more scrap wood projects here.
Your woodworking instructions are sooo well done.
Maybe…. I’ll even attempt one 🙂
Thanks so much for sharing !!
Thank you so much! I tried really hard to give the measurements on this scrap wood sofa. In a lot of my repurposed projects, the measurements depend on what salvaged item I use. For instance, the dresser I use may be larger or smaller than the one you have.
Even though it was a simple project it was a little challenging for me, I think my brain was taking the day off. 🙂 And, math is NOT my strong suit!
gail