scrap wood jewelry shelf
As an Amazon Associate, I earn from qualifying purchases.
I love our monthly Thrift Store Décor Challenge because it nudges me to do smaller easier projects. This month I have a srap wood jewelry shelf. I think that some of you might be more comfortable with easy craft projects versus larger building projects.
Vendors’ Village had a little birthday celebration at the end of April. It was really crowded, and exciting to actually be up front when one of my pieces was cashed out. I got to see who took home my red sewing cabinet makeover. As I was walking through the store doing a little shopping, looking for great deals, I came across a booth with a sign that had FREE items. Apparently the people of the booth had cleaned out their booth a little earlier, and left behind the stuff they didn’t want.
*This post contains Affiliate Links*
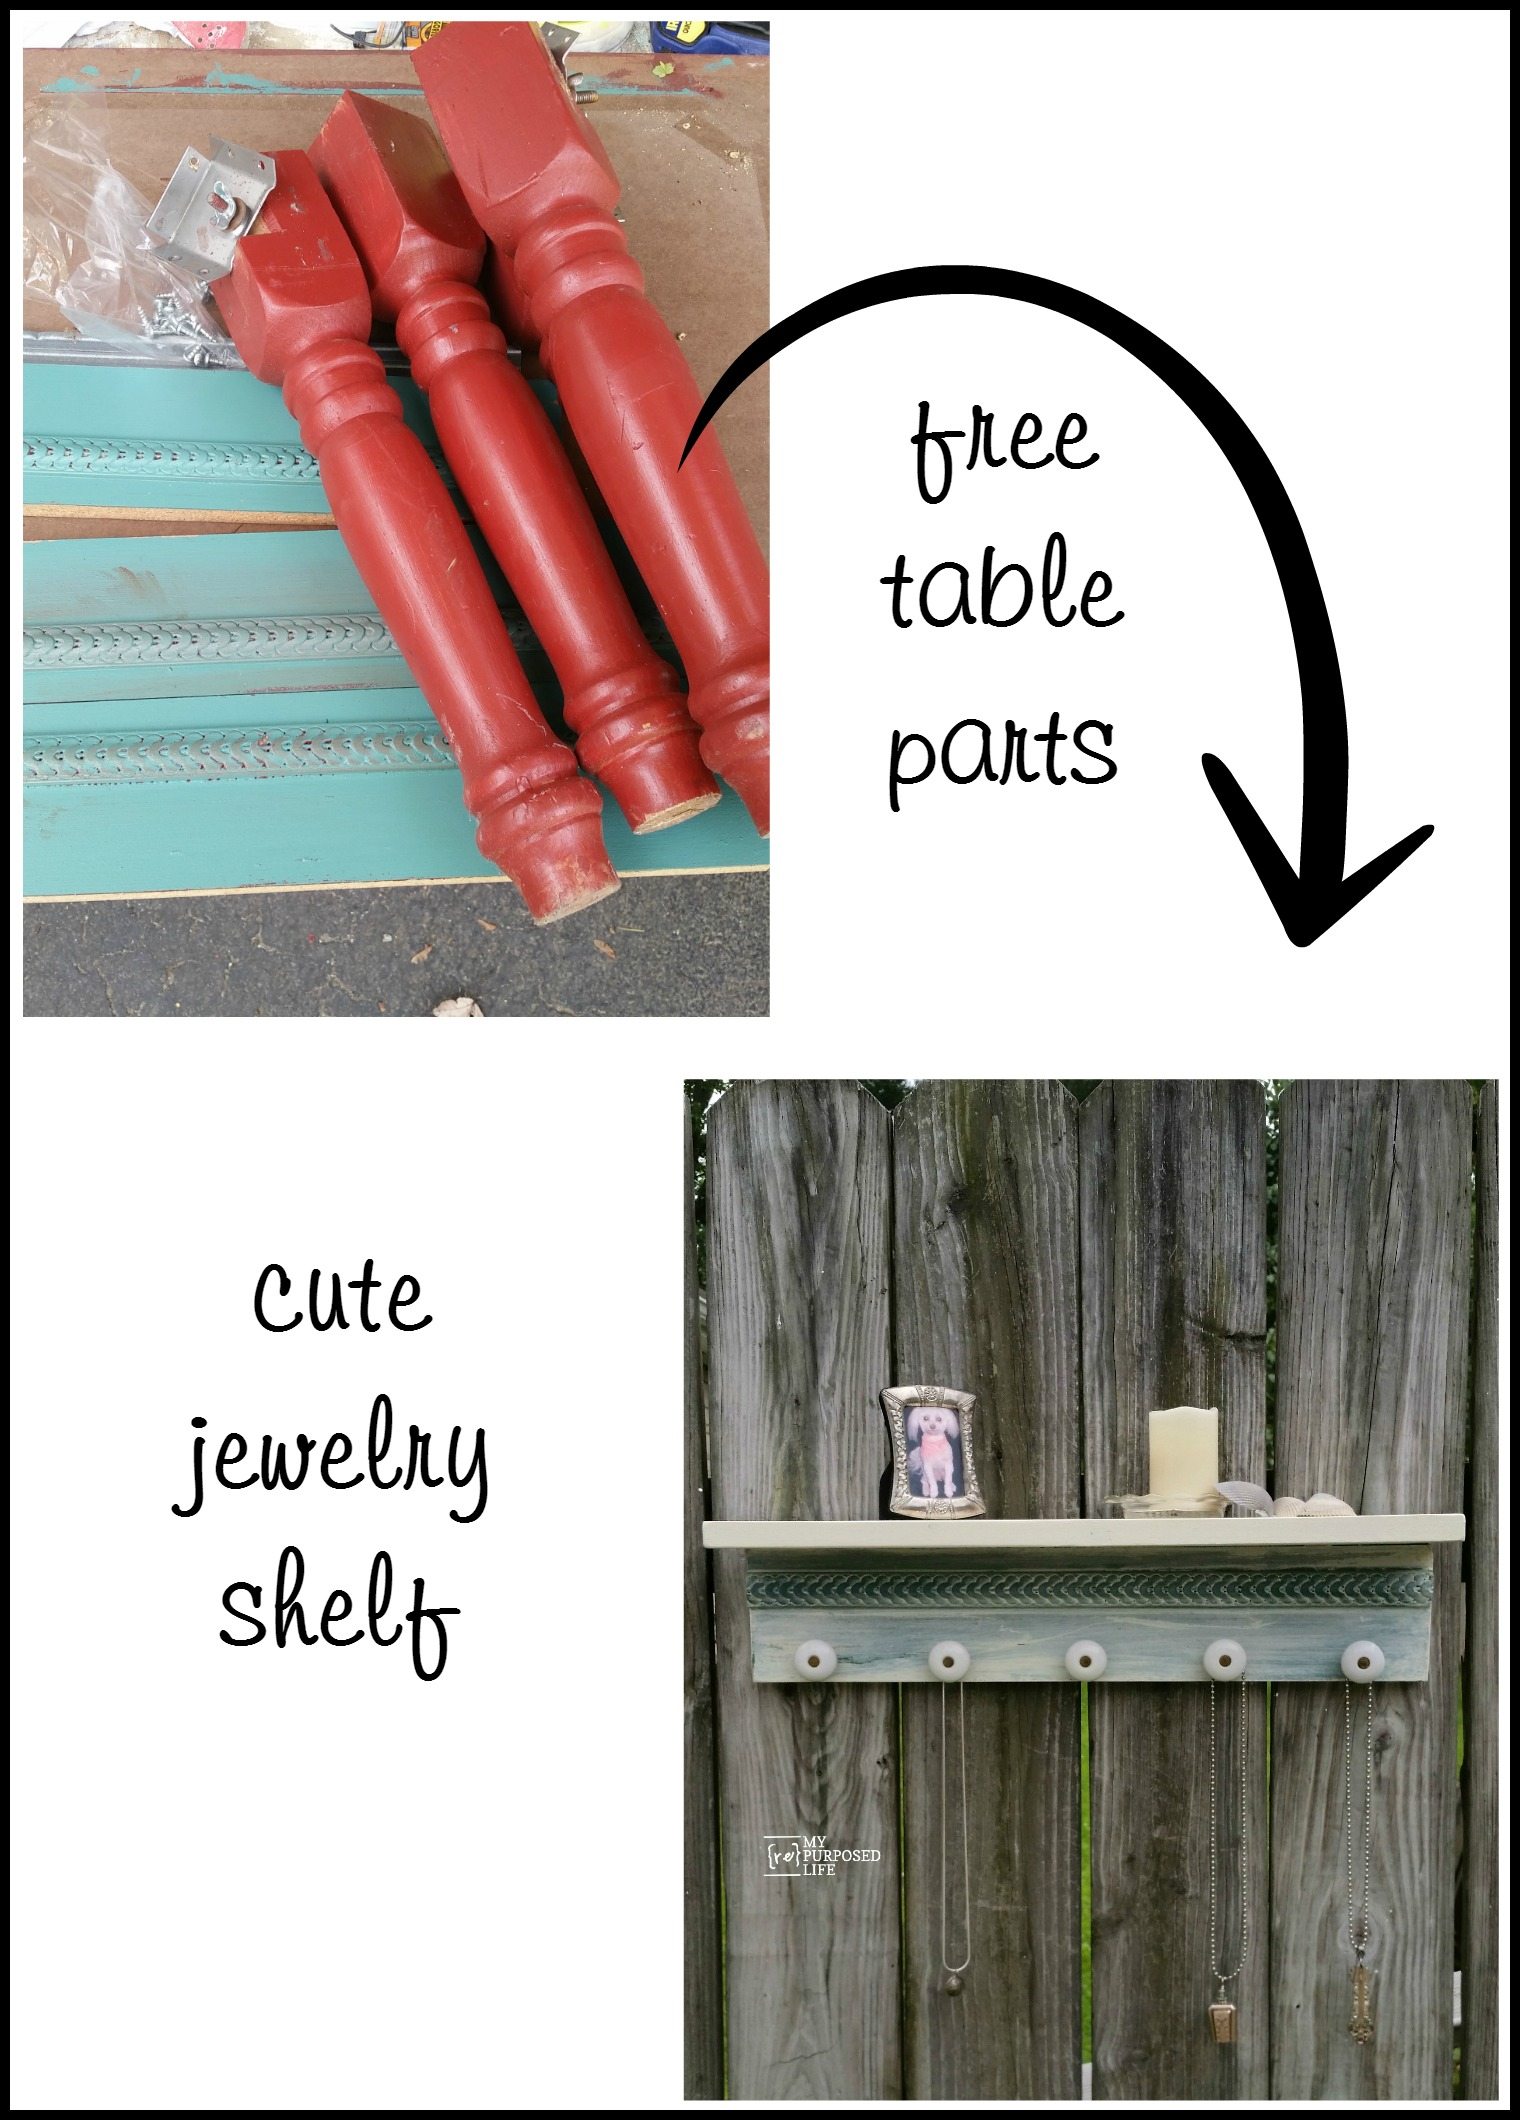
 This table happened to be one of the items left by the owners. I had actually seen it before, but it was $20.
 There had apparently been a drawer, but someone had broken it, and glued the drawer front on to the slot where the drawer had been. I thought it was definitely worth my time just for the legs!

I parted out the table, keeping the three pieces of skirt, and the four red legs. The table top was actually tossed as it was pressed wood and had some damage.
How to use parts of a table to make a jewelry shelf
 The parts of the table skirt was also pressed wood. The one on the left is after I had spackled and sanded the edges, the one on the right is what it looked like before I started.
 I cut a 1×4 to size to make a small shelf to secure to the cheap piece of wood. Gorilla Wood Glue and my Ryobi nail gun were used to attach the shelf.
 I spackled the small nail holes and sanded the spackling. I also removed those random staples from the back of the original table skirt piece. The scrap wood jewelry shelf was coming together nicely.
Paint/Wax scrap wood jewelry shelf
 I mixed up some diy chalky paint primer with some polished pearl (the can with the green Cansealid attached) It’s a great new product and so easy to use-I used it on a can where the lid was rusty and didn’t want to close properly.
 After I painted the table skirt, I immediately wiped back some of the paint to reveal the original turquoise color. The DIY chalky paint primer needs to be sealed, so I used Heirloom Traditions Paint clear wax.
Using reclaimed knobs to complete the scrap wood jewelry shelf
 I added some cabinet door knobs to the scrap wood jewelry shelf that I got from my neighbor’s daughter, spacing them about 4” apart. I drilled holes and was able to use the original screws that were with the knobs.
add d rings for hanging
 Because I buy my d rings by a large quantity, I use them on almost all of my hanging projects. The more you buy, the cheaper you can get them.
 This is a good view so you can see that the new shelf wood is Polished Pearl, and the original piece is a wash over the original turquoise paint.

I made it for jewelry, but it could also hold keys, scarves or hats.


Be sure to check out the fabulous projects from my Thrift Store Decor friends, I know you will be inspired!
My Uncommon Slice of Suburbia
Cute shelf, and way to save that table and make it into something useful! You know I have a hard time throwing things away, and it is so fun to do a quick and easy project too, I should do more!
I LOVE quick and easy projects that use up scraps! I still have two of those boards left, any thoughts of what do do with them?
gail
You always amaze me with your creativity! I need to make one of these or several!
Thanks Christy! I just loved those cheap little boards. The good news is . . . I have 2 left! 🙂
Love the shelf! My husband never throws anything away, it drives me nuts till he makes suomething really cool 🙂
You are always so creative – love it!
Fun Project. I never throw away anything either Gail. I keep all the parts. I think I have some pieces just like the ones with the detail work. Thanks for the inspiration.
this repurpose is awesome! love how you take things and make them into something beautiful! (the puppy in the pic is SO cute!)