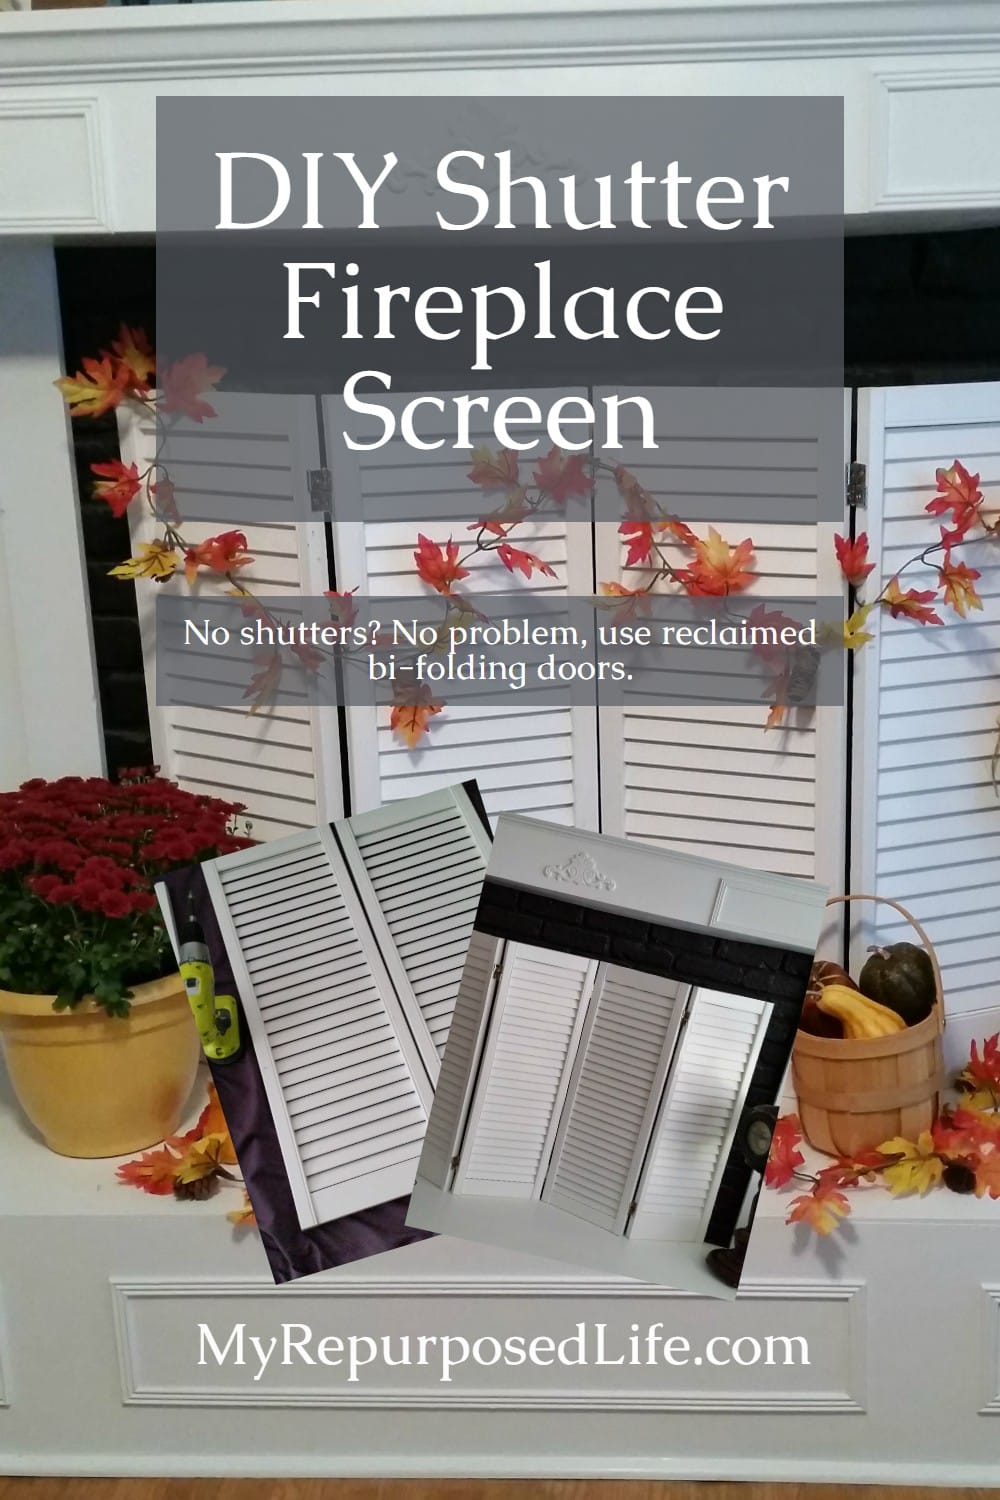
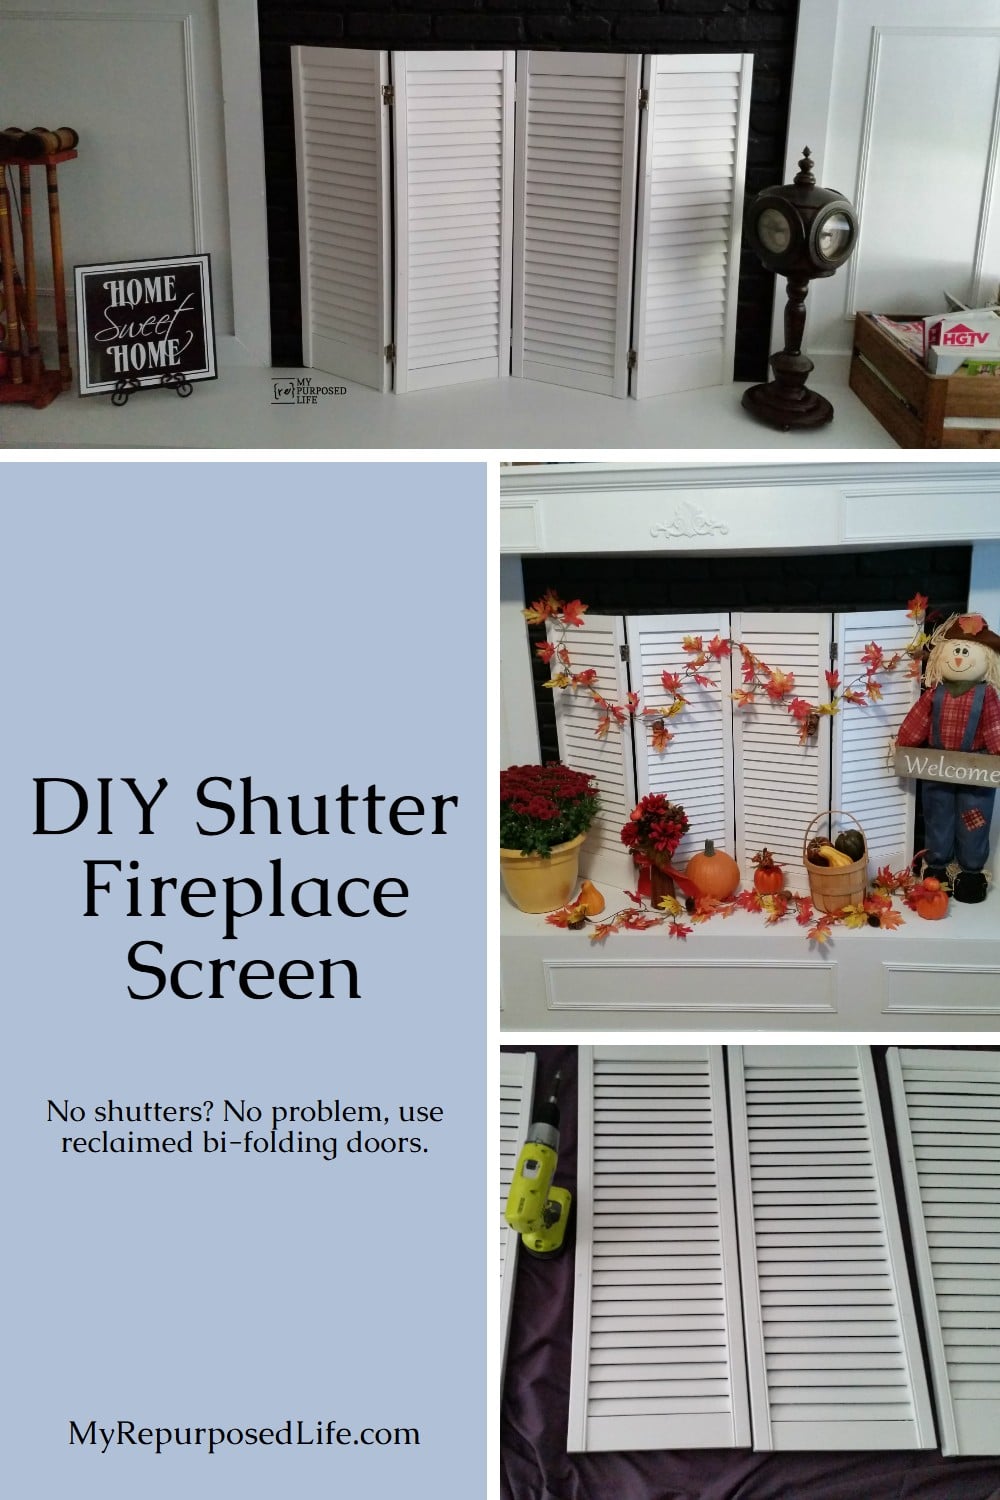
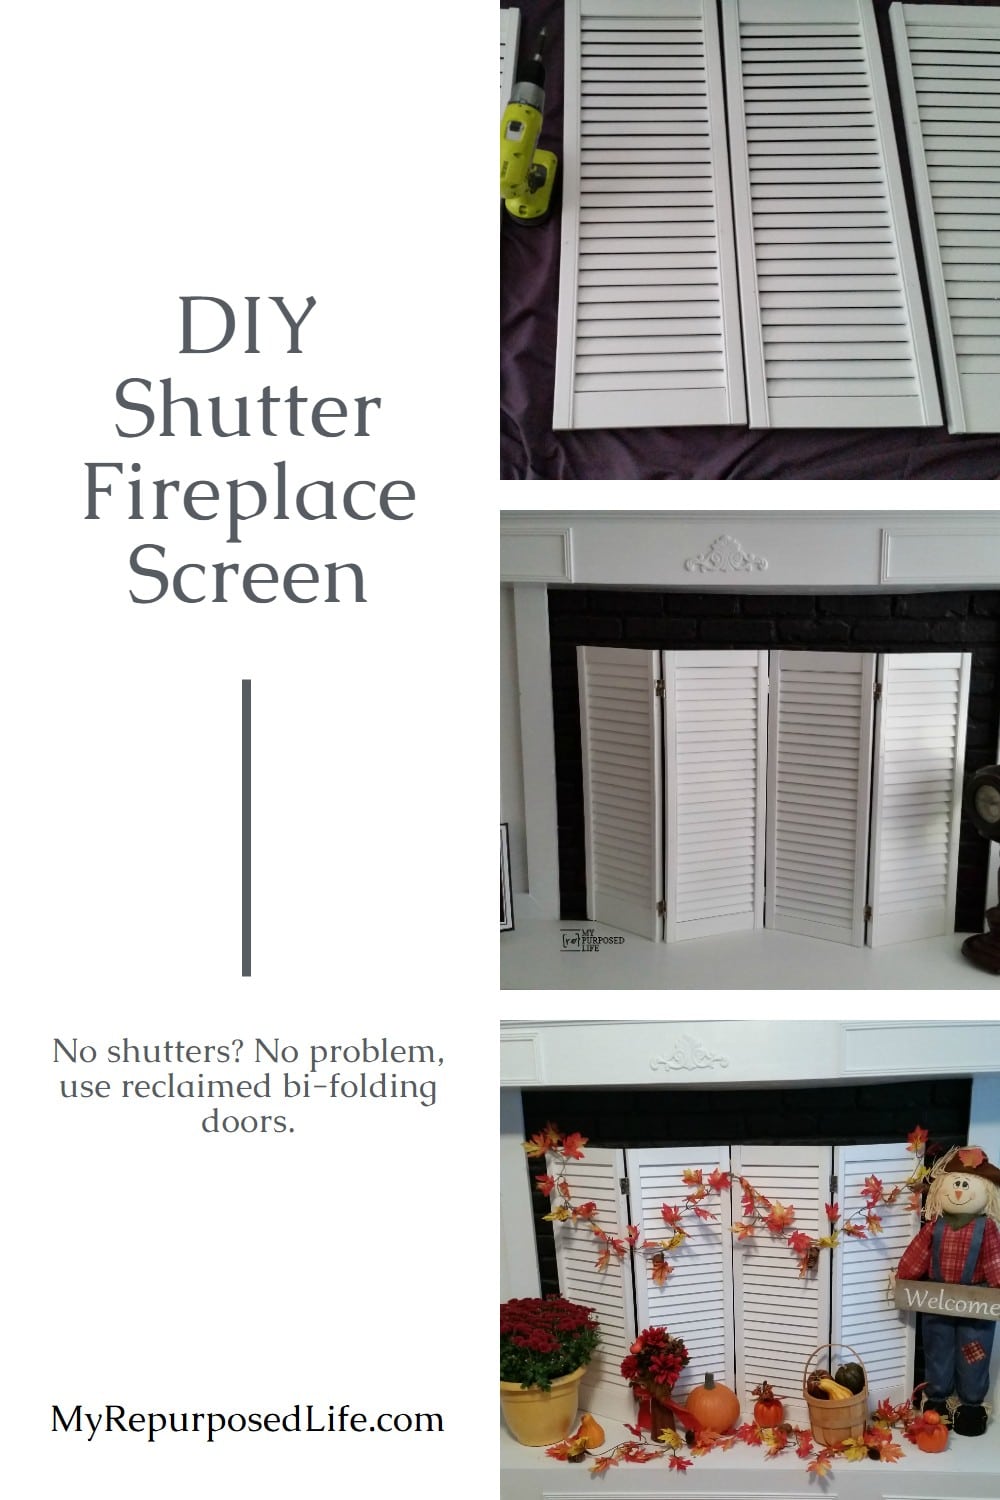
Shutter DIY Fireplace Screen
As an Amazon Associate, I earn from qualifying purchases.
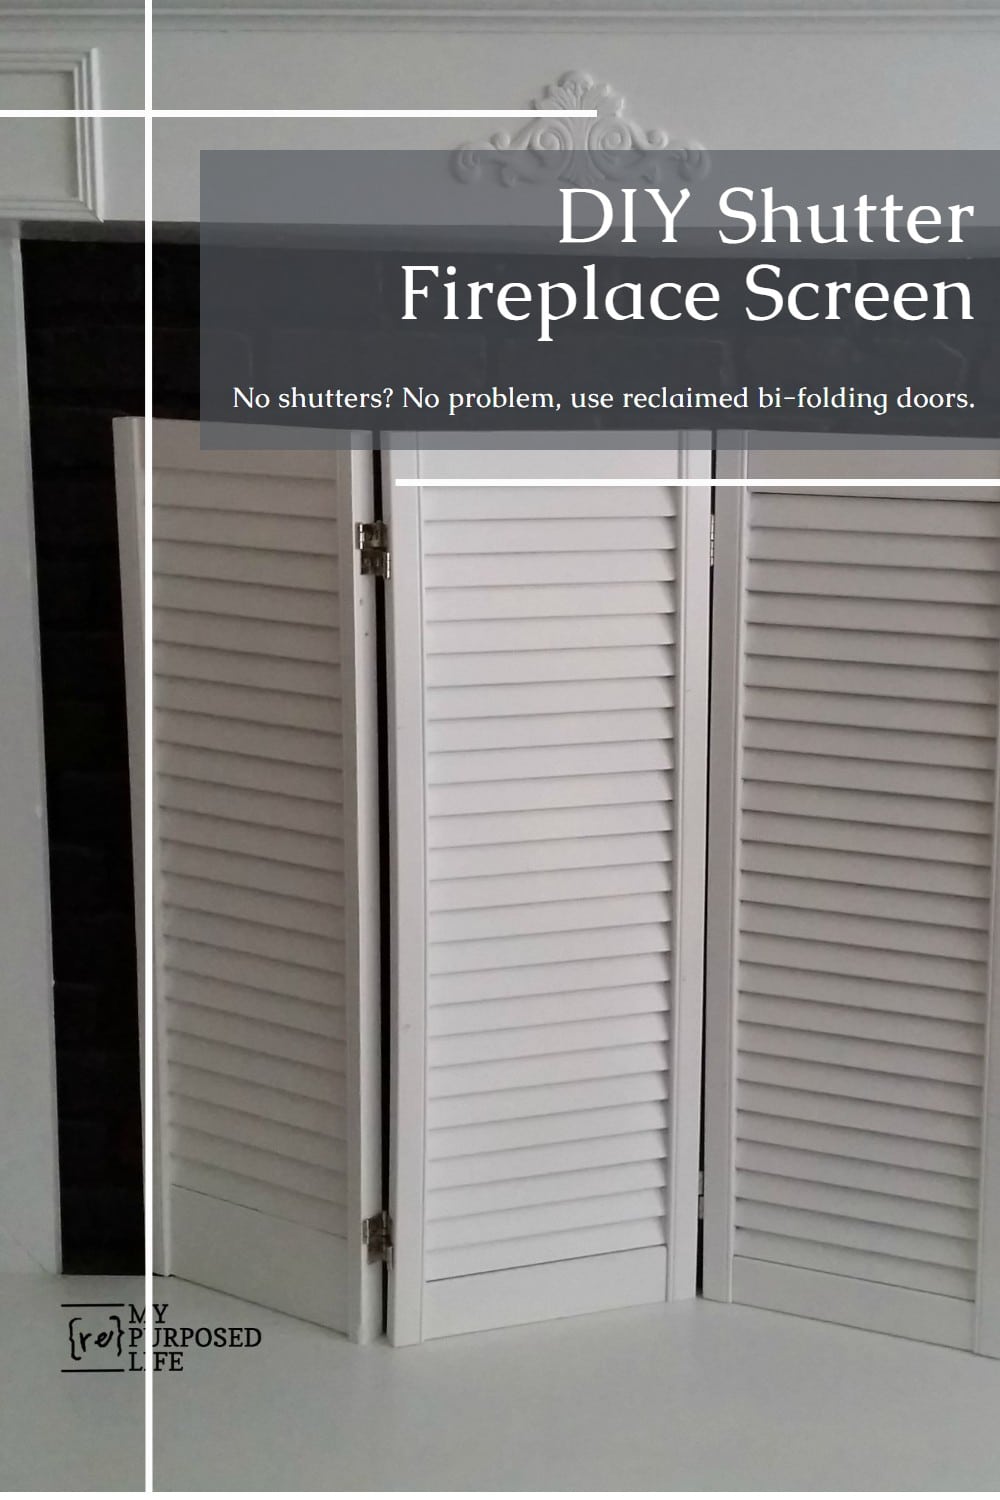
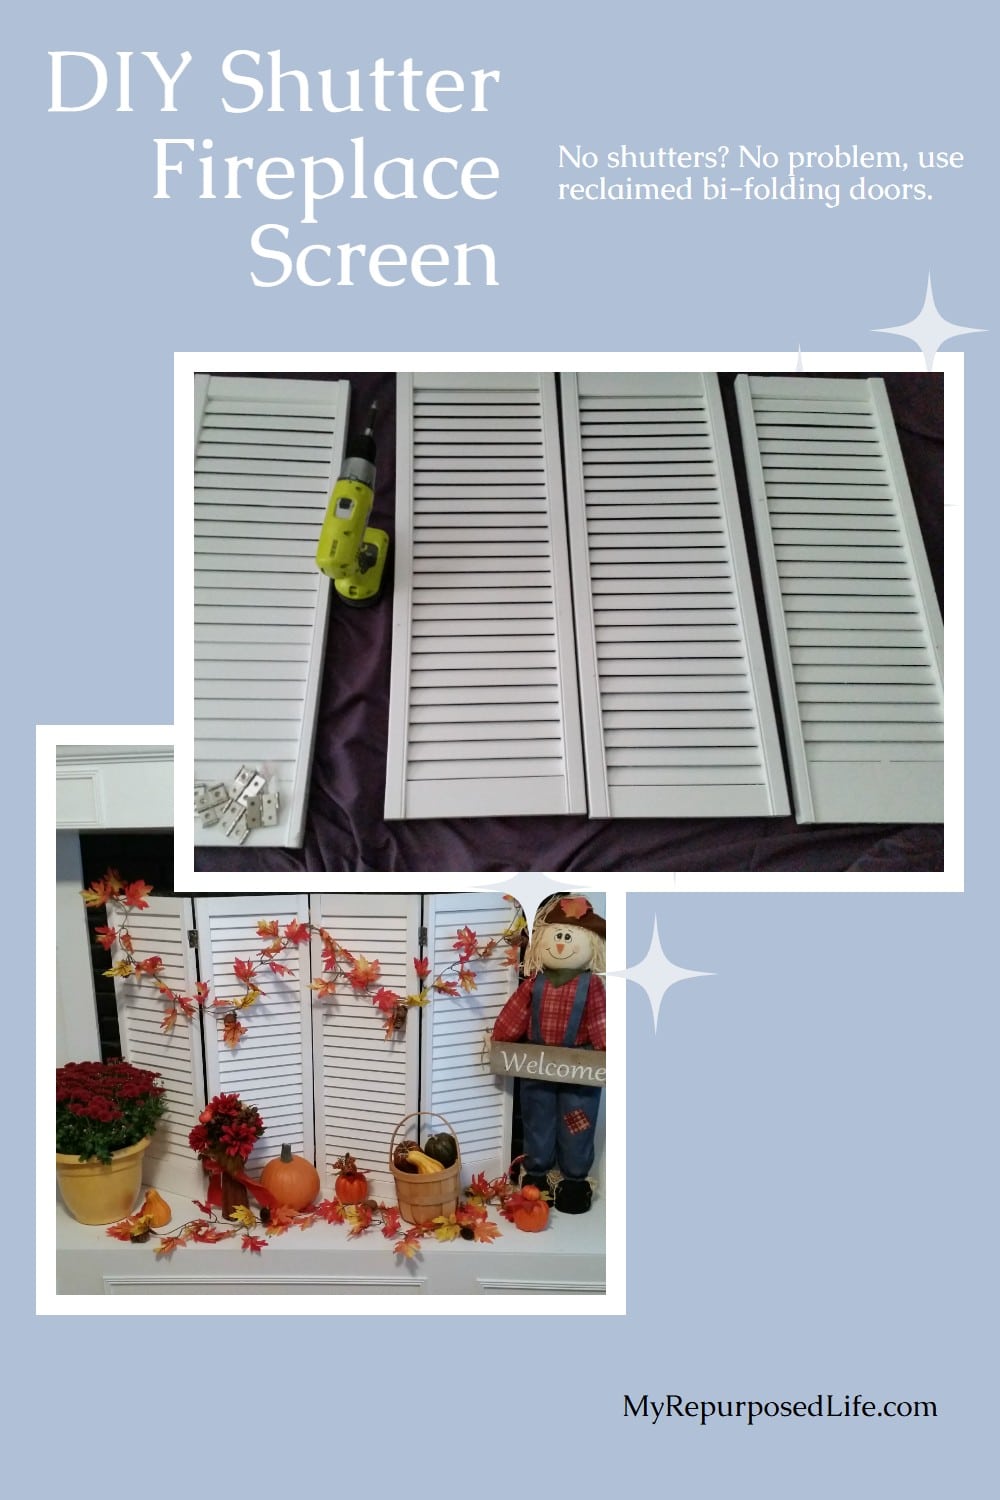
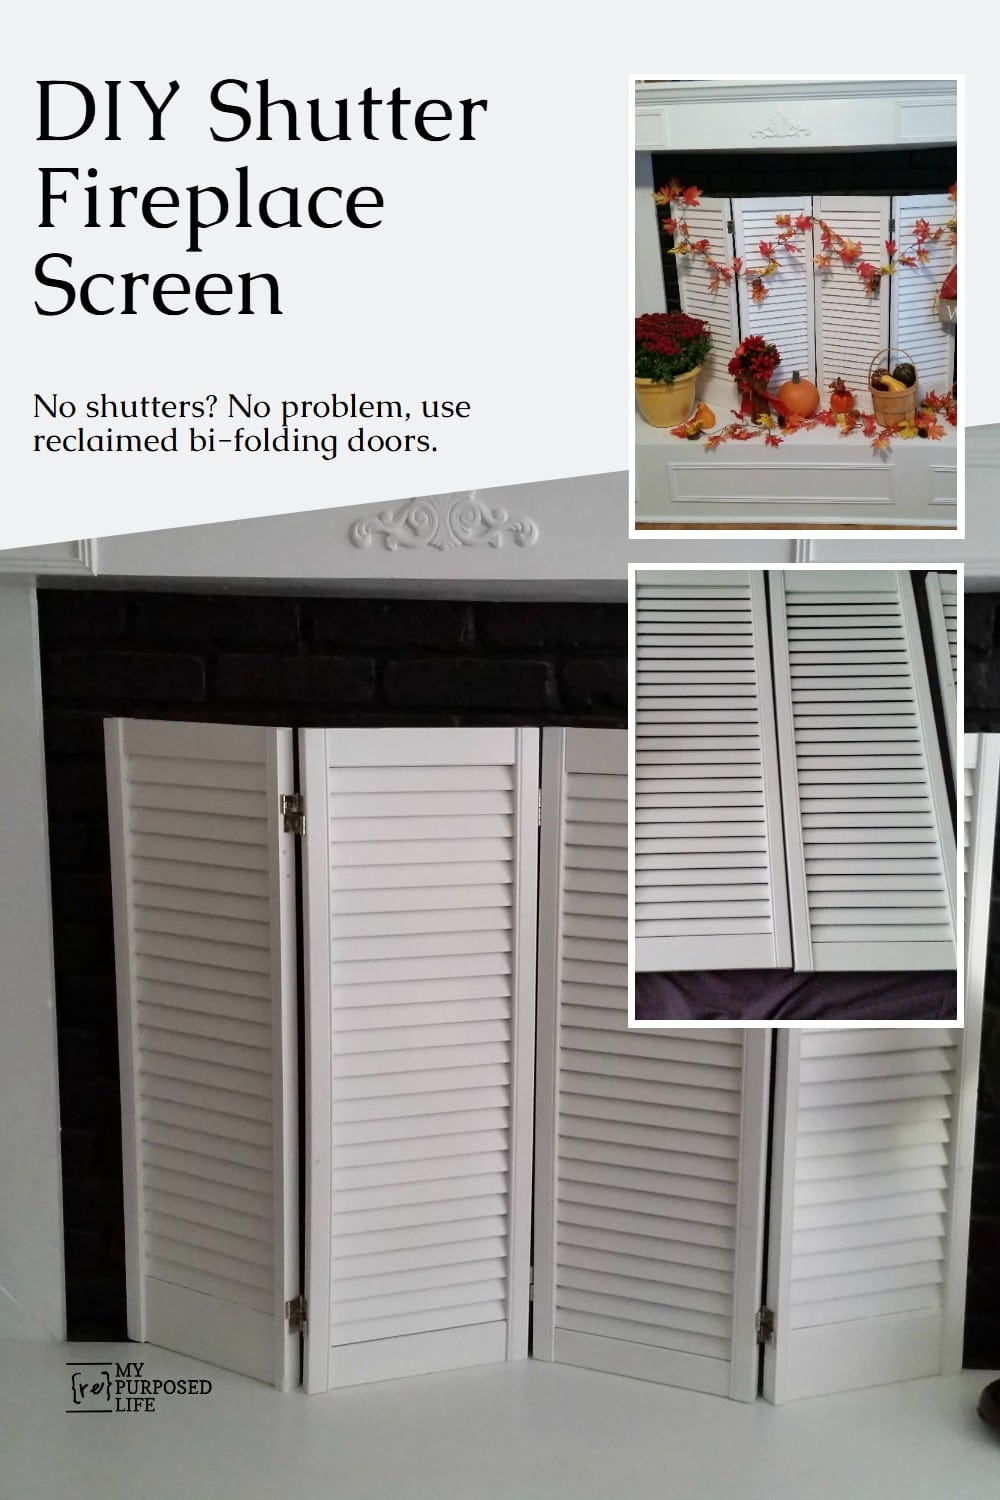
If you’re tired of the same old fireplace look and craving a touch of rustic-chic charm, this DIY shutter fireplace screen is a game-changer. In just a few simple steps, you can transform discarded bi-fold doors, or even mismatched shutters, into an eye-catching accordion-style screen that refreshes any hearth. With nothing more than basic tools, paint, and some hinges, you’ll be beautifying your fireplace in no time.
I’m sharing this shutter DIY fireplace screen today! Do you remember the shutter shelf I made with 1/2 of a bi-folding door? This project is really simple once you locate some doors and cut them in half.
DIY Fireplace Screen
Reclaimed Bi-fold Doors
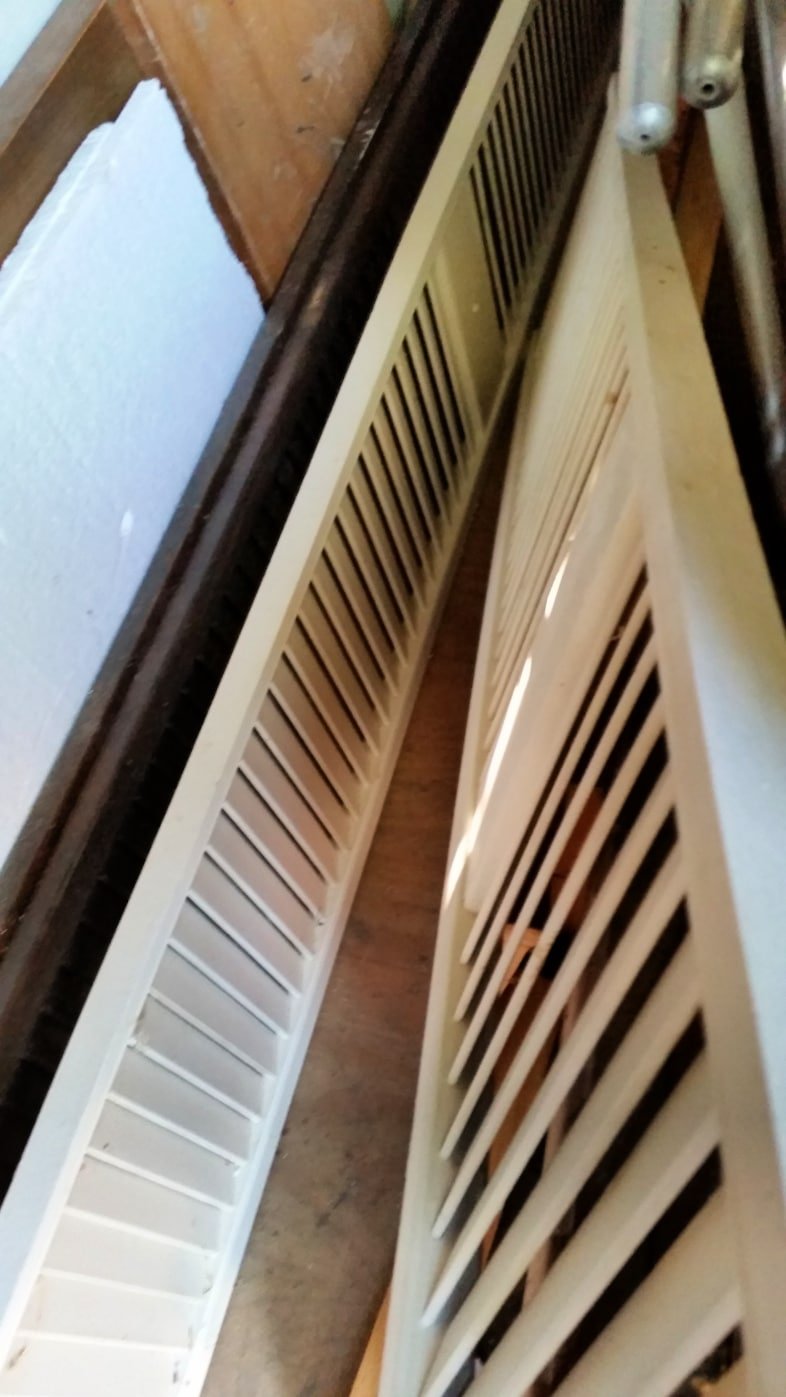
Step 1- Locate some bi-fold doors.
Mine happened to be hanging out in my shed for a couple of years. You could probably find some on the side of the road or at your local Habitat for Humanity ReStore. Remove any hardware. I had already “borrowed” the hinges off these doors for other projects. Then I only had to remove a couple of knobs.
I chose four doors, two of which were black and two of which were white. They weren’t exactly matching or the same width, but once painted and displayed, that’s not noticeable.
Cut Bi-fold Doors in Half to Make a Fireplace Screen
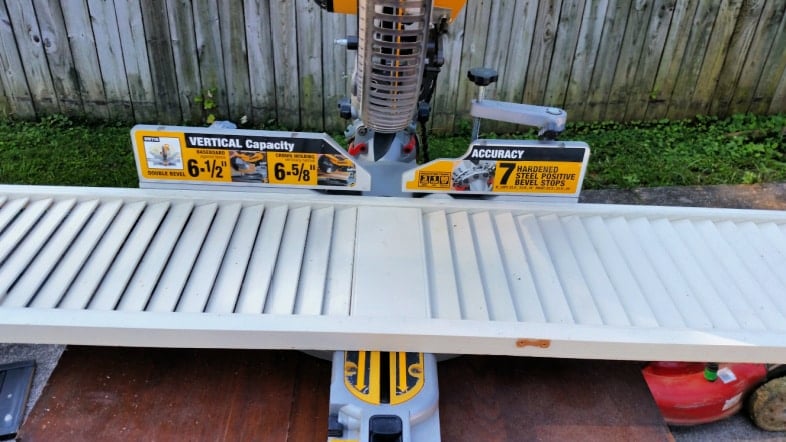
Step 2- cut the doors
The doors are too tall, so they need to be cut in half. I used my compound sliding miter saw, but you could also use a circular saw, jigsaw, or even a handsaw.
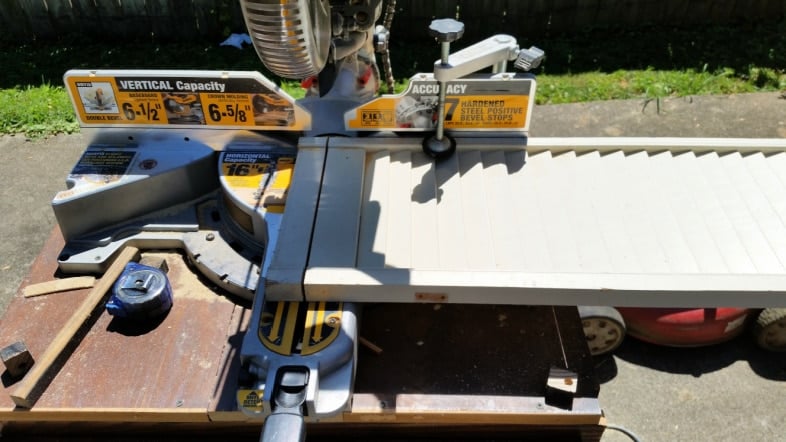
Ensure that you trim the wider part so that all four doors (or shutters) are the same height.
The Easiest Way to Paint Shutters
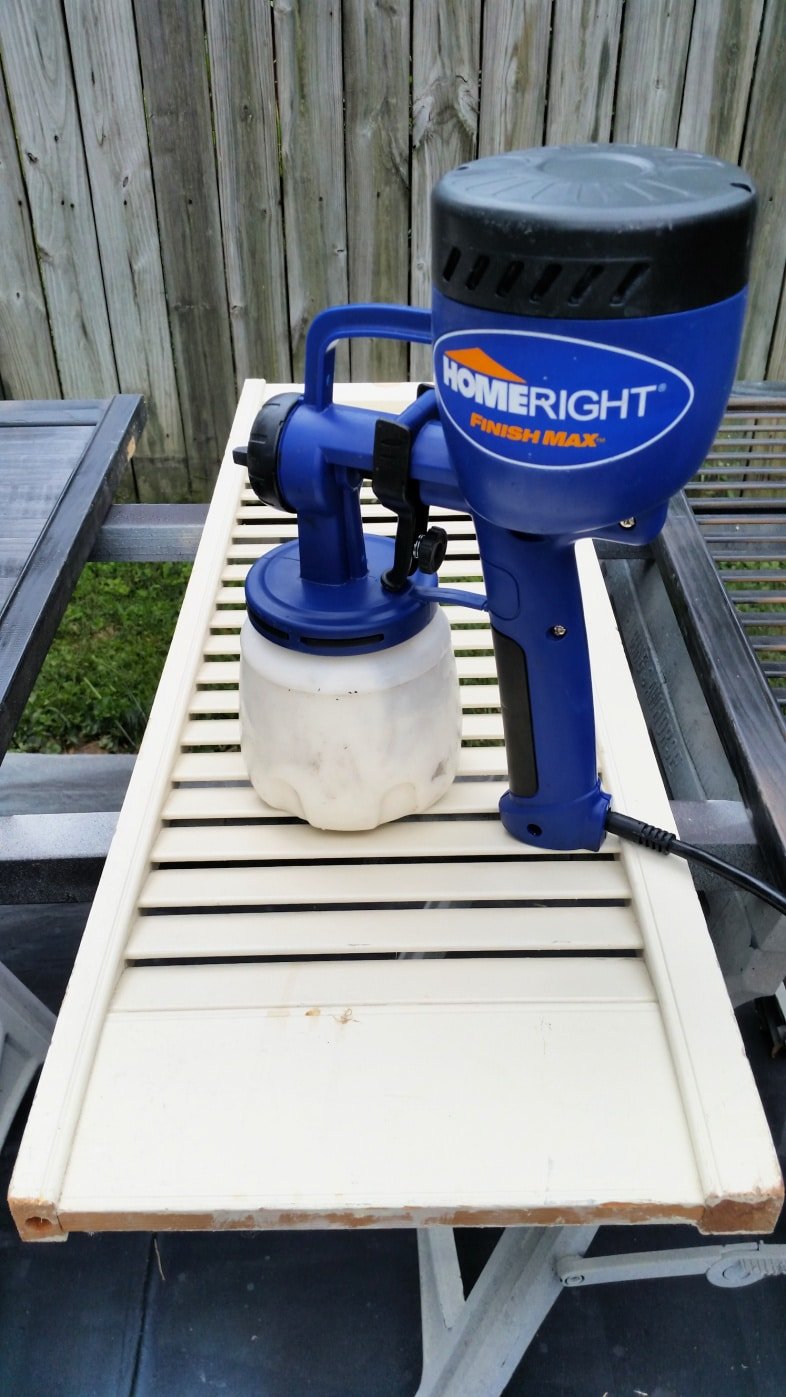
Step 3 Paint
Paint the doors by hand and expect to encounter numerous drips and runs. You know the drill already if you’ve ever painted slats before. Paint one side, run to the other side, smooth out the drips and runs, then go to the other side. Repeat this process until you’ve covered both sides.

But! If you use my best friend, the Homeright Finish Max, there won’t be any runs, drips, or errors. For some reason, I didn’t take any pictures along the way, but I completed this project in the same way I always paint my furniture. I used two light coats of DIY Chalky Paint as a primer. I used Polished Pear for that. Then, for the top coat, I used some exterior white paint I used to paint my porch posts. I did two light coats of the white paint.
Attach Hinges
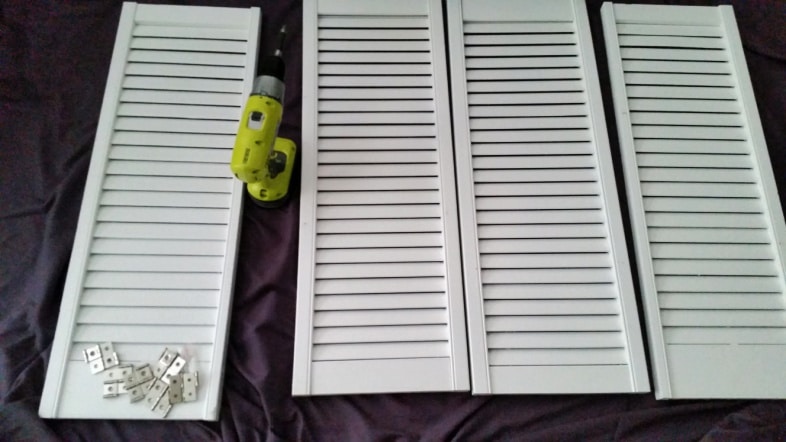
I love the way the bi-fold door halves turned out. The finish is flawless, not a single drip or run. It turned hot, so I brought them indoors to finish them. After they cured for a couple of days, I added some double-acting folding screen single hinges from my friends at D. Lawless Hardware.

These are the kind of hinges that will allow the shutters to swing both ways.
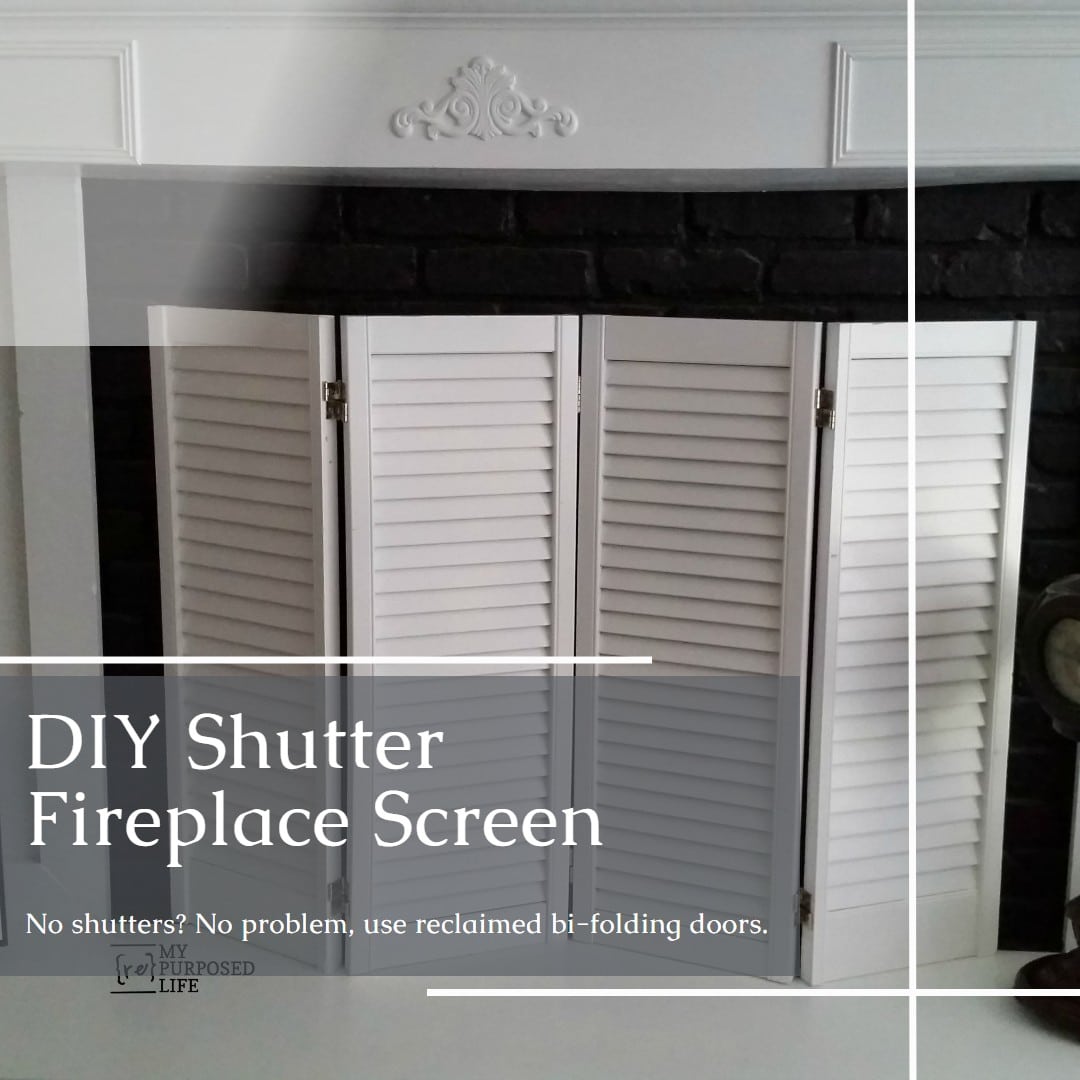
DIY Shutter Fireplace Screen
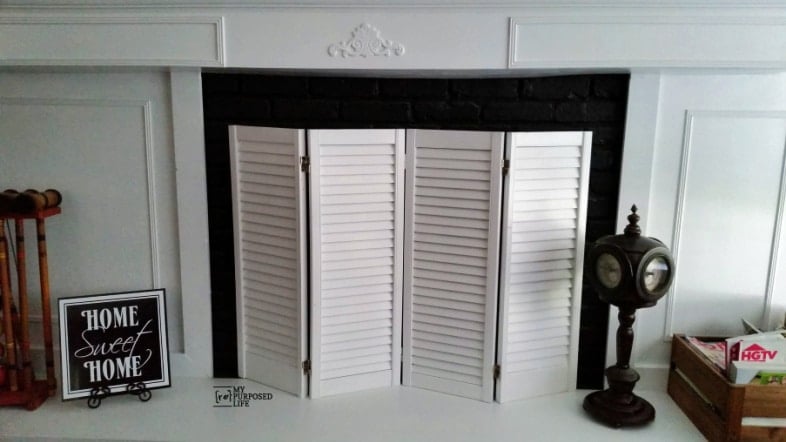
I hoped that they would be able to fold totally flat for storage. The way I attached the hinges, they didn’t quite do that. I need to adjust the hinges that are on the middle doors. But this was definitely the look I was going for—an accordion-type display. I’ve had the same painted brass fireplace screen since I painted my fireplace years ago, and I was ready for a change.
Remember I told you earlier that the doors didn’t match? If you look at the photo above, you will notice that they are uniform across the top—but not across the bottom. The left and right panels match, as do the two center panels. I thought doing them this way would be less noticeable. Be honest, did you notice before I pointed it out?
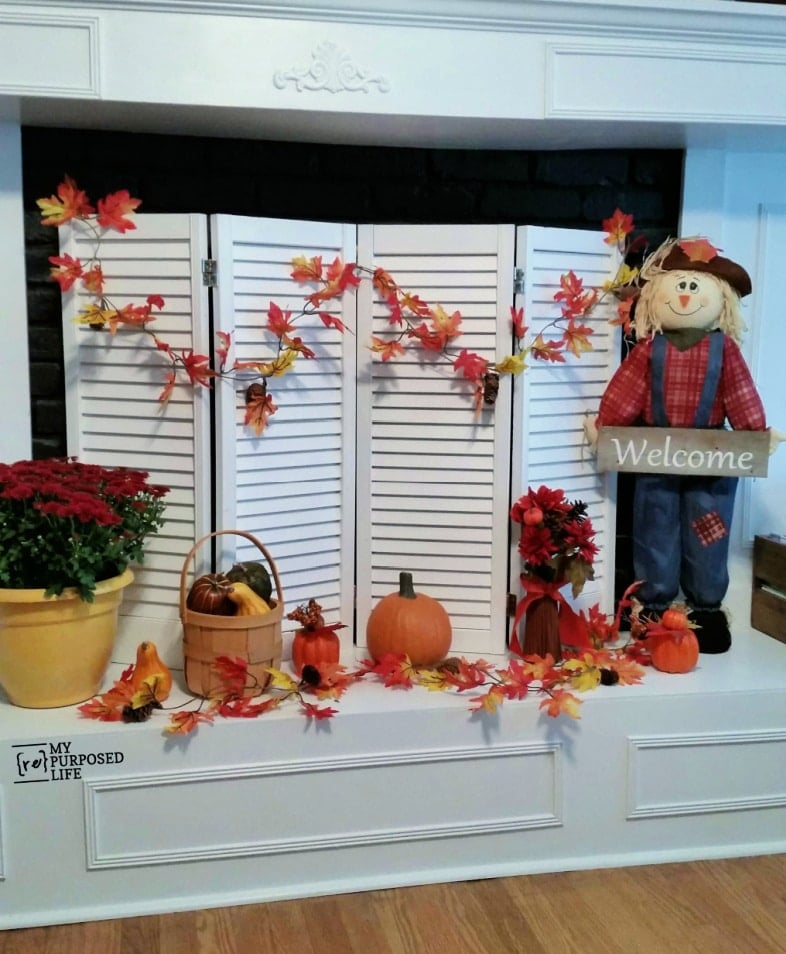

I’m so ready for Fall!
Repurposing old elements, such as bi-fold doors, not only saves money but also transforms the ordinary into something uniquely stylish and functional. If you’re anything like me, with a trove of scrap wood and a love for upcycling, this project is both satisfying and surprisingly doable. Give those weathered shutters or leftover bi-fold door a new lease on life, and let your fireplace screen be a standout piece that sparks both conversation and creativity.
Have you ever done a shutter project, or faked one with bi-fold doors? Did you get runs and drips on your slats? You won’t if you use a Finish Max from Homeright!
gail
related content:
I did notice, I must confess. I think the third from the left needs to be turned over, but the unifying spray of white paint doesn’t make it that noticeable. I think I probably noticed because I have the same project to do, but mine will be hiding the litter boxes that need to be noticeable from the living room. We have the doors, so now I need to get my butt in gear to do this to them. One project at a time, I guess…
Oh, I forgot to say that we will probably stagger the height so we don’t have to get them even. Trying to get them even would probably give us hernias!
hahaha I just looked over at the fireplace to see which one you’re talking about, but not sure I still have them “right side up”. I may have them turned differently now. heheheh
That’s a great idea for the litter box!
thanks Fonda!
gail
My bloglovin’ feed shows all the pictures for your blog as hair color advertisments…I clicked over to make sure I could see your feed and I can..not sure why that is showing up that way…could your blog have been hacked..I hope not! Just thought you might want to know
This was for sure a big time smarty pants move. I’m in love.
xoxo.
Sarah @ Backwoods Babies
thanks for making me smile with that comment Sarah!
gail
Those are cute! No I didn’t even notice they were different until you pointed it out. You are a rock star carpenter..I read all the lango you write and you sound so professional..well cause you are lol
this is great!!! i am currently using my old bi-fold doors for a room separator. maybe when i don’t need them for that, i can turn them into something else!
Really nice piece. Like how they are a back drop for decorating the hearth.
You do great work!
JJ
I have an L shaped fireplace all brick. Need an idea how to cover it but I don’t think bi fold doors would work on it. Help!
I’m not familiar with that kind of fireplace, but would it work to use more panels?
gail
Dumb me uses a fireplace screen!!!
This project turned out beautifully! I love the classic simplicity of the design, and NO, I didn’t notice the disparity in the bottom stiles until you pointed it out…the way you planned out the symmetry works very well.
I have a stash of re-claimed shutters, and don’t think I’ll attempt to paint them until I have a sprayer. You convinced me!
Thanks for creating a great project, and for sharing the step-by-step with us…
Heather,
You are wise to wait on a sprayer to paint your shutters. I have been on the receiving end of a lot of slatted doors that had been painted by hand, and there were many drips (all on one side).
Using the Finish Max is not only faster and easier, the end result is beautiful!
gail