Side Table Makeover | Pet Bed
As an Amazon Associate, I earn from qualifying purchases.
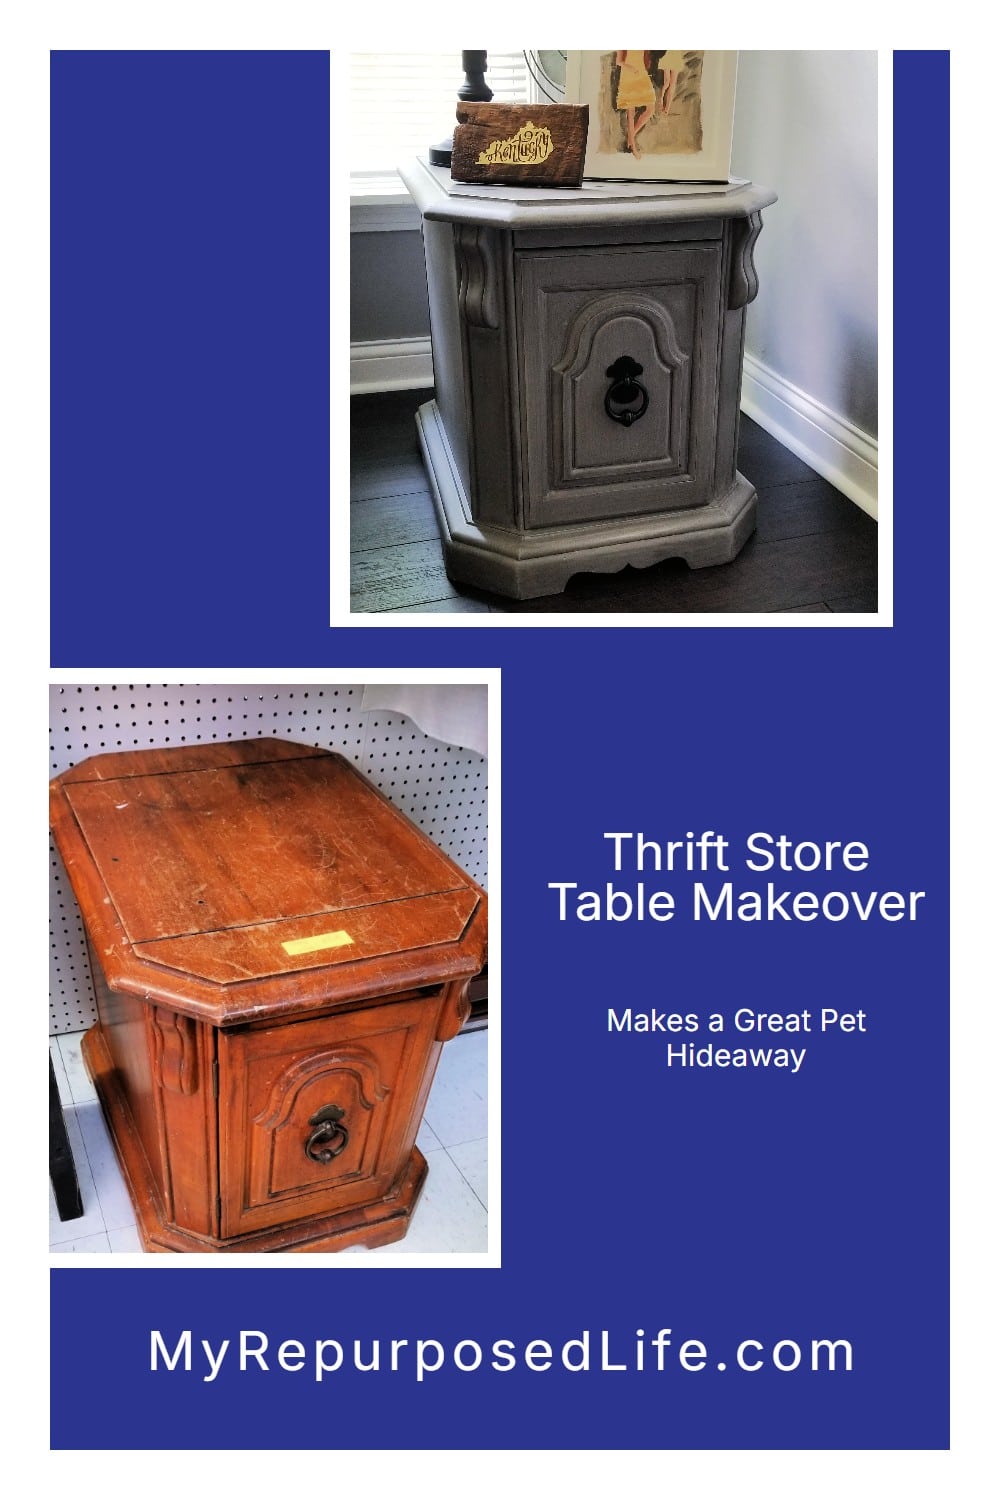
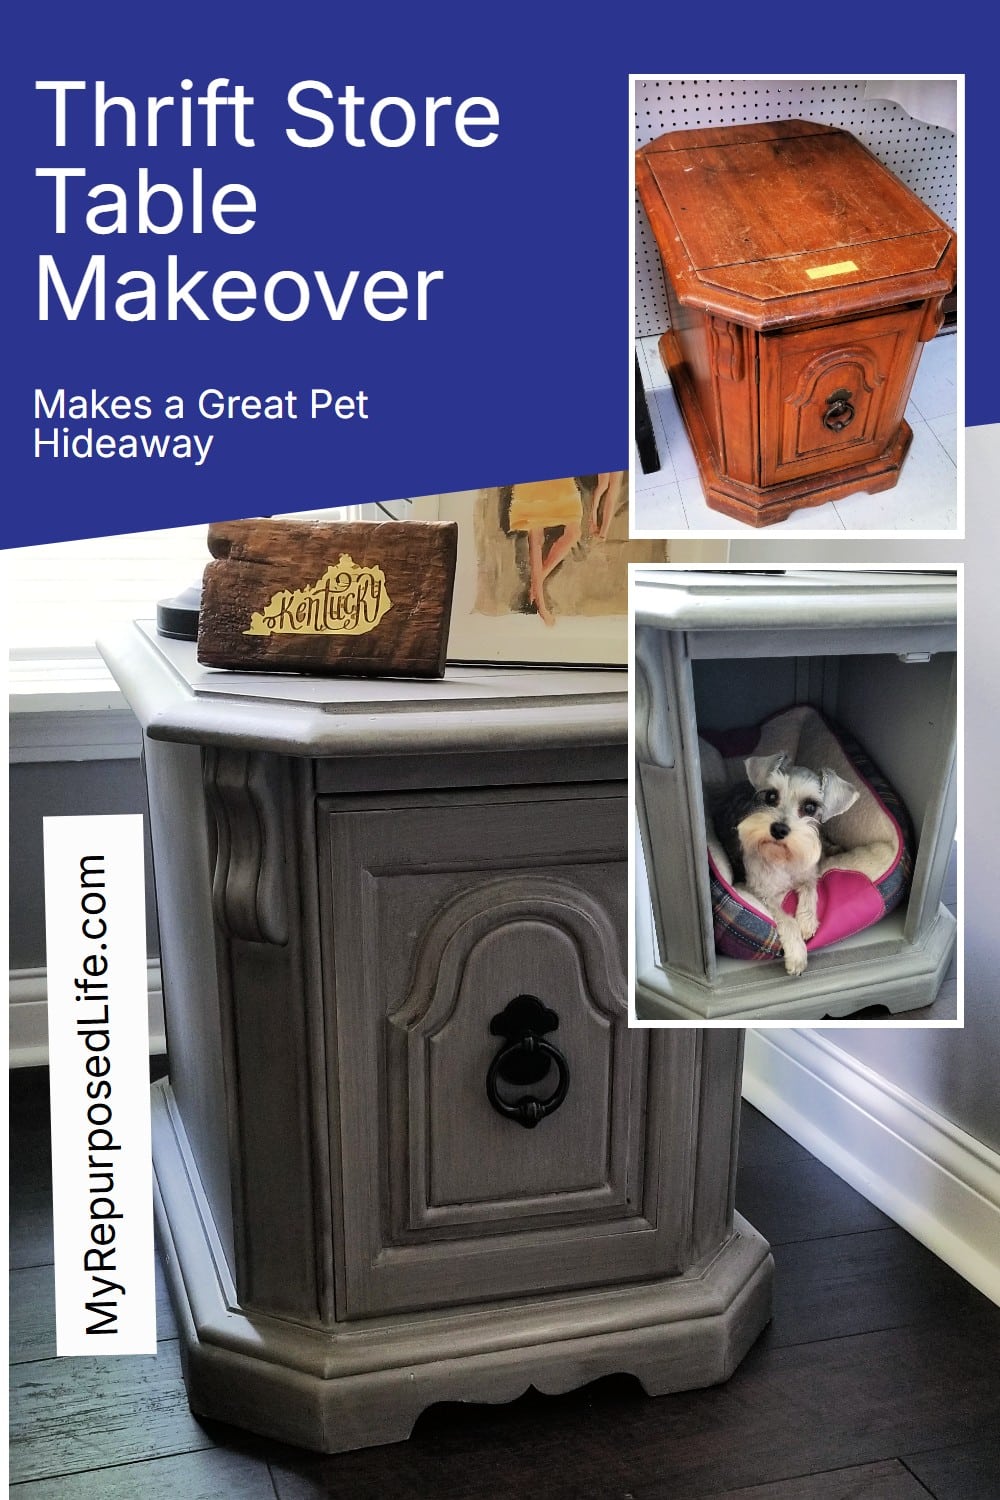

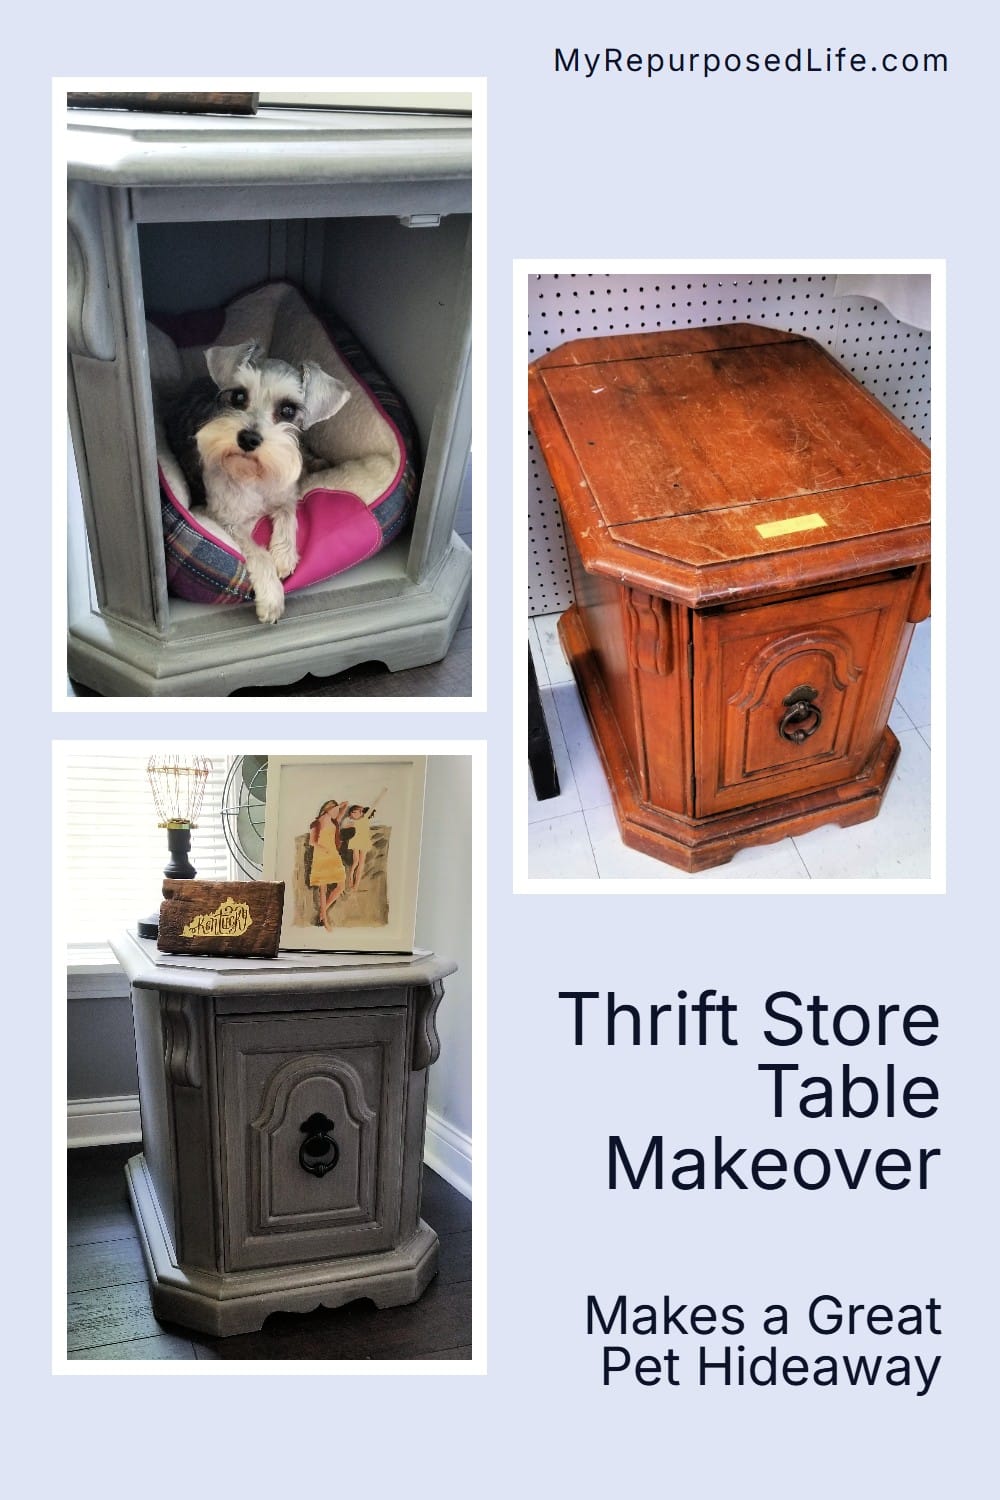
Some thrift store tables practically beg for a second chance, and this one had more potential than I first expected. What started as a scratched, nicotine-covered side table turned into a painted furniture makeover with a bonus idea tucked inside: a cozy little pet hideaway. With a good cleaning, fresh paint, smoked glaze, and a simple screwdriver trick, this side table makeover became both useful and cute.
Isn’t it perfect? I love how it turned out. This is a fairly easy makeover, mostly just paint. But having a screwdriver will be the secret to stepping this table up to the perfect furbaby hideaway!
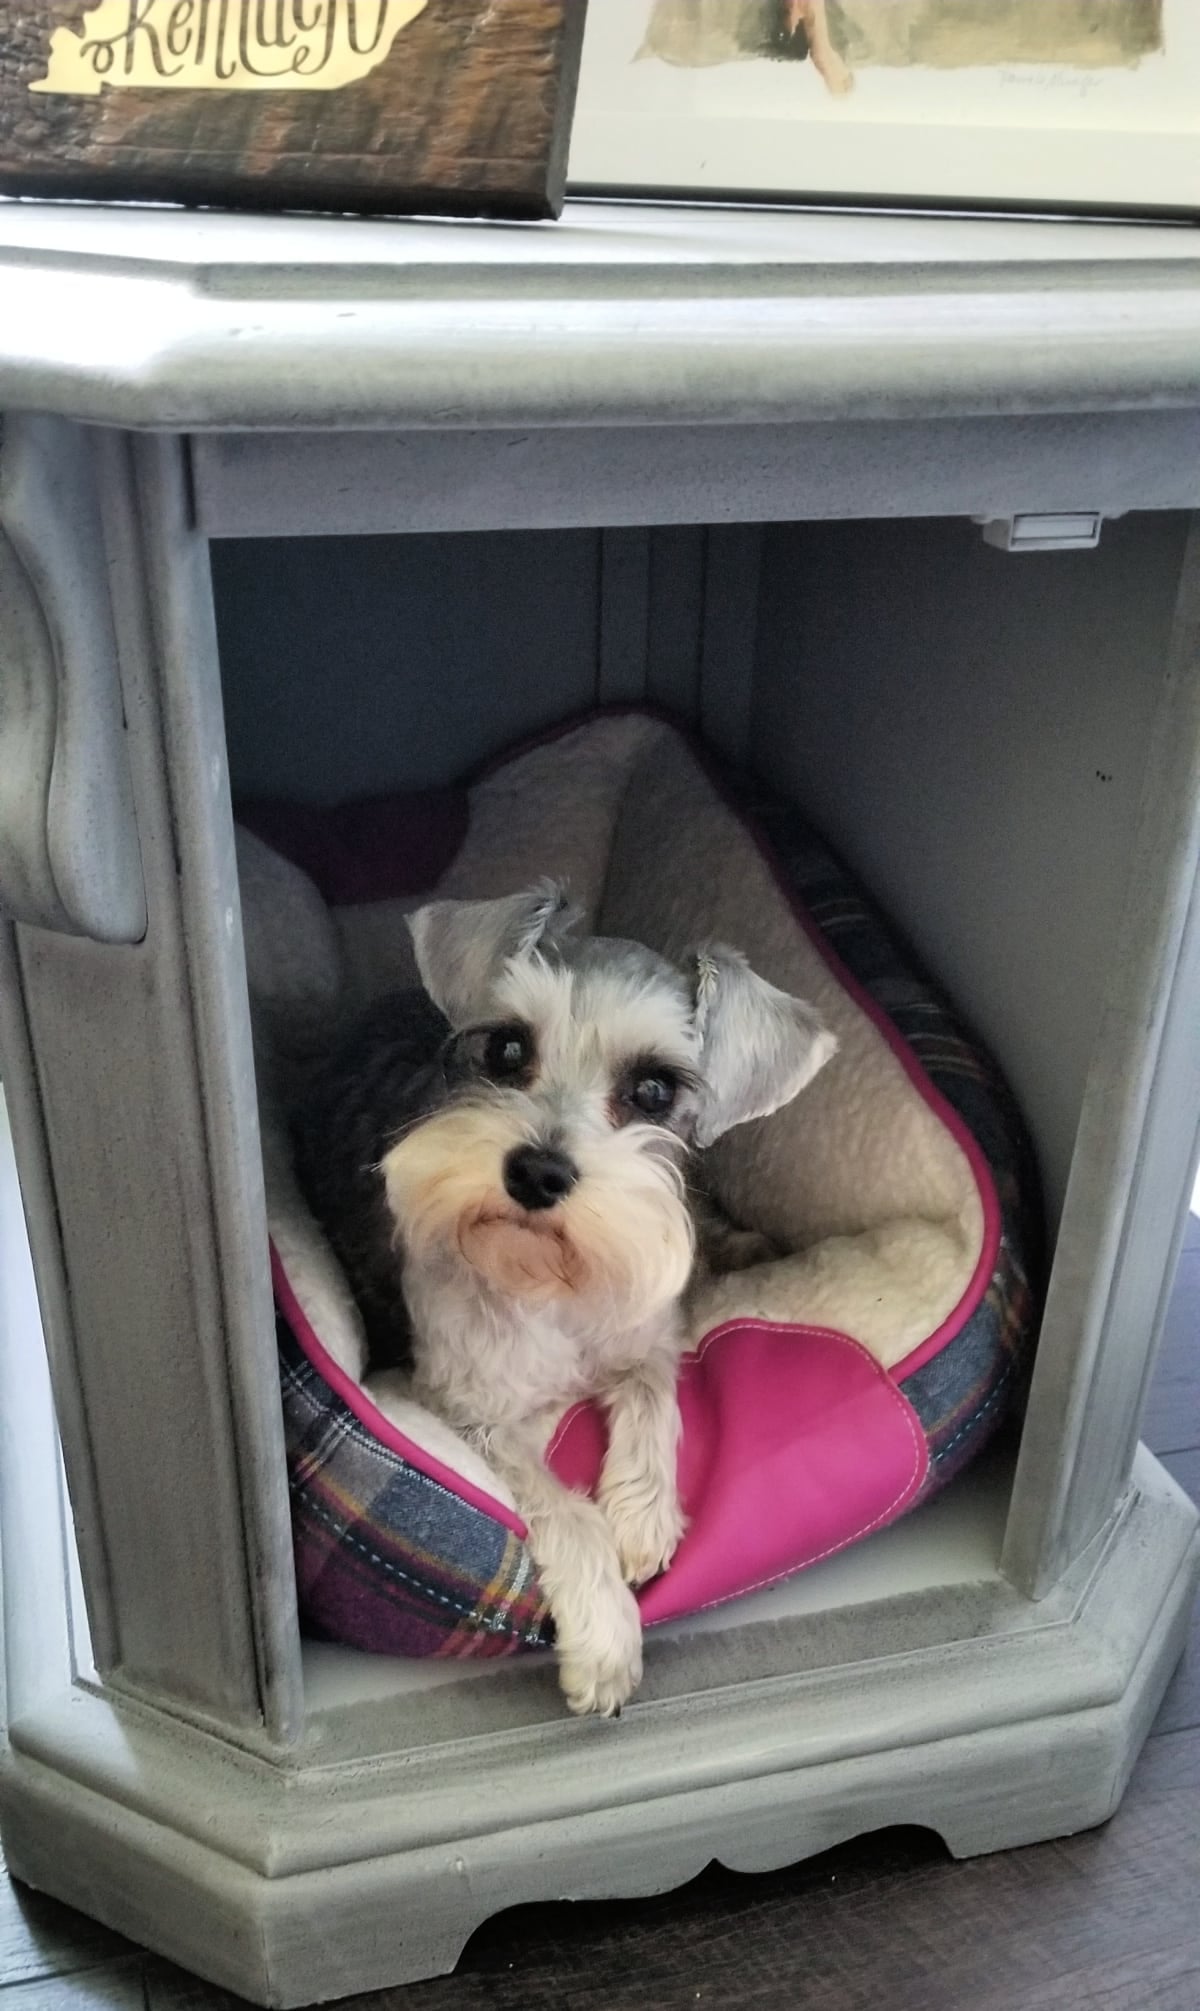
Simply remove the door, add a cute bed, and this side table makeover is the perfect furbaby hideaway!
Let’s see how this makeover came about.
Thrift Store Side Table
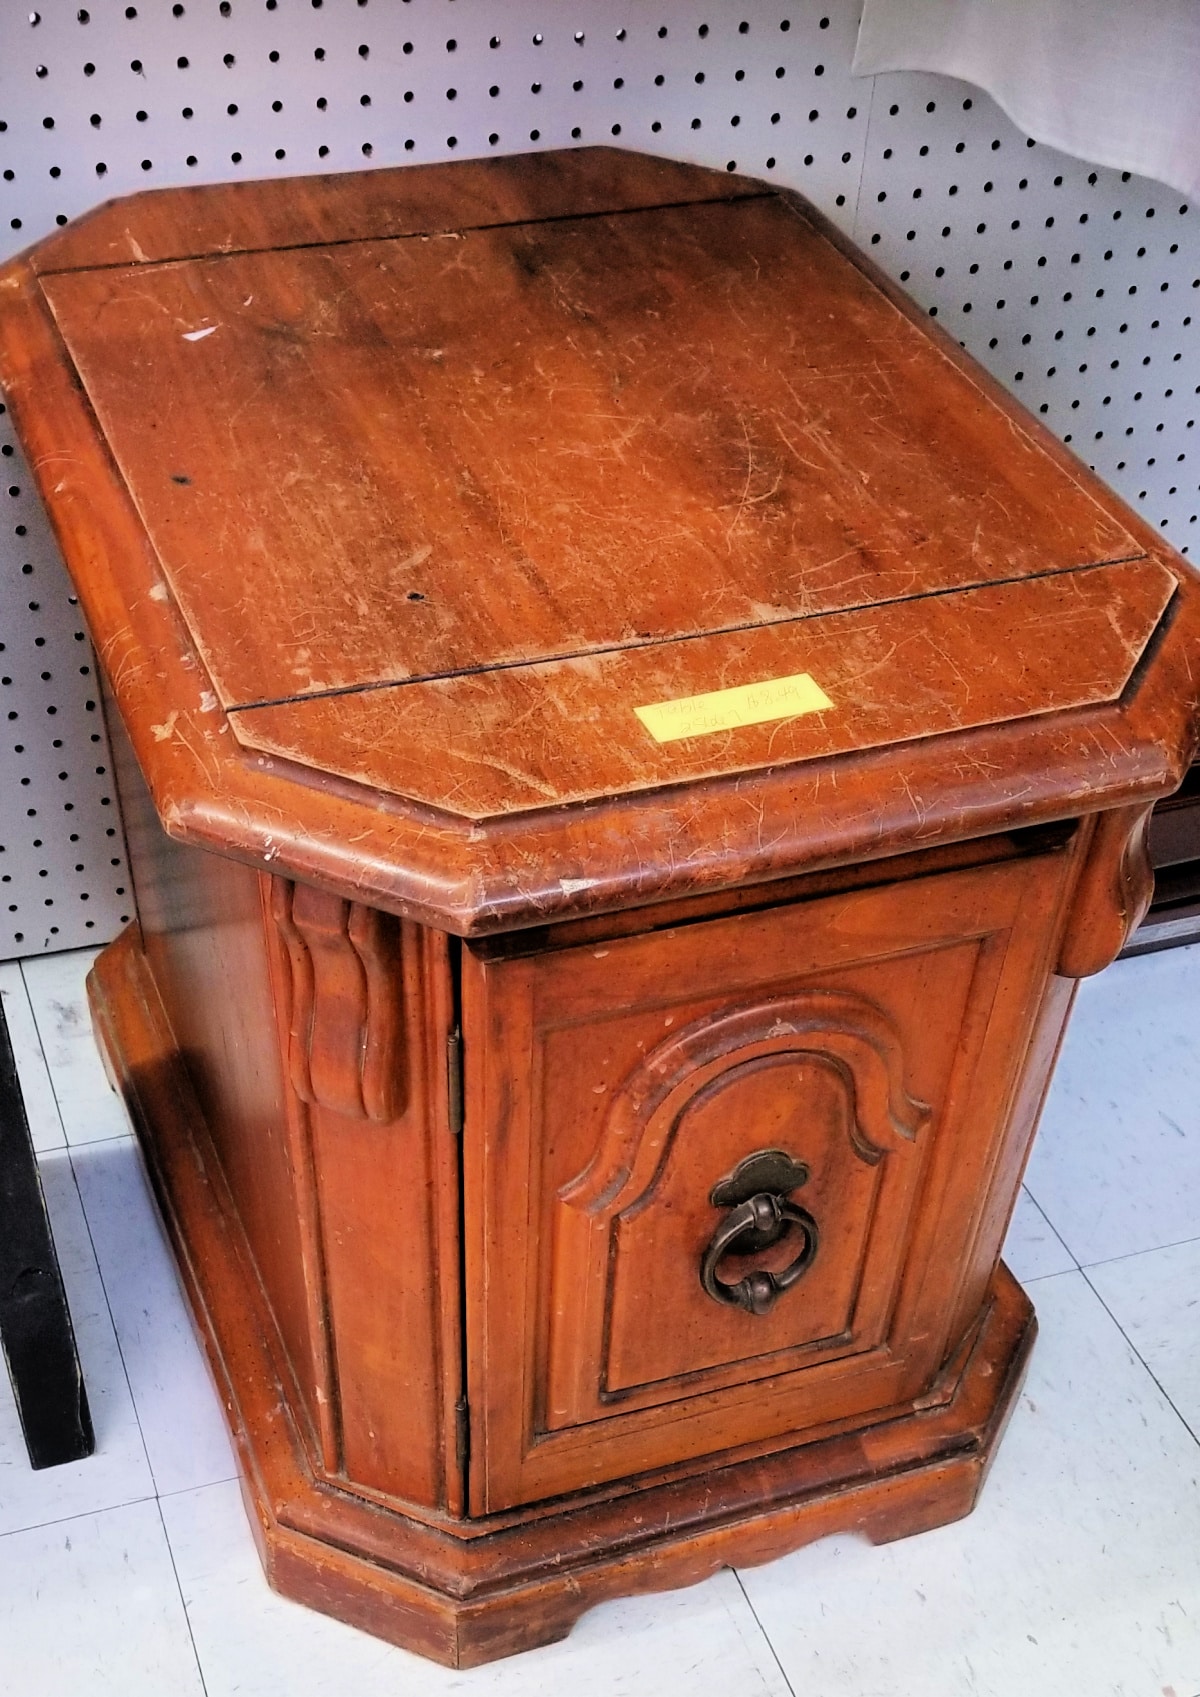
Priced at almost $9, it was over my regular $5.00 limit. I thought the table was on sale for 25% off. But when I checked out at the register, I found out it was indeed priced right. The side table definitely needs some TLC!
How Do You Clean Thrift Store Finds?
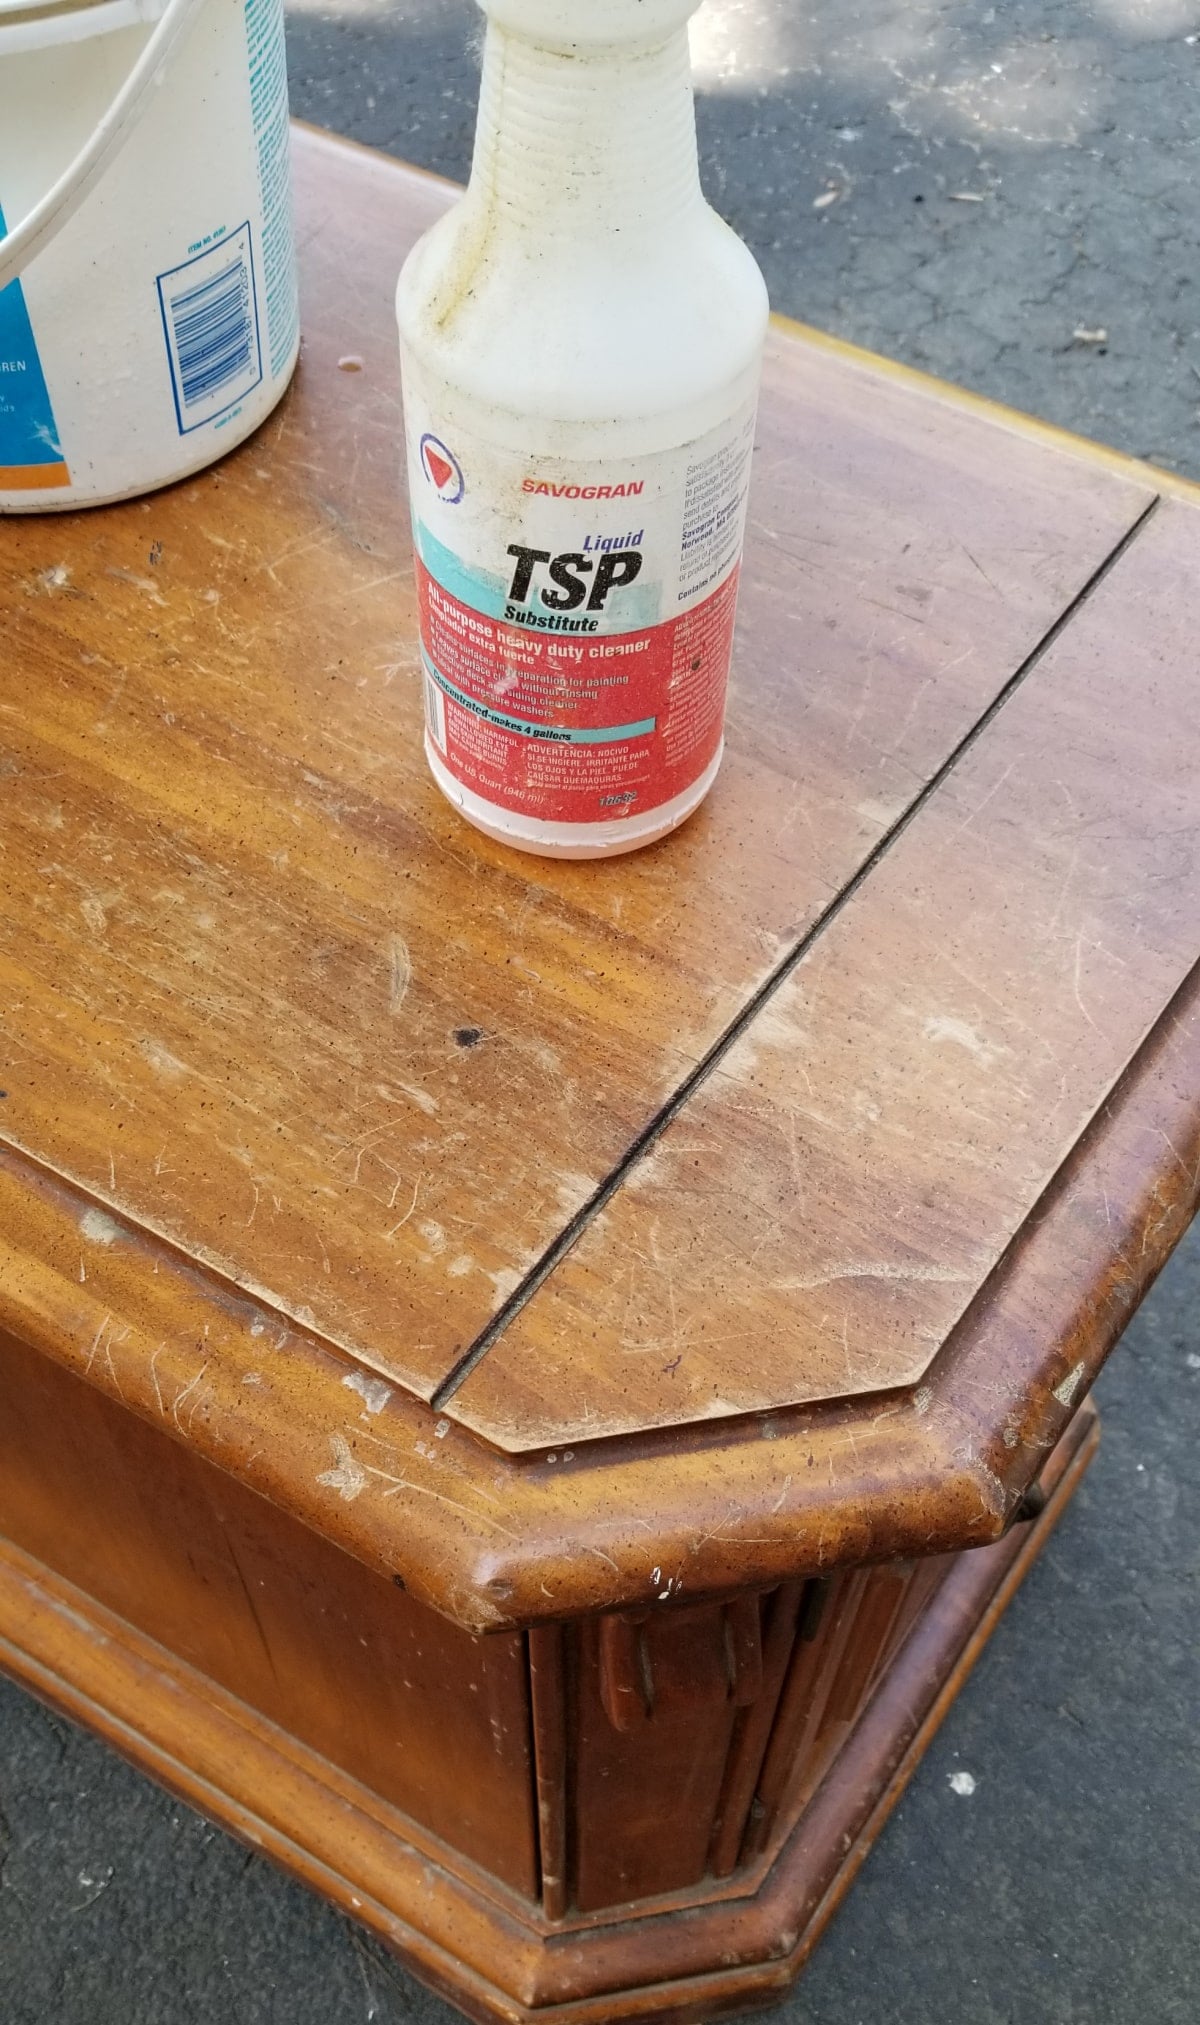
The most important step in redoing any thrift store project is to clean it thoroughly. We really don’t know a piece of furniture’s history until we start cleaning it. I quickly found out that this piece was covered with nicotine.
Clean With TSP
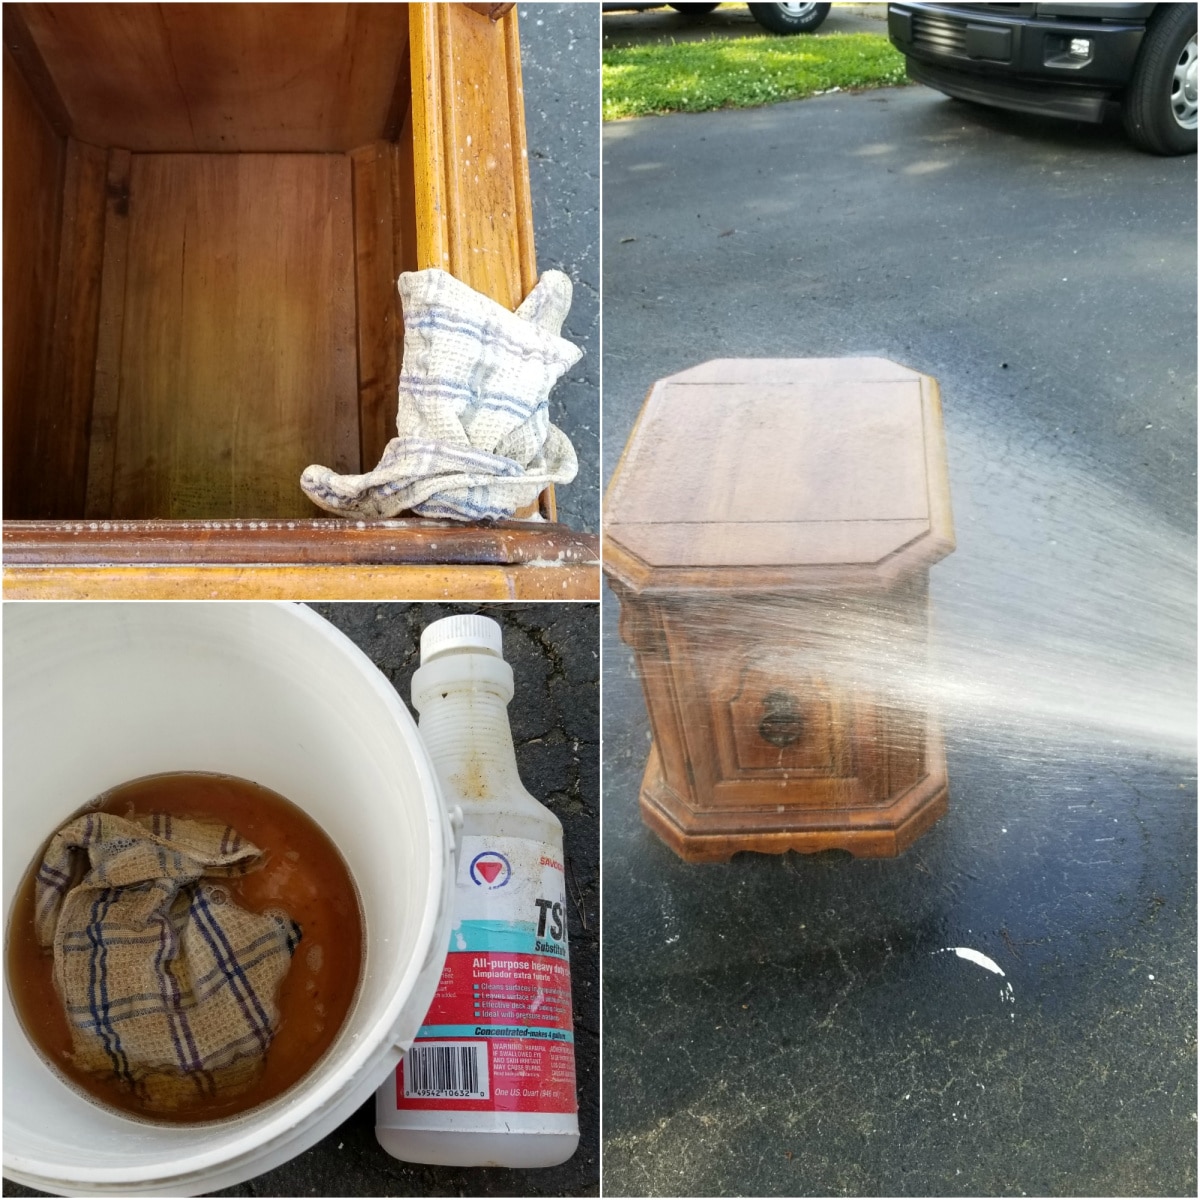
Diluting TSP in a bucket of water, I used a rag and latex gloves to thoroughly clean the piece. A quick rinse with the hose is okay if you let the thrift-store furniture dry right away.
Remove Hardware Prior to Painting
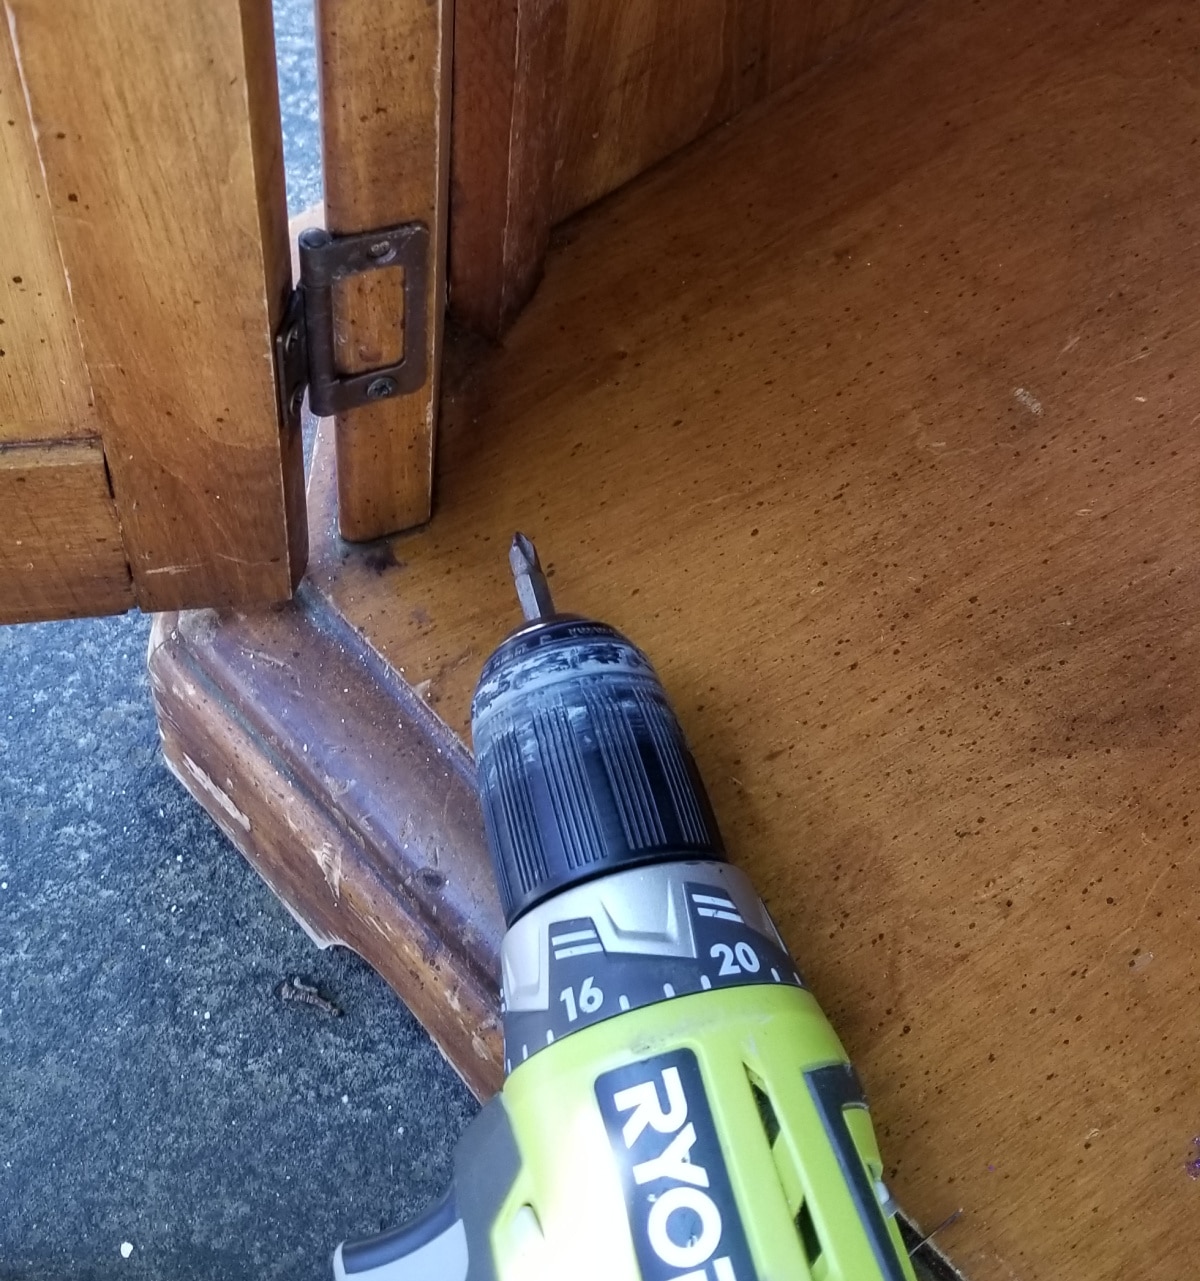
It’s a good idea to remove the hardware prior to giving your thrift store side table its makeover. I have set aside a special place to store my hardware while I am working on a project. Have you ever taken too long to finish a piece, and you KNEW you would remember where you put those hinges and screws, but then you find yourself looking everywhere for them? I have a rolling tool cart with hooks on the side. Lately, I’ve been putting the hardware for my current project in a baggie, hanging it on a hook on the cart. You could also use the lunchmeat containers.
Tips for Using a Paint Sprayer on a Furniture Makeover
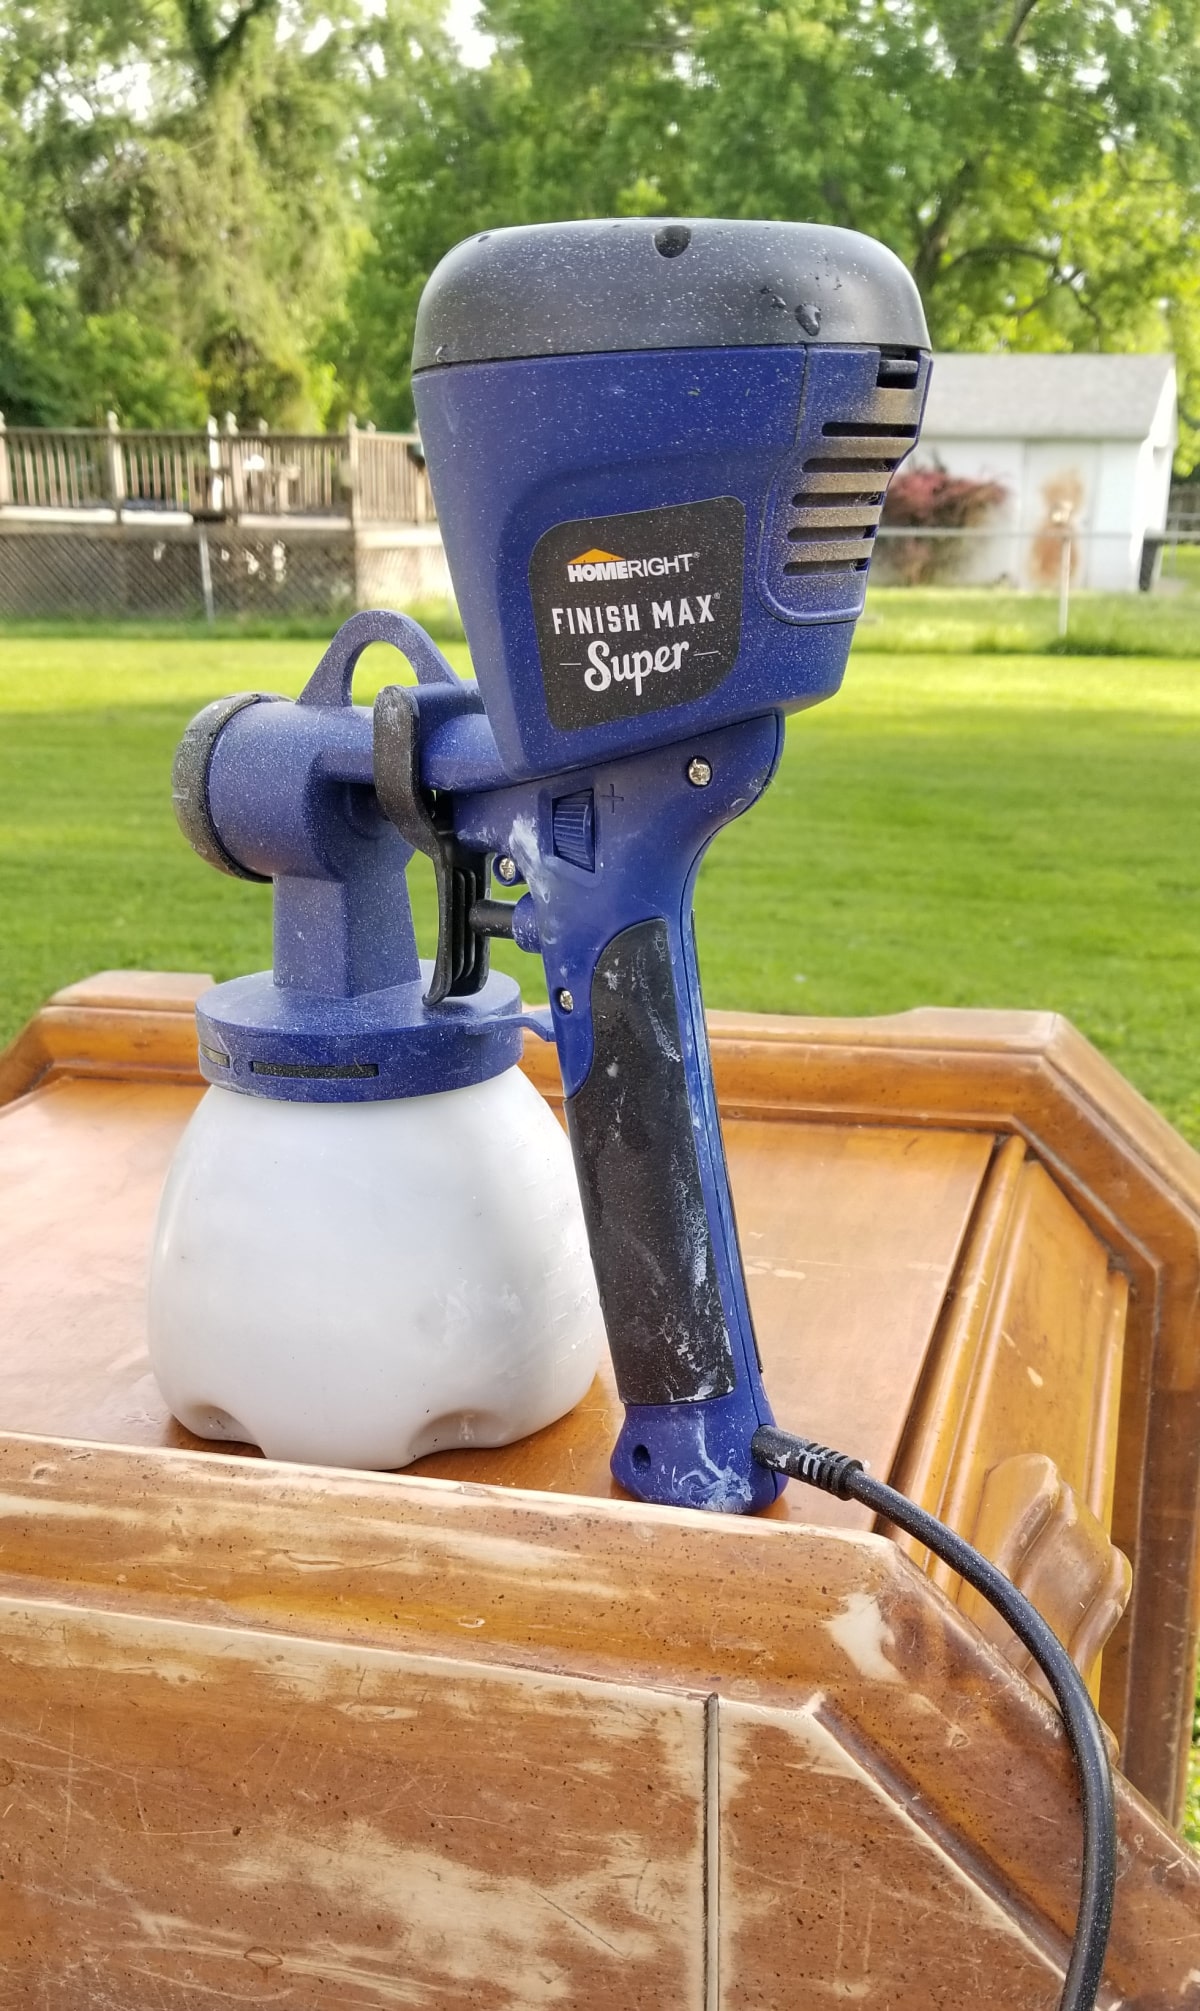
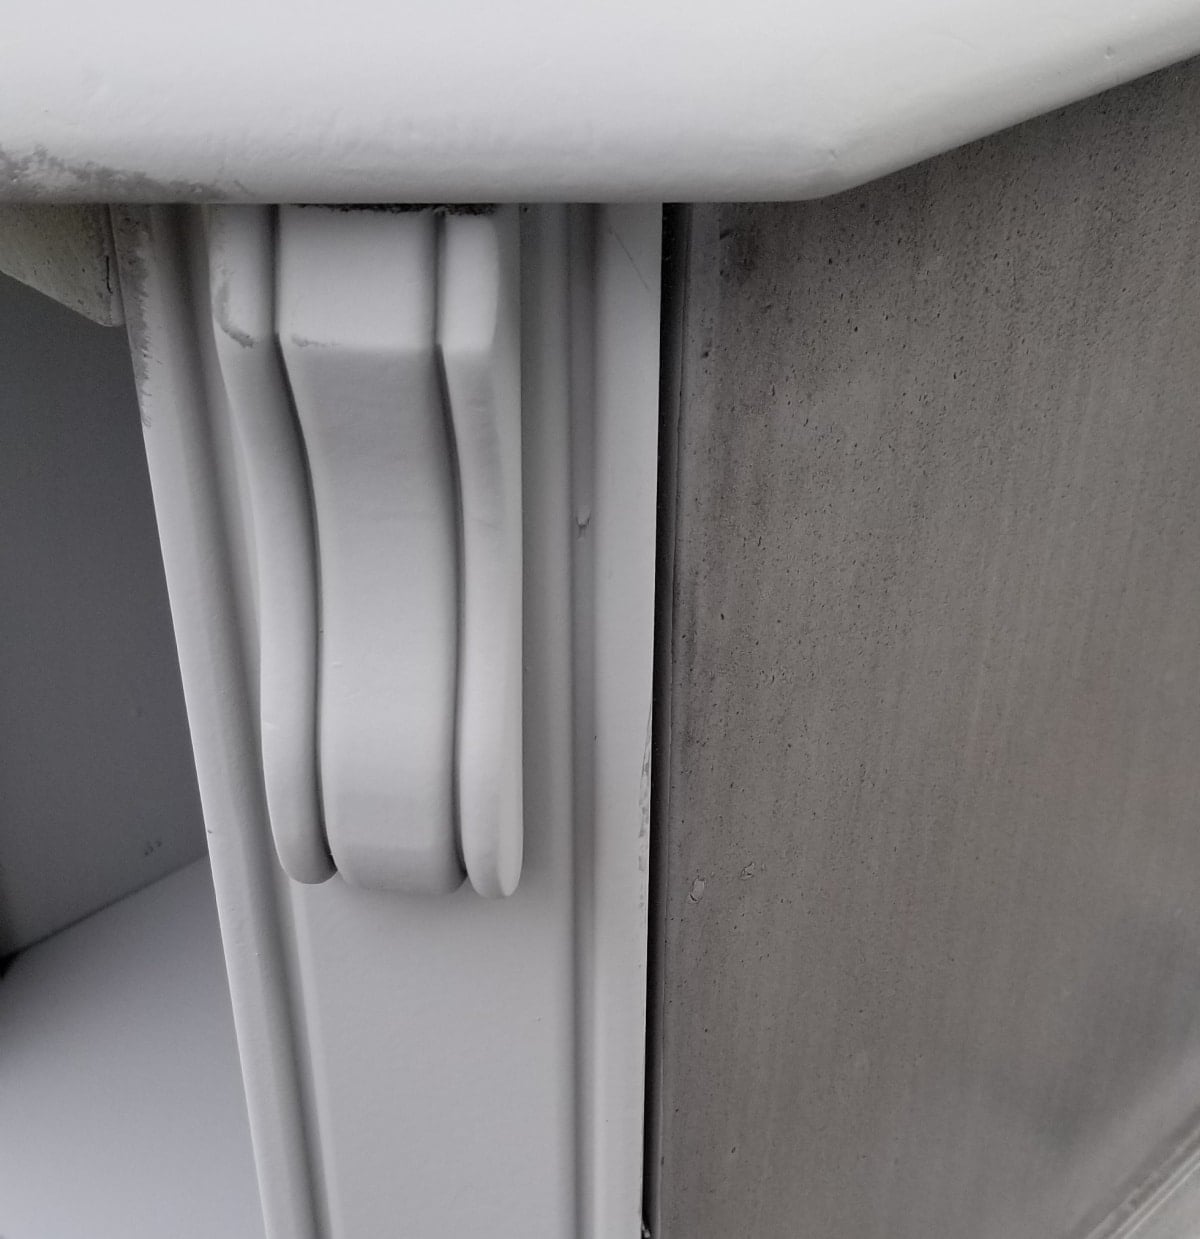
Of course, I used my favorite Homeright Super Finish Max to make this side table makeover a quick and easy project. For this project, instead of using my diy chalky paint primer I used Dixie Belle Paint. Notice that I have the table resting on my easy sawhorses, I find it easier to paint with the furniture up off the ground. You really can get better coverage when you rotate the furniture as you paint it. In addition, I like to paint the tops of furniture while it’s in a vertical position.
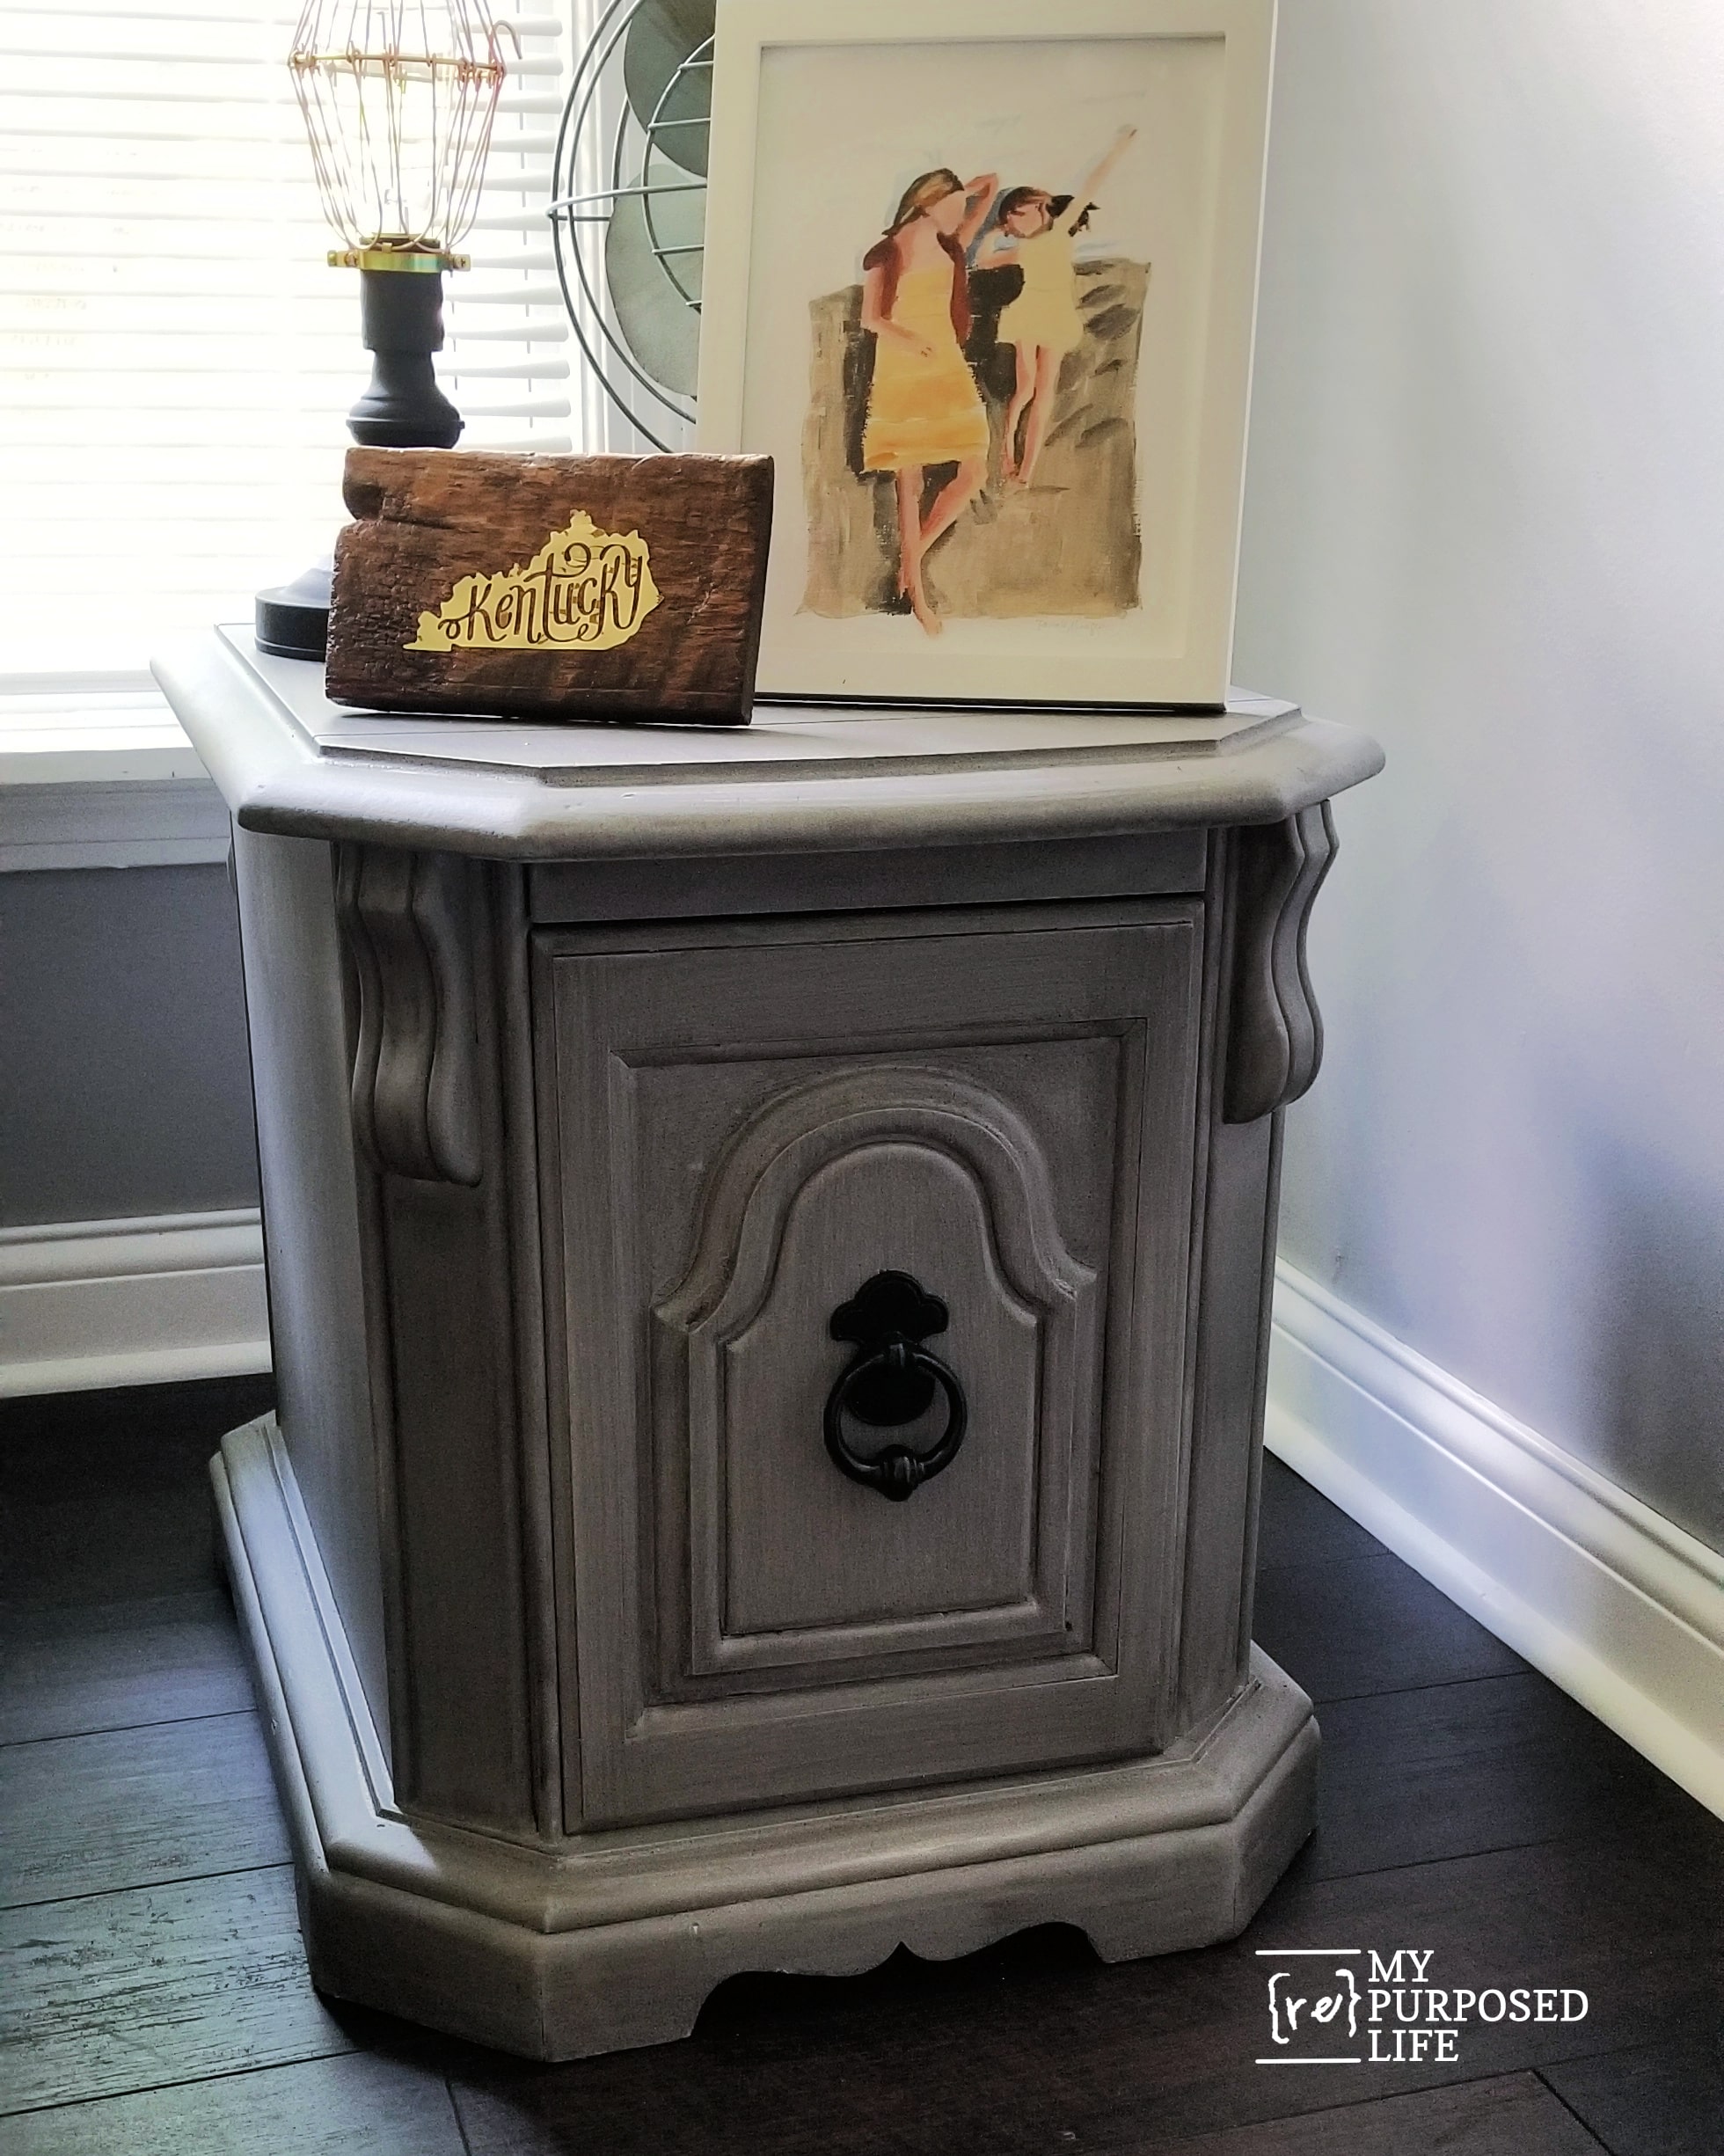
Wow! What a difference paint makes on old thrift-store furniture, like in this unique side table makeover.
To Glaze or Not to Glaze
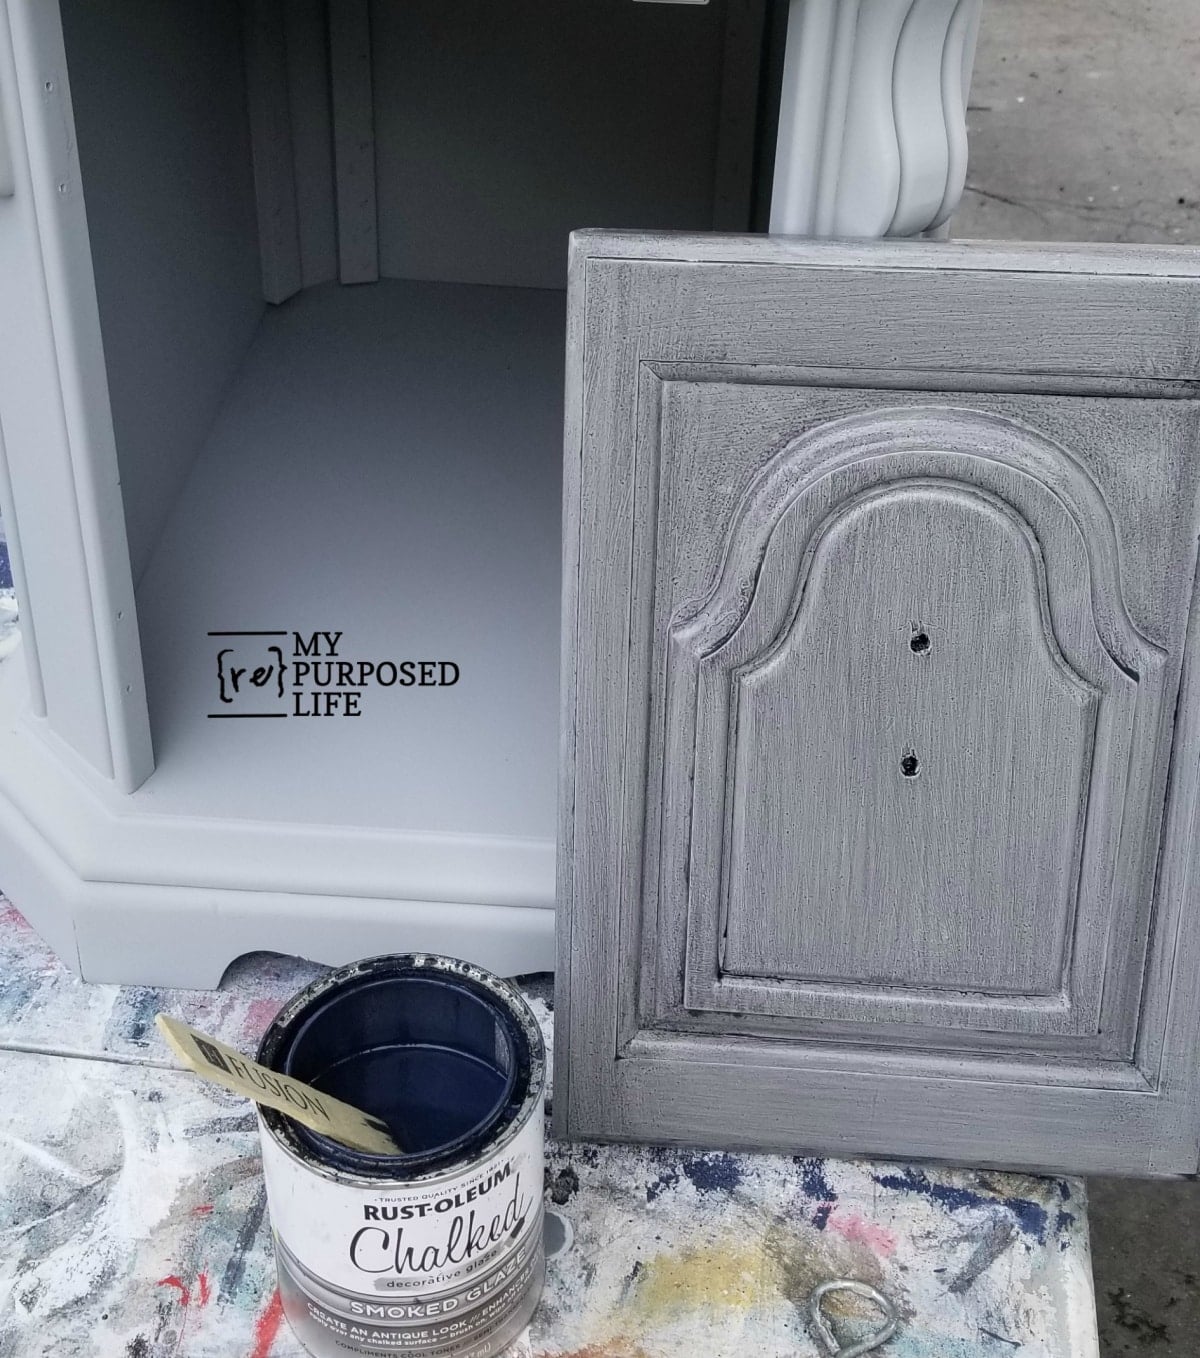
I can’t stop using this smoked glaze. I didn’t intend to use glaze on this side table makeover, but I just couldn’t help myself. I’ll let you be the judge of whether I should have used it. What do you think? Which color do you prefer?
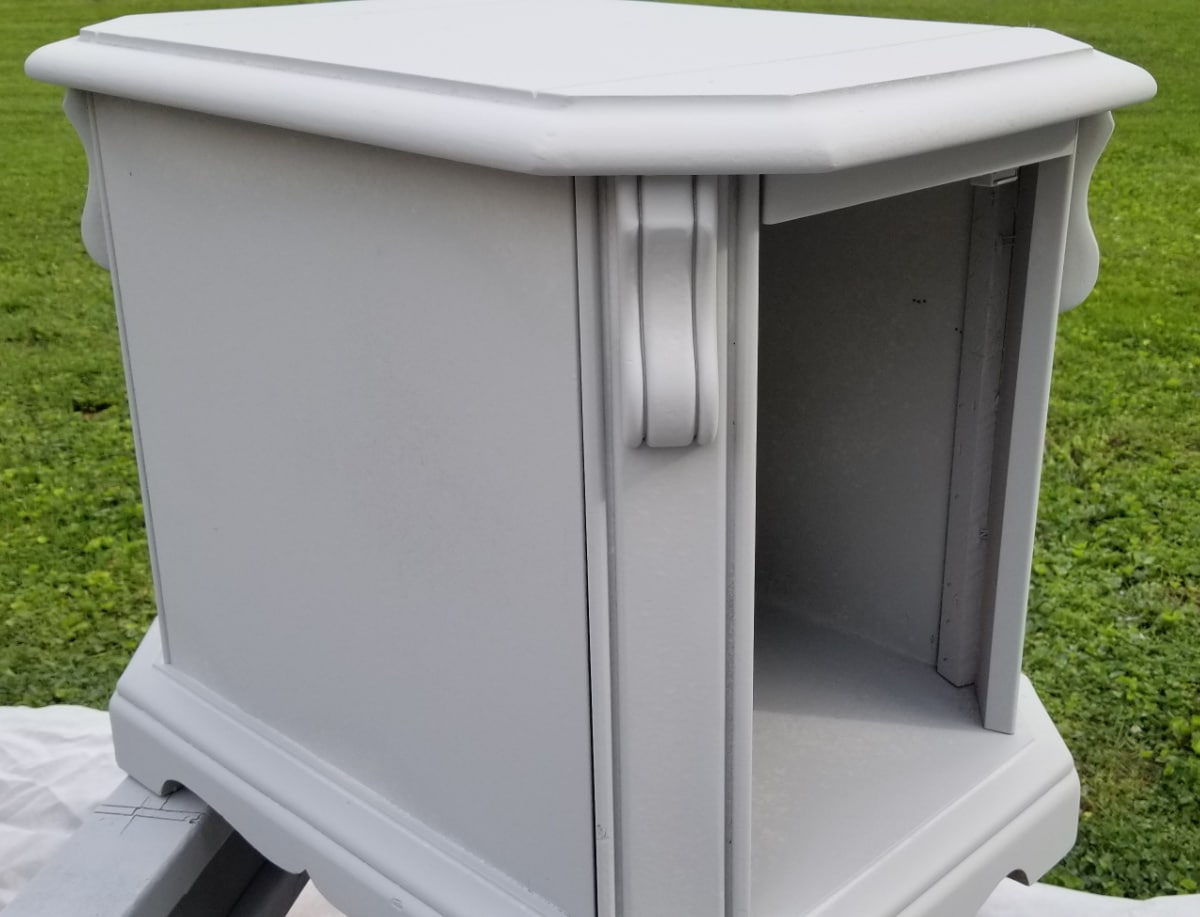
If you like the glazed look, but are not sure how to pull it off, be sure to check out my post How to Glaze Painted Furniture. There’s a video to help you understand the technique I use. I freehanded the area where the door will be. I chose NOT to glaze the interior of the side table.
Spray Paint Thrift Store Side Table Hardware
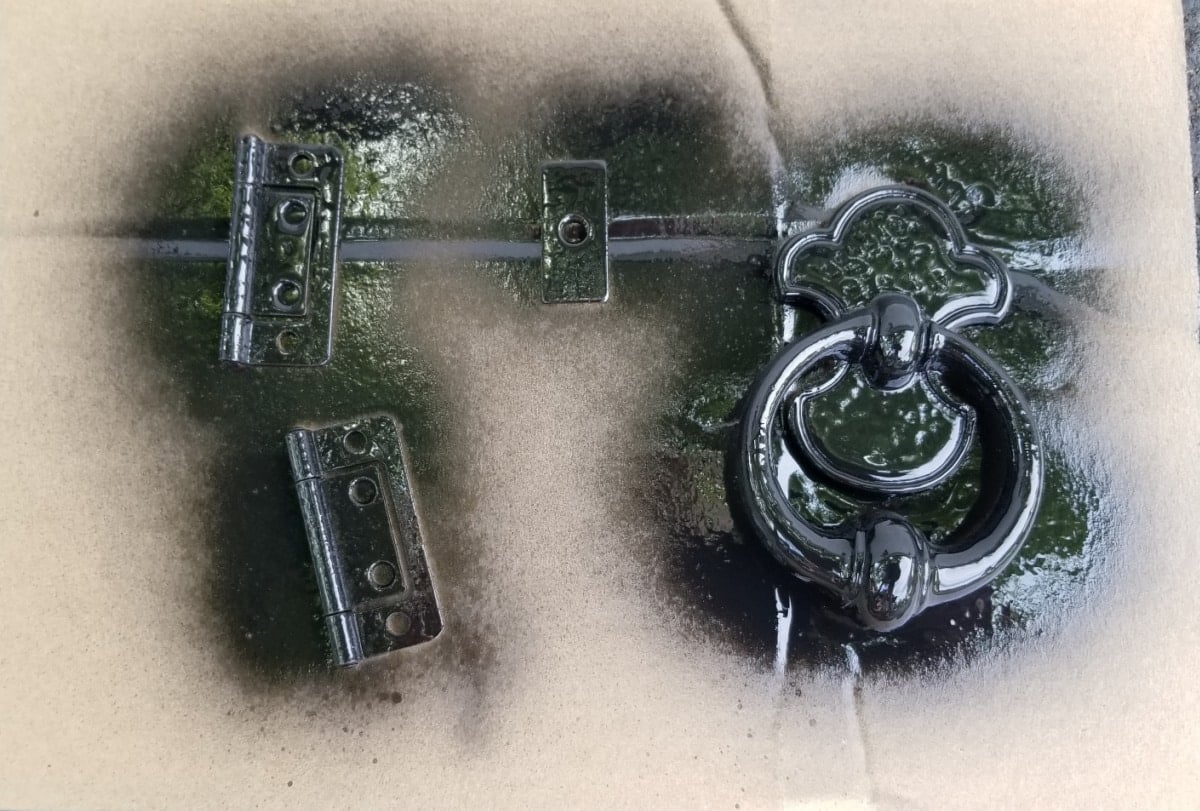
Because I ended up glazing the table, I felt the hardware would look better if I touched it up with black spray paint.
Why a Side Table Makes a Great Pet Bed Hideaway
A small side table already has the bones of a cozy nook. The open interior provides a tucked-away spot for a cat or small dog, while the top still functions like regular furniture. That is the best kind of repurposed project: it looks good, serves a purpose, and solves a small home problem without buying something new.
This idea works especially well if the table has a door. Remove the door for easy pet access, add a soft bed or cushion, and the piece suddenly has a whole new purpose.
Thrift Store Table Makeover with Paint and Glaze
This thrift-store side table is a good size and offers ample storage. With a little TLC, it is now ready for its new home.
This thrift-store side table proves that a little paint can do more than just freshen up an old piece of furniture. It can also help you rethink how that piece might work in your home. Use it beside a sofa for storage, leave the door on for a classic side table, or remove the door and tuck a small pet bed inside for a sweet furbaby hideaway. Either way, it is a simple makeover with a fun surprise.
How to Make a Pet Bed out of a Side Table
Pin this idea to share with others!
Remove the door from the side table, and you have a great hideaway for your small dog or cat! Lulu Mae’s favorite bed fits perfectly in this table.
What’s the last thrift store furniture piece you upcycled with a makeover?
gail
I did sand the top lightly to try to disguise some of the scratches. Using chalk paint or chalk type paint it’s not necessary to sand, just use a good cleaning agent like TSP.
I also use my own chalky paint primer that I made using Behr wall paint and plaster of paris. You can read more about it here if you’re interested: https://www.myrepurposedlife.com/diy-chalky-paint-recipe-makes-a-great-primer/
My version is cheaper and works really well.
gail