Spray Painted Outdoor Rug for Camper or RV
As an Amazon Associate, I earn from qualifying purchases.
Sometimes the simplest projects turn out to be the most satisfying. This stenciled camper rug started as a plain outdoor mat and turned into a fun little personality piece for our RV setup. With a bit of spray paint and a custom stencil, I gave this rug a fresh look that feels welcoming, playful, and perfectly suited for outdoor living. It’s proof that even small details can make your camper feel more like home.
This spray-painted outdoor rug project is easy; you can do it this weekend!
Lulu loves all rugs. Let’s see how I turned an inexpensive big-box-store rug into a custom outdoor rug to match my camper.
Spray Painted Outdoor Rug

Ah, so much better! You can see how I paint fans in the post Customized Plastic Fan. Today I’m sharing the painted outdoor rug.
Tape the Border of the Outdoor Rug
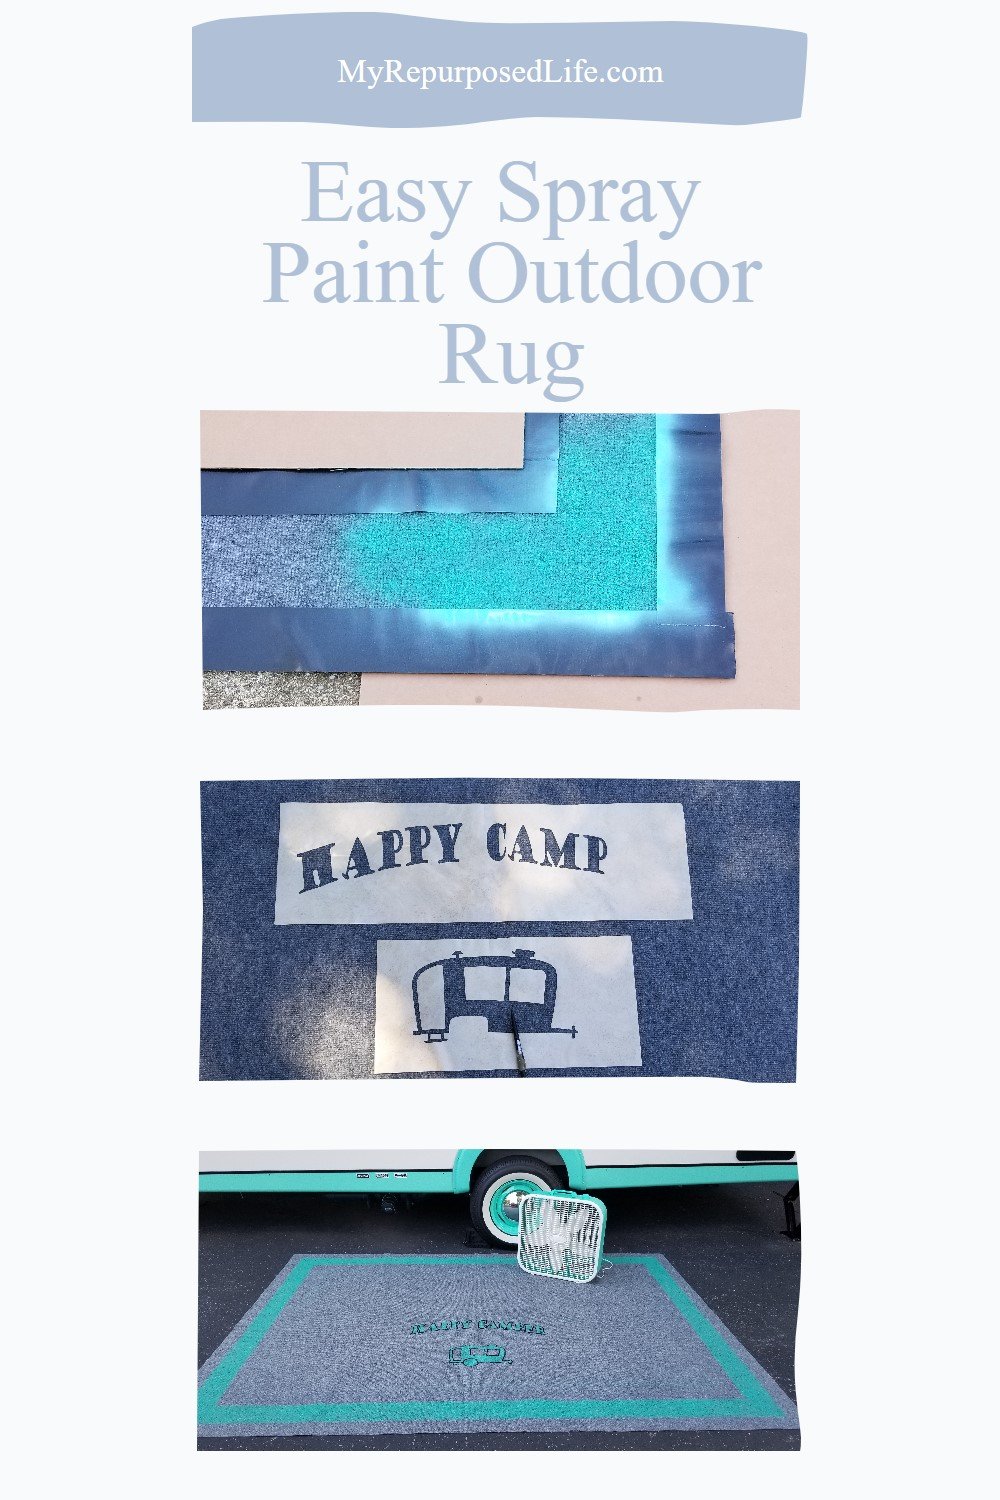
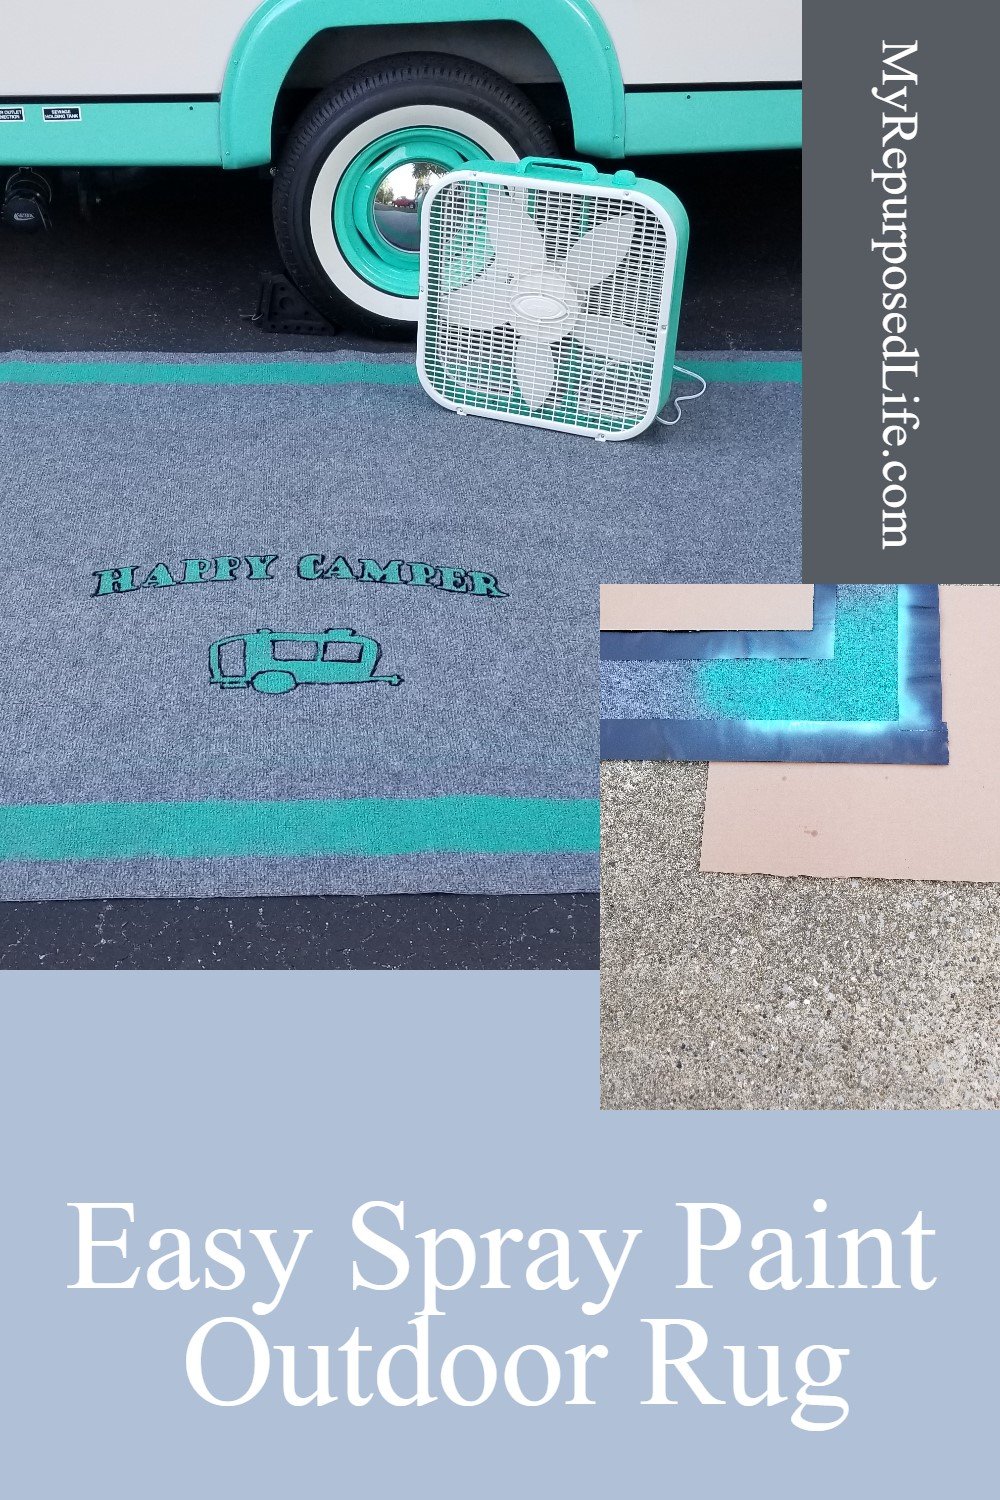
I wanted to spray-paint a border on the simple outdoor rug. I tried to tape off a border with painter’s tape, but it wouldn’t stick to the texture of the outdoor carpet at all. Enter Gorilla Duct Tape! This extra-tough duct tape worked well! As you can see, I used a tile coaster to space the outside and inside pieces of tape. It was sweltering, so I did the taping off inside and rolled the rug up to take it outside to paint.

Rolling up the rug crinkled the duct tape a little. I walked around the carpet—stepping on the tape to straighten it out.
Spray Paint Outdoor Rug
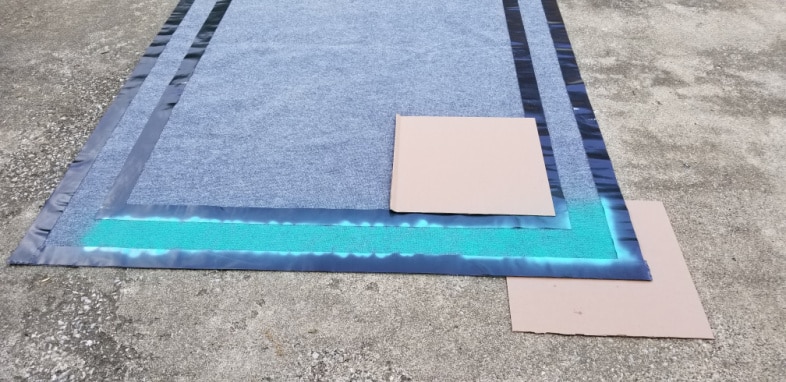
The cardboard was intended to prevent overspray, but after testing, there was none on it. The paint is Sea Glass by Krylon.

When spray painting something like this, it’s best to spray straight down, not at an angle.
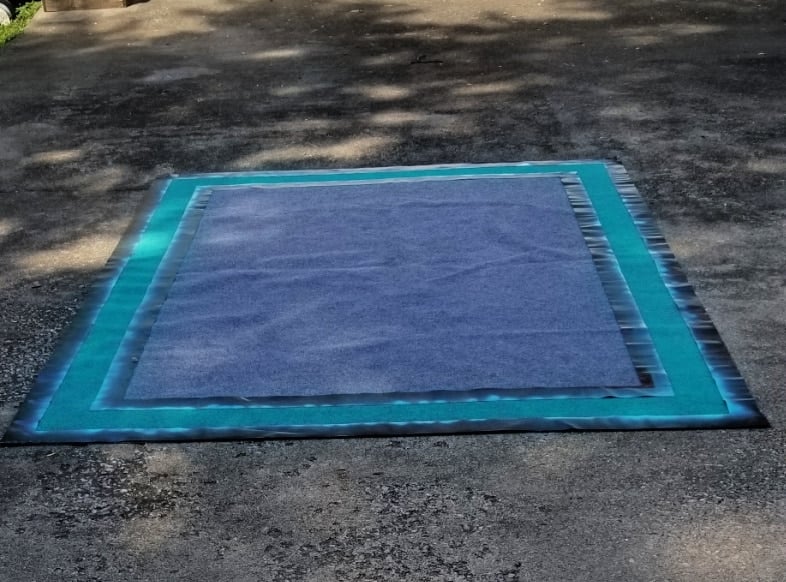
I love the new spray-painted border on the outdoor rug. It was so exciting to see the pretty mint color.
Remove Tape

The outdoor rug is very thin and easy to manage. It isn’t heavy and folds easily into a small rectangle, fitting in the camper’s storage.

Here’s a close-up of the pretty color. But it looks like it’s missing something, right?
Apply Contact Paper Stencil to Outdoor Rug
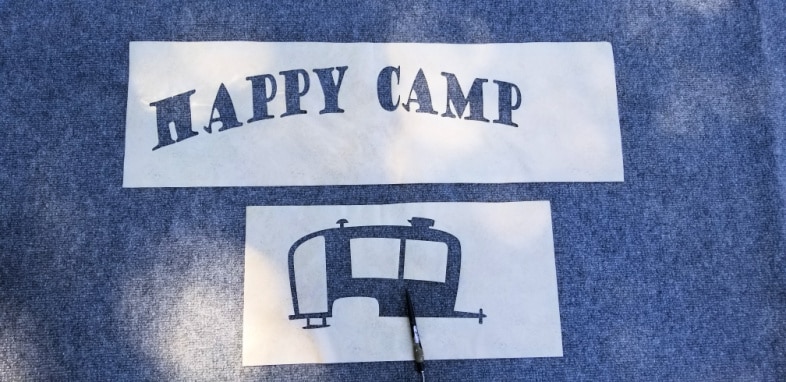
I made a stencil on my Silhouette Portrait out of contact paper. I meant to show you how I use these types of stencils, but I forgot to take a picture. The entire piece of contact paper was placed on the rug before any letter weeding was done. You can see in this picture that I still needed to weed the ER in CAMPER.
Prepare the Stencil With Paper and Painter’s Tape.

I used the backing paper and painter’s tape to protect the outdoor rug from getting overspray.

The contact paper stencil curled when the spray paint was applied. Again, I sprayed straight down without any angle.
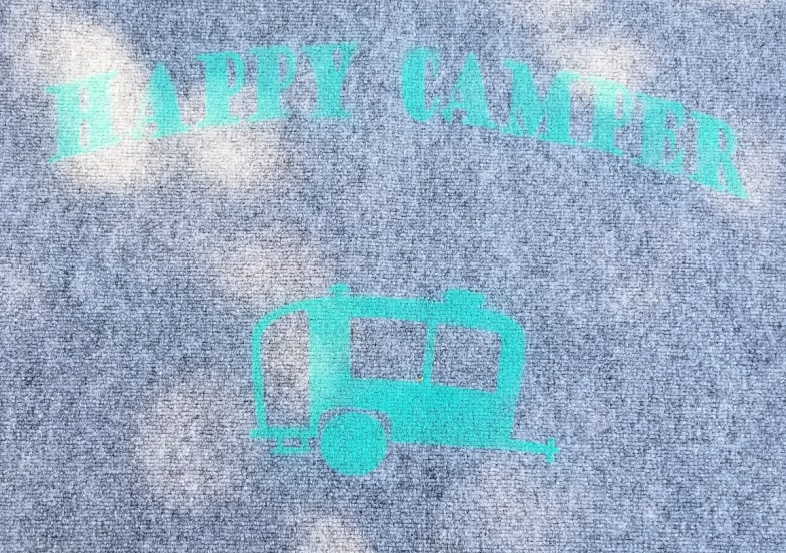
Yeah, that didn’t work! The camera saw it pretty well, but the spray-painted stencil did not show up in this image or in real life.
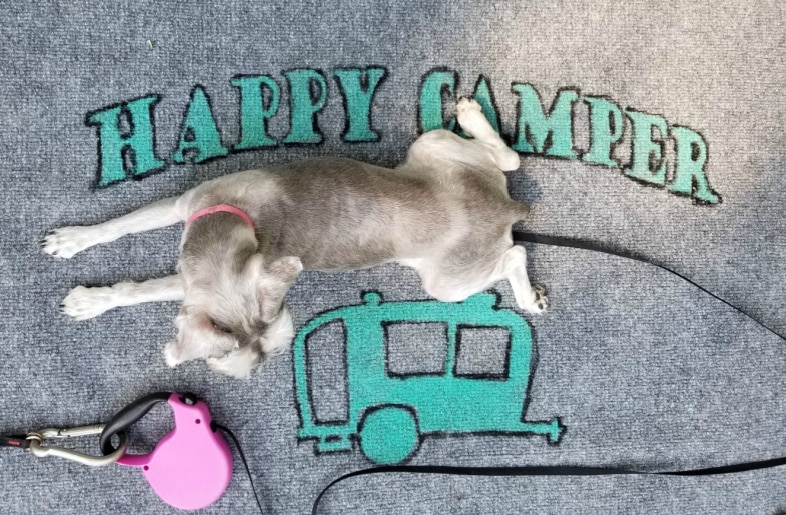
Trace Stenciled Letters With a Paint Pen
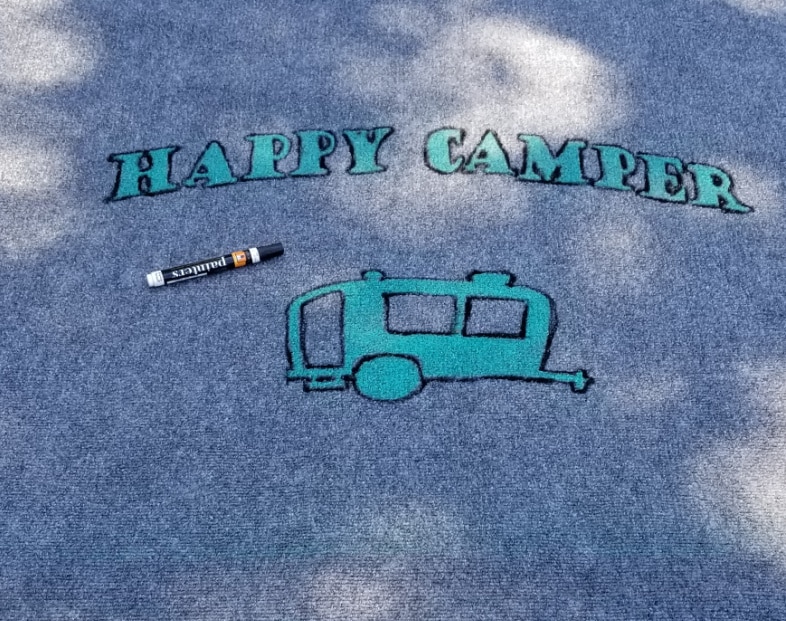
I used a black paint pen to trace the Happy Camper letters and the inside and outside of the stenciled camper. Do you LOVE the sea glass color as much as I do? I wish the lettering and the trailer were larger.
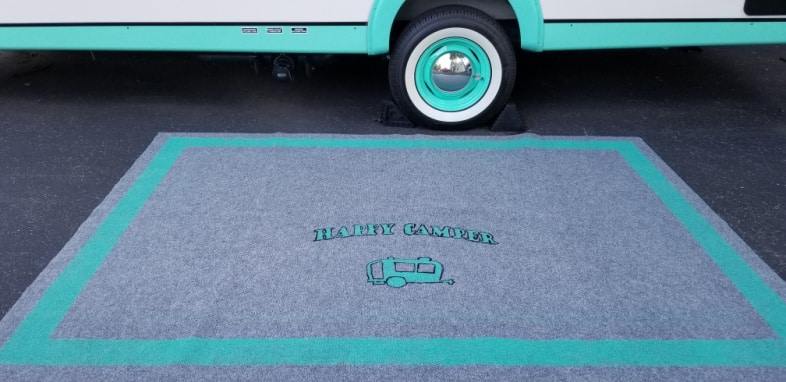
The stencil was purposely put in the bottom 1/3 of the outdoor rug because the chairs will most likely be near the camper.
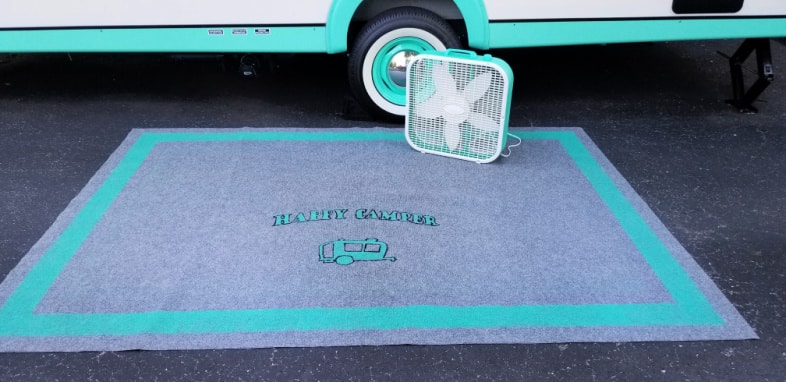
I love the “pop of color” the spray-painted rug and box fan add to the camper! Isn’t it amazing how well the spray-painted box fan matches the trailer?

Lulu is a Happy Camper!
I’ve done some stenciling and painting for rugs and flooring. I’ve stenciled on a small pet mat rug and a piece of vinyl wallpaper as a rug for my laundry room. I bought an inexpensive outdoor rug at Home Depot to use with the new Vintage Cruiser camper.
gail
If your camper space feels a little blah, don’t overlook what’s under your feet. A painted rug is an easy way to add charm without spending much, and it’s something you can change whenever the mood strikes. I love projects like this because they remind me that creativity doesn’t have to be complicated to make a big impact.
But this project isn’t limited to RV living. These rugs come in all sizes and are suitable for indoor and outdoor use.
love the color!!!
It’s really cute. Question for you. I’m doing an 11×15” silhouette stencil for a sign for my son in law. I did one that was all 1 piece. It didn’t work. If I did each row of letters separately will it make it easier to handle? The stretch made it almost impossible to do. I tried with the sticky transfer paper, but I wasn’t sure how to use it and it wasn’t just picking parts up that I didn’t care about. I suppose practice makes perfect, but the vinyl is expensive for practicing. Thanks for sharing your expertise. Oh and I started out hoping that there was a chalk couture transfer sheet of the same saying, but no luck.
Jennie,
I’m actually planning a facebook live about stenciling soon. I would have already done it, but the weather has been too nice to stay indoors.
I need a few more details to clearly understand what you’re trying to do.
I am assuming that you are not doing a stencil, but individual letters for a phrase.
If that is the case, these are the steps I would take.
1) design and cut out phrase (I like to draw a box around my design so that everything is “square”)
2) weed away extra material, including oodles and boodles (middle of letters, etc)
3) apply transfer material to all letters, burnishing well
4) peel everything up and place it on your sign
5) burnish letters down
6) pull up transfer material.
have you seen my youTube videos on this? (you are my sunshine)
gail
ps let me know if you have any more questions, I’d be happy to help, even jump on the phone for a quick call if that would help.
The rug turned out very nice and I love your little camper. Enjoy your camping trips!
Such a great set up you have, all colour coordinated.
Happy Camping!