Teapot Lamps
As an Amazon Associate, I earn from qualifying purchases.
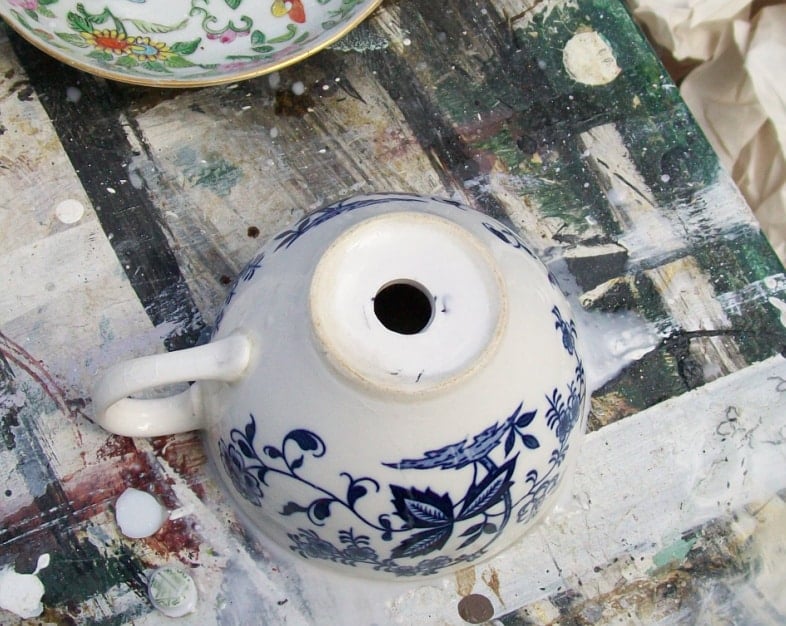
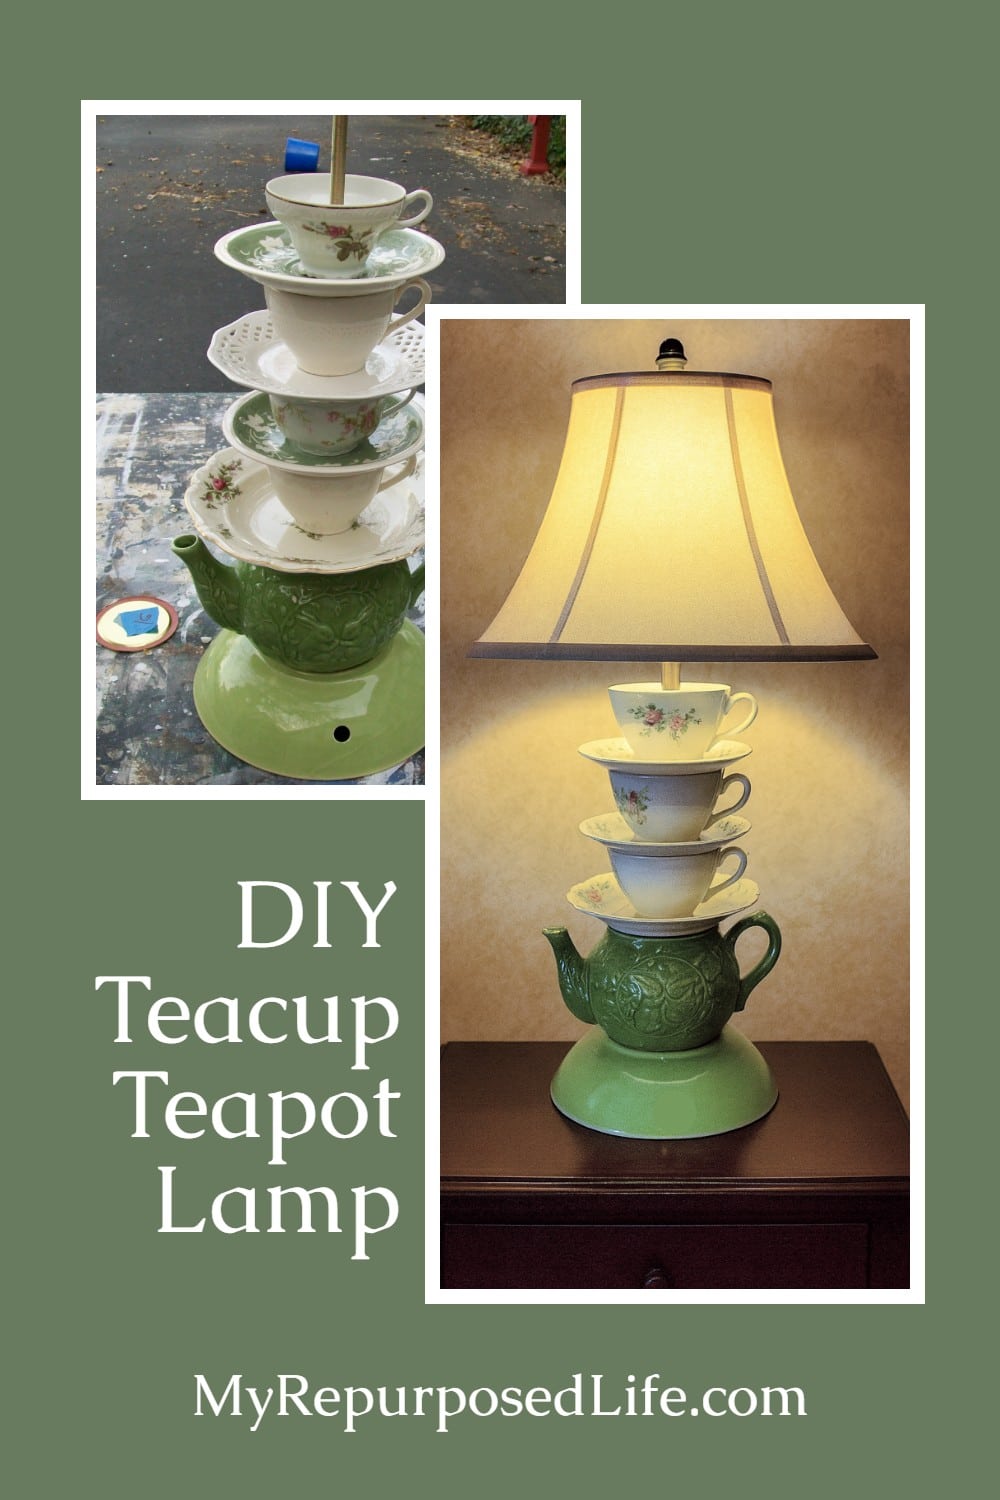
Transforming vintage teapots and teacups into lamps begins with careful drilling. Using a diamond-tipped bit and steady water flow helps prevent cracks while creating clean holes through the delicate china. Once the pieces are drilled, they can be stacked on a lamp rod, separated by washers or spacers for balance, and secured in place. The result is a whimsical teapot lamp that blends charm, craftsmanship, and a touch of creativity.
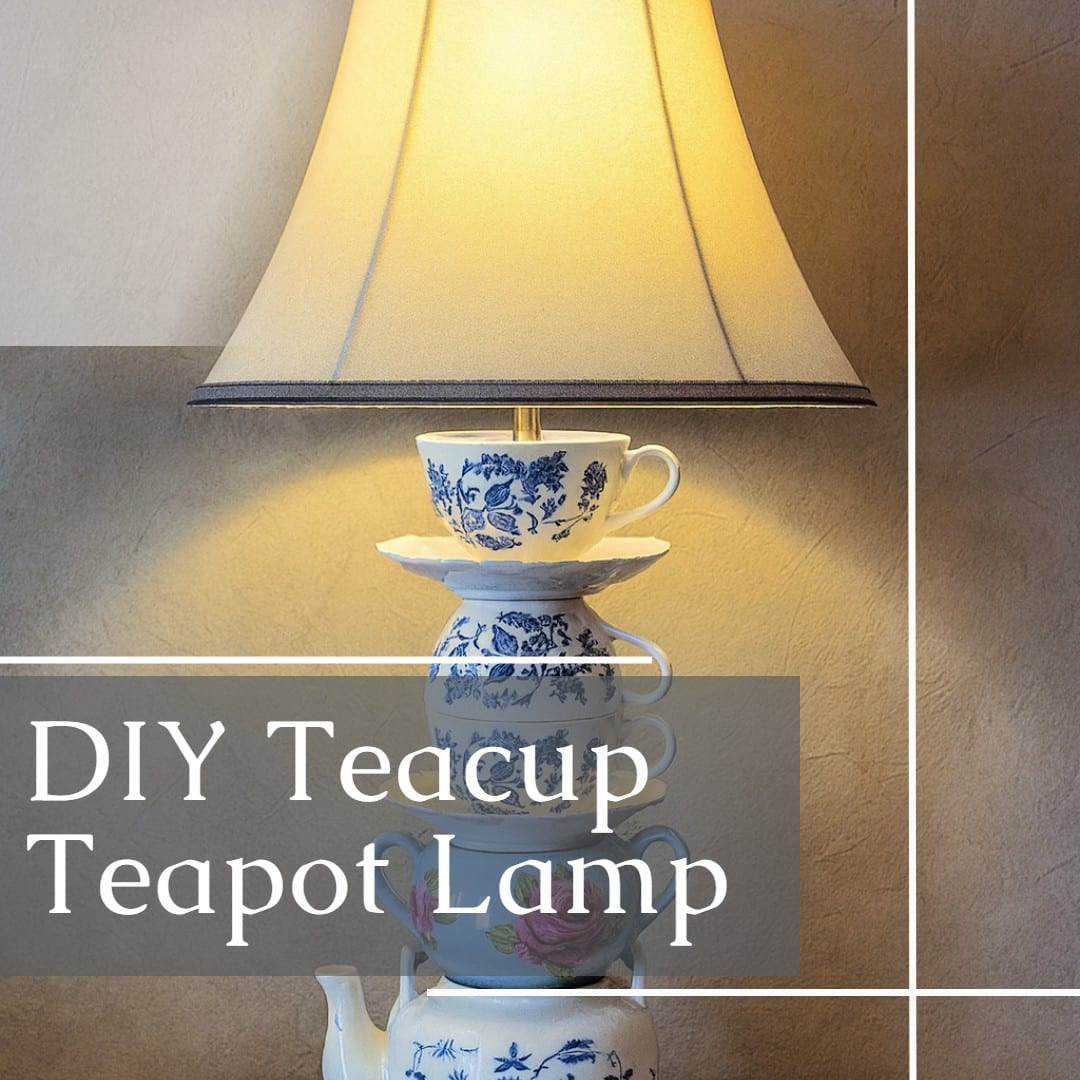
Let’s see how I made two lamps for a friend.
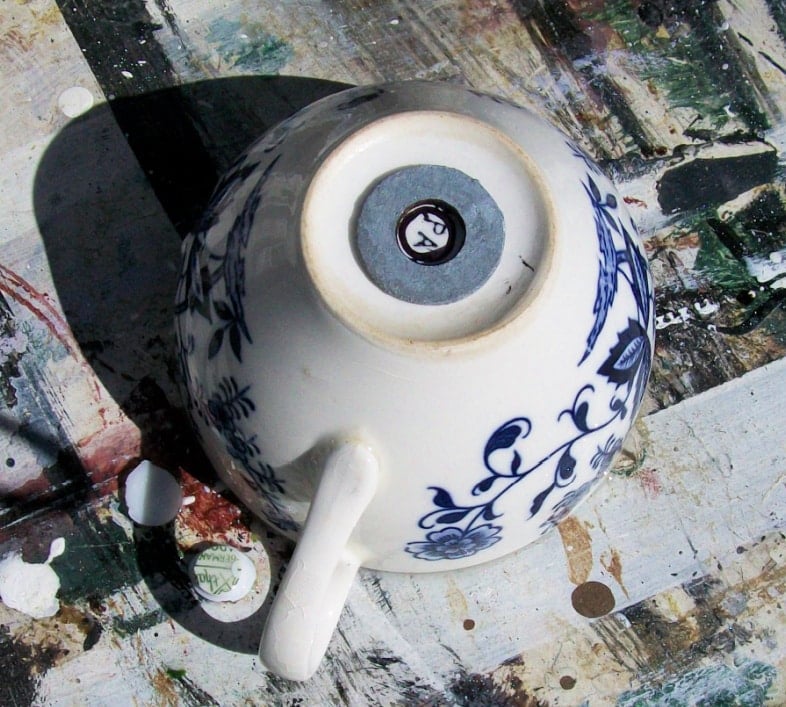
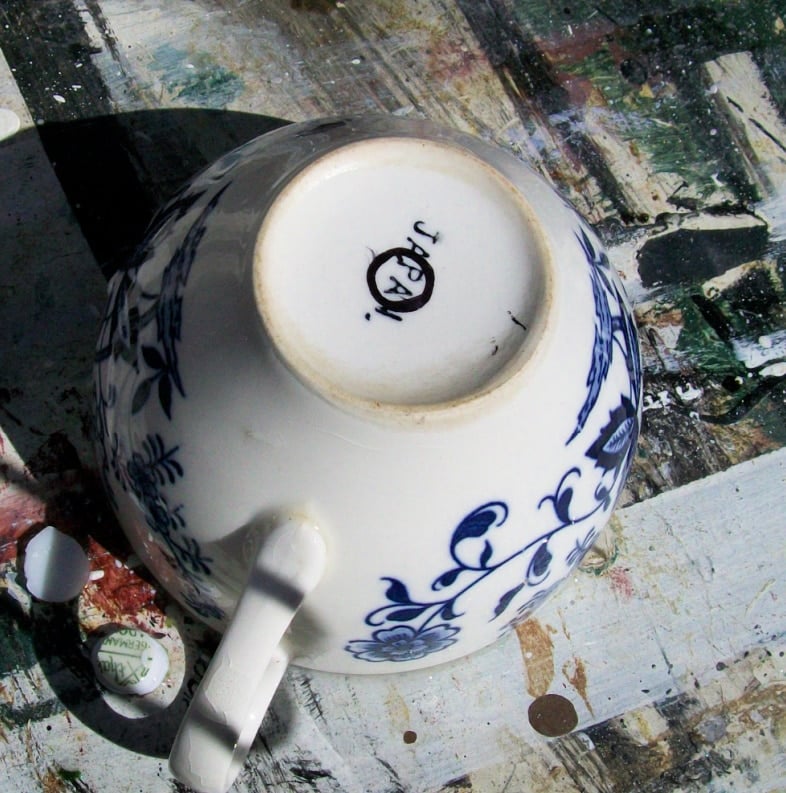
I began by drilling holes in many pieces of china, including saucers, cups, and teapots.
Drill Holes Through China Teacups and Teapots
Sometimes it’s challenging to find the center on a round surface. I find that a washer helps locate the true center.
It’s still not perfect, but it’s good enough to move forward with my plan.
You can see the steps for drilling holes in china teacups and teapots in my article How to Drill China.
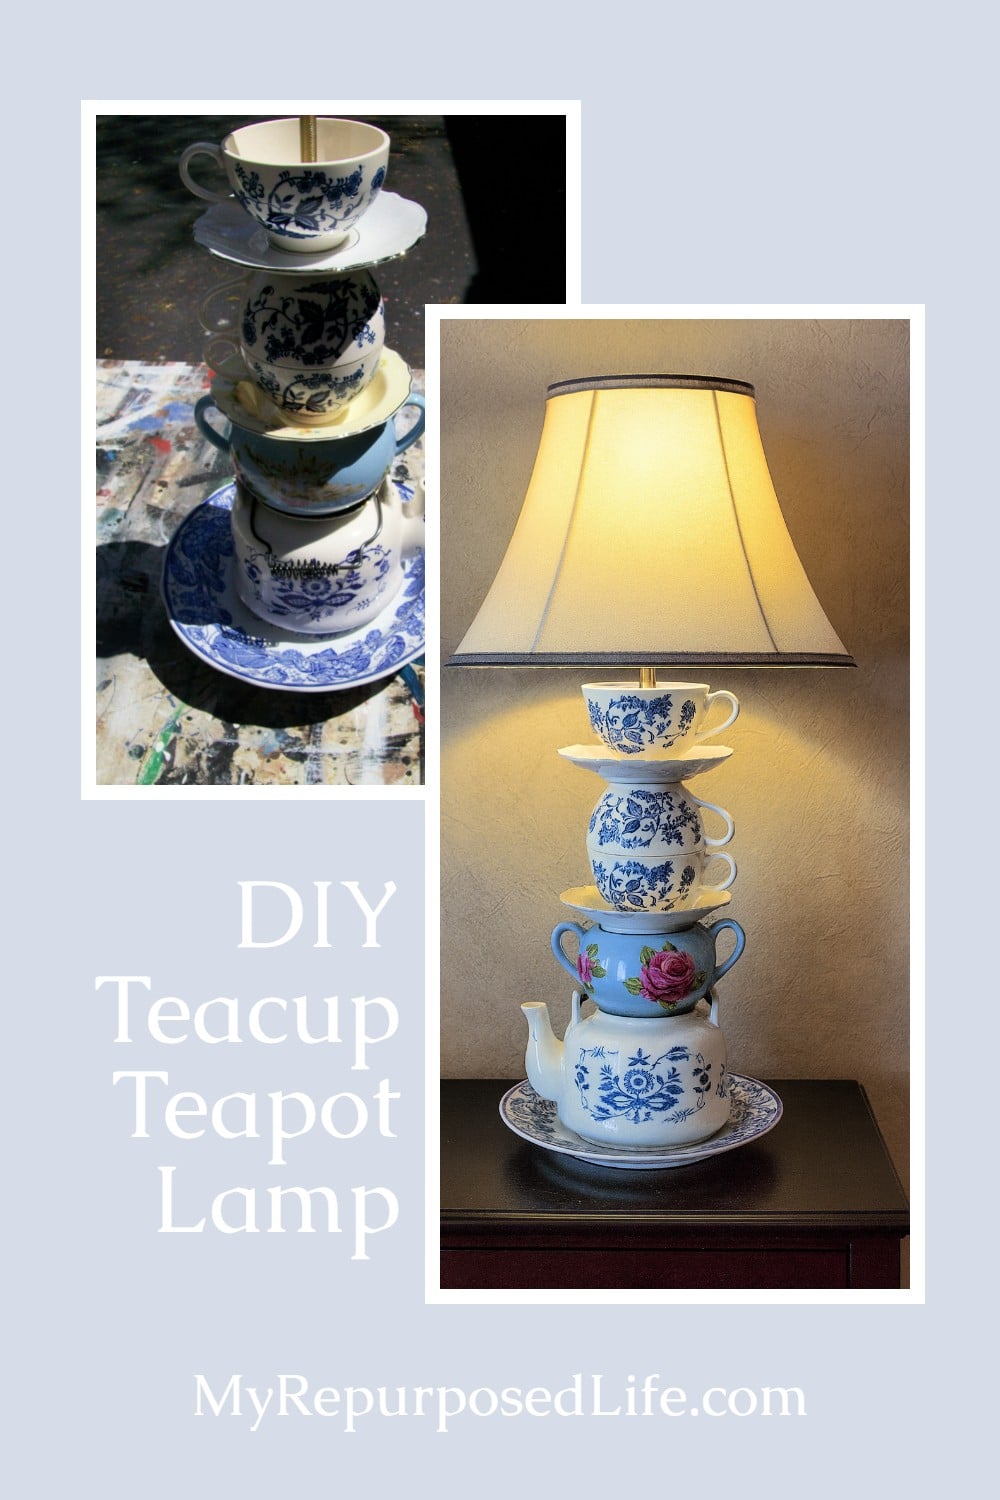
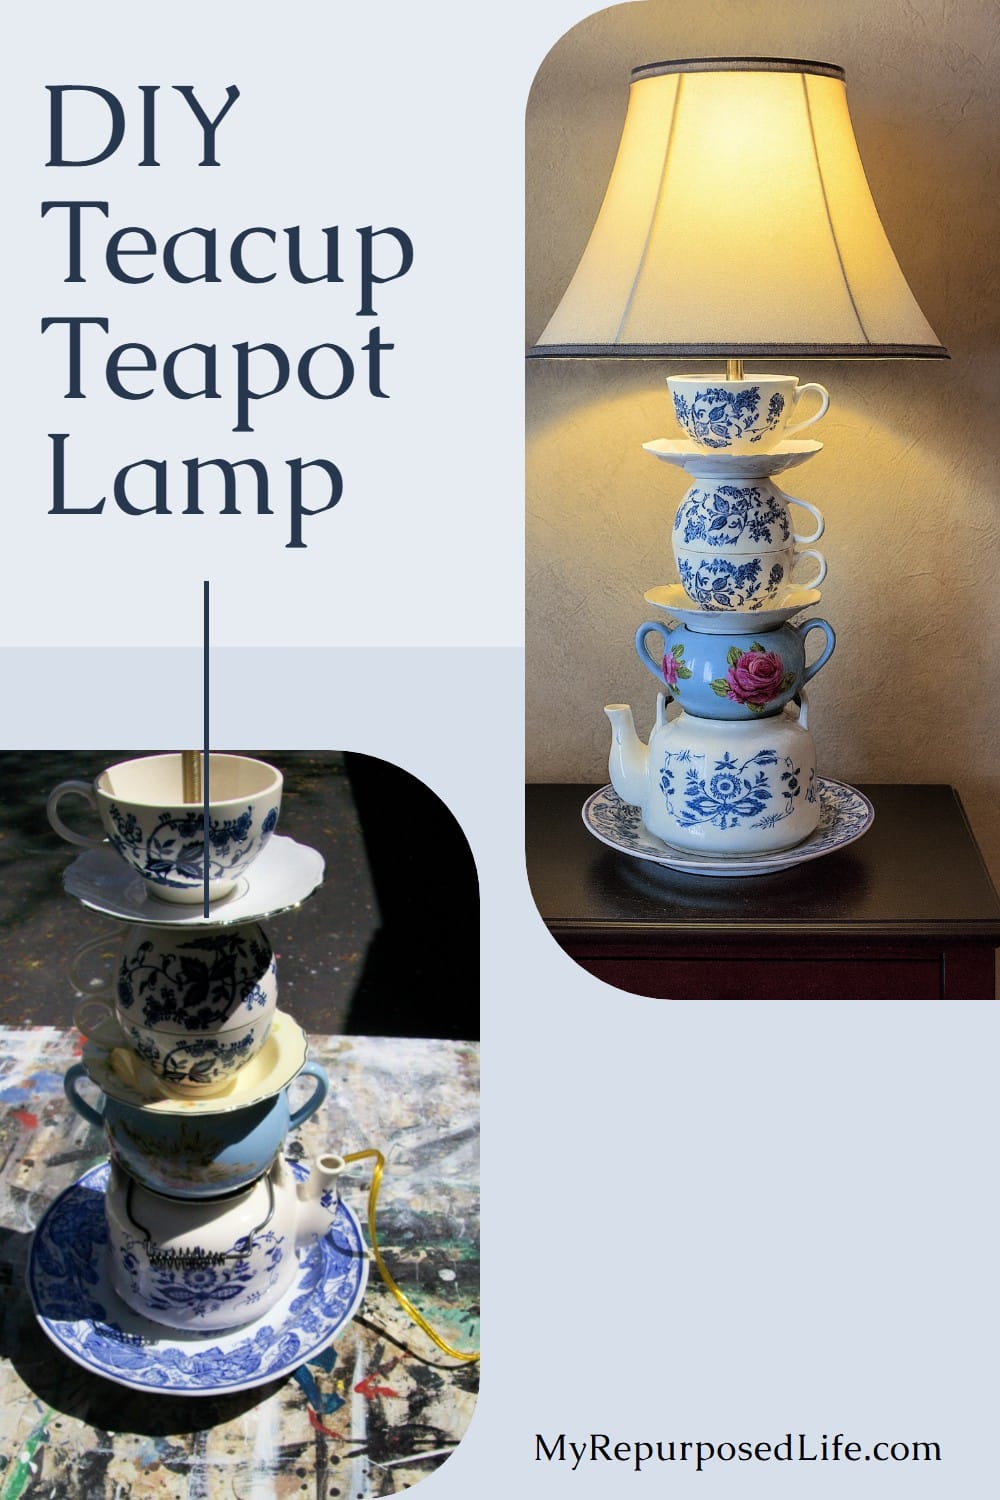
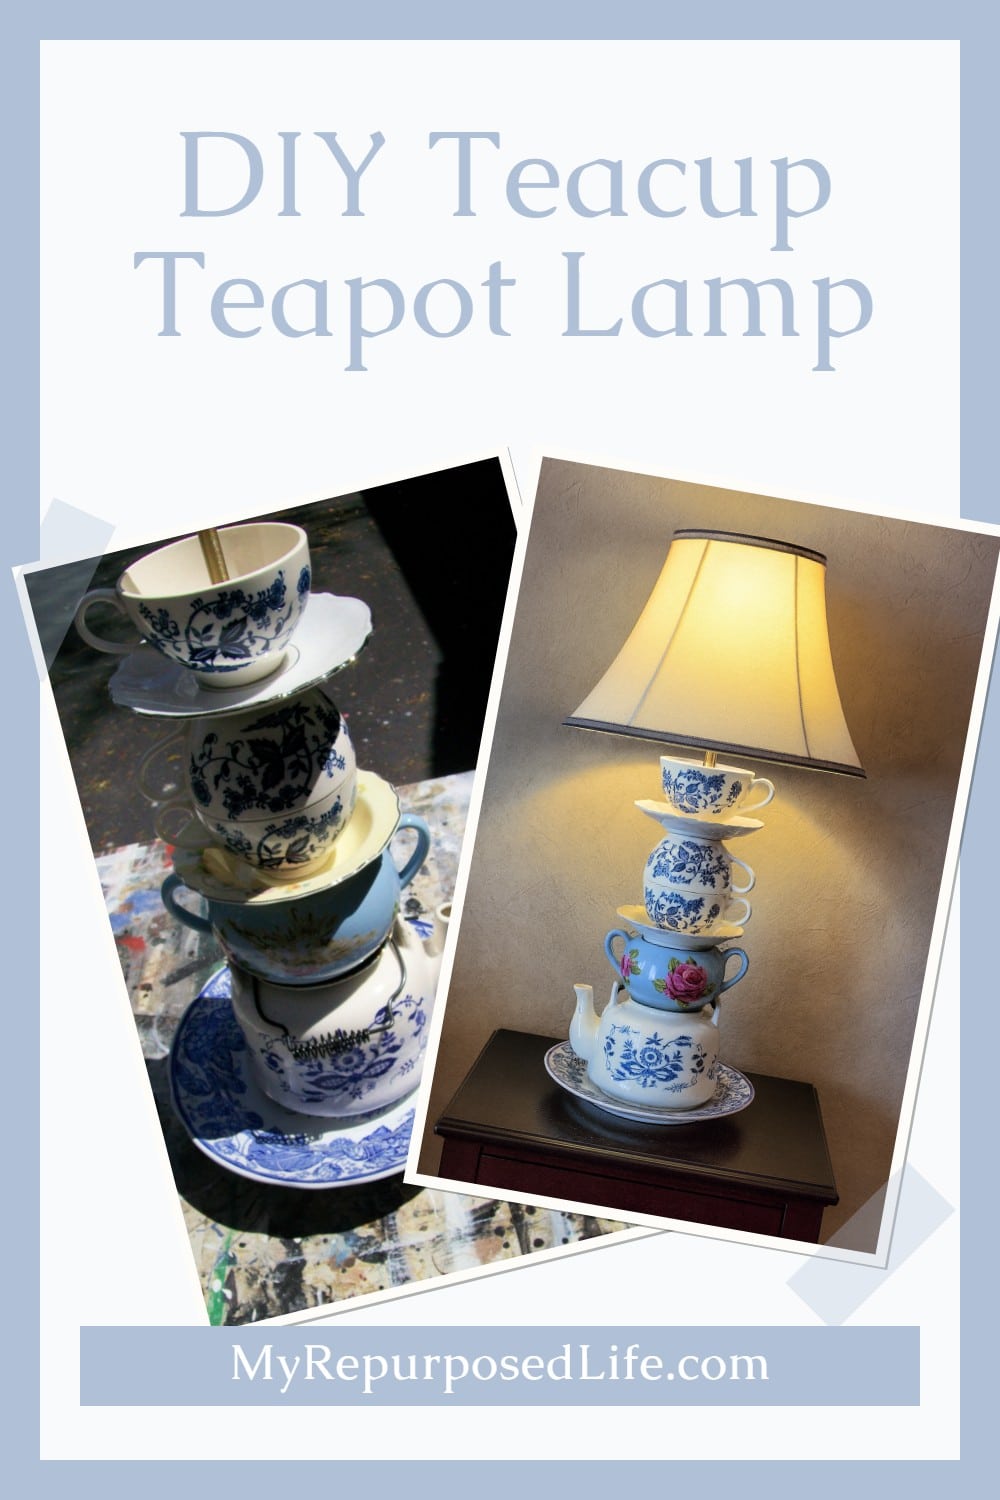
The photos in this article feature two different lamps. However, the details are the same.
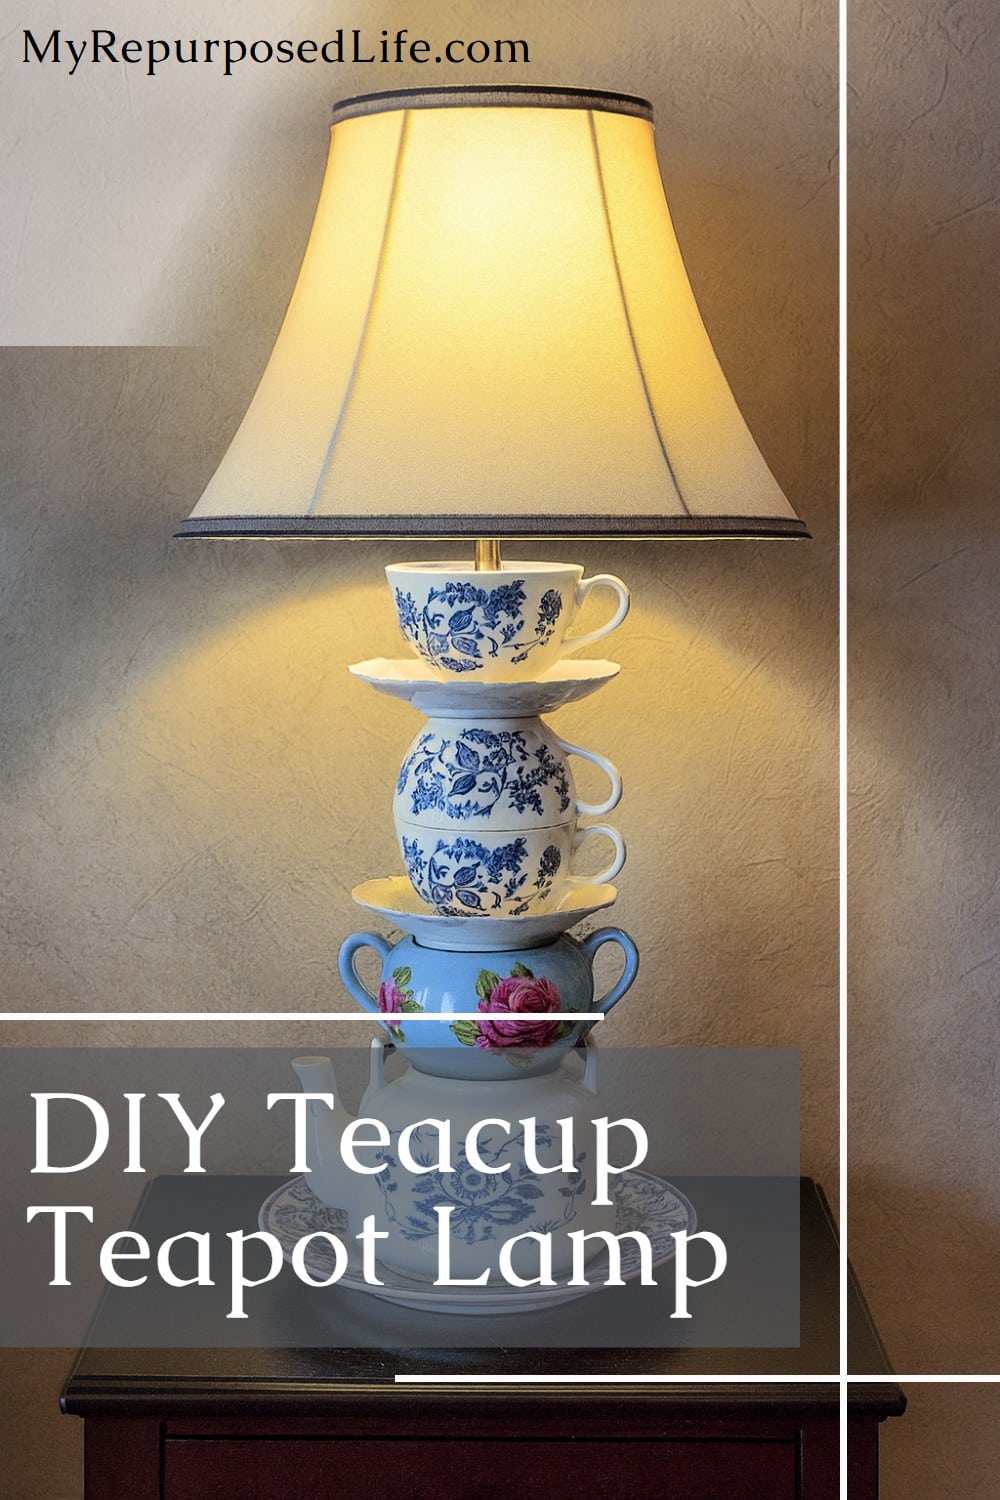
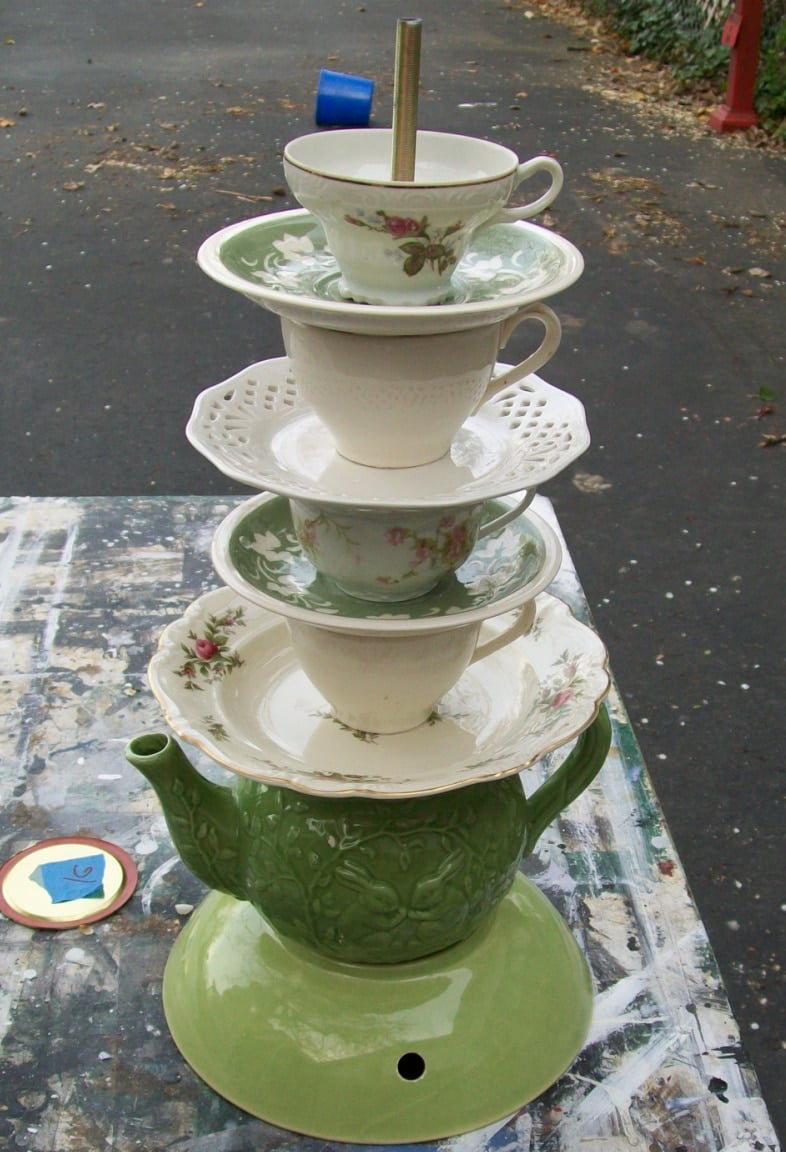
Begin stacking china pieces to get the look you want for your teacup lamp
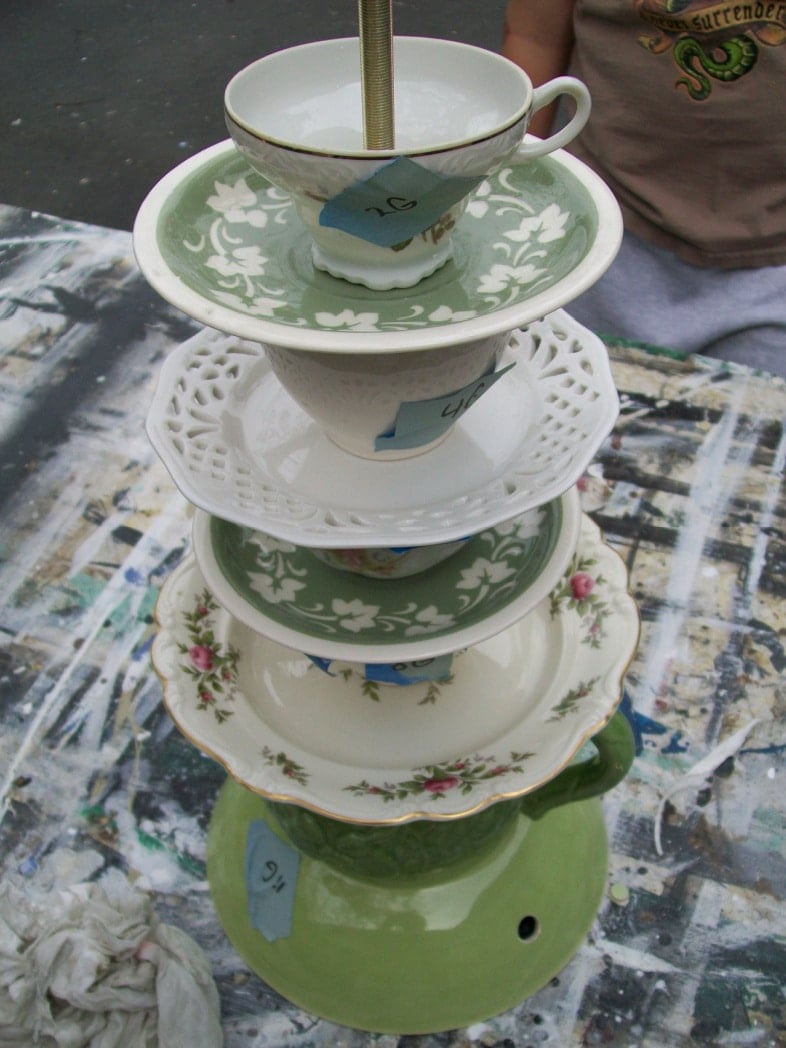
Note the hole in the bottom piece. That hole is for the electrical cord.
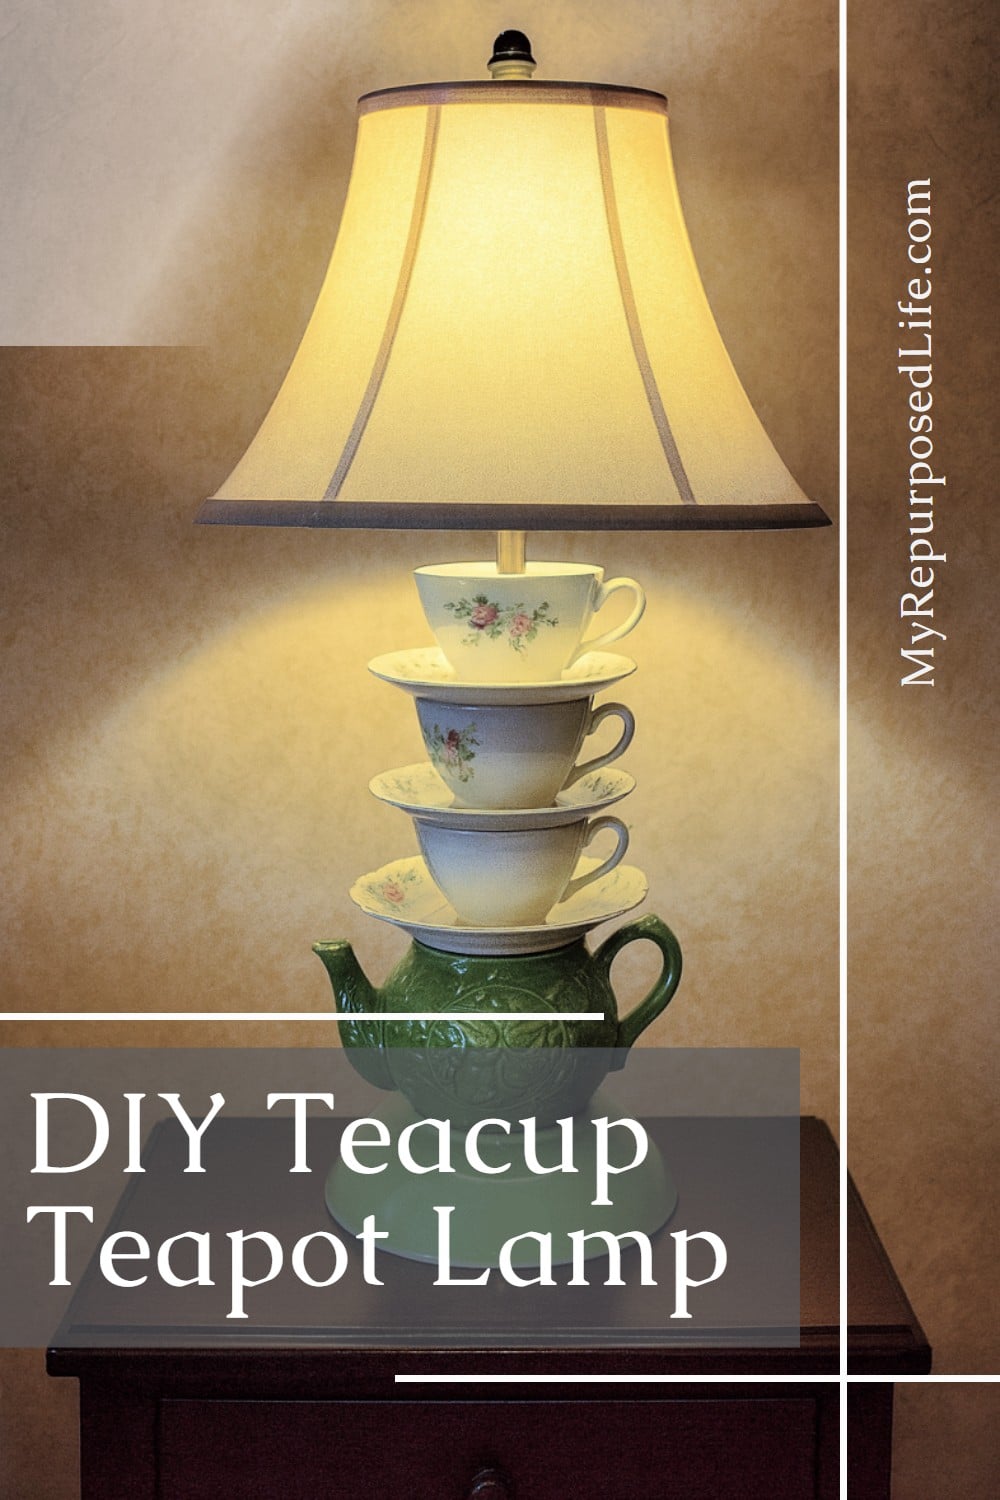
The writing on the tape is 8G, 9G, etc. Meaning these pieces were for the Green lamp.
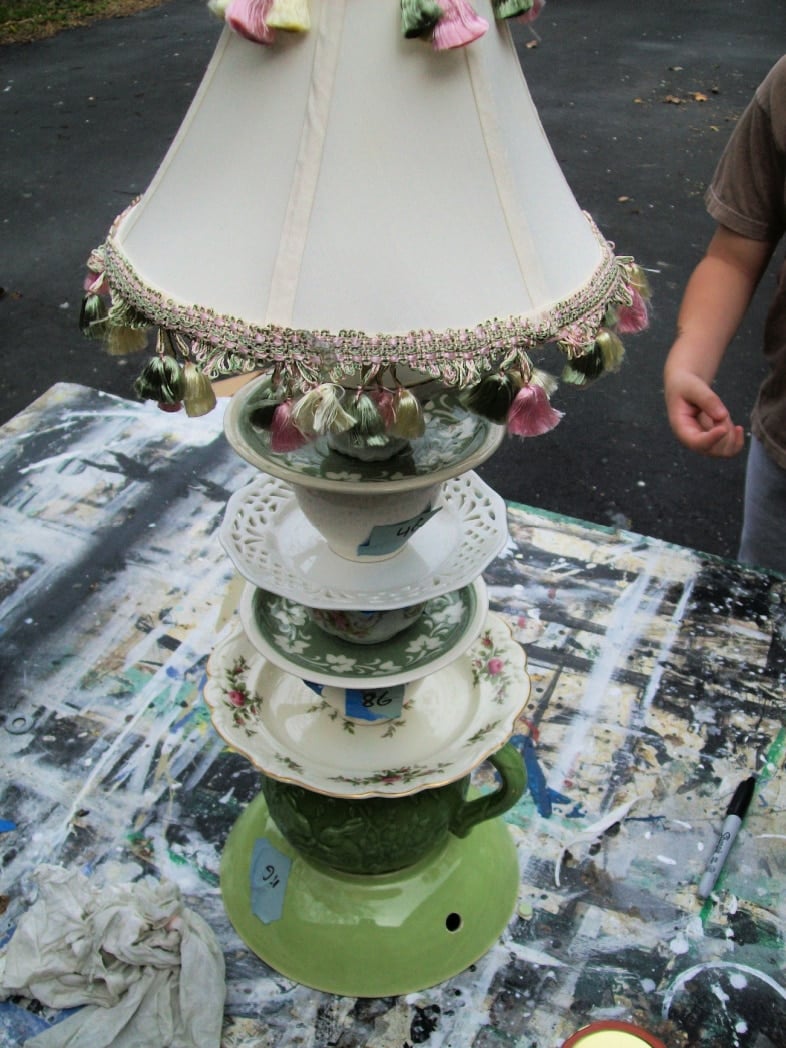
At this point, I was restacking them after completing a few more holes. My friend supplied this shade to see how the lamp was going to “stack up”.
It’s a lot like making glass totems. Another project where gail stacks bits and pieces. I’m telling you, I must not have played with enough blocks as a child.
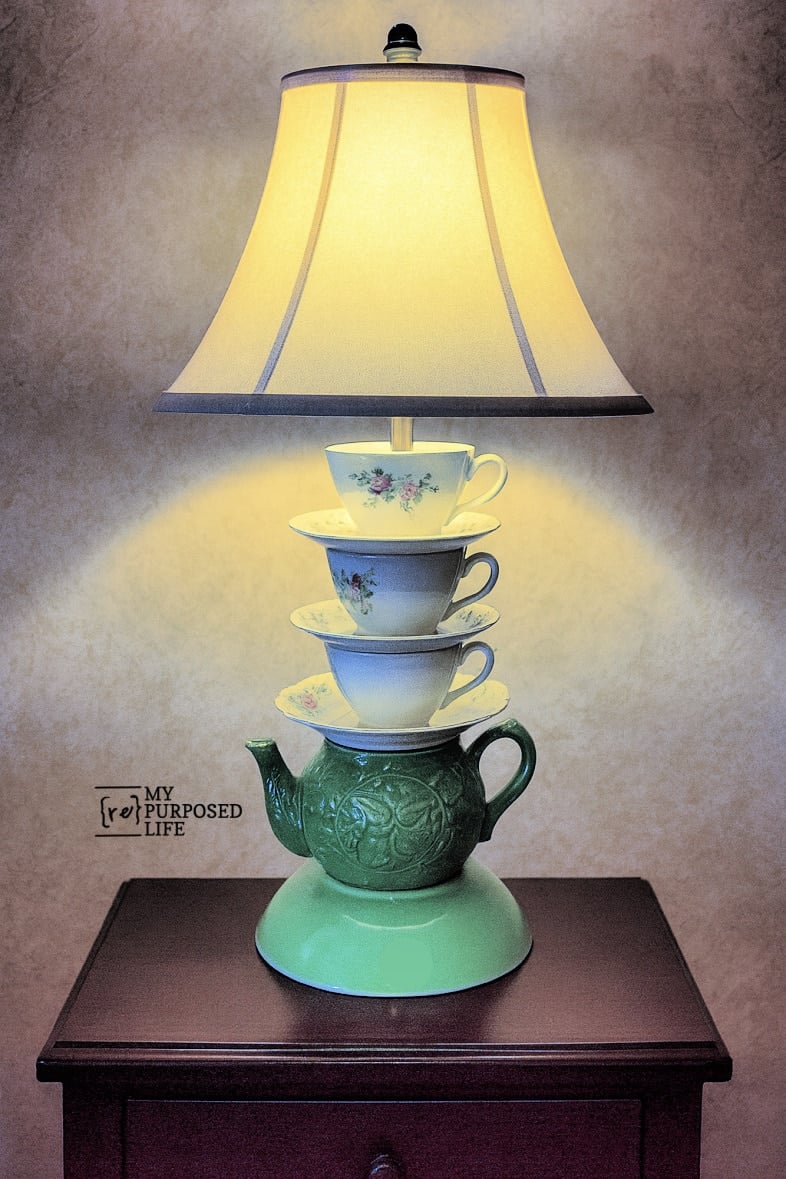
Teapot Lamps: Cups and Saucers of all Sizes and Colors
Do you see the mason jar lid? I thought I might need to use that for the top to get a tight fit. It was not needed. The lamp is not wired yet.
How to Secure the China Pieces for Your Teapot Lamp
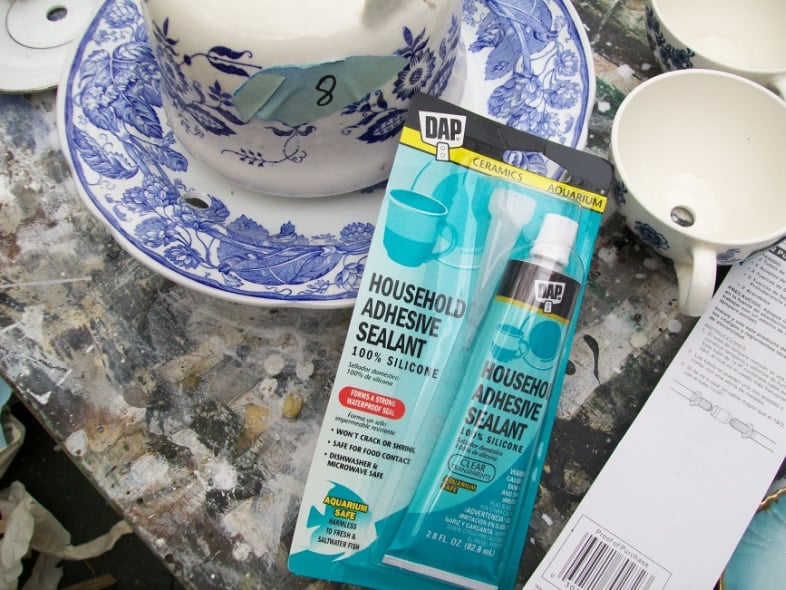
This is project #2, the blue lamp. You can see the Dap Silicone Sealant I used to “glue” this one together. I used Silicone in a caulk gun on the glass totems. But for this project, I was looking for something easier and simpler. I bought mine at Home Depot.
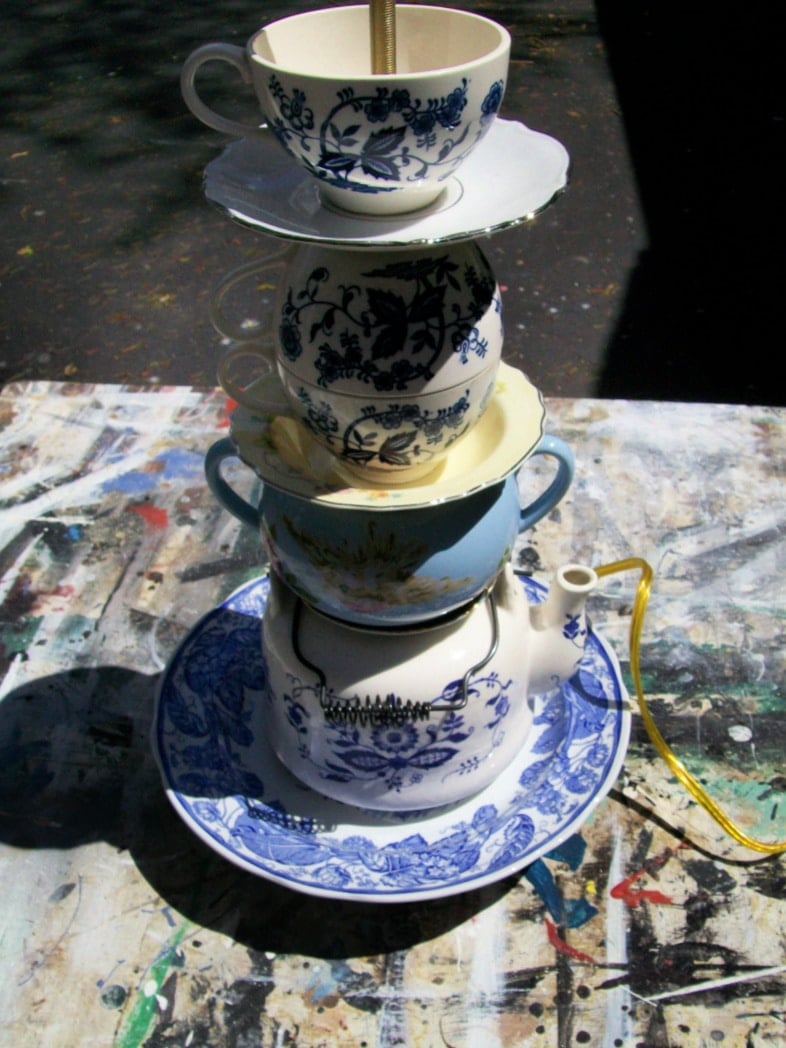
I really like how we put the one cup upside down on the other, don’t you?
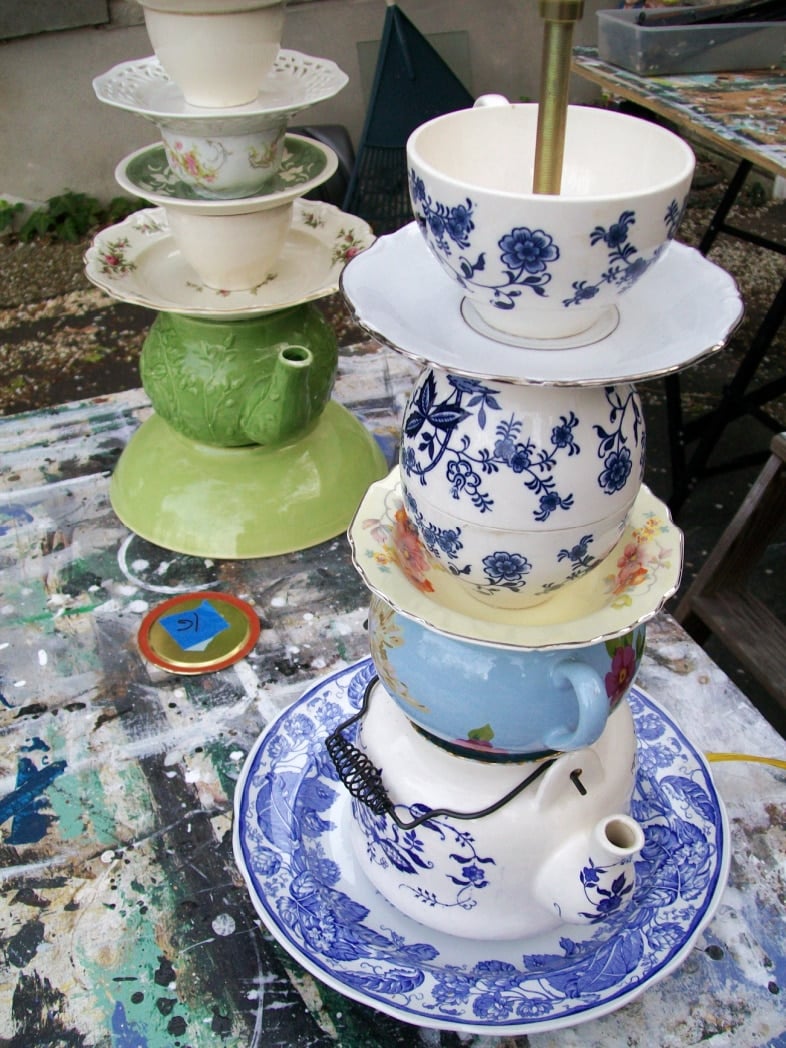
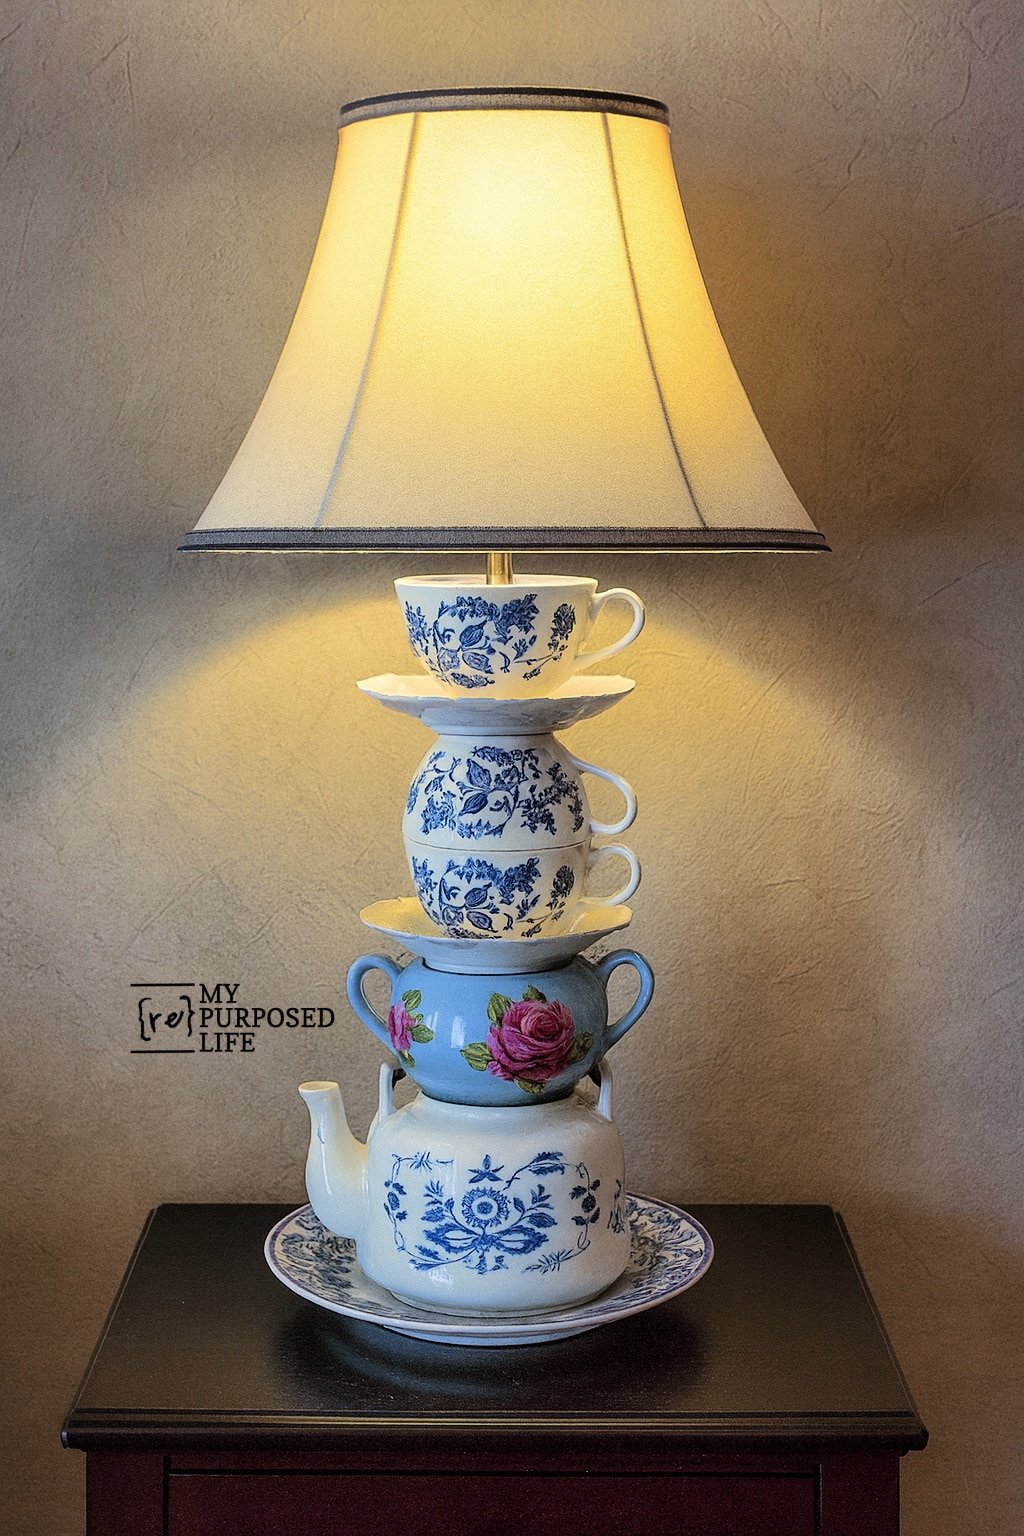
Here they are side by side.
How to Cut a Lamp Rod When Making a Teapot Lamp
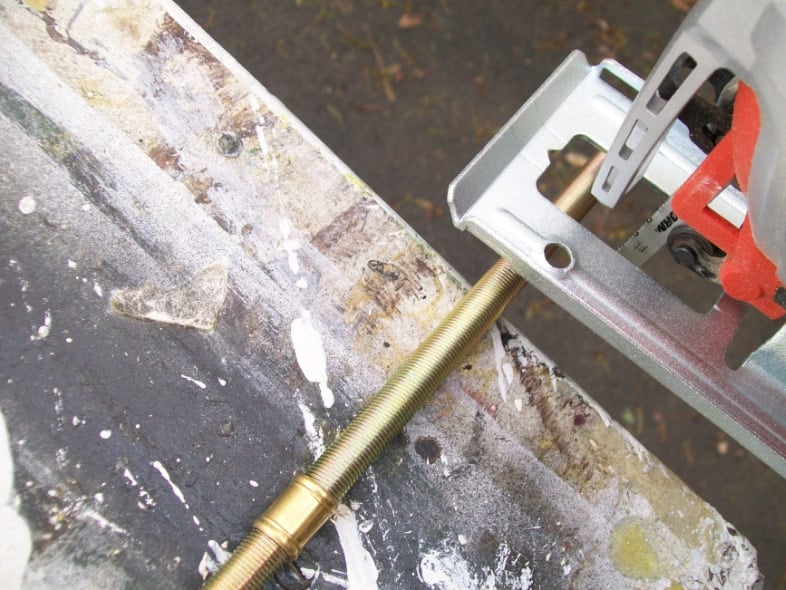
When Jan picked up the lamp kit, she got the kind with threads all the way down. In my opinion, this is the best way to go. There were two rods that join with that neat little connector there in the middle. Once connected, the rod was too tall for the “stack” of china pieces. I used my jigsaw to cut the rod down to size.
Use Caution When Rewiring a Repurposed Teapot Lamp
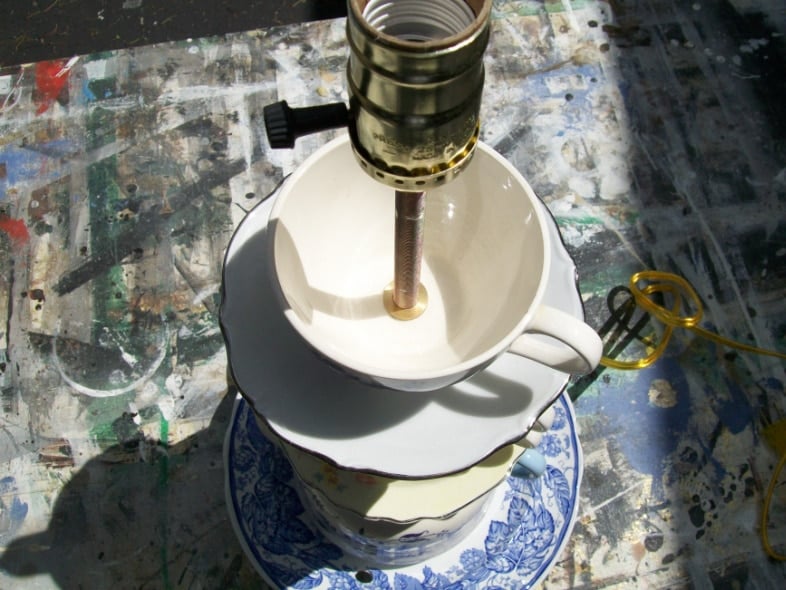
This is why I didn’t have to use the mason jar lid. Because the threads run the length of the rod, I was able to screw a washer/nut all the way down to get a tight fit with the top piece (cup). I then wired and screwed the socket in place. Because this is not my lamp, I suggested that Jan’s husband check the wiring and, if necessary, rewire it himself. (I don’t want to burn their house down) I know my limits, and I am not very knowledgeable about electricity and wiring.
How to Wire a Teacup or Teapot Lamp
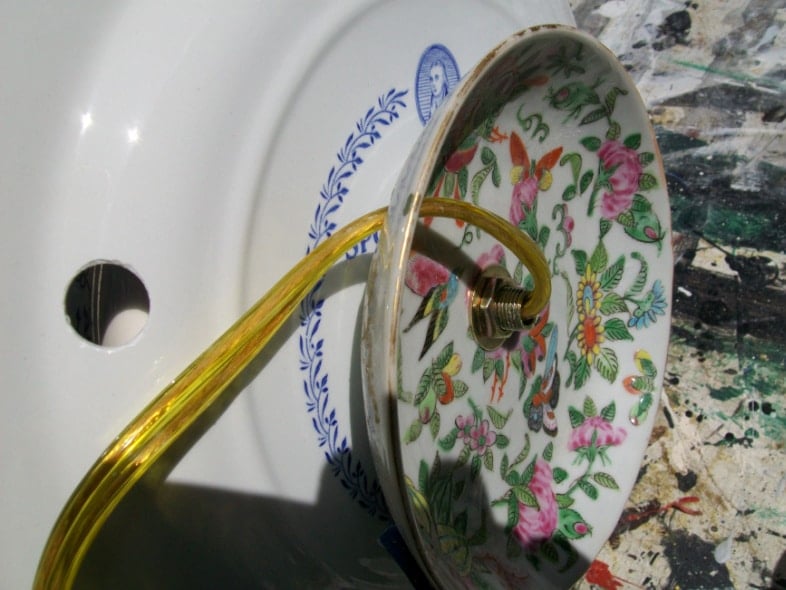
Okay, in this picture, I’m going to show you my “oops”. As I was drilling the pieces, I accidentally drilled a side hole in the large plate, thinking it was going on the bottom. I had forgotten that we had decided to put this small bowl as the base. I glued it so that this hole will be toward the back of the lamp. In all honesty, the blue plate is rather “busy,” so hopefully it won’t be noticed.
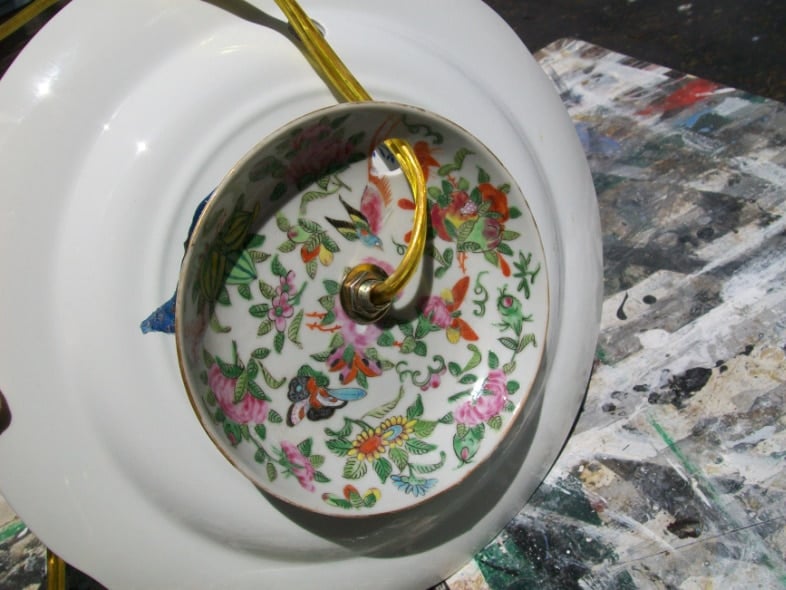
You can see that you need a side hole so your cord can exit. You can also see that I used a washer and a nut to hold the bottom of the rod in place.

Which is your favorite? The blue or the green?
Love unique lamps? Check out my repurposed coffee pot lamp and other repurposed light ideas , plus repurposed glassware project ideas
Teapot lamps are a clever way to give new life to forgotten china while adding personality to any space. Whether used as bedside lighting or conversation pieces in the kitchen, these lamps prove that a little imagination can turn everyday items into functional art. With the right tools and a gentle touch, anyone can enjoy the satisfaction of creating something beautiful and unexpected from mismatched teacups and teapots.
I absolutely love this idea! Have you ever tried to do a hanging light? Maybe 2 or 3 over the sink.
Kim
Thank you!
No, I haven’t tried a hanging teacup light. Would that look good with a shade? I’m having a hard time wrapping my brain around it. 🙂
gail
These are the prettiest lamps I’ve ever seen!! If I send you my cups and saucers will you make me one? It waaaay over my head to do this!!
Your comment made me smile Mary Jane! This is such a difficult project, and I would never want to attempt to drill someone else’s china cups! There could be breakage.
But if you’re serious, and have extras–I may consider it.
gail
What a fantastic idea! I also have a love for tea cups and looking for a way to incorporate it into my home. I’ve been looking for the perfect antique tea canisters but most of them don’t have lids 🙁
Here’s my little ode to the tea cup post on my blog:
http://typearamblings.blogspot.com/2011/05/tea-time.html
Pam
I enjoy them both! I can never find such lovely pieces at thrift stores, maybe i should try more garage sales. I have made bird feeders from them in the past but not lamps, great idea!
I love BOTH but am partial to the green. I did something similar… didn’t want to fuss with drilling so made candles, HERE
-caroline @ c.w.frosting