Three-Tiered Table | Plant Stand
As an Amazon Associate, I earn from qualifying purchases.


I call this latest project a three-tiered table, but it may have been used as a plant stand. It’s hard to say how old it is, but I’m guessing 1940’s.
Description From Google
A table with a higher middle section and equal sections on the left and right is often called a step-up table or stepped table.
Three-Tiered Table Before

So, when I googled the three-tiered table, it described three shelves: a top, middle, and bottom. I suppose the step-up table makes more sense.
As you can see, this table was free roadside roadkill. I was lucky to be the first to spot it next to a beloved neighbor’s garbage can.
This project is my monthly FFU project.
It’s Furniture Fixer Upper Tour Day! Be sure to visit my friends’ projects at the bottom of this post.
Repairing a Step-up Table (Plant Stand)
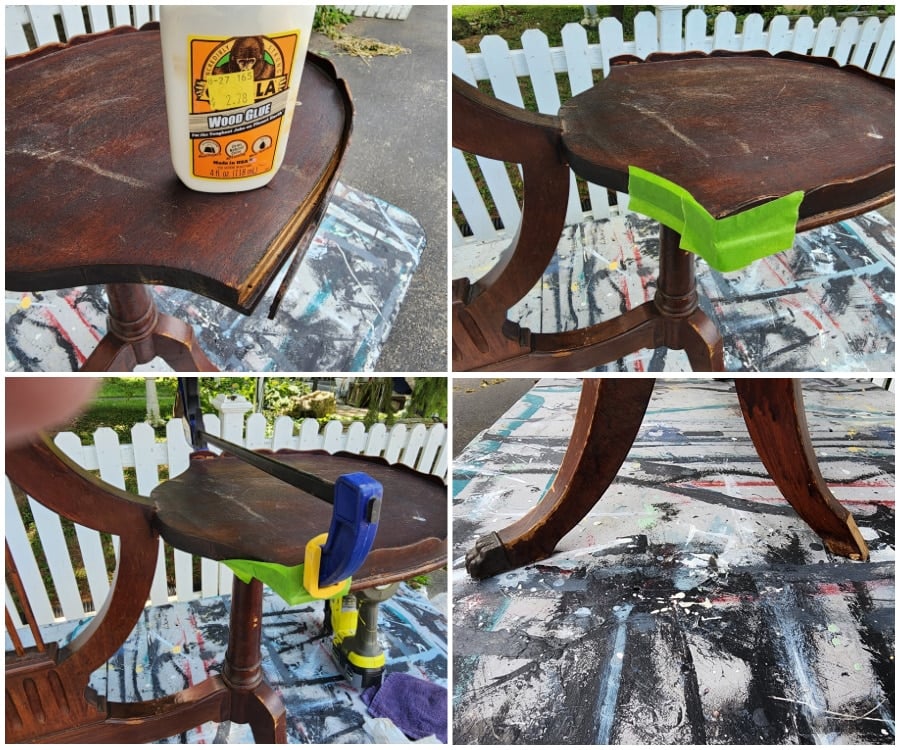
The sad little table had a few issues. Wood glue was used to repair the trim piece. Did you notice it’s broken little foot? I’ve dealt with this kind of damage before on a Small Claw Foot Table. I removed the “shoes” and painted the broken foot. It wasn’t terrible. That was the plan for this little gal.
Cleaning up Antique Furniture

There was a lot of build-up around the top shelf edge. I used Krud Kutter’s full strength for cleaning and a little water to rinse it. After the rag was damp with Krud Kutter, I used it to wipe down the rest of the three-tiered table.
Time to Paint the Three-tiered Table
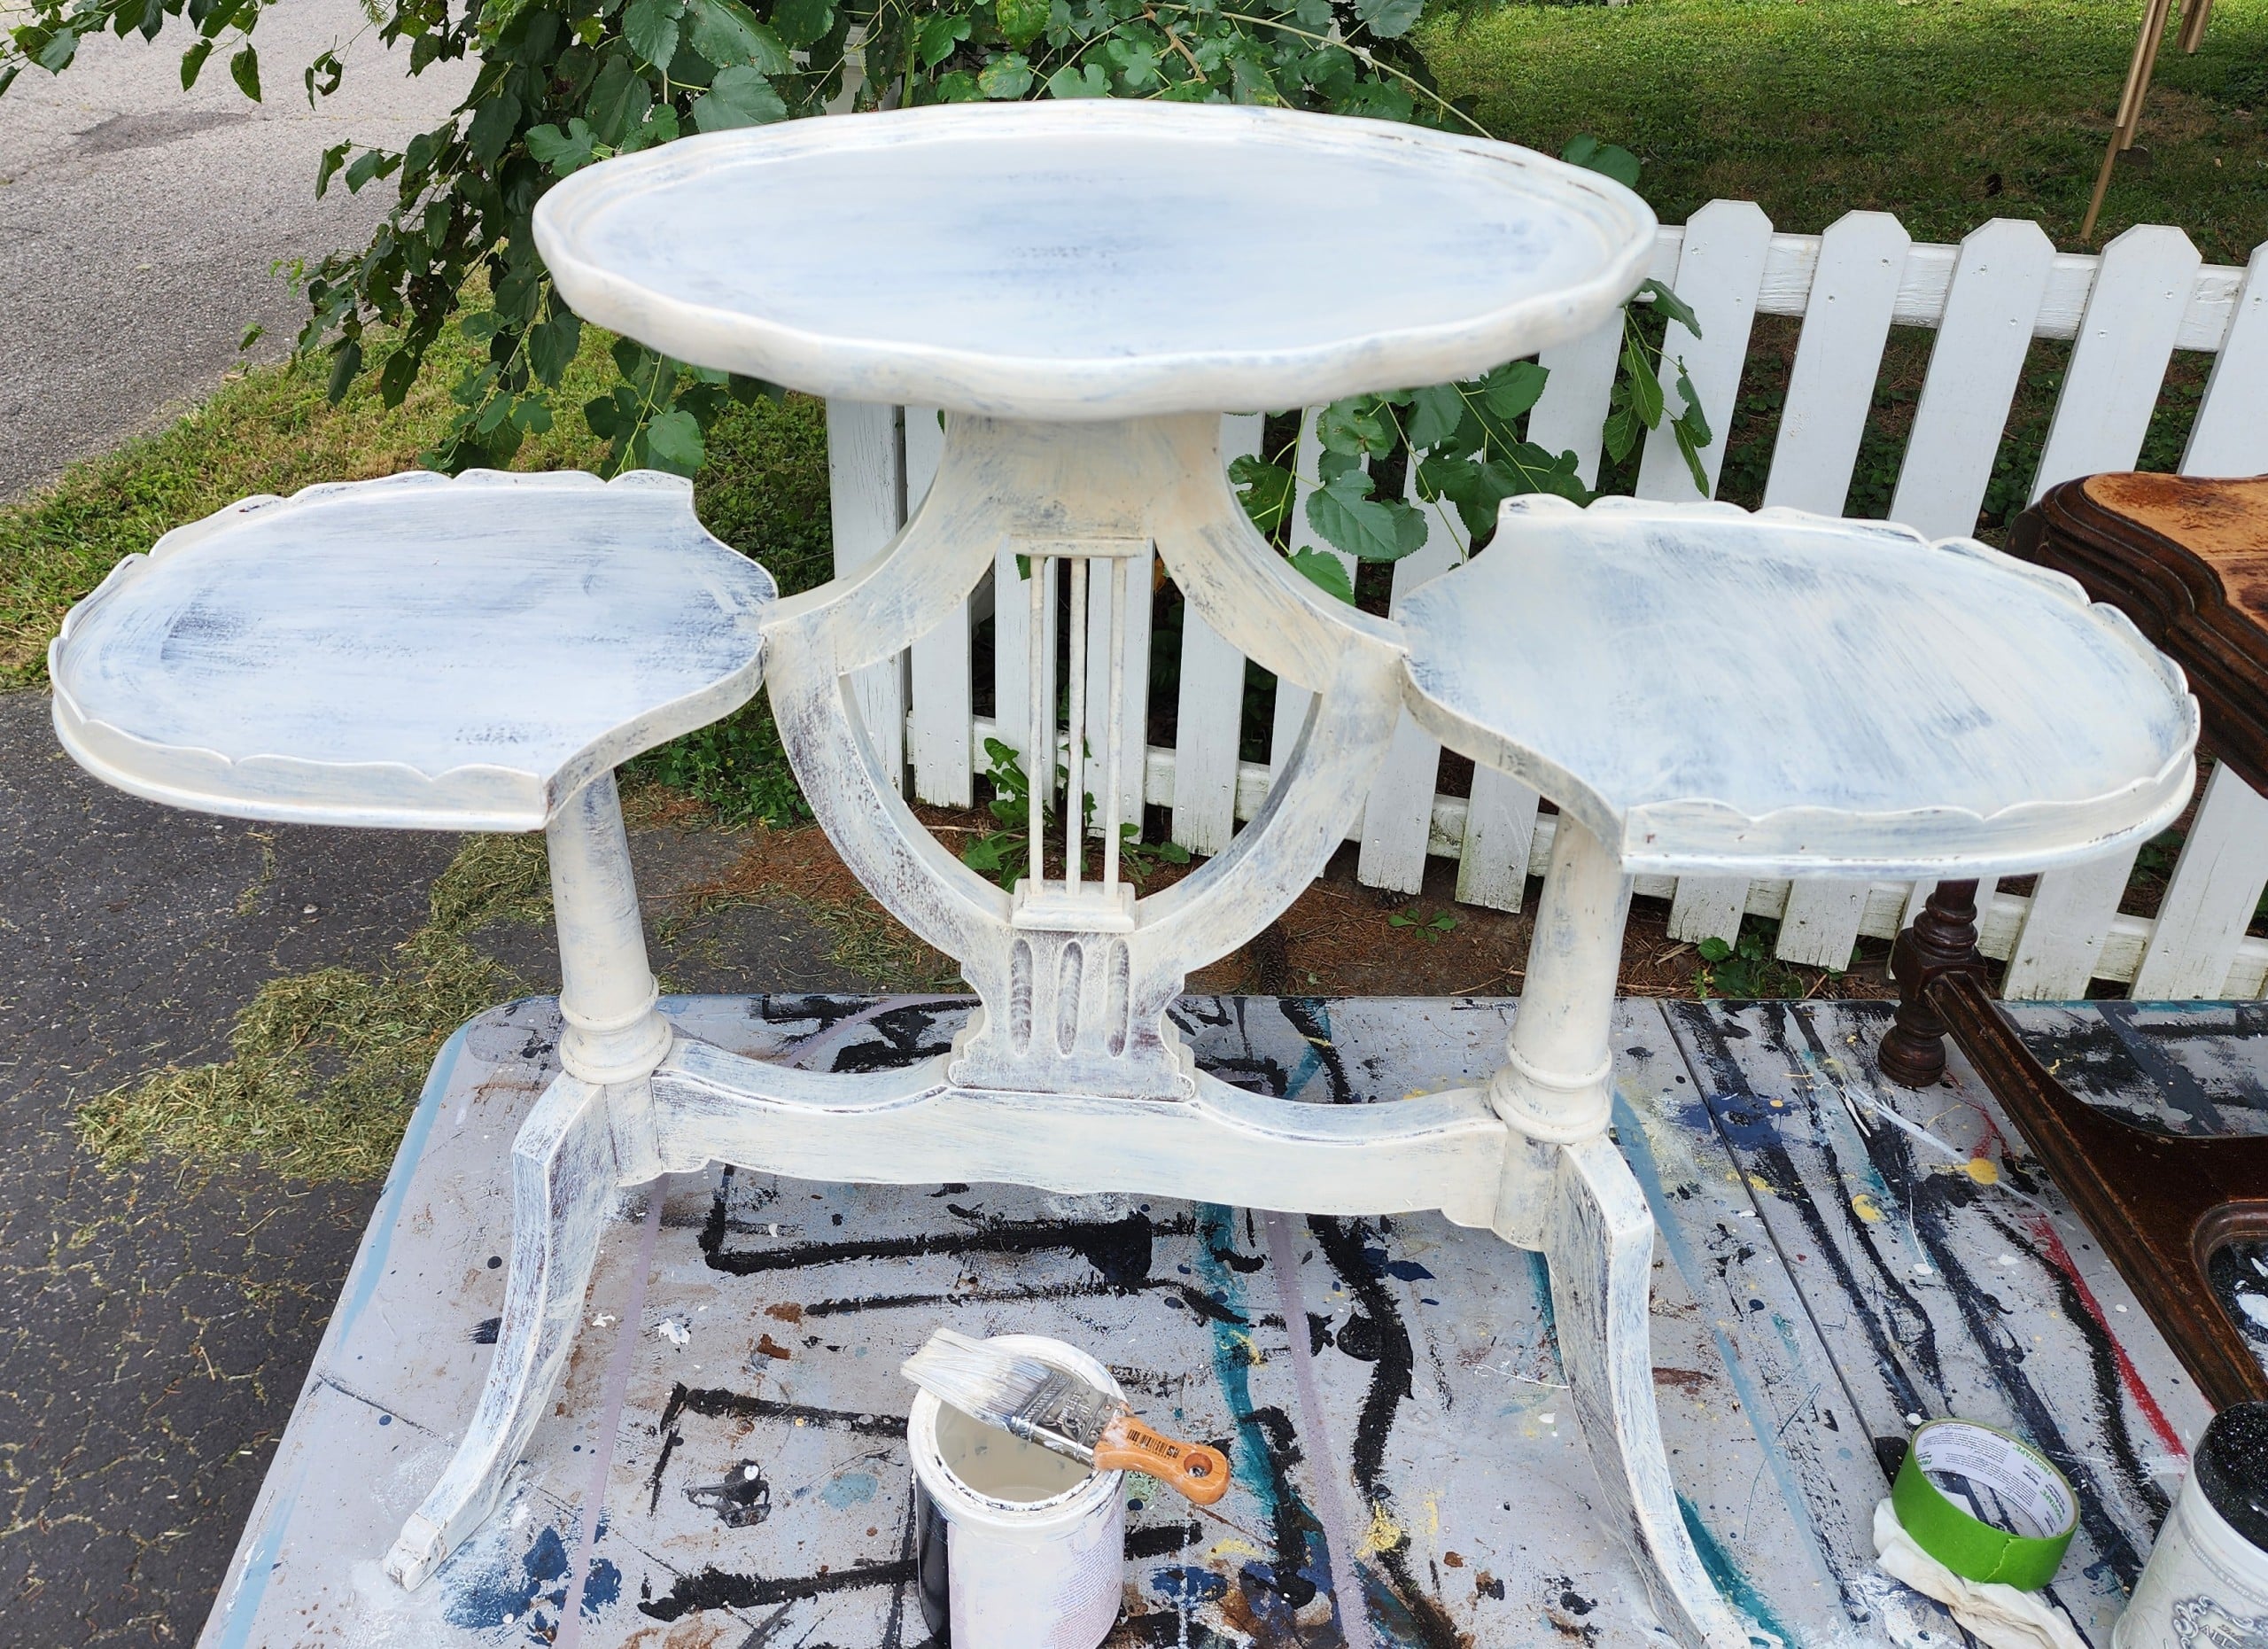
Because I didn’t have much of the paint I wanted to use, I painted the first coat white. Remember: the first coat is the “ugly coat.”
Painting a Three-tiered Table Yellow

I fondly remember my neighbor; I knew her for over 40 years. We all miss her terribly, so I wanted the table to be a “happy” color. The Naples sample from All-In-One Paint was half empty, so I started with the white base coat.
You will love the Garden Chair I used the first half of the sample paint on.
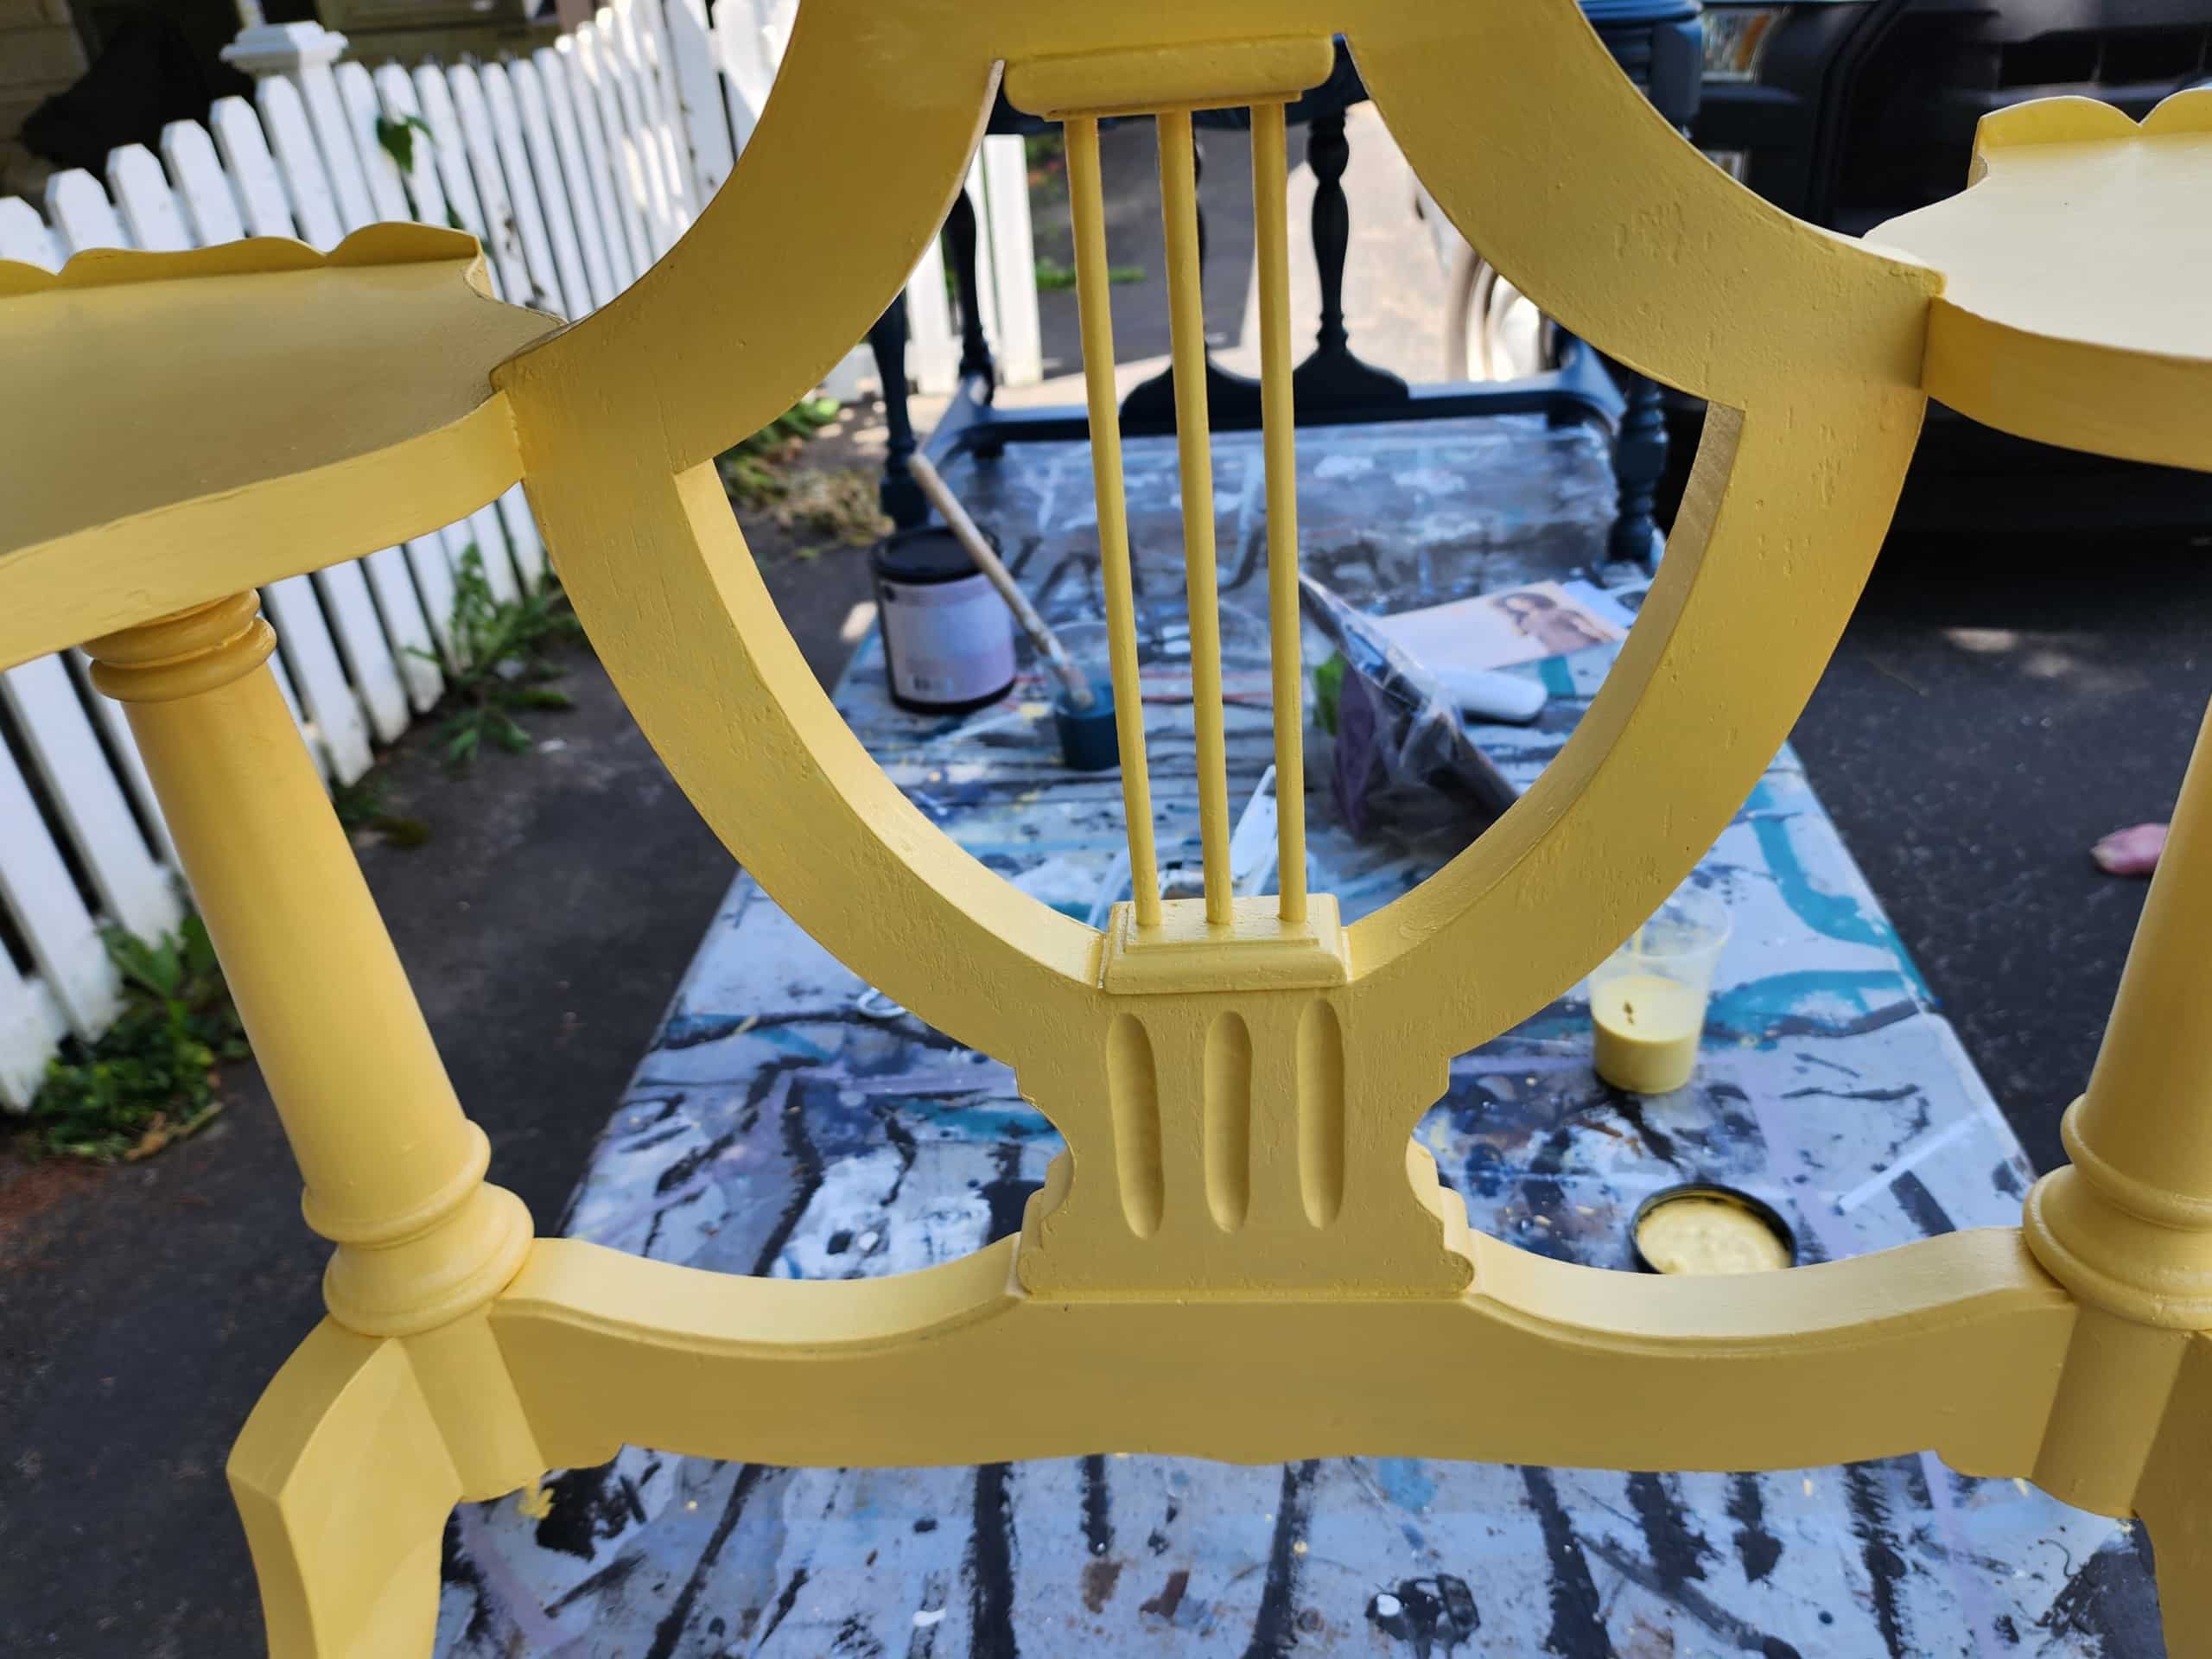
The first coat of Naples didn’t cover everything, so I did a second coat.

The broken claw foot is visible on the three-tiered table on the left. On the right is how the regular claw foot looks without its “shoe.”
As I said, the plan was to remove the three brass claw feet and send the three-tiered plant stand on its way.
But then I researched and found some options to repair the claw foot. The first option was putty. I tried that, but it didn’t work very well. I’ll show you pictures later.
How to Repair a Broken Claw Foot
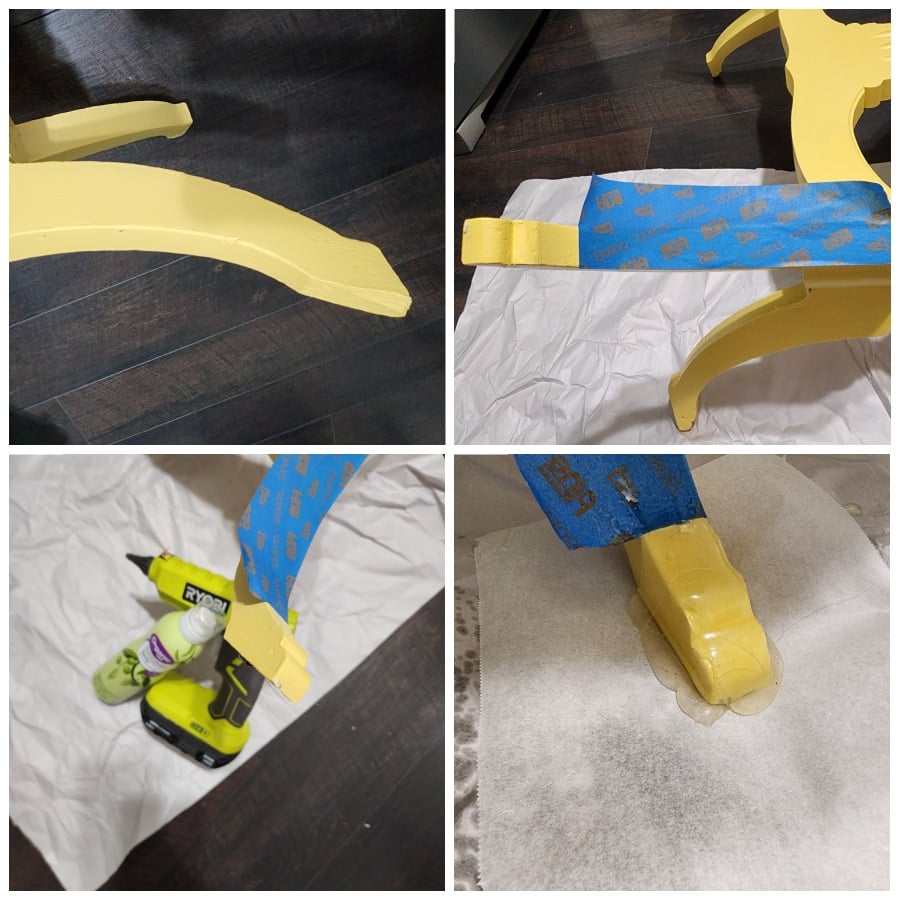
- Measure from the top of the leg to determine where to add the new foot. I used painter’s tape.
- Transfer the painter’s tape to another leg, placing it at the same distance from the top as before.
- Spray the area with cooking spray.
- Flow hot glue over the entire area to make your mold. I put down a layer of wax paper to keep the hot glue from sticking to the brown craft paper.

- I removed the hot glue mold while it was still slightly warm and used scissors to trim it a bit.
- Mix Bondo and fill the mold with it. I removed the Bondo while still warm and manipulated it as I did the test fit. CAUTION: Bondo gets very hot while it’s curing.
- Test fit the new clawfoot replacement. Allow the Bondo to harden completely. Attach the new foot with wood glue.
- Sand and shape the new foot to look like the original.
Hot Glue Mold Versus Putty Mold
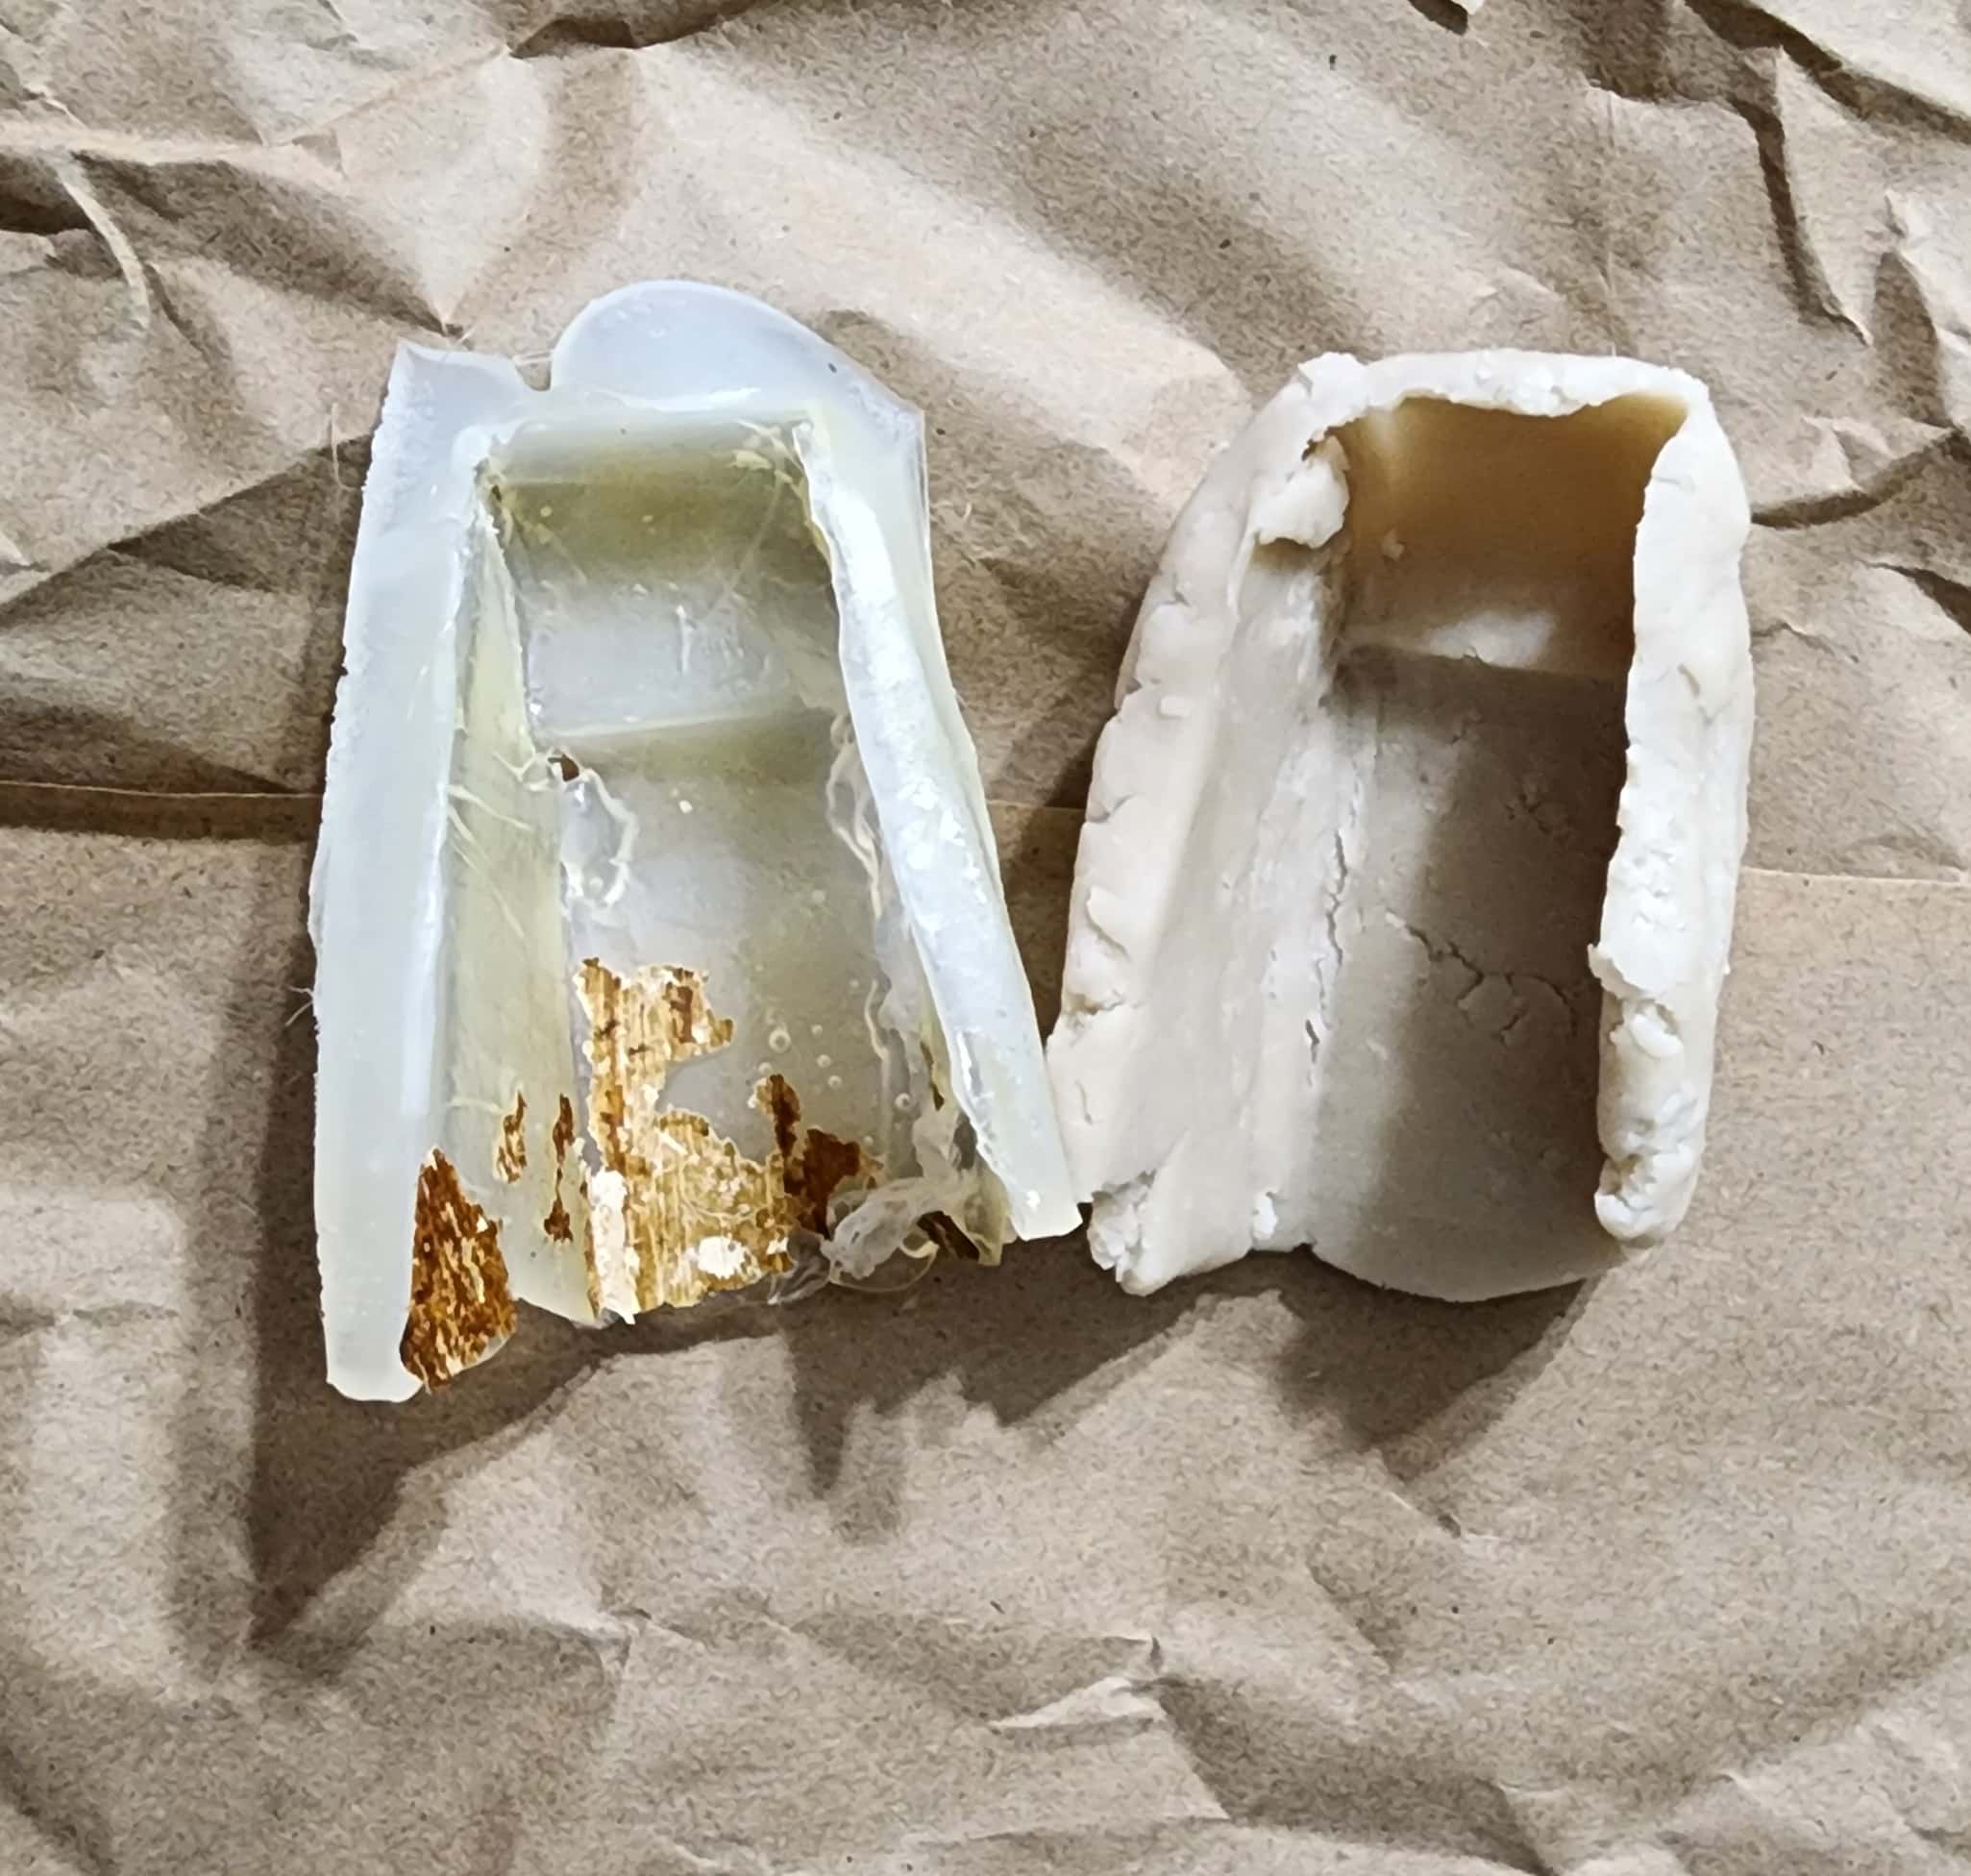
Here is a side-by-side comparison of the hot glue and putty mold. The putty mold was too fragile to hold the Bondo mixture.
Don’t Forget to Use Cooking Spray

I forgot to use the cooking spray, and this was the result. I would definitely use this “hot glue mold” method again.
Cleaning Brass Toe Caps
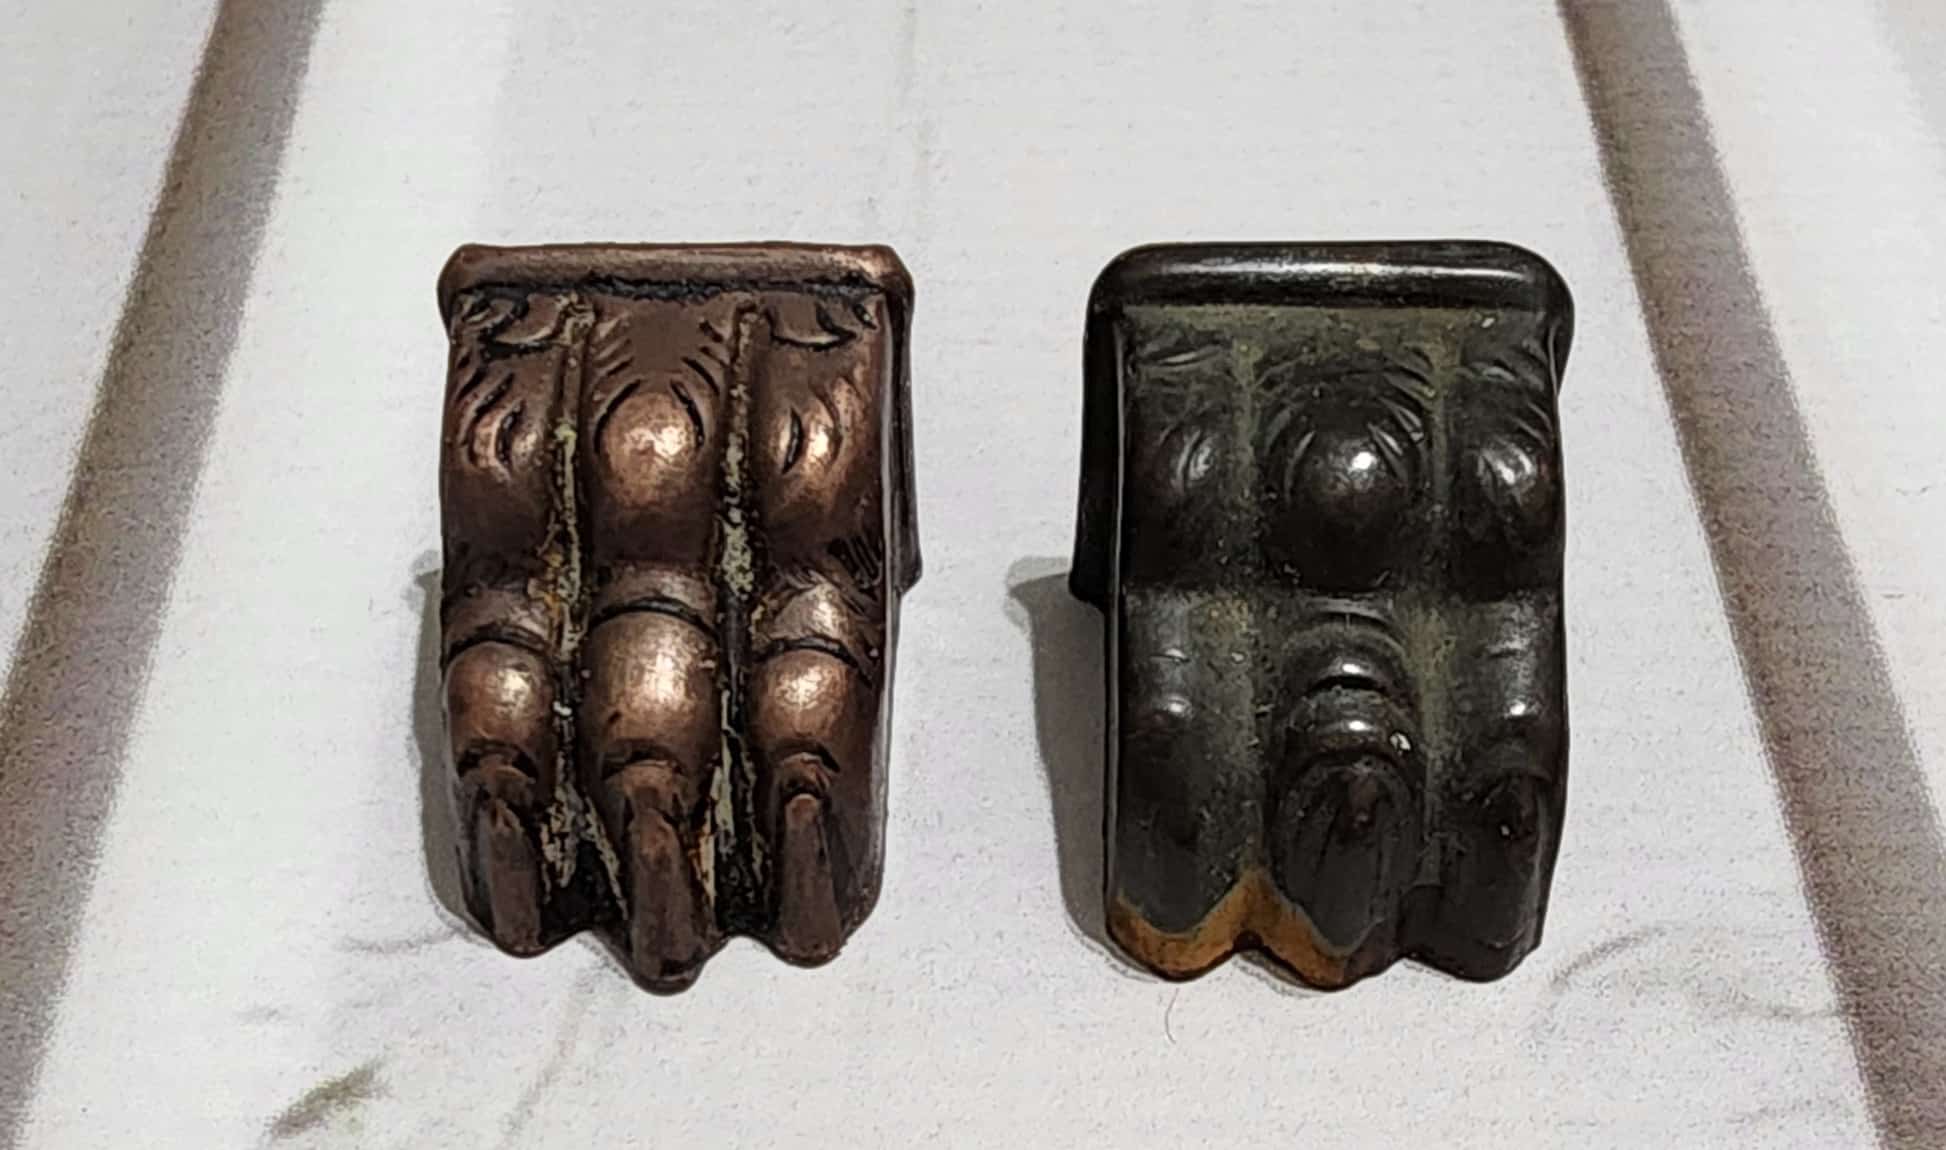
If you need extra brass toe caps, you can find them on Amazon. I mentioned earlier how I dealt with a broken clawfoot table. I took the toe caps off and saved them, so I had three brass toe caps to spare. The toe cap on the left is after I cleaned it. I chose not to spray paint mine, but that is definitely an option if your brass toe caps are too dirty.

I used The Works Shower Cleaner to remove years of grime from the toe caps. Always wear gloves when scrubbing with such a harsh cleaner.
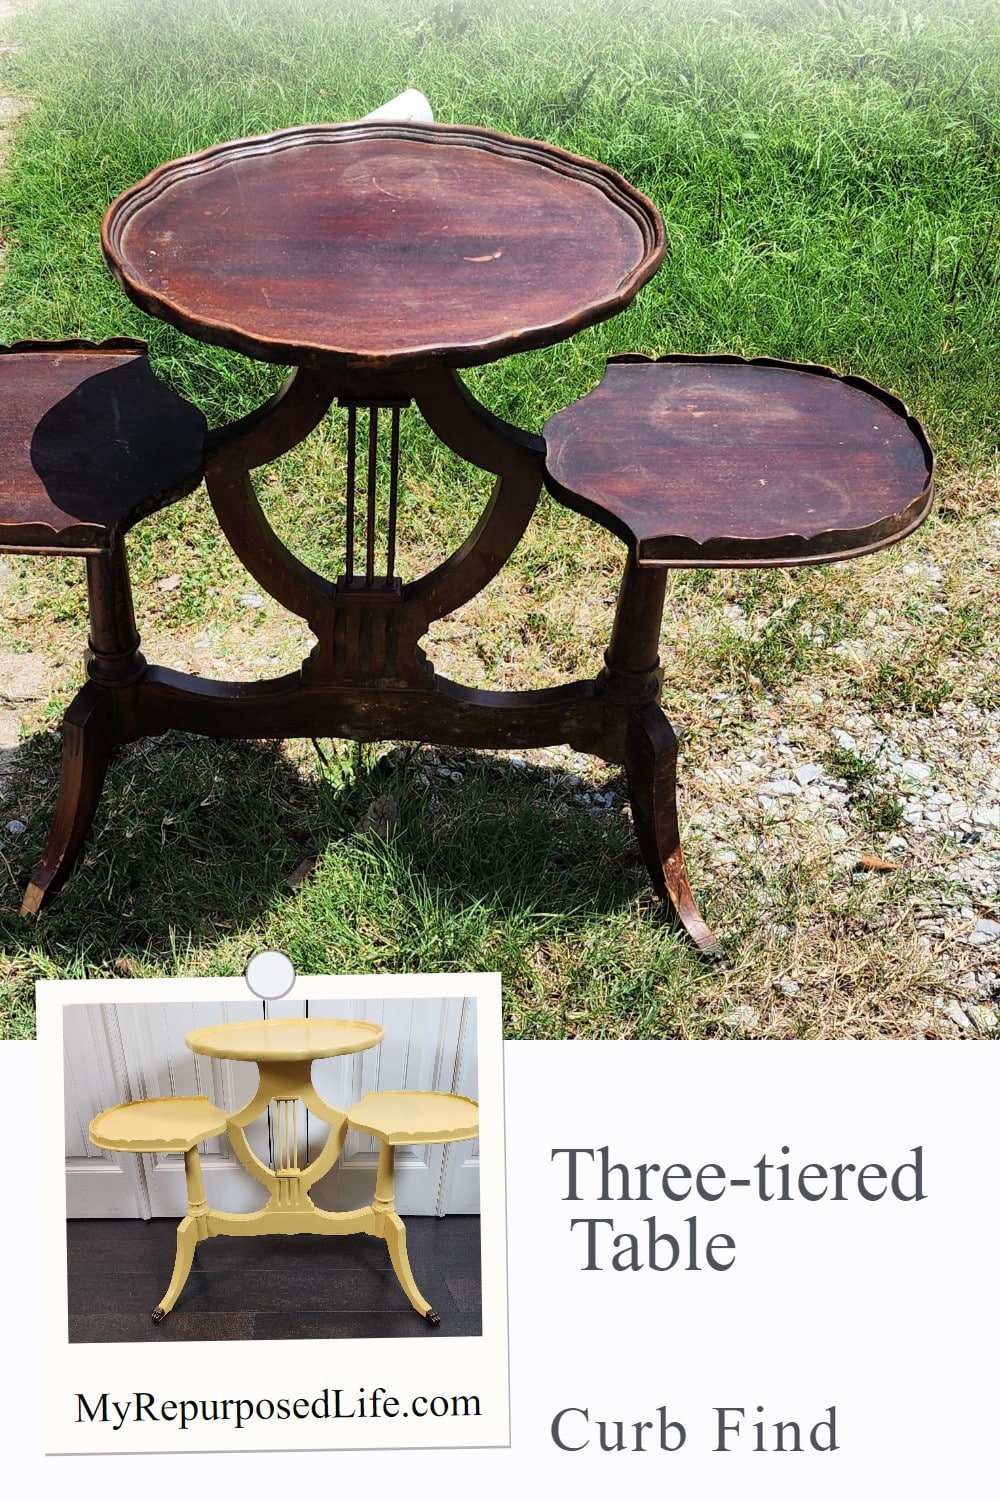
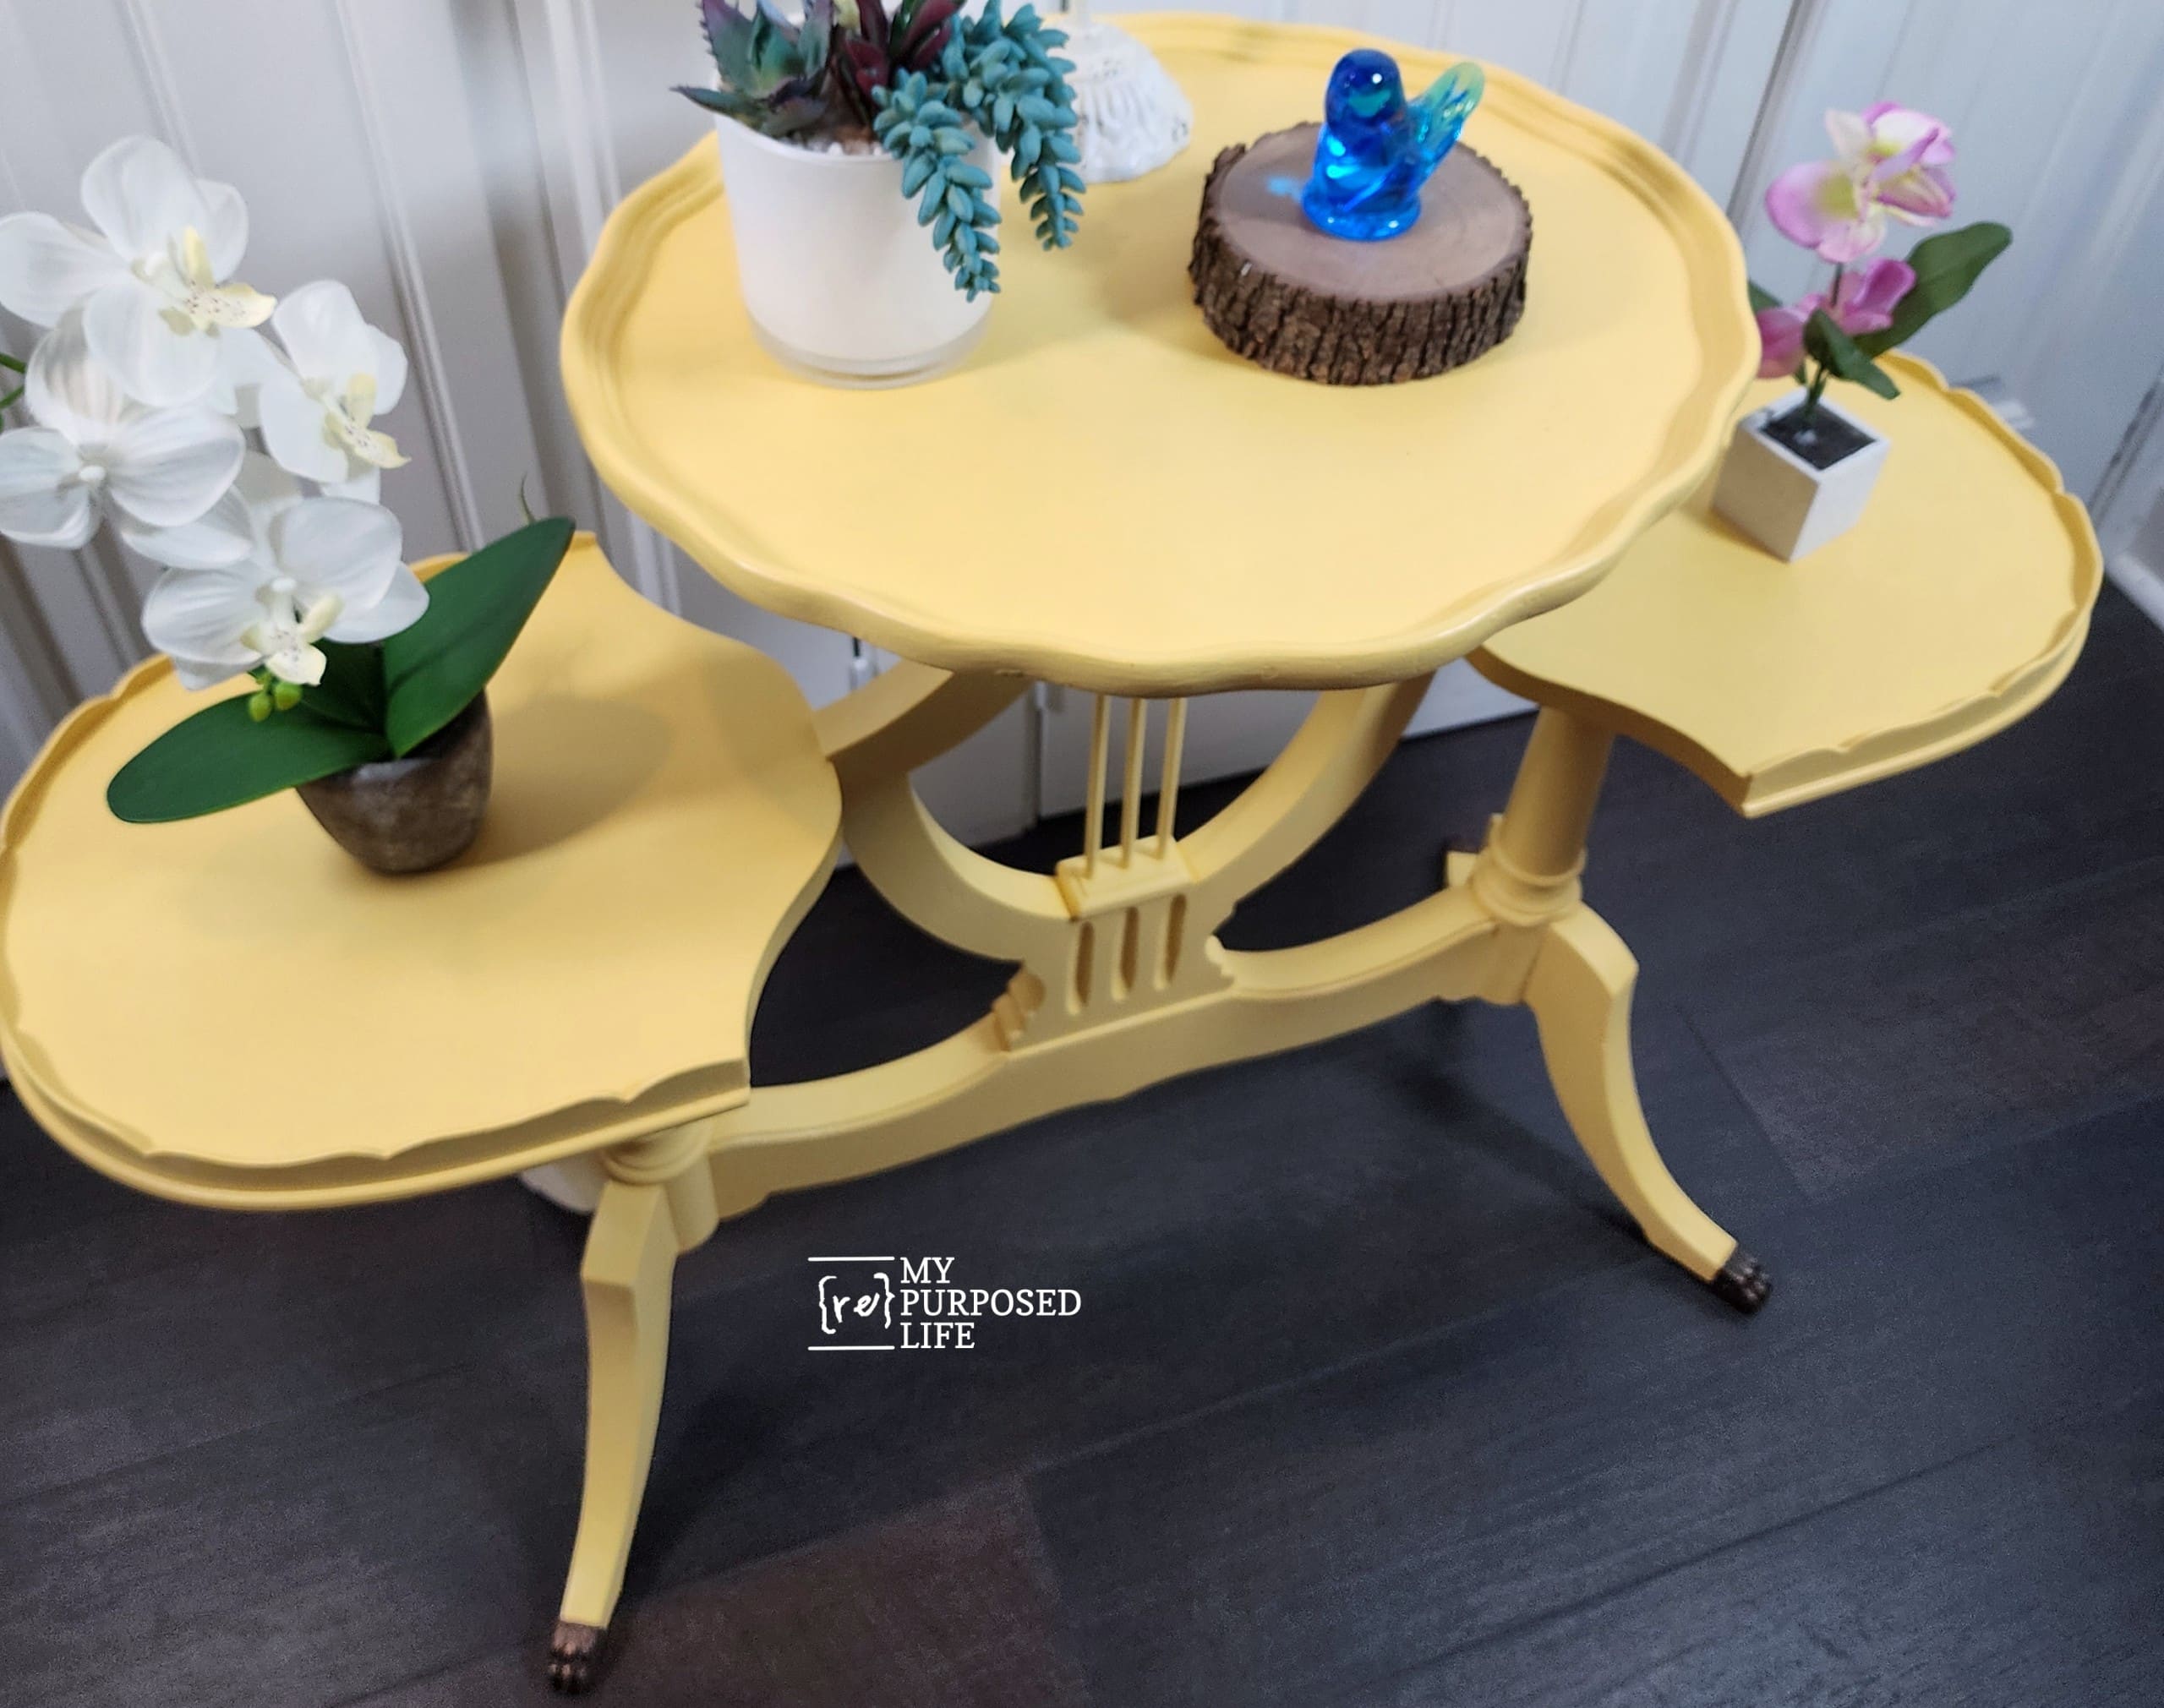
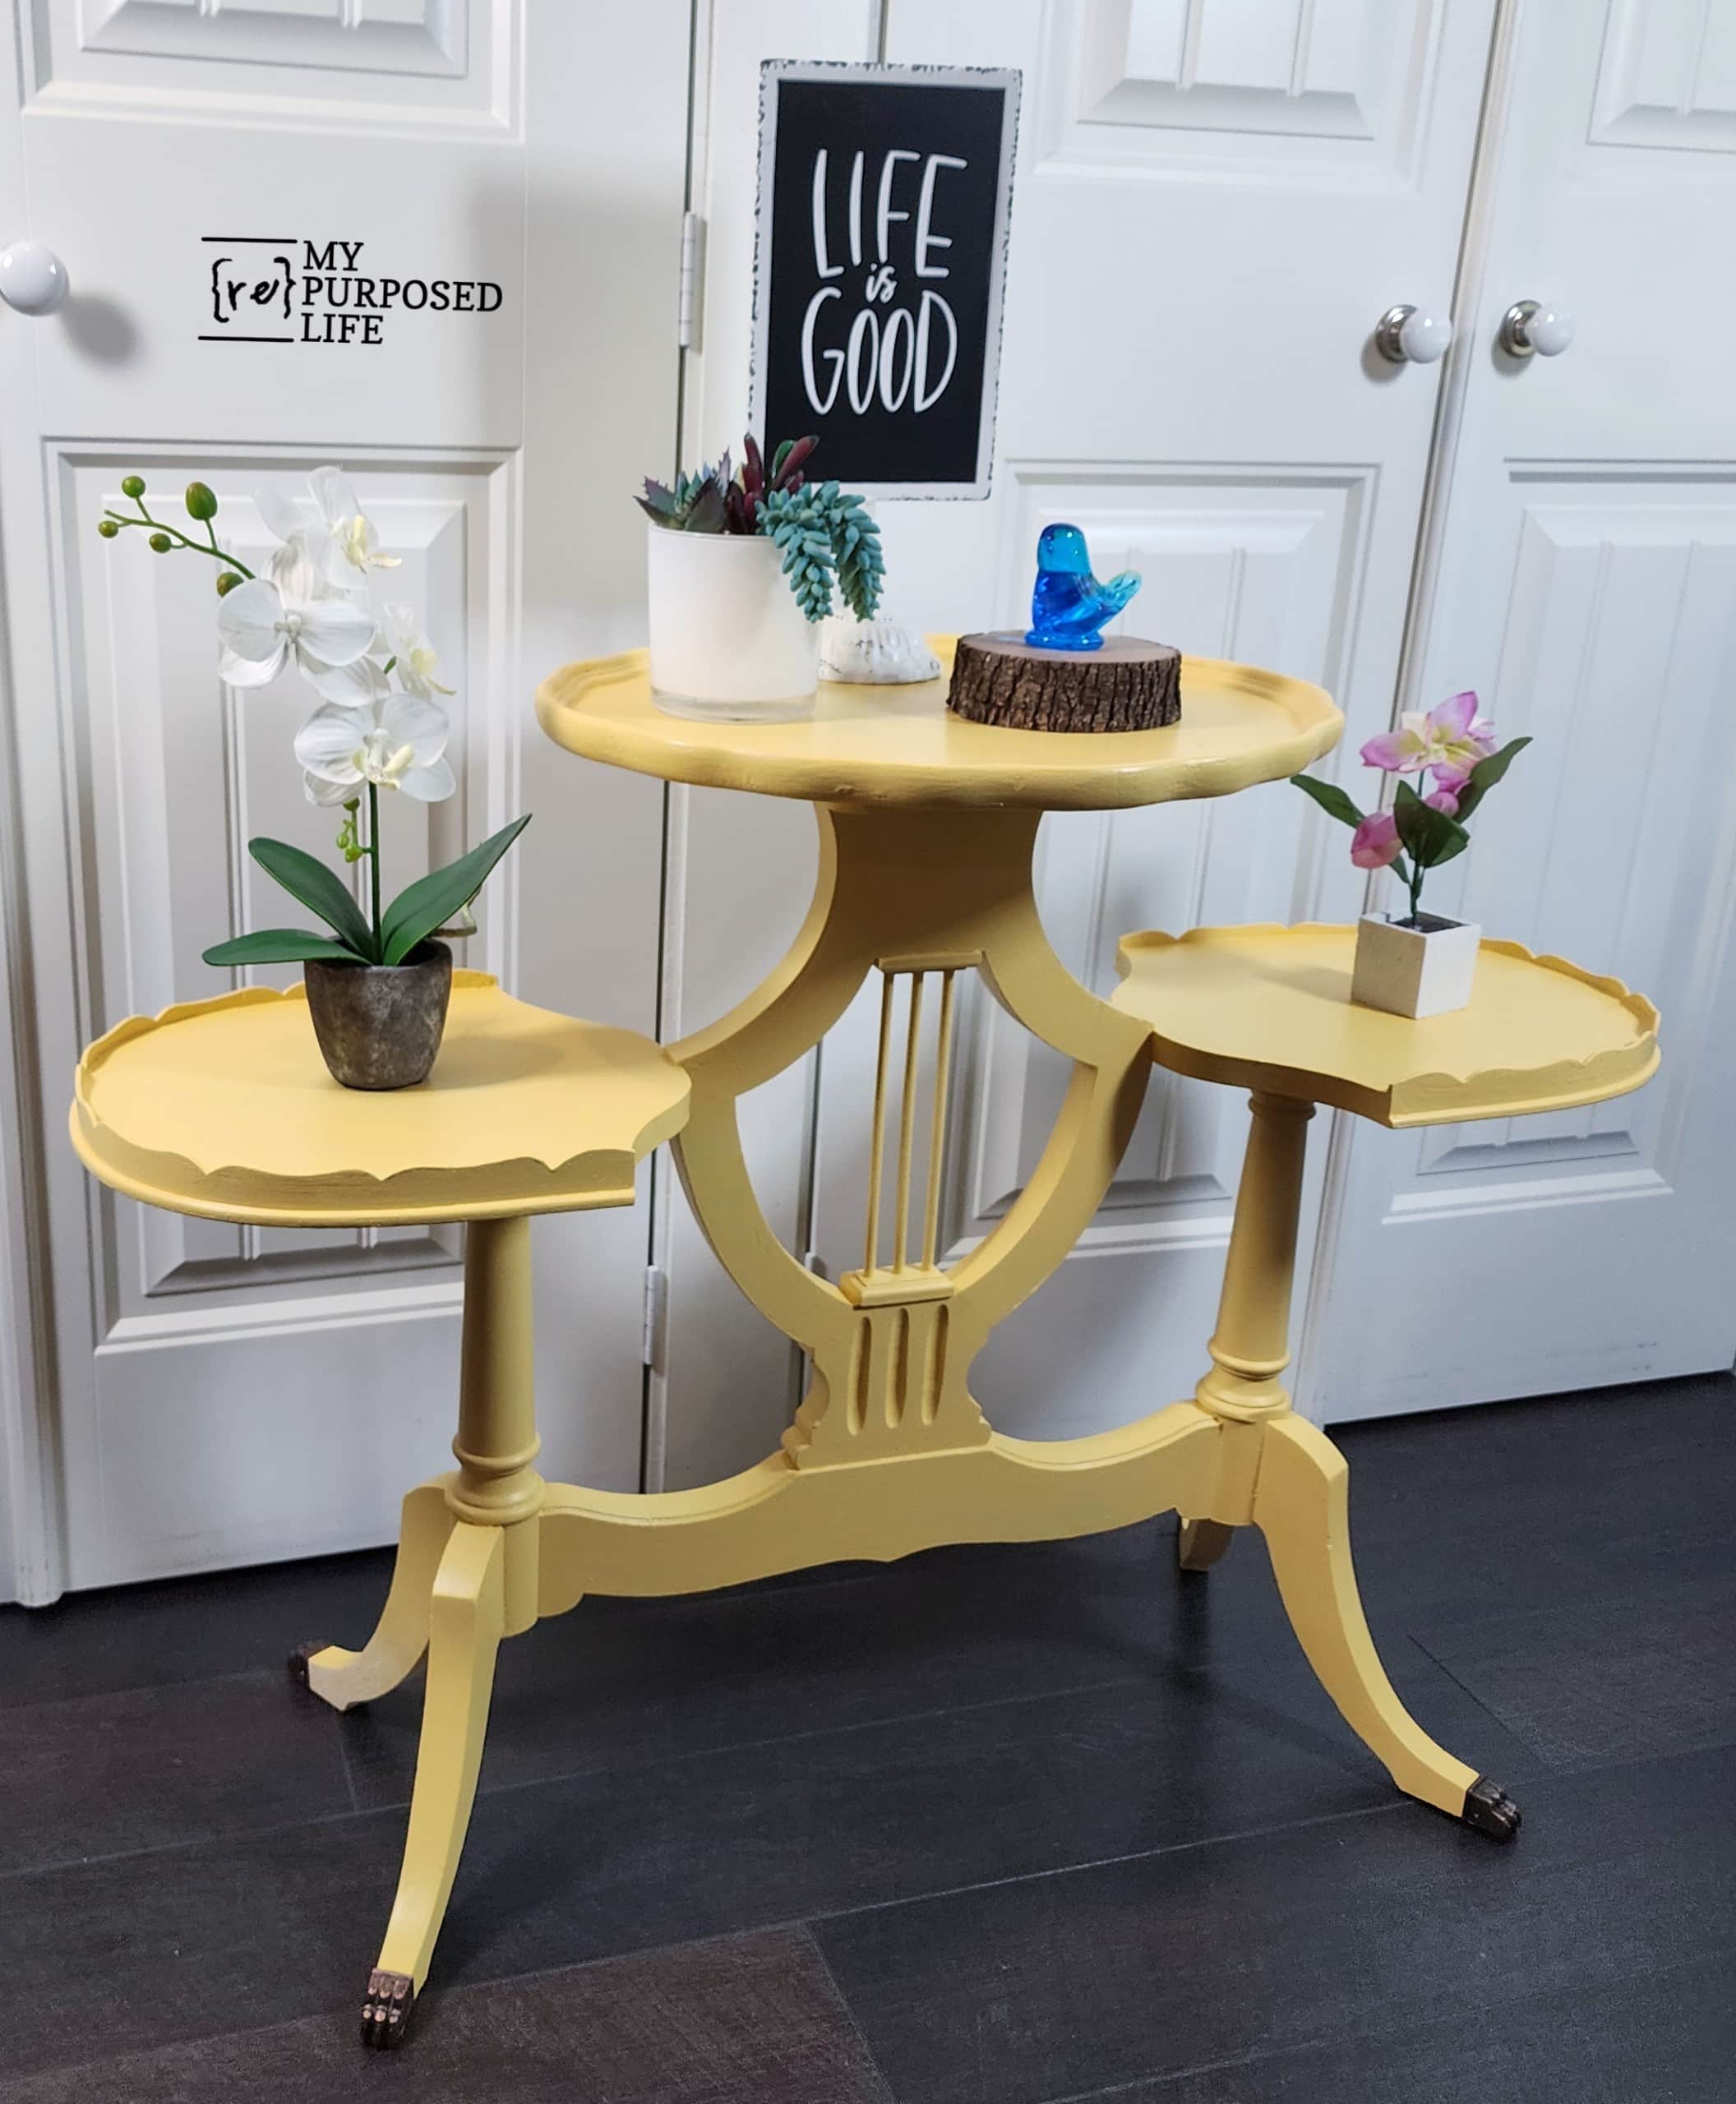
Yellow Three-tiered Table

While uploading this image, I realized this table belonged to Mrs. Mason. Mr. Mason built my house, and he and his family lived there for many years. My point is that it’s more than likely that this table was in this very house all those years ago.
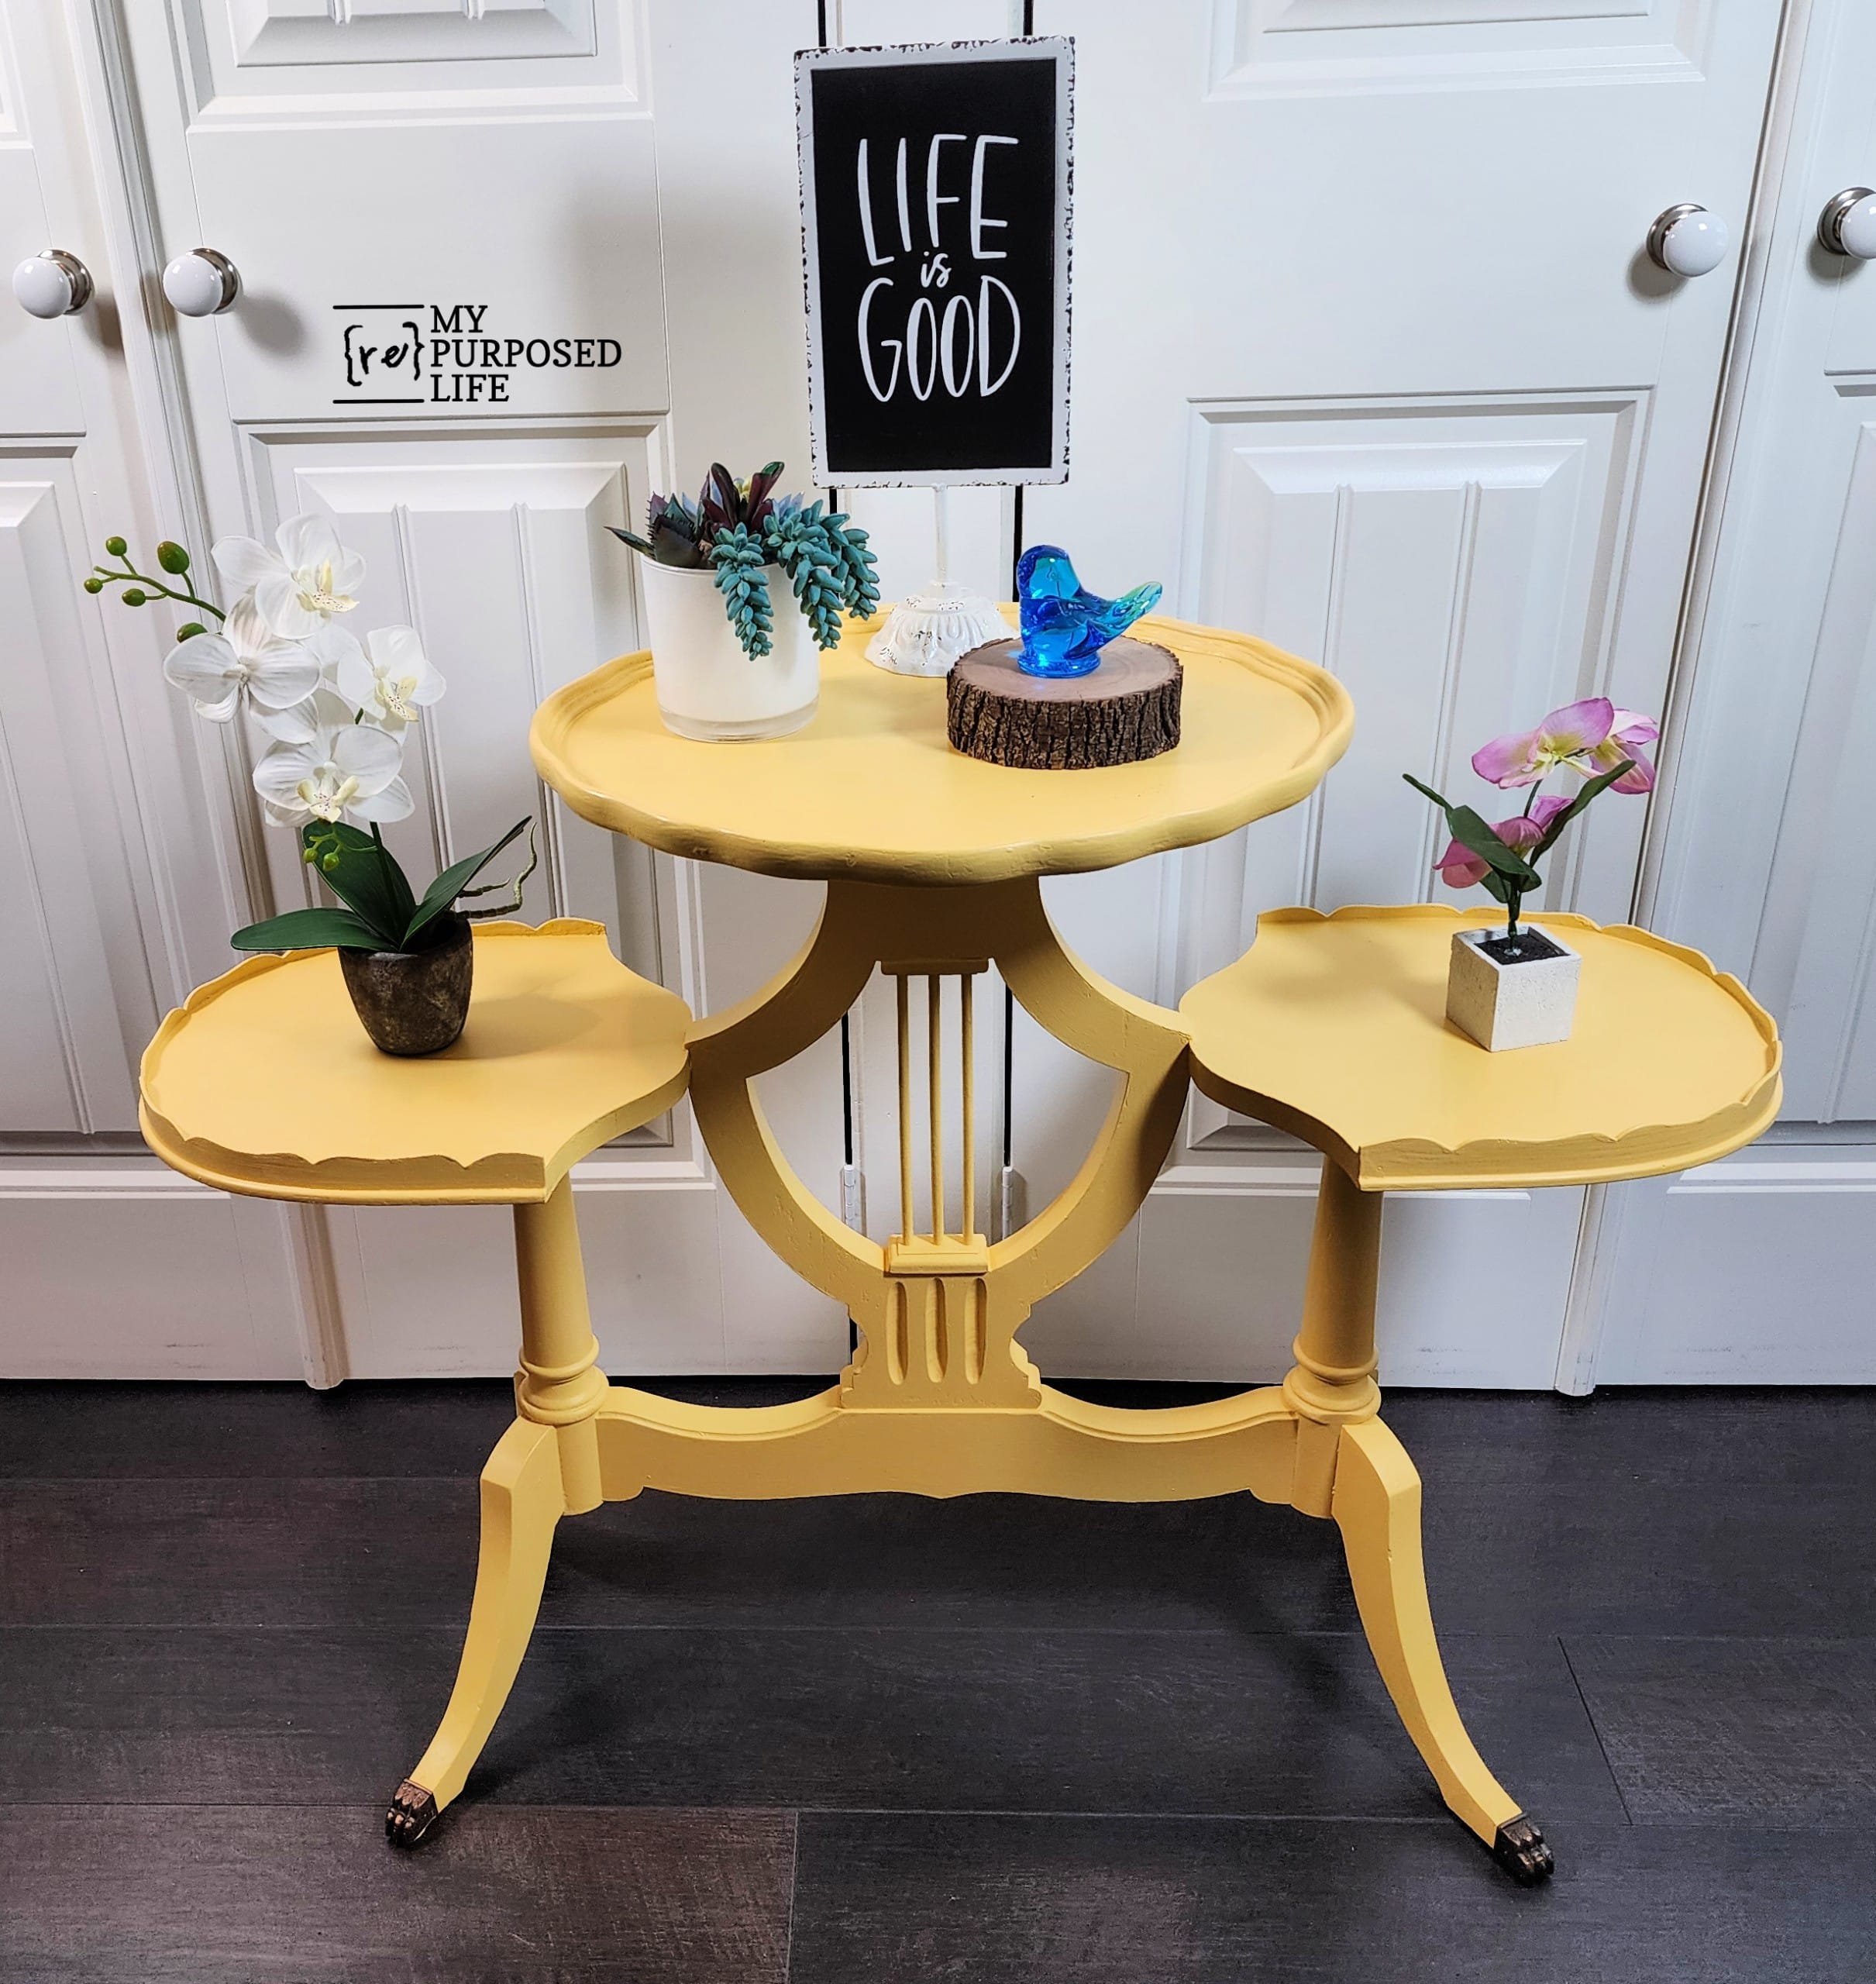
Doesn’t she look spiffy with her new shoes?
There’s another layer to this story. I decided to remove the toe caps and take it to my booth, knowing someone would buy it “as is” since it no longer had a broken foot.
I sent pictures of the table to Mrs. Mason’s daughter, who forwarded them to her niece. Shortly after, the niece messaged me and asked if she could buy her grandmother’s table. I went to my booth, brought the three-tiered table home, and placed the toe caps back on her little feet.
I hope you were inspired by this project. What did I learn? I learned that I can fix those little claw feet.
Now, let’s see what the makeovers from my FFU friends!
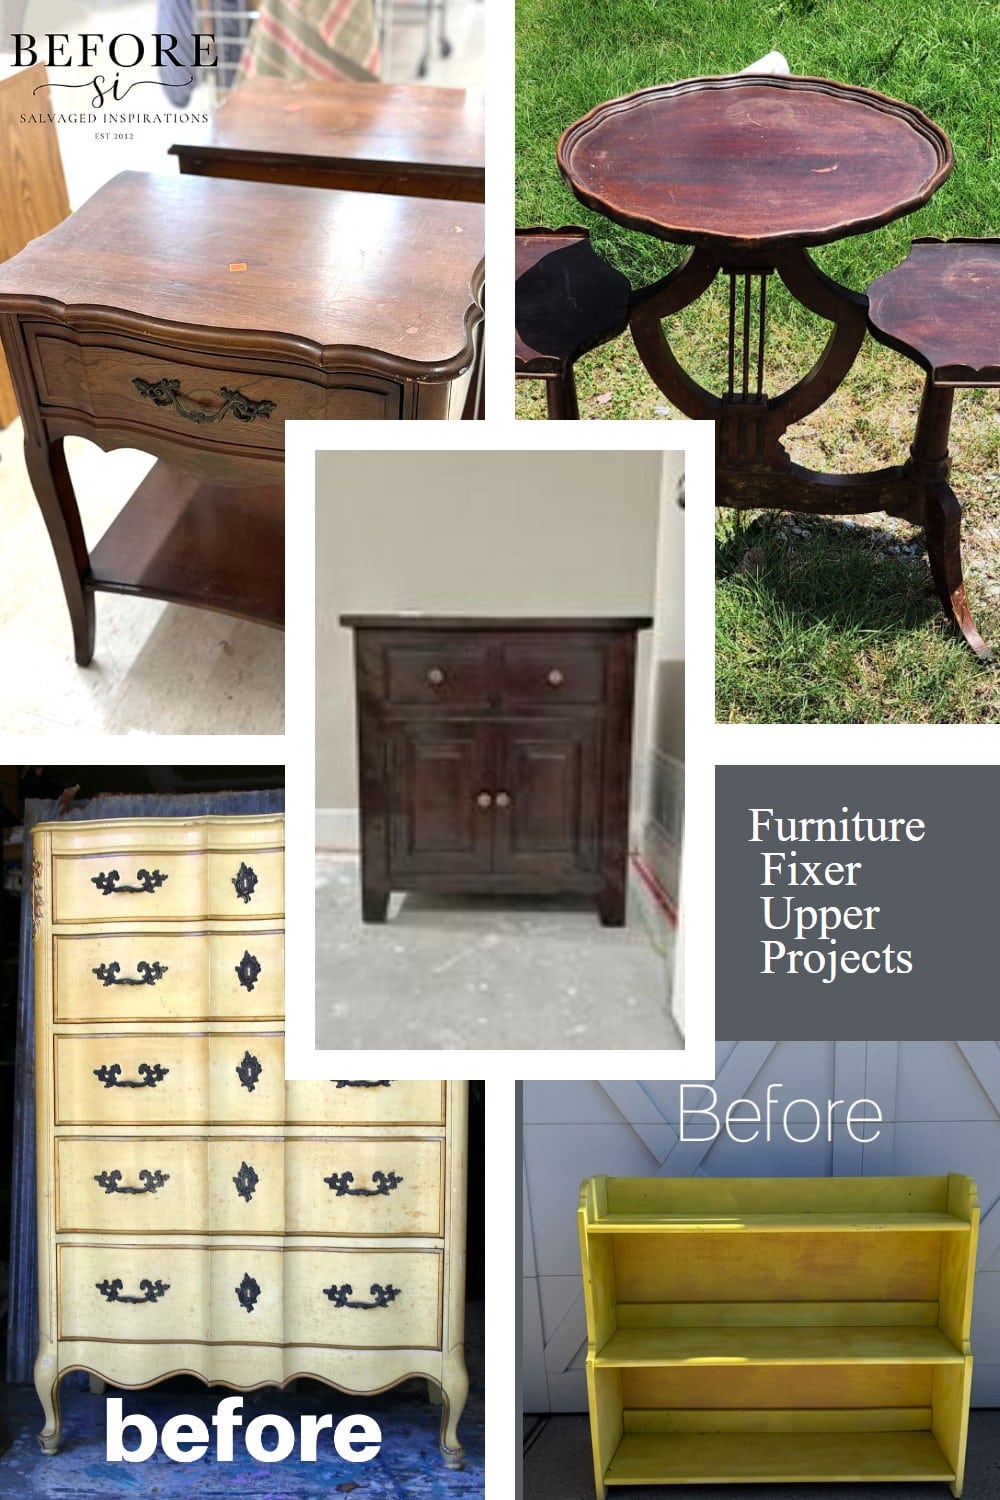
- Black Painted French Provincial Nightstand
- Three-tiered Plant Stand (you are here, thank you)
- Painting Rustic Furniture
- How to Paint French Provincial Furniture
- Yardsale Ikea Bookcase Makeover
I wonder which is your favorite?
Furniture Fixer Upper Tour Projects
If you love seeing old furniture get a second chance, be sure to visit more Furniture Fixer Upper Tour makeovers. Each project starts with good bones and ends with a fresh new story.
See more Furniture Fixer Upper makeovers here
You will find everything from small side tables to large statement pieces, all transformed by talented DIY bloggers who believe in saving furniture rather than replacing it.
I’m glad that the table went back to the family who originally owned it
Thanks! me too! The entire family is very near and dear to me.
gail
So beautiful! That is the perfect happy yellow. Not too bright and so warm. I love it! And I love the story that you shared. What a lovely way to honour your neighbour. And the fact that it ended up back in the family is the perfect ending. Thank you for sharing.
Anita,
Thank you for your kind comment. I agree about the color, and I’m not generally a fan of yellow.
take care,
gail
I’m so glad you rescued this beautiful table, rejuvenated it, and that it ended up with a younger member of the Mason family.
I really love what I do, and when my projects are loved by their new owners is the icing on the cake.
Thank you Cyndel
gail
The table is so charming, Gail. I tend to stick with neutral colors but I could see this in a sunroom or screened porch. What a great idea to use hot glue to create a mold and fix that foot!
Marcie,
Thank you! I usually stick to neutral colors as well, but as I mentioned, the neighbor was very near and dear to me and I wanted a happy color to remember her. I was amazed at how well the hot glue method worked for make a mold for the little foot.
What a great job on that little table, fixing that little toe was such a good idea and very interesting, job well done! How did you ever think to use shower cleaner on the feet?
Mary,
I wish I had known about this hot glue hack when I did the other little table. Even if you don’t have the toe caps, once painted, the repaired broken toe looks better after it’s fixed.
I’m really not sure why I thought to grab the shower cleaner. I used to use it when I help a friend clean houses after I lost my job. I remembered how well it worked on those really dirty faucets and such. 🙂
gail
So cheerful and I love her new feet/shoes! I’m not surprised that you were contacted back about it and it sold so quickly! Pinned! xo
Thanks for pinning Denise! This is one hack I’m going to file away because many times these little tables are missing their “toes”.
gail
I loved the yellow table AND will save the instructions for making the mold and a new replacement piece.
Thank you so much Kathleen! I’m happy to share this hack with my friends.
gail
Gail, you did such a beautiful job restoring this fun piece and I love the story behind it. How perfect that your neighbor’s granddaughter ended up with the table. That was a beautiful bit of serendipity. 🙂 Thanks for sharing.
Allita,
I am so happy you appreciated the story behind this sweet little table!
gail
I love the plant stand AND the story! Great job!
Thank you Cyndi. I appreciate you stopping by and taking the time to leave a sweet comment.
gail
This is such a fun transformation for the table! So cheerful!
Thank you Natalie!!I love a good trash to treasure story.
gail
I absolutely LOVE how this turned out, Gail! It might be my favorite project of yours, and I love the hot glue mould…genius! So glad it is back with a family member who will cherish it! XOXO
Christy,
awwww, thanks for your very sweet comment. I love all the members of that family. The grandmother was “one of a kind” for sure!
gail