Welcome Porch Post
As an Amazon Associate, I earn from qualifying purchases.
Have you ever wanted to make a welcome porch post sign? I’ve had this very tall former lamp for several months now. It’s been in the front of the garage, so every time I opened the garage, I felt as though it was mocking me for ignoring it. I just didn’t know what it wanted to be. I posted a before picture on Facebook and got over 108 comments before Christmas. Many of the ideas were holiday related. Well, that ship sailed, so it was time to figure out a new plan!
Welcome Porch Post Tutorial

Please SAVE & SHARE on Pinterest!

Here is the wooden floor lamp that I got from my cousin Terry. How did I turn it into a welcome porch post? It was oh, so easy after I had a plan.
*this post contains affiliate links, read more here*
Homemade Chalk Paint Fail

If you’re a regular around here, you know I’ve been making my own DIY Chalky Paint Primer for years! This my friend is how NOT to mix homemade chalk paint. There are some good reasons why this went so wrong. 1) I’ve been sick for weeks 2) I was in a hurry 3) It was really gloomy and chilly outside 4) I wanted to get back in quickly.
What did I do wrong with the homemade chalk paint? I poured red oops paint into my paint cup. I had forgotten to take warm(ish) water outside to mix with the plaster of paris. Because it was cold outside, the water from the hose would not be warm enough. So, I poured the POP right into the paint cup. BAD idea!

This is what happens when you spray THAT paint through your paint sprayer. Not even a Super Finish Max can make bad homemade chalk paint look good.
What’s a gal to do? Go in and call it a day.
How to Salvage a Bad Paint Job

To try and fix the problem the following day, I used a sanding sponge to lightly sand out the lumps and bumps of the plaster of paris. Since I was sanding, I decided to do some distressing of the paint. Finally, I wiped off the entire lamp with a damp rag.
Plan B

Let’s try this again. I’m still sick, and it’s still gloomy and cold, but I learned my lesson the previous day.

Following my regular way of painting, I poured the paint into the paint cup, mixed some POP with water, then poured that through my mesh strainer. I didn’t strain the paint because it was a brand new can of paint.
Move Wet Paint Projects on a Furniture Dolly

It was about to rain, the lamp wasn’t dry yet. I carefully lifted it onto a small furniture dolly and rolled it into the garage for yet another day. For an easy project, this sure is dragging on, isn’t it?

Still sick, still cold outside and we’re on day number three. I brought the welcome porch post lamp into the kitchen and gave it a little more distressing with an emery board. If you’ve never used them for distressing, I highly recommend it. So easy!
 I braved the cold and headed outside to use my favorite smoked glaze to tone down the red a little bit. The glaze is thin enough that the distressing would show through. This old chip brush is perfect to apply the glaze. Do you see how the ends are sort of feathered? That makes it apply with a dry brush effect. See How to Glaze Painted Furniture (video).
Glazed | Distressed Red Paint

Do you love it as much as I do? You can see how the Smoked Glaze really tones down the bright red paint.
How To Make Welcome Sign & Bracket for Hanging

While shopping online for a bracket to hang a welcome sign, I quickly realized they were definitely out of my price range. The cheapest sign holder I could find was $28.

Where did I find my supplies to make a sign bracket? The Dollar Tree! I picked up a plant bracket, a plant hanger, and a 2 pk of artist canvases.
Drill Holes in Plant Bracket

This is my first attempt. I ended up doing two brackets. On the second bracket I learned that if you start your drill VERY slowly, the bit will stay where you want it to be. On this first try, the bit walked a little and wasn’t centered. But, even so, the sign hangs perfectly fine.
Stenciled Welcome Sign

I used Chalk Paste and a transfer from The Junky Chalker Shop on a scrap piece of wood. One length of chain from the plant hanger was more than enough to hang the sign.

After the border dried, I added the word welcome.
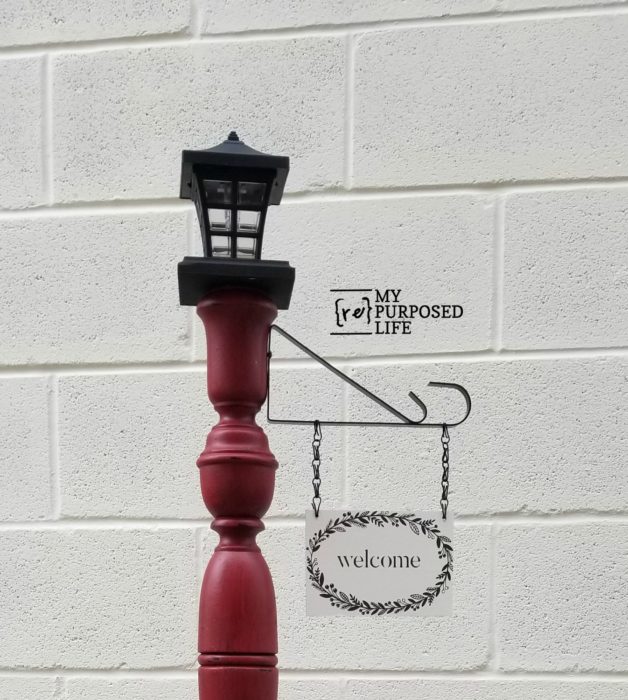
Welcome Porch Sign Solar Lantern

In order to get this Dollar General Store Solar Lantern to work, I had to make some adjustments. I used a routed piece of wood that was left over from my DIY Picket Fence. This was in the design stage, seeing how it would work. At this point, I had removed the handle and base of the solar light.

Taking the base off was easy after I removed one small screw.

Since the screw no longer held the reflector in place, I secured it with hot glue.

I marked the placement of the lantern on the base and also secured it with hot glue.

The last step was to secure the wooden base to the top of the lamp base.
Attach Sign Bracket to Welcome Porch Post

To make attaching the sign bracket easier, I pre-drilled the hole.

This job called for a regular ole screwdriver, NOT a power drill.
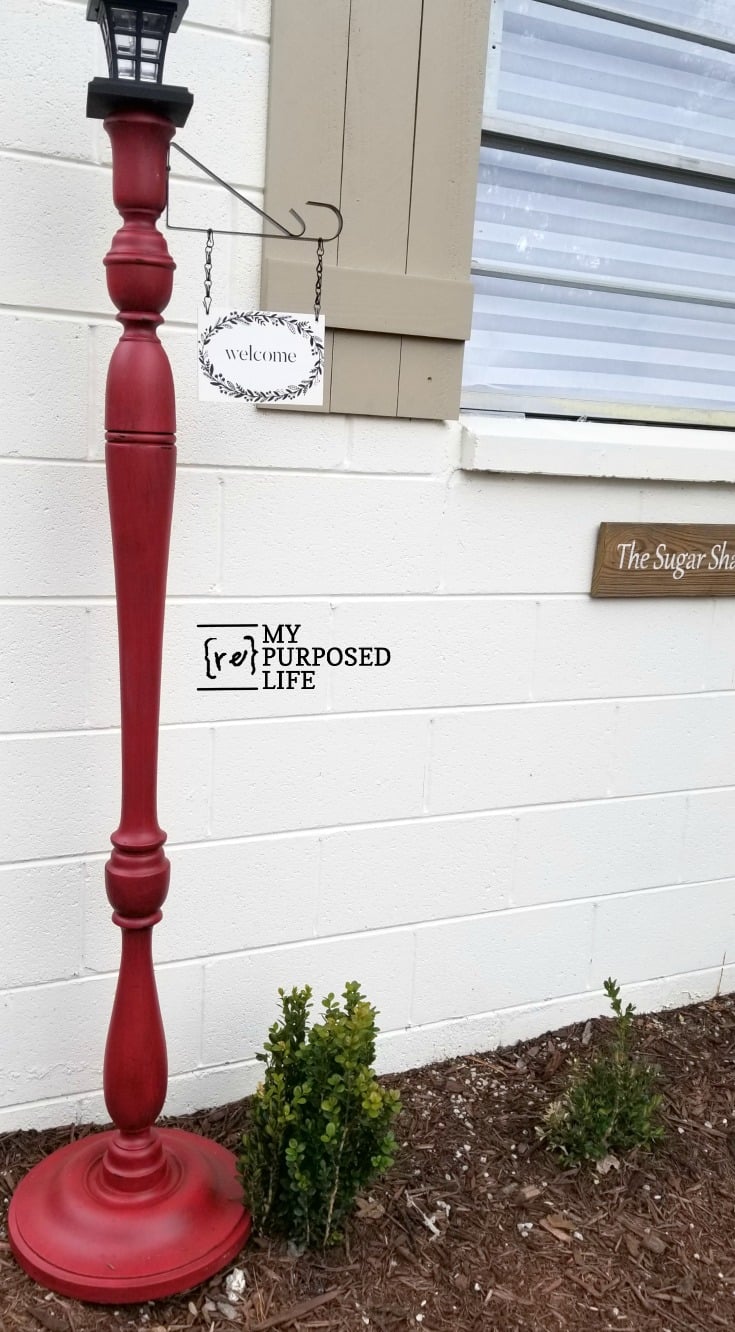
The new welcome porch post makes me smile! I’m so happy I was able to make the bracket for less than $2, rather than purchasing one for $28.
I did a Facebook Live showing how I made the sign and the bracket. The welcome porch post is already in The Sugar Shack.
I would love for you to save & share this on Pinterest!
What would you have put on the top?
gail
See more repurposed lamp ideas here.
Great job. I bought a box of exterior finials at a garage sale. I think they are wolmanized lumber. They are about 1/4 larger than indoor finials and have used them on several projects. They might work for this project also.
Thank you Vicky!
I had to google wolmanized lumber. 🙂
That’s awesome! I love buying architectural salvage pieces at garage sales and junk stores. I may not need them at the time, but I’ll hold on to them until I need ’em!
Thanks for being so transparent with your good and “not good yet” results!! I love how you used the plant hanger. I also used these same plant hangers as shelf brackets for a border shelf around the top of my bedroom. They would also be great used in a layered window treatment.
Sara,
I love that you appreciate my honesty. I always try to keep it real here. 🙂
you have great ideas for using those plant hangers and brackets. Thanks for sharing!
gail