Wind Chime Makeover | Paint & More
As an Amazon Associate, I earn from qualifying purchases.

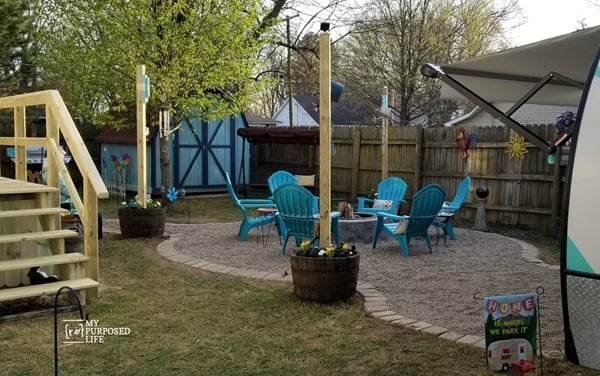
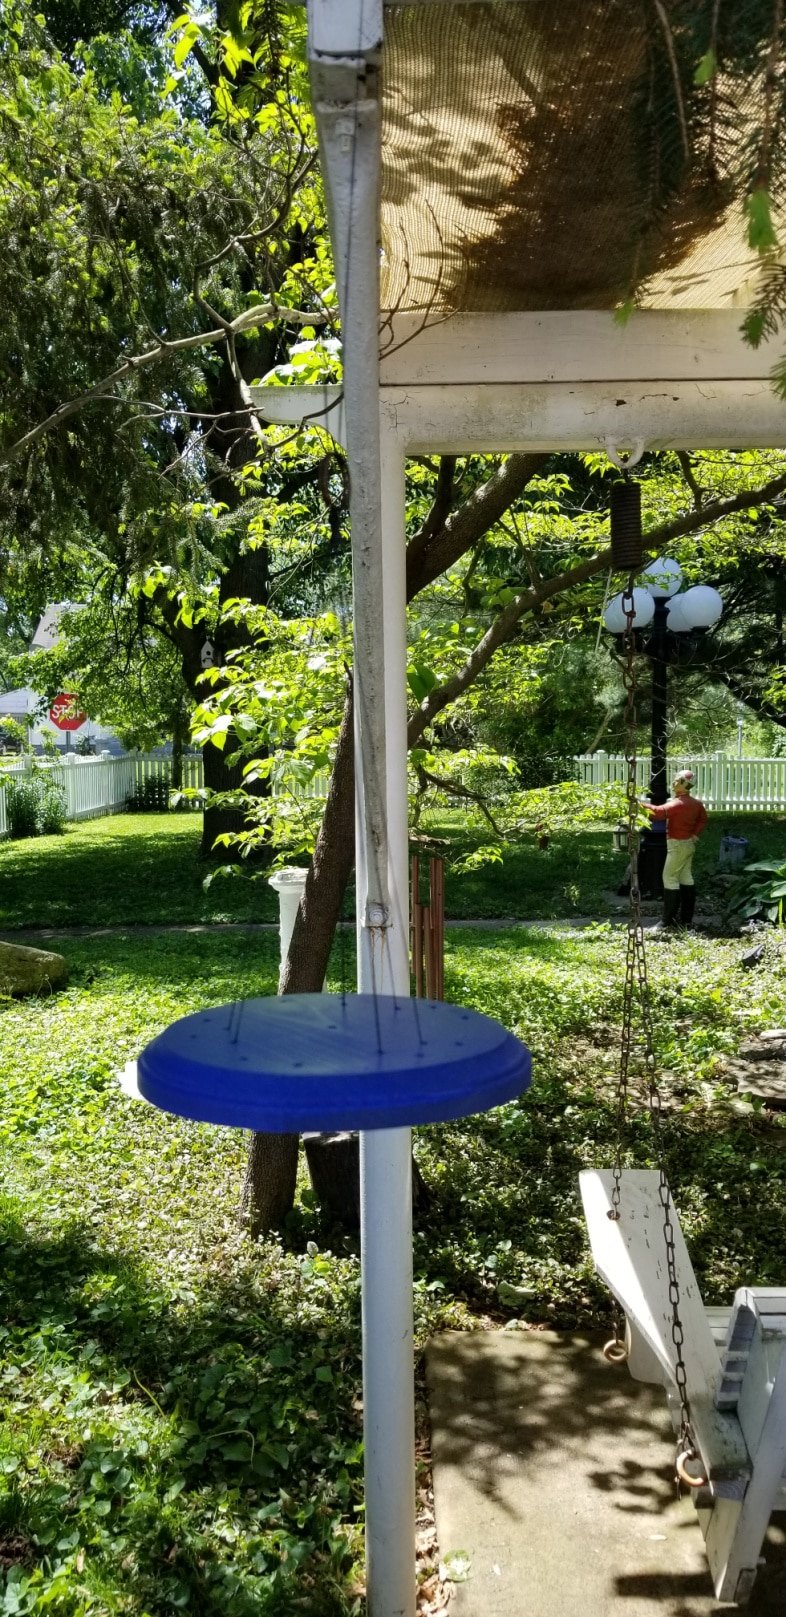
It’s my favorite time of the month! It’s Thrift Store Decor Wednesday! I’m doing a wind chime makeover. I have an empty bracket on a Texas lamp post in my backyard camper retreat.
Visit the My Repurposed Life Amazon Store to shop my favorite items.
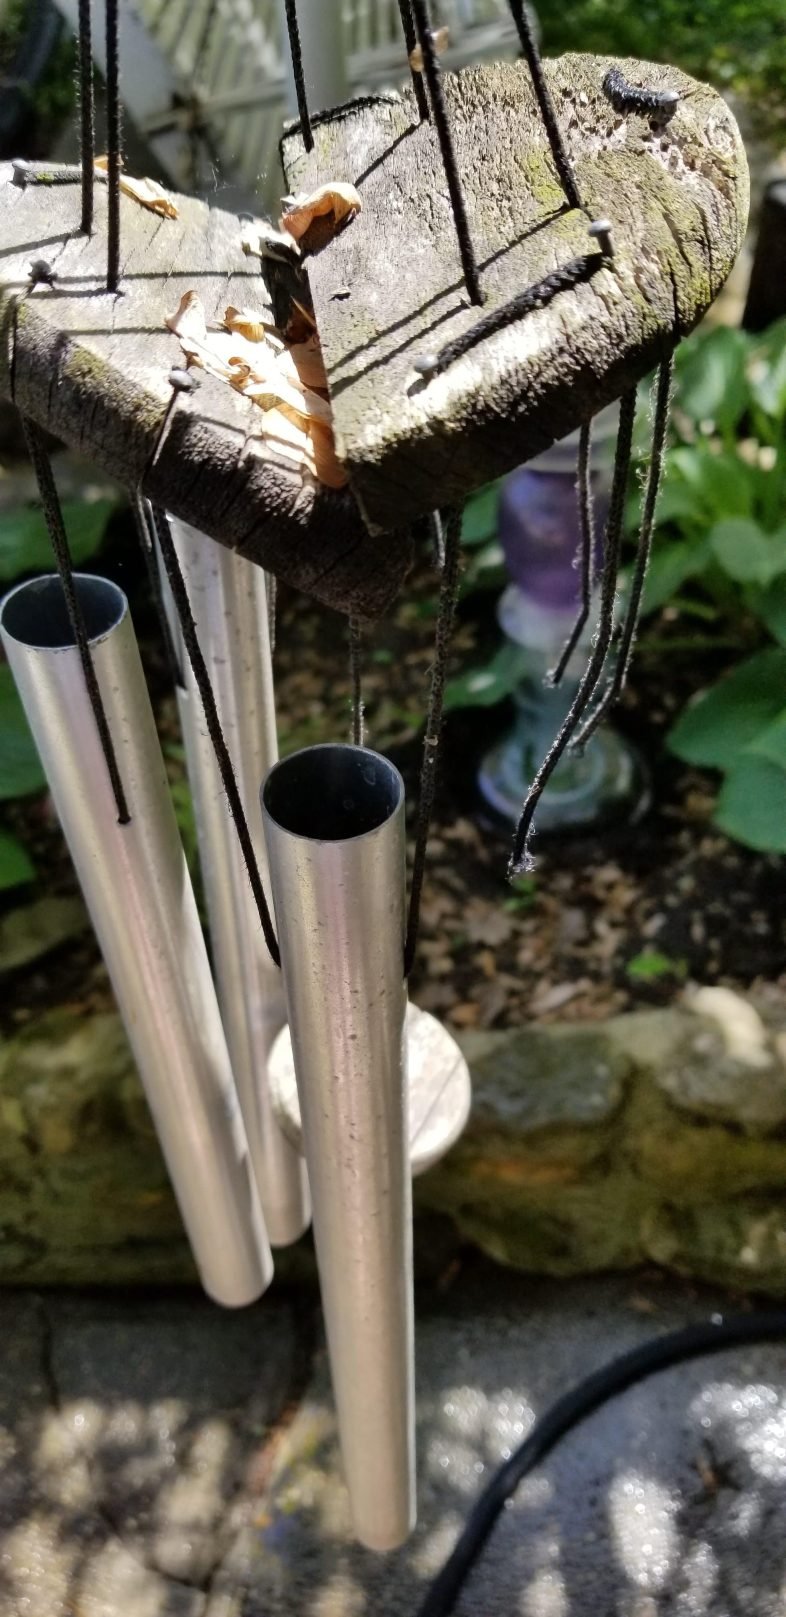
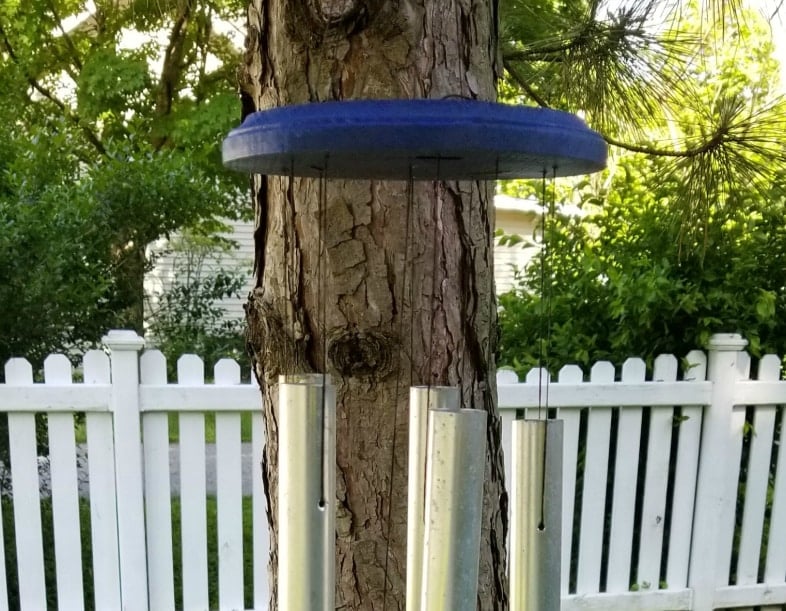
Look at how sad this wind chime is! It definitely has seen better days. The key to repairing a wind chime is to look at how it’s made before you disassemble it. Take pictures! You may think you will remember, but I guarantee you, you will be referencing the photo on your phone as you stumble through the assembly process. Oh wait! That’s just me? ![]()
NOTE: See the small tacks in the holes? Keep those!
How do I fix my wind chime?

- Rusted O- Ring
- Broken top piece
- Tubes missing because the string broke
- Clapper is so/so
- Windcatcher is missing
Fixing a wind chime isn’t that difficult. I repaired and refreshed a wind chime a few years ago. So this isn’t my first rodeo. I love wind chimes and have several in the front yard. Recently, I hung one of them in the backyard makeover, but I need one more back there. I could buy a new wind chime, but why should I when I can fix this broken wind chime?
Use a Craft Wood Base

Because this wind chime top was round, I decided to stick with a round shape. I had this round wooden base in my stash, and it was nearly the perfect size—good enough for me!
How to Mark Holes in the New Wind Chime Top
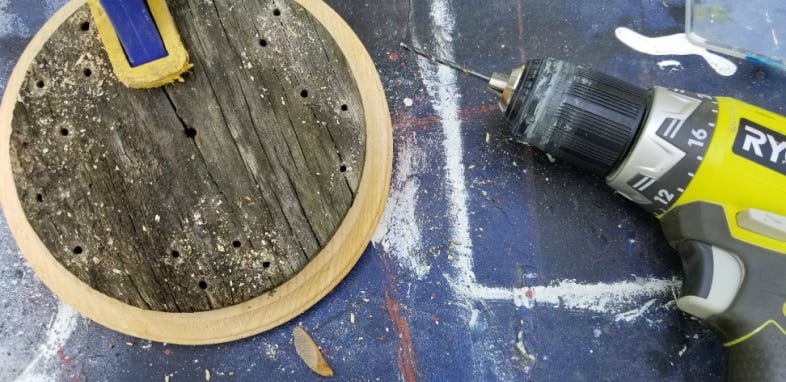
While trying to figure out how to mark the holes, I decided it would be best to clamp the broken pieces onto the new top of the wind chime. You can see that I drilled right through the existing holes on the broken top.
Use Wax Thread to Restring Wind Chime
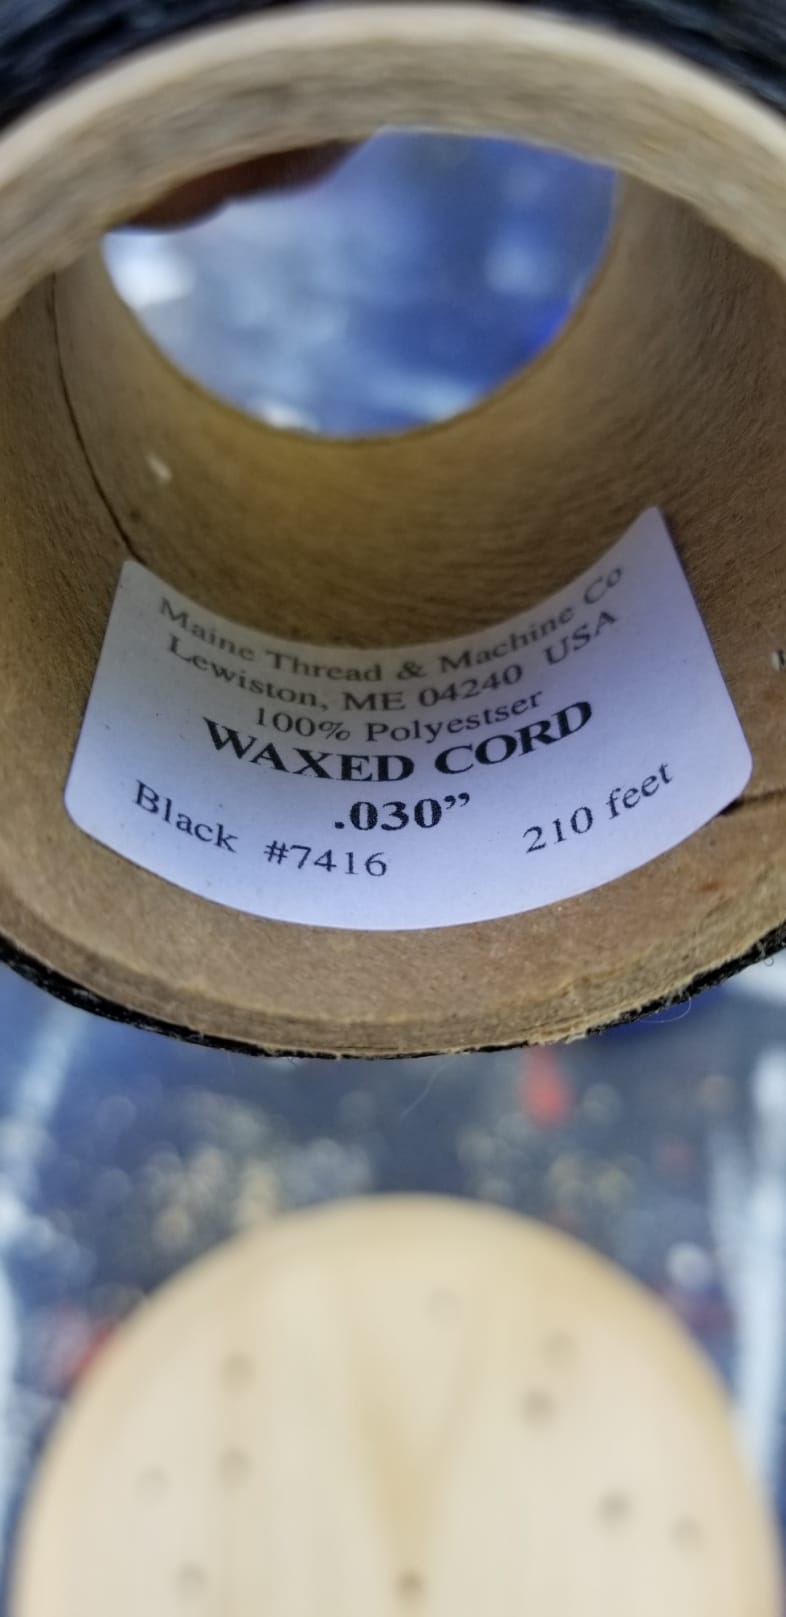
This is the wax cord I used to repair my other broken wind chime. I bought it on Amazon.
Spray Paint Wind Chime Wooden Parts
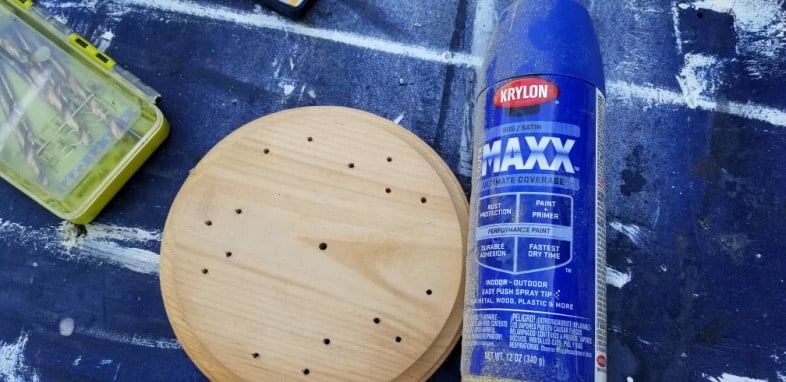
I stained the other wind chime I repaired, but I chose to spray paint the wooden parts of this one. Looking at the wooden top, can you see how confusing all those holes can be?
Replace Top String
The first step of restringing a wind chime is re-establishing the top string. After doing this, I hung it up to make it easier to restring the tubes.

For this step, I used three pieces of wax thread, inserting each one up through the bottom in the three pairs of center holes. Thus, each pair of holes will have two ends coming up.
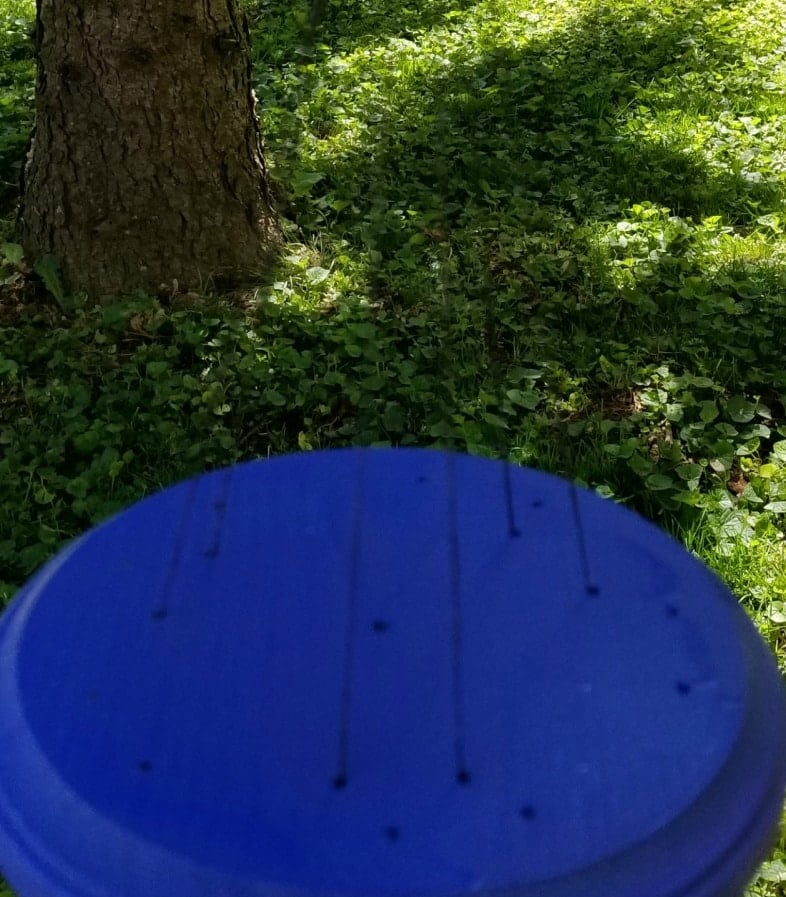
Grabbing those six ends, I tied, knotted, and secured it all to the O-ring.
Use Small Tacks to Secure Wax Thread on the Wind Chime
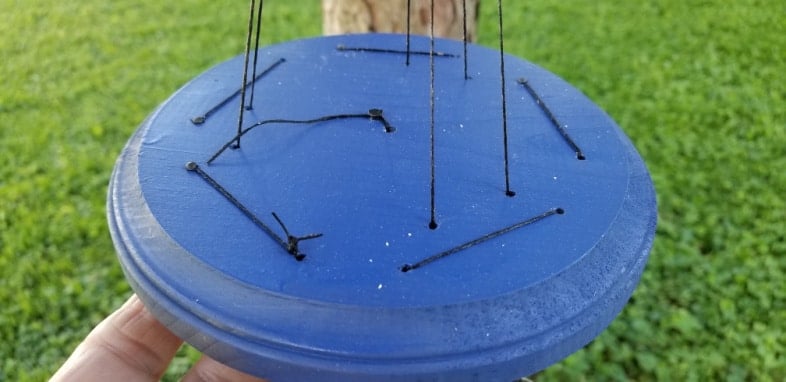
You really need three hands while stringing the tubes, so I didn’t take any in-progress photos. Remember those tacks I told you to keep? They are very helpful to hold the wax thread in place while you’re stringing and even in the future. It’s one continuous string; there could be some shifting if you don’t hold the thread in place.
What Order do the Tubes go?
Try to keep all the tubes about the same distance from the top. Remember when you pull one down, another will go up! I’m not sure of the exact order the tubes should go on a wind chime. I started with the longest tube and worked my way around to the shortest tube. You will see pitting of the tubes. I chose not to paint mine, but you could paint yours like I did on the one I did years ago. Tips for painting wind chime tubes here.
Wooden Pieces of a Refurbished Wind Chime
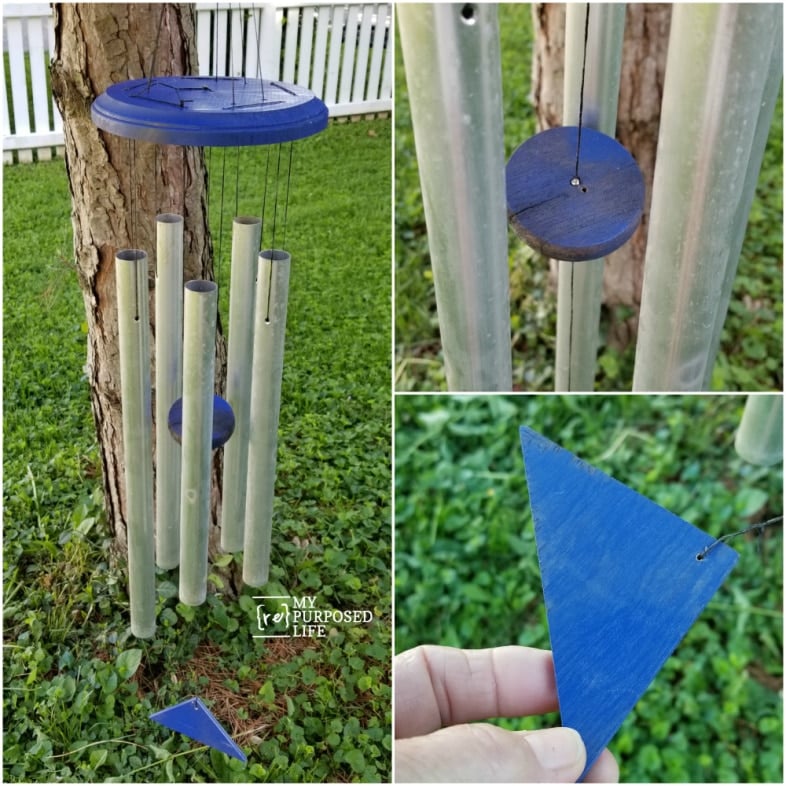
Here, you will see that the clapper was the only original wooden part I re-used. I replaced the top of the wind chime and the wind catcher. For the wind catcher, I used a scrap piece of thin plywood I cut on the table saw in a triangle shape.
Look closely at the clapper, and you will see I used a screw to hold the center string in place. For the top of the center string, I used a small tack to secure the wax thread and tied a knot in the bottom at the wind catcher.
I used about 5 yards of wax thread for this entire project: 3 for stringing the tubes and 2 for the top and center strings.


Now it’s time to visit my friends and see their awesome after photos. But, please, will you pin my wind chime before you go? Thanks!

Accent Table Makeover My Uncommon Slice of Suburbia
Wind Chime Makeover My Repurposed Life
Re-Trending from Country Decor to French Farmhouse Sadie Seasongoods
Metallic Spray Paint Makeover Petticoat Junktion
Breadbox Repurposing House of Hawthornes
DIY Nautical Oar Domestically Speaking
Chandelier to Lantern Makeover Our Southern Home
Vintage Wooden Bowl DIY Refresh Restyle
gail

I have a big box of pieces and parts of wind chimes that have come apart over the years. I had trouble figuring how to restring them, so I more or less gave up. You have inspired me to find that box and get to repairing at least of few of the chimes. Thanks!
Jean,
That makes me so happy to hear that you’re going to revisit the project of “saving the chimes.” Good luck!
gail
What if your missing a chime?
Anita,
I was missing one, and I searched the bushes to find it. Are you sure it’s not somewhere in your yard? I guess if you have 7-8 tubes, missing one wouldn’t be a problem. You would just need to get creative how you space them out.
gail
This was so inspiring to read! I have wind chimes that were beloved by my late mother. They are in the same weathered condition as the ones you featured on your page. I have been holding on to them for years with the hope of one day restoring them. This has encouraged me to give it a go. Thank you.
ohhhh I’m so happy you found my tutorial. I’ve done a couple more since this one. I just can’t bring myself to every throw one away. 🙂
wishing you lots of luck getting your mother’s wind chimes up and running again.
gail
We have about a dozen very expensive Woodstock Windchimes, some as tall as me, and after being heartbroken at seeing them fall apart one by one and not having the means to have them repaired for many years, maybe this page will help my husband to find the time to finally restring the few remaining ones we have.
I truly hope you do get your wind chimes restored!!!
gail
This is a great idea! You truly have a fix for everything.
hahaha I’m sure not for everything! LOL But I hate to throw things away if they can be saved, as in the case of this wind chime.
thanks Christy!
gail
Oh I love wind chimes too. There’s just something about hearing the wind make music in the garden that always makes my soul smile. Love your tutorial on how to redo one that’s seen better days They’re totally worth saving
Yay! I love to know I’m not alone in saving the wind chimes! 🙂
gail
this is super cute and I love that pop of blue
I have so much spray paint, I literally just grabbed the first color I could. 🙂 Blue does happen to be my favorite color.!
Save the wind chimes!
gail
Those had really seen better days! What a great save!
Yeah, this wind chime was totally neglected for way to long. I have one more I need to do. It’s lost it’s wind catcher….
I love hearing wind chimes – I need to keep my eyes open for some at the thrift store.
Me too Maryann! I bought a really huge (expensive) one in Gatlinburg a few years ago and I can hear it while I’m sitting on the couch. I love it so much! The other smaller ones I hang from trees, I suppose that’s why they don’t weather very well.
gail
Wow, that’s sort of amazing. I have a couple old ones in my basement that have seen better days, I’ll have to drag them out and give them a little face lift! Thanks for the tips!
hahaha Thanks Pam! Someone on the fb page said “I thought it was mine”. I guess a lot of us have geriatric wind chimes!
gail