Wooden Spindle Sign For Christmas
As an Amazon Associate, I earn from qualifying purchases.
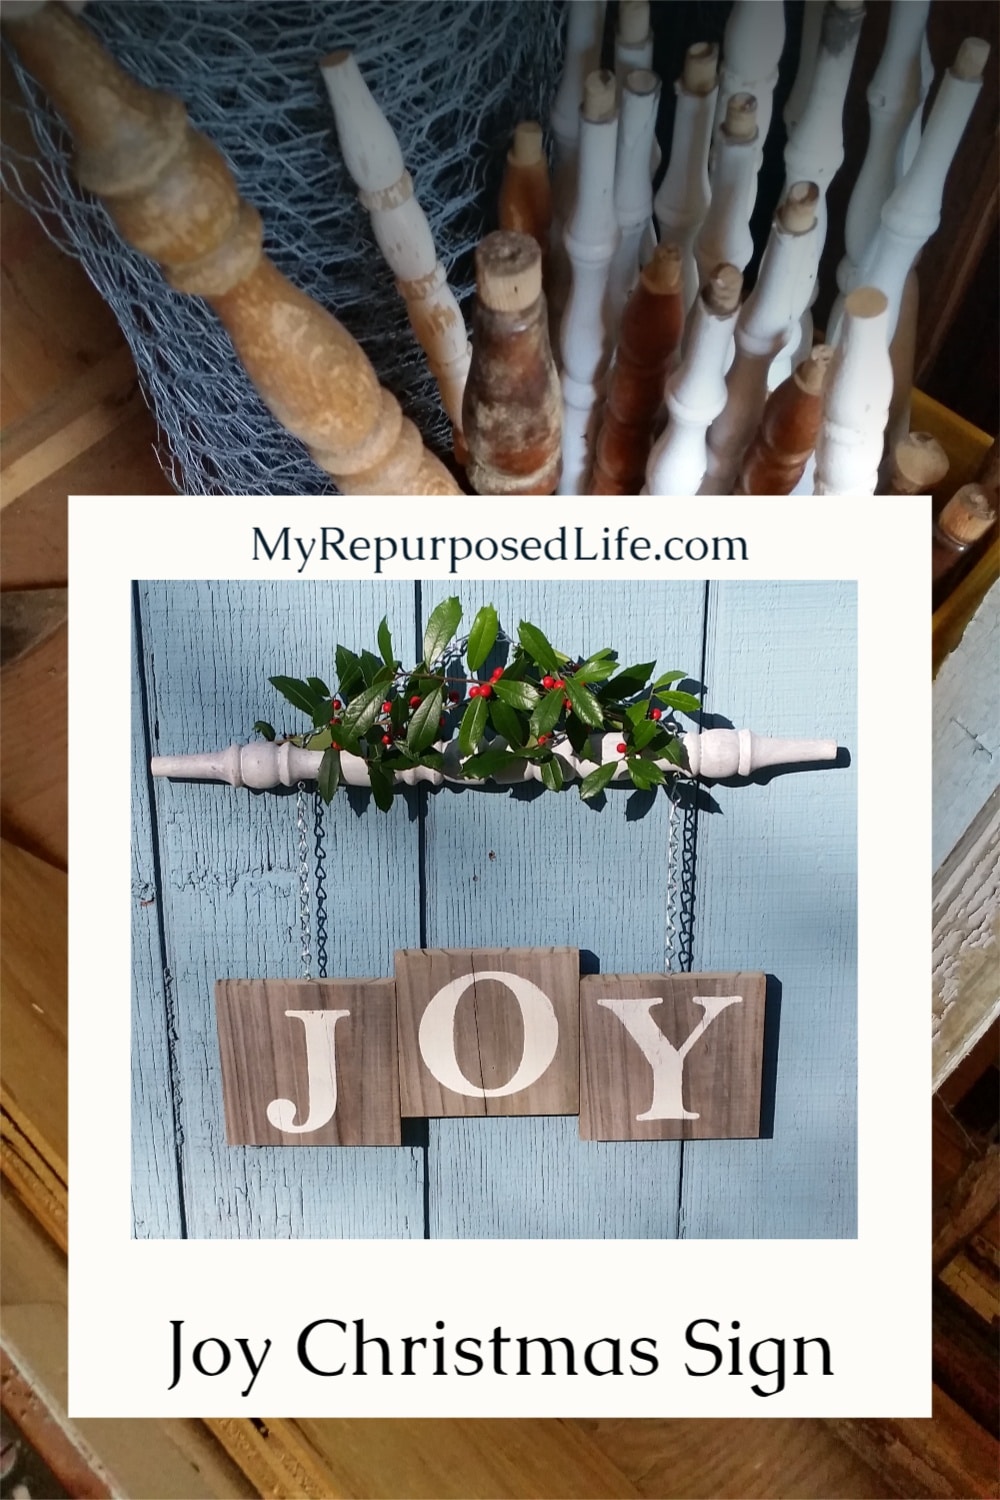
I made a wooden spindle sign for Christmas! It’s a small wooden sign made from reclaimed fence boards and an old spindle. It’s short and simple—to the point—JOY!

I recently showed you my stash of spindles when I made the DIY Christmas Lanterns. That stash of spindles is in the garage, and this smaller stash of random spindles is stored in the barn/shed. Many of these spindles are reclaimed from old cribs. I think the one I used for this spindle sign was from a chair.
Items Needed to Make a JOY Wooden Spindle Sign for Christmas

I love using reclaimed fence boards for signs. They are perfectly weathered and gray.
Visit the My Repurposed Life Amazon Store to shop my favorite items.
Make Stencils for Joy Sign

This started as a very simple project using these pieces. I love using contact paper as a stencil. I transferred the entire piece to each board and then used that hook to pick out the letters. If you use tweezers or dental tools, I highly recommend using this hook tool instead. You can also print letters on your printer to trace and paint them.

I use Martha Stewart Foam Pouncers on all of my stenciling projects.

Blotting the excess paint onto the contact paper backing gives a smoother stenciling application.
Remove Stencil Before Paint Dries

It is best to remove the contact paper while the paint is still wet. Even on this rough wood, the contact paper has minimal bleed.

Can you see why I love stenciling this reclaimed wood? The white paint shows up perfectly, making it ideal for my wooden spindle sign.
How to Paint a Spindle

Generally, I use my Homeright Finish Max to paint spindles. But since I just had one to work on, I used a rag dipped in the stenciling paint to wipe the paint all over the spindle.
Attach Weathered Fence Boards to Scrap Plywood

Grabbing a piece of thin plywood from my bucket of scraps, I used my Kreg Multi-Mark tool to ensure uniformity.
A Nail Gun Makes This Wooden Spindle Sign Project Easy

My nail gun quickly attached the reclaimed fence boards to the thin plywood. Then I flipped it all over . . . .

oops! How the heck did THAT happen?
I took apart the wooden spindle sign and redid it. WRONG again! Can you believe it? How hard can this be, people? In my defense, I was distracted by several phone calls from my friend who was Christmas shopping and couldn’t decide what to buy for a “dirty Santa” gathering.
DIY Joy Sign

Much better! It’s time to attach the Joy sign to the wooden spindle.
Being a little math challenged, this self centering tape measure makes it really easy to find the center on any project I’m working on.
A Nail is Handy to Start a Pilot Hole

I used an old trick my mom taught me to add small eye hooks to the wooden signs. Using a nail to make a small hole will allow easy installation of the hooks. Using said nail to “twist” the nail into the hole saves fingers. ![]()

If you look closely, you will see that I marked the spindle to match the spot on the signs. I will also place another eye hook on the spindle.
Attach Small Chain to DIY Spindle Sign
I added eye hooks to the bottom side and top of the spindle.

Here is the Joy spindle sign hanging on the shed to ensure it hangs straight. I used linked chain to hang it, but you could also use jute or rope.

Holly branches help spruce it up a little on the front of the diy picket fence.

DIY wooden spindle sign
It resides on my front gate until I can take it to my booth at Vendors’ Village. I love simple Christmas décor projects that work both inside and outside, and this Joy spindle sign fits the bill perfectly!
gail
If you love this wooden spindle sign, check out my Bless The Food Before Us Sign.
Bonnie,
I buy a large roll of contact paper and I cut it all the way down the middle to make two 9″ rolls of stenciling material. I set my Silhouette to a speed of 10 and a thickness of 3. There are a lot of variables. I buy real contact paper not from the dollar store. If you have more specific questions, I’ve done lots of projects you can see here: https://www.myrepurposedlife.com/tag/vinyl-project/
gail