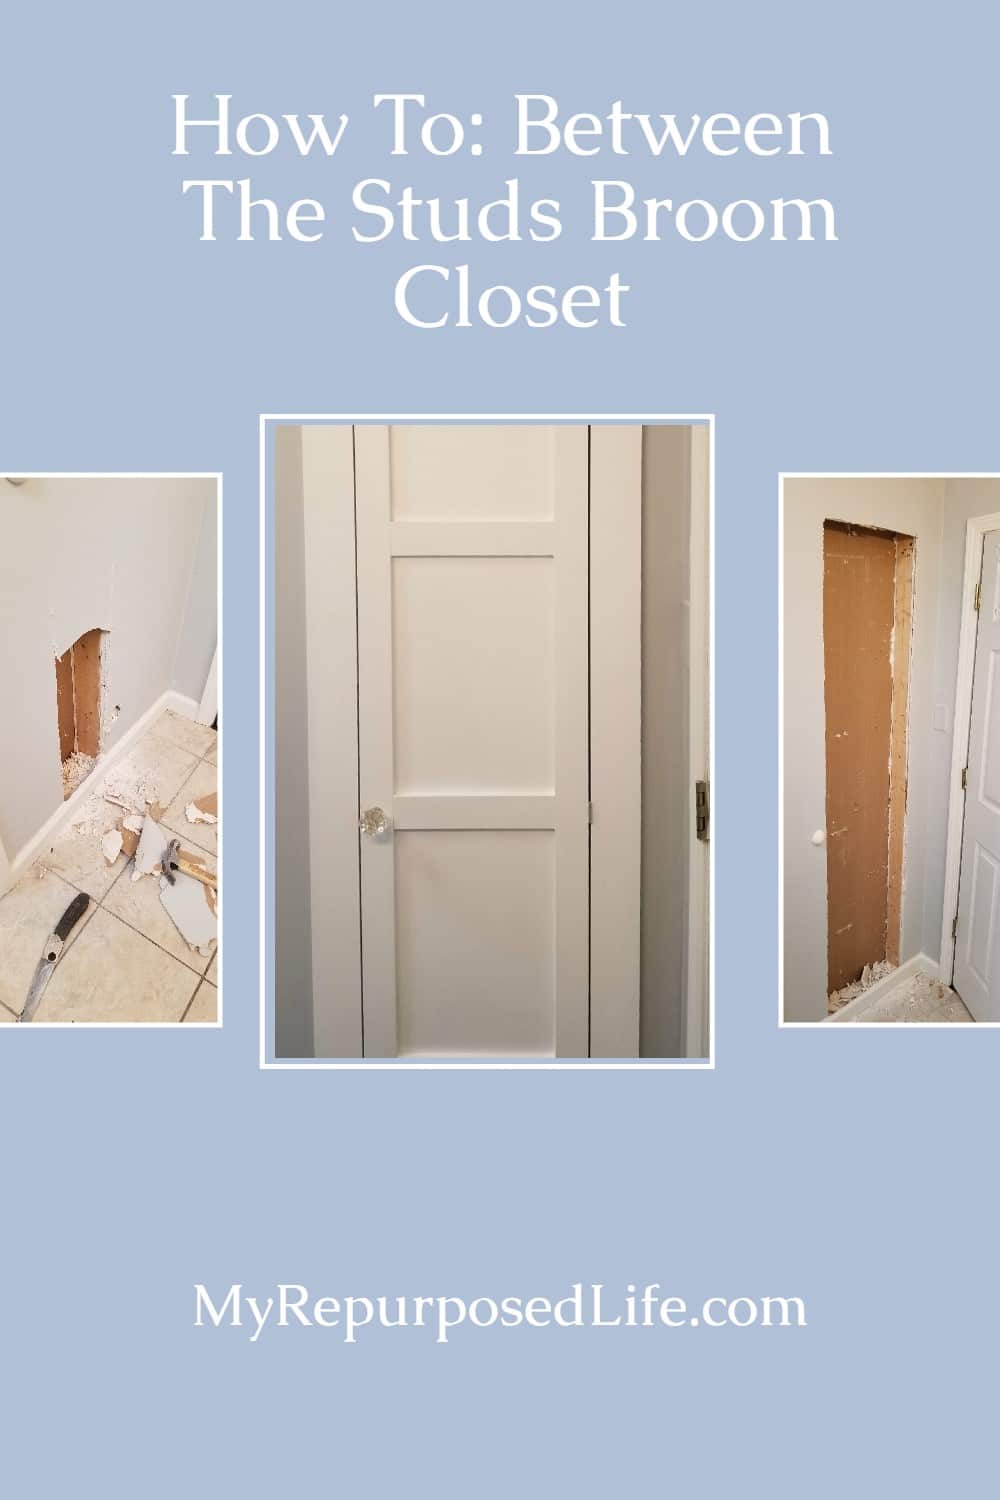
Between The Studs Broom Closet
As an Amazon Associate, I earn from qualifying purchases.
Maximizing storage in a small space can be challenging, but sometimes the best solutions are hidden in plain sight! Utilizing the space between the studs, Gail Wilson from My Repurposed Life created a sleek and functional broom closet that keeps cleaning essentials organized and out of the way. This DIY project is perfect for adding storage without taking up extra room—ideal for small homes, apartments, or anyone looking to declutter. Let me show you how easy it is to build your own between-the-studs storage solution!
My between-the-studs broom closet came about for a blogger challenge. A bunch of us will be participating in monthly challenges. This month, the challenge was to choose a space in your home that needs some organization and build a clever solution for it! This DIY project has been on my to-do list for quite a while. This was the perfect nudge I needed to complete my broom closet made between the studs.
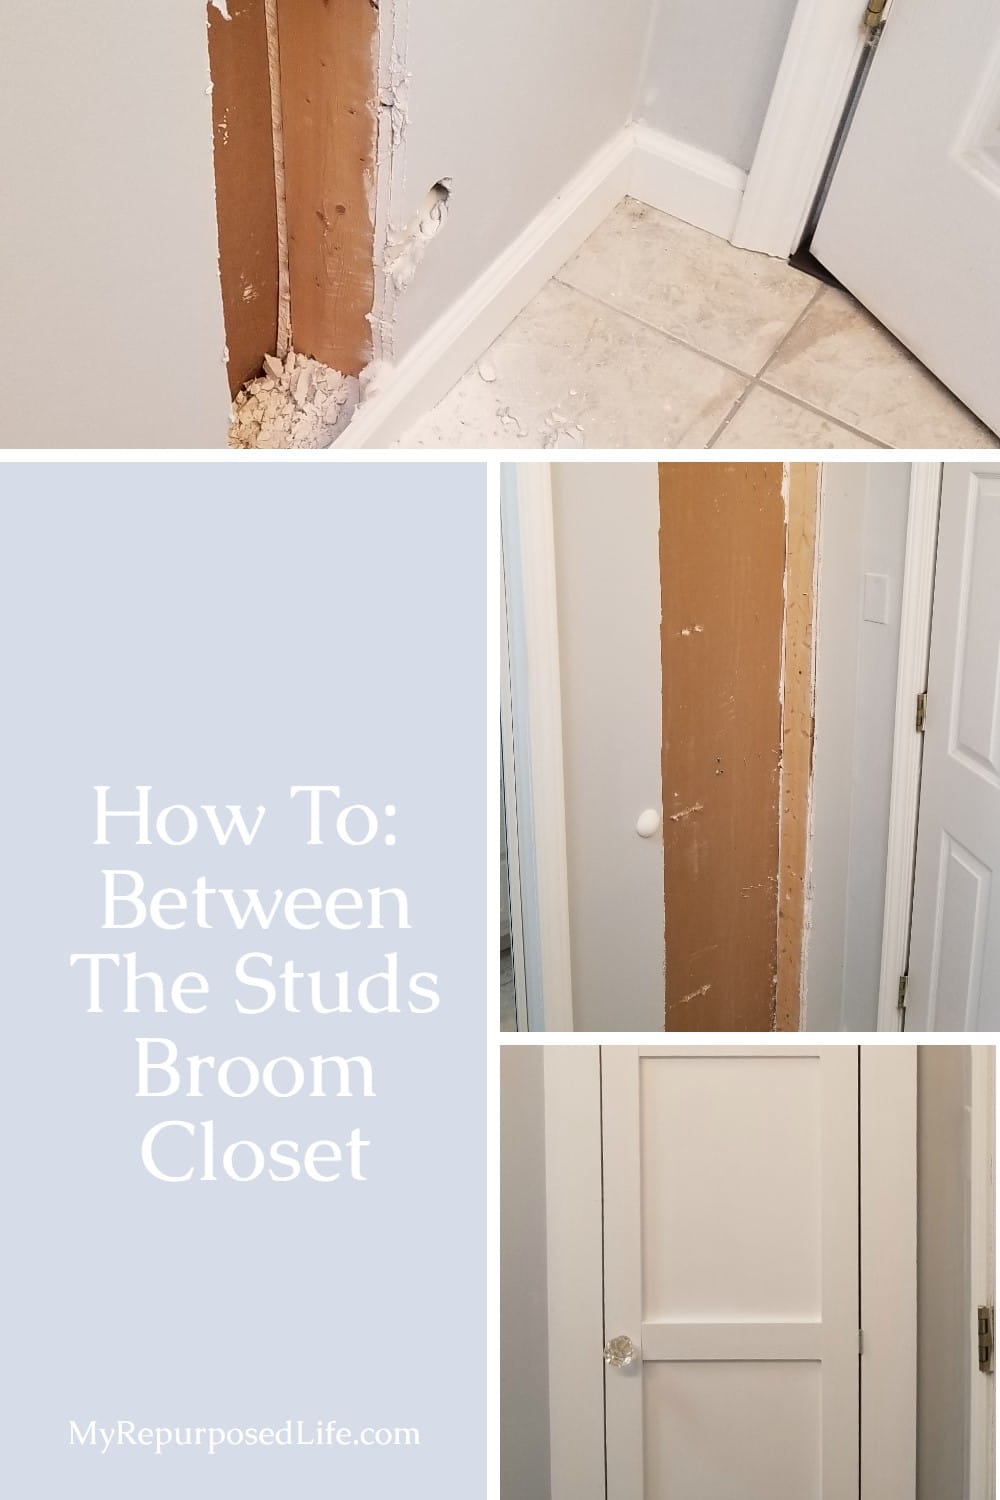
Ugh! The dreaded before. I have this fabulous duster for my new laminate floors, but I don’t have anywhere to store it.
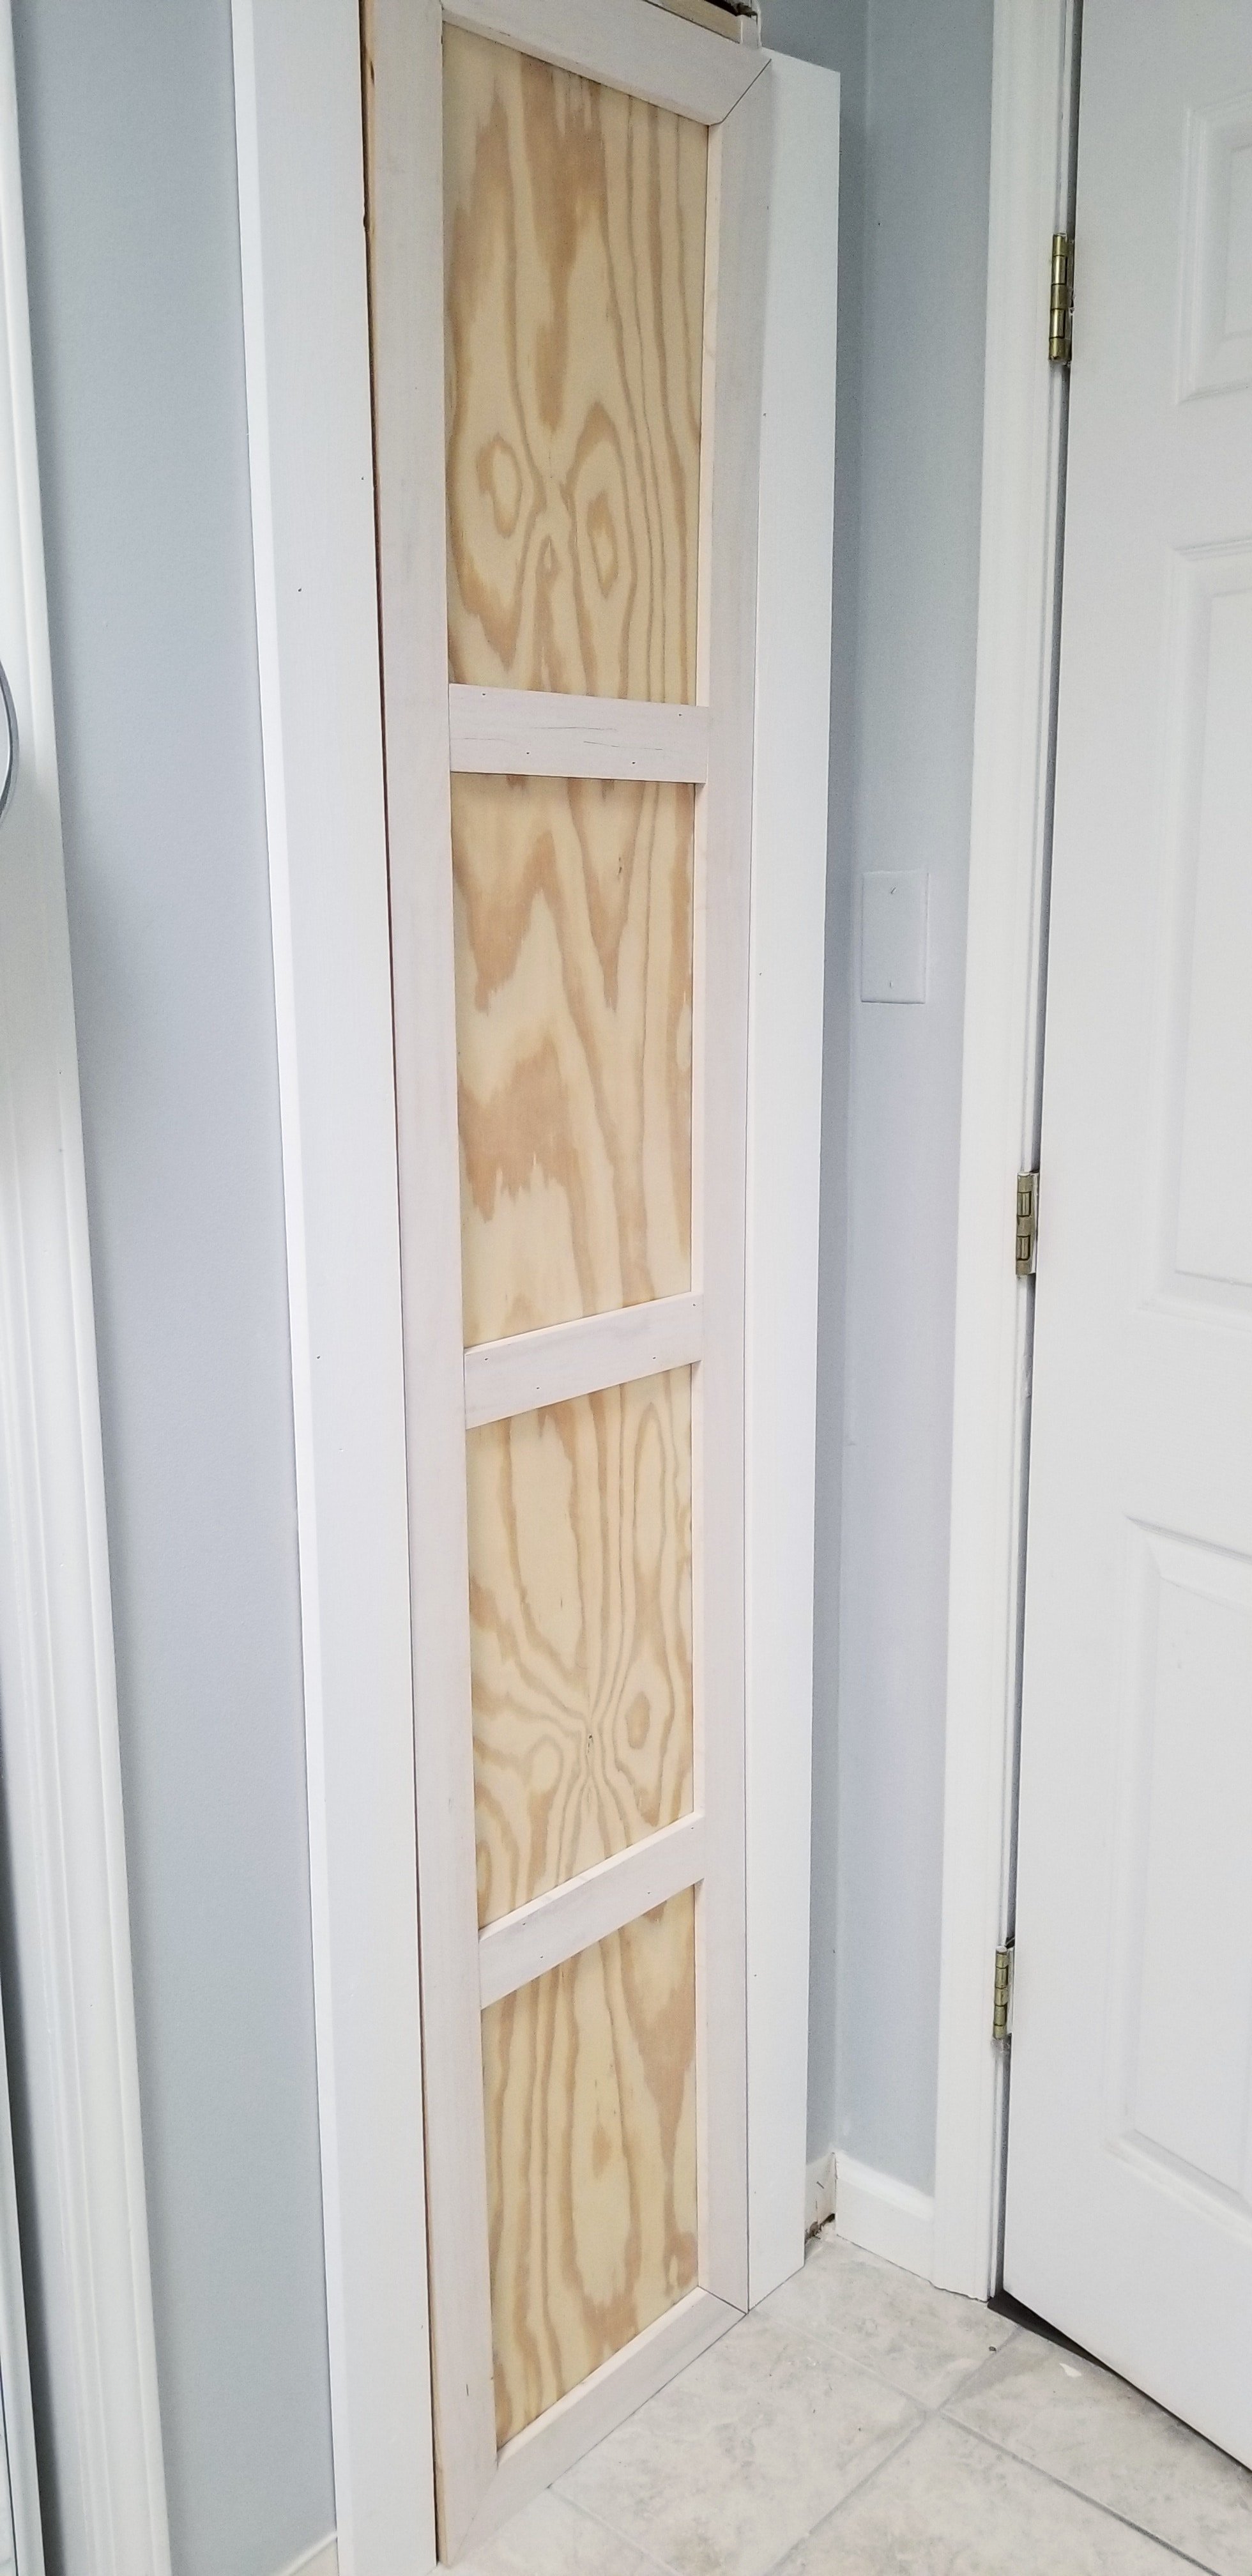
Here’s a nice in progress shot, but let’s look at how all this started!!
Between the Studs Broom Closet

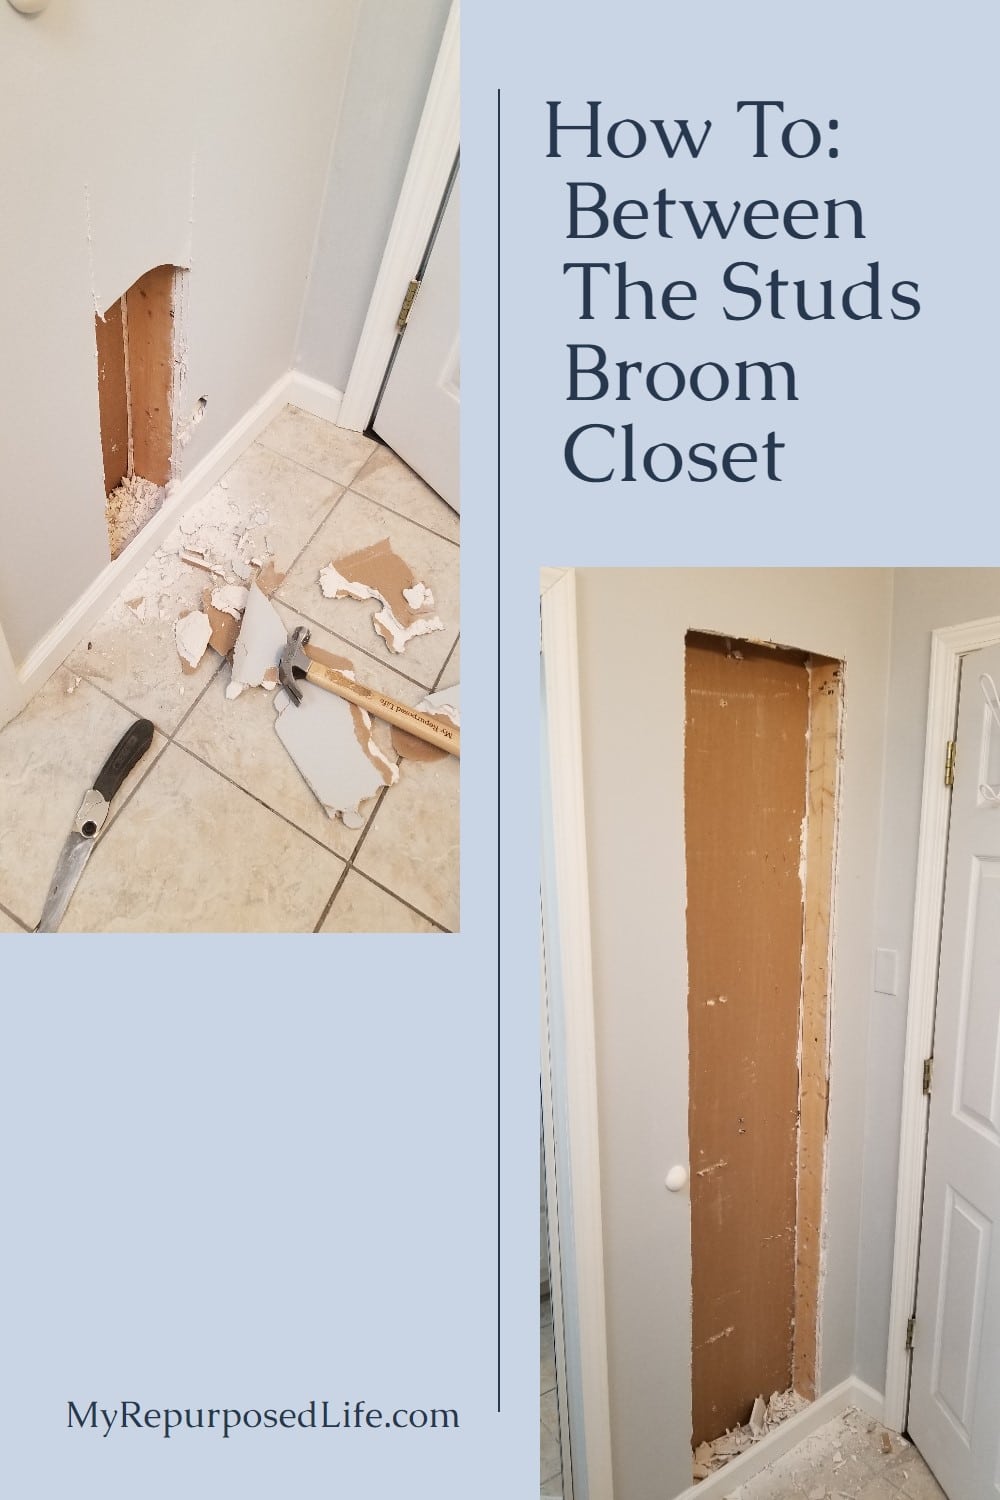
Suddenly, one day, I just knocked a hole in the wall on a whim. I’ve been putting this off for a long time, and I figured if I put a hole in the wall, I’d have to follow through. Can you relate?
Here’s a quick back story: I’ve been in this house for 43 years. The original bathroom linen closet was in this exact spot. Years ago, some not-so-savvy friends renovated the bathroom (hence the lousy tile floor). Along this wall was the bathtub and the small closet. The tub area is now the linen closet I organized with Dollar Store items. Even so, there wasn’t enough room to hang my duster and a couple of car wash sticks.
On with the details. . .
How to Use a Mirror to Identify Pipes and Wires Inside a Wall
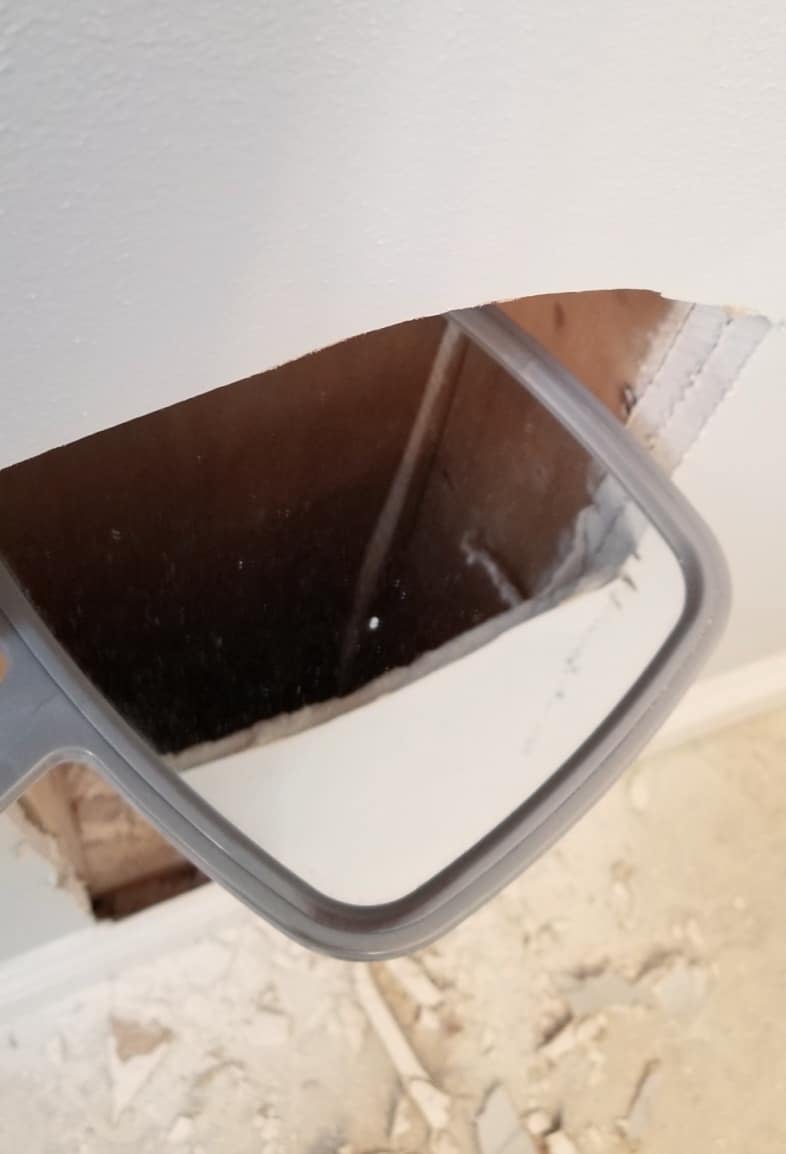
I was nearly 100% positive there were no wires, but to make sure, I looked into the wall with a hand mirror and a flashlight.
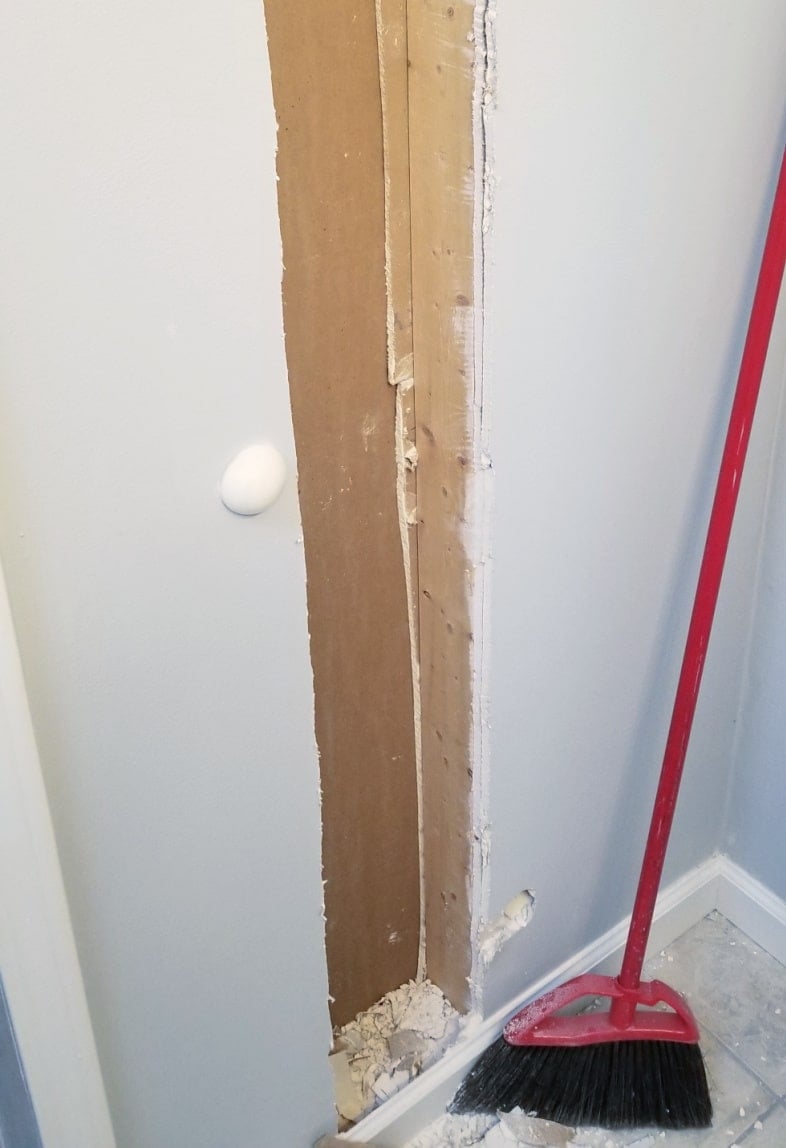
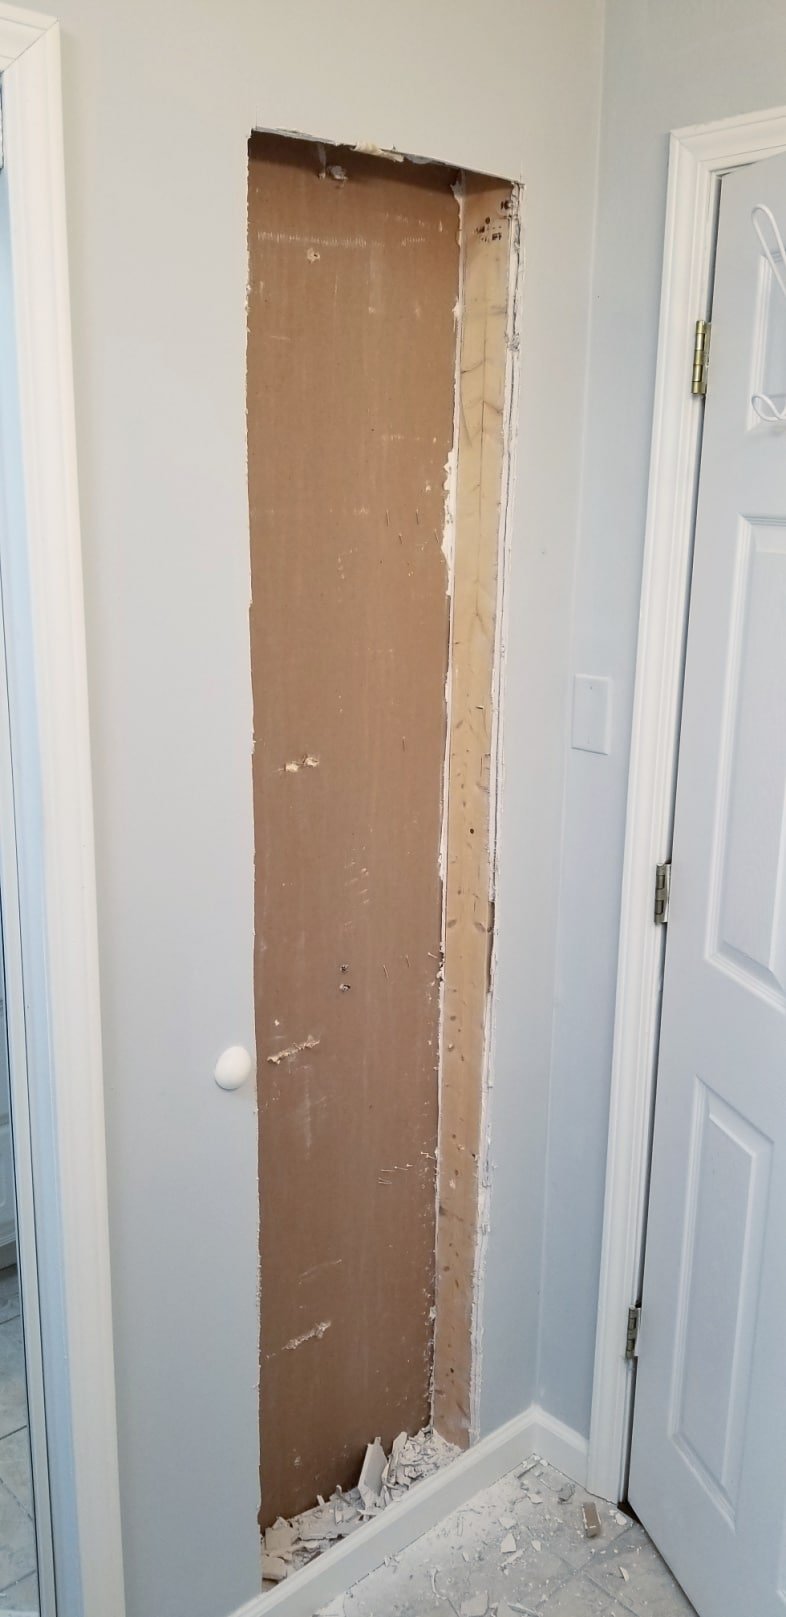
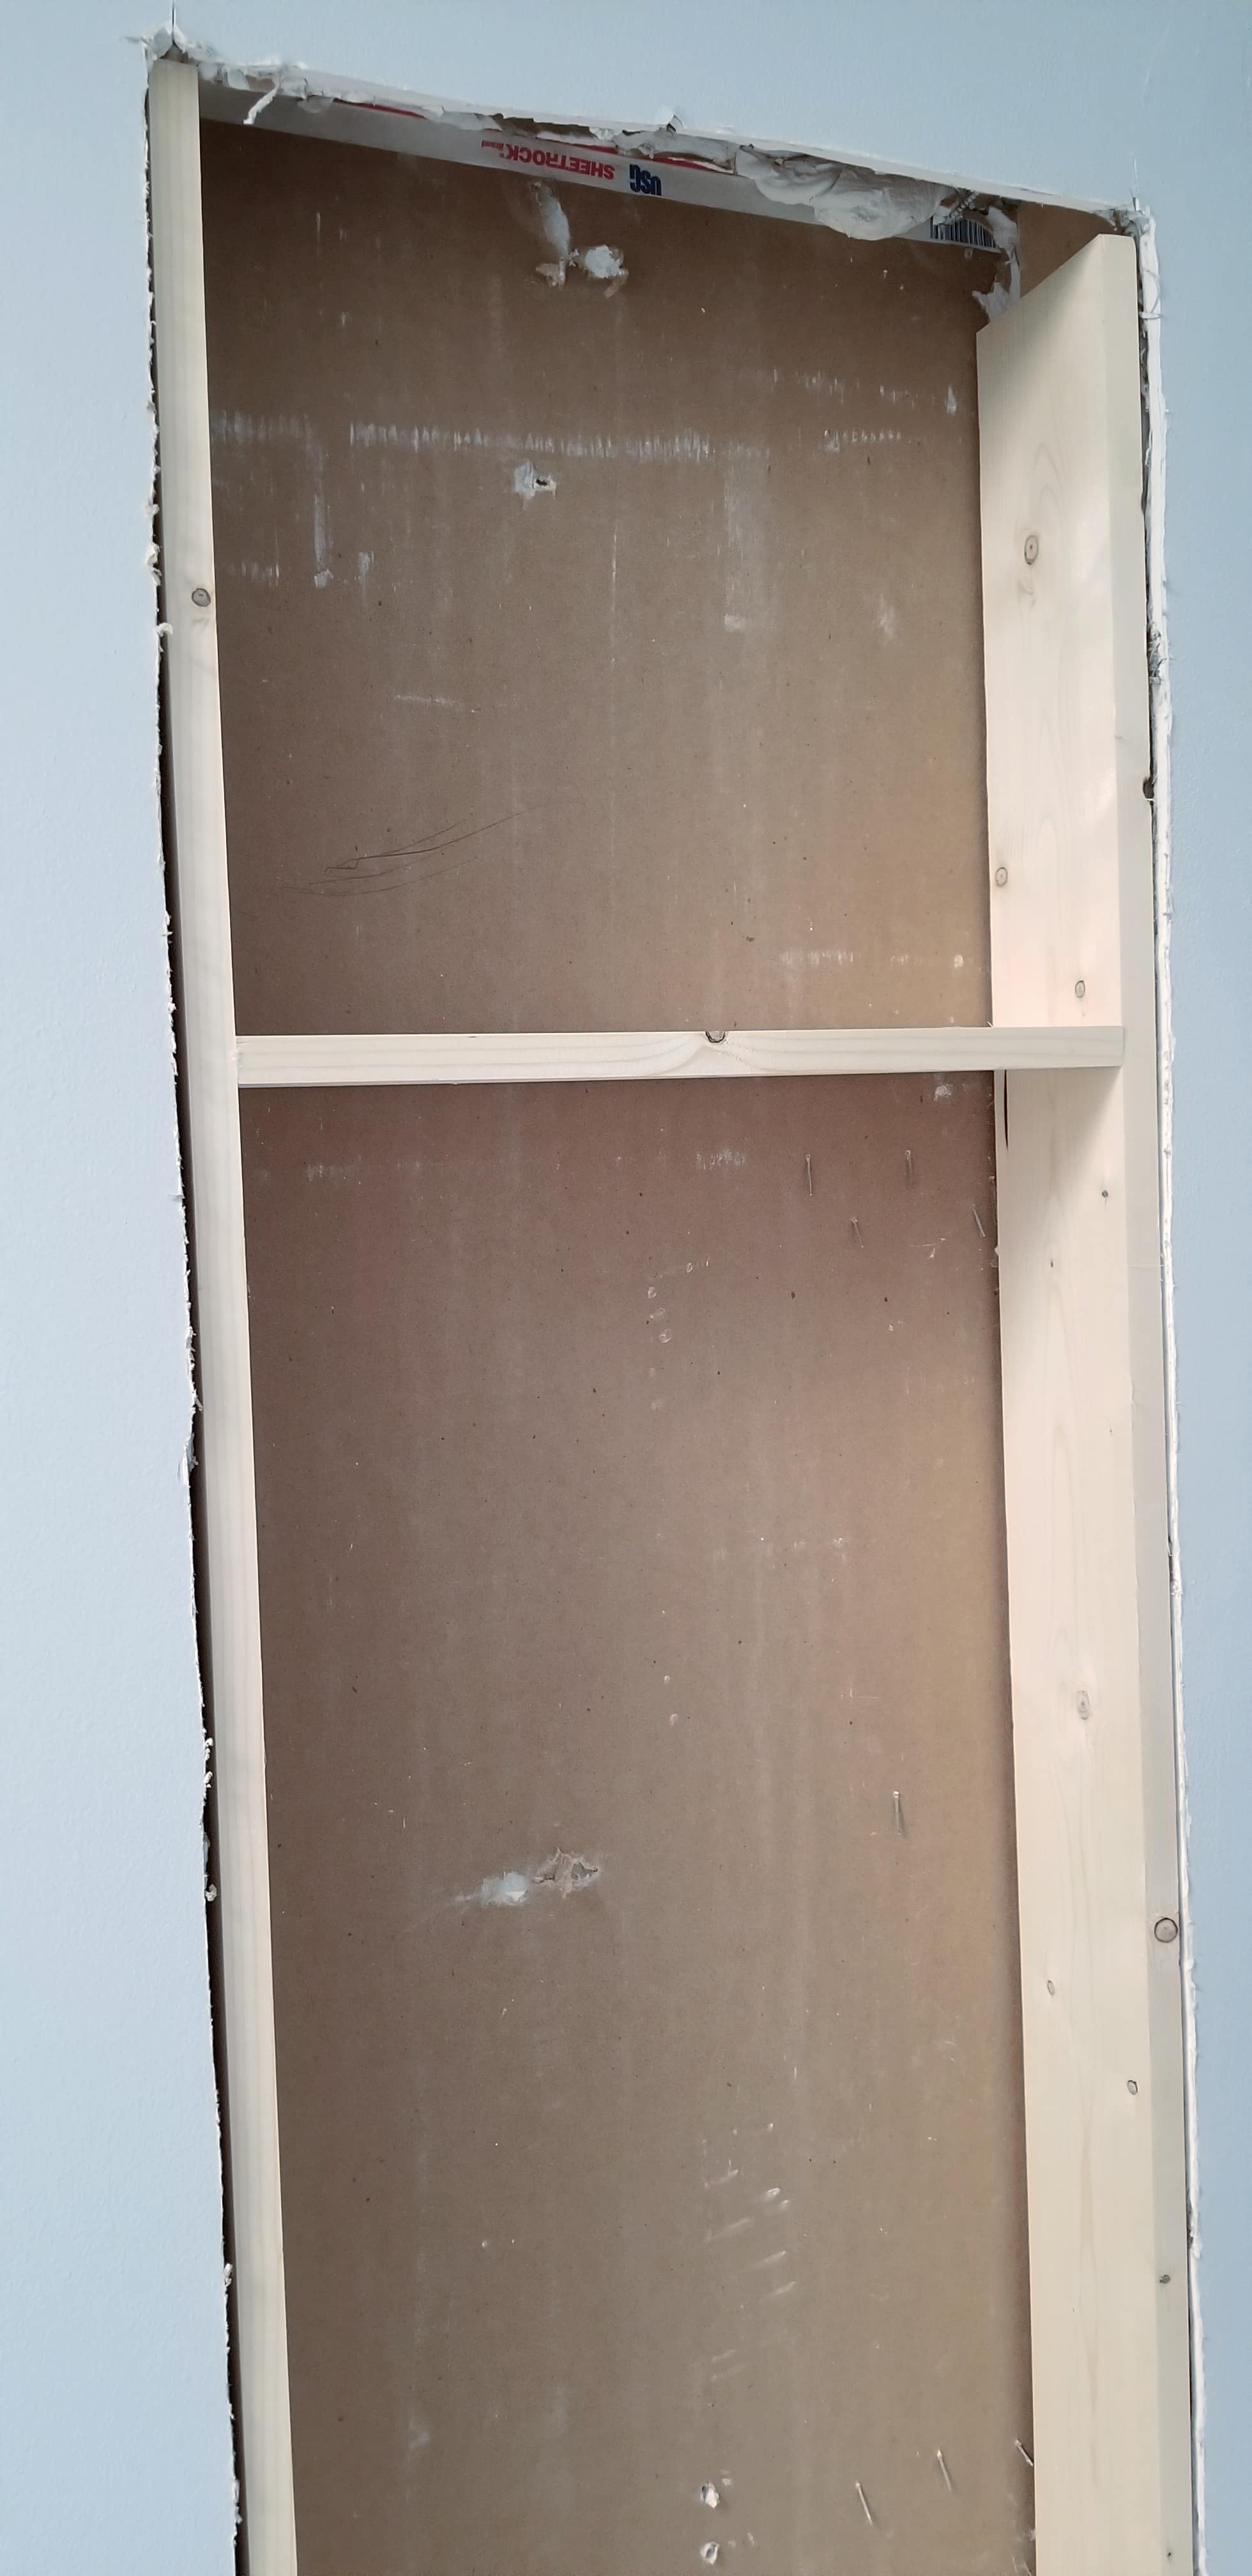
Cut Out Drywall Between Studs

Cutting the drywall by hand probably wasn’t the best option. Look to the right to see the original hole I busted with my trusty hammer. Did I mention I was impatient? I don’t do much of this kind of work, so I don’t own a stud finder. I knew the original closet was much broader than this, so that is what I was basing the size of the between-the-studs broom closet on.
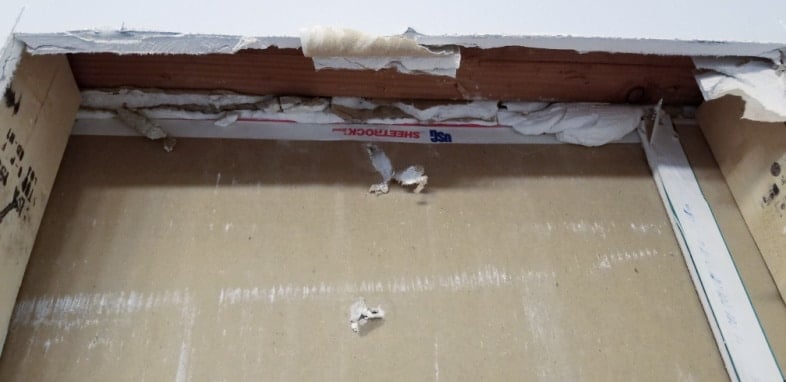
I’m not sure why there are two layers of drywall on each side. For some reason, they used scraps to advance the drywall.
Does this make any sense to you? Here, you can see the scrap piece of drywall in the back with the actual drywall attached to the scrap and the stud. Go figure! It just shows that you never know what you’ll find when doing this job.
Visit the My Repurposed Life Amazon Store to shop my favorite items.
Remove Unnecessary Wall Stud With Reciprocating Saw
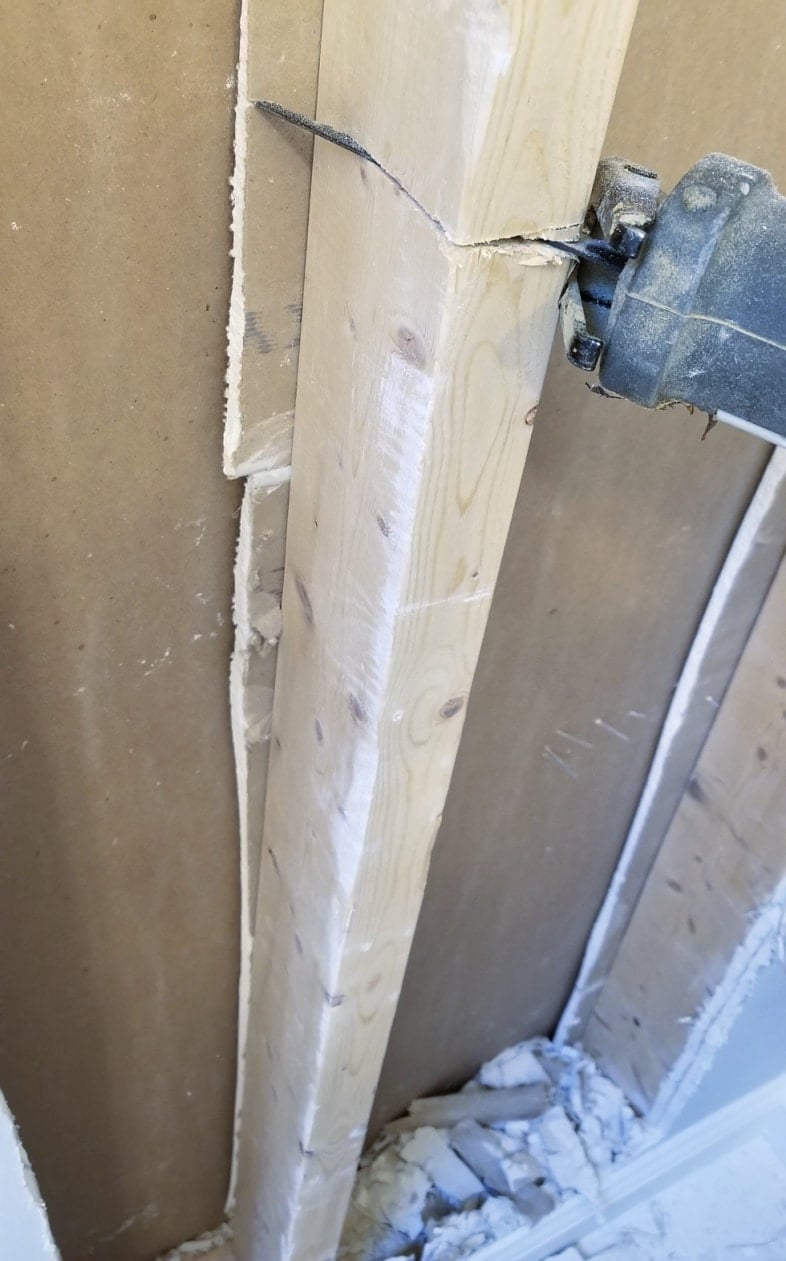
After opening up the other side, I revealed a header at the top. This stud was unnecessary, so I grabbed my reciprocating saw to remove it.
Use a Shop Vac to Clean as You Go
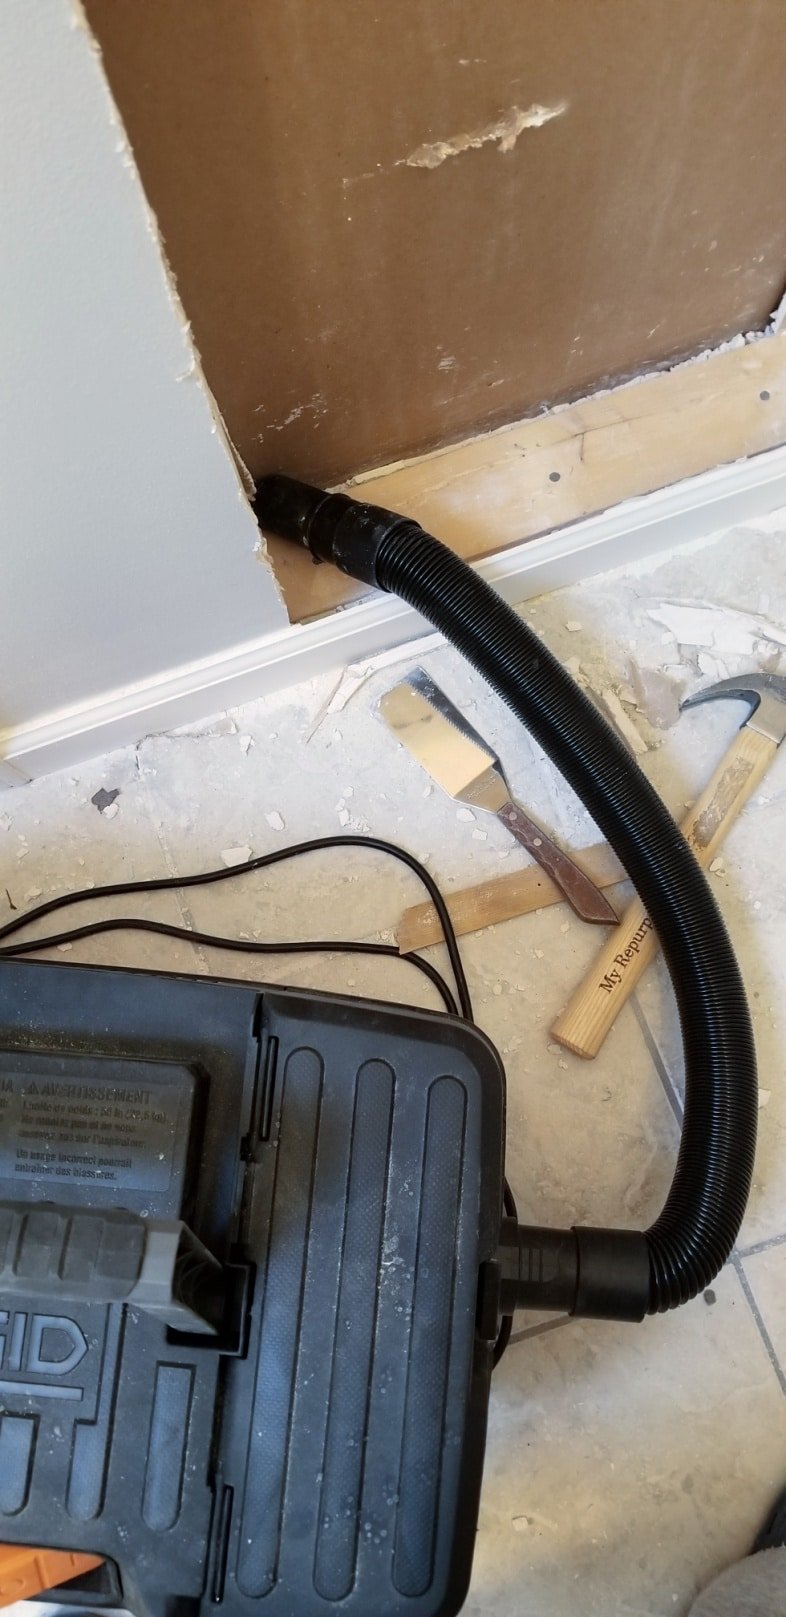
I may be impatient, but I know it was worth my time to go to the basement shop to grab my shop vac instead of using my household vacuum cleaner.
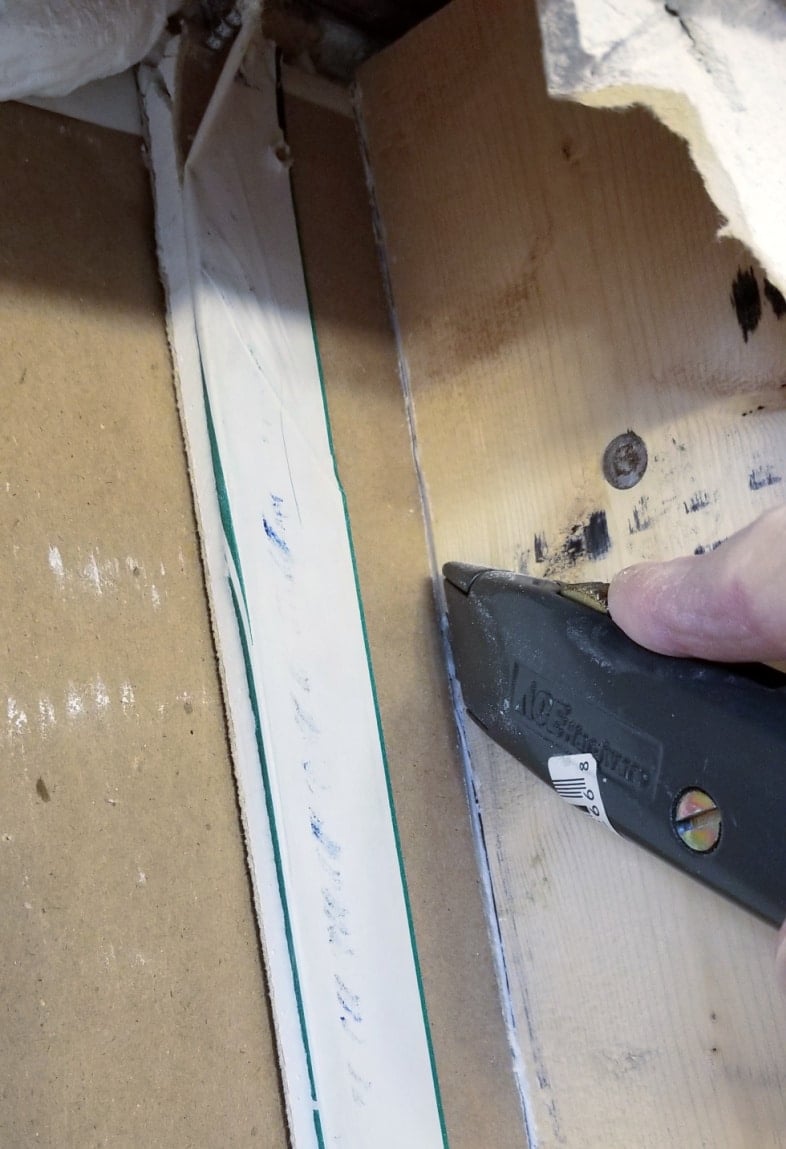
Then there was this mess. I needed to cut away those scrap pieces of drywall on the back wall to use the full depth between the studs. I used a utility knife to score the drywall against the stud for this area.
Clean up Rough Cuts and Mud
This is a shot of the original header at the top of the original closet opening. I had to clean up the uneven drywall, remove the mud, and remove the scrap drywall.
At this point, I wondered if this was all worth it.
This between-the-studs broom closet would also make a great storage area for health and beauty aids.
The shallow broom closet is taking shape. Can you see how handy this would be with many shelves for storing health and beauty aids like makeup, shampoo, etc?
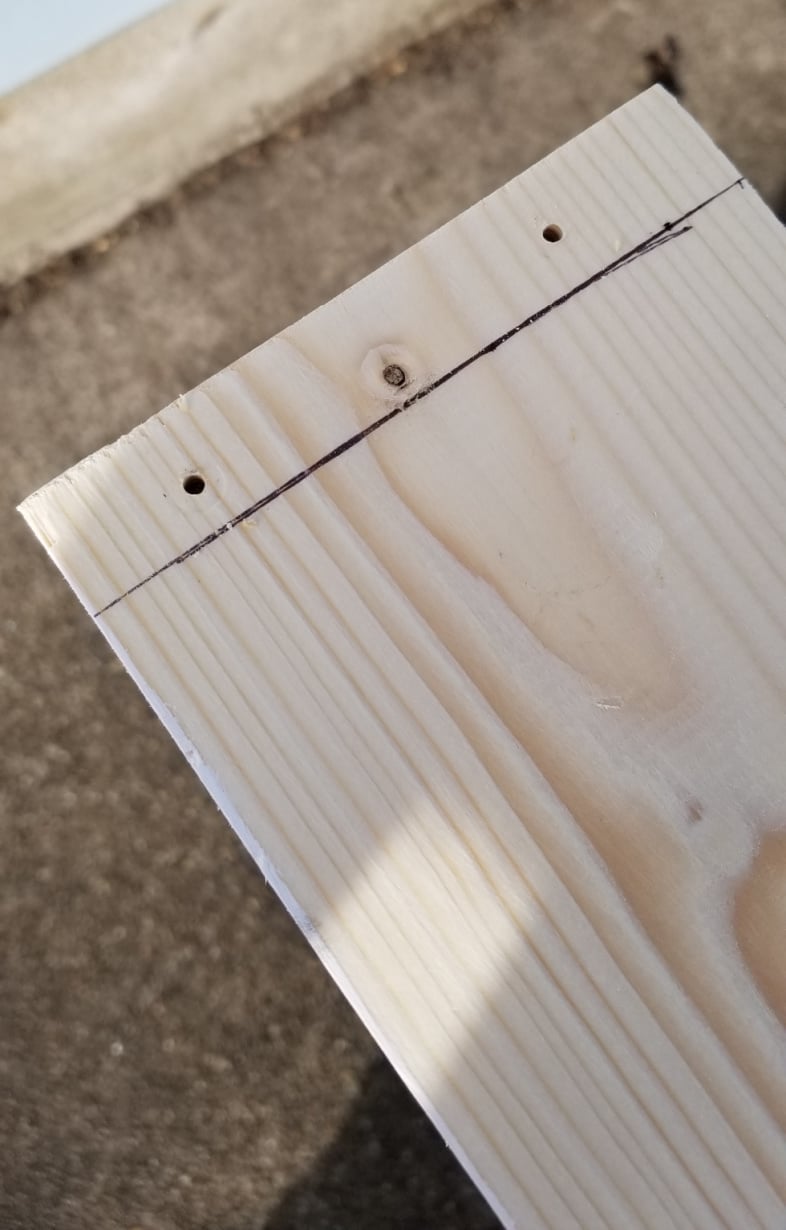
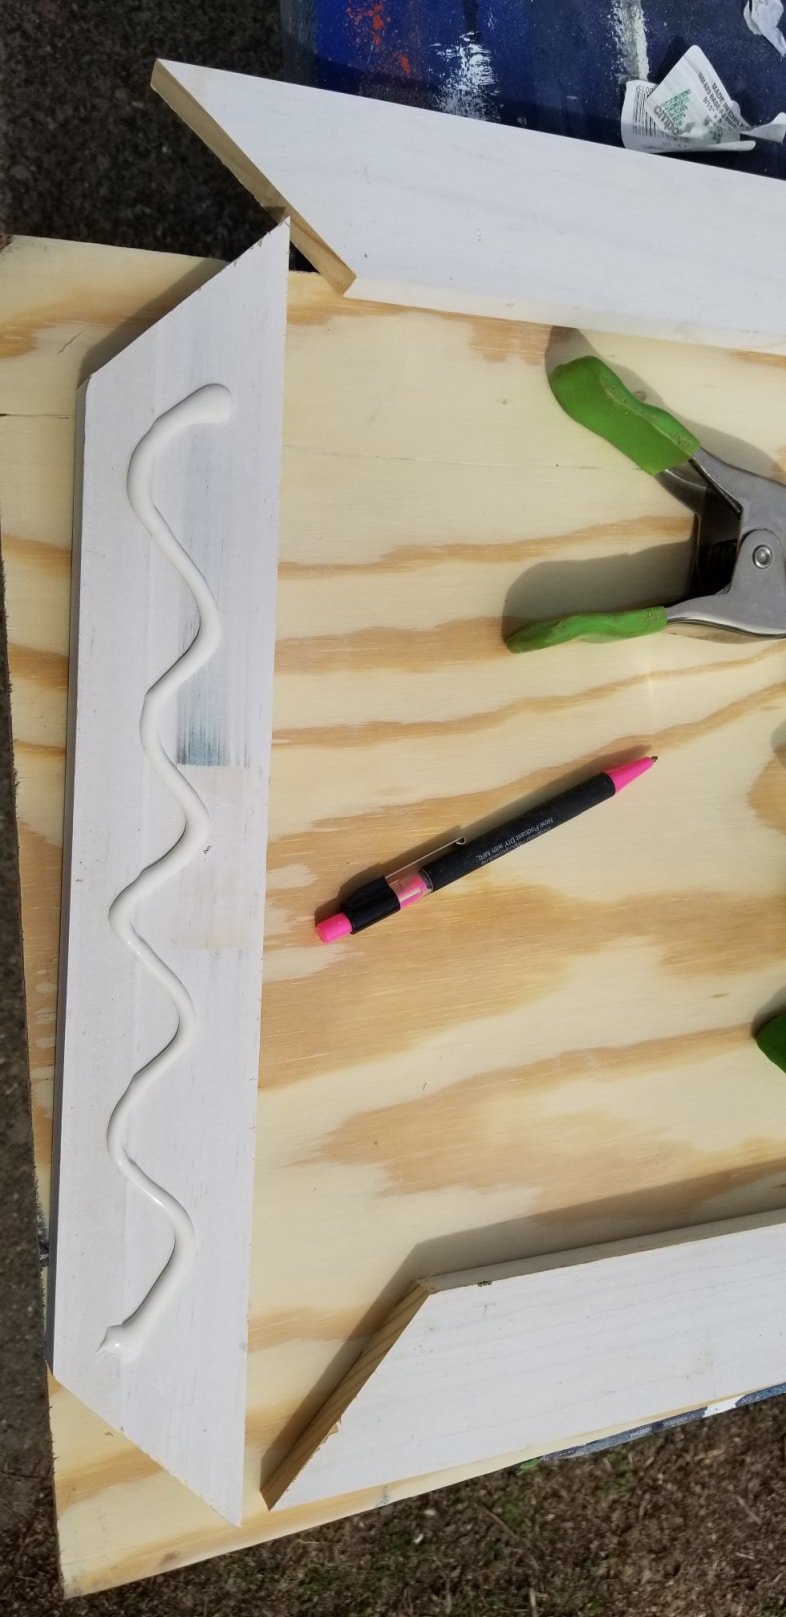
Measure Twice, Cut Once!
Not only do I measure twice, but I always do a dry fit. I cut the left and right sides and one cross board to ensure it would fit in the opening.
Use Clamps and Brad Nails to Test Broom Closet Insert Fit
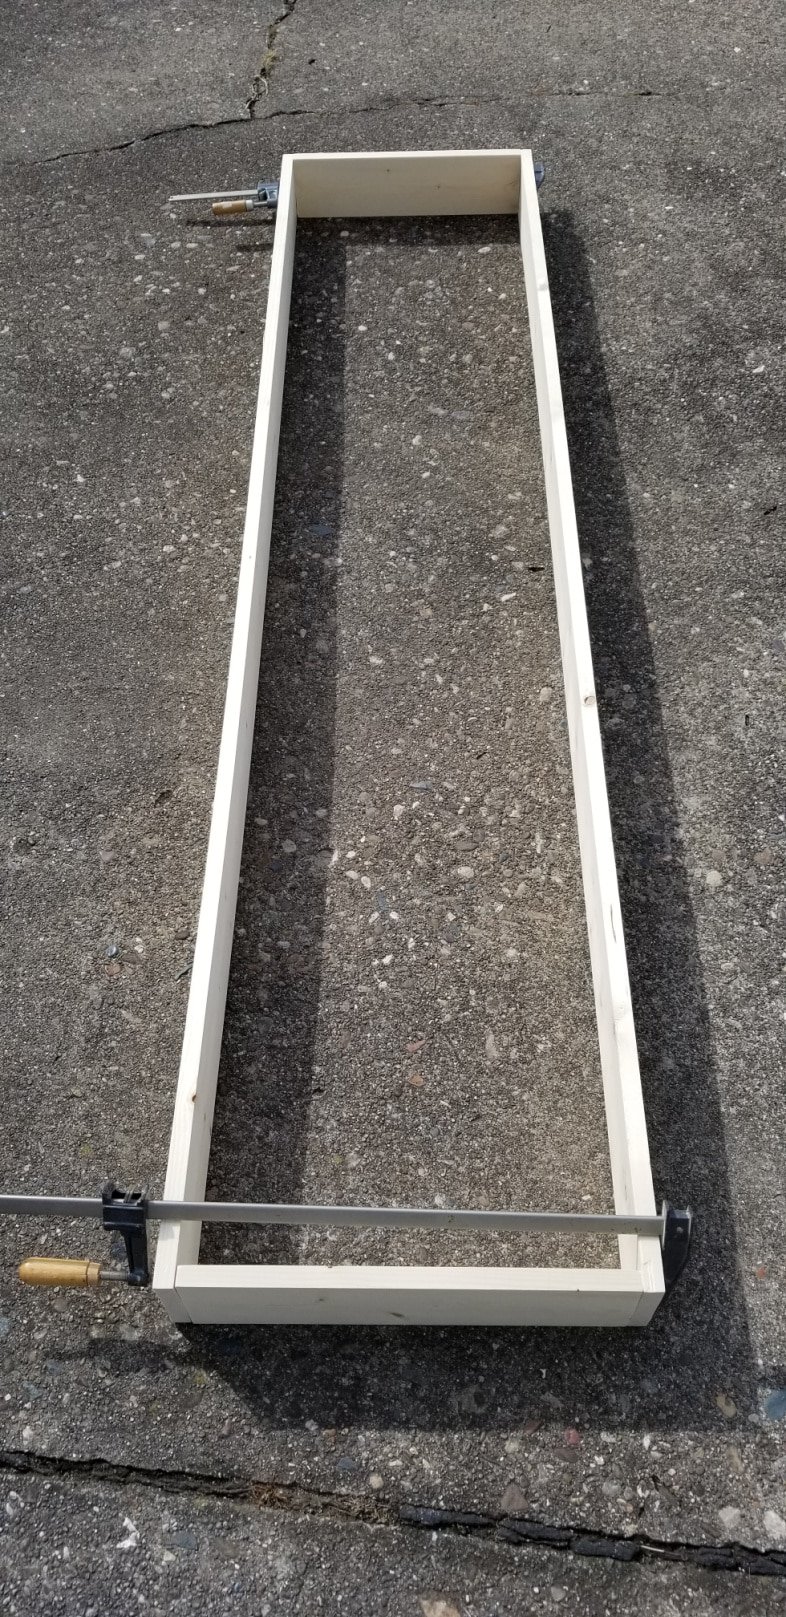
As an extra precaution, I clamped the between the studs closet insert and used my nail gun to tack the pieces in place. Then, I carried it into the house to ensure the closet was square enough to accept the closet insert. (not shown)
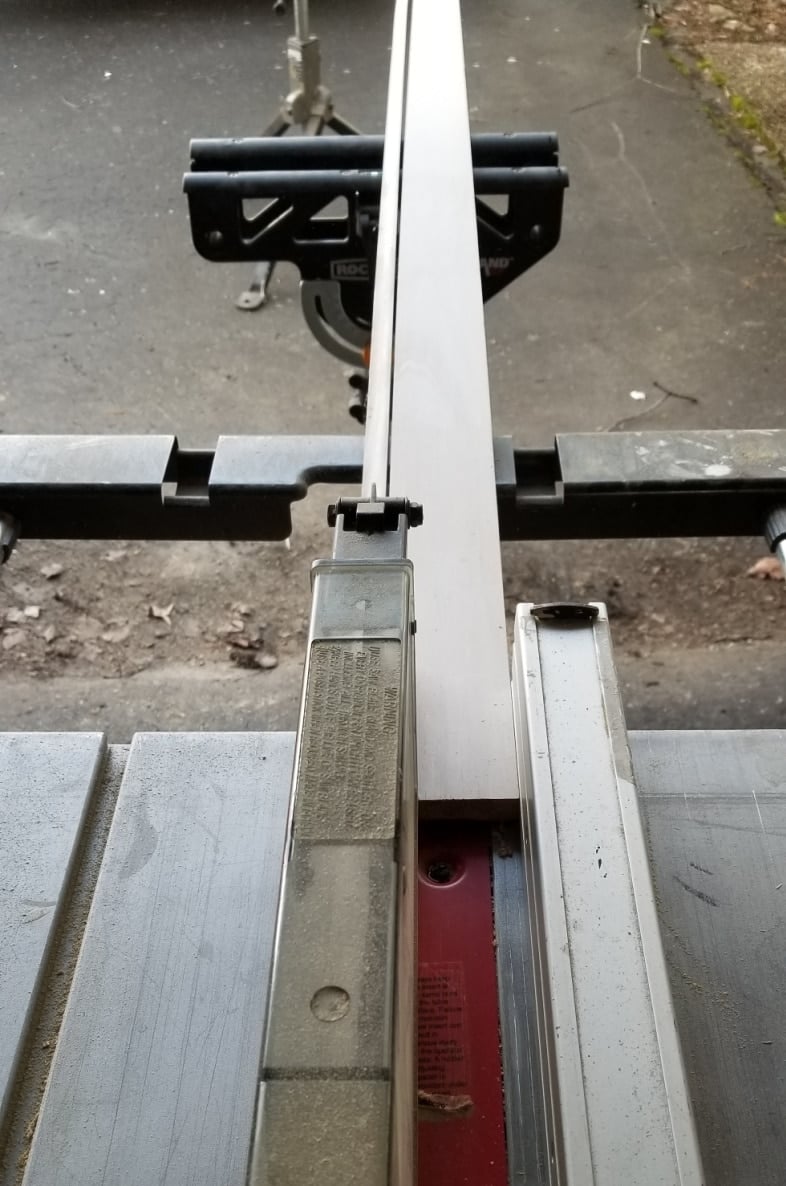
Carefully Cut Plywood on a Table Saw
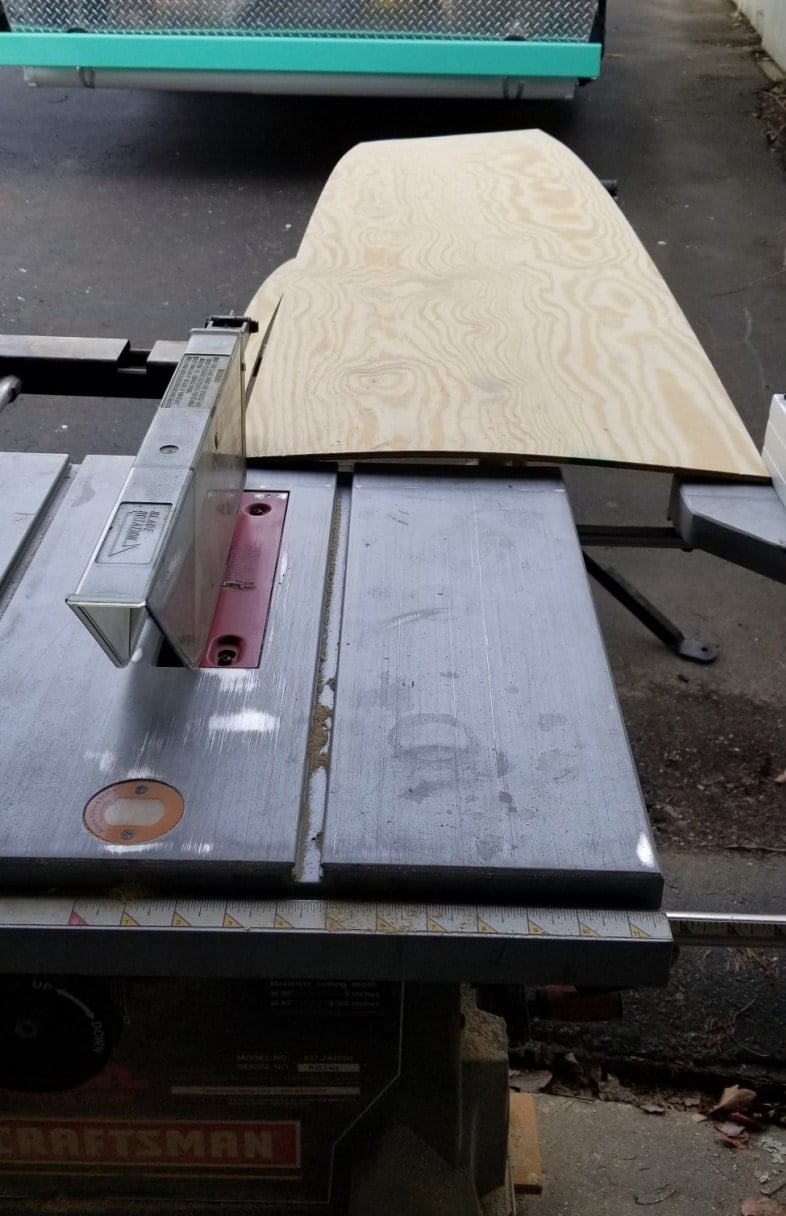
Because I didn’t want the insert and door to be too heavy, a friend recommended that I buy 1/4” plywood. I bought the wrong grade—I should have purchased birch. So, keep this in mind if/when you do this project. I had the piece ripped into two smaller pieces at The Home Depot, which made it a little more manageable for me on the table saw. My Rockwell Jawstands were perfect to guide the long piece of plywood. I’ve had these for almost four years, and they are fantastic when you work alone.
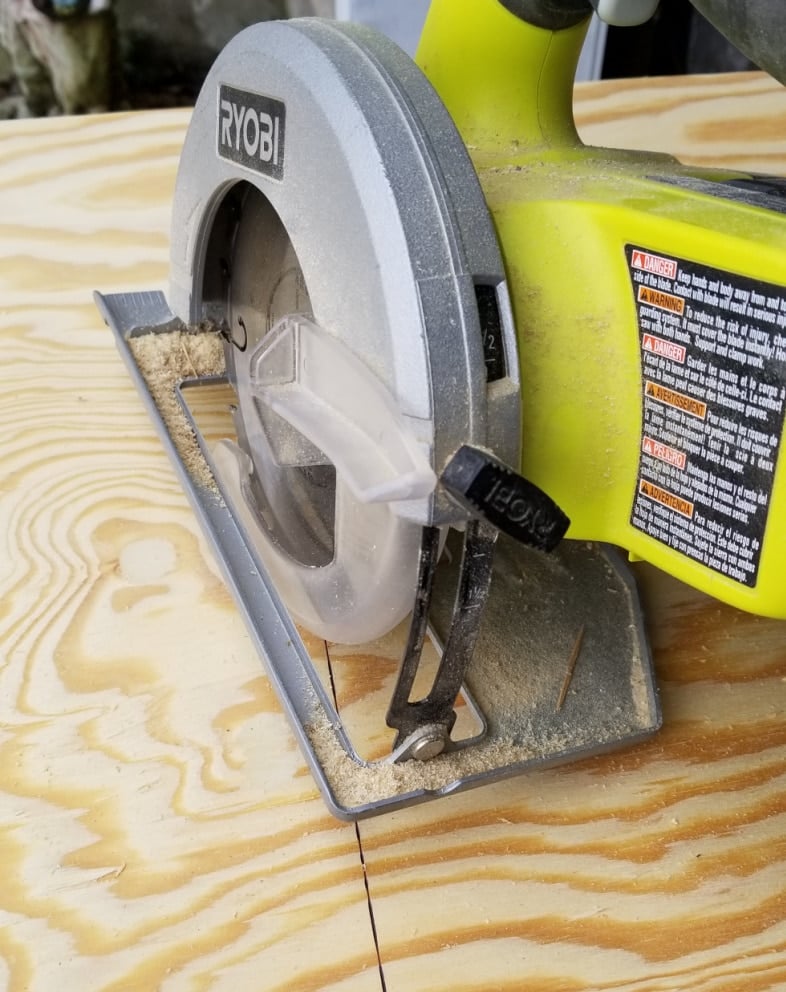
The handy battery-operated Ryobi circular saw made the cross-cut on the plywood. If you don’t have a table and circular saw, you could use a jigsaw for both tasks.
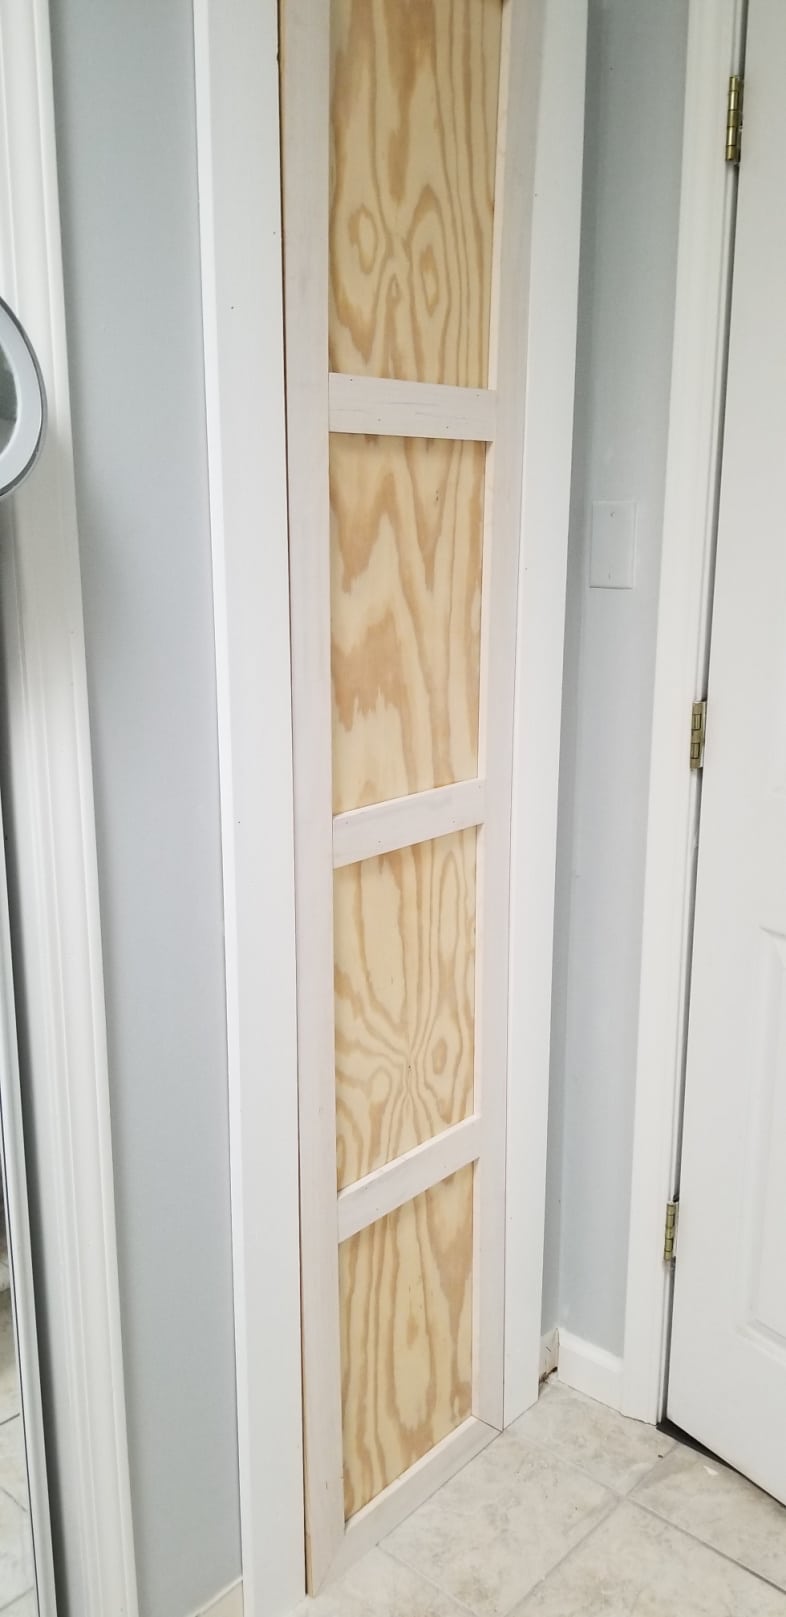
Paint and Install Closet Insert
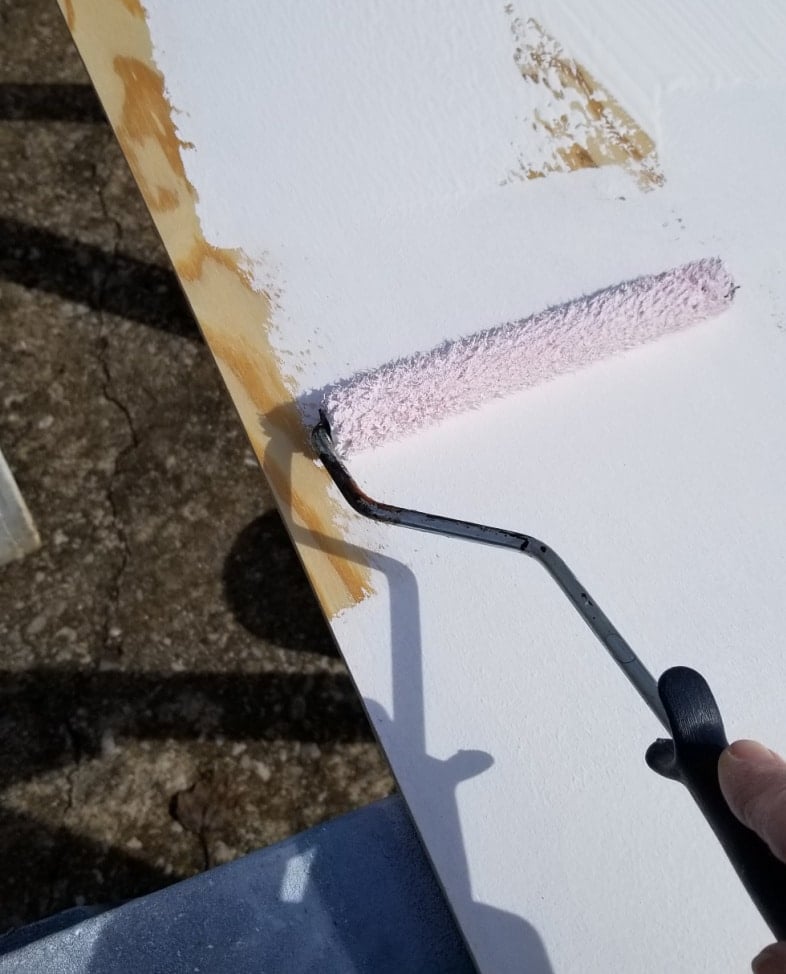
I chose to pre-paint all of my pieces before putting them together.
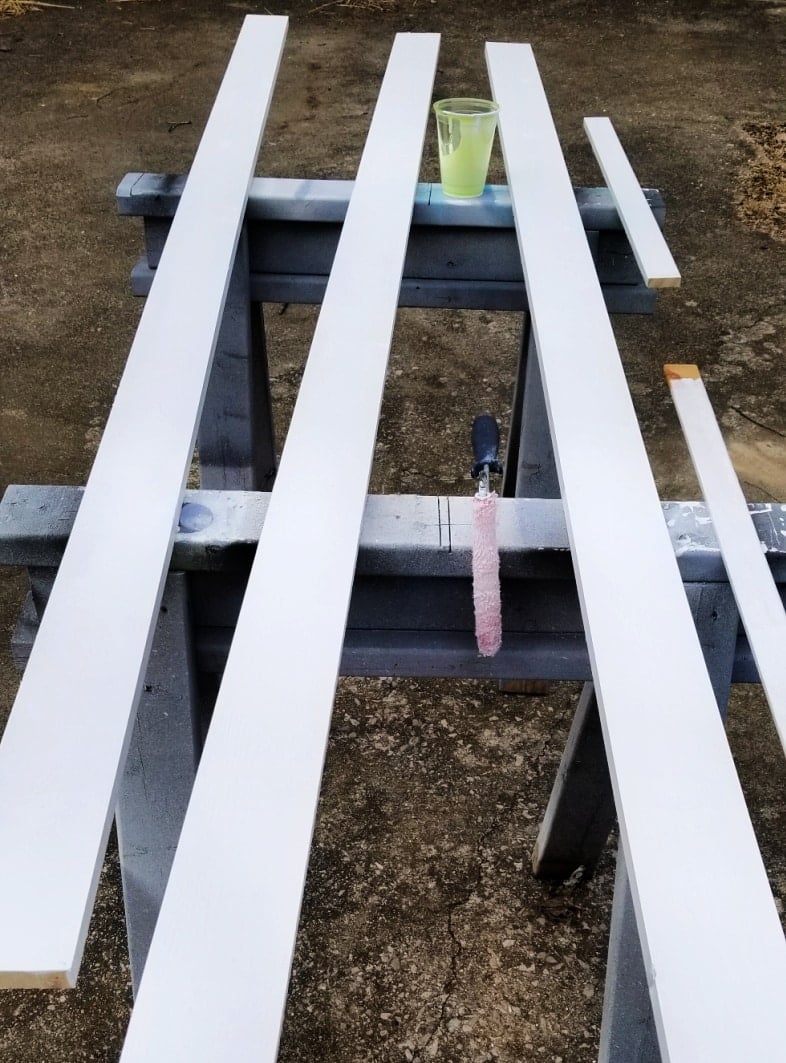
A small paint roller is perfect for this type of application. A regular wall roller holds too much paint and is wasteful.
After drilling pilot holes the box of the between the studs closet insert was put together with wood screws.

The back was secured with brad nails, and another fit was done before adding a top shelf. The insert is resting on a 2×4 near the ground. When installed, it will be raised so that it’s up near the opening at the top.
Cutting Trim for Small Closet Door
Still trying to reduce the weight of the hand-made door, I decided to use a thrift store baseboard for the trim. I ripped the trim on the table saw. You may think this is wasteful because the foot sells this type of trim. However, I got this at a thrift store for $1 per piece! I bought all they had and never intended to use it as baseboard.
Secure Mitered Wood Trim Boards With Wood Glue
Because I didn’t want any nails showing through the front side, I used Gorilla Wood Glue and clamps to secure the trim boards on the small closet door.
After the glue was set up, I turned the door over and shot the nails from the back. This is a better method because the plywood is so thin.
Side note: I really wish I had bought the better plywood. But again, I’m an impatient DIYer, and I needed this done before going on a trip, so I’m stuck using what I have.
Will the New Handmade Door Work?
This is a dry fit of the closet door; I was thrilled when it fit! But there was an issue. The door was warped. I enlisted the help of my neighbor, and he suggested adding a brace/stiffener to help with the bow. It was a rough day, and I don’t have pictures of that adjustment.
I have made a header for the door frame, but it hasn’t been installed yet. I wanted to make sure the door fits correctly.
Fast-forward: The door has been painted and installed, the header is in place, and it’s time for the finishing touches.
Drywall Mud as a Patching Material
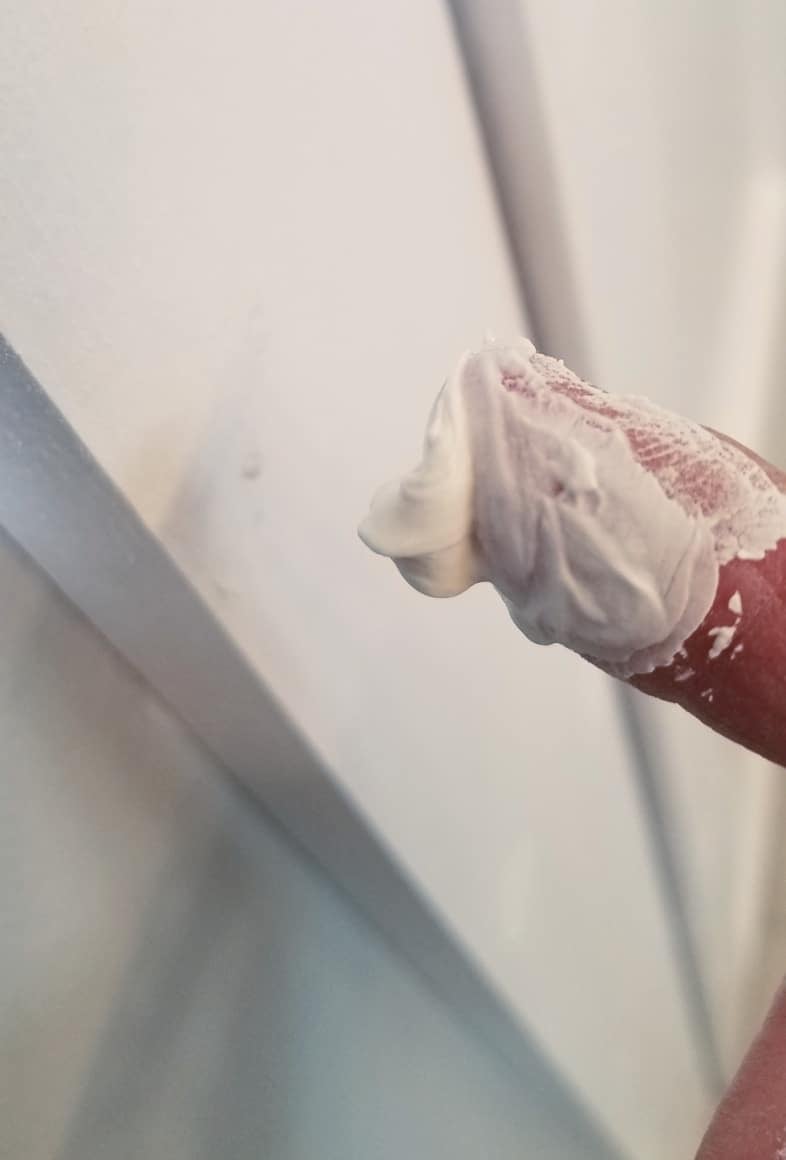
Did you know that if you buy a drywall patch in the paint department, you pay a LOT more than if you walk to the pro department to pick up a gallon bucket of drywall mud? Here, I use drywall to patch the nail holes holding the door frame in place. I like to do two light coats—the first one usually has a few indents. Then, I scrape the high points with a small putty knife or use a slightly damp rag to wipe away the excess. If done correctly, you can often delay touchup painting. ![]()
Don’t Skip the Finishing Touches!
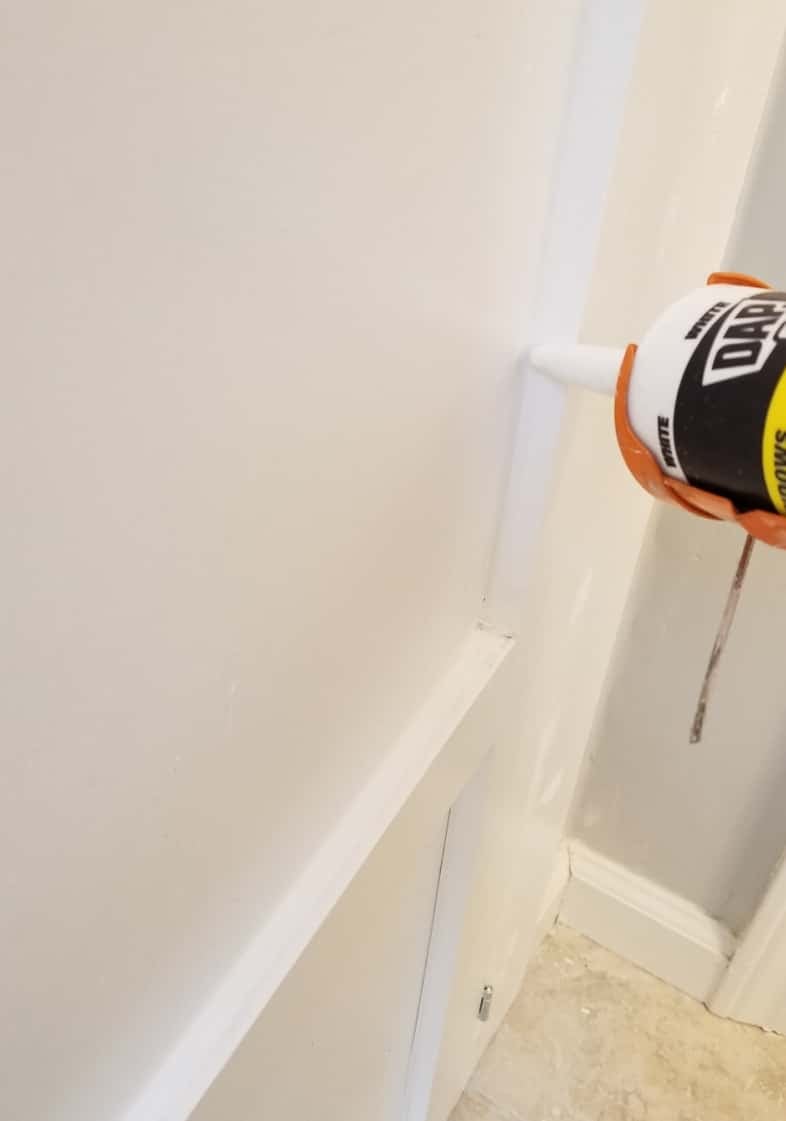
Don’t be discouraged if things aren’t perfect at this time. The finishing touches will bring this all together beautifully! Notice where I have patched the holes but haven’t cleaned them up yet. In addition, this is before caulking.
It looks so much better after the caulk. Remember I said I pre-painted my pieces? Everything still needs a final coat and a half. In this picture, I have replaced the small piece of baseboard to the right of the closet. I used the original baseboard and cut some for the left and right sides of the small door area.
This is a small bathroom, and getting a picture of the entire door is difficult.


Practical Storage Option
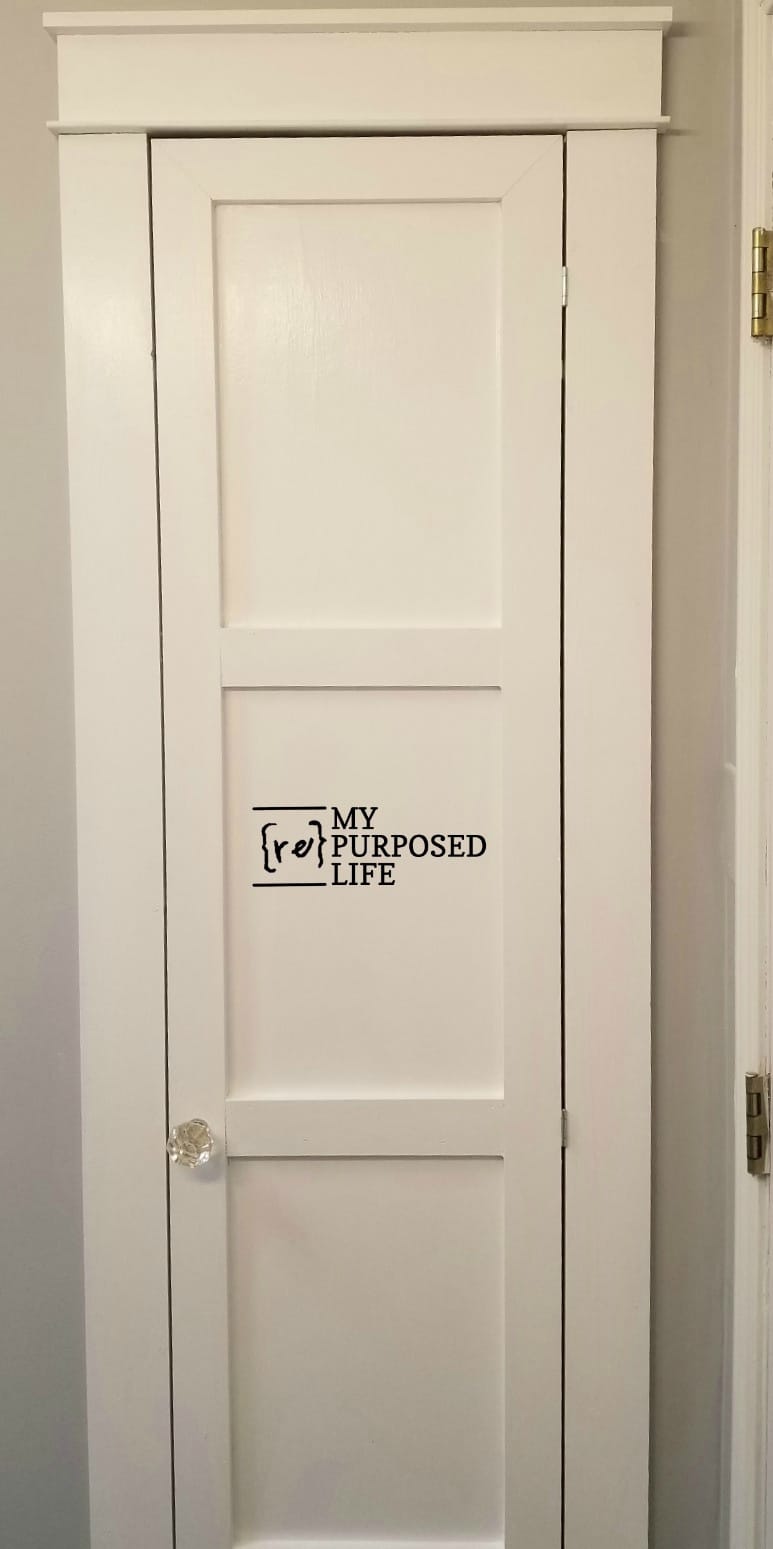

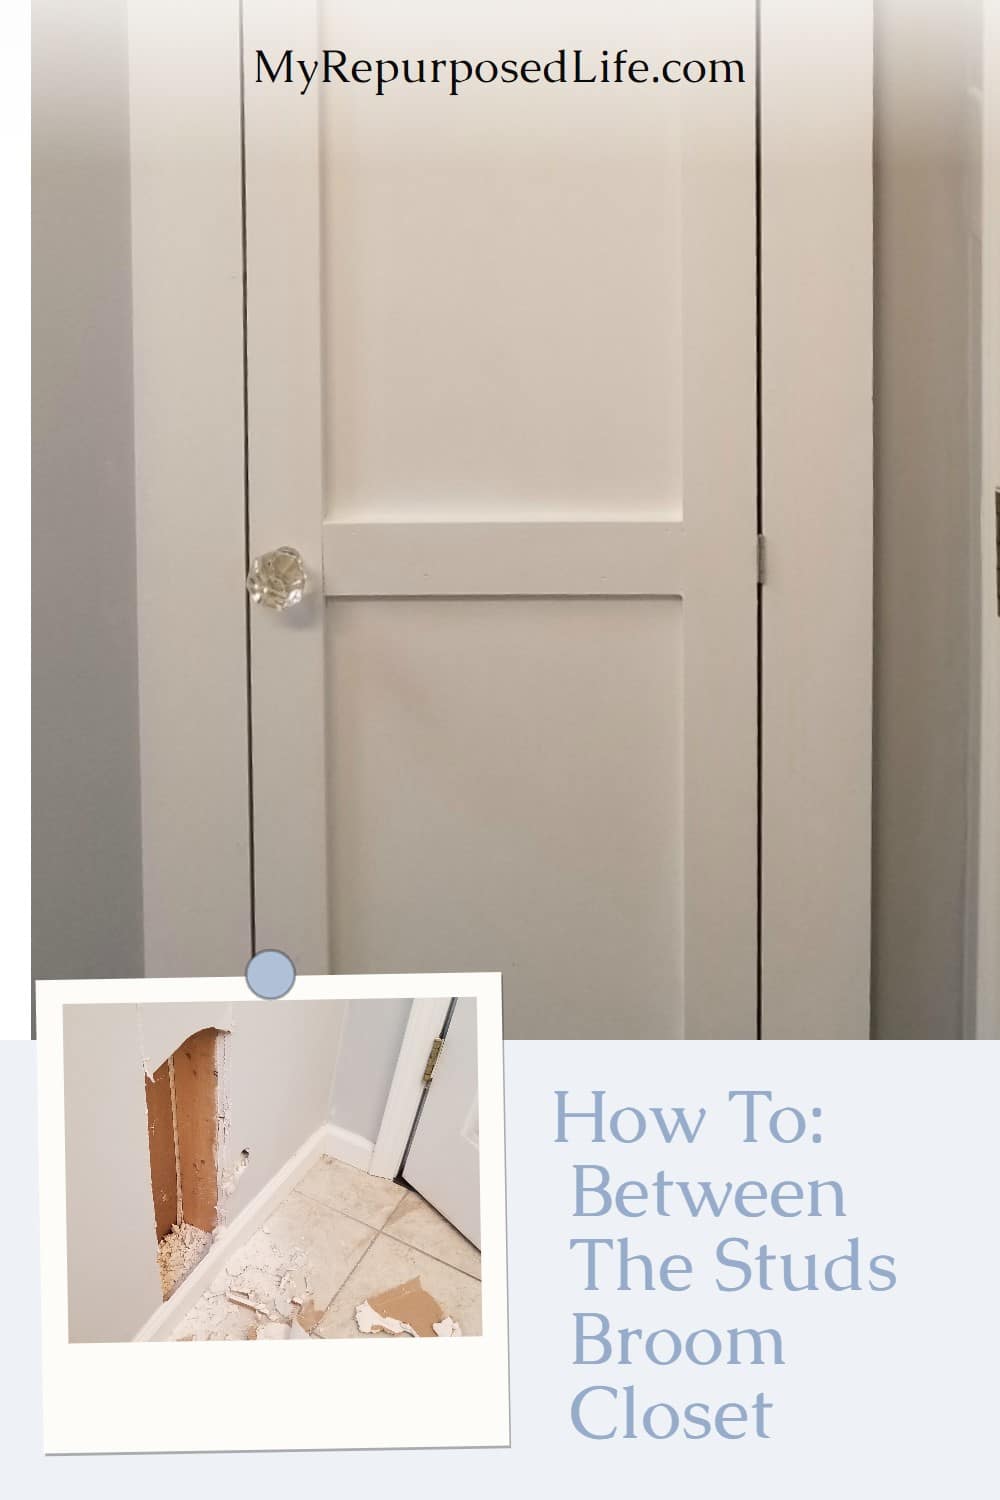
After the caulking and touch-up painting, I added a doorknob and a friction catch to the inside of the broom closet. It makes me chuckle that this is where I kept my towels for years before the bathroom remodel. Putting a small closet between the studs is so practical.

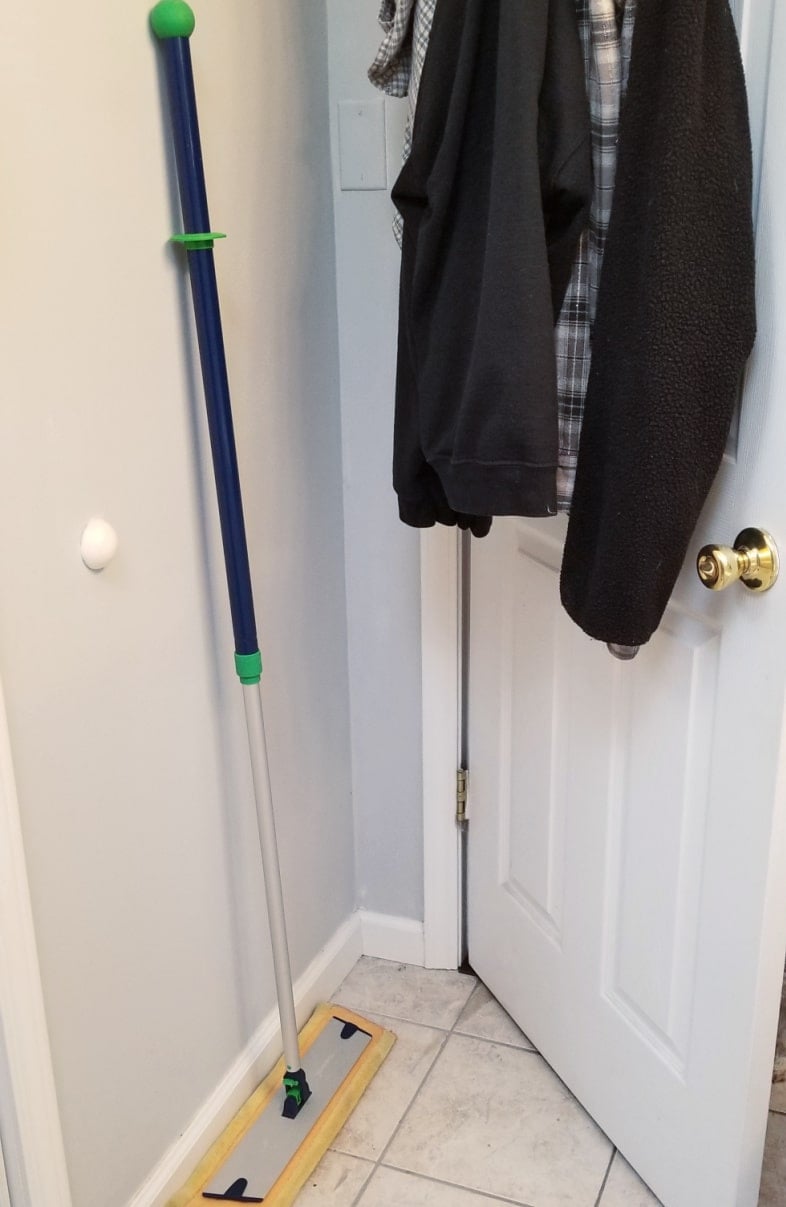
This is where I was keeping my oversized duster. When guests use the bathroom, they will see a cute little door instead of a big ole duster!

I thought I would put toilet paper rolls on the top shelf, but the OVERSIZED rolls will not fit with the door shut. I’m not loving the broom storage clips I brought, so I will probably switch them out. But, for now, these items are out of the way. The AutoRight Easy Wash Stick and Easy Wash Stick Brush are so handy to help clean my truck AND camper! Many people may store these items in the garage, but have you seen my garage full of tools and more?
Another great way to stay organized is in a linen closet with dollar store baskets.
It really is the little things in life that make me happy. Where could you use an in-between-the-studs closet?
Related Content:
Read more about Gail Wilson | My Repurposed Life
Be sure to check out all the fabulous projects from my friends.
Awesome DIY Organization Projects
- House of Wood – DIY Shoe Organizer
- My Love 2 Create – Between the Studs Workshop Organization
- House Becoming Home – DIY Closet Organization
- Anika’s DIY Life – DIY Corner Vegetable Storage Bin
- 100 Things 2 Do – Small Parts Bins
- Her Toolbelt – Backpack Storage Bench
- Remodel La Casa Office Organizer Drawers
- Jaime Costiglio – Easy Closet Shelves
- The Created Home – Shoe Storage Cabinet with Trays
- Woodshop Diaries – DIY Closet Cabinets
- Addicted 2 DIY – French Cleat Wall Organizer
- The Inspired Workshop – Ziploc Bag Organizer
- Reality Daydream – Cleaning Closet Organization
- Ugly Duckling House – DIY Jewelry Organizer
- Hazel and Gold Designs – Bathroom Drawer Organizer
- Place Of My Taste – Easy DIY Wine Rack
- Joyful Derivatives – DIY Spice Rack
gail
I have started the same project. I plan to clean up and paint the studs and the back of the other wall that form the inside of the closet. Do you think its necessary to make a complete insert like you’ve done?
Jrachelle@yahoo.com
That’s a great question Jenise! If you clean up the studs and paint, give it a try. If it doesn’t work out then procede with my instructions. Good Luck! I can’t wait to hear what happens next.
gail
I am interested in how you identified this as a non load bearing wall. I can’tseem to find straight answers online about this. Thanks!
PS. Yes, contacting a contractor is always the best bet, but let’s just say hypothetically speaking…
Heather
heheheh Well, in my case it had been a closet years ago, and drywalled to access it another way. Hypothetically speaking, If you’re not removing any studs, it shouldn’t matter, right?
gail
Gail,
This is such an awesome idea! I own a tiny home. Just under a 1,000 Sq. ft.😊 I need this closet!
Thanks for sharing.
Lisa,
I need another broom closet, this one for my vacation home, a trailer (400 sq ft) However there are no studs, so I’ll have to build something in my tiny master 1/2 bath. lol
Good luck if you decide to do this.
gail