Black and Hickory Side Table Makeover
As an Amazon Associate, I earn from qualifying purchases.
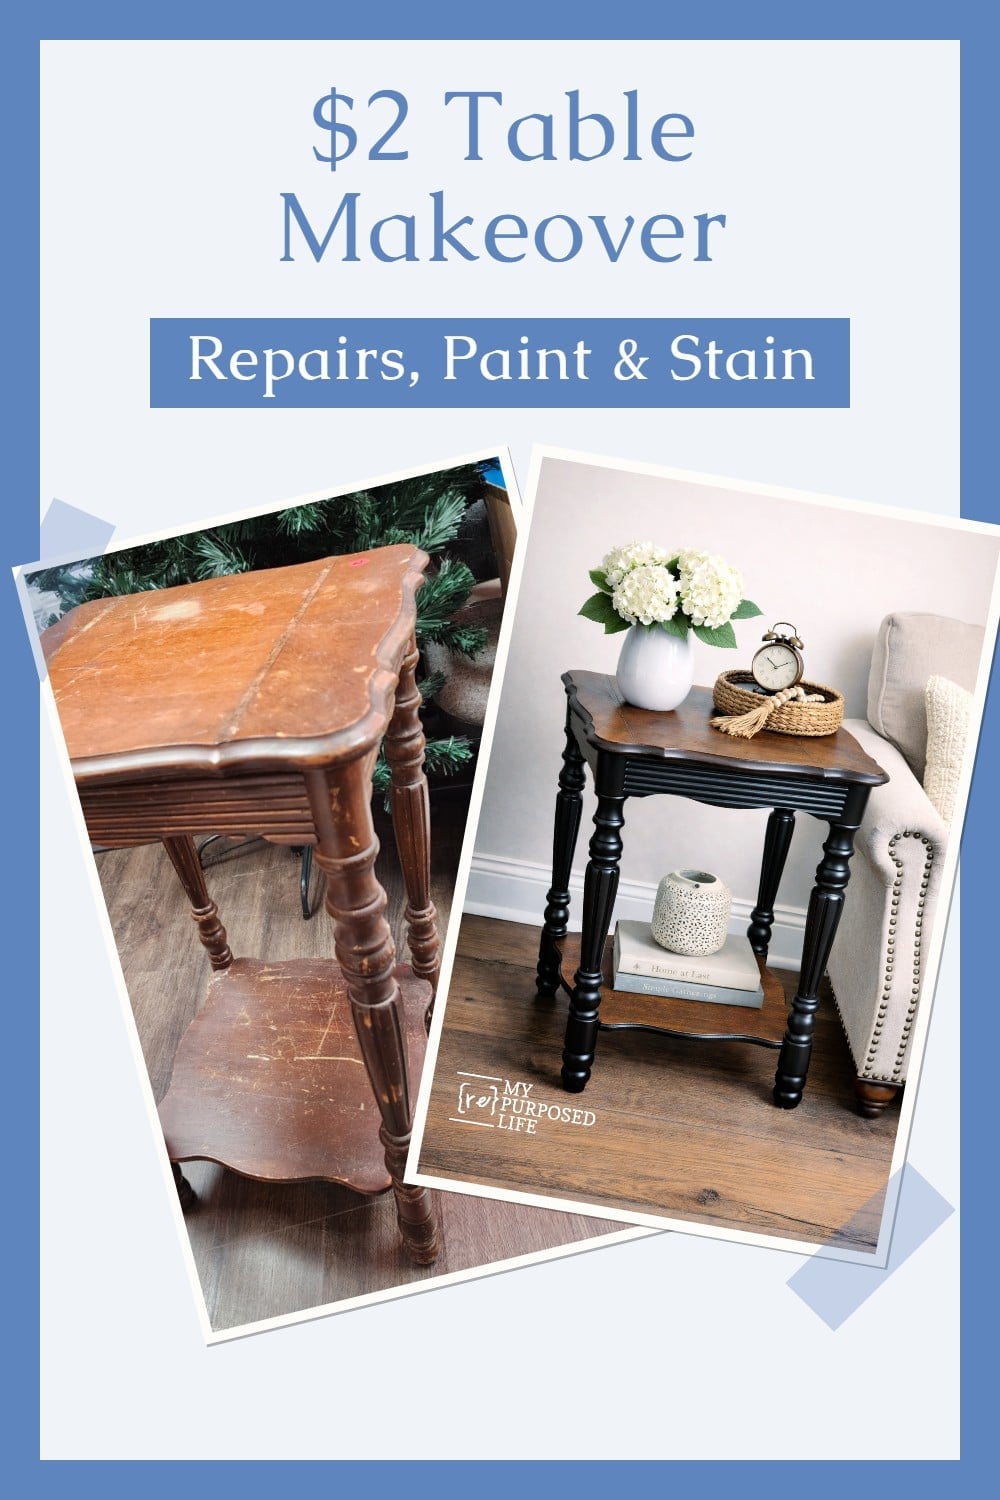
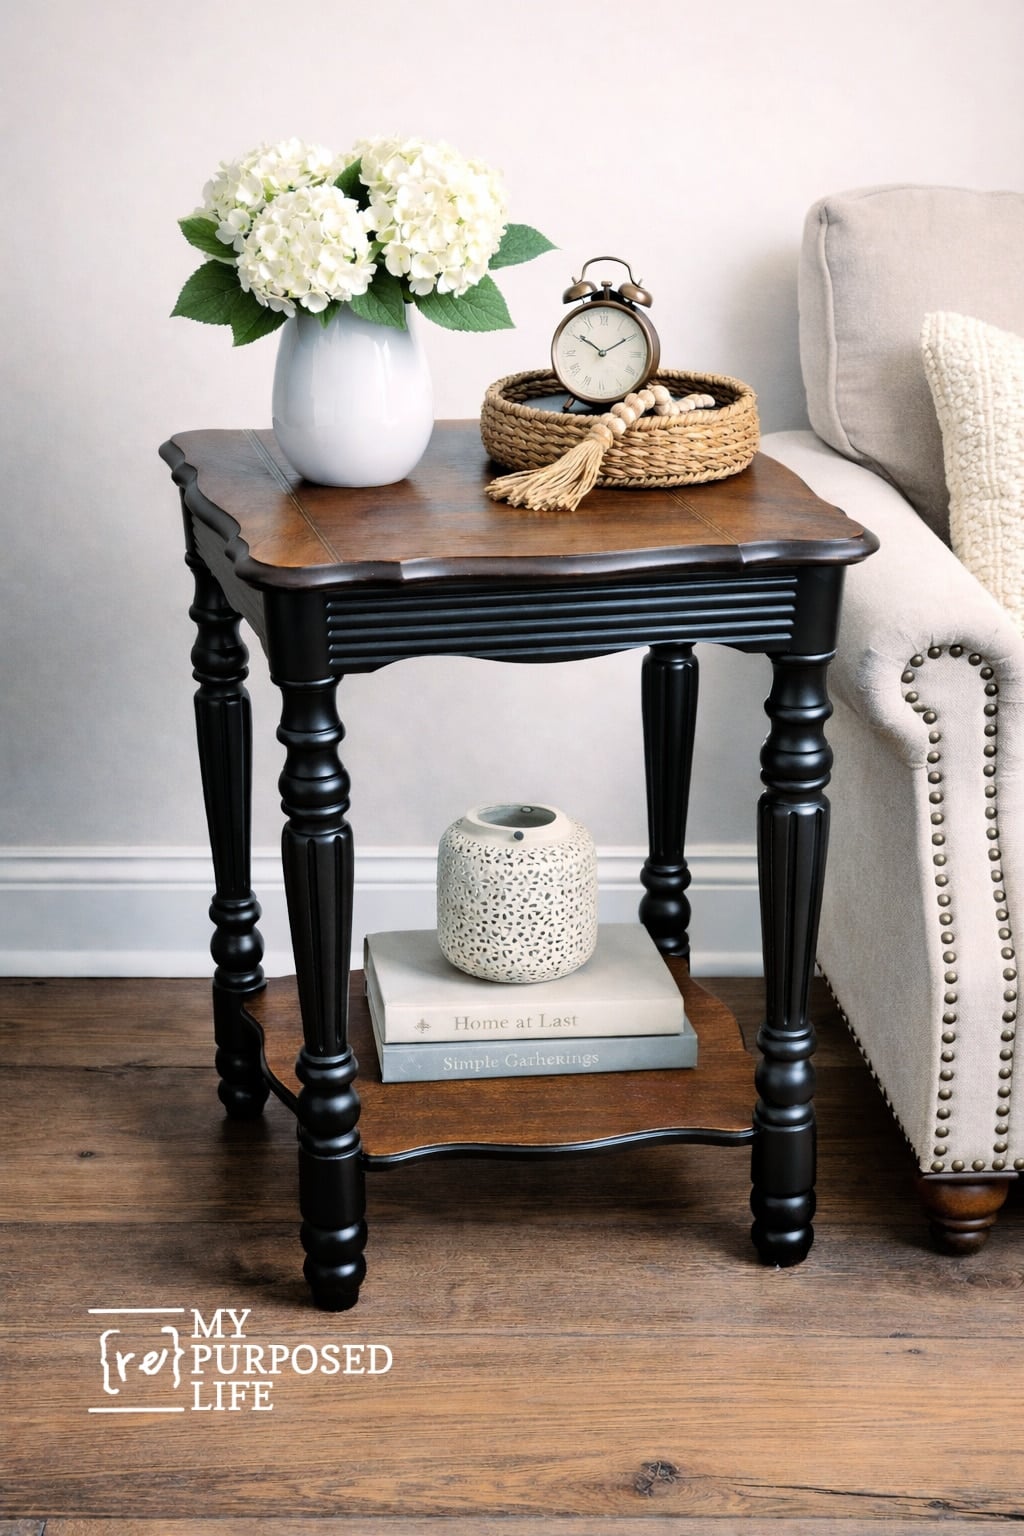
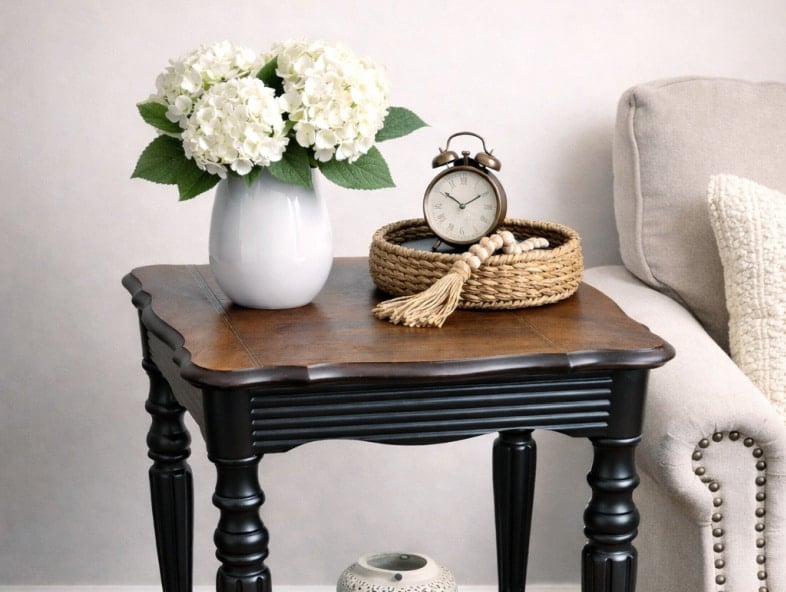
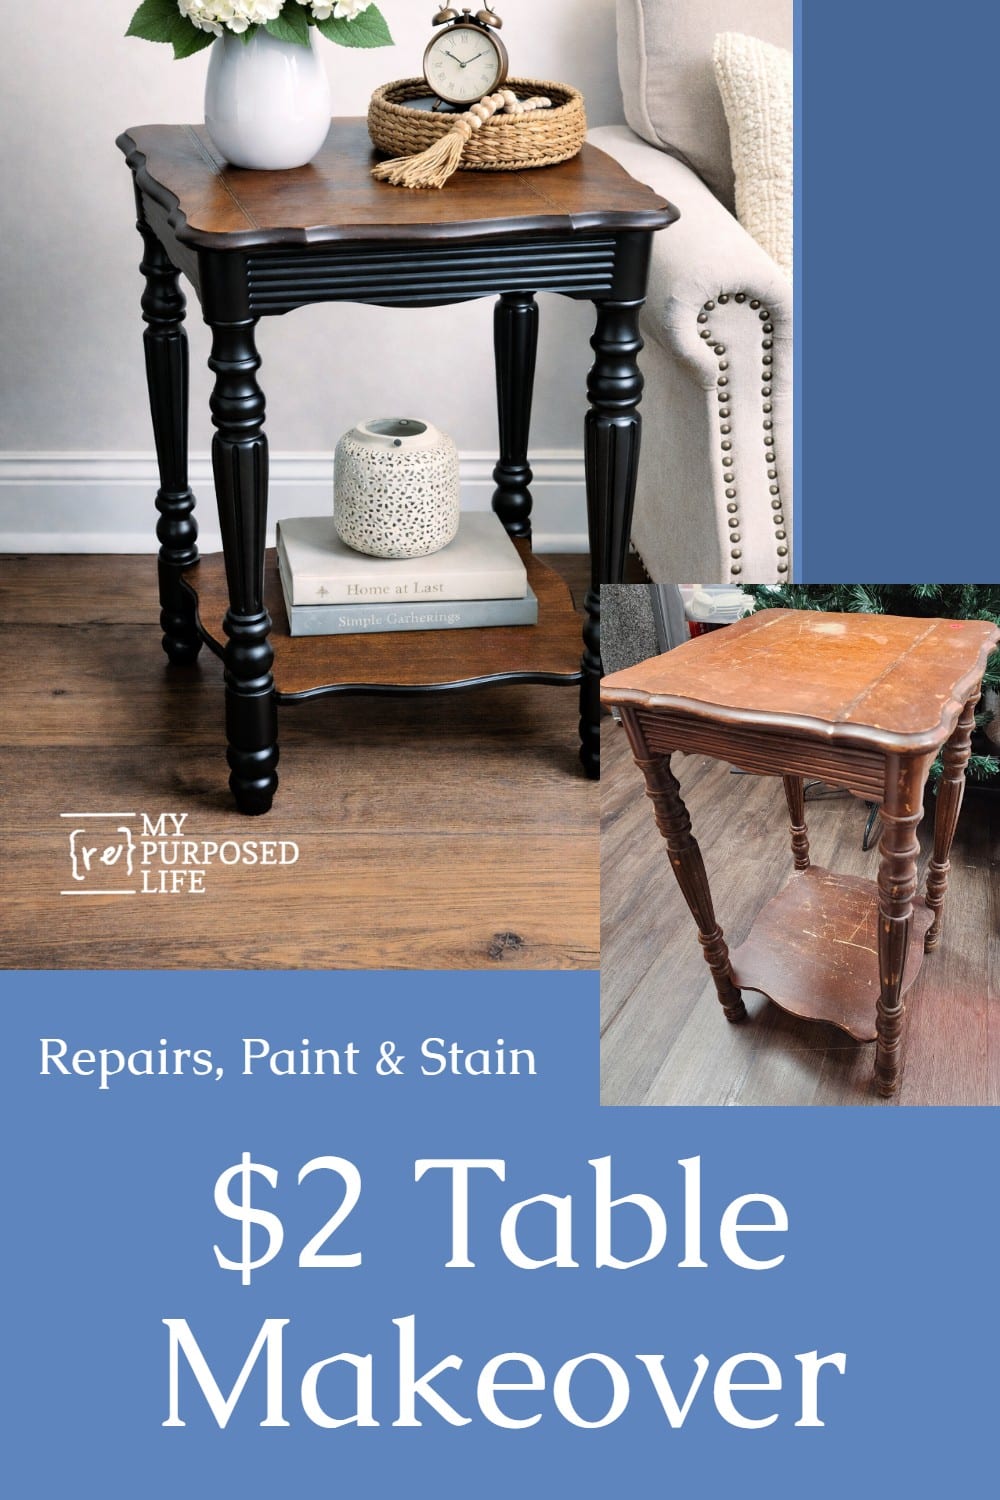
This side table started out as a quiet, traditional piece that blended into the background. But once I saw the inlay on the tabletop, I knew it deserved a stronger presence. By pairing a black-painted base with a warm hickory stain on the top and lower shelf, this little table finally found its personality. The contrast highlights every curve and inlay detail, turning a simple thrifted piece into a polished black and hickory side table makeover.
Black and Hickory Side Table Makeover
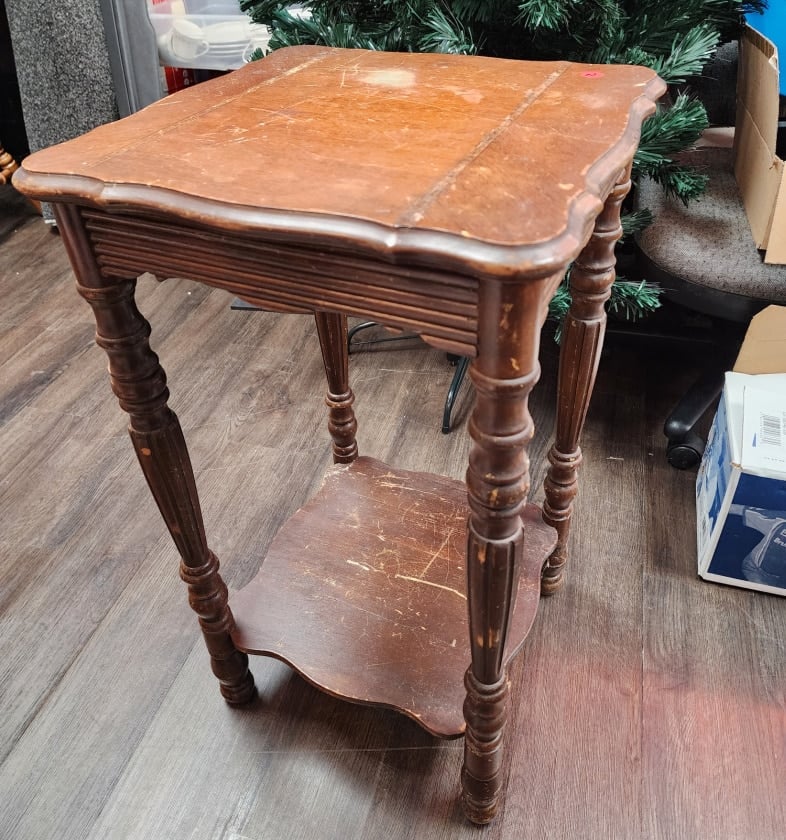
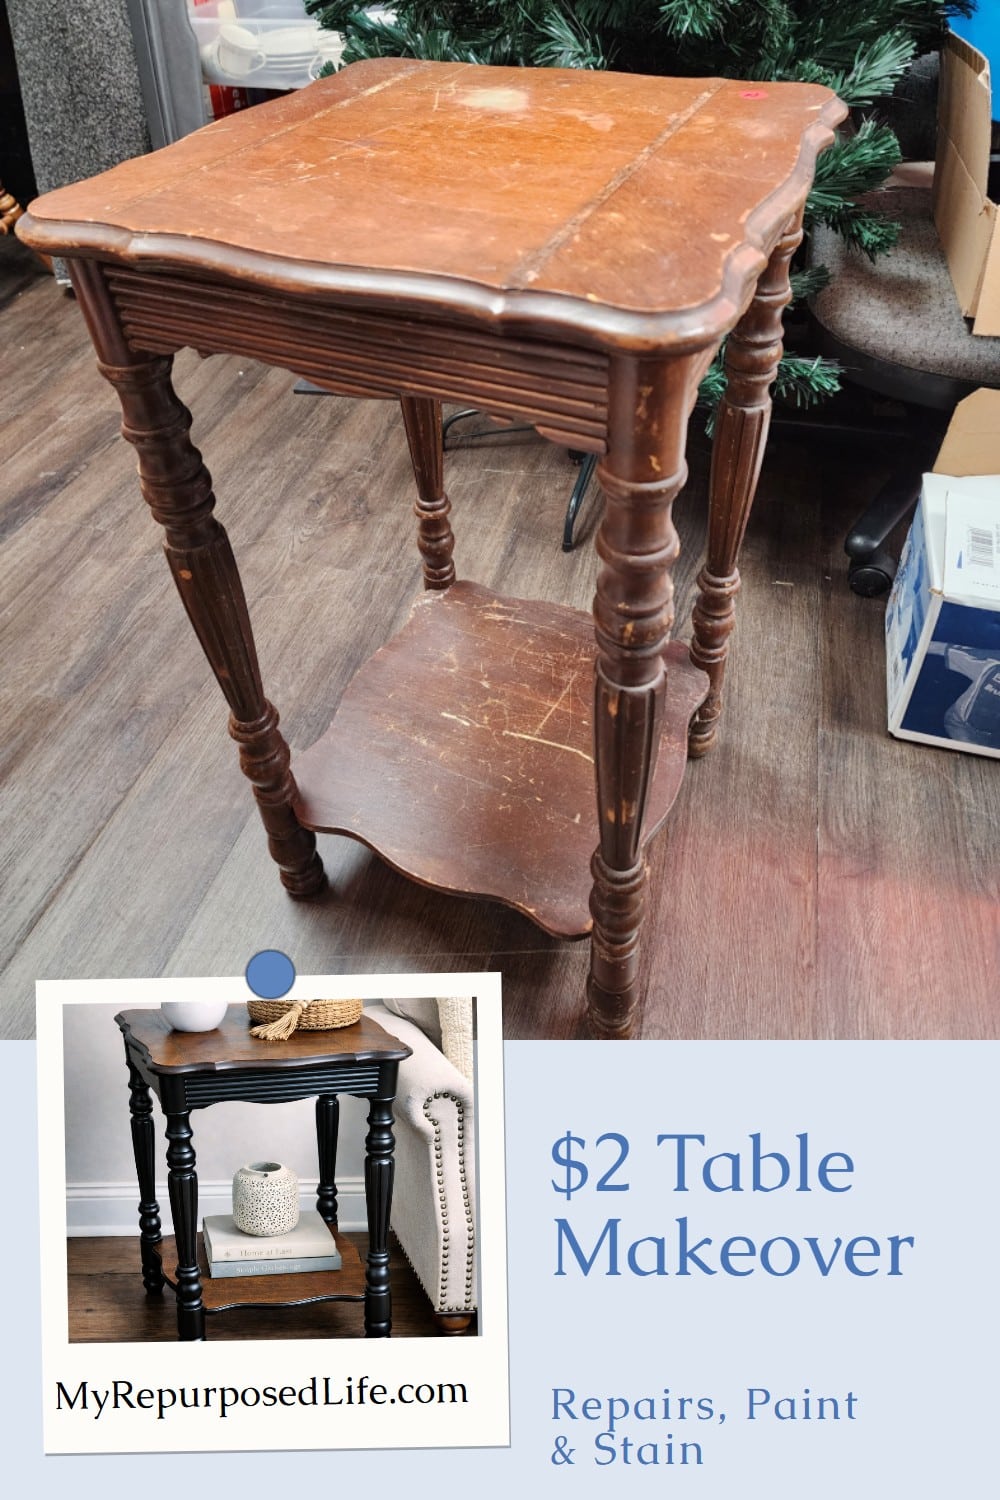
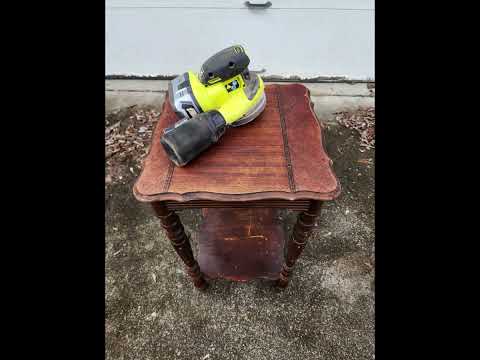
Winter months in Kentucky are a hit-and-miss. I don’t have a studio for painting furniture. So, for this month’s FFU project, I set out to find something small to paint in the kitchen. Luckily, I found a small $2 antique side table. At first, I had no idea the side table would get a black-and-hickory paint-and-stain makeover. However, plans can change. I’ll walk you through my thought process in this article.
The Furniture Fixer Upper Tour is a monthly furniture makeover series featuring a small team of furniture-painting friends. Each month, we all start with a tired or thrifted piece and share how we clean it up, repair it, and give it a fresh new finish. After you check out this project, be sure to visit the links at the bottom of the post to see what the rest of the Furniture Fixer Upper team did with their finds.
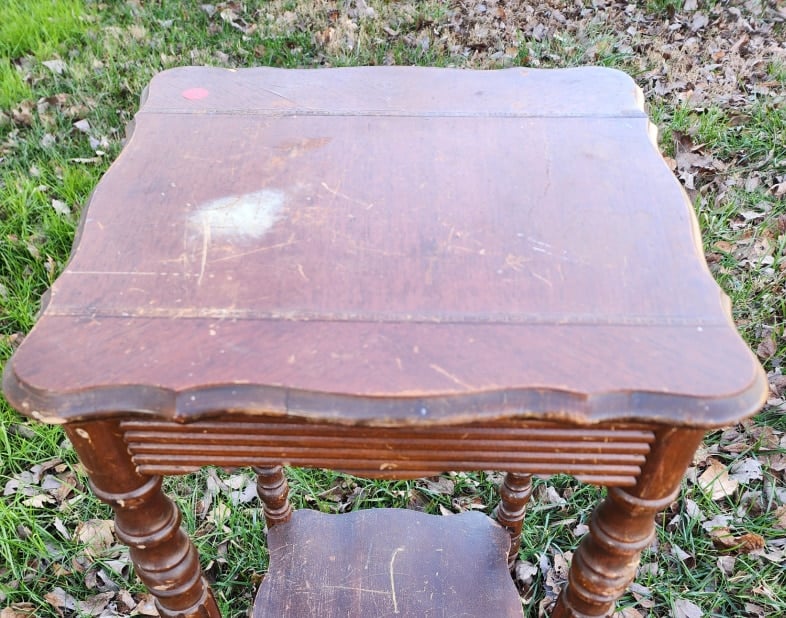
Inspect Thrift Store Furniture and Make Repairs

When I grabbed the $2 antique table at the thrift store, I immediately knew why it was marked so low. Not only was it wobbly, but one piece of the skirt was coming off.
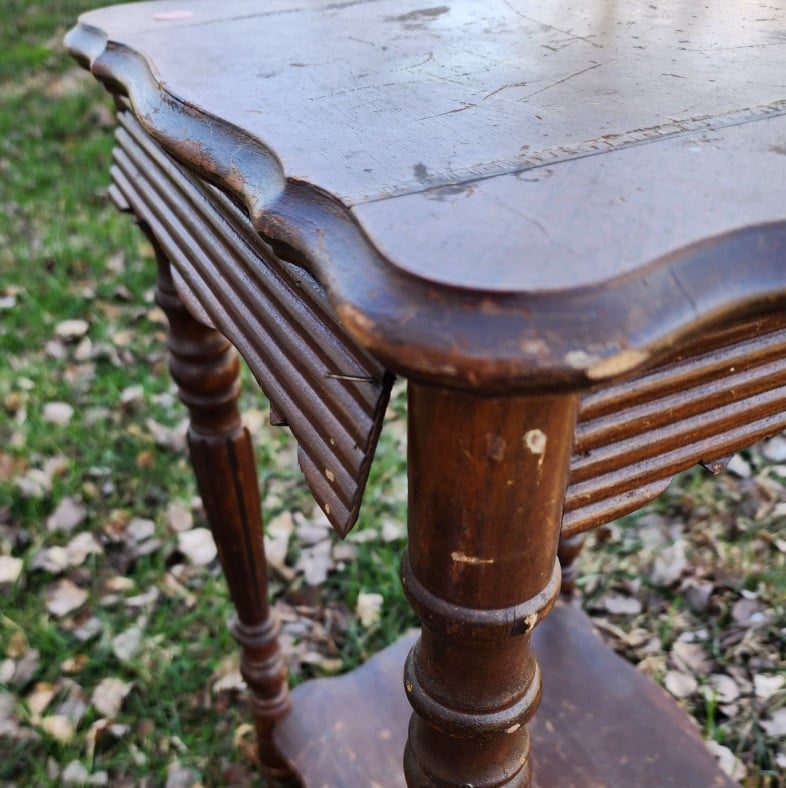
To take the photo, I pulled it farther away from the top of the leg so you could see it.
Continue reading below for all the details and my best tips for completing less than desirable furniture makeovers.
Badly Scratched Lower Shelf
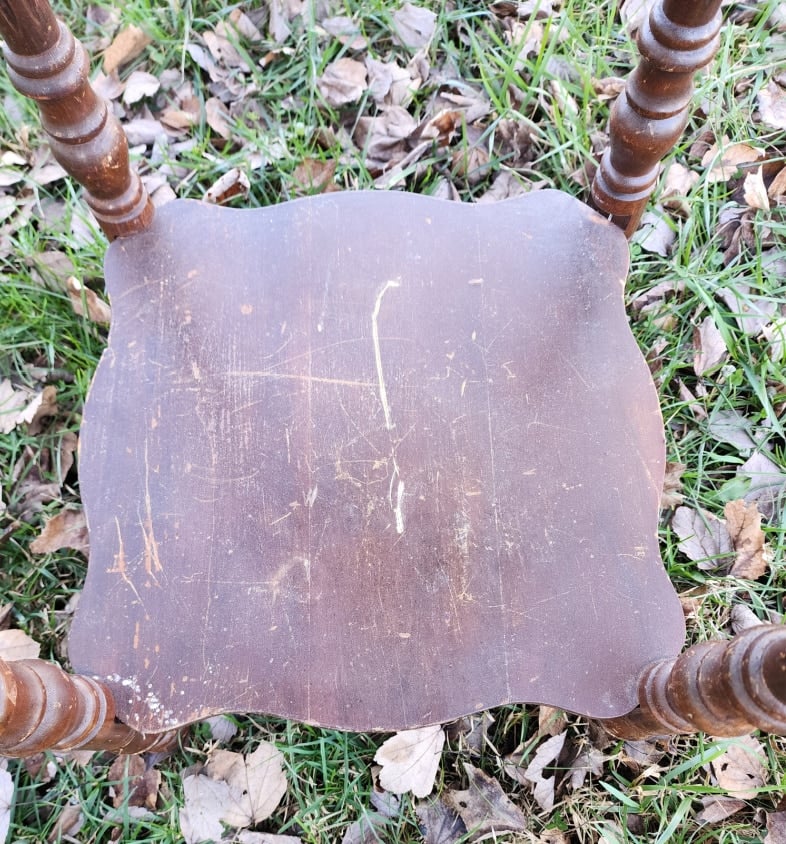
Not all repairs need a hammer and nails. The lower shelf was badly scratched.
The top of the table had some dings, scratches, and what appears to be a white water stain.
Making Furniture Repairs
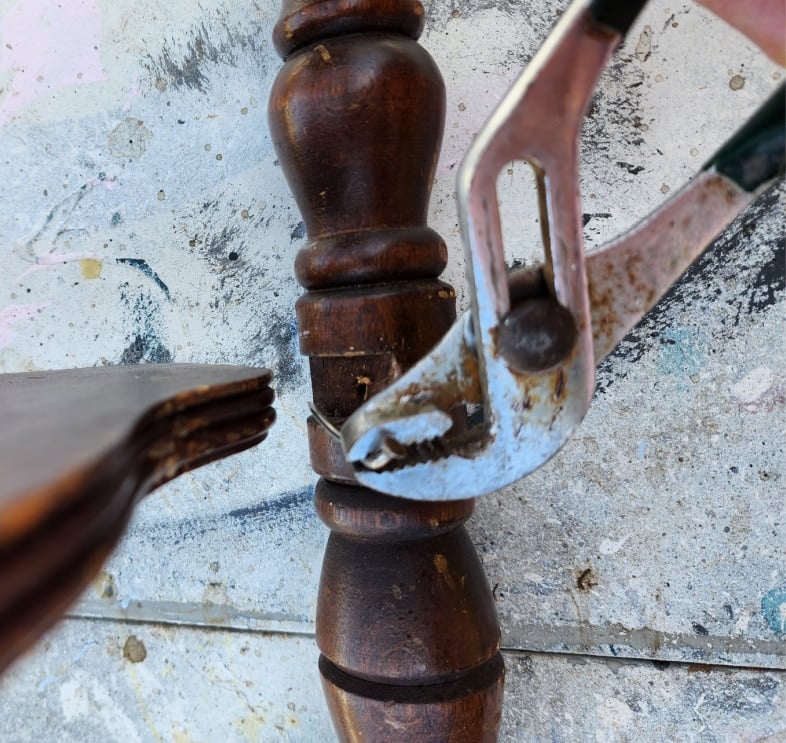
Each leg had a large nail on the underside to hold the lower shelf in place. Because I couldn’t get it where it needed to be, I removed it with a pair of channel locks.
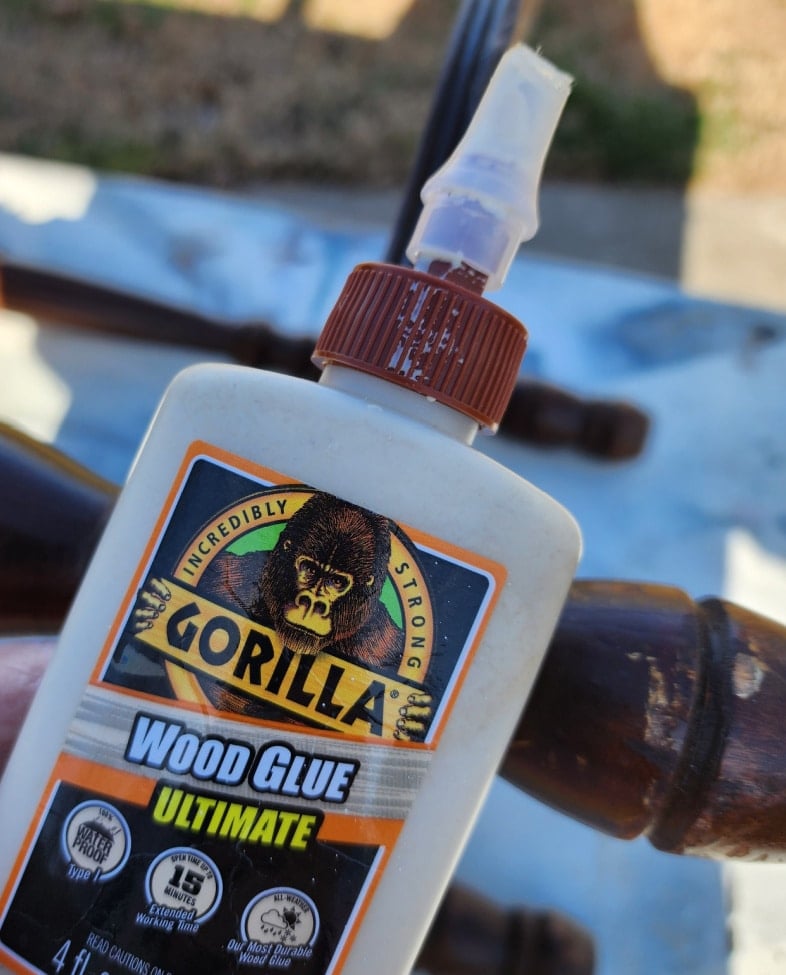
After removing the nail, I filled the void with Gorilla Wood Glue and let the weight of the table hold it in place until the glue set up.
Clamping Hack

Then, I worked on repairing the skirt. I applied a generous amount of wood glue to the loose corner. My longer Irwin Quick Clamps would not reach from side to side, so I used my clamping hack. Connect the two clamps to extend the reach. This also works with metal bar clamps; see that hack in my article Pineapple Headboard Bench.
After the glue set on the lower shelf and the ribbed table skirt, I used a nail gun to shoot a few brad nails for extra stability. It is wobbly-no-more.
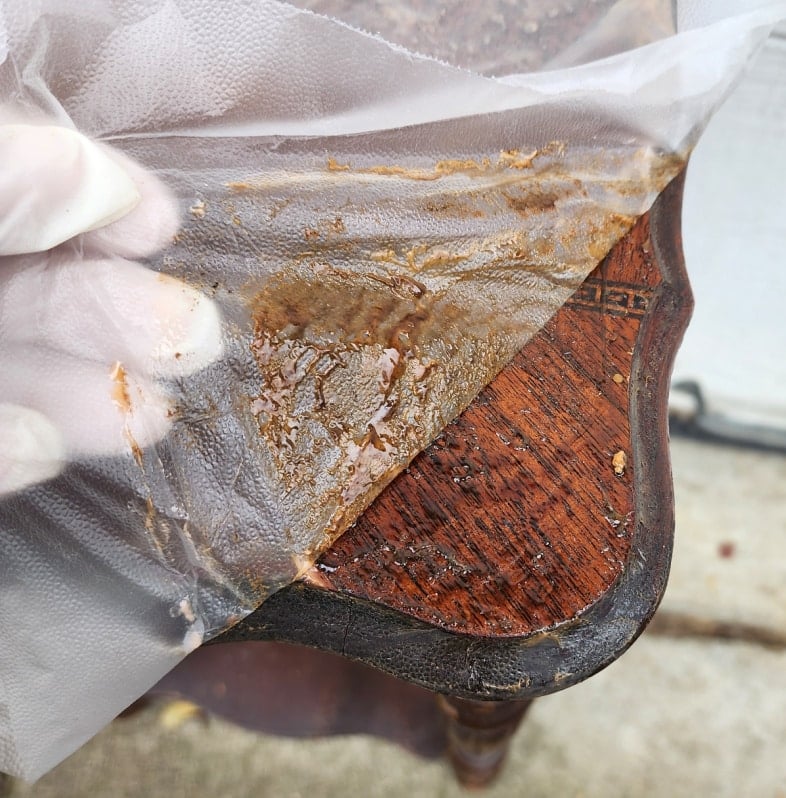
Citristrip Stripping Gel
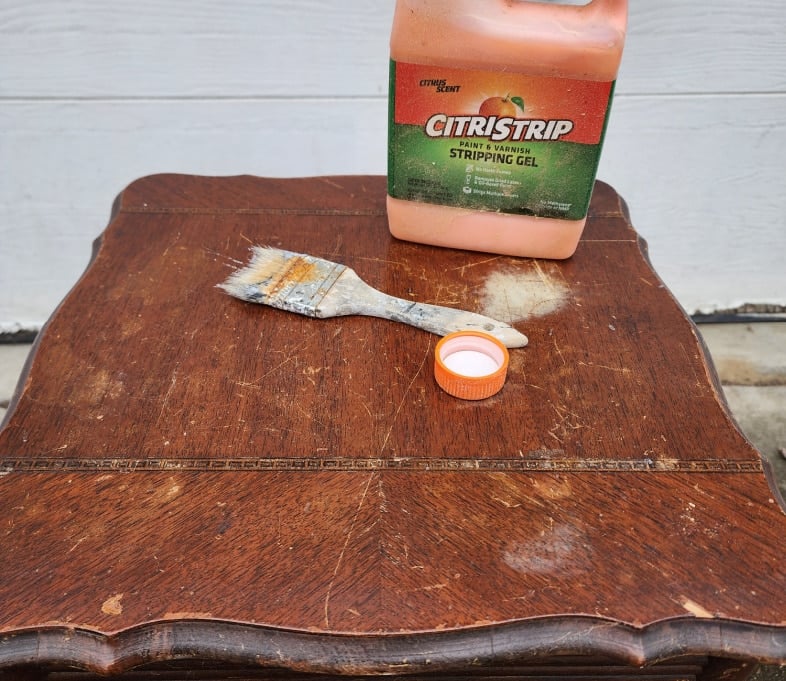
After admiring the inlay pattern, I decided to strip the finish off the top of the table, similar to what I did with the Amazing Waterfall Chest Makeover. Bonus! The weather was cooperating for a few days.
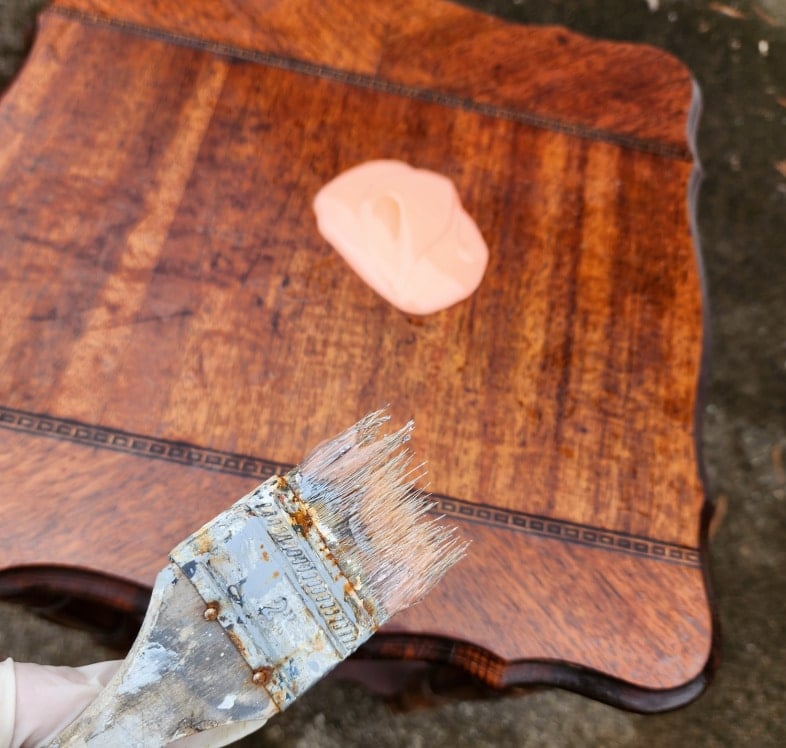
I poured the Citristrip right onto the tabletop and used a cheap chip brush to spread it around.
The Citristrip is easy to work with. In this image, you can see I applied the furniture stripper very liberally.
Using Plastic Wrap to Aid in Furniture Refinishing
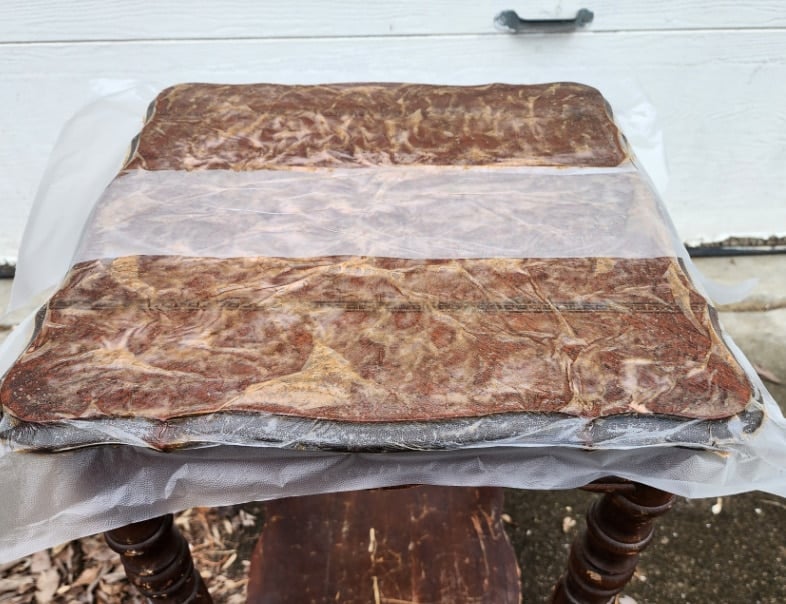
Somewhere I read that using plastic wrap over furniture stripper helps remove the finish better and/or faster. I didn’t have regular plastic wrap, so I used Press’n Seal.
After an hour, I peeled back the plastic wrap to check on the progress. It was difficult to tell if it was working.

Using a plastic putty knife, I pushed the Citristrip around, letting it work a little more. Not shown, I did a second coat of Citristrip without the plastic wrap.
Preparing the Lower Shelf

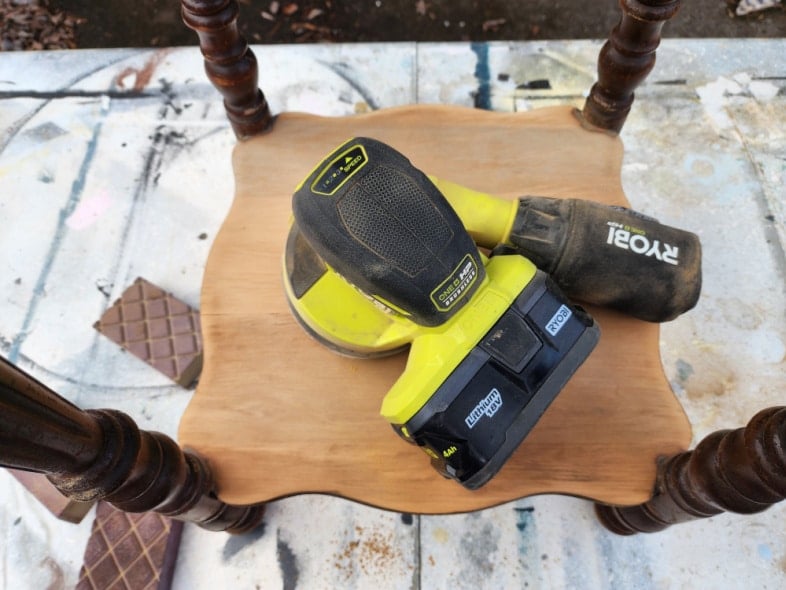
First I used the orbital sander, then I used a couple of sanding sponges in 80-grit and 220-grit. The sander took care of the large gouge and scratches.
Wipe Away Citristrip Furniture Stripper
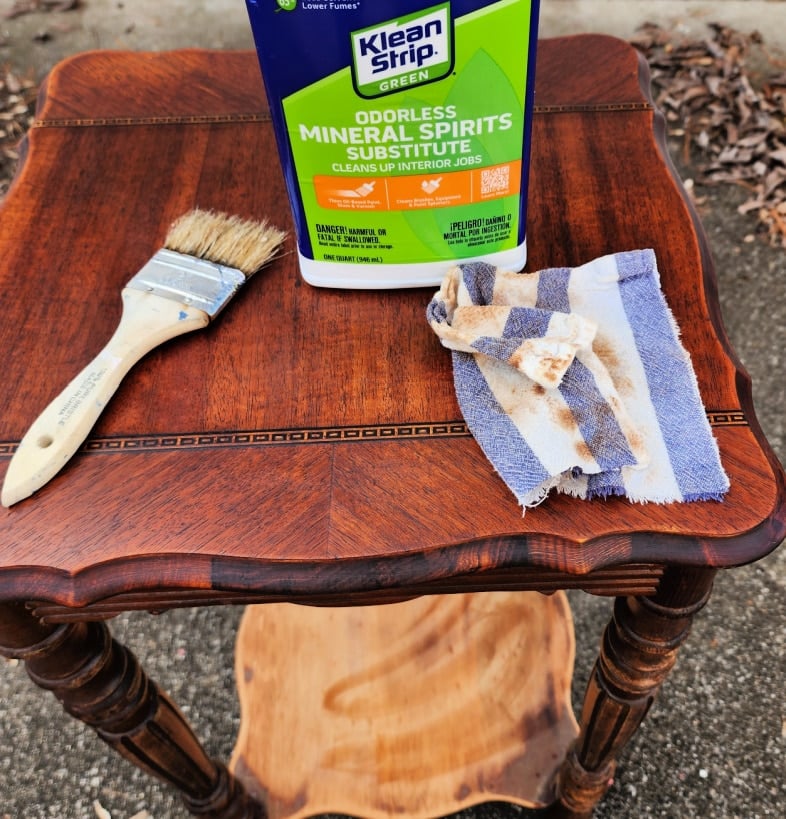
The directions on the furniture stripper say to use lacquer thinner to clean up the project. I didn’t have any, so I reached for the only thing I had, odorless mineral spirits substitute. It worked well enough.
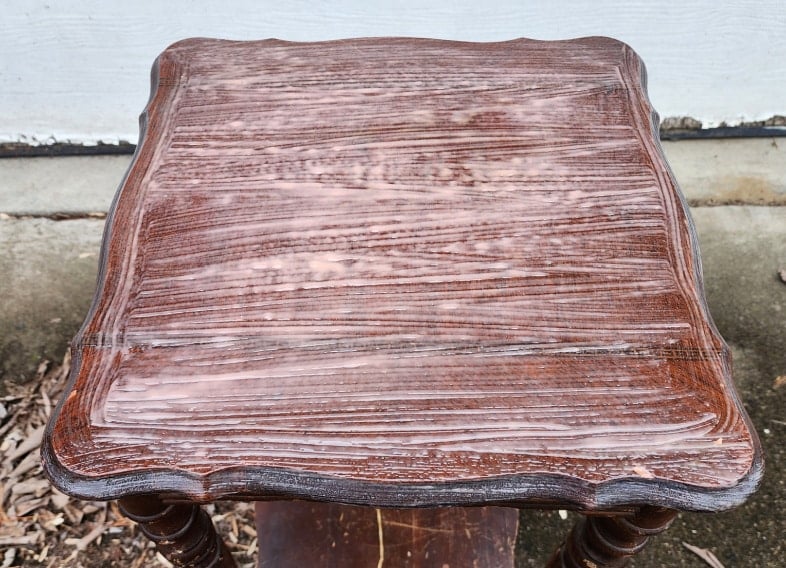
Lightly Sand Furniture Project
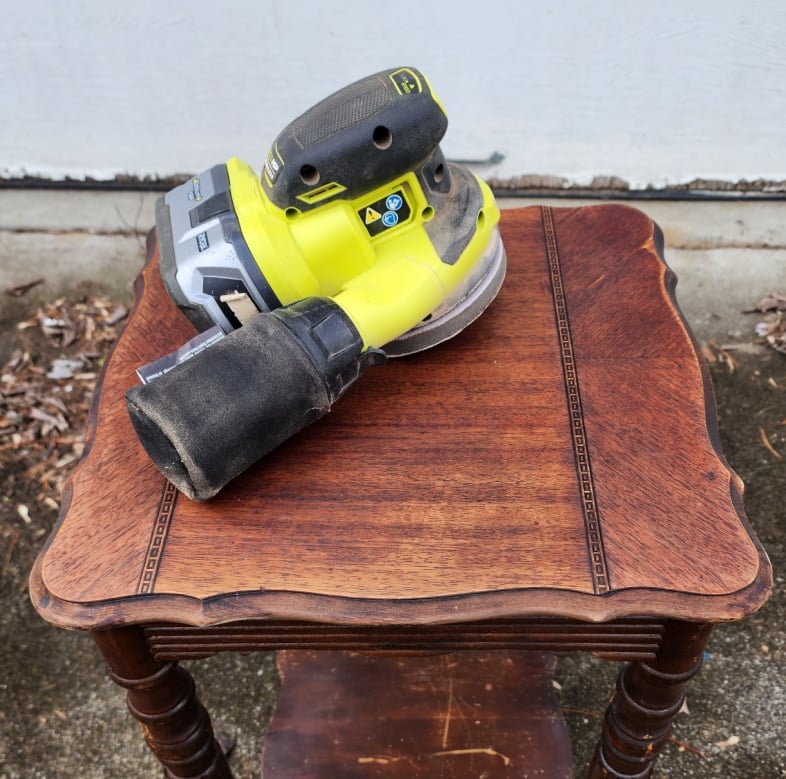
To preserve the integrity of the inlay, I lightly sanded it with my orbital sander. Looking back, I should have waited until the next day, when the wood was completely dry.
Tip: While the tabletop was wet with the mineral spirits substitute it was a good indication of what the top would look like with the stain applied.
Varathane Hickory Gel Stain
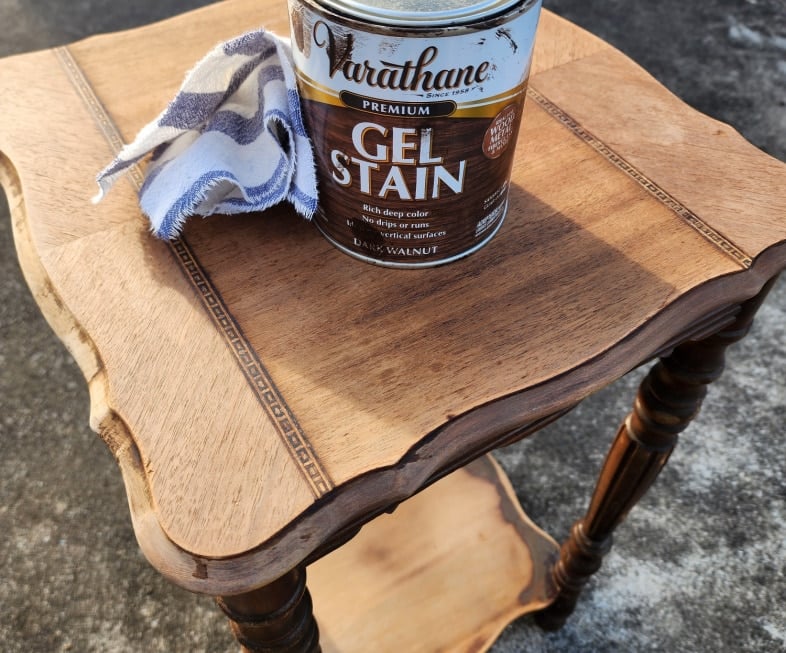
See how much lighter the table top is now that it is dry? It’s ready for the Hickory Gel Stain.
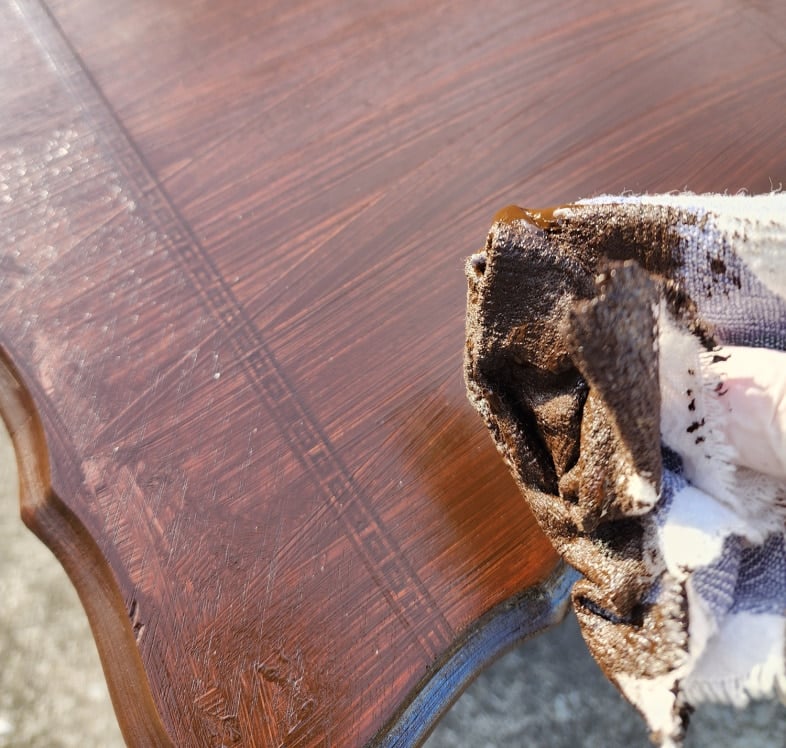
Gel stain is different than regular wood stain. You can apply it even though not all of the finish is removed. Think of it as “paint stain”. When applying the gel stain, it’s recommended that you first go against the grain, then with the grain. Then let the stain set for 5-10 minutes and wipe it away.
After wiping away the stain, it was still slightly tacky. I let it sit overnight in the garage because of the odor. The next day, I brought it in the house to warm up and used a soft cloth to “buff” the finish a few times over the next couple of hours.
What to do With the Bottom Shelf
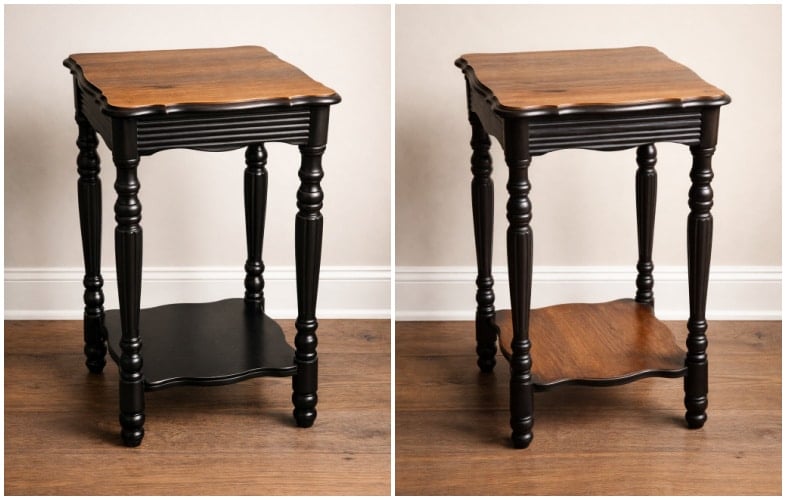
Maybe you know I struggle with decisions on color when it comes to painting furniture. After speaking to some friends, and my friend Aggie (Chat GPT) I decided to paint the table black to go with the hickory stain. I considered leaving the lower shelf “as is” and paint it black. I had Aggie do a mockup with the table both ways.

Even seeing the comparison, I still wasn’t sure, but decided to remove the rest of the finish from the lower shelf. This is what it looked like before I started sanding.
Again, the orbital sander didn’t disappoint. After sanding and wiping off the lower shelf, it was ready for the Hickory Gel Stain.

This image shows the lower shelf still wet with the gel stain. Because the sander removed all of the original finish, the gel stain soaked in pretty well, and wiped back nicely.
Prepare Table for Painting
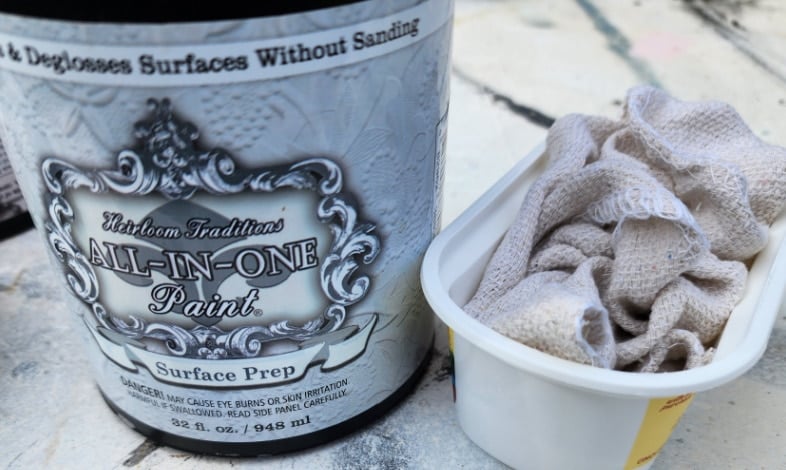
I didn’t have any Surface Prep Wipes, and I didn’t want to brush on the liquid surface prep because of the fresh gel stain. I grabbed a soft cloth, and poured surface prep into a plastic tub. So, essentially, I made my own Surface Prep Wipes.
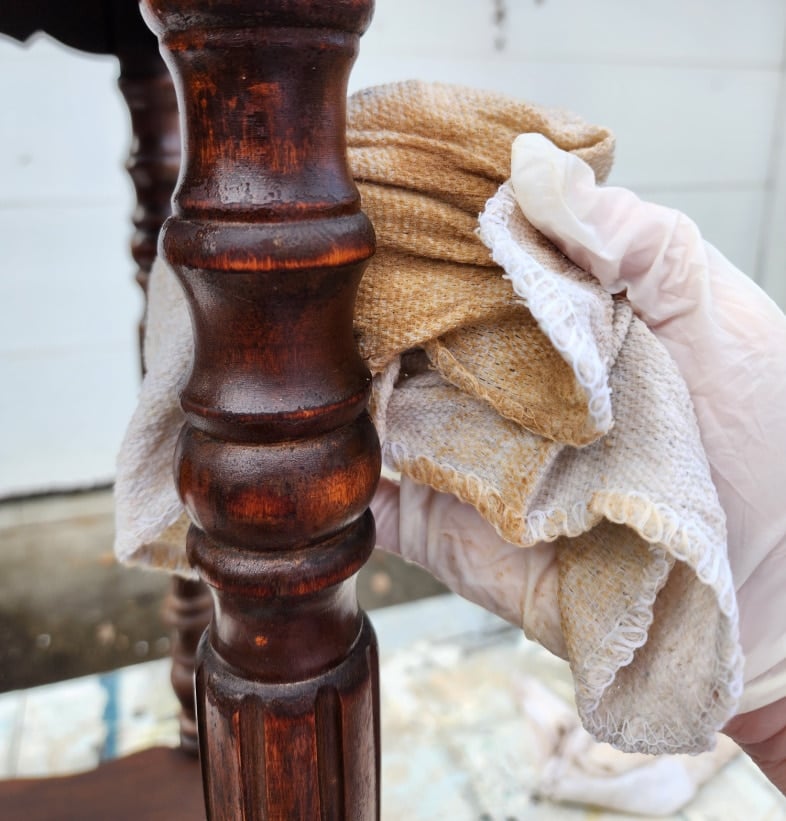
The Surface Prep damp cloth worked perfectly to clean and degloss the wood to ready it for paint.
Warm Embers (Warm Black)
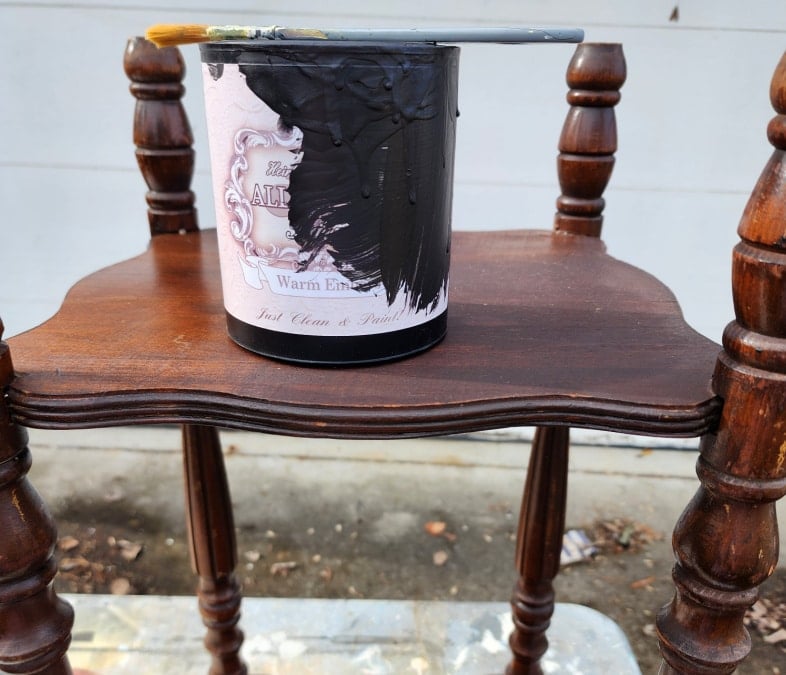
Instead of using a true black, I chose Warm Embers, which is a warm black. It’s the color I used on my kitchen cabinets and the floral deoupaged side table.
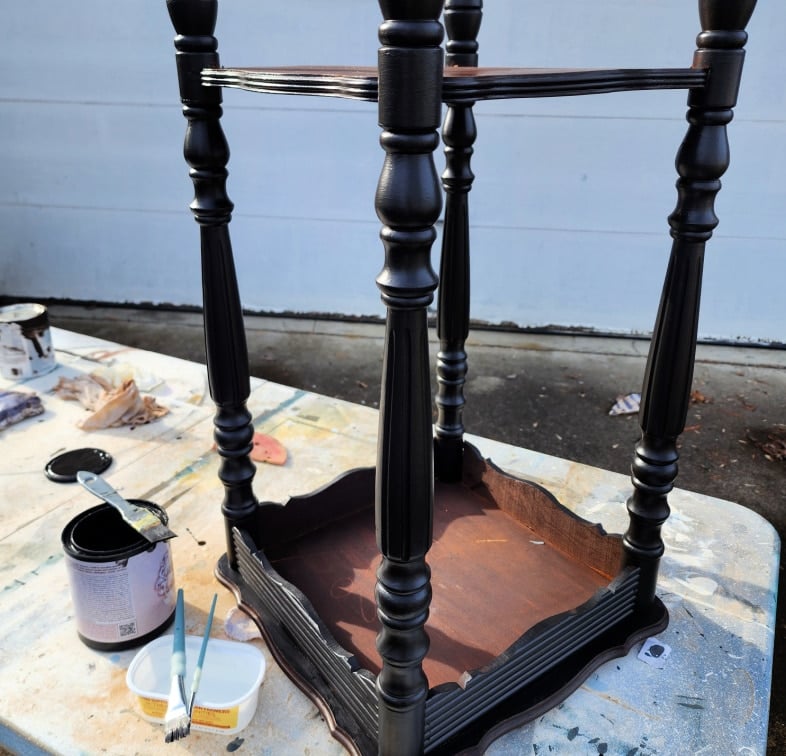
I prefer to use small brushes on a project like this black and hickory side table. Paint is not cheap, and I’m not a fan of washing it all down the sink when I’m finished. The small angled brush resting on the can is my go-to brush. I can’t find one like it, and I keep buying others, but they don’t compare.
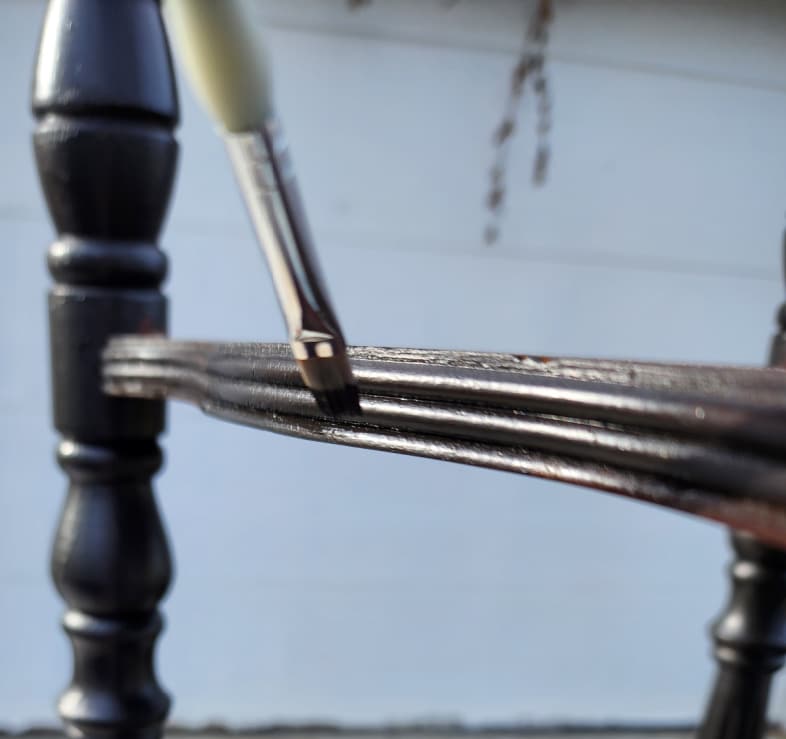
The small artist’s brush was perfect for touching up the ribbed skirt on the table.
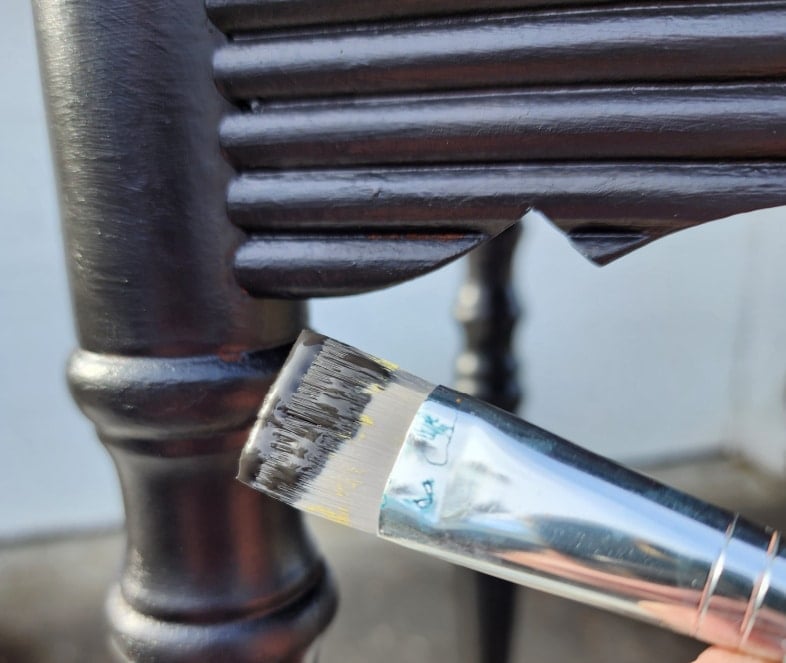
Another wider brush was used to touch up the turned legs and more.
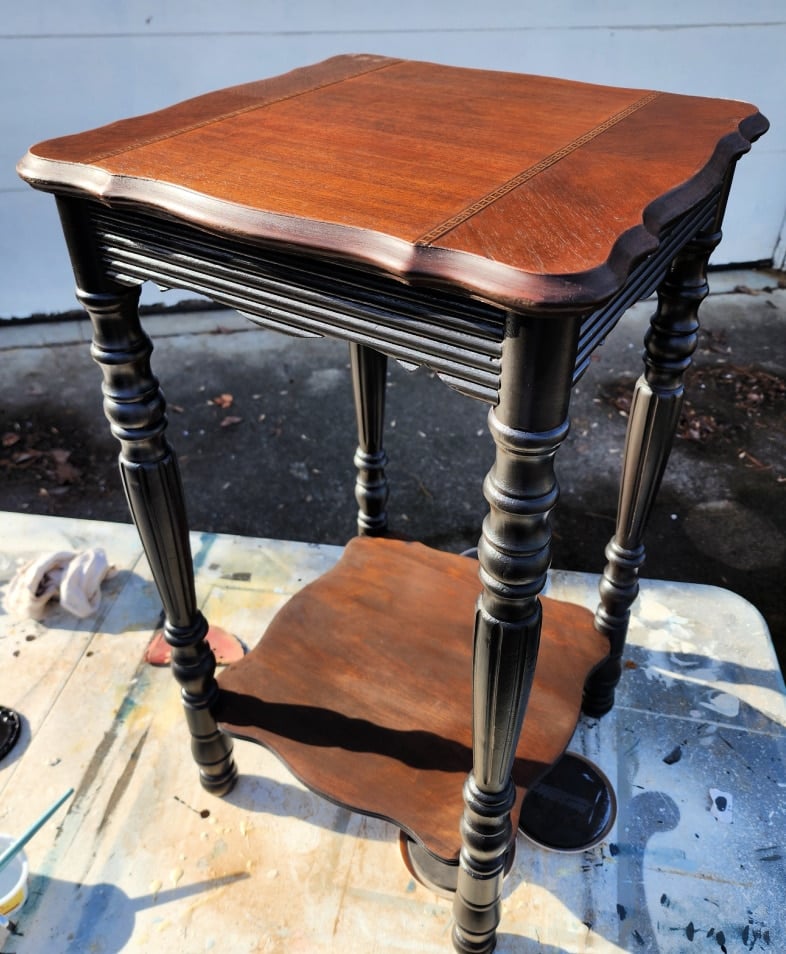
Finally, it was time to turn the table upright so I could do more touch-ups. Are you a fan of the black-and-hickory two-toned look? As I said earlier, black paint was not on my radar to pair with the hickory gel stain.
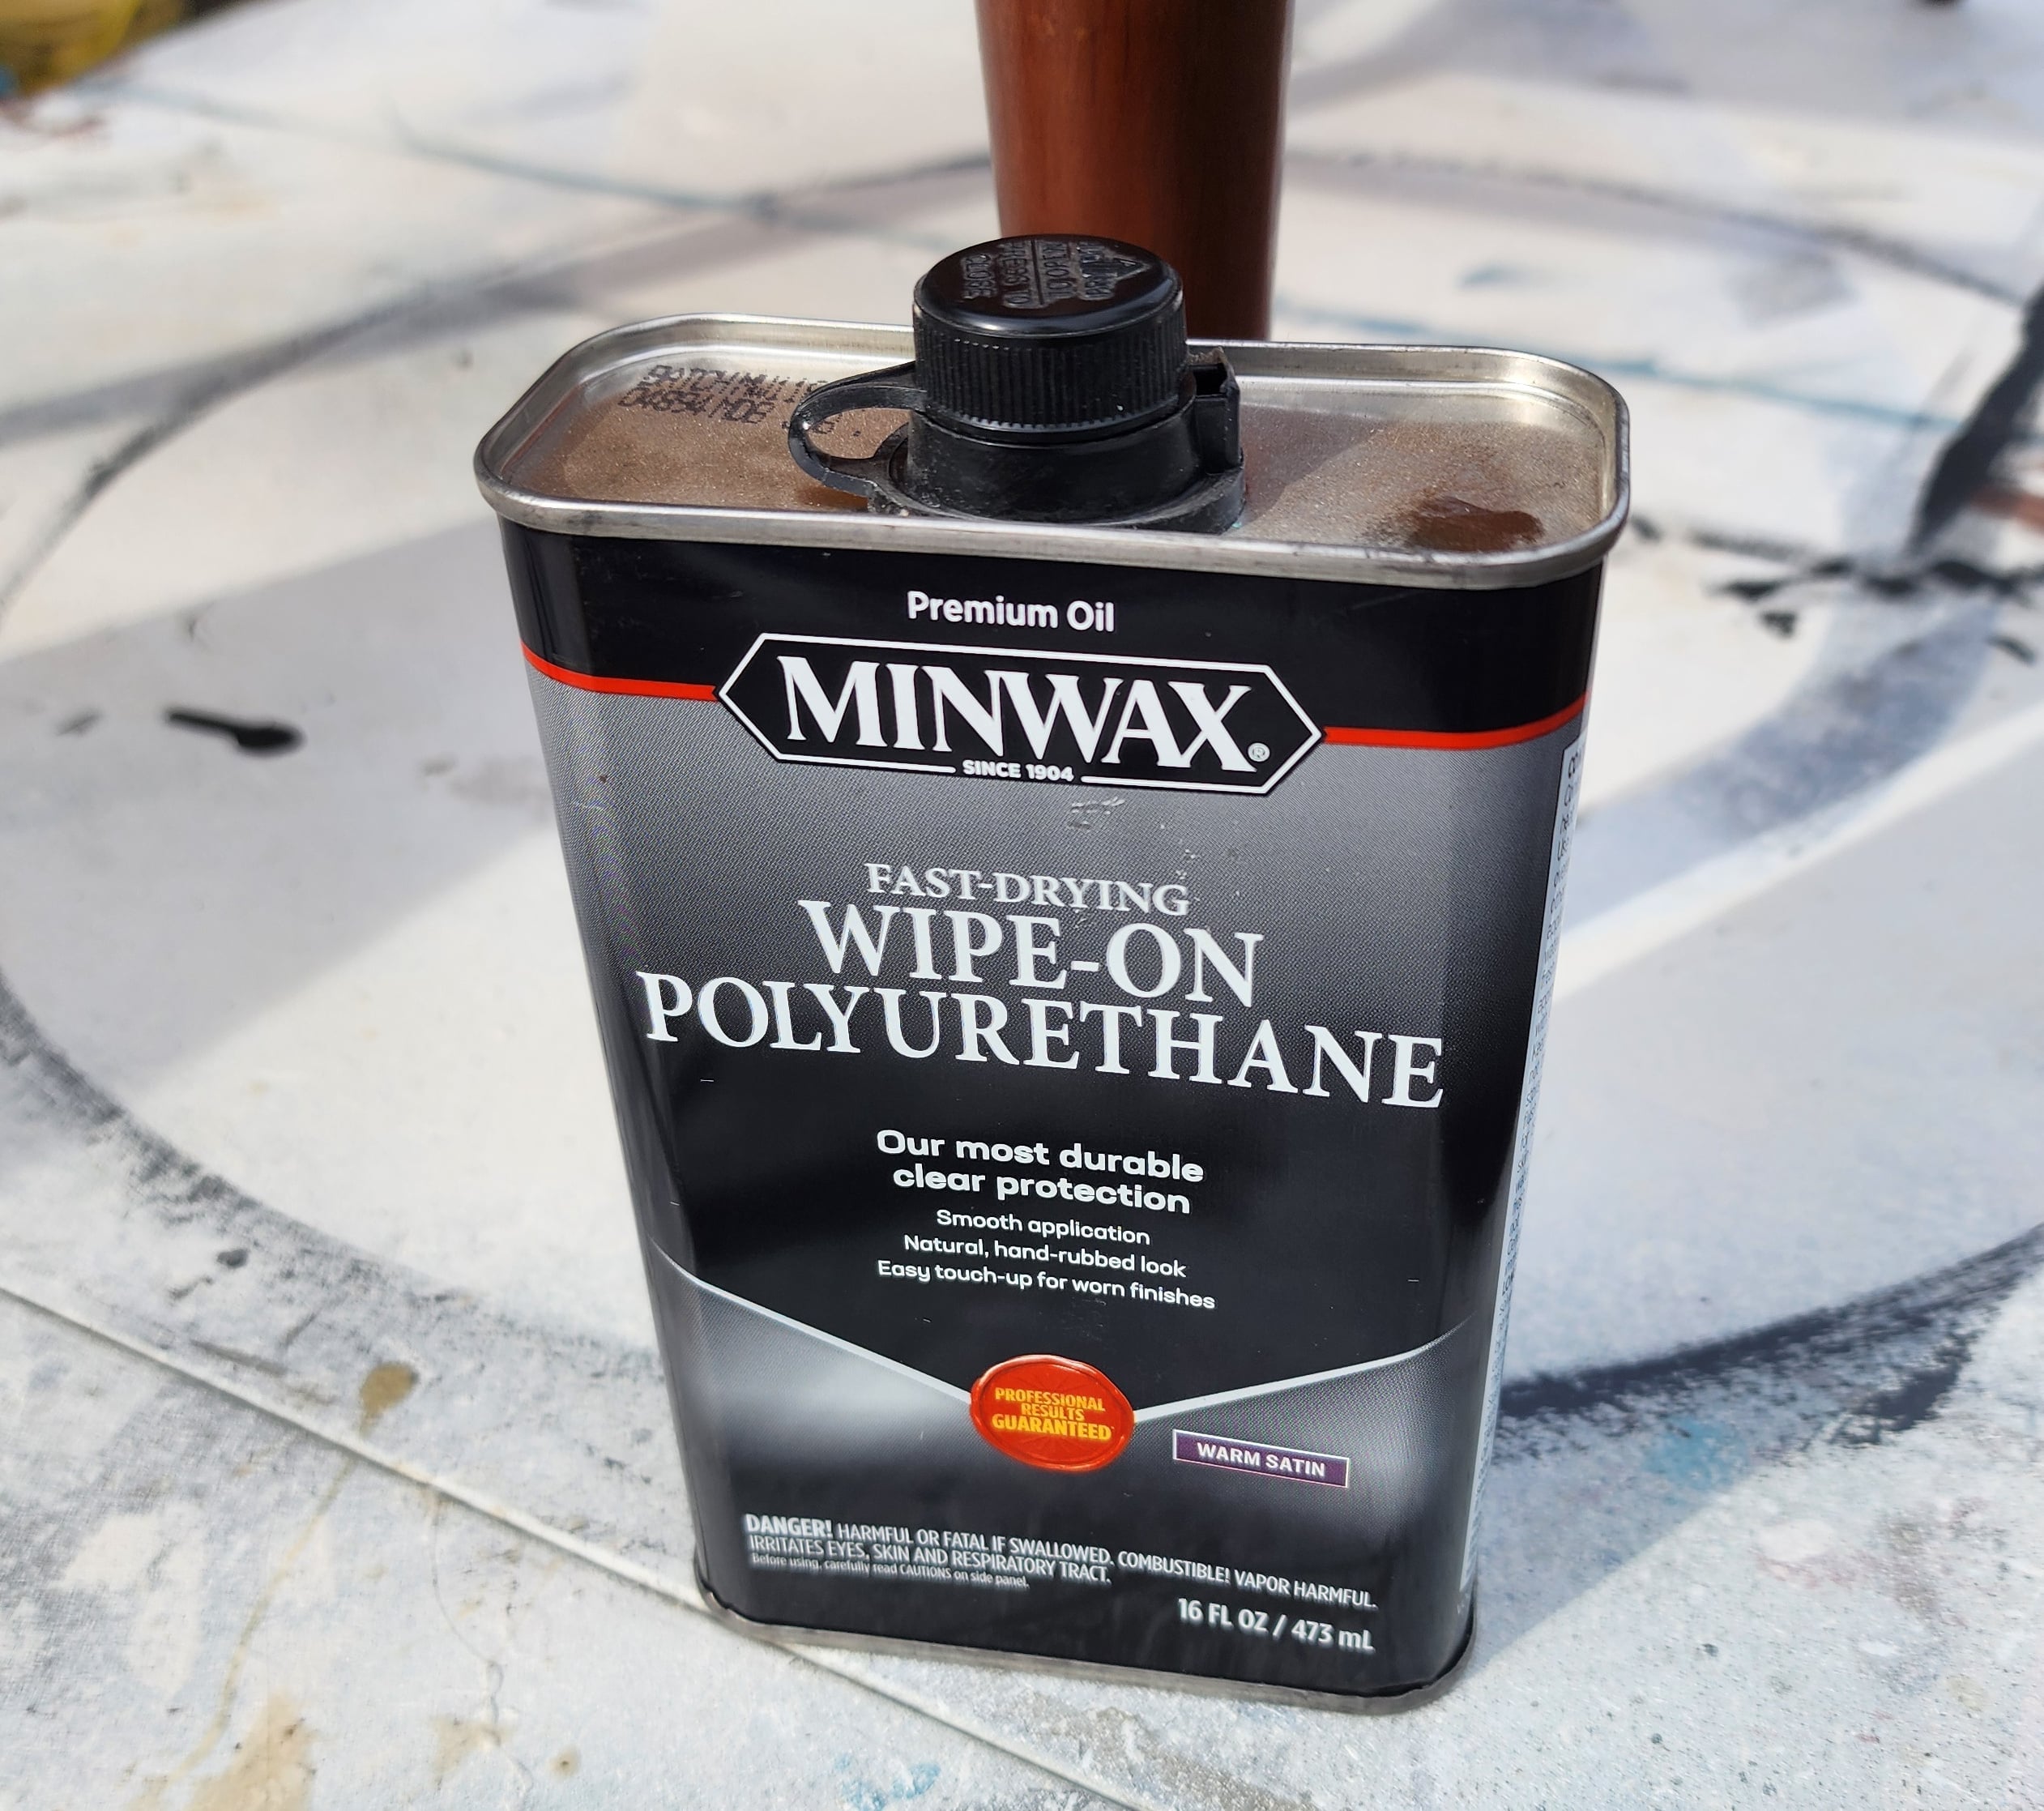
While waiting for the gel stain to cure, the weather turned cold, so I couldn’t seal the tabletop and the lower shelf. I will be sealing it with Polycrylic or this wipe-on poly when it warms up enough to be outside.

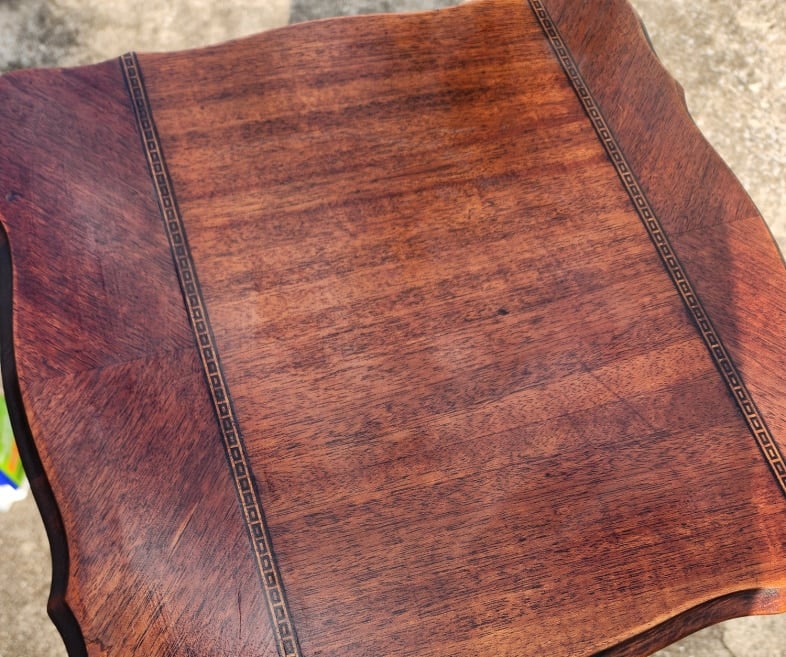
I am so pleased with how this $2 antique table turned out with the black paint and hickory gel stain! Saving the inlay on the tabletop was a priority for me. I know a lot of people don’t like it when antique furniture gets painted; however, I feel this small update improves the charm of this sweet table.
Black and Hickory Table Styling Suggestion
This black and hickory side table is one of those pieces that works almost anywhere. Use it beside a sofa or chair in the living room, as a nightstand in the bedroom, or in an entry or hallway where a full console would feel too bulky. The lower shelf adds storage without adding visual weight, making it a practical and flexible accent for any room.
The inlay top isn’t perfect, but it’s better than it was when I got it.
What would you have done with this two-dollar table?
Real furniture. Real makeovers. Real second chances.
Today’s project is part of the Furniture Fixer Upper Tour. The collage below shows the starting point for each makeover. Scroll down to see how every piece was reimagined.
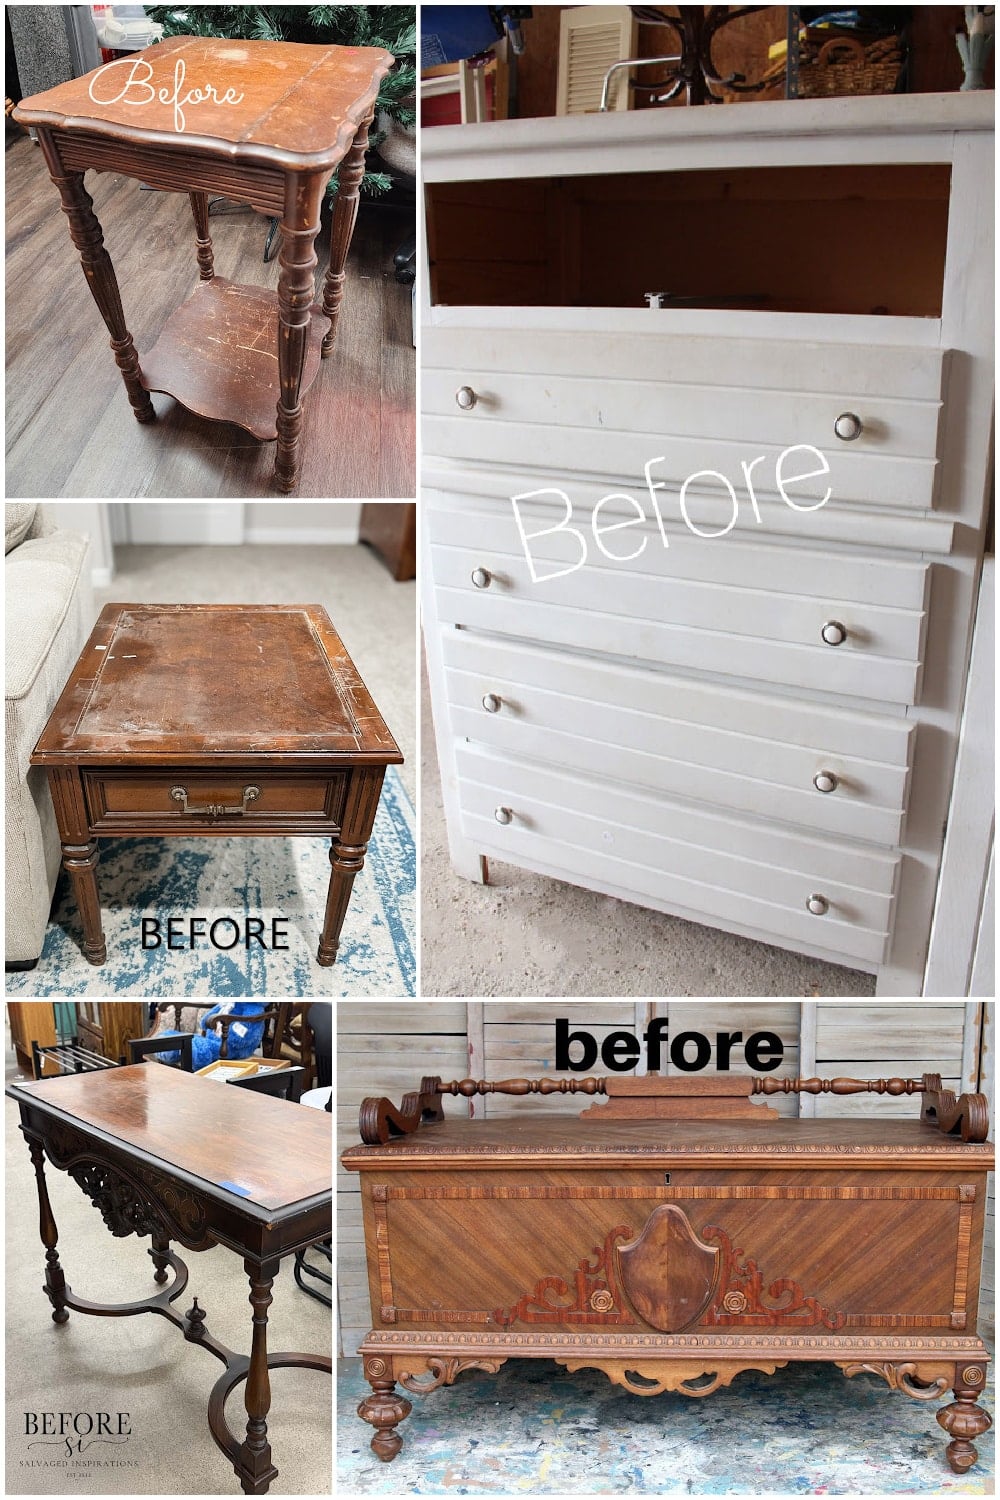
- Two-dollar Hickory and Black Accent Table (You are here, thank you)
- I Used the Wrong Paint-How I Fixed It
- Crabby Dresser Makeover
- Walnut Bronze Table Makeover
- How to Restore Old Furniture Without Sanding and Stripping
Furniture Fixer Upper Tour Projects
If you love seeing old furniture get a second chance, be sure to visit more Furniture Fixer Upper Tour makeovers. Each project starts with good bones and ends with a fresh new story.
See more Furniture Fixer Upper makeovers here
You will find everything from small side tables to large statement pieces, all transformed by talented DIY bloggers who believe in saving furniture rather than replacing it.
I just love the contrast you chose here. The hickory top really warms everything up!
Thank you Natalie. I struggle with paint colors so much! I know what I like, but when I’m trying to re-home furniture, I have to think differently.
gail
Source of cheap large plastic for covering stripper – plastic drop cloths. I find them unusable as a drop cloth but you can cut to fit when using a stripper. Love that little table. Was there a reason you didn’t clean the legs before you stained?
Great suggestions for plastic items for covering stain! I don’t know why I didn’t think of that.
I was sort of all over the place with this table. I did wipe the legs down when I initially cleaned the entire table, but all that sanding made so much dust, I had to clean and degloss the legs.
I rarely have a complete plan when I start a project, just like not knowing if I was going to stain or paint that lower shelf. hahah
Thanks for stopping by and leaving such a great comment!
gail
$2 is like FREE! What a gorgeous makeover Gail, you really brought this one back to life! Pinned XOXO
Thanks for pinning Denise! I really love how this small table turned out, and was so glad I happened into the thrift store to find it for $2
gail
Really beautiful!
Thank you Josee! I love quick and easy projects that turn out beautifully.
gail
This may have been small, but you still did a ton of work to bring it back to life! It is gorgeous now, and I love that you decided to pair it with the black! XOXO
Thank you Christy. I’m still second guessing the warm embers, vs true black. I hope it finds a new home soon, but until it does, I’ll problably find a small nook to display it.
gail
Looks so refreshed, Gail. Worth a lot more now!!
Thank you Jeanne. I’m trilled with the end result, but thinking I should have used a true black like Iron Gate instead of the warm embers. It truly looks prettier in person.
I appreciate your comment!
gail