DIY Hose Hanger Post
As an Amazon Associate, I earn from qualifying purchases.
I love my new Easy DIY Hose Hanger. I’ve needed to do this for a while now, but I tend to work on fun projects that I can sell in my booth instead of must have projects for the home. Wendi’s Power Tool Challenge theme this month is Summer. I suppose a diy hose hanger fits the bill, don’t you think?

For years and years I had some ugly bushes in this spot, and the hose just sort of lived in the bushes. (way to the left of the A.C. unit in the bottom picture)
After installing the DIY picket fence, I had one 12 ft 4×4 left over. When I cleared out the carport and stored the leftover lumber I cut the 4×4 in half so it would store upright in the garage. For this diy hose hanger project I grabbed the slightly longer of the two pieces and got to work.
*this post contains affiliate links*
The perfect spot for a DIY hose hanger
 The bushes have been gone for about 2 years now, and my old hose was stored in this handy hose reel. This hose reel lasted a really long time and I loved the fact that it was automatic in the fact that there was a little switch to flip that used the power of the water to ROLL your hose up by it’s own power.
My hose developed several leaks and I got a new heavy duty hose for Christmas. The new hose had large fittings that won’t fit the handy hose reel.
NOTE: how ugly the peeling paint is. Because the bushes had been in the way, the paint hadn’t been dealt with for …. ohhh….. about 20 years or so!
Post Hole Diggers
 The first step to installing the diy hose hanger was digging a post hole. I’ve dug a few in my day, but I have to say it never went as fast as this one did. I borrowed these post hole diggers from my neighbor Rodney, and he’s anal about keeping his tools sharp. Lucky me!
 It may have been overkill, but I dug the hole the full 24” that was marked on the post hole diggers handles.
 I used a bag of quikrete that I had left after putting up the picket fence posts. These bags of concrete are very heavy. I had 2 bags stored on a small dolly, and was able to drag one of the bags off the dolly onto this little cart to transport it from the garage to the other side of the house. There is no way I could have lifted—let alone CARRIED this bag.
Add water a little at a time
 Because I was unable to lift the bag into the wheel barrel to mix the quikrete, I opted for the “cheat” method of filling the hole with some water, pouring in a little of the quikrete in the hole, then adding the post.
Alternate water with Quickrete
 You can see I used the claw of the hammer to bust the bag, allowing the quikrete to flow directly into the post hole.
Fill only the bottom of the hole
 Tap, tap, tap with the hammer, makes the concrete mix pour into the post hole.
Insert DIY hose hanger post
 I inserted the post into the hole, then added more concrete mix, a little more water, then a little more concrete mix.
Tap Quickrete around with stick or metal pole
 I used a metal rod to drive the concrete into the hole and make sure it mixed well with the water. The metal rod? It’s part of an old crib that I use to paint wine bottles.
Allow post to set up
 Not shown—I used the level to make sure the 4×4 post was standing tall and straight. I let the concrete mix set up overnight . . . in fact I think it was two days because I was trying to figure out how I was going to actually hang the hose.
Attach hose hanger
 The same white Behr exterior paint that was used on the new fence was used to protect the post and make it look prettier.
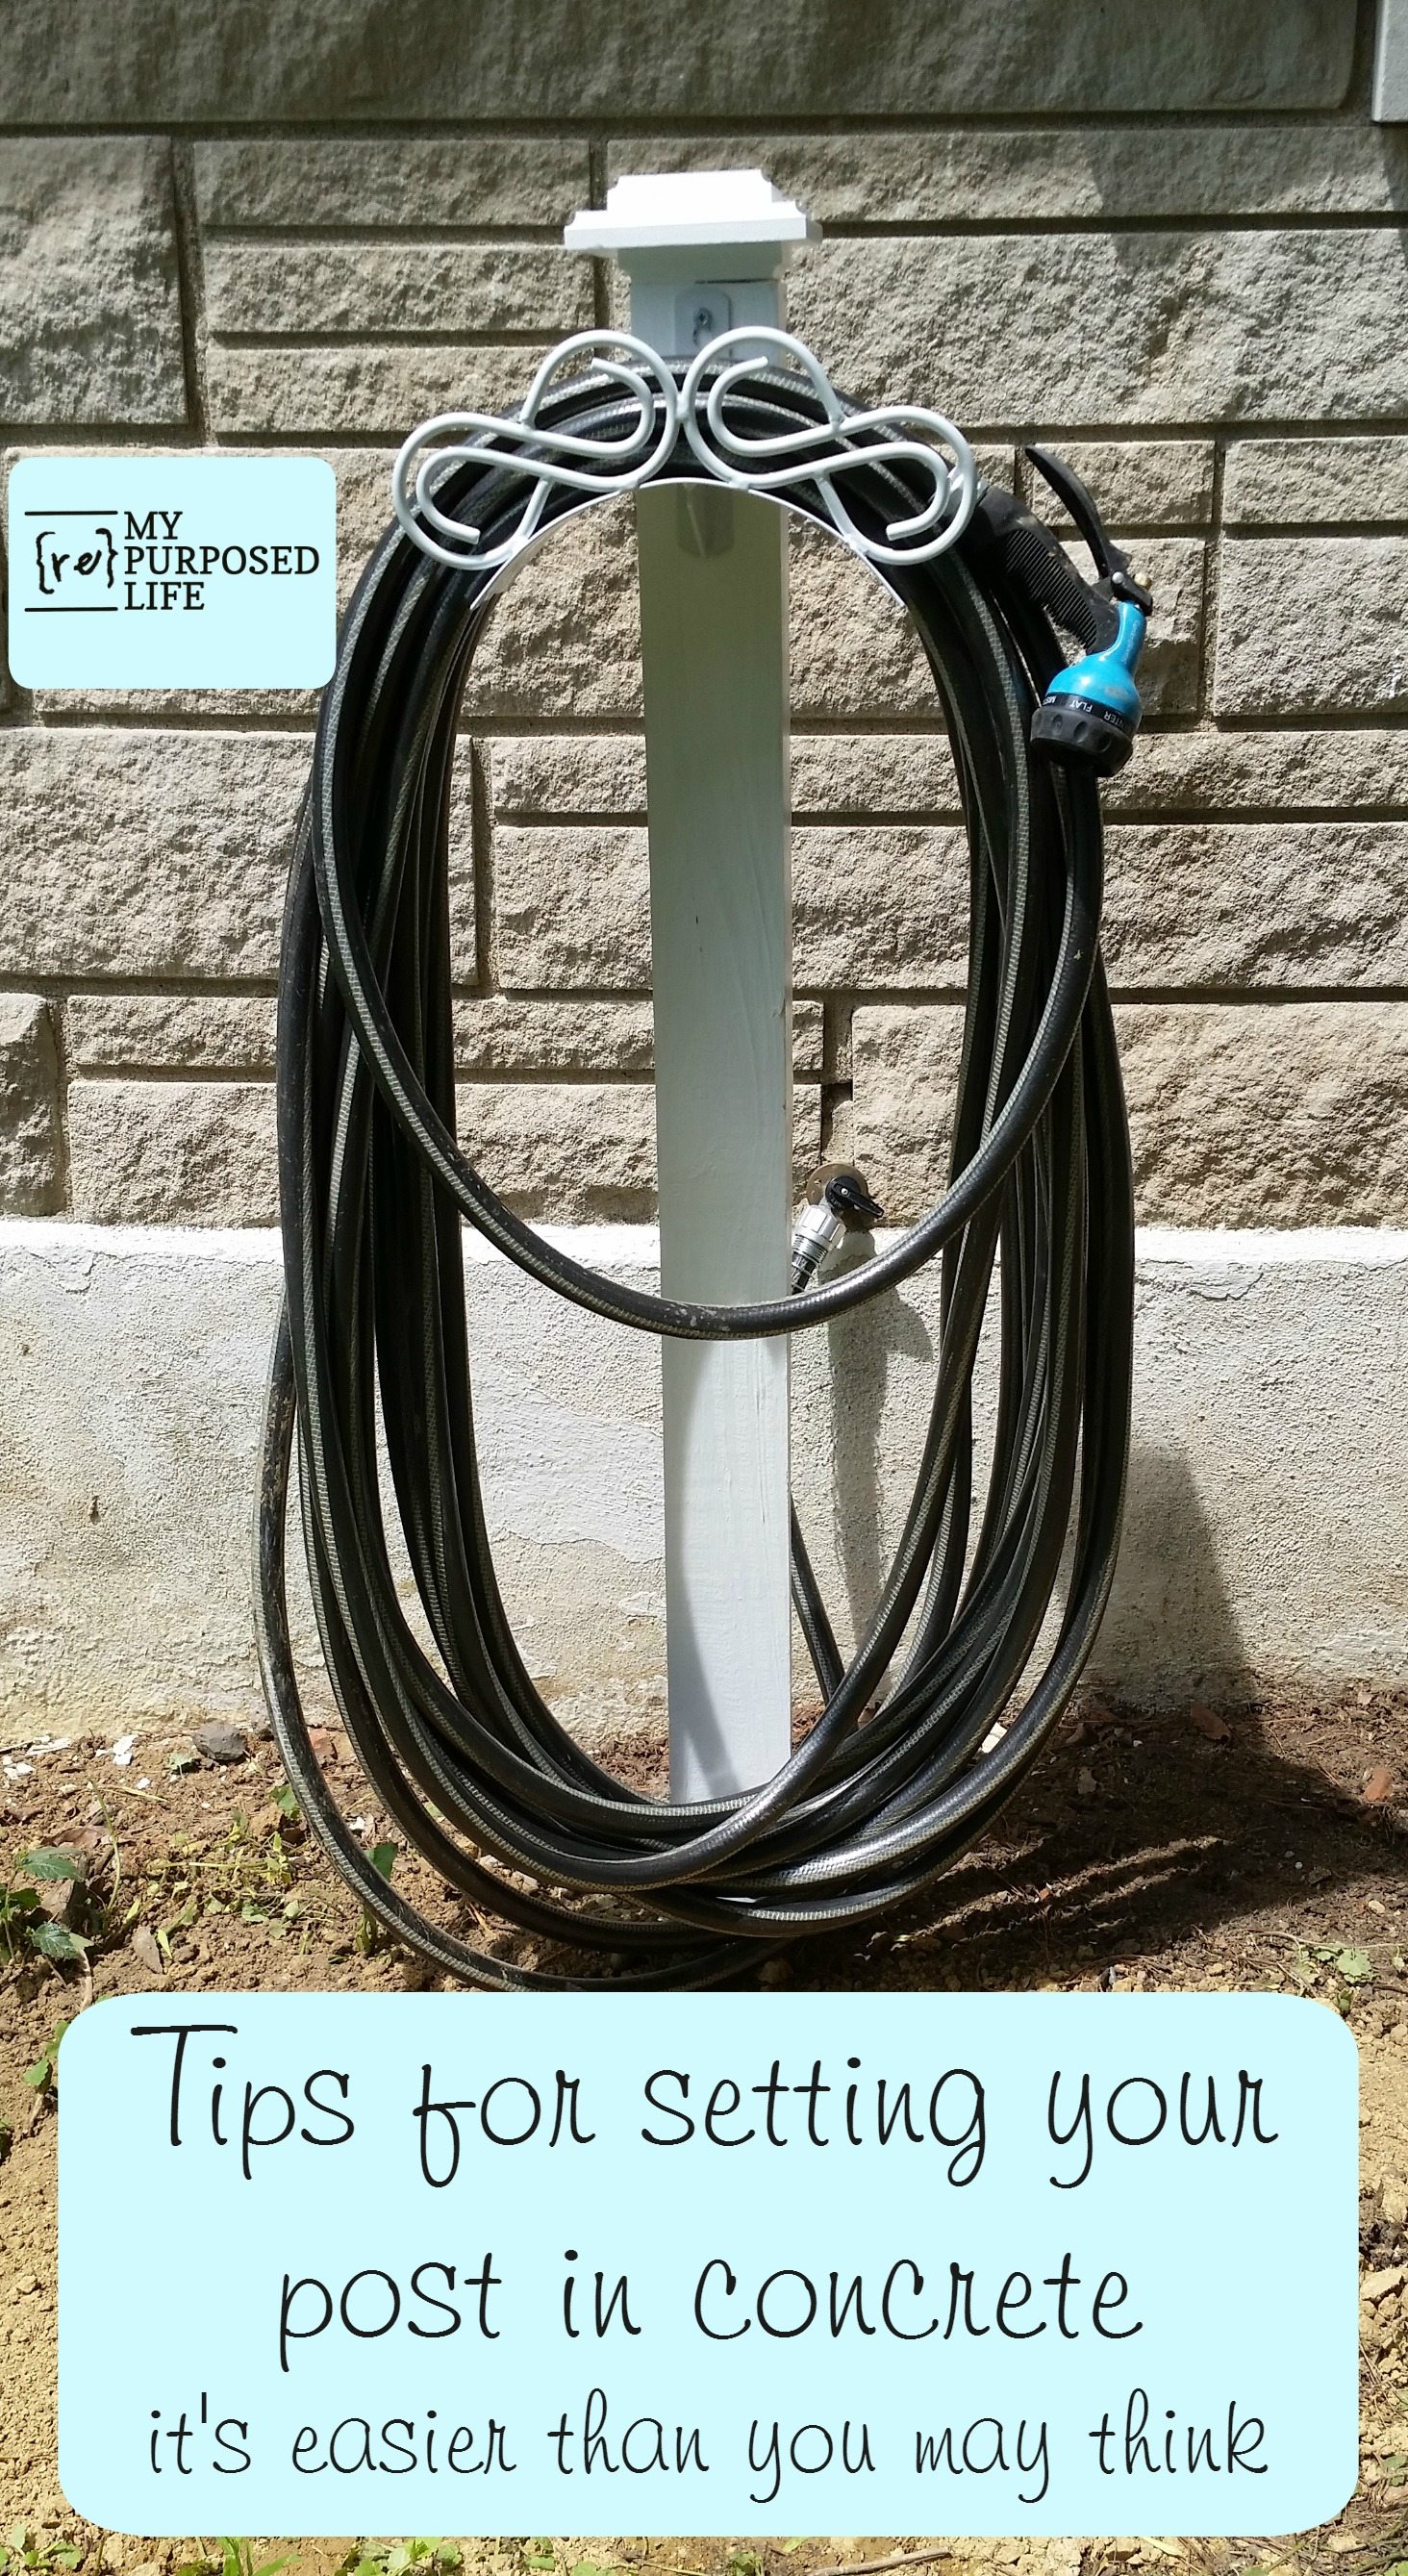
I ordered the hose hanger from Amazon. The color didn’t really matter, but the white one was a LOT cheaper when I ordered. It’s very strong and sturdy which was a nice bonus! A Sharpie was used to mark where I needed to drill pilot holes and secure the screws.
 I put a cap on the top that matches the caps on my picket fence. I was unable to use my drill to secure the screws, so I used a small wrench.
DIY Hose Hanger
 I spread out the dirt, scraped the old paint away and wrapped the hose around the new hose hanger. By the way, the nozzle? It came FREE with the new metal hose hanger I ordered on Amazon.
RELATED CONTENT: How to Repair a Damaged Garden Hose
Reclaimed Wood Garden Hose Organizer
Still on the to do list….maybe plant some flowers, or grass? I’ve already used the hose to wash away some of the dirt on the foundation, but a little paint wouldn’t hurt either.
Be sure to check out all the other wonderful SUMMER projects from my friends below.

Frozen Treat Stand by My Love To Create
Red White And Blue Cornhole Game by Create And Babble
Drying Rack From Old Crib rail by The Kim Six Fix
Chair Spindle Wooden Garden Caddy by Interior Frugalista
Star Clothes Drying Rack by A Piece Of Rainbow
Farmhouse Bench Building Plans by Refresh Restyle
Vegetable Gathering Basket by Designs By Studio C
DIY Standing Towel Rack Tutorial by H2OBungalow
Reclaimed Wood Bookcase by Confessions of A Serial DIY’er
DIY Footstool by Virginia Sweet Pea
DIY Hose Hanger by My Repurposed Life
This is exactly what I was looking for! So simple and clean and you explained it perfectly. (ha, I may even fix the leaning mailbox one day b/c you made cement look so easy!) Now to dig thru all the tree roots clogging up my garden. ugghhh…. I don’t know how the surface plants survive. It’s an ancient silver maple. Provides lovely shade on the house in the afternoon, esp on these 100+ degree days, but the roots are awful.
I’m happy you found this project to inspire you. Roots are the worst! Especially if you’re like me and dig holes in flip flops. After several years, I am still enjoying having this handy hose hanger post in my yard to look pretty and be so functional!
Good luck!!!
gail