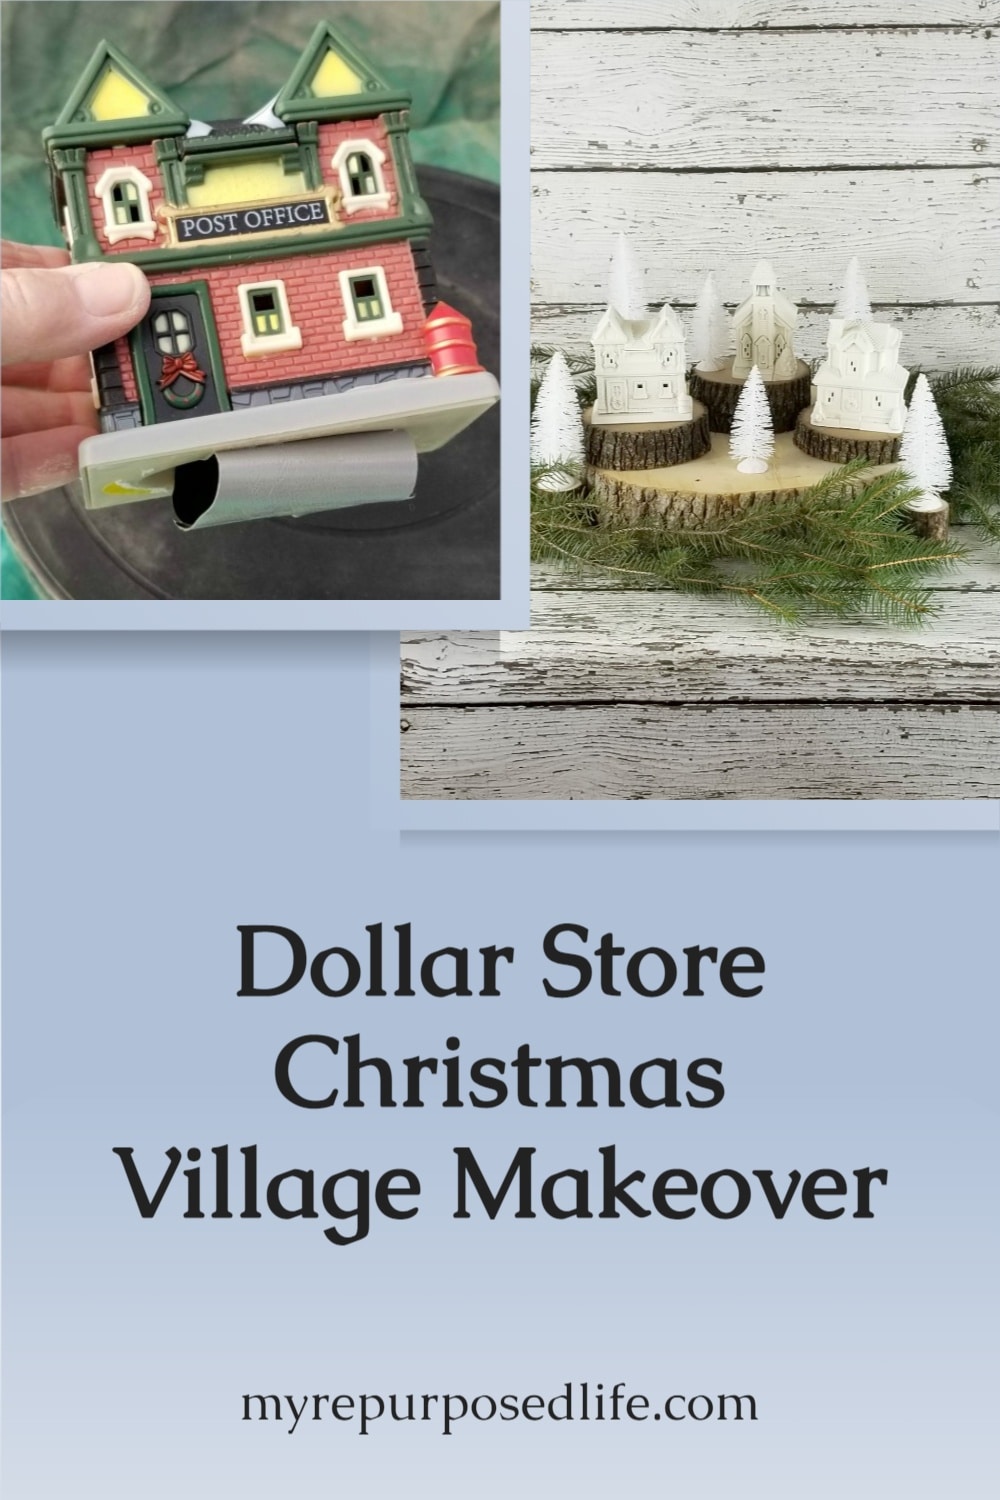
Dollar Tree Christmas Village Update with Paint
As an Amazon Associate, I earn from qualifying purchases.
It still amazes me how a few dollars at the Dollar Tree can turn into cozy Christmas decor. This little plastic Christmas village started bright and shiny, but a few coats of paint gave it a softer, more collected look. If you have an inexpensive village tucked away in a box, you can give it a fresh winter makeover, too.
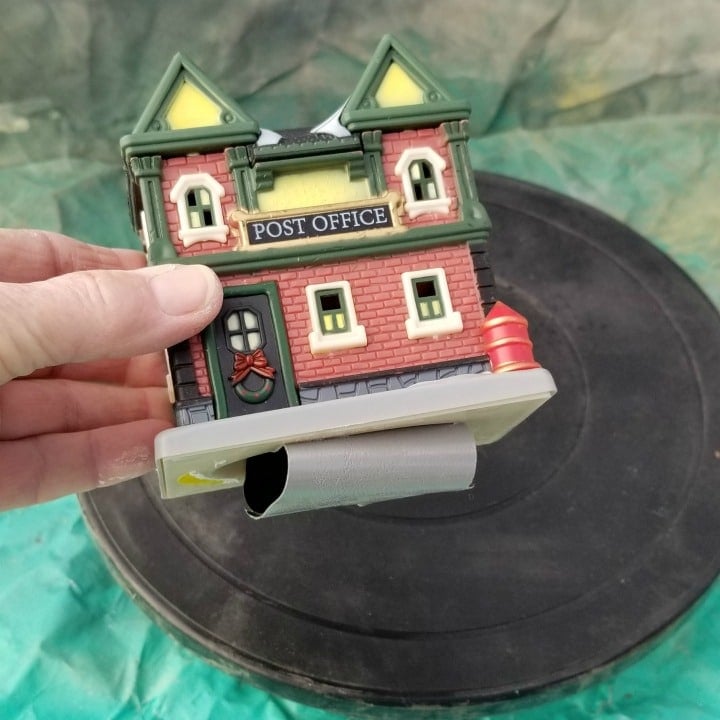
Dollar Store Christmas Village
Here is the way the Christmas village looked when I bought it. Of course, I wanted to change it up with paint!
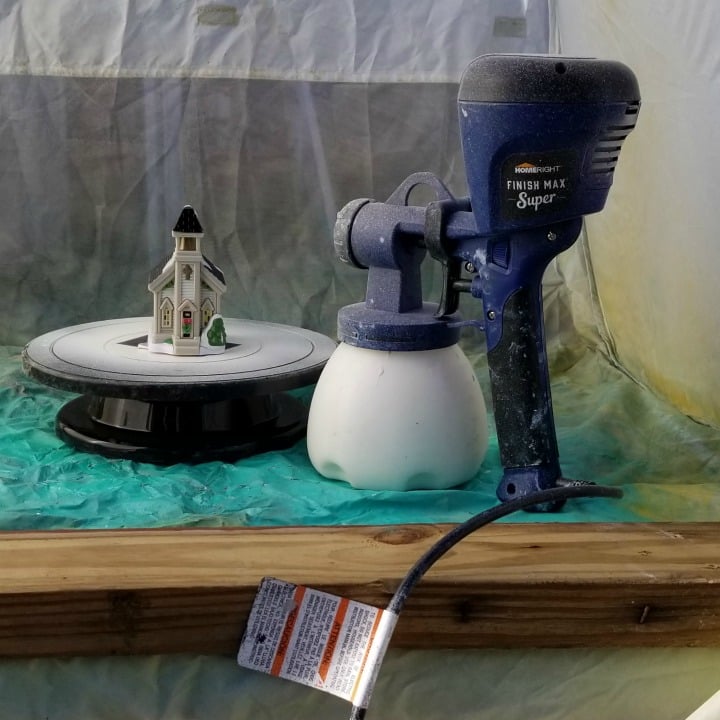
Using a Finish Max Paint Sprayer

I’m so excited to share this dollar store Christmas village update with you. I used the Super Finish Max, the small spray shelter, and the turntable for paint spraying.
Typically, I use the green nozzle (2.0 mm) for most of my furniture projects. But for this smaller project, I used the small wrench to switch out the blue nozzle (1.5 mm).
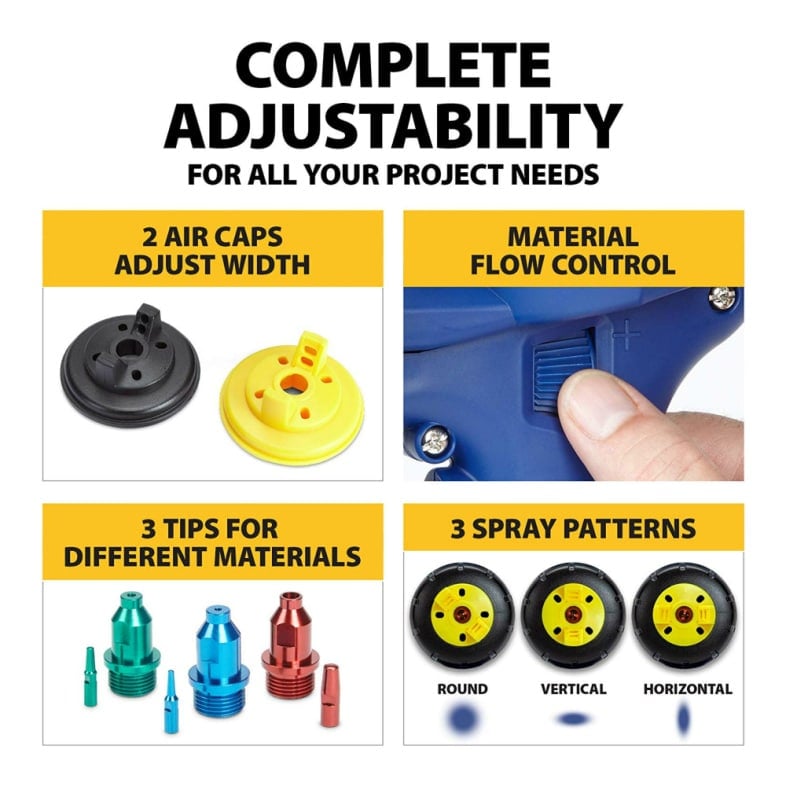
The Super Finish Max paint sprayer comes with these three nozzles (tips). More tips are available (sold separately). I used the red tip (4.0 mm) when painting a concrete-block outbuilding.
Popup Spray Shelter
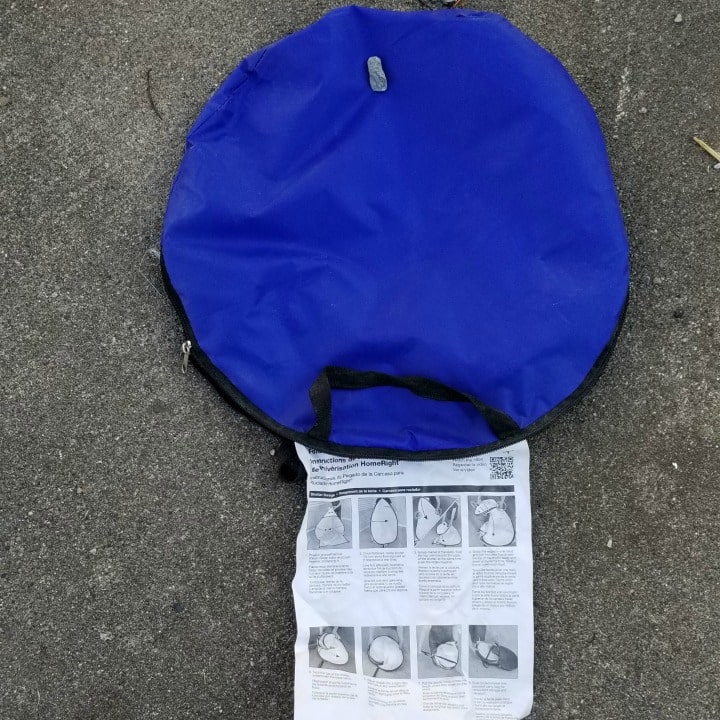
The small spray shelter comes in a handy pouch with the directions attached.
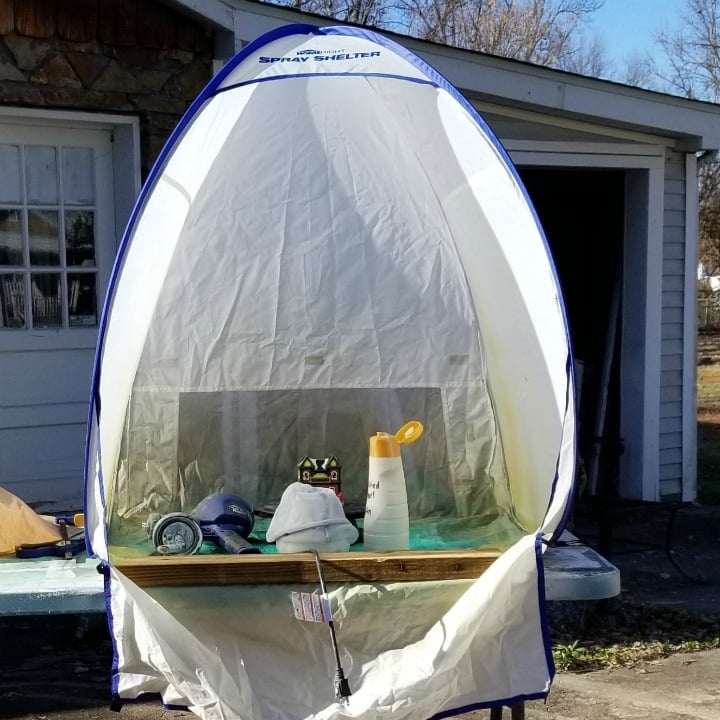
The shelter literally pops up into place. I like to clamp the back of the shelter onto my work table, using a scrap 2×4 to hold down the front. I opened the rear vent for airflow and ventilation.
Because my paint has a little age on it, I strained it in my reusable mesh paint strainer.
Add a Turntable
Before painting, I used a small piece of duct tape to secure the Christmas village building to the turntable. The tape was left in place for each of the remaining village pieces.
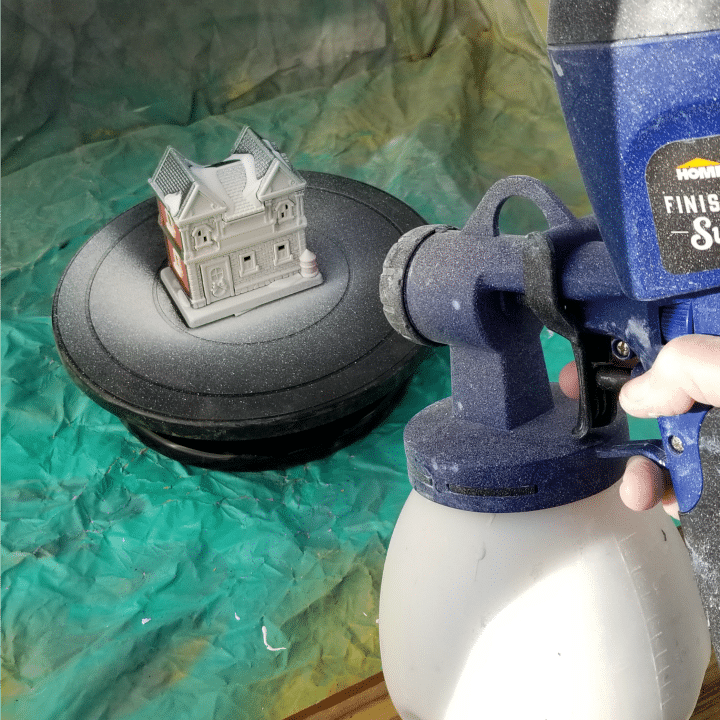
Using the turntable really makes this job quick and easy! NOTE: I started with the flow control dialed back and increased it slightly after I saw the width of my spray pattern.
After spraying a couple of the Christmas village pieces, you can see there is a small amount of overspray on the turntable, but very little on the bottom of the spray shelter itself. That is because of the flow control I chose.

I love how the small plastic pieces turned out with my Super Finish Max paint sprayer.
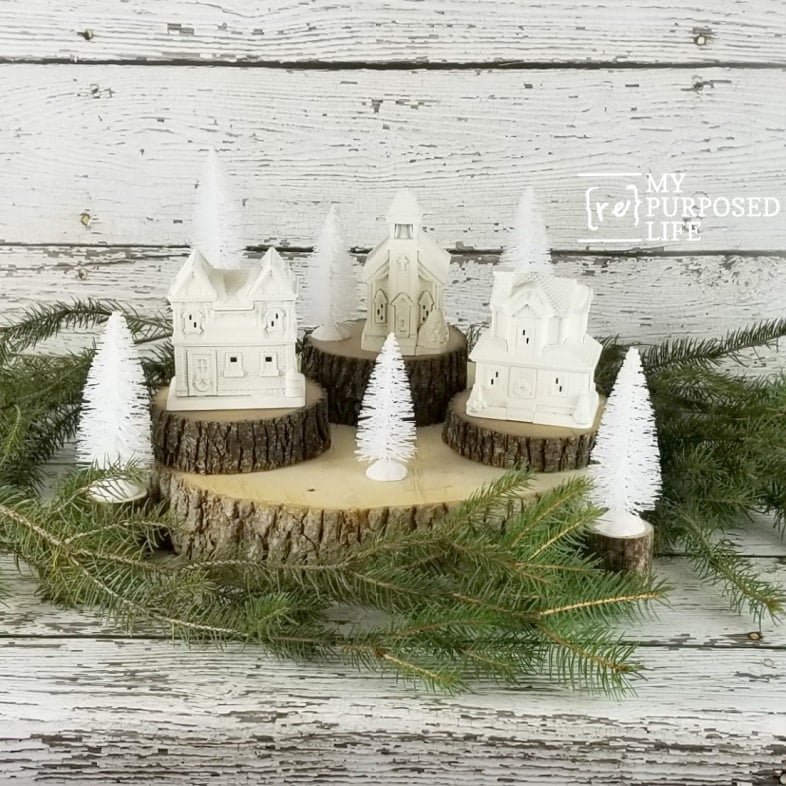
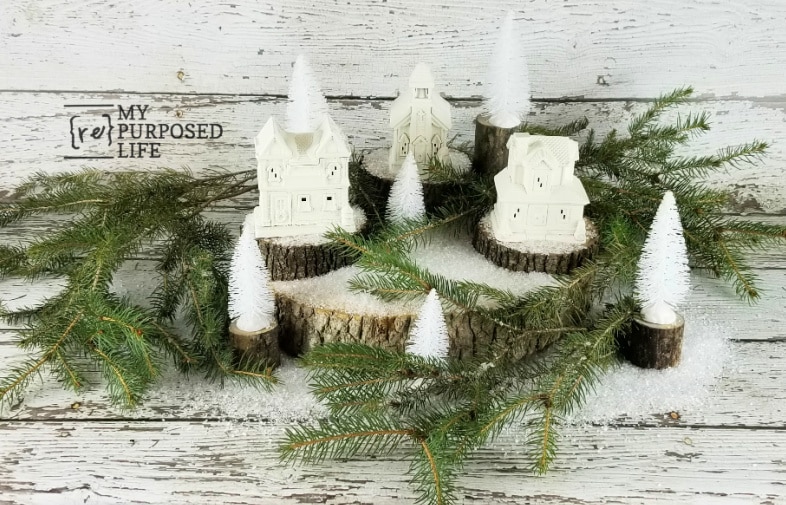
Dollar Store Christmas Village Painted White
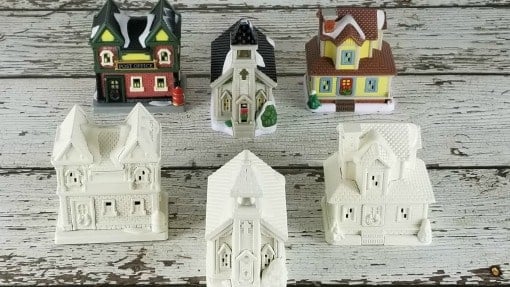
Here’s the dollar store village before and after. The power of paint is amazing!
Christmas Village After Painting With a Finish Max
This Dollar Store Christmas Village makeover was quick, easy, and very frugal.
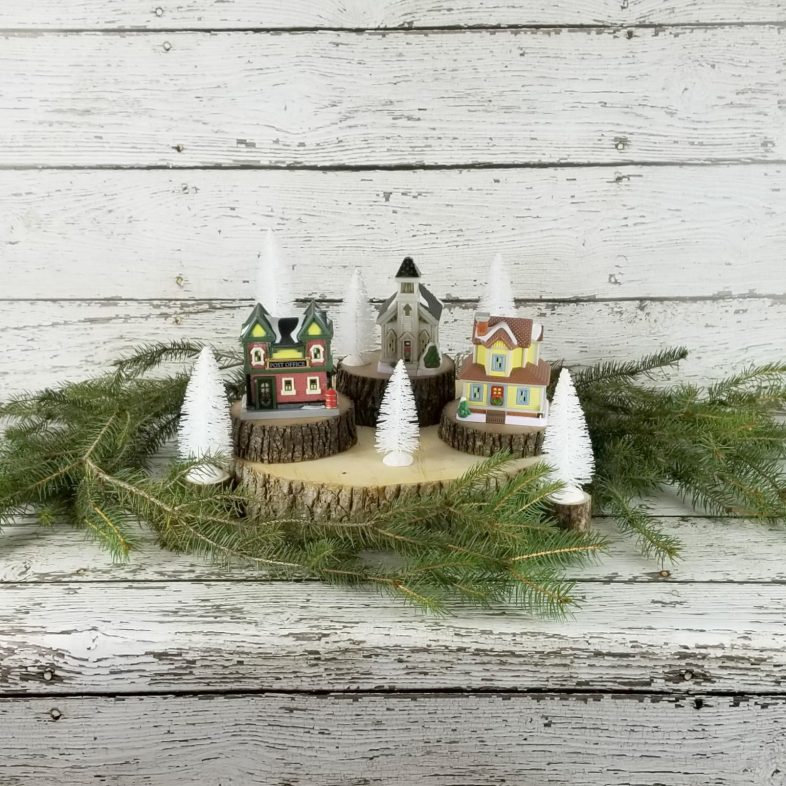
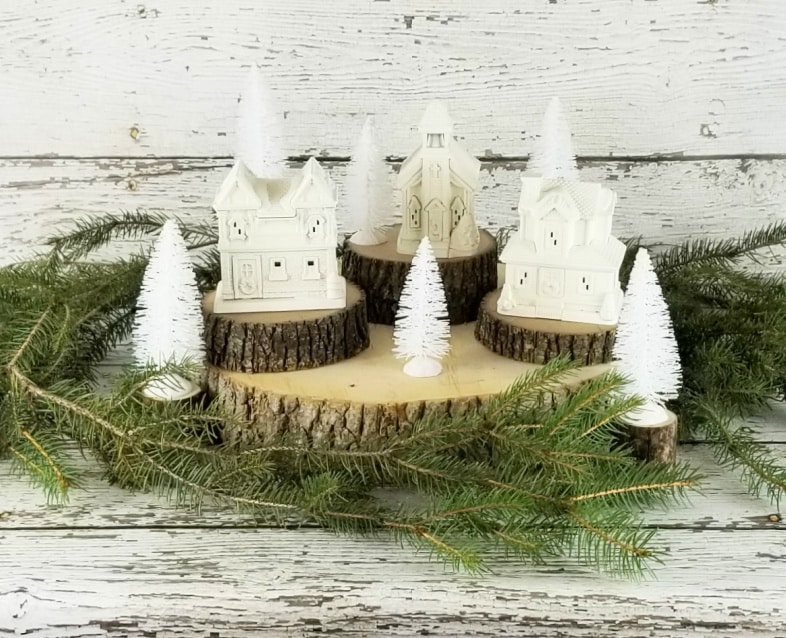
Using Natural Elements with Christmas Village Decor
I had fun playing around with the Painted Christmas Village pieces. Can you believe they only cost a little over one dollar each? The bottle brush trees were $1.25 each, large and small. (2 per package)
I had a large wooden slice from putting up the DIY Picket Fence. I used one a few years ago to make a rolling plant stand. This large one was hanging out in the garage. You can buy your large wooden rounds on Amazon.
Do you see the smaller limb pieces on which the bottle brush trees are resting?
Visit the My Repurposed Life Amazon Store to shop my favorite items.
As I said, I got all of these at the Dollar Tree, but you could easily paint a thrift store Christmas Village. Be sure to visit my friends at Homeright to see how easy this project is.
I hope this painted Dollar Tree Christmas village encourages you to look at inexpensive decor with fresh eyes. A little paint can calm down bold colors and help everything work with the rest of your holiday decorations. If you try this idea on a thrifted village or one you already own, I would love to hear how it turns out.

I painted these dollar store items to make a sweet gingerbread village!
Related content:
Tree Branch & Log Project Ideas
Robyn,
I use the creamer bottle and detergent bottles for storing my paint. I tend to hold onto paint for too long. The cans begin to rust. So I pour the paint into detergent bottles for large projects. When I need paint for smaller projects, I use the creamer bottles. This paint has been in that creamer bottle for more than a year. It’s so handy, and so easy to pour.
You can see the detergent bottle storage here: https://www.myrepurposedlife.com/how-to-deal-with-rusted-paint-cans/
gail