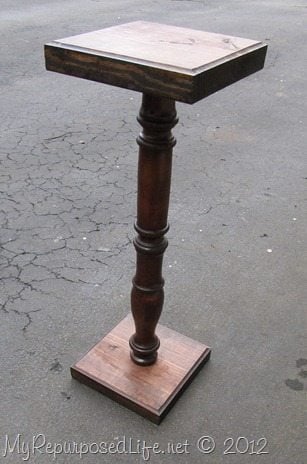
Pedestal Stand Knockoff
As an Amazon Associate, I earn from qualifying purchases.
Wow, sometimes projects are so easy, they barely even need words to explain the details. Yep, projects like this pedestal stand can be done even by beginners if you just take your time and follow my directions.
Remember “always measure twice, and cut once”.
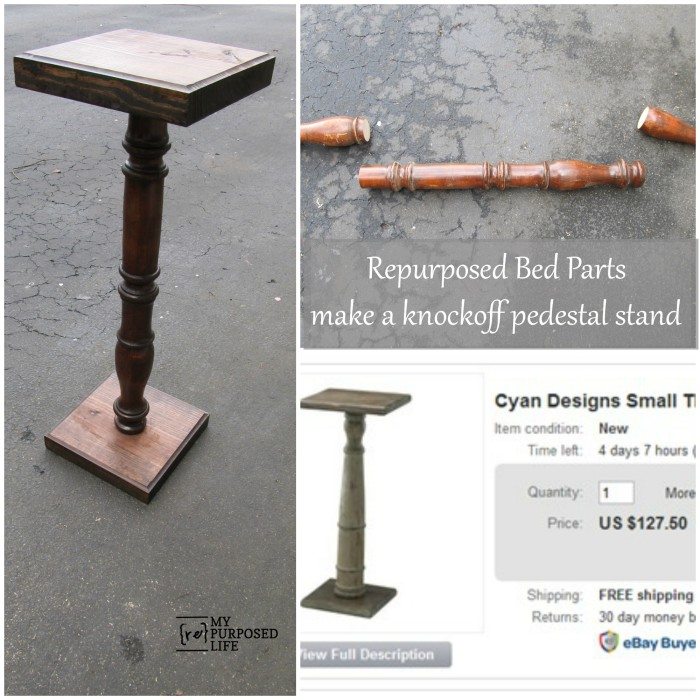

When I saw this pedestal stand, I was shocked at the price. I had parts laying around to make something nearly identical. (for FREE)


I dug out this old bed piece from my stash. Doesn’t everyone have such random items in their stash? I knew right away it would be perfect to make a pedestal stand.

First, I cut the large bed rail down to size with my compound miter saw.

Then, I cut some scrap 2×10’s into squares.

To make the pedestal stand have a more “finished” look, I routed the edges with my router.

After applying some stain, a combination of Jacobean and Mahogany, both from Minwax, I drilled a hole in the middle

To get a good tight hold I used Gorilla Wood Glue

I attached the pieces with drywall screws and allowed it all to set up. Generally you would use wood screws for a project like this. But I didn’t have any on hand.

As I said, I used the combination of Jacobean and Mahogany to get the top and bottom pieces to match the original bed part on this pedestal stand.
It is SO MUCH FUN putting bits and pieces together. I did it with my Photo Display Stands, Candlesticks and More, and my Small Red Porch Post
As I’ve said before—I don’t think I got to play with blocks as a child!
What would you use this little baby to display?
Oh my Goodness Gail. I think you may have just mae me some potential money. I picked up one of these almost identical last week at the Salvo’s for $4. I was going to paint it whit with some chalk paint. However I have an antique vintage market on this weekend which I now think with a new coat of stain I may fetch myself a lovely little profit.
I am so glad I came across your post mant thanks for sharing.
Happy days
Judith
Yay Judith! I’m happy you found something to inspire you. Good luck with your show!
gail
You go girl! … You know I like it :O
Looks GREAT, I like yours better than the more expensive one.
Where did the screws go in? I see that you drilled the hole on the top piece but wasn’t sure which way you did the actual screws. Thanks 🙂
-Stefanie
2ndChanceCreations.etsy.com
I would put a plant on it. 🙂 What router bit did you use to route the edges?
Hello Gail-
What an awesome idea. You did a wonderful job. I picked up a 3ft. post,very heavy, and quite round (looks like it came from the middle of a pedastal table) or something at the goodwill for $1.99 and I have been throwing ideas back and forth on what to do with it. Thanks for sharing.
sandraallen260@centurytel.net
I’d put a couple of vintage clocks on it, and maybe a small plant if there’s room. It’s cool! And free~even cooler!
Is it sturdy enough for a plant maybe…or on a smaller scale a vase of flowers. Or a Fishbowl!
Very, very cool!!!m ^..^
What an awesome job you did! I bet it is better made than the one for sell. I found your blog on the linky followers blog hop and I am glad I did. I have been blog hopping for two days and I am loving meeting so many talented and amazing people. I am following you and hope that you take the time to hop over and maybe follow back.
My Turn (for us)
http://myturn-evelyn.blogspot.com
Thanks, I enjoyed the visit.
Where do you sell, I have apparently missed that somewhere, LOL. I really love it and just the idea of how you did it was fantastic, but then your ideas are always great! I love reading your blog. Have fun!