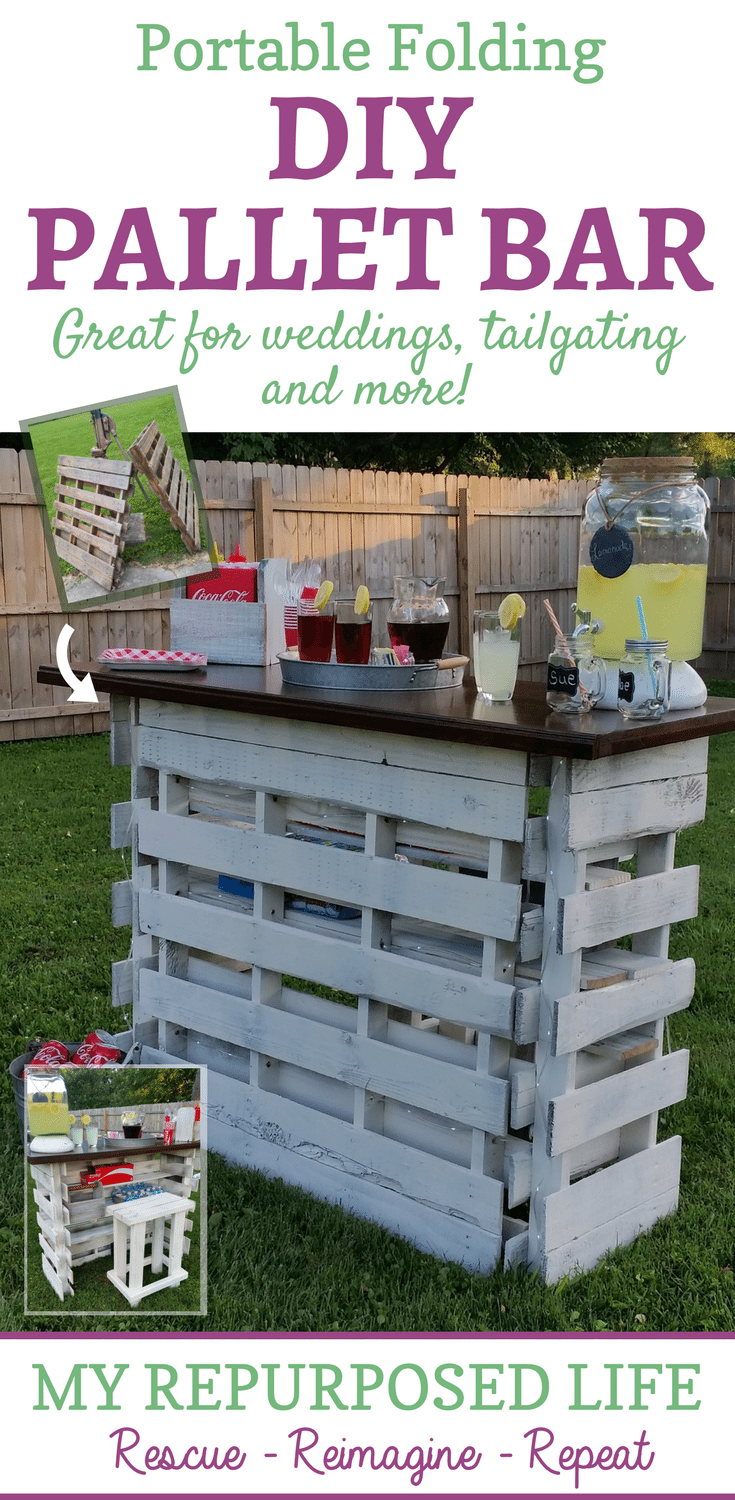
Portable Folding DIY Pallet Bar – great for weddings, tailgating and more!
As an Amazon Associate, I earn from qualifying purchases.
If you’re looking to take your outdoor entertaining up a notch, this portable folding DIY pallet bar might be just what you need! Made from reclaimed pallet wood and designed to fold flat when not in use, this bar is both practical and charming. Whether you’re hosting a backyard BBQ, tailgate, camping trip, or a special event such as a wedding, this space-saving solution is as functional as fun.
Not just a DIY pallet bar – but a portable folding pallet bar.
Everyone should have a DIY pallet bar! At first, I was stressing over June’s Power Tool Challenge theme. Summer Fun! Until I figured out I wanted to make a DIY pallet bar — not just any old pallet bar, but a folding, portable one that would be great for a wedding or outdoor event.
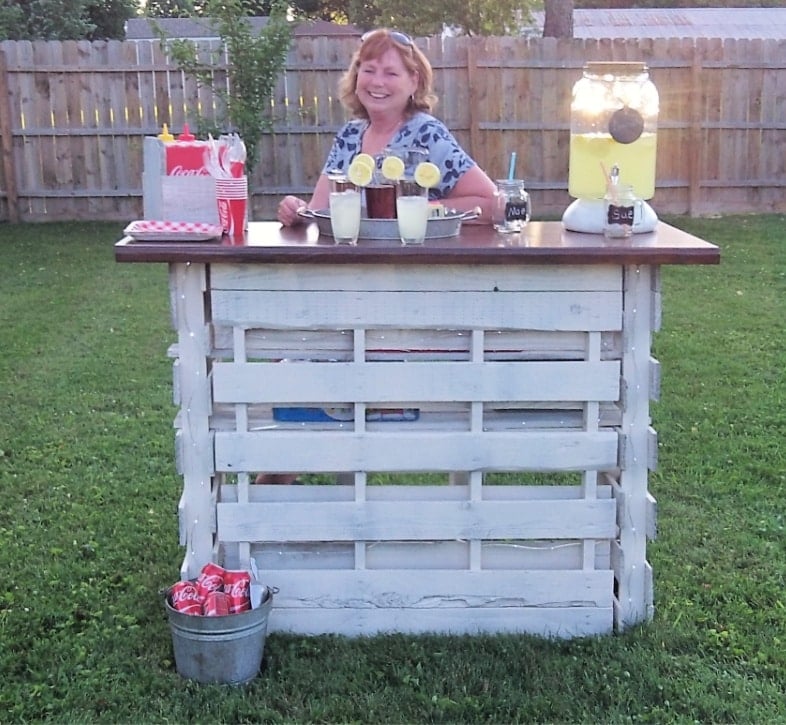
See how happy I am that the pallet bar is finished!

Let’s see how it all came together . . .
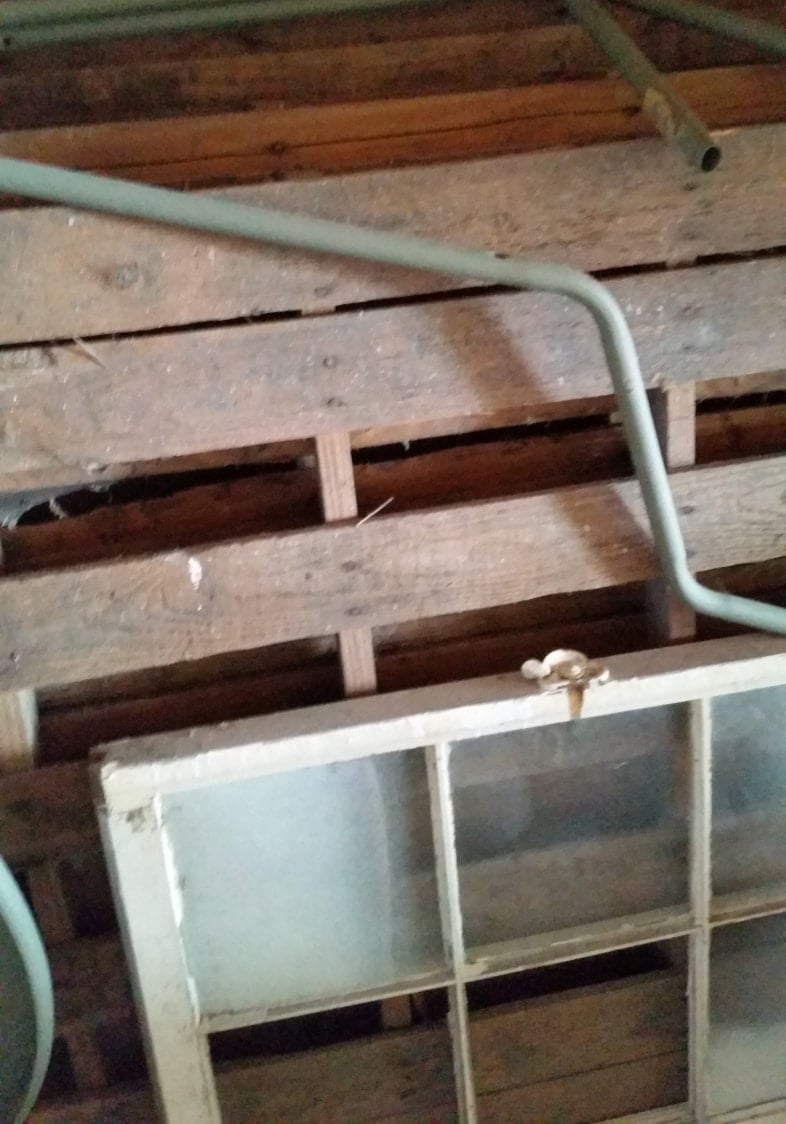
I forced myself to visit the back of the storage shed to scope out the existing pallets I had in storage.
You will need two pallets for this DIY pallet bar.

The pallets were so gross that I immediately cleaned them with the hose. I was trying to match up the pallets to see if they were similar because I had a unique plan. I rarely know what I’m going to do going in. Some changes took place, but for the most part, this portable pallet bar ended up just as I saw it in my head.
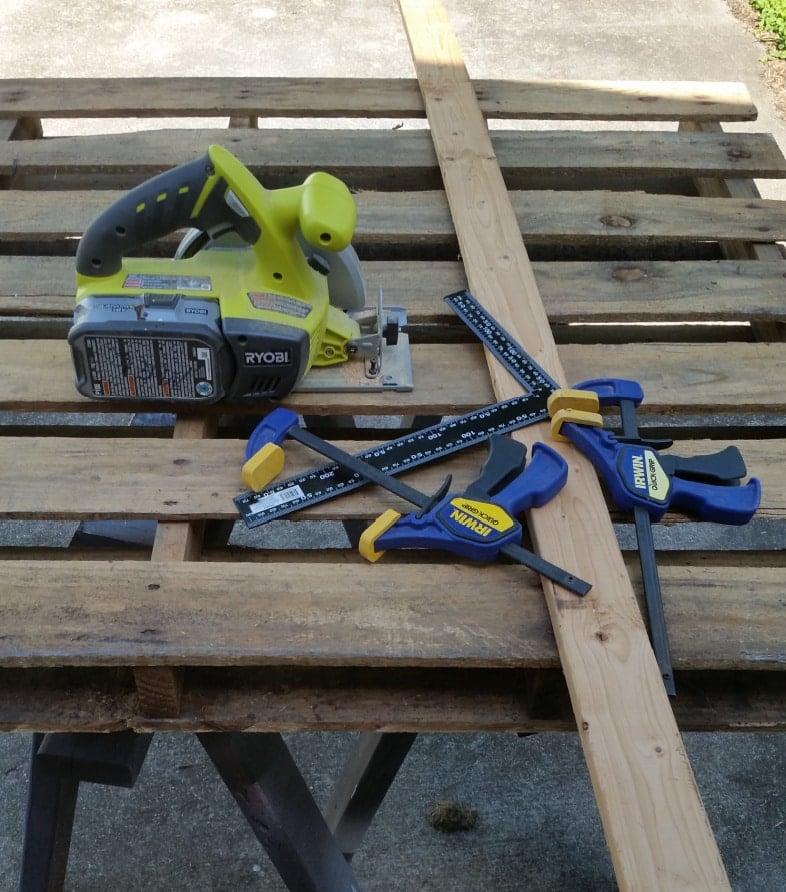
The plan was to cut one of the pallets in half. Using a spare 1x board, I could only clamp the wood (guide) in place once. I put it dead center, slid the circular saw on the right side, and returned the other way. Then, turn over and repeat.
Cut Pallet in Half
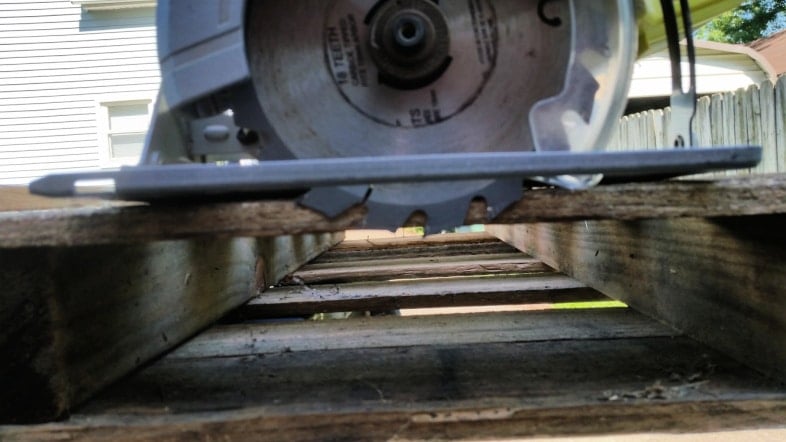
You must set the blade depth when using a circular saw to prevent kickback. (don’t ask me how I know—it’s a lesson I learned years ago in my 20’s)
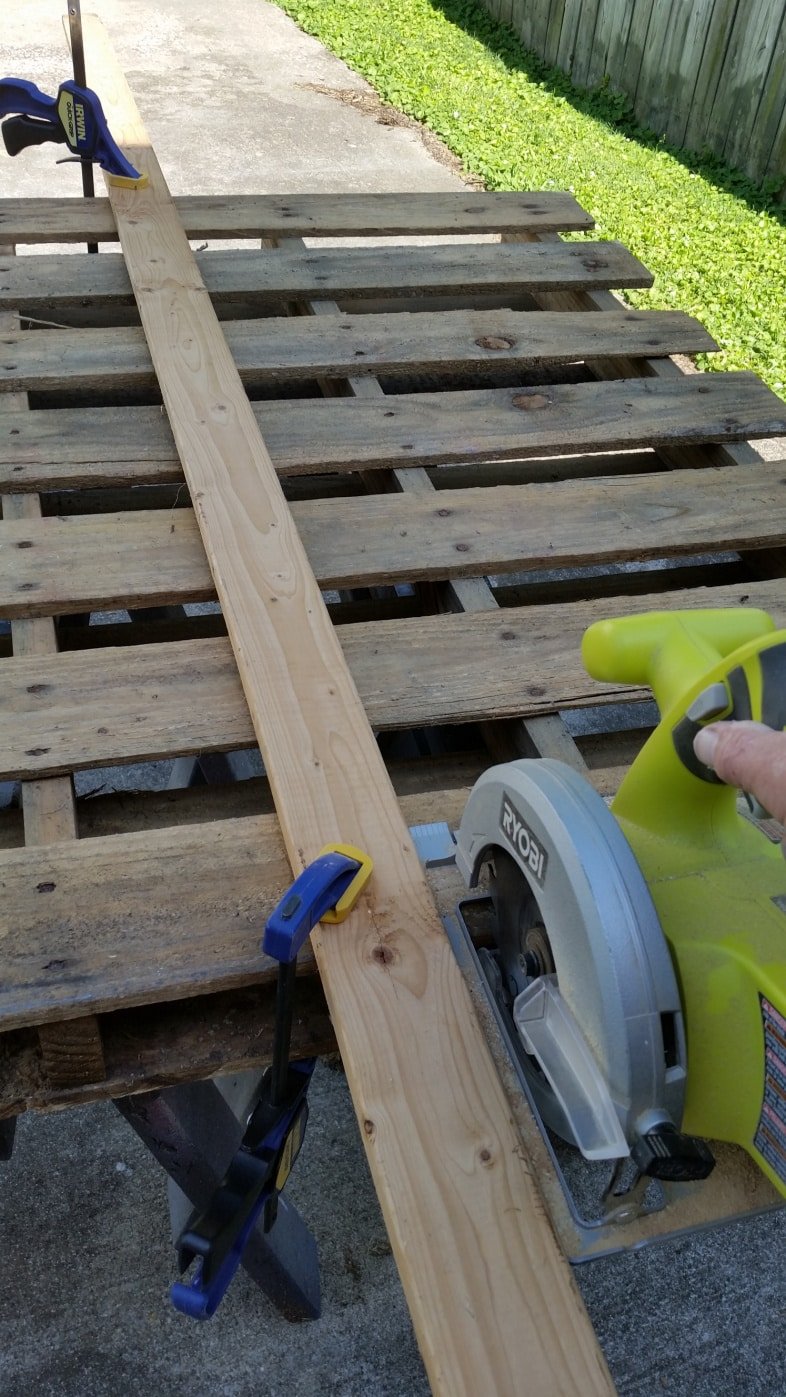
After examining all of the boards for nails and or screws, I used the guide to keep the circular saw on track. Then, I proceeded to cut the pallet boards. Note the clamps must be on the opposite side of the cutting area.
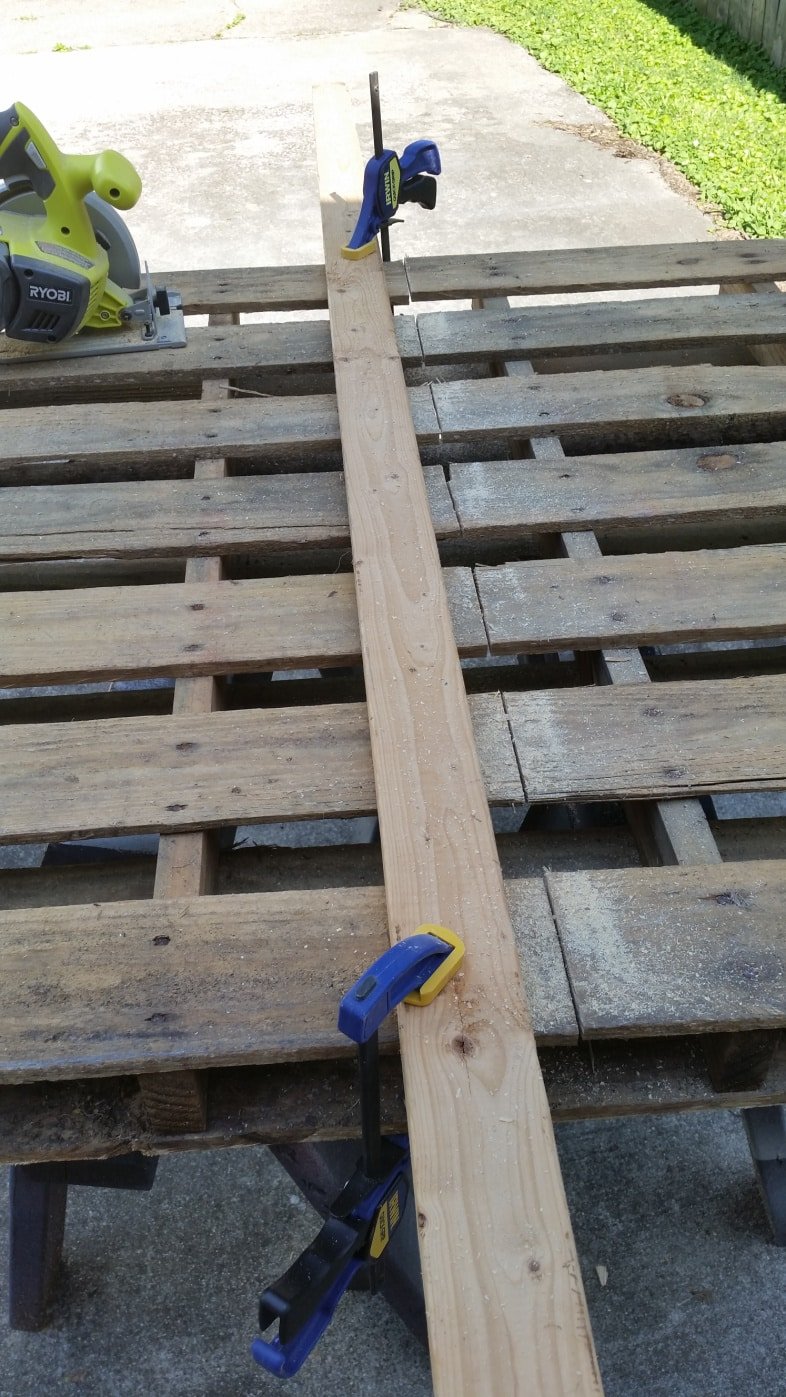
You can see that I have cut half of the pallet and am changing the clamps so I can come back from the other direction. If I changed the clamps and went in the same direction, the distance between the board and the blade would be much more significant, making the pallet’s halves unequal.
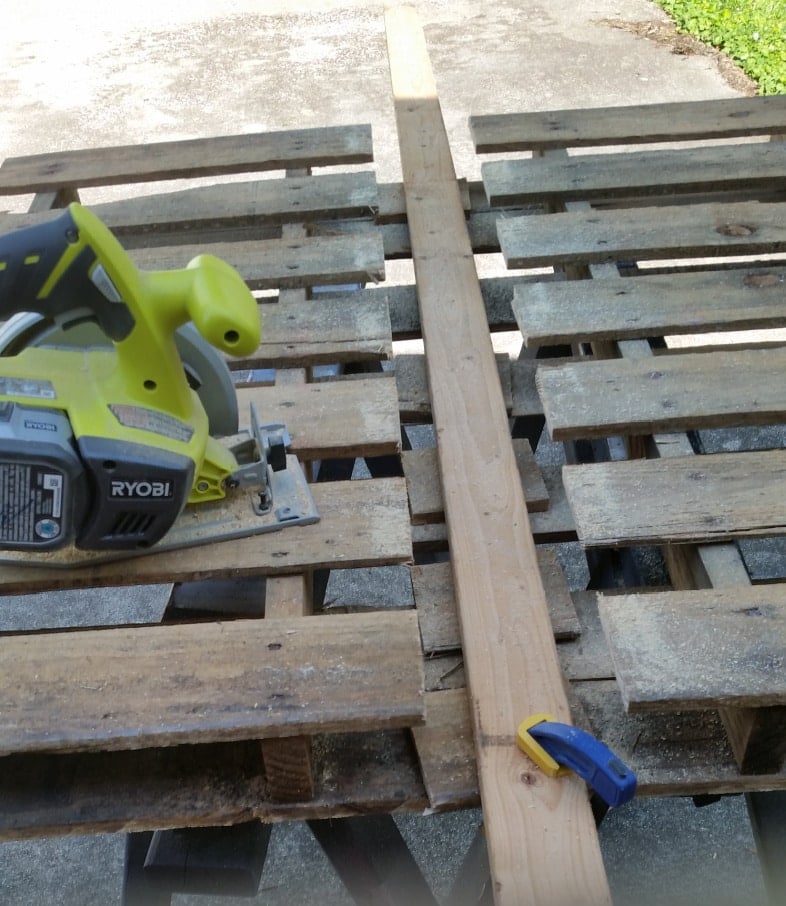
The board and all the scraps fell through as I approached the end. It’s time to flip it over and do the same on the other side. (not shown)
Add Each Half Pallet to the Whole Pallet
You can see how it will come together as I do a dry fit.
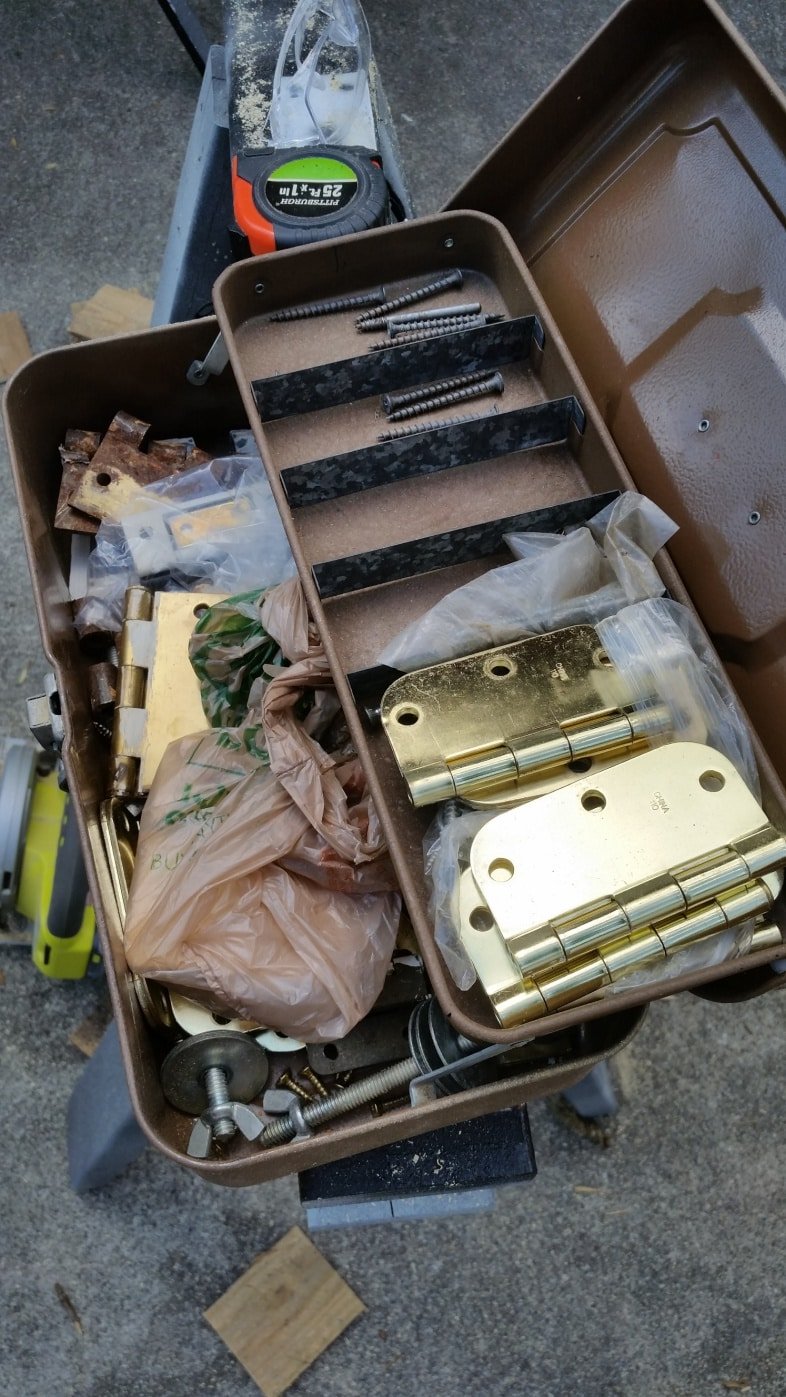
This is where the portability of the pallet bar comes into play. I have this old tackle box full of door hinges I got from a friend years and years ago. They changed out the color of their knobs and hinges, and I got all the old ones.
I searched online for a similar bar that folds up, and I could not find anything. Most pallet bars have this shape, and many are made with pallet boards, but I chose to make mine with one whole pallet and one pallet cut in half (well, a little smaller than half)
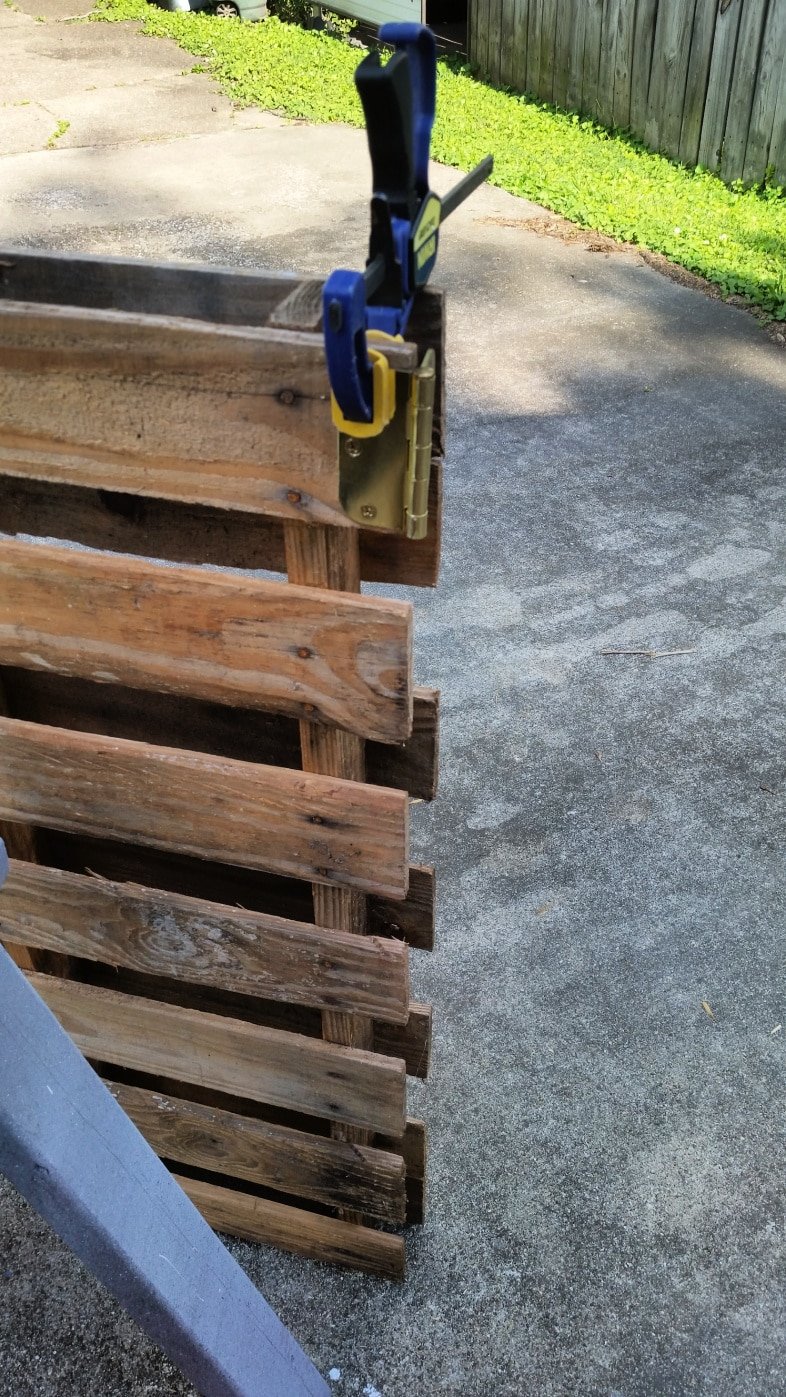
First, I did the left side and struggled with it, so I’ll show you how to add these hinges. Put all three hinges on the full pallet – folding each hinge back as you attach them. I used a quick clamp to help hold the hinge in place. I drilled pilot holes to ensure the pallet boards didn’t split. Having two drills going simultaneously is very helpful for this stage.
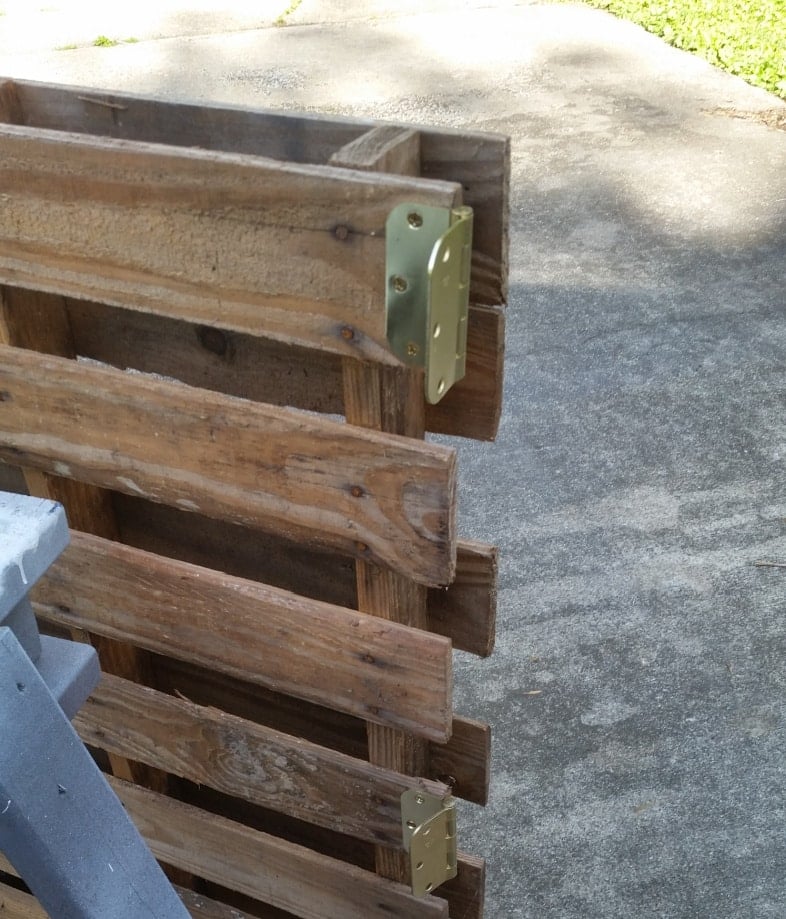
Fold each hinge inward and prepare to attach the side of the pallet bar.
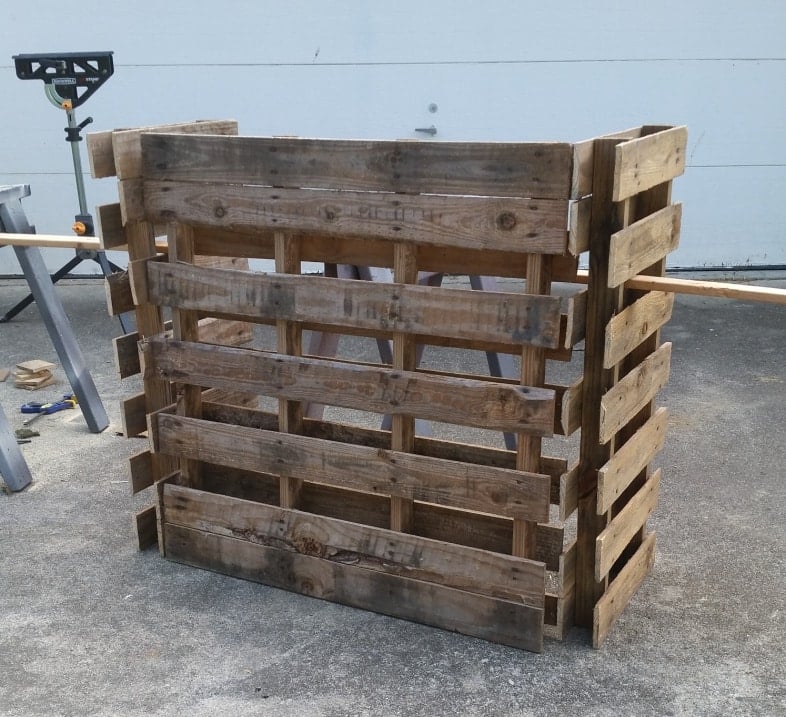
Pallet Bar Folds!
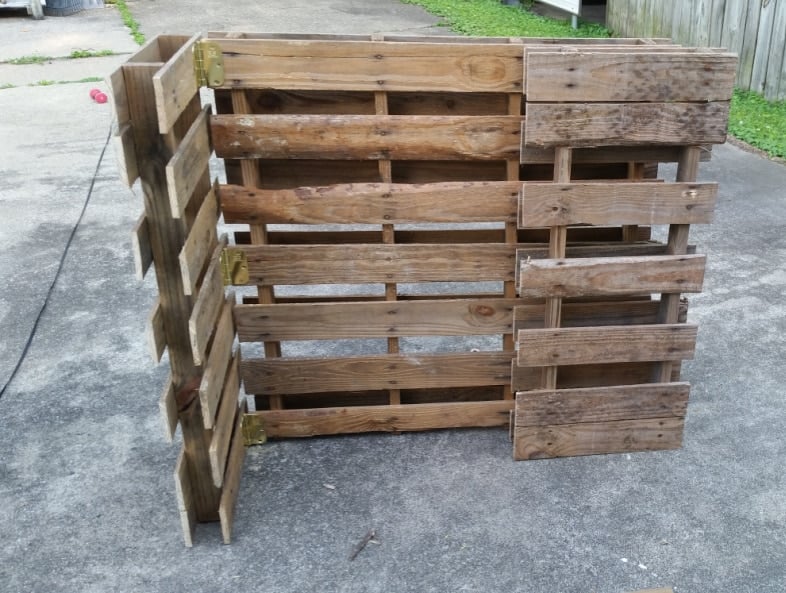
Voila! Oh my gosh! It’s just as I had imagined. Look how perfectly it will fold up! Full disclosure: It is cumbersome for one old gal to carry alone.
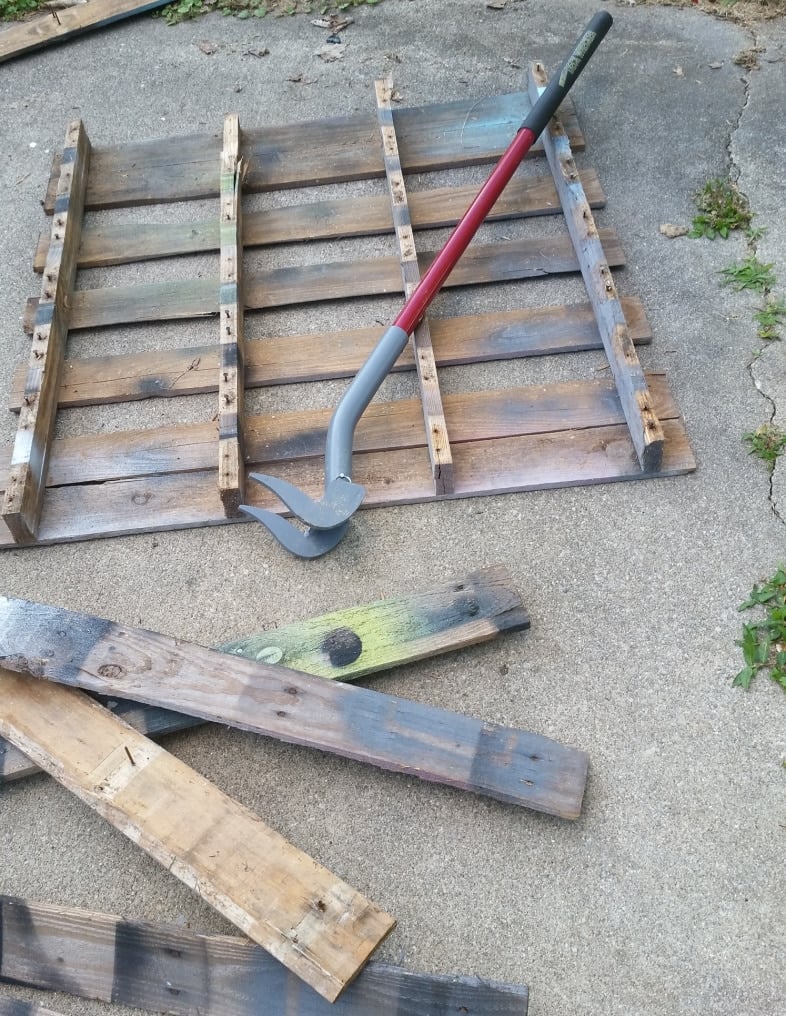
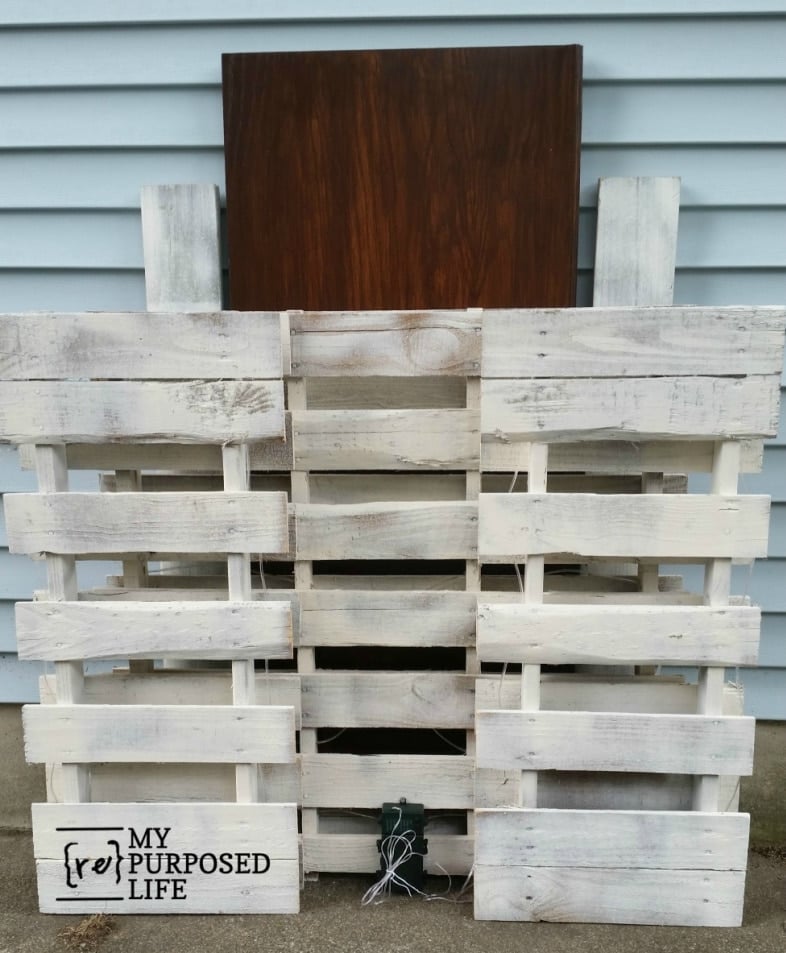
This is the third pallet shown at the top of this post. You can see that I had used this pallet for painting. I used my Duckbill Deck Wrecker to dismantle the pallet quickly and easily. I then de-nailed all the pallet boards. The plan was to use the boards to make the bar top.
See more Pallet Projects and tips for dismantling pallets by clicking here.
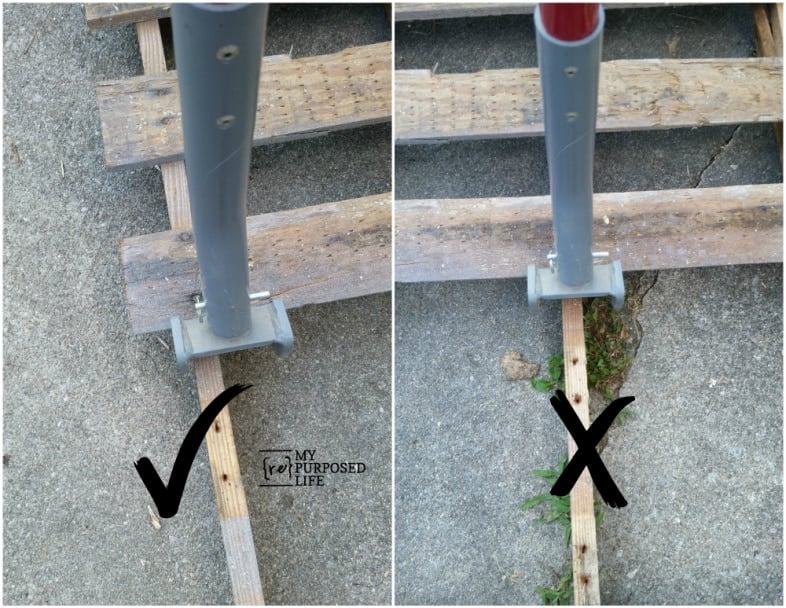
While discussing the Duckbill Deck Wrecker that quickly takes pallets apart, I want to ensure you know the best way to do so without splitting your boards. When you position your deck wrecker up against the brace board (on the left), the likelihood of your pallet board splitting is much less than if you center your duckbill deck wrecker over the brace board (on the right)
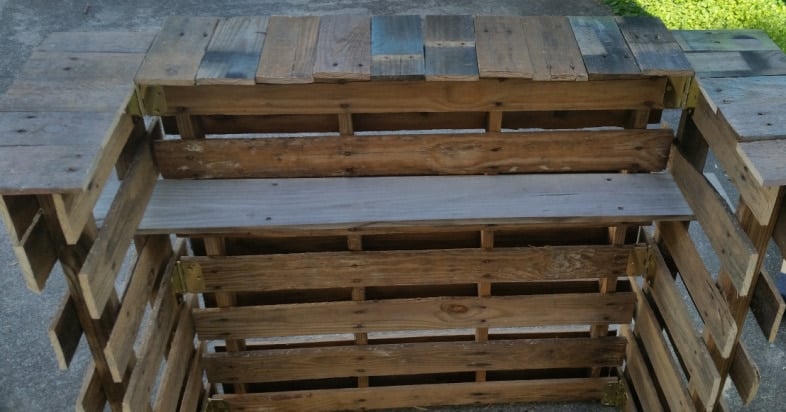
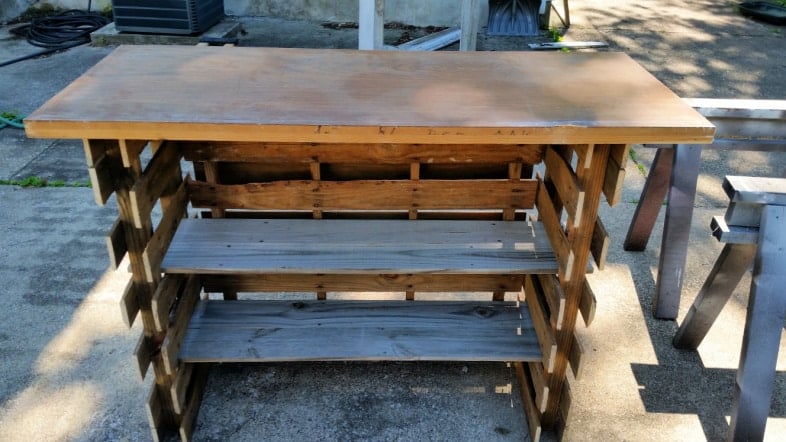
Yeah, that was a wasted hour. I don’t like how the portable bar top looks. But this image gives you a sneak peek at the adjustable shelving included with this folding pallet bar.
Pallet Bar Top
Plan B!

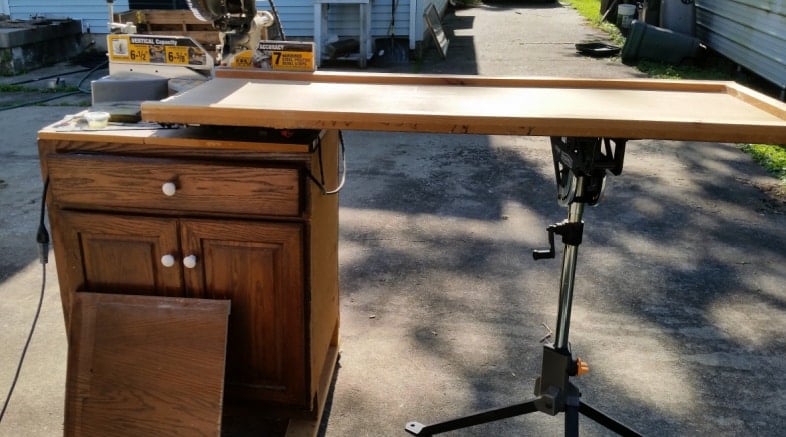
Years ago, I got a ginormous hutch from my cousin. I cut it in half. I used 1/2 of it to hold my sliding compound miter saw. (seen below) The other half of the cabinet became a craft table. This long piece leaning against doors was the top of that monster. I’ve never known what to do with it.

I dragged it out and placed it on the pallet bar to see if it would work.

This is part of the cabinet I got from my cousin. (home for my large miter saw) That jaw stand comes in handy for large jobs like this. I cut half of the top, then flipped it over to do the other half. You could use a jigsaw or a circular saw to get the same result.
Flipping the table top over and being VERY careful to avoid any screws and nails, I finished cutting the end off of the large plywood hutch top.
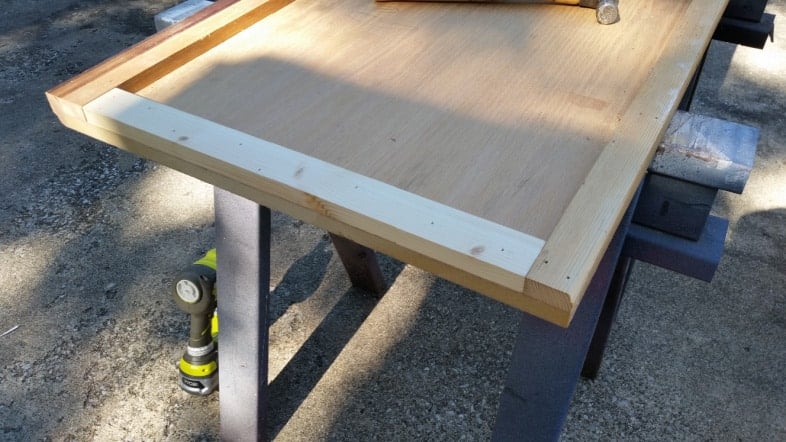
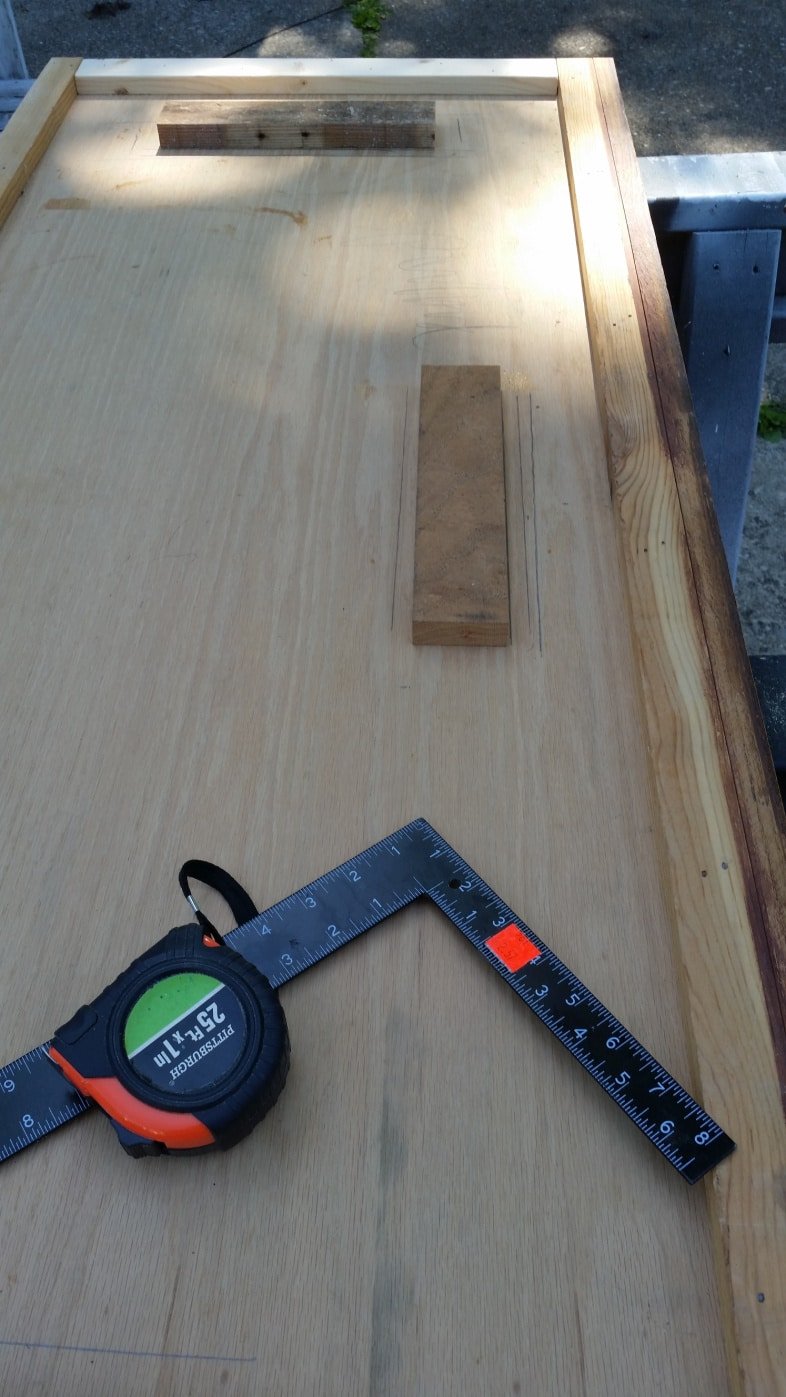
To make the cut-off end match the other end, I used a scrap 1x that I found.
I cut more fence boards to allow for adjustable shelves in the portable DIY pallet bar. At this point, I’m thrilled with how well it’s coming together, but I wanted to ensure that the top rested securely on the pallet bar.
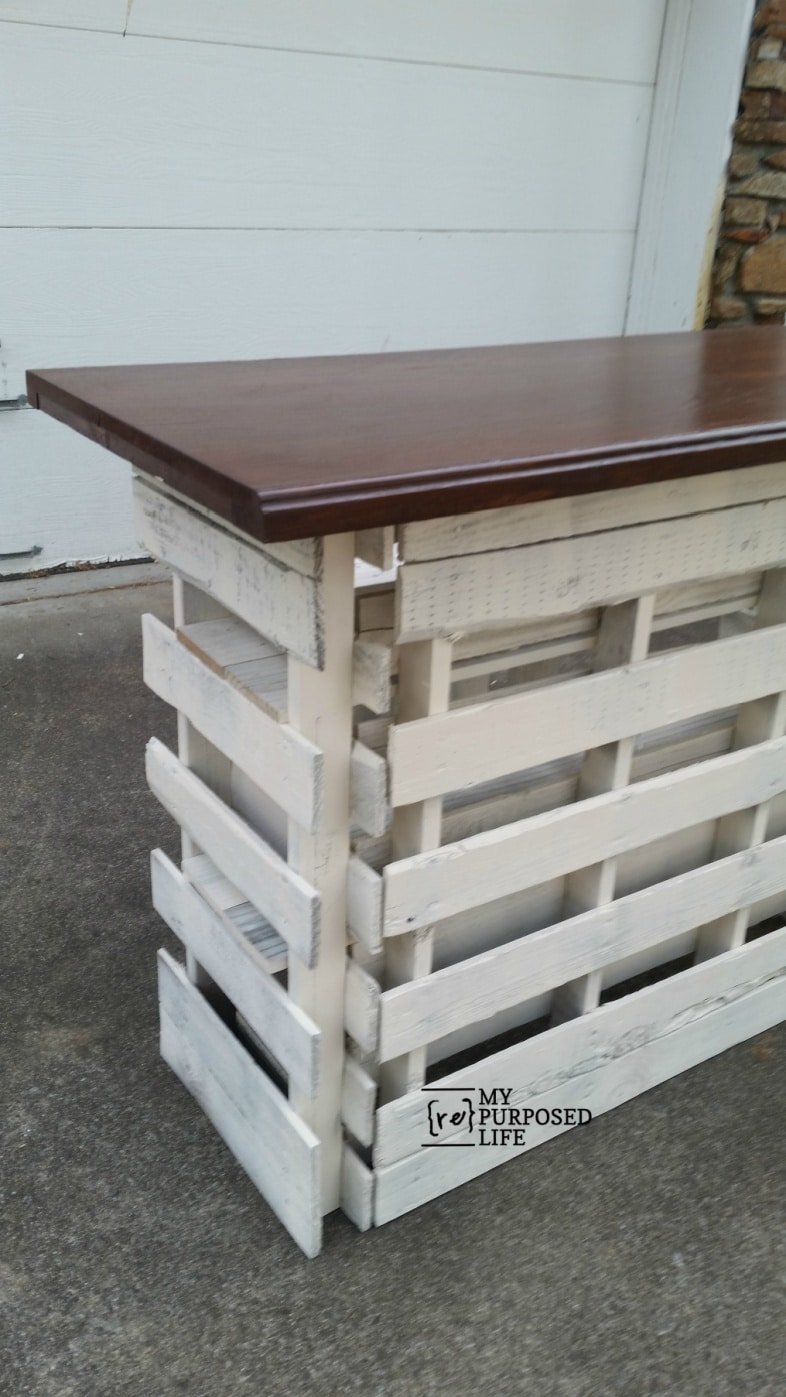
Add Cleats to the Bar Top
Using some of the scrap boards from the pallet I dismantled and another piece of hardwood, I made inserts to keep the pallet bar top from shifting once placed on the pallet bar. I attached the pieces with my nail gun, checked to make sure they fit okay; then secured them with some wood screws.
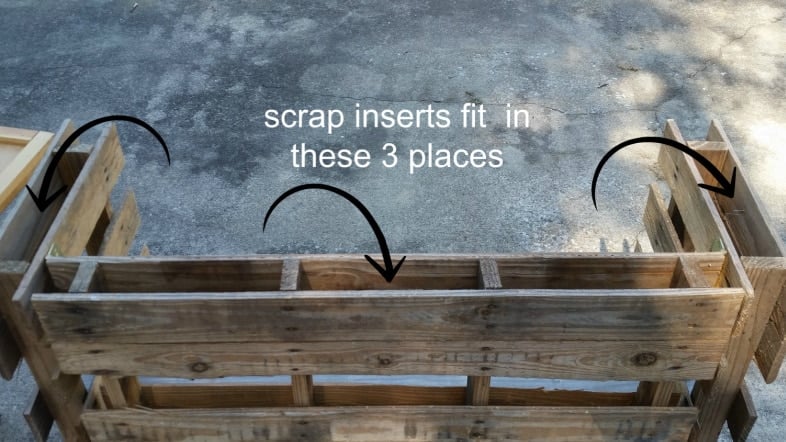
These are the three places where the inserts will rest to keep the pallet bar from shifting once it’s in place. They fit very snugly.
You’ll see in the video that they need to fit perfectly to secure the bar to the top properly.
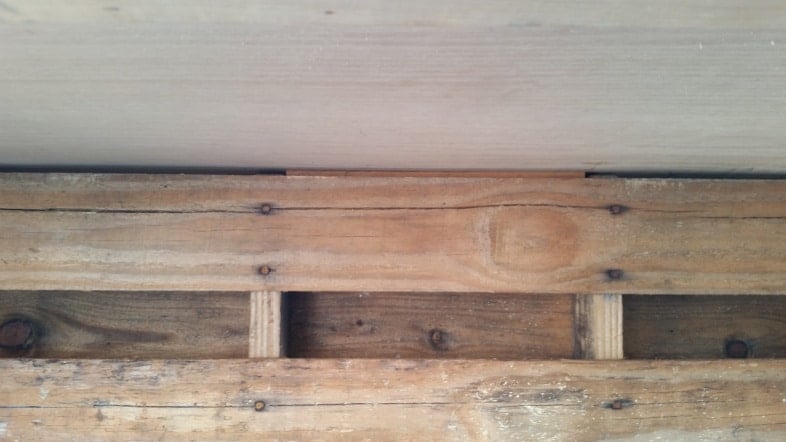
If you look closely, you can see the insert here in the middle front of the pallet bar.

The portable bar is easy to move on my small furniture dollies. These things are a lifesaver.
Easy Stool for Pallet Bar
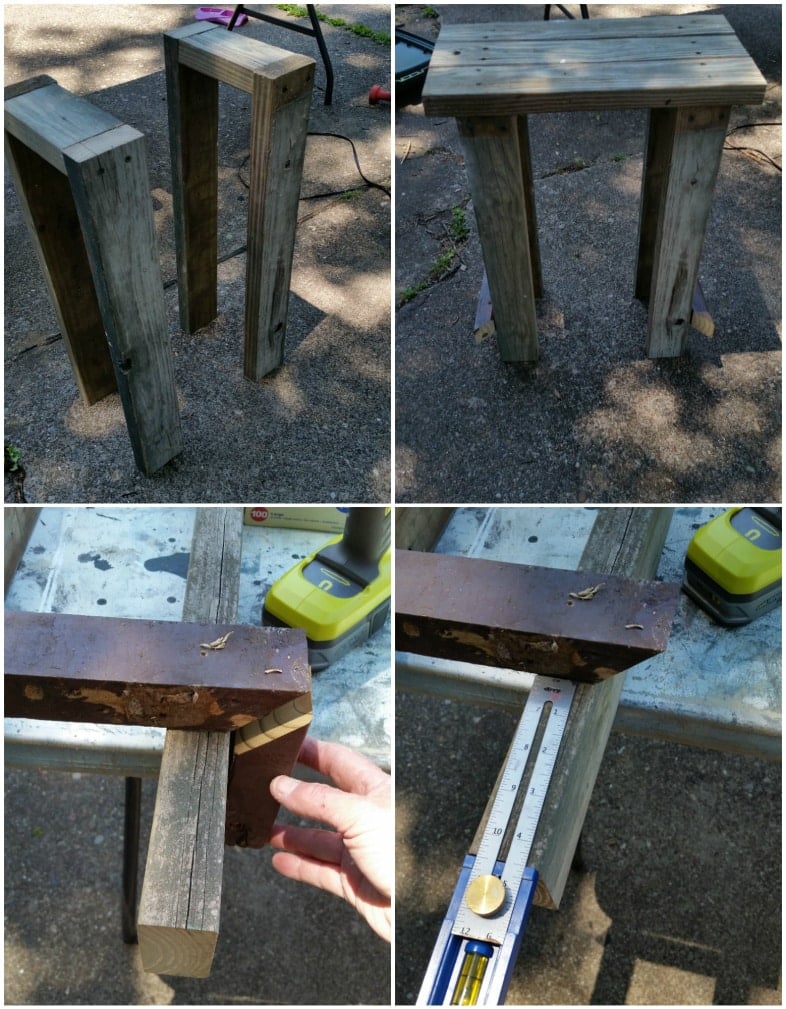
I made a DIY bar stool out of weathered 2x4s and some leftover 2x2s from my porch swing pergola. It’s a straightforward build. I used my Kreg Multi-Mark tool to place all the bottom braces uniformly.
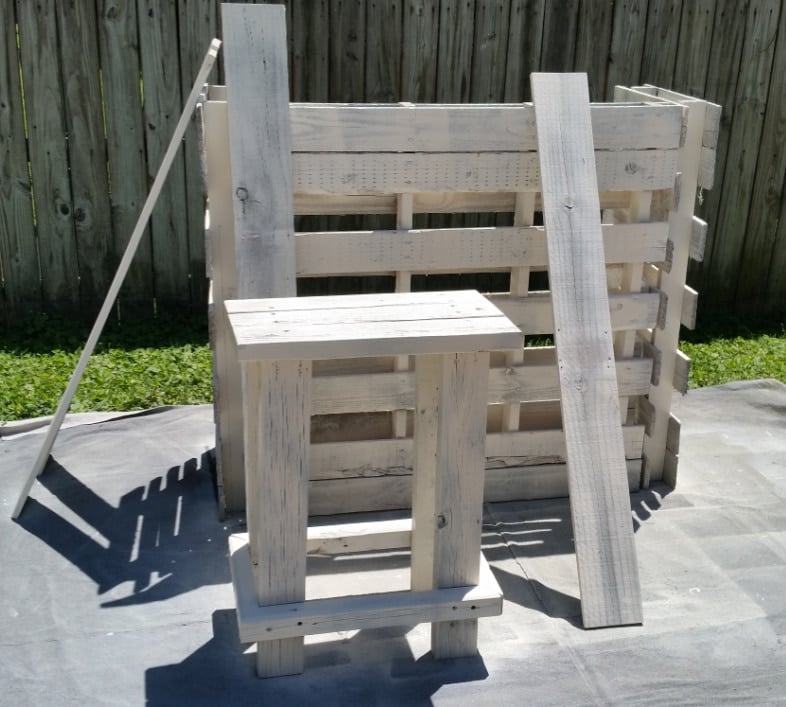
I painted all the DIY portable bar components with my Homeright Finish Max.
Stain & Protect Bar Top
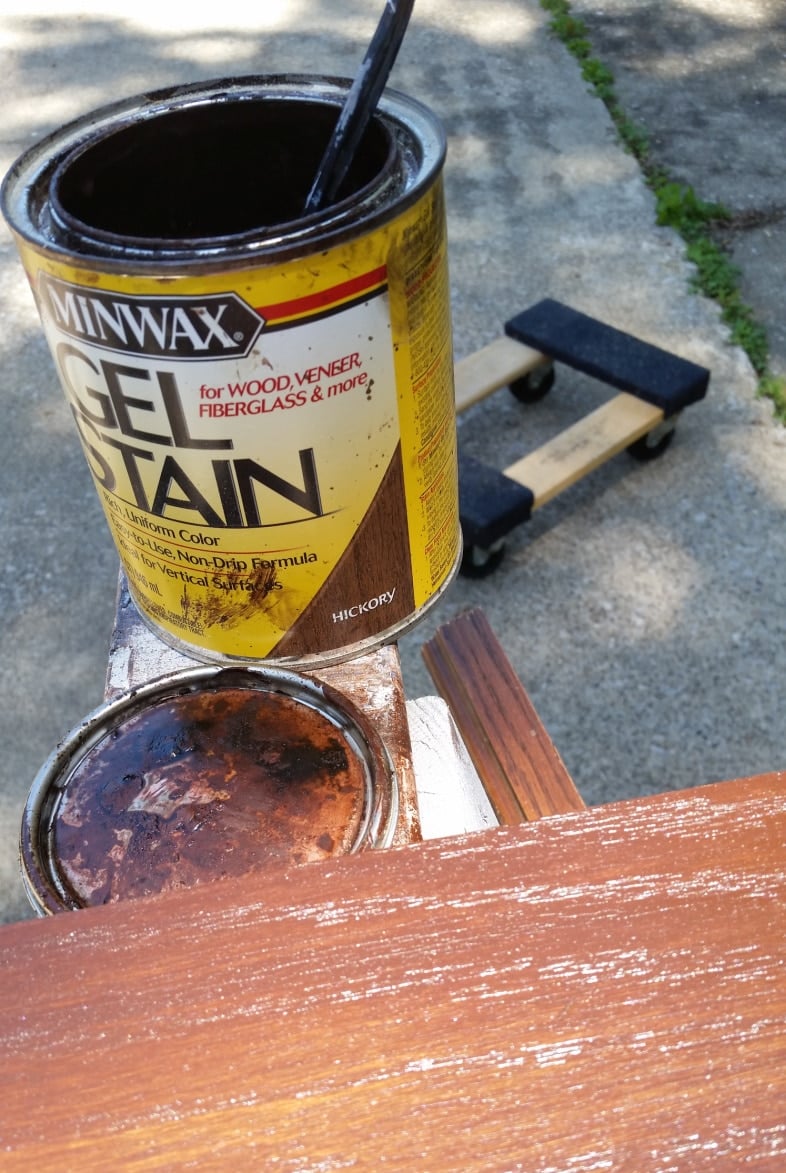
I used a Minwax Gel Stain to give the bar top a fresh new look. The color was Hickory.
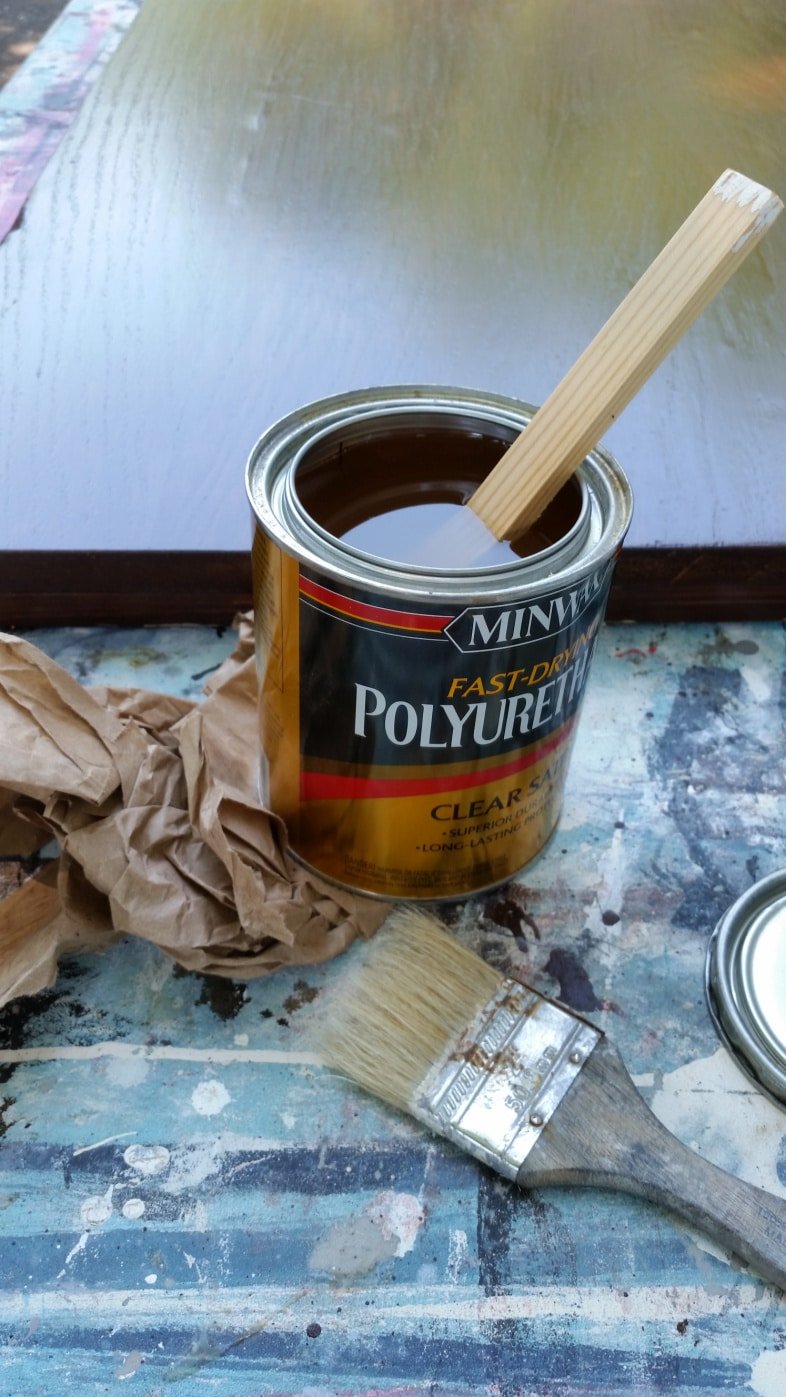
The bar top is NOT weatherproof, but I wanted to make it water-resistant because it’s a bar! I attempted to use my favorite Minwax polyacrylic for durability—BUT because the gel stain had such a shiny surface, the polyacrylic just sat on top of the wood stain.
Luckily, it’s water-based so that I could wipe it off with a damp rag.
When all else fails, read directions, Gail! The gel stain recommends Fast Drying Polyurethane. I sanded the top with brown craft paper, wiped it down, and used a cheap chip brush to apply the polyurethane. I did two coats following the directions in between coats.
Are you ready for the reveal? Or have you already scrolled down to see the “after”?
Don’t you want to make a foldable and portable DIY pallet bar? Everything but the top could stay outside in the weather.
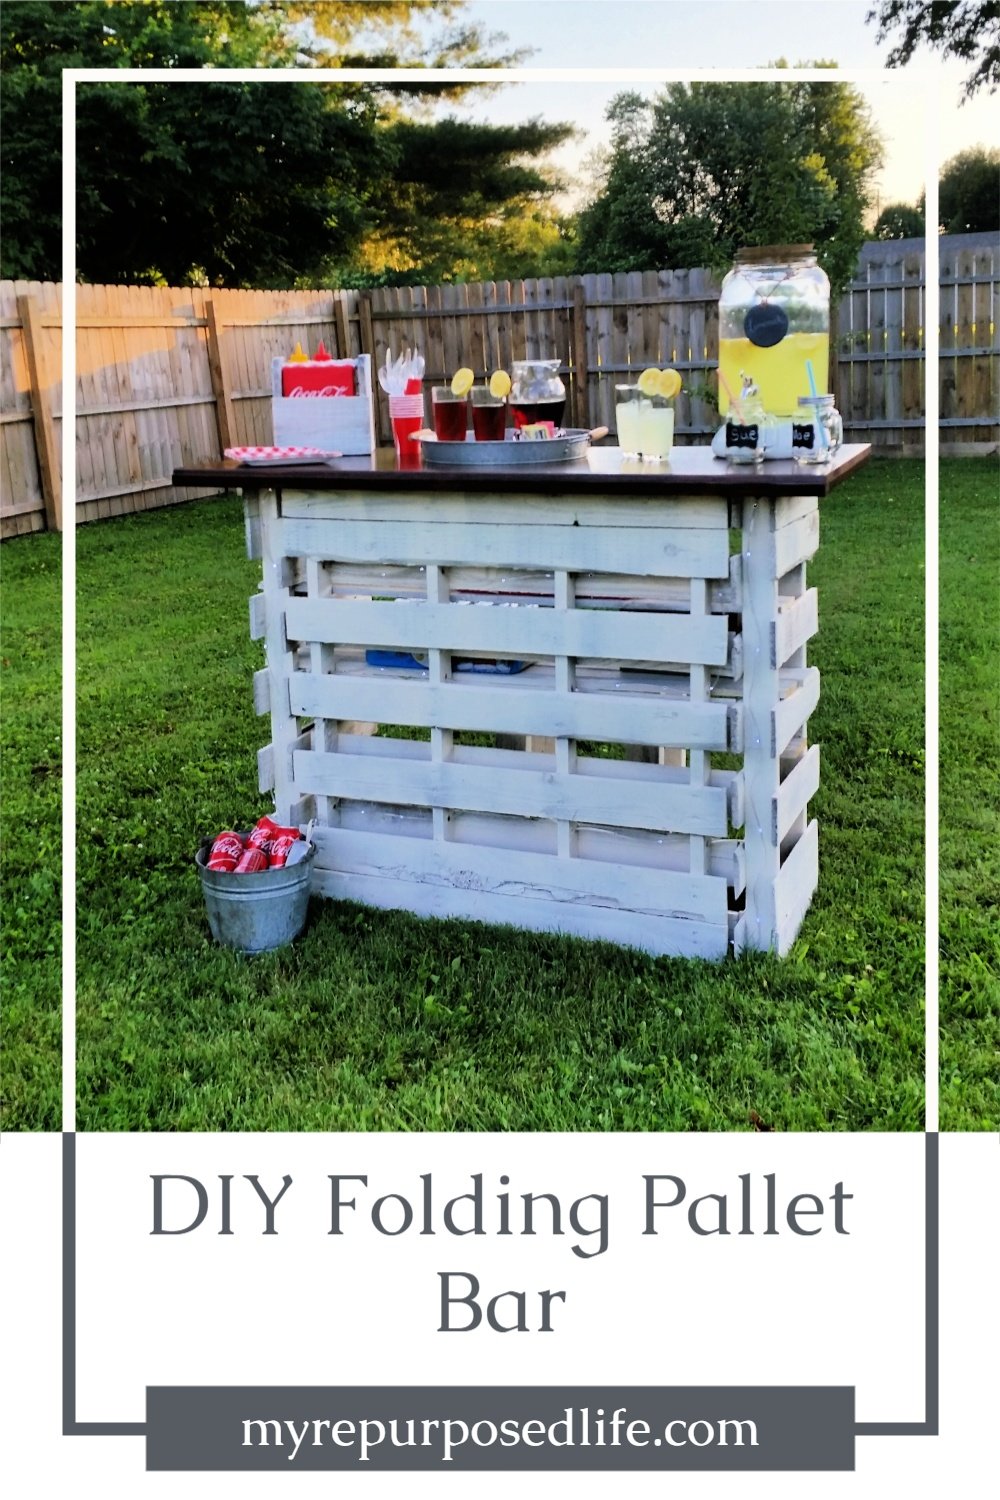
Folding Pallet Bar

Wouldn’t it be perfect for an outdoor wedding or your next BBQ?
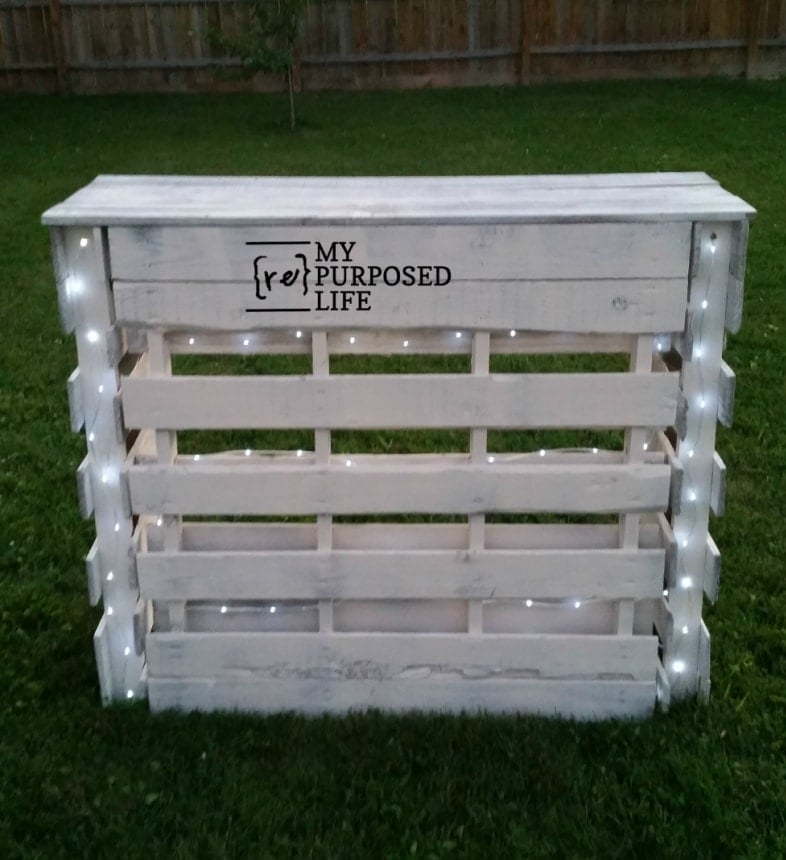
I LOVE Amazon Prime. I ordered these rope lights with same-day delivery.
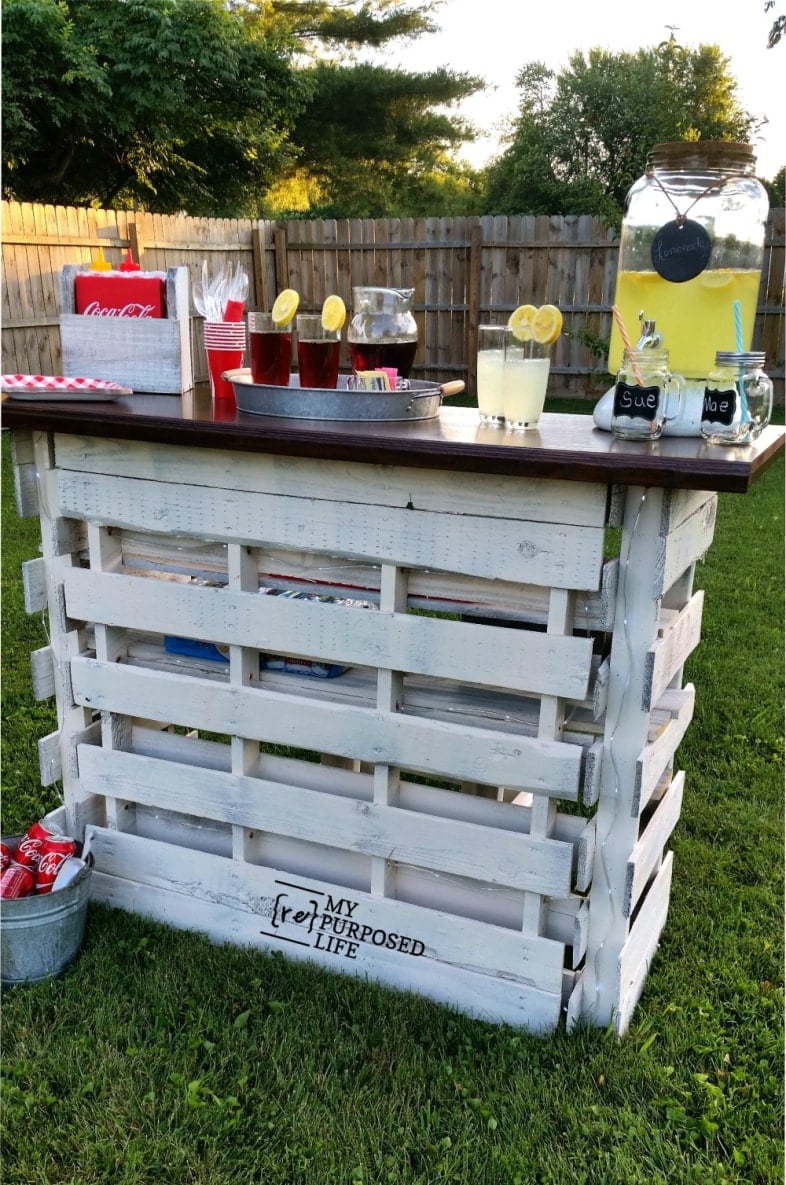
Here is the portable folding pallet bar all dressed up for a party!
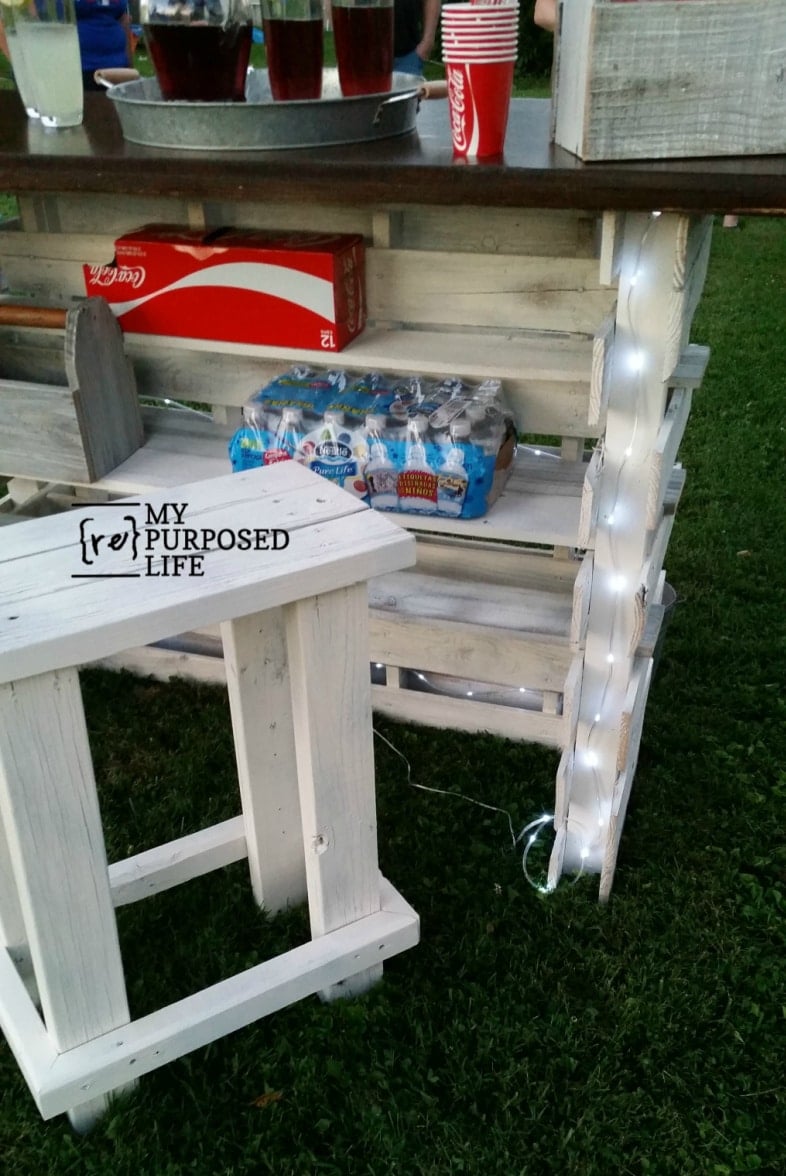
A view of the shelving area of the pallet bar—lots of storage area, completely adjustable to the owner’s liking.
There is one more option! The shelves can be placed on top of the pallet bar for a more rustic and weatherproof option.
This bar is so versatile—think weddings, reunions, birthday parties, outdoor events, and even tailgating. Move it to the front yard for the kiddos to sell lemonade.
The pallet bar easily folds away for storage, taking up very little room in your garage. Additionally, it’s very transportable in your SUV or pickup truck.

I hope I have inspired you to make your own portable pallet bar. It’s so easy to make, put up, and store!
Now, it’s time to check out all the Summer Fun projects from my friends.
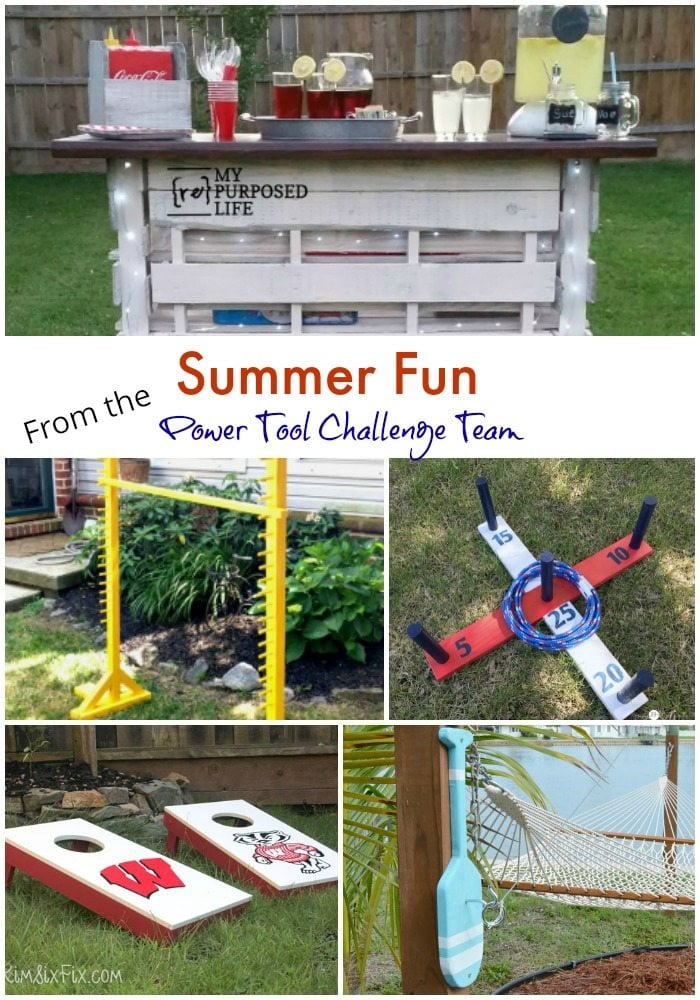
My Repurposed Life Portable Folding DIY Pallet Bar
Create and Babble Limbo Game Station
My Love 2 Create Ring Toss Game
The Kim Six Fix Cornhole Game From Cabinet Doors
H2OBungalow DIY Hook and Ring Game Tutorial
OMG…..You are not intimidated by those power tools at all! That is one great BBQ bar!
OMG – You stood in line many time when creativity was given out! I love seeing the amazing things you make! If I lived near you I’d love to take classes! Do you teach>
Thanks for all the great eye candy stuff!
Toni,
Thank you so very much for that sweet comment. I don’t teach, I just share all my repurposed furniture ideas right here on the blog. It’s my way of sharing what I learn with my friends.
gail
I love this project. I cant wait to make one for myself! I have seen lots of pallet ideas but this is the first one I liked enough to want to actually make and use. Great IDEA!
Thanks so much for stopping by and taking the time to leave a comment Danyle. It’s very much appreciated. This is a fun and easy project, you should definitely make one!
gail
Looks fantastic…perfect for my backyard and kids lemonade stand and my new patio Bar lol I am going to make like 3. What else can I use for a top. Something that is waterproof?
What else for a top? That’s a great question Cat. You could use more pallet boards, they hold up well in the weather? Or, wider fence boards? Those are both treated, so I wouldn’t let food come in contact with them.
I would LOVE to see what you come up with!
gail
Gail this is the perfect outdoor bar! I am LOVING how you made it to fold up, and the shelves, and the cute bar stool! It is so awesome in everyway! You shared so many great tips in this post too, for sure pinned!
Thanks so much Mindi! Wouldn’t this portable pallet bar be perfect for lemonade sales too? You should make one for your kiddos!
gail
Amazing! I love this idea! Making it fold is great for those who don’t have a space to leave a bar out year round. I think our patio at the lake is in need on one of these!
Paula,
This pallet bar was such a fun and easy project. Plus it got two pallets out of my storage area. 🙂
Thanks for stopping by,
gail
That is so great! I love the repurposing, of course, but all that storage!! You are so creative!
Karen,
I was really excited about this folding pallet bar project. I wanted to share it as soon as I got it done. Hoping you get to join in next month with the power tool gals.
gail
WOW! such an awesome finished bar!!! might have to figure out if i can actually put one together!
Sure you can put together a fold up pallet bar Nova! Maybe you can find a good deal on some hinges at the ReStore or thrift shop.
The top might be more difficult to find. I was really lucky – I’ve been wanting to use that big piece for a couple of years now. Great project, plus I got rid of a few pallets and a piece of wood. 😉
be sure to let me know if you make one.
gail
This is awesome! And the parts are so readily available. Thanks, Gail, for another inspiration.
Thank you Sandy. I appreciate your comment.
gail
Hi Gail – another great idea. Your projects are wonderful. So this is HI! from another “ol gal” Gail.
Hi there Gail! It’s from to hear from another ol gal Gail! Thanks for saying hi!
gail
Shut the door girlfriend, this project rocks! Will you bring it over so we can have a party? It will go great with the other games from the team! LOVE! Pinned and shared..of course 🙂
I can’t believe I was the only one in the challenge that didn’t make a game Wendi! I guess my summer fun ideas are a little different than the rest of the gals. 🙂
Thanks for pinning!
gail
Oh yeah! Pinned this one. Great idea and execution! Really cool!
Carol,
I looked and looked online and couldn’t find another folding pallet bar anywhere. It’s so rare to think of something “new” these days.
Thanks so much for pinning!
gail
Another awesome project Gail. I love it, especially with the lights – perfect for a wedding! Pinning!
You’re so right Jeanie, this portable pallet bar is perfect for a wedding, and so much more. Even tailgating! Can you imagine, I’d be the envy of the parking lot!
thanks for pinning!
gail