• Skip to primary navigation
  • Skip to main content
  • Skip to primary sidebar
  • Start Here
  • Shop Favorites
  • About
    • Welcome To My Repurposed Life Home of Repurposed Furniture
    • More About Gail
    • Disclosure
    • Privacy Information
  • Gallery
    • Repurposed Furniture
  • Repurposed Items
    • Building Supplies
    • Miscellaneous Household Items
    • Picture Frame/Chalk Board
  • DIY
    • Home Reno
    • outdoor living
    • Painting
    • Shop Talk
    • Tips for Around the House
    • Build It
      • Furniture
      • Home Decor
      • Storage
    • Crafts
      • Dollar Store
      • Easy
      • Holidays Seasonal
  • Furniture
    • Chair
    • Desk
    • Dresser/Chest
    • Headboard | Bed Parts | Cribs
    • Kids Furniture
    • Table
    • Kids Furniture
My Repurposed Life®
menu icon
go to homepage
subscribe
search icon
Homepage link
  • About
  • Start Here
  • Project Index
  • Furniture
  • Subscribe
    • Email
    • Facebook
    • Instagram
    • Pinterest
    • RSS
    • Twitter
  • ×

    Home » Repurposed Furniture » tufted upholstered headboard bench

    tufted upholstered headboard bench

    Published by Gail | Published October 25, 2016 | Updated April 9, 2019
    As an Amazon Associate I earn from qualifying purchases.

    Pin
    Share
    Tweet

    I have been wanting to do an upholstered headboard bench for years. Since I really didn’t know quite how to do it, I did as I normally do—I just jumped in and started.
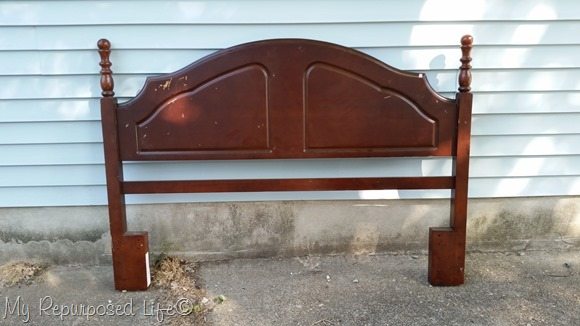
    full size headboardI got this headboard from my friend Cathy after she couldn’t sell it at her yard sale a couple of years ago.

    Materials needed for standard headboard bench assembly
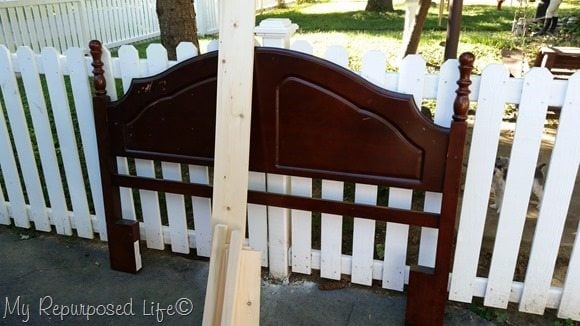
    supplies for building headboard benchFor the frame of the headboard bench I used two 1x6’s and one 2x2 (found at Home Depot in the hardwood dept). Because this bench will be made without a foot board, the first thing I had to do was to decide what I'll use for the front legs.


    *this post contains affiliate links*

    Begin assembly of headboard bench with pocket holes
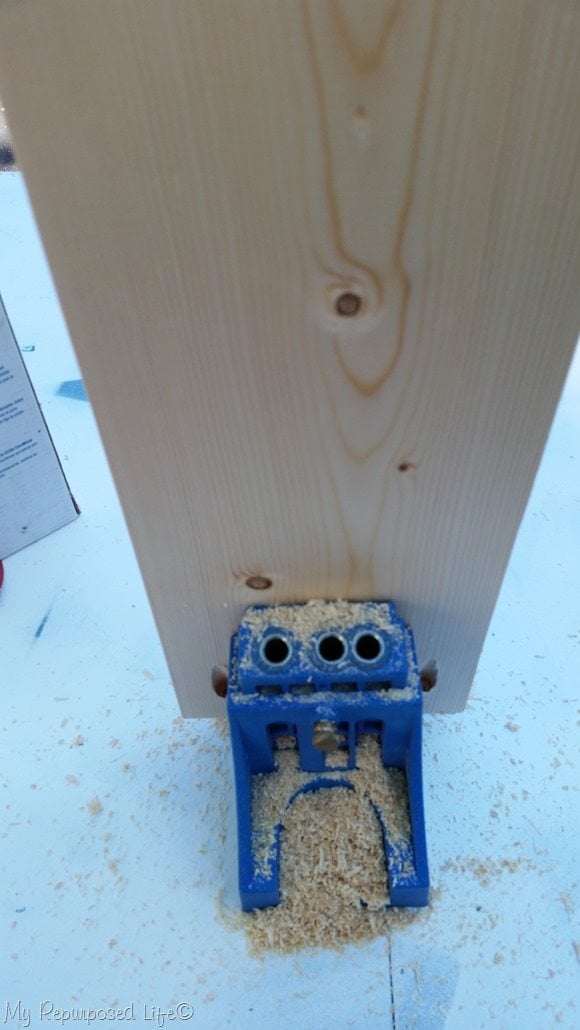
    kreg jigI assembled the bench as usual using pocket holes made with my Kreg Jig. Because I was using 1x6’s, I made one pocket hole on the left, shifted the board to make one on the right, then shifted the board one last time to make a pocket hole in the center of the board. Generally I use 1x4’s for headboard benches, but because this is a full sized headboard, probably holding more weight, I used 1x6’s.

    If you don't have a pocket hole jig, you can use "L" brackets. However, if you do a lot of projects, I highly recommend you investing in one of these jigs. For more details see my post How To Use A Kreg Jig
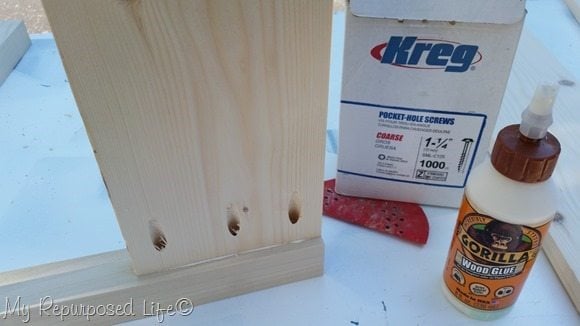
     

    attach side to front legAgain, because this is larger bench I used Gorilla wood glue for extra strength along with the pocket hole screws.


    Basic frame to make a headboard bench
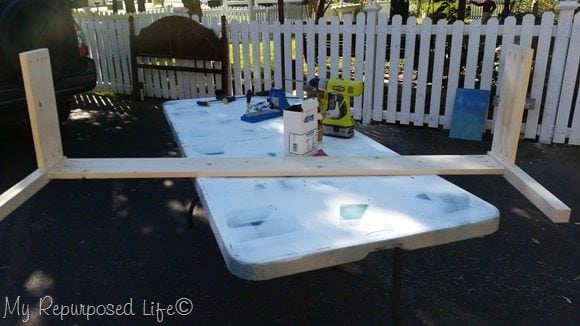
    full sized headboard bench frameYou can see how I built the frame that I will be attaching to the headboard (background)

    Attach frame to headboard

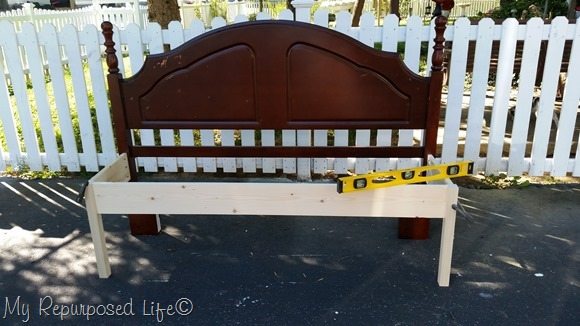
    attach frame to headboard to make benchUsing clamps and a level makes it easier to get everything straight. Although I drilled ¾’ pocket holes on the 1x6 sides,  I used 2” pocket hole screws to attach the sides to the headboard because they were going into the thicker bed post.

    Notice the smaller board on the original headboard. It’s not quite large/strong enough to help out with the seat, so I will need to add a brace board in the back.
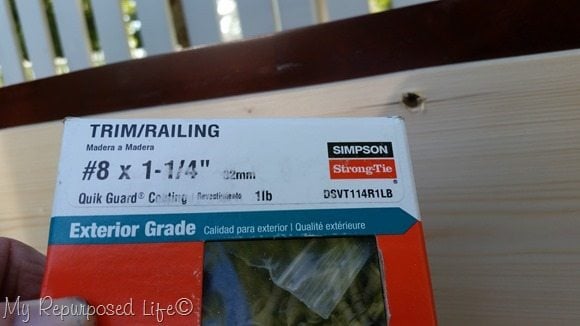
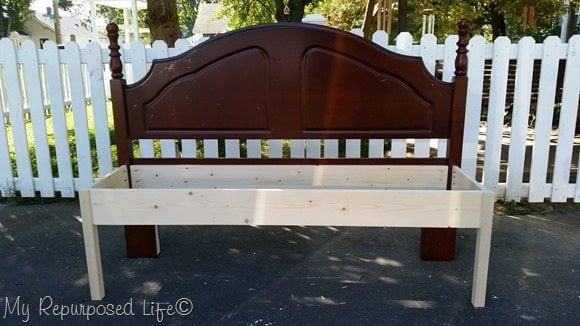
    wood screws hold back board of headboard benchIn addition to pocket holes and screws on either end, I used a couple of these wood screws to connect the new board to the original board for extra strength.

    how to frame a double bed headboard benchThis bench went together so quick and easy. It’s the first double bed I’ve used for a bench in a long, long time. The bed is a little different in the fact that it is solid, without spindles. Because of that, I decided to do something different. NOTE: bed posts on left and right

    Paint tufted headboard bench frame

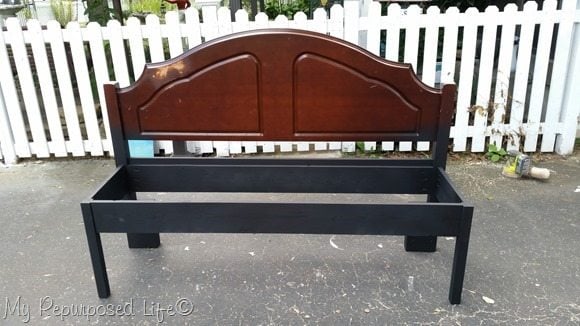
    primed bench cut off postsI gave the bench a quick coat of my diy chalky paint primer  with my Homeright Finish Max. Do you see what else I did? Yep, I cut off the bed posts with my reciprocating saw. I have a plan!

    Trace headboard pattern onto foam

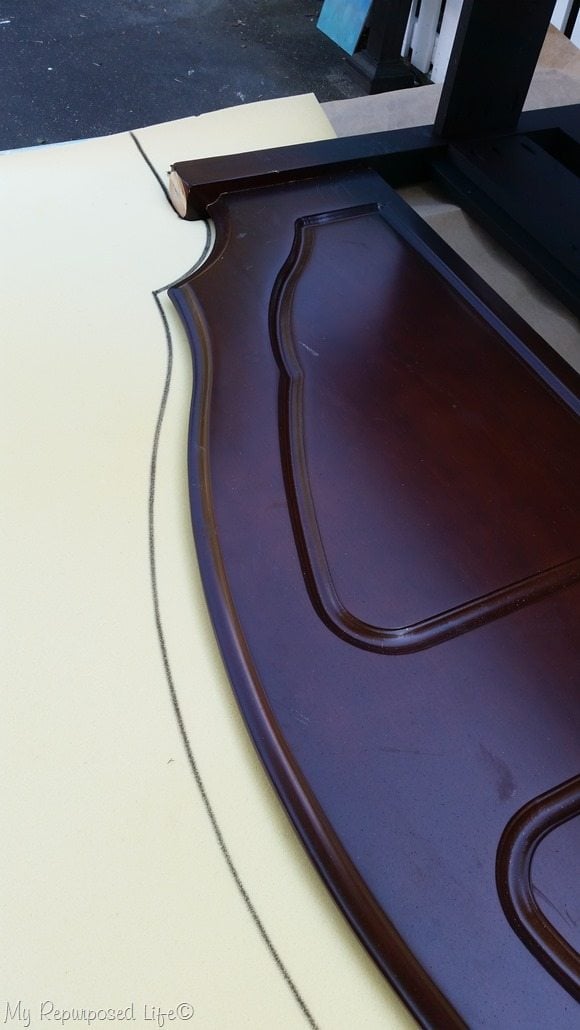
    trace headboard shape onto foamHere’s the plan…upholstery! I am not the best at it, and I tried to find an upholstered headboard bench online, and couldn’t find one to help me figure this out. I traced the shape of the headboard onto a piece of memory foam, then cut it out with some scissors.

    Spray foam with adhesive

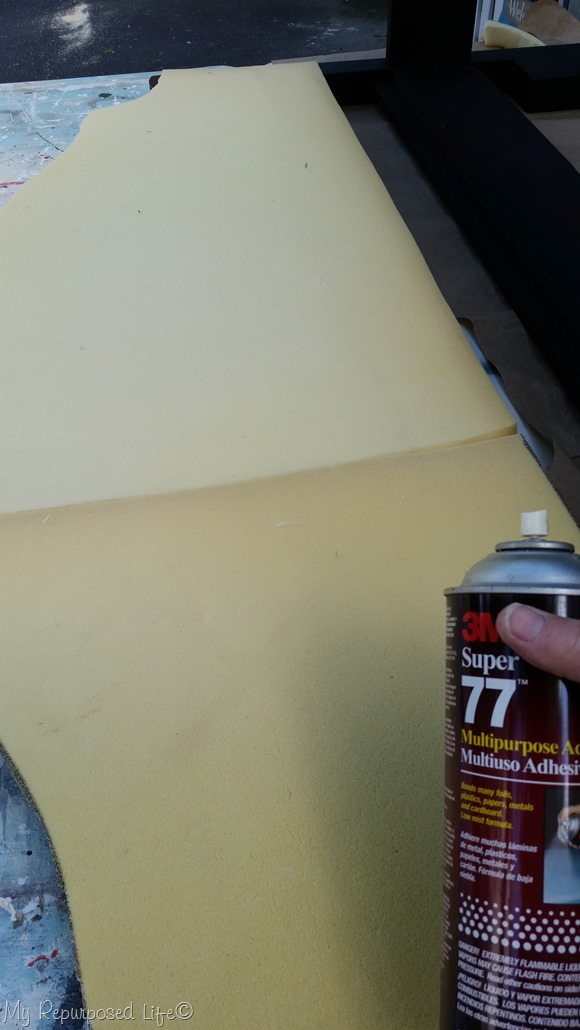
    piecing together foam for headboard benchBecause I wanted to do two layers of memory foam, the first layer had to be pieced. I used some spray adhesive to secure the first layer to the headboard and the second layer to the first one.

    The first layer only covers the front portion of the headboard. The second layer was cut large enough to wrap around the sides of the headboard.

    Using a bed sheet for batting
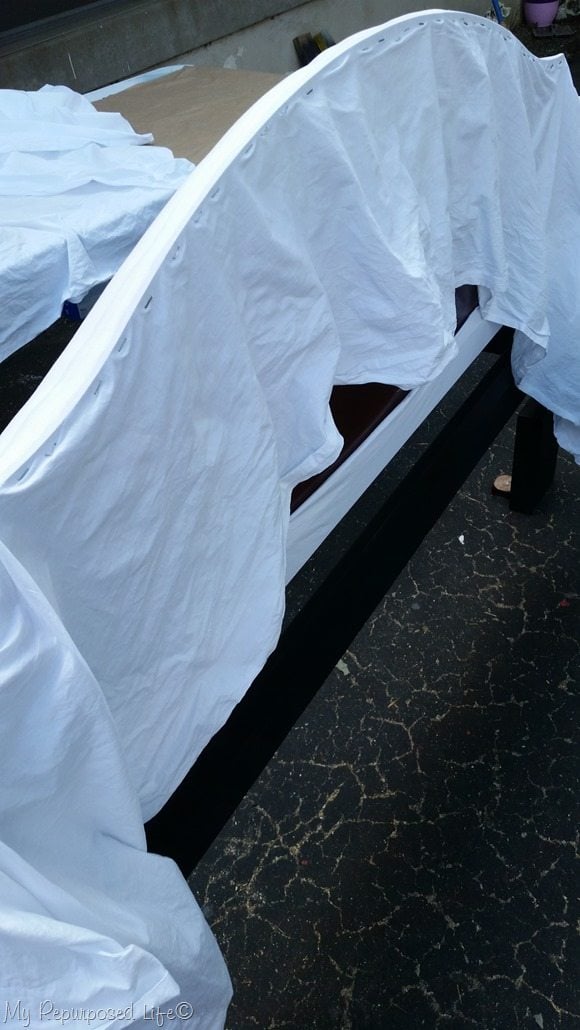
    using a sheet instead of battingSince I didn’t have enough batting for this project, I used ½ of a sheet I picked up recently at Vendors’ Village.

    Time to make a minor adjustment with the saw
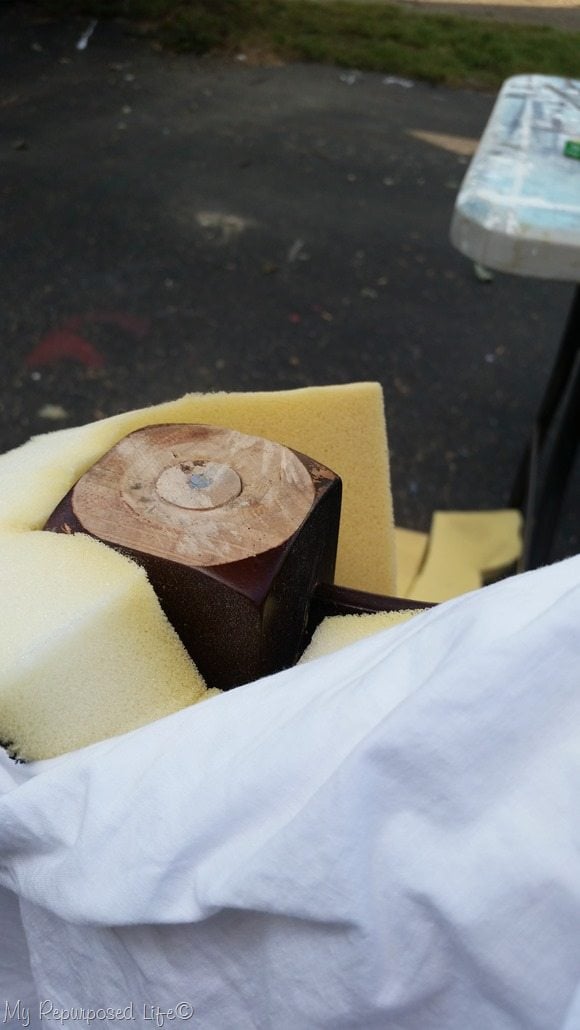
    remove more bed postAs I began covering the foam with the sheet, I realized that I should have cut the bed posts off even with the top of the headboard. I got my saw back out  and quickly took care of that!

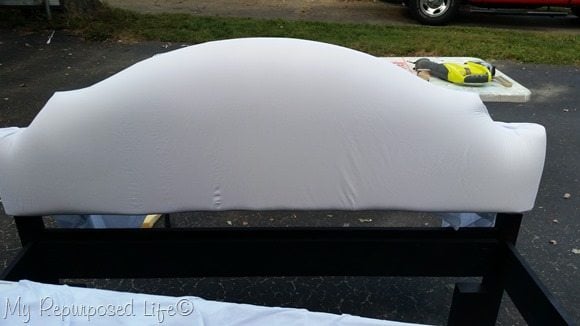
    first step of upholstering headboard benchThis photo is with two layers of the memory foam and the sheet stapled in place.

    As I said earlier, I’m not an upholsterer. I really think I should find a local class for beginning upholstery.

    Patience is the key to upholstery when you don't know what you're doing
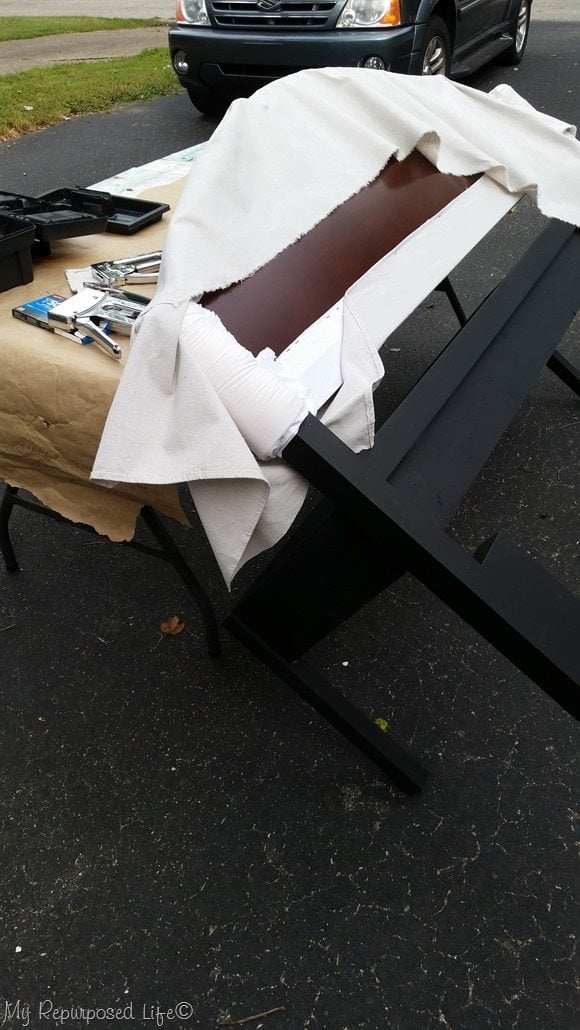
    attaching drop cloth upholsteryI’m just winging it here, and now realize that I probably did this all wrong. You might want to consider this a tutorial of how NOT to upholster a headboard bench.

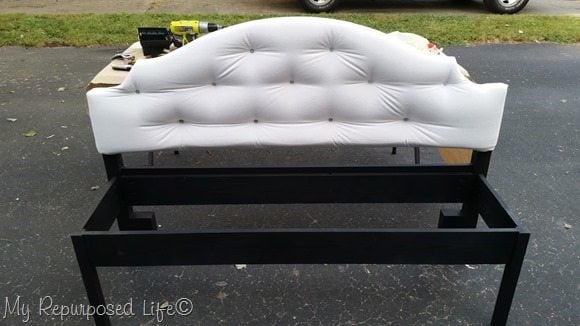
    I worked my way around stapling the drop cloth material to cover the sheet and the memory foam layers.

    Designing the upholstered headboard bench button tufting
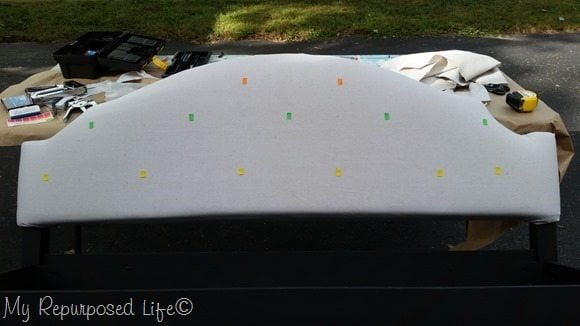
    using stickers to figure out placement of button upholsteryThinking outside the box, I used stickers to try to figure out the button placement on the upholstered headboard bench back.

    Easy upholstery using screws

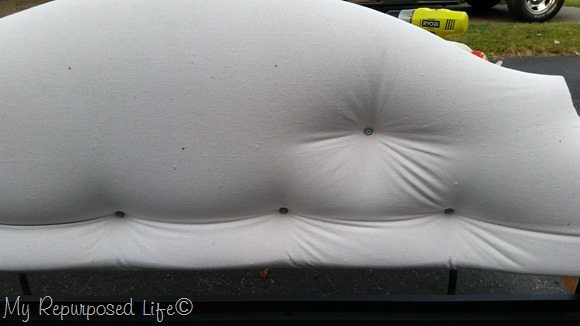
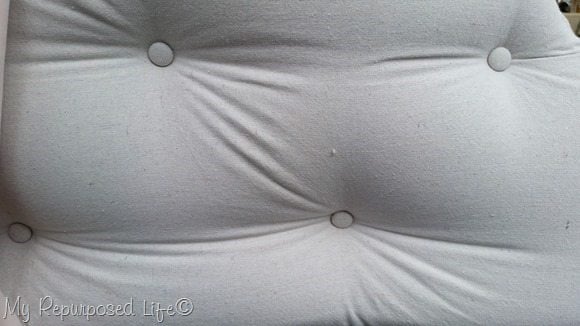
    using screws for button tuftingI decided to use the same method of using screws that I used on my upholstered corner bench. To do so, I used 1 inch screws with small washers to do the button tufting.

    button tufting with screws and washersI measured from the bottom and the middle and made tiny dots with a sharpie, then put a screw and washer in each of those spots. After doing this, I looked on pinterest and saw that people who do diamond tufting do the buttons (screws) before pulling the fabric and stapling it. To-do list—find an upholstery class. Winking smile

    back of upholstered headboard benchThis is where I really start making it up as I go along. For a short time I considered cutting a piece of thin plywood and painting it to cover this mess. But I already have a lot of money tied up in this bench (in lumber). That’s okay if you’re making one of these benches for yourself. I think it’s worth the money—but I am going to flip this so every penny counts.

    Drop cloth upholstery is a thrifty alternative
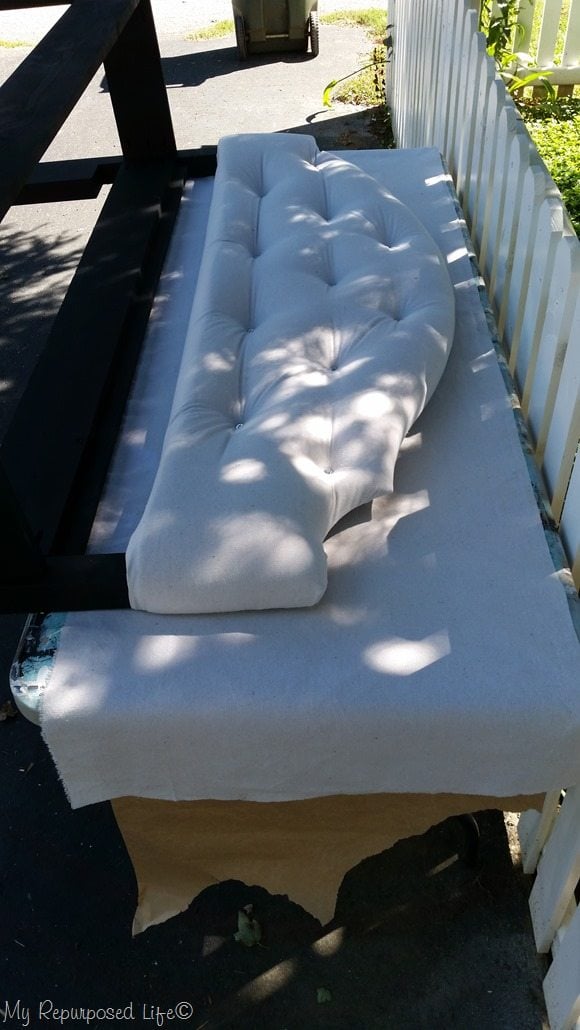
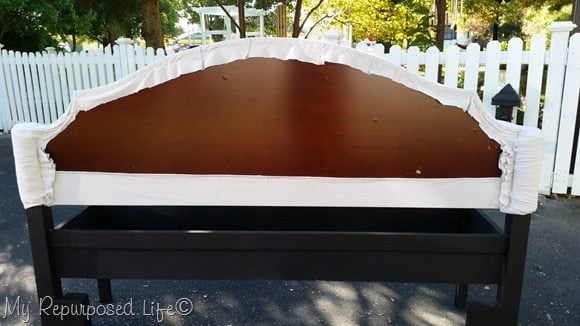
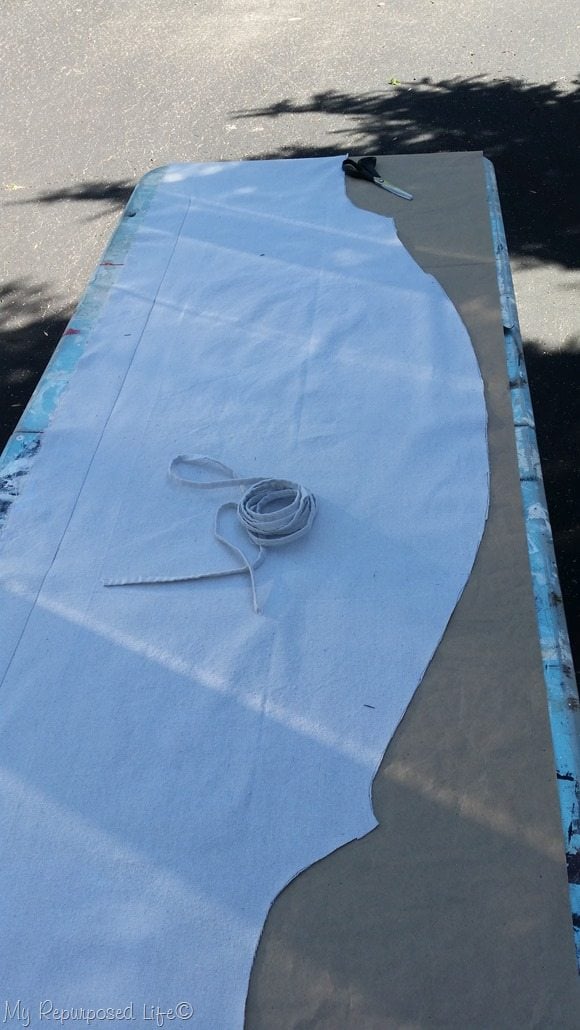
    trace fabric for back of headboard benchBecause of the curves of the headboard, I knew I needed to cut the back to have a similar shape. I laid the fabric down, and then hoisted the bench onto the table. It’s up against the diy picket fence because the table tried to get away from me as I was shoving the bench onto the table. Where there’s a will, there’s a way!

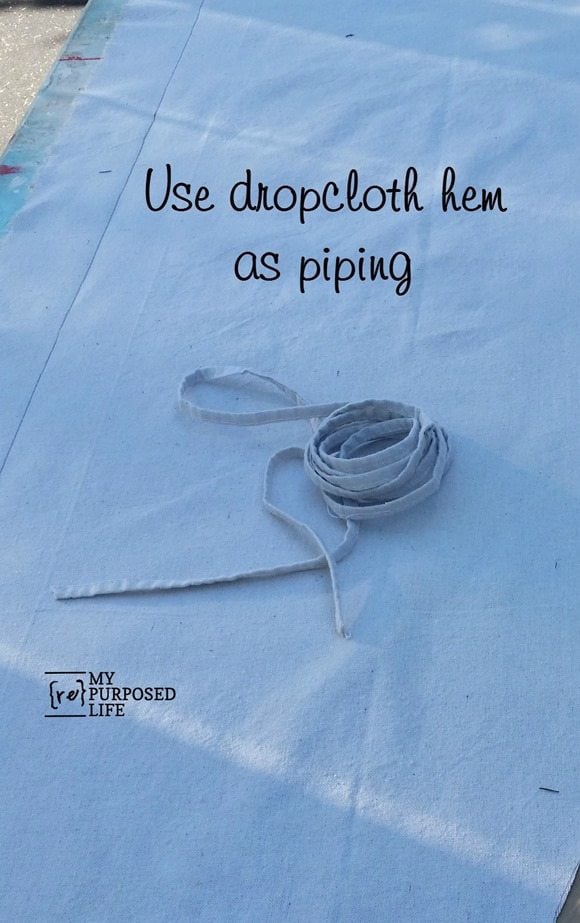
    Using a drop cloth hem as piping
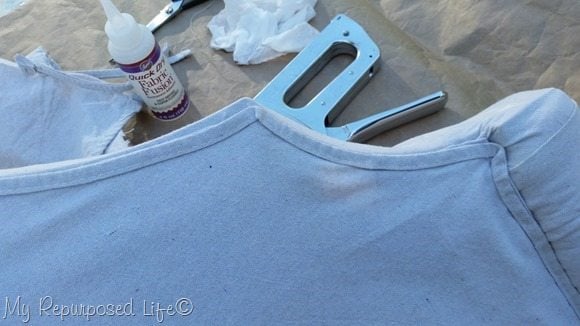
    cut out fabric for back of headboard benchI love the look of the shape of this headboard bench.

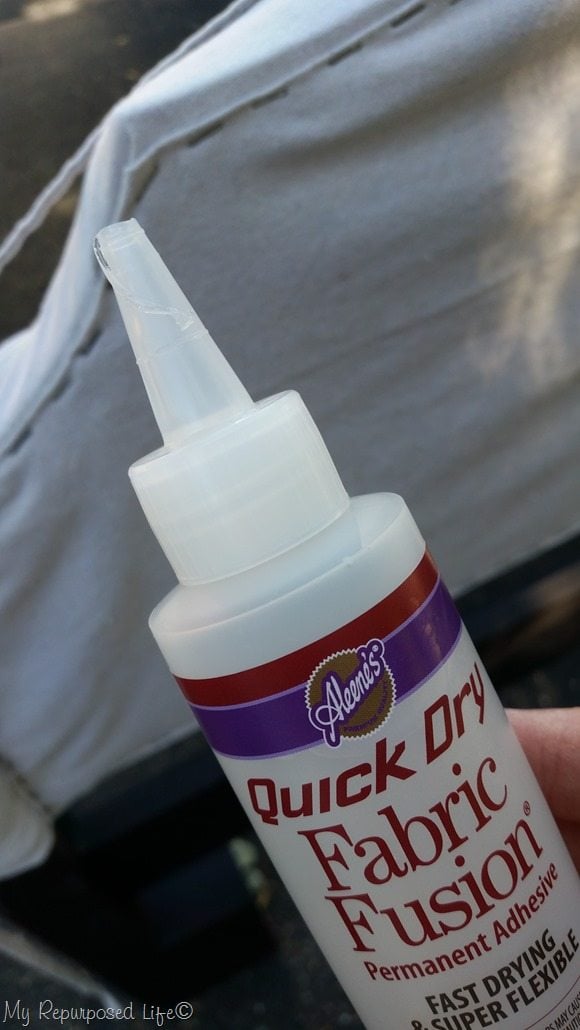
    quick dry fabric fusionI stapled the drop cloth fabric all around the back of the headboard bench. I’m about to use this Quick Dry Fabric Fusion, but I forgot to show you how I’m going to cover up all those staples.

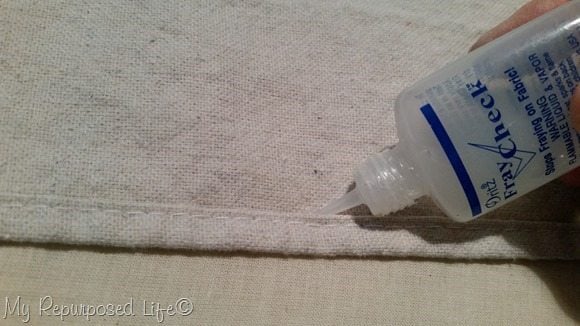
    fray checkDrop cloth frays very easily, but I have found this Fray Check to work really well. I applied it all around the hem of the piece that I cut for the back of the headboard.

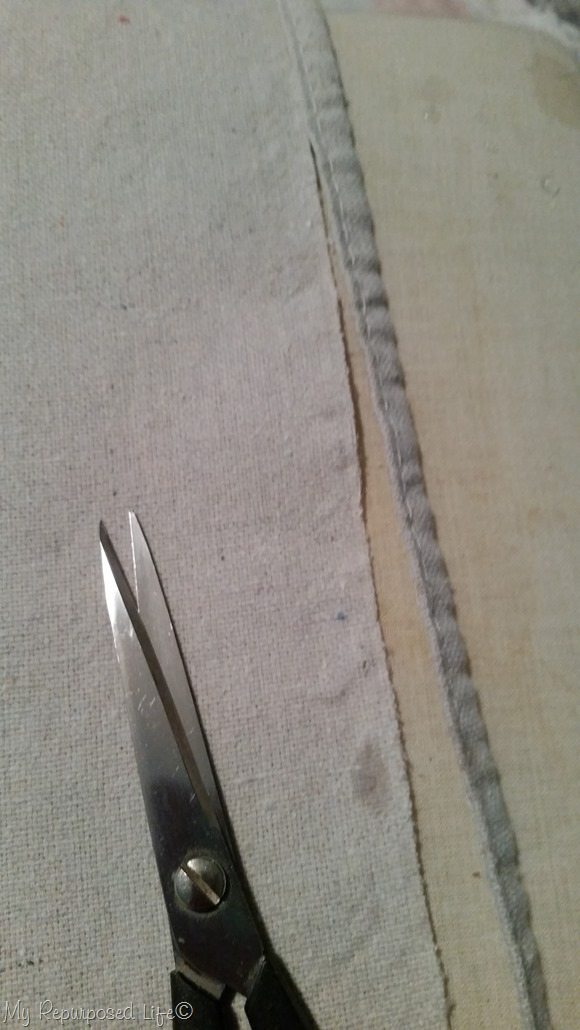
    cut off hem of drop clothAfter applying the gel, I snipped off the hem of the drop cloth as close to the stitch as possible.

    use drop cloth hem as piping MyRepurposedLife.comI don’t know a LOT about upholstery, but I do know that people use piping to cover up staples. Because I didn’t have piping and I didn’t want to MAKE piping  I chose to use the original drop cloth hem instead.

    drop cloth hem as piping to cover up staplesI’ll let you be the judge of whether or not you like it. I think it does the job, and I’m not sure piping would work any better in this circumstance, but the staples HAD to be covered somehow.

    Upholstered headboard bench seat
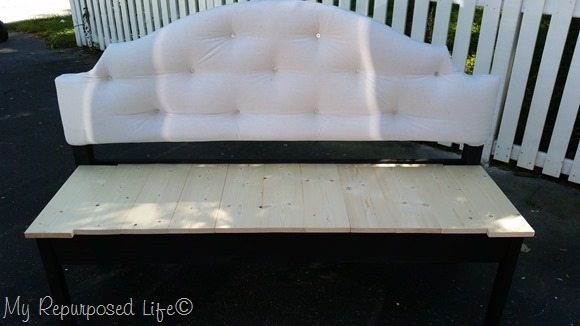
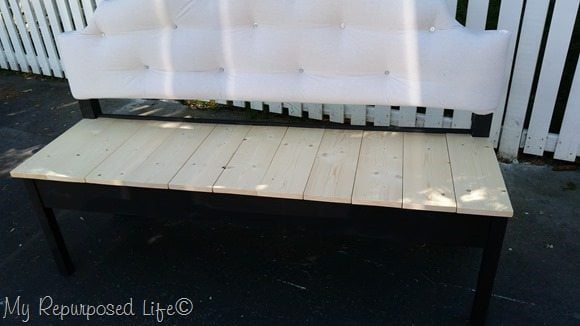
    upholstered headboard bench seatRemember when I talked about how much lumber I already had tied up in this bench? I prefer to run my seat lengthwise as “planks”. But that would have been another $33 in lumber for three 1x6’s. Cutting the boards this way used one full (new) board, and a lot of scrap pieces I had leftover from other projects. This is a dry fit before I notched each board on the end.

    headboard seat planks notchedThis may be the easiest and nicest notches I’ve ever done. Smile

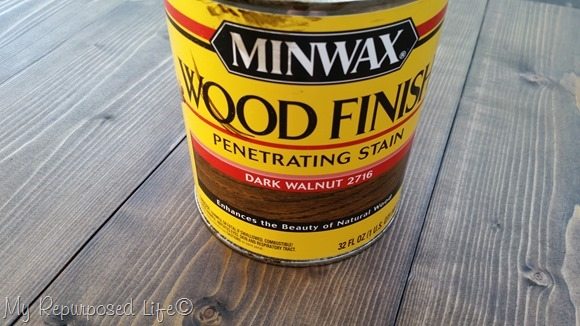
    dark walnut stainI stained the planks with Minwax Dark Walnut Stain.

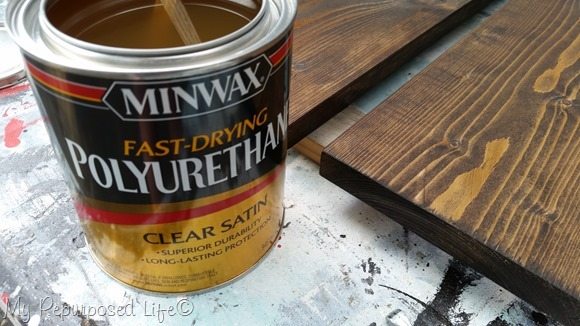
    minwax polyurethaneMinwax Polyurethane was used to seal and give some shine to the seat. I did this while the planks were raised on scrap boards—not while it was attached to the bench.

    Buttons to cover tufting on upholstered headboard bench
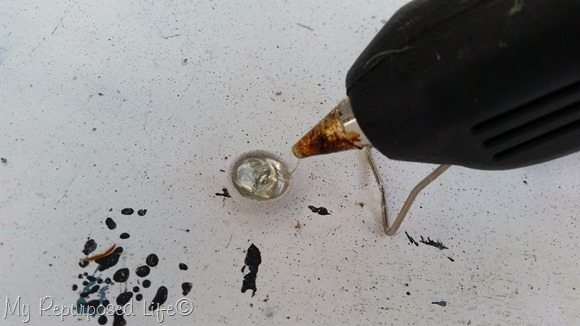
    covered buttonsI bought this button kit from Amazon and covered them with scrap drop cloth pieces. Because the dents on the upholstery are already secured with screws and washers, I used my hot glue gun to attach the buttons.

    hot glue button tuftingI had tried larger buttons (1”) and the fabric glue but it didn’t work at all. These smaller ¾” buttons look so much better. Gotta love Amazon Prime with 2 day shipping! Smile

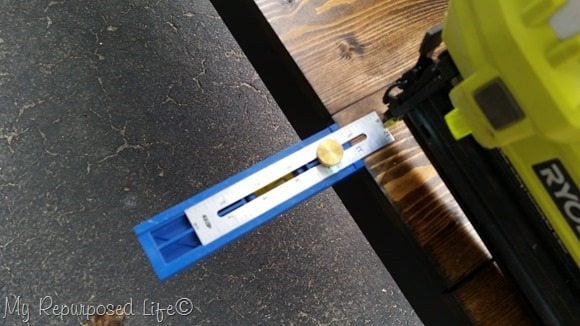
    attach bench plank seatingUsing the Kreg Multi-Mark allows me to make sure I hit my mark with the Ryobi Air-Strike nail gun.

    Are you ready for the big reveal, or have you skipped down to see the “after” already?

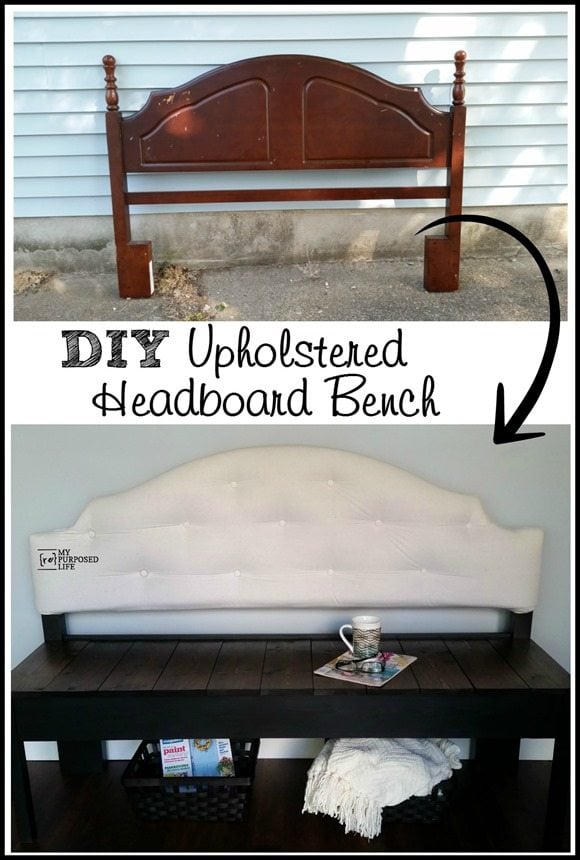
    DIY Upholstered Headboard Bench
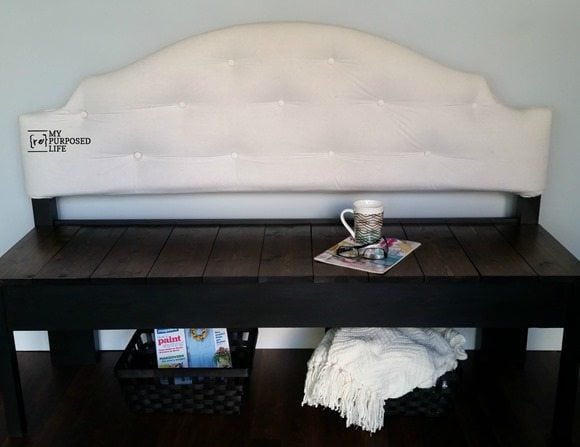
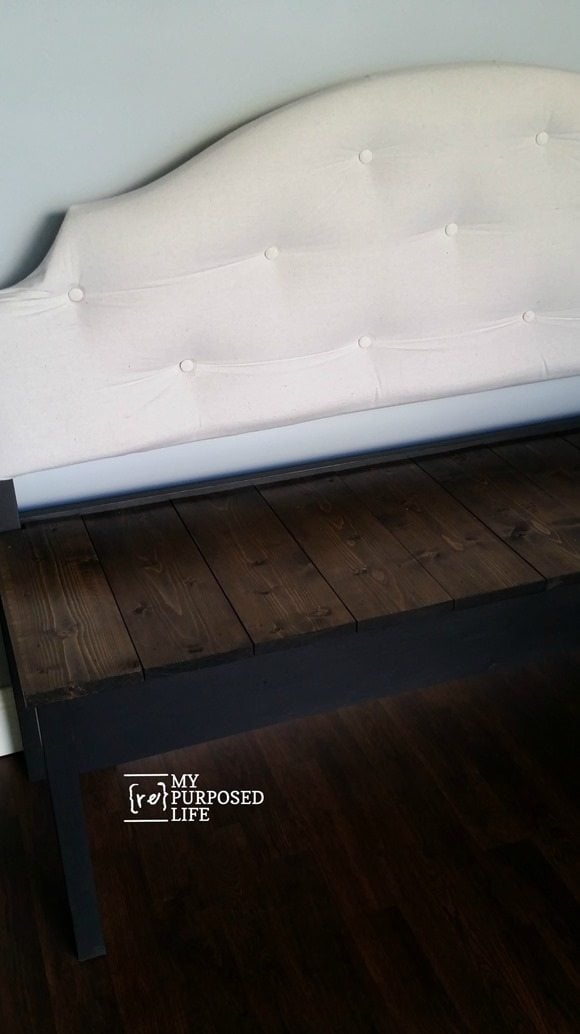
    full sized upholstered headboard bench MyRepurposedLife.comThis is a very large bench! It was difficult for me to move it by myself to get some good photos of it.


    before after upholstered headboard bench MyRepurposedLife.com

    large upholstered headboard bench MyRepurposedLife.comThis was one of the very first items to sell at Glendale 2016.

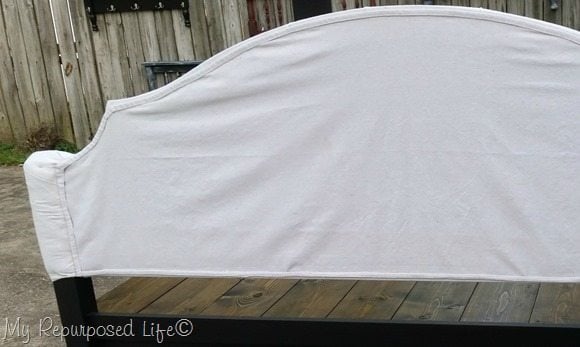
    back of upholstered full headboard bench MyRepurposedLife.comHere’s a shot of the back of the upholstered headboard bench, which I’m guessing will probably be against a wall.

    Those of you who do upholstery, I would appreciate your honest, constructive criticism so I can learn what I should have done differently.

    I may never do another one, but you never know.

    gail

    See my favorite Mission Style Headboard Bench with Storage-The Complete Tutorial See Remodelaholic for more inspiration

    Pin
    Share
    Tweet

    About Gail Wilson

    Hi, there! I’m Gail, the author and mastermind behind My Repurposed Life. I’m obsessed with finding potential in unexpected places and believe that with a little hard work and imagination, any old thing can be made useful again—myself included! I hope you’ll enjoy the journey and pick up a few tools along the way… literally!

    Reader Interactions

    Comments

      See comments Cancel reply

      Your email address will not be published. Required fields are marked *

      This site uses Akismet to reduce spam. Learn how your comment data is processed.

    1. Mike spencer

      November 03, 2016 at 10:22 pm

      What a great way to take advantage maybe anybody else would discourage.The headboard bench IMHO is a really cleaver project and congratulations for being so creative.

      Reply
      • Gail Wilson

        November 04, 2016 at 9:54 pm

        Thanks! It was a challenge, but glad I finally tried it.

        gail

    2. Debbie @ Refresh Restyle

      October 26, 2016 at 6:23 pm

      Wow! You are amazing, love it! Pinned it!

      Reply
    3. Nancy

      October 26, 2016 at 5:55 pm

      just a little observation. What do you think of the space between the back and the seat. The legs of headboard
      could have been cut off the amount of the space. Otherwise, a great job.......

      Reply
    4. SKK

      October 26, 2016 at 2:17 pm

      Whoa!! I may never make a bench but you gave me a great idea to
      upholster a thrift store headboard! Cutting off the dated posts transforms
      it to a modern upholsterd headboard. Genious!

      Reply
      • Gail Wilson

        October 26, 2016 at 8:12 pm

        Awesome! Happy to give you new ideas for thrift store headboards!

        gail

    5. Bambi Mayer

      October 26, 2016 at 1:21 pm

      Not an upholsterer but have looked at many tutorials (which is why I've never tried it). I think your method of screws and washers looks much easier than the methods I've seen before and the bench looks wonderful!

      Reply
      • Gail Wilson

        October 26, 2016 at 8:13 pm

        Bambi,

        Thanks for stopping by and taking the time to leave a comment. I've used that method before in a much smaller capacity. It does work, and makes things so much easier (in my opinion).

        gail

    6. Jeanie

      October 26, 2016 at 1:17 pm

      For not having any upholstery skills, I think you did a marvelous job of "winging" it! You're my repurposing hero!

      Reply
      • Gail Wilson

        October 26, 2016 at 8:14 pm

        Thanks so much Jeanie! I appreciate you stopping by and taking the time to leave a comment.

        gail

    7. gindy johnson

      October 25, 2016 at 7:30 pm

      This turned out great. I am about to try my first bench....

      Reply
      • Gail Wilson

        October 25, 2016 at 9:06 pm

        great!!! Good luck, let me know if you have any questions.

        gail

    8. Kate

      October 25, 2016 at 1:02 pm

      You have more patience that I have! Looks great.

      Reply
      • Gail Wilson

        October 25, 2016 at 9:08 pm

        It was touch and go there for awhile....

        thanks Kate!
        gail

    9. Roseann D'Elia

      October 25, 2016 at 10:21 am

      Gail, you did an amazing job for someone who has never upholstered something. I'm trying new things as well, and follow your amazing work. thanks for all your help, honesty , hard work and more.

      Reply
    10. girlfromwva

      October 25, 2016 at 10:17 am

      i think it looks awesome! i am sure the new owner will be enjoying it for years to come!

      Reply
    11. Cassie Bustamante

      October 25, 2016 at 9:07 am

      wow, gail! what a dramatic change and it looks awesome!

      Reply
      • Gail Wilson

        October 25, 2016 at 9:24 am

        Thank you Cassie! I never should have started this while I was in crunch time for my craft show. It took up way too much of my time. 🙂

        gail

    Primary Sidebar

    Hi, there! I’m Gail Wilson, the author and mastermind behind My Repurposed Life. I’m obsessed with finding potential in unexpected places and believe that with a little hard work and imagination, any old thing can be made useful again—myself included! I hope you’ll enjoy the journey and pick up a few tools along the way… literally!

    More about me →

    Footer

    ↑ back to top

    SEEN ON

    Might I Suggest

    • Start Here
    • Furniture Makeovers

    Newsletter

    • Sign Up! for emails and updates

    About

    • Gail's Favorites on Amazon
    • About

    As an Amazon Associate I earn from qualifying purchases.

    Copyright © 2023 My Repurposed Life · Privacy Policy · Disclosure