Upholstered Twin Headboard Bench
As an Amazon Associate, I earn from qualifying purchases.
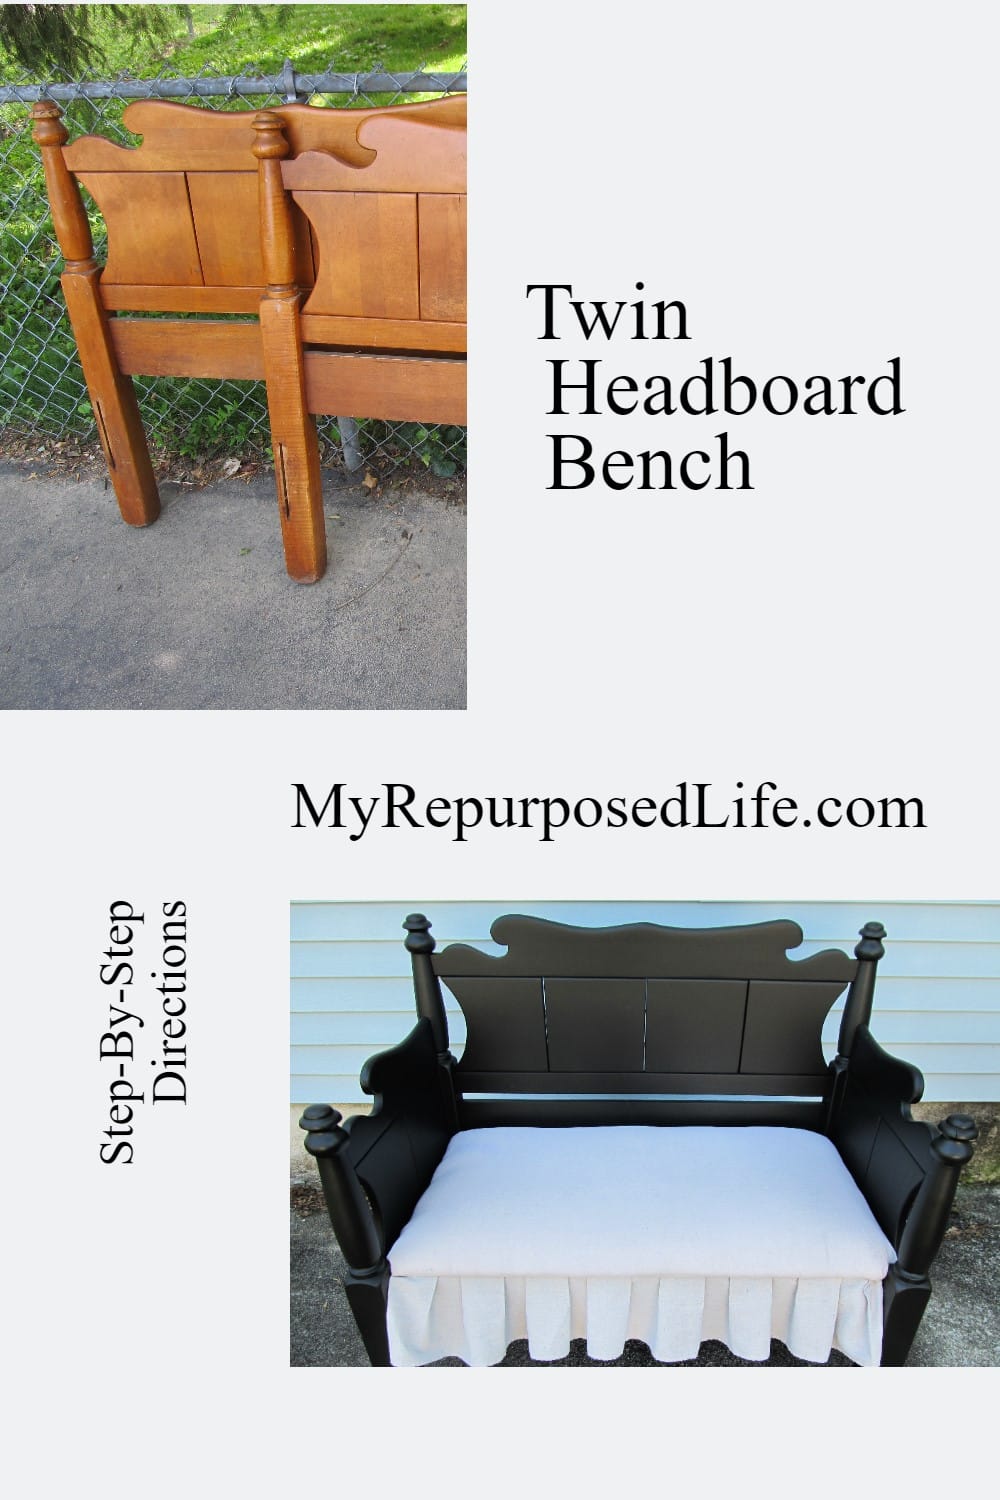


I have a great no-sew upholstered twin headboard bench to share with you. I hope you love it as much as I do.

Please Pin it now, before you forget. 🙂

You know I love making benches from headboards. However, I try to change them up occasionally. I decided to give this upholstered twin headboard bench a softer touch.
Visit the My Repurposed Life Amazon Store to shop my favorite items.
How to Make an Upholstered Twin Headboard Bench
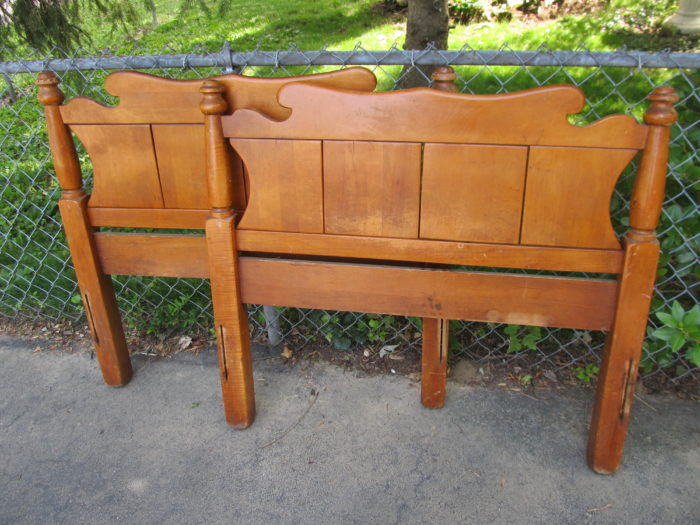
It started with these twin bed pieces. I’ve had them for a long time, I believe I got them from my sister.
Cut One Section of the Twin Bed in Half to Make the Armrests
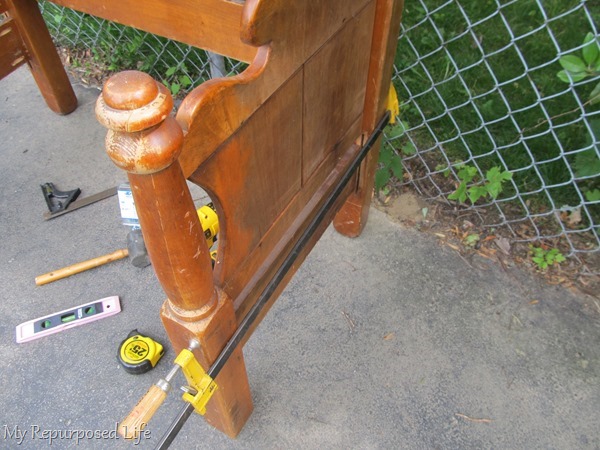
I used my circular saw to cut one piece in half. Then, I cut some off the posts with my compound miter saw to shorten the armrests to the back.
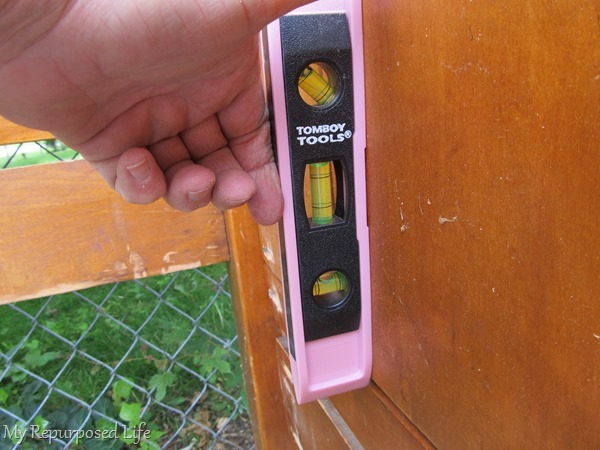
This small level is great for tight places. It’s essential to ensure all of your pieces are level and plumb.
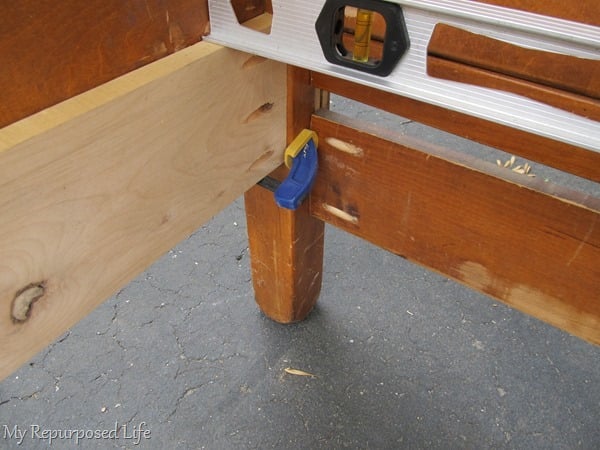
I needed a longer level to ensure the twin headboard seat would be level. Sometimes, the bottom board on the back (headboard) may not be low enough to attach your sides and rest your seat. In that case, you must add a piece, as I did here.
Tip: if you don’t have a long level, you can attach your small level to a yardstick with a rubber band.
Attach Sides to Headboard (Back)
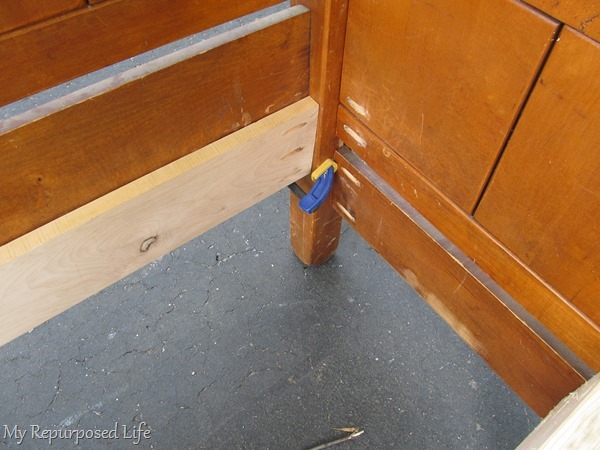
To get the back board level and screwed in place, I rest it on my quick clamps. (there is nothing to clamp the board to, it rests right at the bottom of the original back board. I used my Kreg jig to make the pocket holes to secure the sides (armrests) to the back.
See my tips on using a Kreg Jig here.
How to Fill Gaps of Headboard Slats
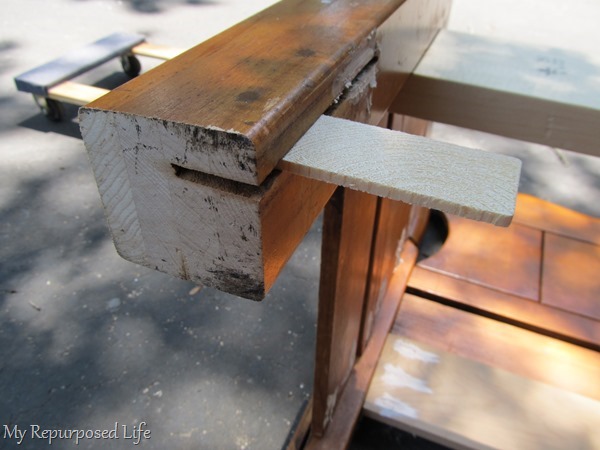
Some beds have larger openings for the slatted side rails. Instead of using so much wood filler or spackling, I used some scrap pieces to fill in the gap. I used Gorilla Wood Glue to hold these scraps in place.
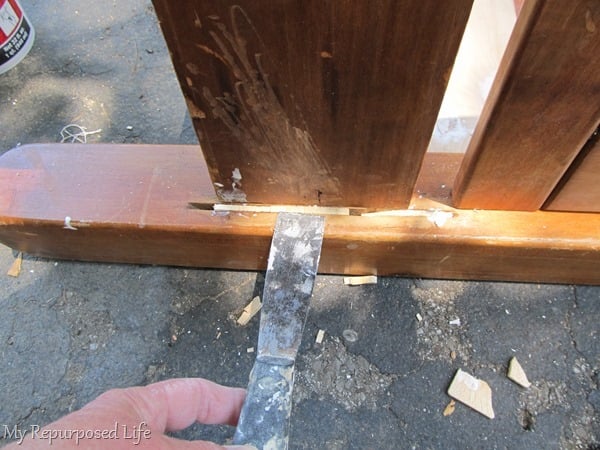
I used my putty knife to chisel off excess glue. After the glue set, I used spackling to fill any remaining gaps.
Add Center Brace on Twin Bed Bench
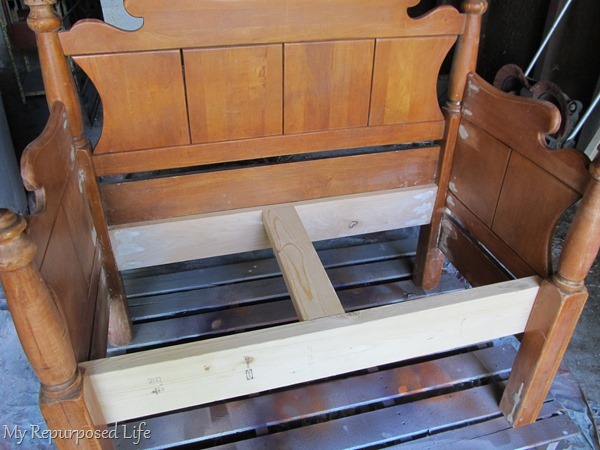
Because I’m using an old OSB piece of plywood (left over from my waterbed), I added a brace in the middle of the upholstered twin headboard bench. You can see that I have filled all of the holes with spackling.
In this view, you can see how the pocket holes were used up the side to attach it to the back, making it very secure.
Primer and Paint Headboard Bench

Using my HomeRight Finish Max Fine Finish Sprayer, I painted a coat of primer. Notice after filling the pocket holes; they are no longer visible.
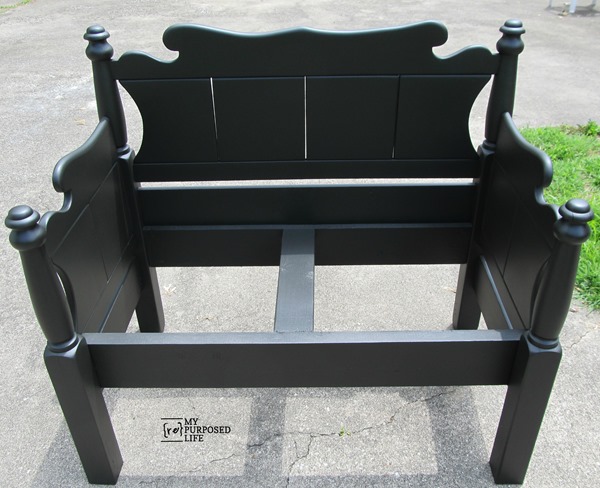
After which, I sprayed several light coats of black paint. Look at that beautiful finish made possible by the Finish Max!
Prepare to Upholster Twin Headboard Bench
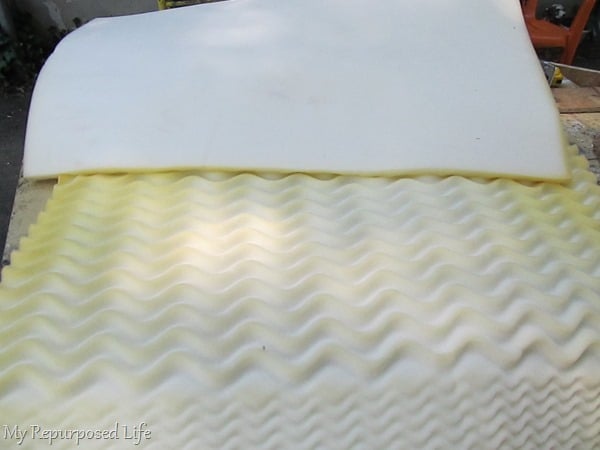
I used twin egg crate memory foam for this bench, which my aunt gave to me. I try to keep costs down wherever I can!
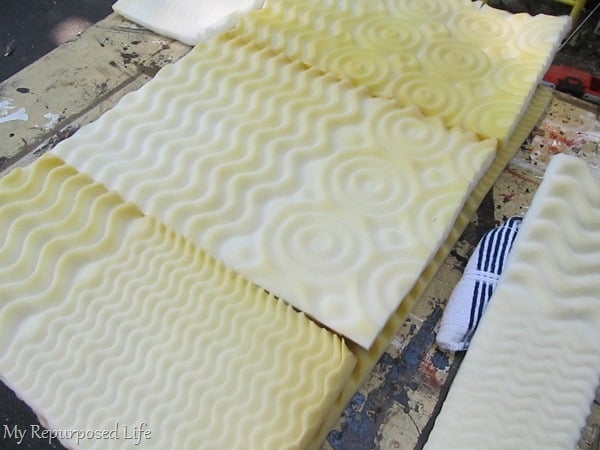
Wanting to have at least three thicknesses of padding, I had to cut it several ways, so I ensured the cut pieces were lined up differently on each layer. The top layer was a complete piece.
Spray Adhesive is Handy for Upholstering Headboard Benches
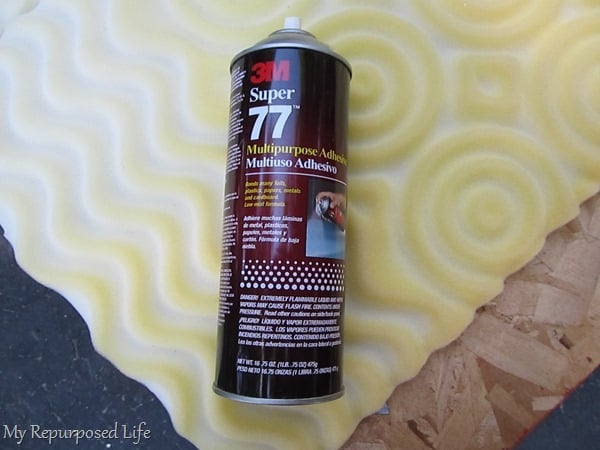
I used 3M spray adhesive to stick everything together.
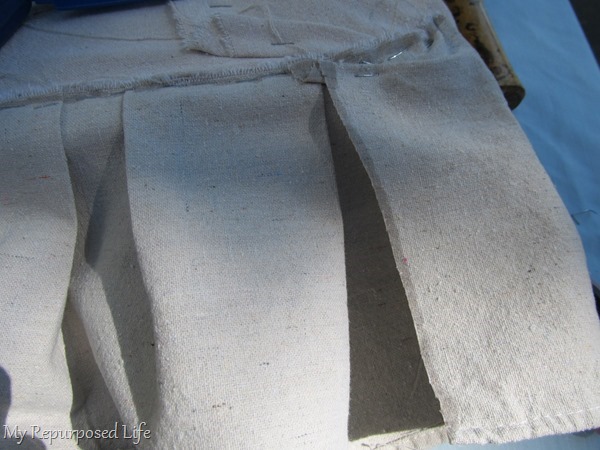
Iron and Pin Ruffles for Upholstered Bench
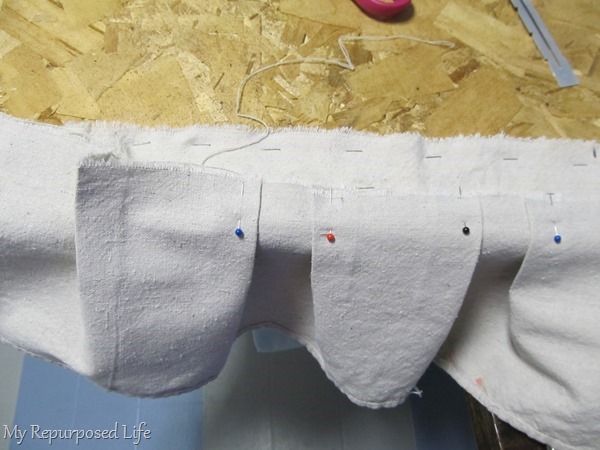
I used a drop cloth for the upholstery material. It was washed in bleach and dried in the dryer to soften it up. I stapled a large piece onto the board. About 7 inches from the hem was ripped to make the ruffle. (if you make a slit, drop cloth rips quite easily) I ironed my pleats (not pictured), then pinned them in place. Using the hemmed side makes it an easier project without hemming. It’s a lot like I did on this Upholstered Chair.

I folded the corner back to make sure I had a clean edge.
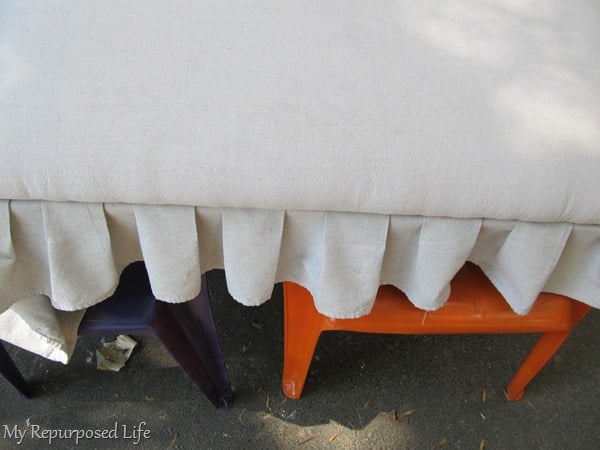
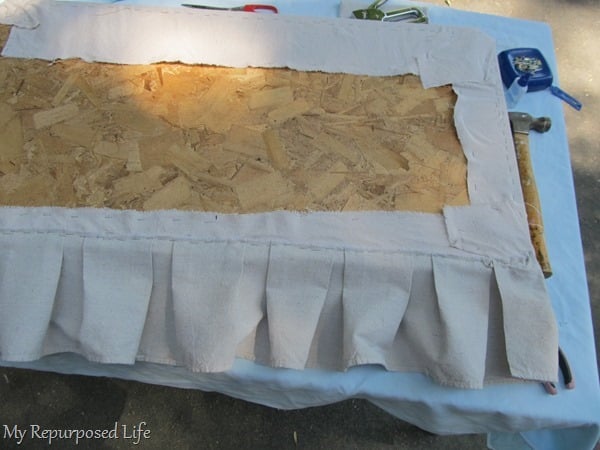
I took it outside to do a dry fit on the bench with it pinned.
Yep, I’m thinking it looks pretty good!
Use a Staple Gun to Attach Ruffle on Headboard Bench
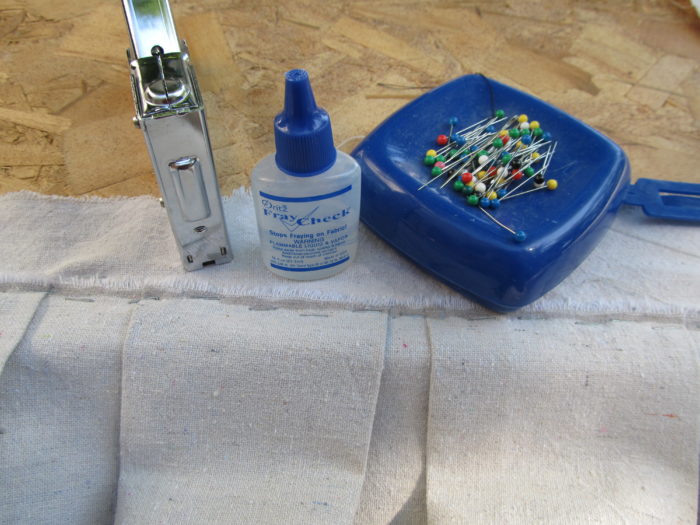
I stapled the pleated hem on, and then I used fray check on the edges.
On one side, when I folded it back, it was too long. Therefore, I cut it off and added a fray check to it.
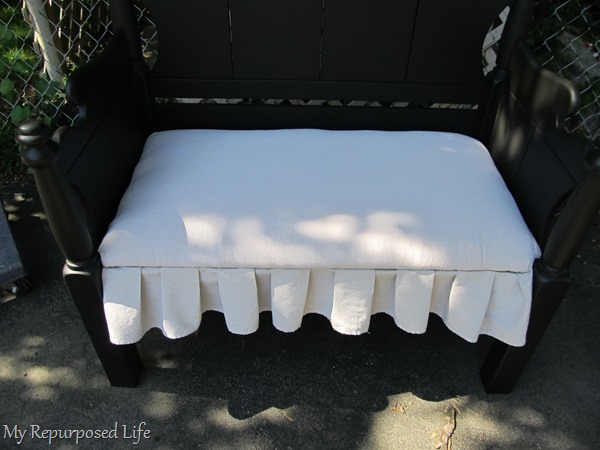
Pretty Black Upholstered Twin Headboard Bench
I had to notch the osb (seat), and it’s a very snug fit. I LOVE the finish this paint has. It is the same Behr Premium Plus Ultra I used on my kitchen island.

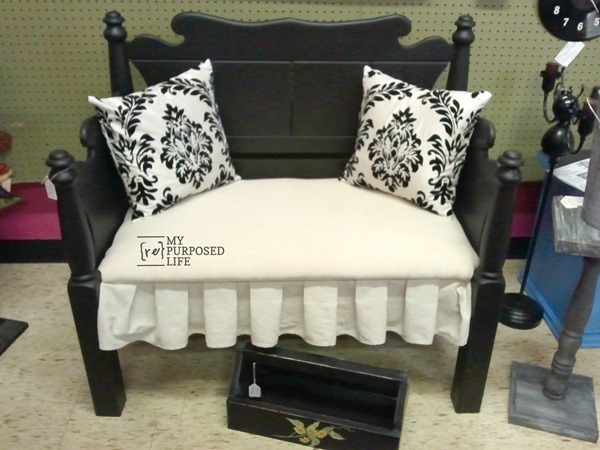
Here it is in my booth. The pillows had been on the Spool Bed Bench, but it sold, so I didn’t include them in the sale.
If you want another tutorial on building a bench, check out the Twin Headboard Bench Tutorial.
Do you like the softer look of the upholstered seat?
gail
Mission Style Headboard Bench with Storage-The Complete Tutorial
Just beautiful. Thanks for the post.
Wow that’s so nice. I wish I lived closer so I could visit your booth.
My absolute favorite! LOVE LOVE LOVE this! Fabulous Job!
This is awesome! Thanks so much for the tutorial. Cant wait to get started!
Thanks for linking up to my party, Gail!
I am featuring your cute project in my post today.
Blessings,
Traci
Wow…I really love this bench! It’s something I wouldn’t have thought of, but I’m so glad you did. Your instructions are great, too. I guess I need to be on the lookout for a headboard. 🙂
Kelly
ANOTHER FABULOUSLY AMAZING BENCH Gail!! i have some head boards just begging to be done, i am just terrified of trying in case i mess up, still have to paint the telephone bench so intend to start with that. Let me know if you ever come to Africa, have a geust suit for you so you can come and help me with my bench, lol
smiles
Paola
Thanks so much for sharing at The DIY Dreamer.. From Dream To Reality! xoxo
This is fabulous! I love it!!!
Hi Gail,
Your bench looks so amazing. I love the upholstered seat!
I hope your feeling better after the fall.
Hugs,
Dee
Oh goodness!! I am in LOVE!!! It sooooo perfect!!!
I hope you are planning on sharing this over at The DIY Dreamer.. From Dream to Reality!! Please 🙂
This is gorgeous!! Great work!!