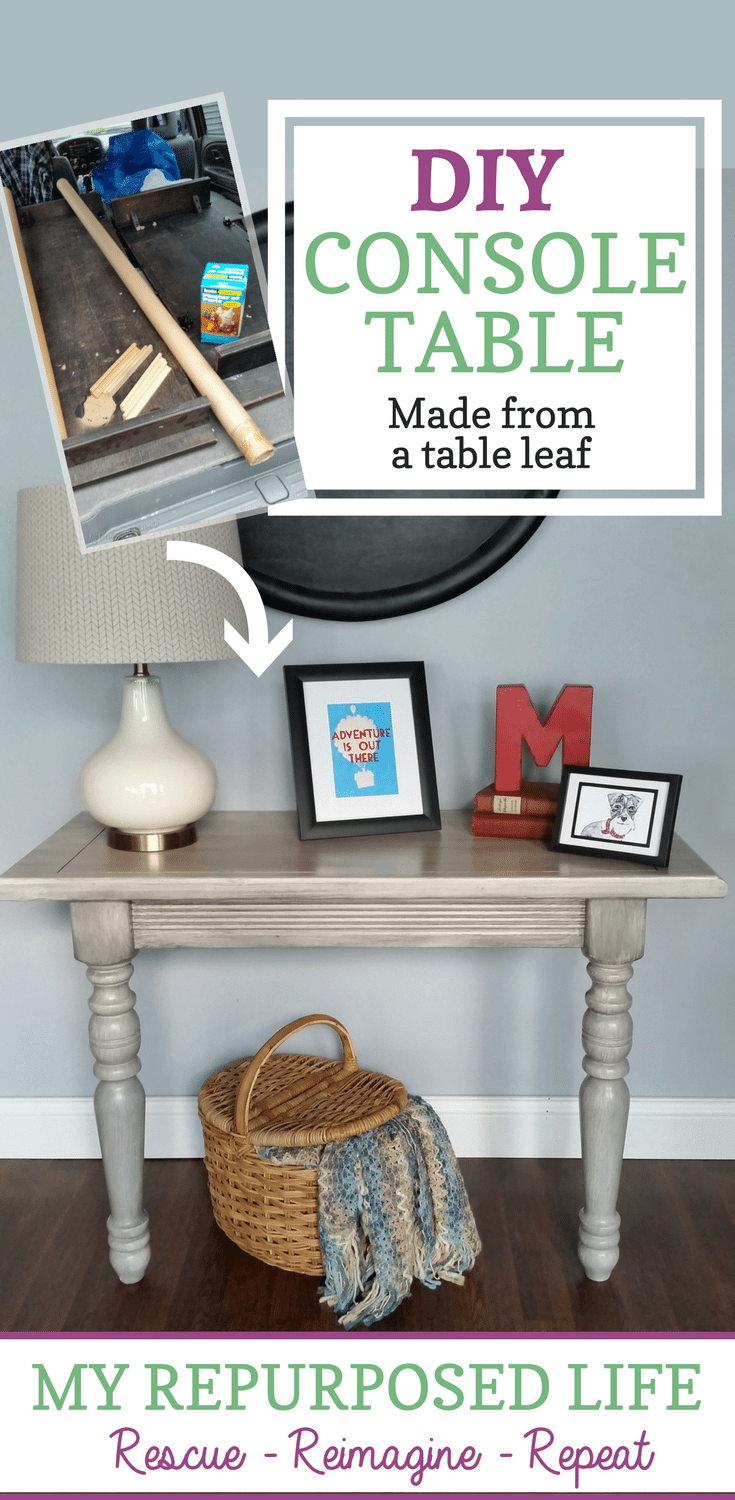
DIY Console Table made from a Table Leaf and odd Table Legs
As an Amazon Associate, I earn from qualifying purchases.
You won’t believe how easy it is to make a diy console table using an old table leaf and some odd table legs. I think it took me longer to tell you HOW to make this console table than it took me to actually MAKE the table. This console table stands on two legs, and attaches to a wall. It’s the perfect way to use two odd table legs.
Let’s see how it all came together.
I picked up these two table leafs in Nashville a couple of years ago. They were a good deal although I had no idea what I would do with them.
PIN IT!
Remove pins from table leaf

As I was struggling trying to get the pins out of the leaf, my neighbor Rodney walked up and showed me a better way. I was using the pliers to twist and tug the pin out of it’s home, when Rodney said, he didn’t want to tell me how to do it, but he’d show me how to make it easier. Rodney got a good grip on the pin, then tapped the pliers with the hammer, and voila! the pin came right out.

I proceeded to remove the rest of the hardware, and the side skirts that matched the original table.
Select legs for table made from table leaf

These table legs had been given to me a few days earlier, as Rodney was cleaning out his garage. As I was getting ready to store them, I saw the table leaf and thought they would make a great marriage. I had wanted to do a cleat console table recently, but ended up attaching the table to a door to make a DIY entry table.
*this post contains affiliate links, read more here*

To attach the table legs to the new console table (table leaf) I make pocket holes with my Kreg Jig (K3). The table leg was too thick to clamp in my K4 jig. An Irwin quick clamp quickly holds the jig in place while I drill.

Gorilla Wood Glue and pocket hole screws give a really secure hold. I used my kreg multi-mark tool to make sure the distance was the same on each table leg. You can see that I drew the pattern for placement to make sure the legs were squared in the right place.
Attach reclaimed legs to table leaf

Because I was attaching the large legs into 3/4 in stock, that is how I had my jig set when I drilled, and I used 1 1/4 inch screws.

The table skirt fit into my K4 jig so I used it for all the skirt pieces. This was also set a 3/4 inches.
Apron for new diy console table

To make sure the skirt was squared, I used a combination square. Jobs like this are easy if you have the proper tools.

After only securing the skirt with a few screws, I was anxious to rest it on the ground so I could make sure I was going to like the look of how it was coming together. I have it resting up against my DIY picket fence.
Notice how the front of the table looks sort of unfinished—where the side pieces make the whole thing look awkward. I’ll show you later how I dealt with this.
Secure cleat for diy console table

It was time to add the back (cleat) that would secure to the wall. I ripped a 1×6 to the proper width to match the boards I used for the skirt.
How to add pocket holes

This is when I realized that I might want to secure the table skirt to the table top with additional pocket holes. For that, I used my Kreg Mini Jig—it’s so portable and easily clamps anywhere you need to add a pocket hole.

For these pocket holes, I used 1” pocket hole screws.

You can see how I attached the cleat to the back of the table top. Pilot holes are pre-drilled in order for this console table to be attached to the wall in it’s new home.
Installing trim to DIY console table

Remember the awkward looking front needed some TLC? I rip a lot of boards and I always save the thin pieces and found the perfect piece to add here. I drew the pattern on each end and cut the detailed edge with my jigsaw. Using Gorilla Wood Glue and my nail gun I secured this thin scrap to the front of the table.

So much better! This thin trim piece hides those extra boards on either side. I sanded it smooth all around the edges to make it look seamless. It will look even better once it’s painted.
Paint Console Table

Time to paint with my new Homeright Finish Max Extra ! I’m so in love with this new sprayer. Did you know that there’s no need to dilute paint? The sprayer comes with 3 sizes of nozzles. For this project I used the green nozzle. I always strain my paint with a mesh paint strainer to make sure I get out all the lumps and bumps in my diy chalky paint primer.

It is customary for me to paint the underneath side of my projects. I rested the table on my easy diy sawhorses to make painting quick and easy.

After a couple of quick (thin) coats of primer. I love this stage when all the new parts match!

Because this table only has 2 legs, I continued to rest it on the sawhorses. If you look closely you will see that there are portions of the spindle legs the get missed with the paint. Another reason why you should always paint projects upside down and right side up.

Here’s the close-up.

I rested it against the house to see how it’s coming along.
Project ideas and a video of “how to glaze painted furniture and more”
Use glaze as a topcoat

Instead of just leaving it white, I decided to use my favorite chalked smoked glaze. Latex gloves and a cheap chip brush along with a soft rag are the best way I’ve found to use this yummy glaze.
Watch my video of How To Glaze Painted Furniture

After brushing on the glaze with the chip brush, I quickly snapped this picture before I wiped it back with the rag.

I love, love, love the look this glaze gives.

To do the legs and the underneath side of the table, I spread waxed paper on the work table to keep the paint from sticking, and to prevent transfer of the work table paint onto the newly glazed table top.

ohhh, I love the new look of the table legs. They don’t look at all like the original orange legs I got from Rodney.
The one thing you should keep in your wood shop

Here’s a great tip for you. I keep a dishwashing bottle handy in the garage that has mostly water and only a small portion of soap. It’s a great way for a quick cleanup of hands or brushes. Because the soap is minimal, I don’t need to rinse my hands or brushes. I just wash the brush out, and dry it with a rag or paper towel. I highly recommend you adding this to your shop. You’ll secretly thank me every time you use it for quick cleanups!
How to secure console table to wall

The table easily attaches to the wall from underneath with wood screws. The pilot holes are spaced to allow the screws to secure into existing studs.

Isn’t the console table so pretty!!! This narrow table would be perfect for a hallway, entry way or oven behind a sofa!

Making a console table like this is the perfect way to use up spare items from your stash. This cleared out a table leaf, and kept me from storing the two free table legs. Isn’t it lovely?
I hope you picked up some tips in this post, if you have any other tips, please leave them in a comment below.
Watch my video of How To Glaze Painted Furniture
gail
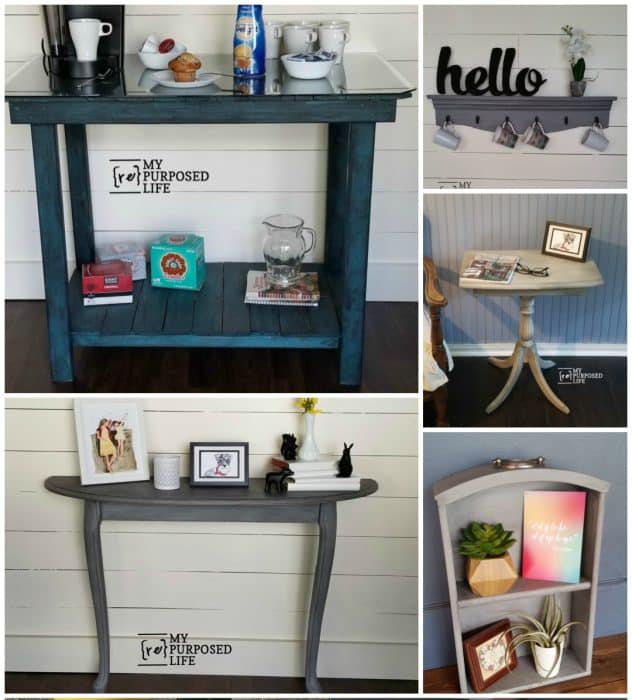
More projects using two table legs:
- Repurposed Queen Ann Table Legs
- Reclaimed Coffee Table into Hall Table
- Double Pedestal Table
- DIY Entry Way Table
- Table Shelf Towel Rack
Sharing at Inspiration Monday
and Funky Junk
Great tutorial, you make it all make sense! Love the paint and glaze used on that table too!!
Wow. you did an amazing job with this table!!! It looks so beautiful. Love the color you choose. Thanks for a great instruction and pictures!
Thank you Jessi!
I’m obsessed with this color.
gail
your tutorials are just excellent, you explain everything step by step and so detailed, pictures are wonderful and the tips such as how you went about getting that pin out and how you put this table all together are great for a novice like me, I am learning so much here, love your blog, love your table
Terry,
Thanks for letting me know you appreciate all of the details. Sometimes I feel like I spend too much time on the small stuff. 🙂 I’m happy you’re here and learning new tips.
gail
CRAZY — in a GOOD way!! Wow – a lot of effort but what an outcome! I love that Chalk glaze you used as well!
Love it! I need to check out the glaze you used. Love that color!
Thank you Paula! I seriously can’t stop using this glaze. I’ve always loved a color like this, and the fact that the glaze gives me the color with a seal is a bonus for sure!
gail