DIY Entry Table
As an Amazon Associate, I earn from qualifying purchases.

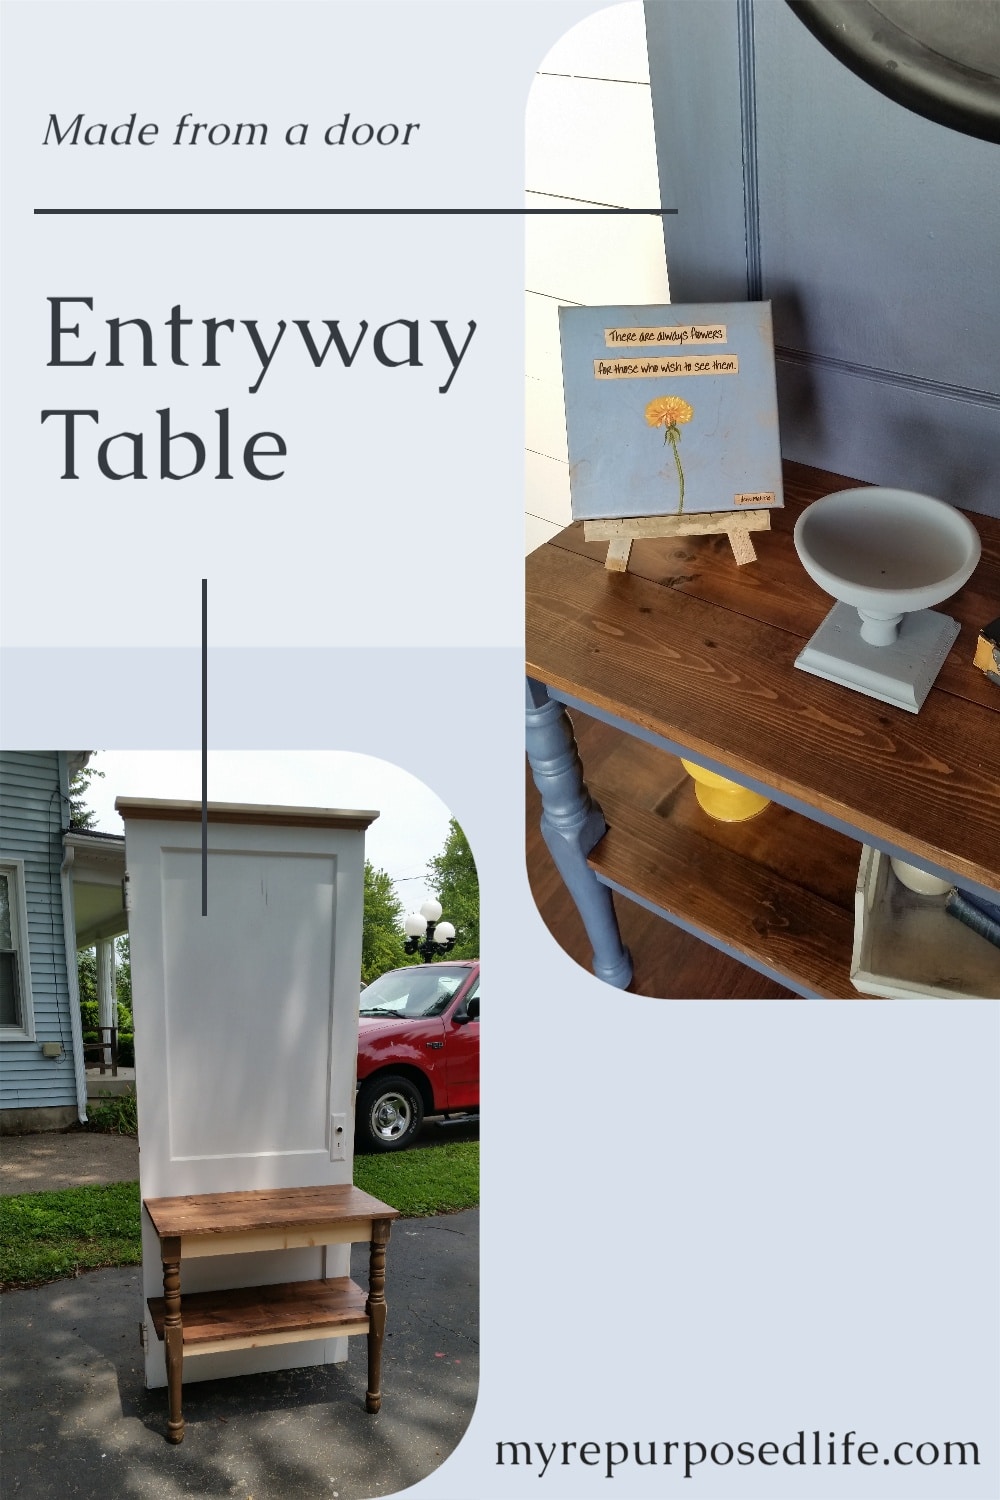
Seeking an affordable way to add charm and functionality to your entryway? This DIY entry table project begins with a discarded door and a pair of inexpensive table legs, and culminates in a one-of-a-kind piece that’s both practical and stylish. With a bit of creativity, some basic tools, and a few simple additions, you can turn everyday materials into a beautiful console table that makes a great first impression.
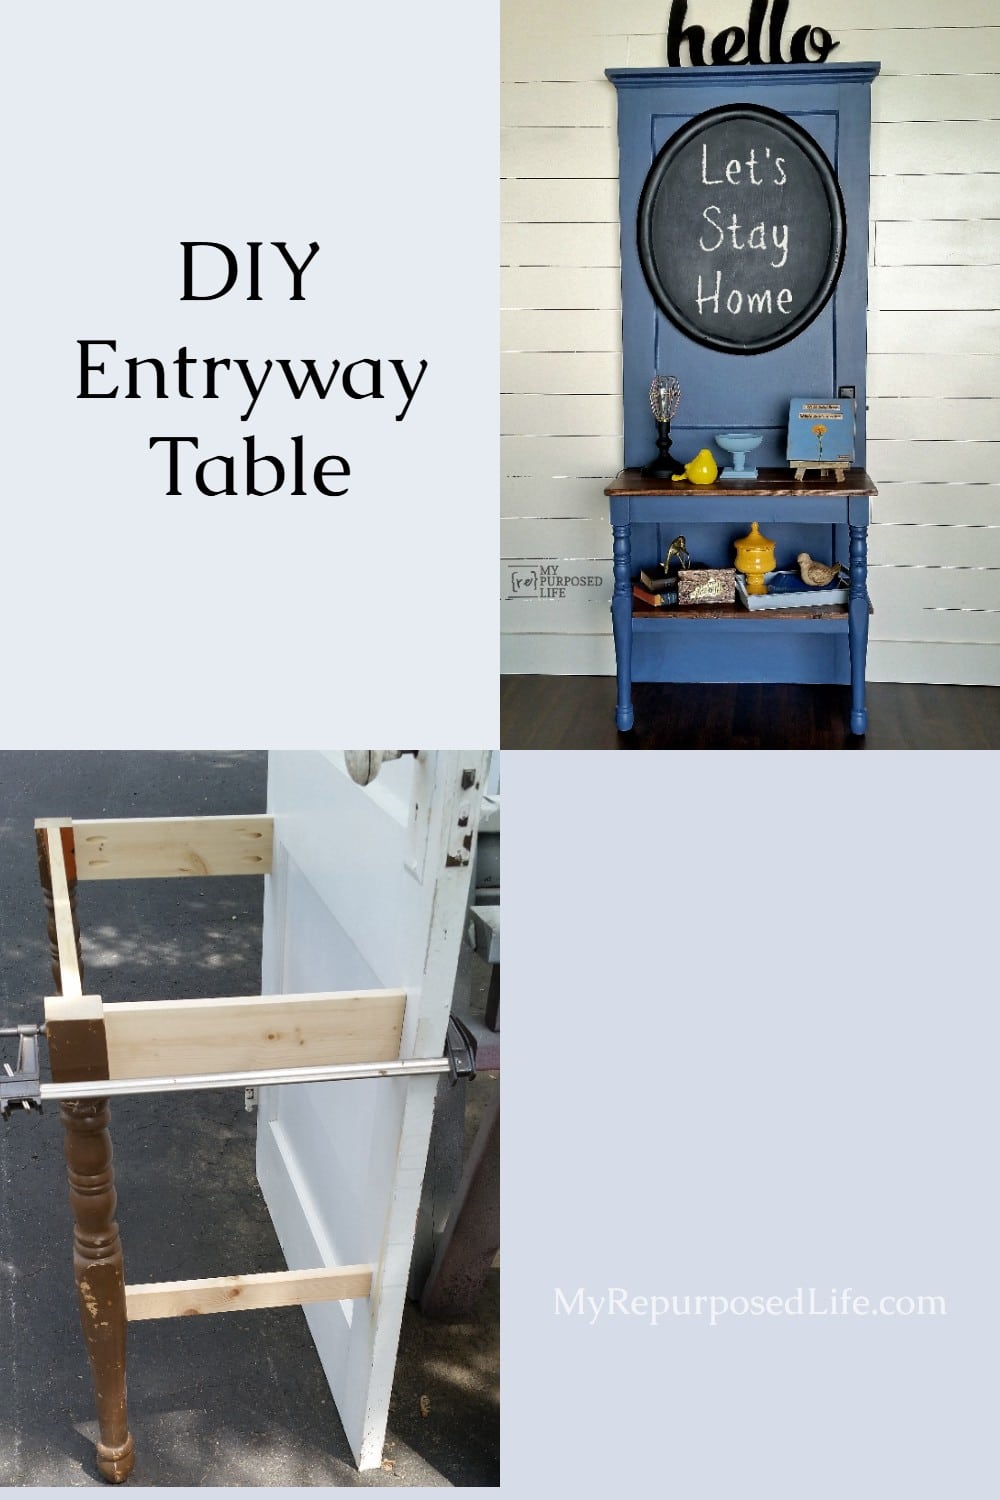
Yes, this DIY entry table was a fun and easy project, utilizing an old (free) door and some $1 table legs. Of course, I had to add some new lumber components to finish the trim and the shelves, but it was a very frugal project.
How to Make a DIY Entry Table out of an Old Door

Isn’t it perfect? Initially, I was going to make a console table that would rest on the wall using a cleat. Can you see that it would work if it were not connected to the door?
The Main Components are a Door and Reclaimed Table Legs
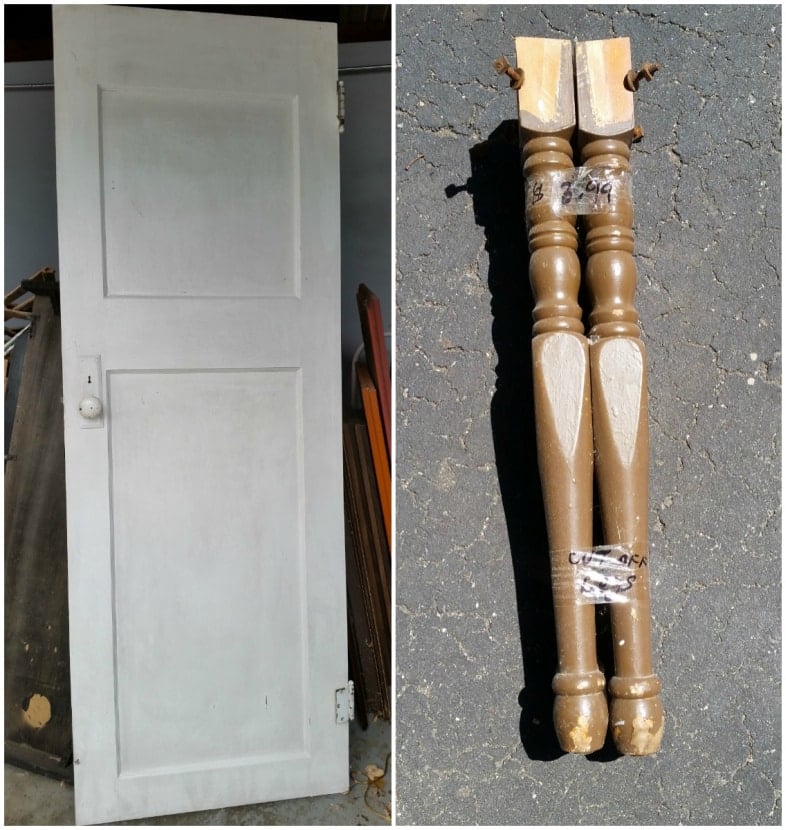
However, as I began designing the table, I decided to incorporate one of the free vintage doors I had acquired a couple of months ago. The legs were 3.99 for 4 legs, but one was chewed up. So, I used two legs, and now I have almost 2 more legs to use for another project. I could cut the fourth one to match the height of the third, or cut them both even shorter for a small console side table. I could even use them to make some sort of spindle project.
Trim Table Legs on the Miter Saw
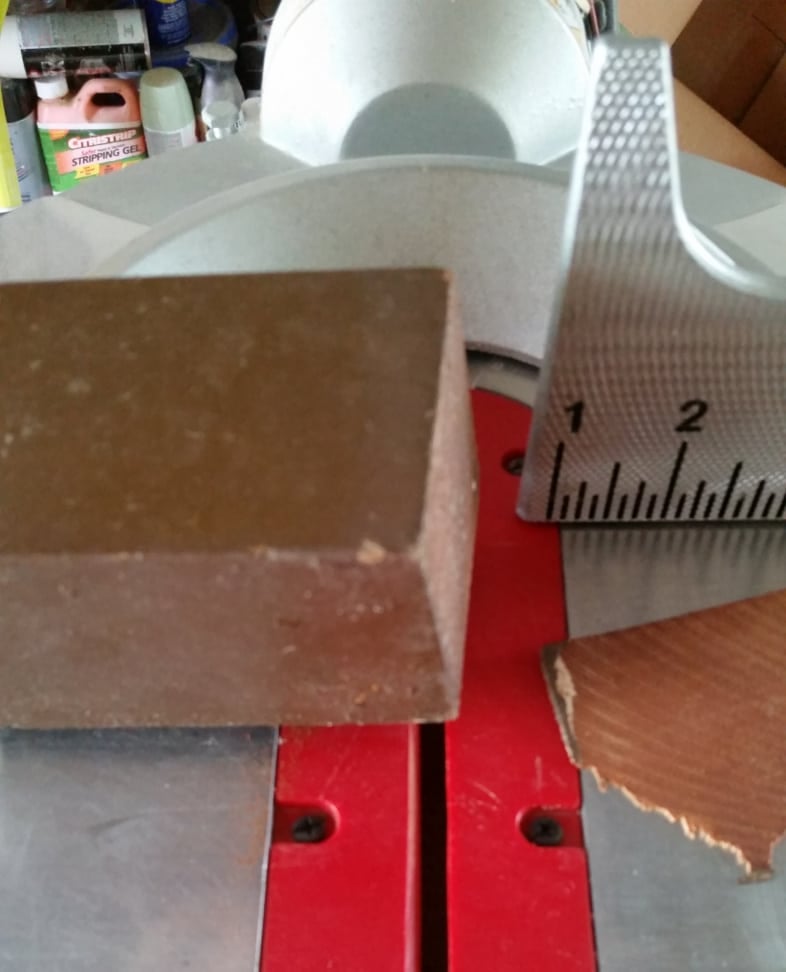
The top of the table legs were at an angle, so the first step was to trim them to make them flush.
Designing a DIY Entry Table
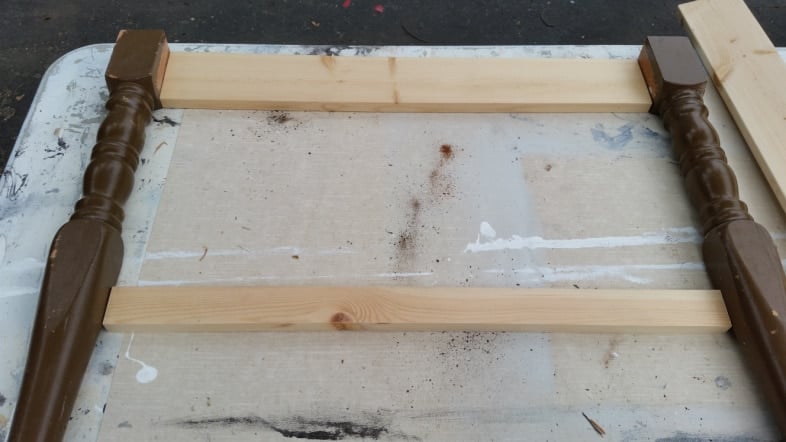
I cut two 1x4s for the top skirt and the lower shelf brace. The skirt was used as is, but I ripped the lower board to a narrower size to better fit the flat part of the legs.
Pocket Hole Screws Secure Table Parts
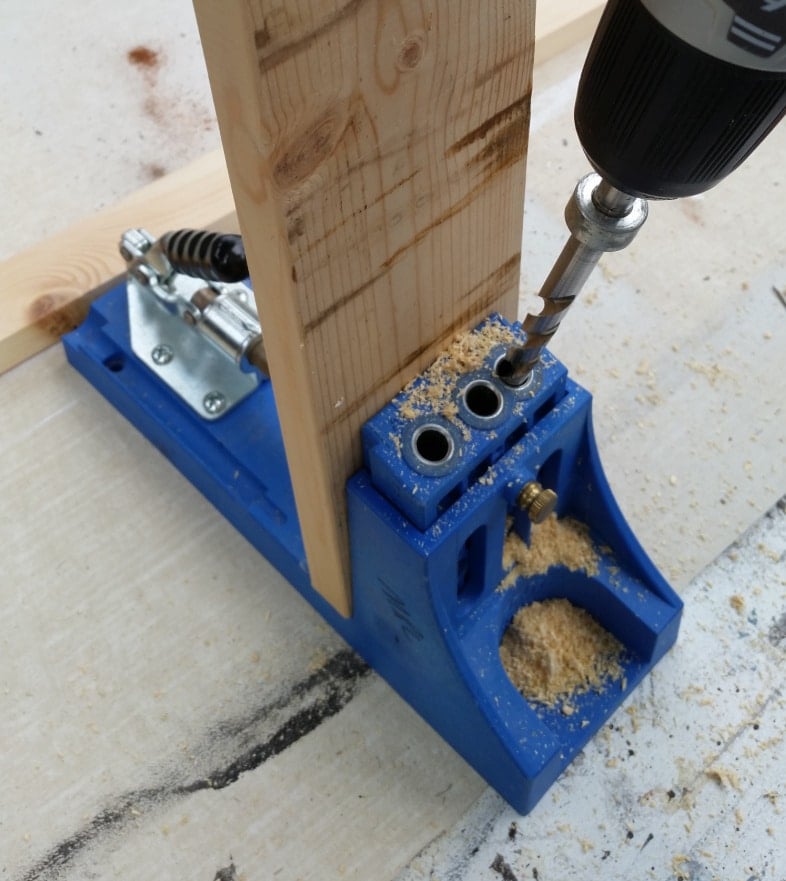
I used my Kreg Jig pocket hole system to drill pocket holes to attach the skirt and lower brace to the table legs. This is where I would love to tell you that you could use “L” brackets to achieve the same install, but there are times when the best way (and only way) is with pocket holes.

A 1×4 is 3/4” thick and would normally use 1 1/4” pocket-hole screws to join the pieces. When joining 3/4” to something larger, I use a longer pocket hole screw—in this case, 1 1/2”.
If you want to start building furniture or repurposing it, look at the furniture in your home to see how it’s constructed. The skirt across the front will look much better if it is inset slightly. To achieve this, I used a scrap piece of stock to raise the skirt slightly off the worktable.
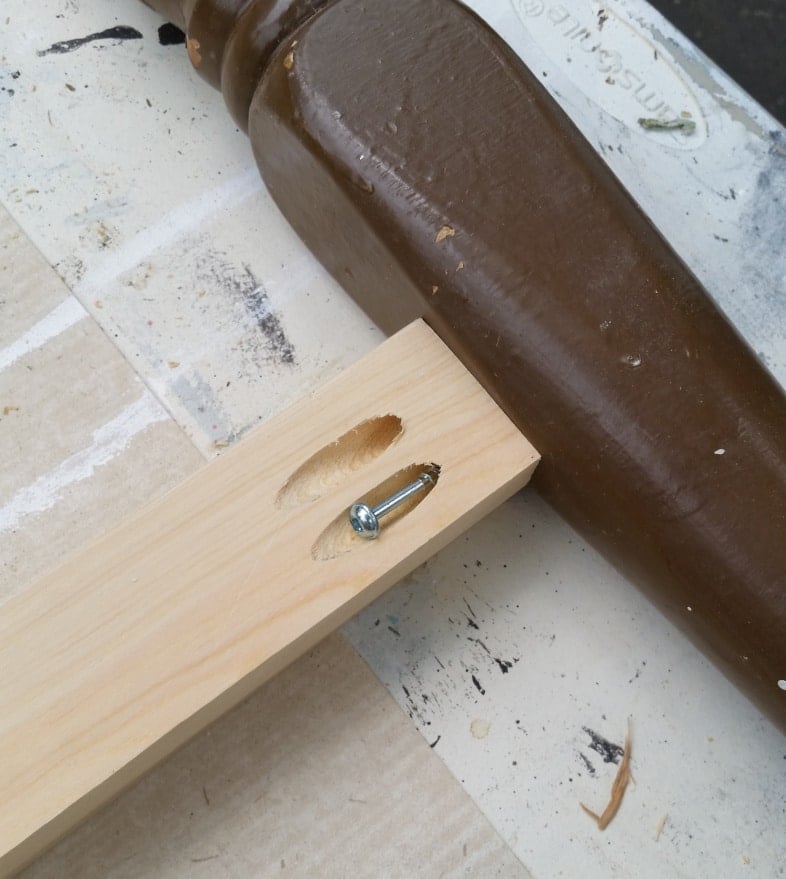
was done with the lower shelf brace. I placed it as far down the leg as possible, but I was careful to stay on the flat part of the table leg.
Bar Clamps Aid in the Building Process
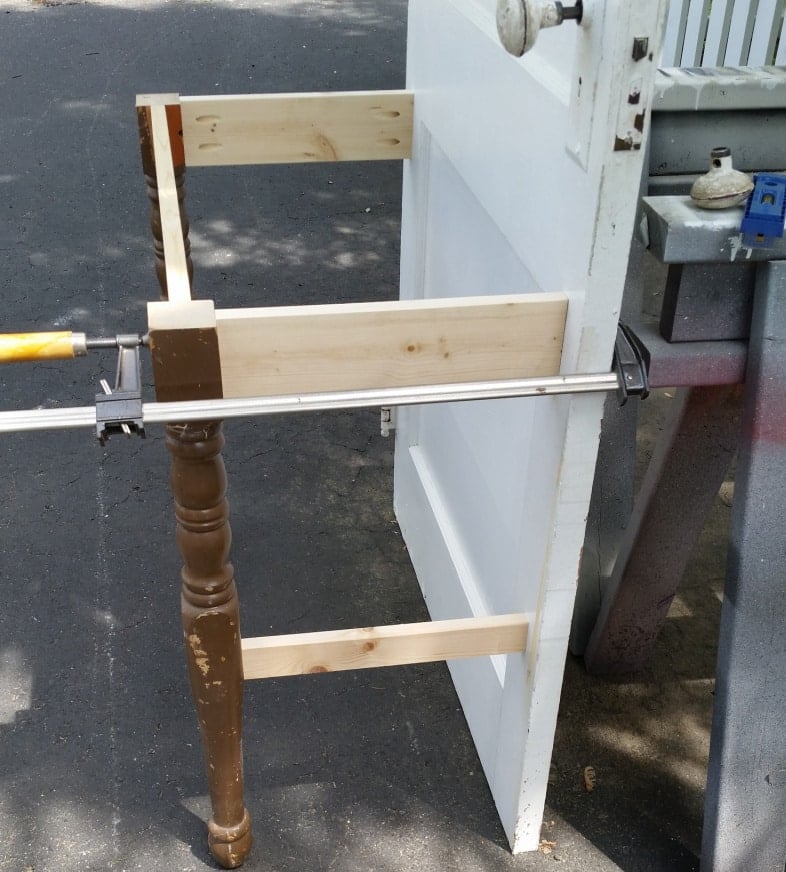
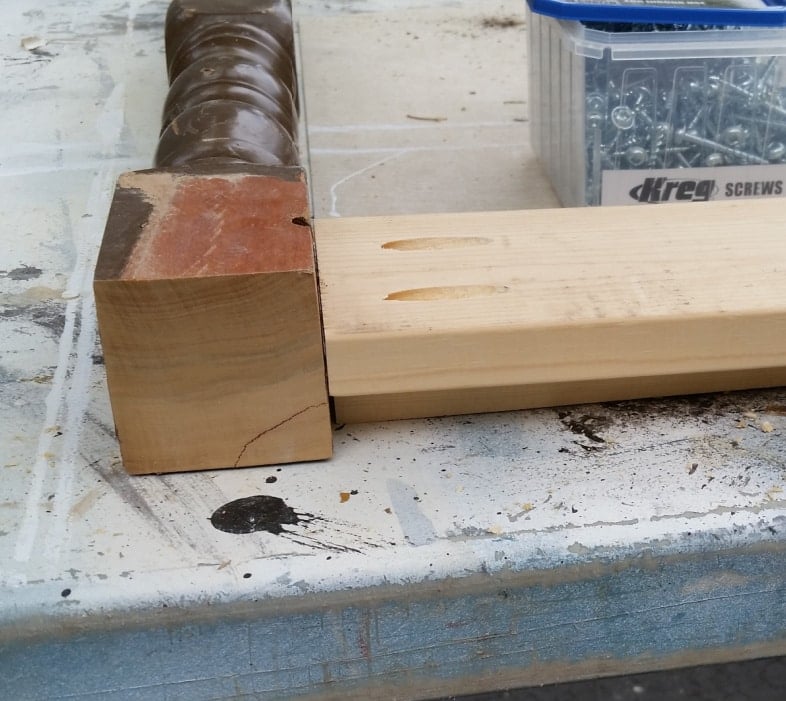
After completing the front braces, I proceeded to the side braces. I would love to tell you that I made this table the “standard” depth, but truth be told, I found some boards in my scrap pile, and cut them in half. THEY determined how deep the table would be. If you create a project like this, consider the thickness of your table legs.
In this image, you can see how the boards are not at the outer edge of the table legs. In my opinion, paying attention to small details like this will make your projects look much more professional. I’ve learned the hard way. ![]()
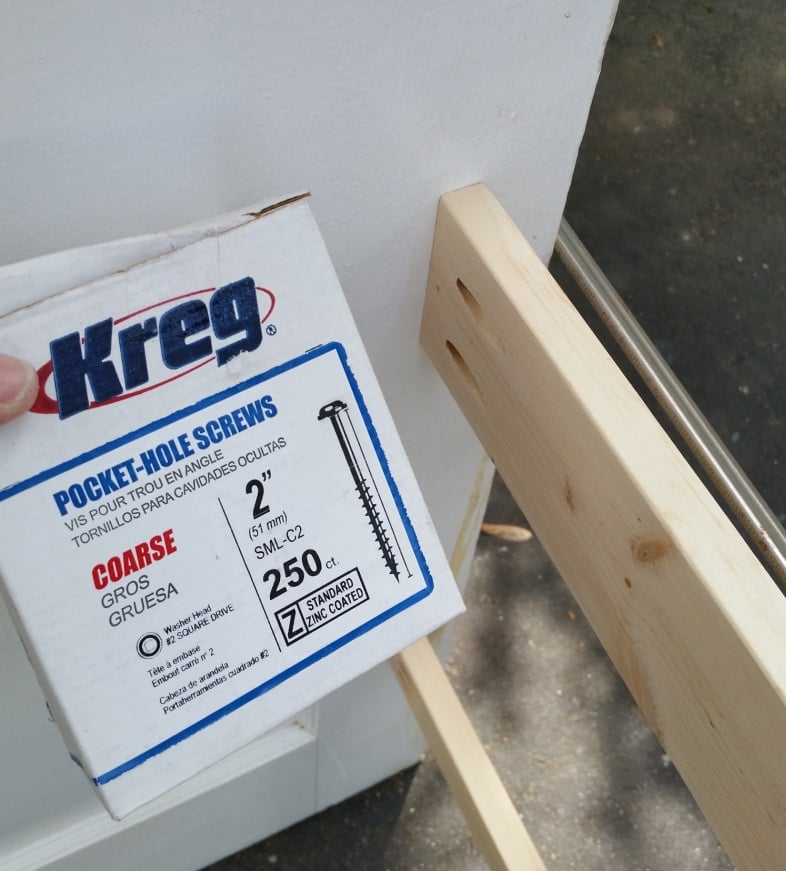
Because I’m using 3/4” stock, the screws recommended by Kreg would be 1 1/4”—but because the door is so thick, I chose to go with a longer 2” pocket hole screw. I buy all my pocket hole screws in bulk because I use them frequently.
For more information, see my post How To Use A Kreg Jig.
Cut Lumber for the DIY Entry Table

This is when it gets fun! Making the shelves’ planks brings everything together. I mostly used 1×6 boards. For the top shelf, I ripped one of them because using three full-size ones left too much overhang at the front.
The lower shelf was made using 2 1x6s and notched out a 1×4.
Add Trim to the Top
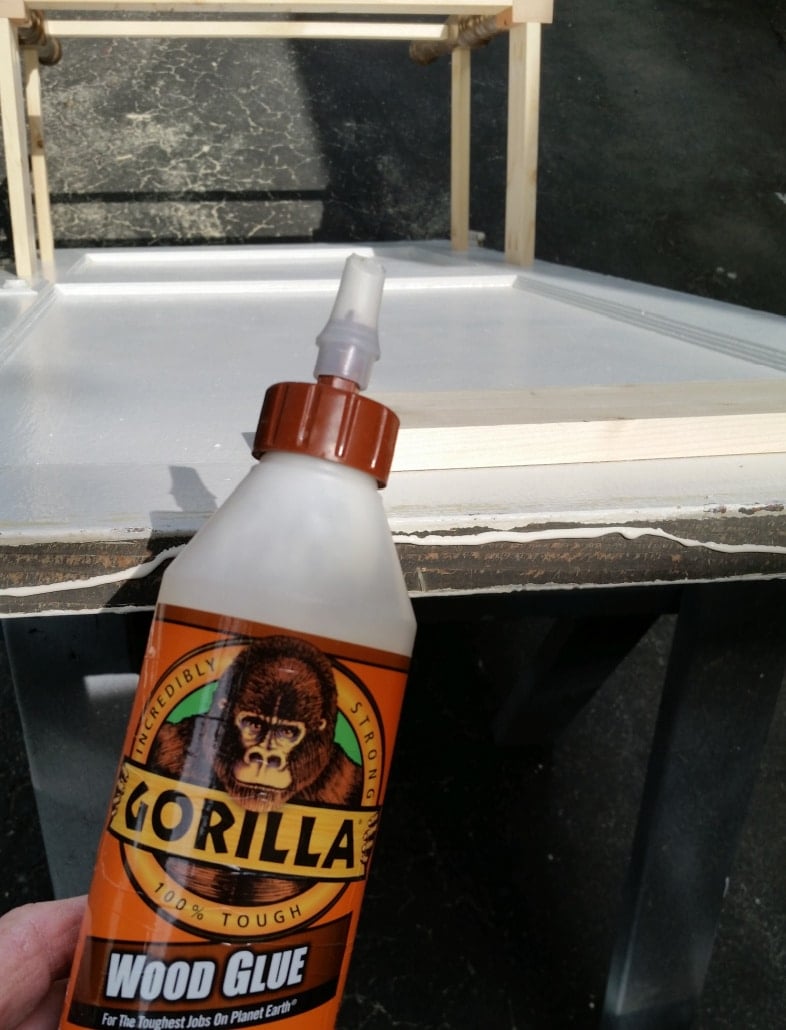
To keep the entryway table from looking like a full-fledged door, I added a small 1x on the top and a piece of random trim I found in my stash. I used Gorilla Wood Glue and my nail gun to attach the pieces.
Stain Boards
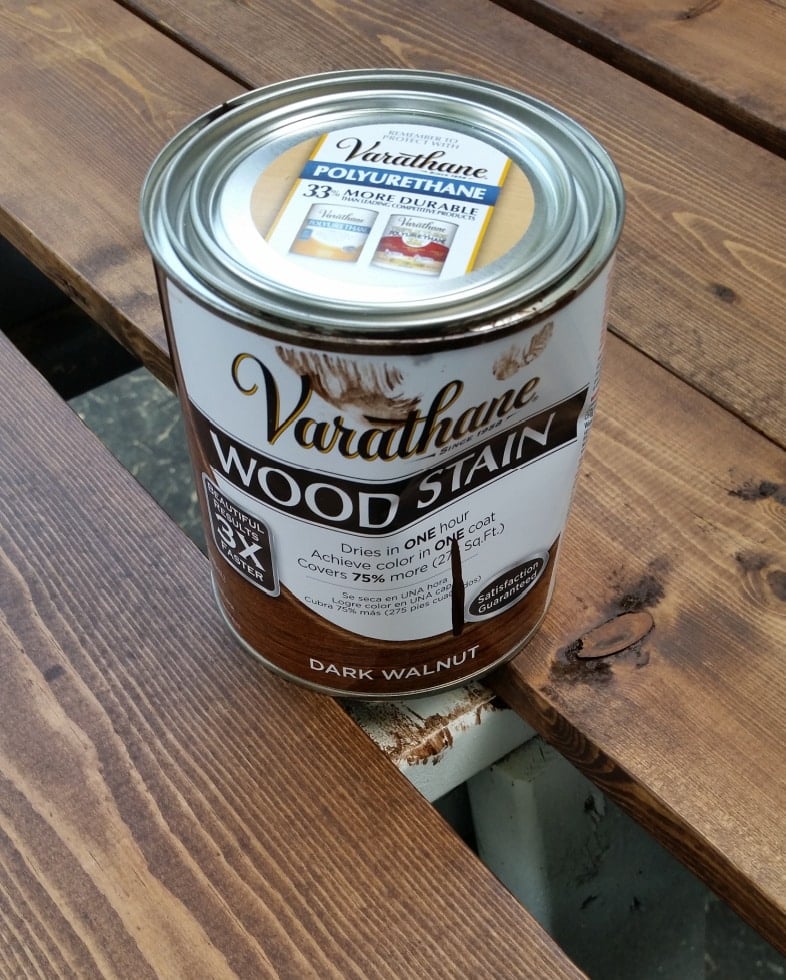
Because I love two-toned furniture, I chose to stain the shelf boards in dark walnut.
Test the Design Before Painting.
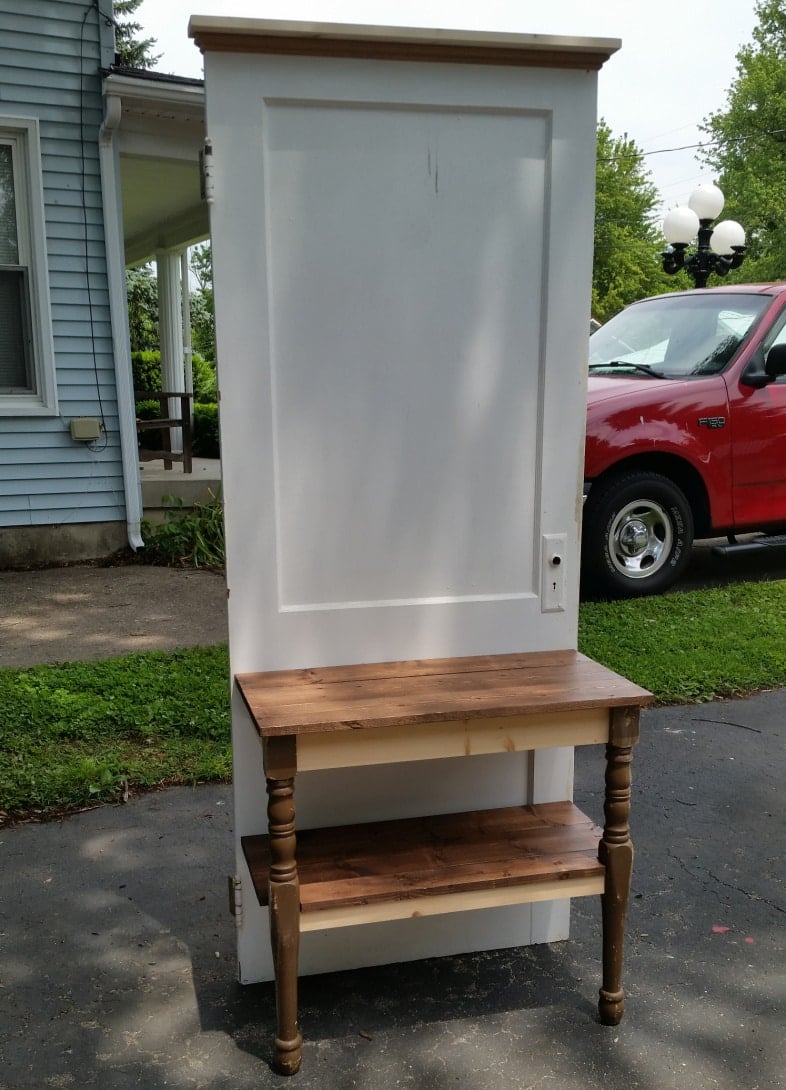
I was excited to try them on to see how they looked. I’ve made hall trees before, but I’m not sure I’ve made any quite like this. The closest one to this used a cabinet door for the tabletop.
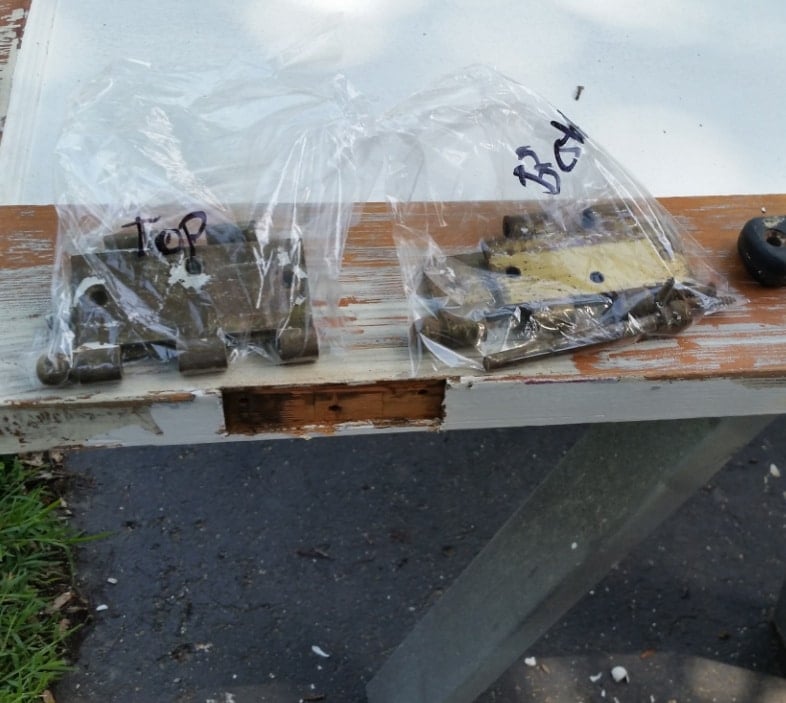
Not shown: as I was scraping a little of the loose paint off, it really just peeled off. You know, when you put on too many coats of nail polish, and you can peel off all the layers at once? I removed (and peeled the paint off) the hinges, knob, and door plate as well.
Time to Paint
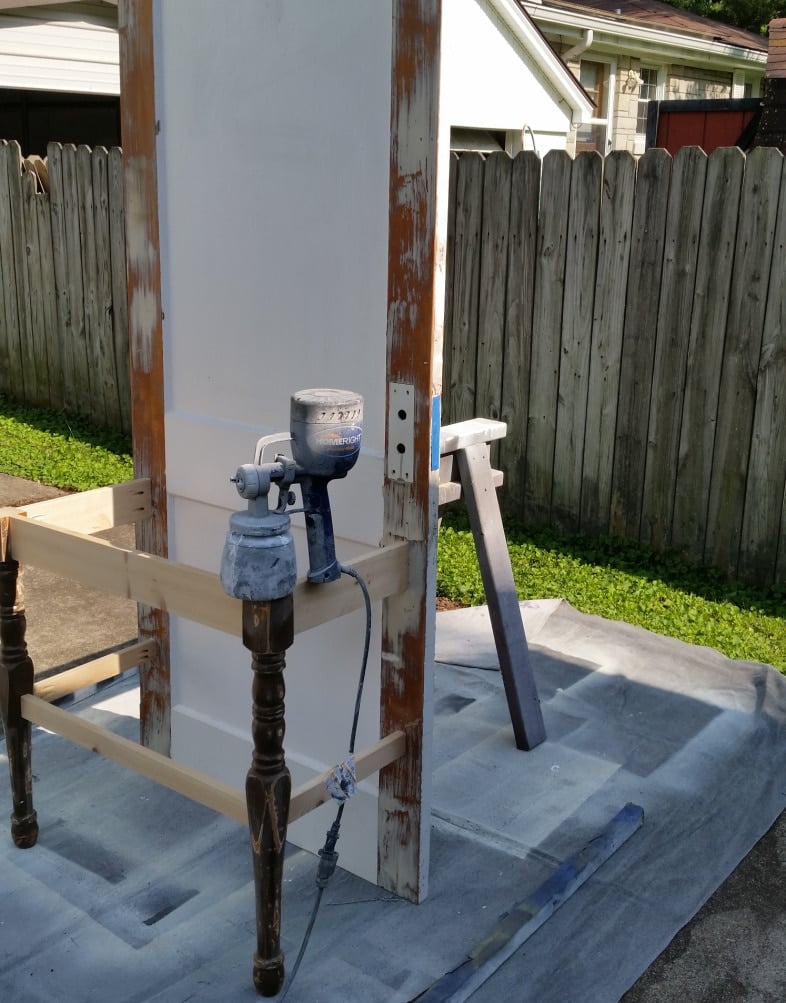
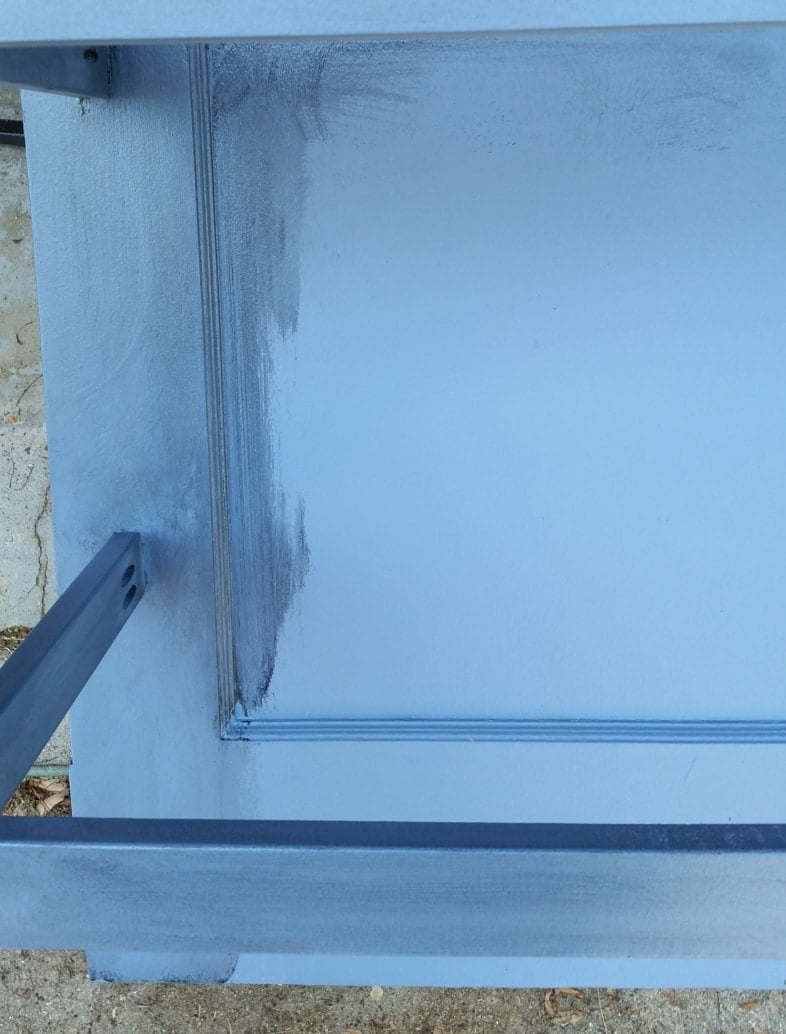
Here’s the entryway table in all its naked glory. Before adding the shelves, the entry table was a little top-heavy, so I placed one of my easy DIY sawhorses at the back of the door to make sure the wind didn’t catch it and blow it over. Of course, I used my favorite Homeright Finish Max to make this job quick, easy, and flawless. Here’s where I keep it honest. See the run from the original paint job in the center of the upper panel. I sanded it, but I didn’t sand it enough.
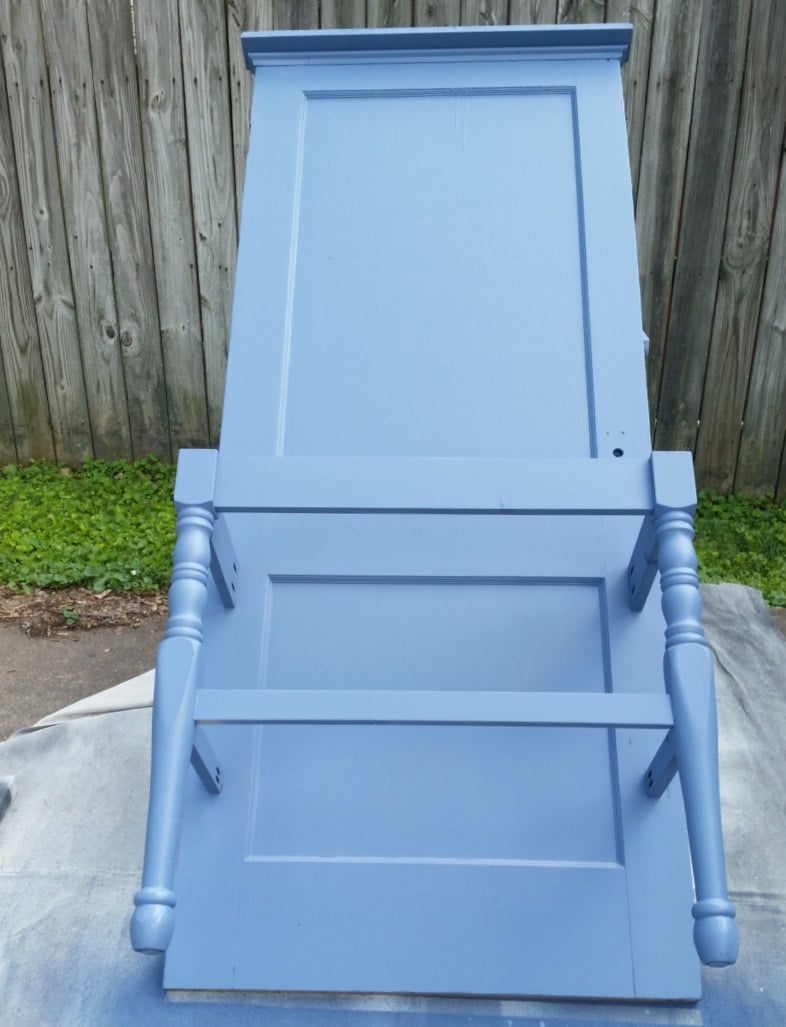
It is evident after the first two coats of diy chalky paint primer. ugh! When will I learn that paint does NOT cover up flaws? Initially, I was going to paint this piece black. I’m running a little low on black paint, so I decided to prime it with this oops blue. NEWSFLASH! After I primed it, I fell in love with the color. As you know, I sell 99% of my furniture, and I’m always trying to figure out which colors sell quickly. My last hall tree—the one I made with a nightstand– was painted green and has already found a new home.
Related Content: Navy Blue Furniture Projects
Project ideas and a video of “how to glaze painted furniture and more”
Add Glazing as a Topcoat
Although I loved the blue, I wanted to tone it down slightly. Since I wasn’t in the mood to wax this baby . . .

I used this Smoked Glaze “chalked” decorative glaze from Rust-Oleum. I’m unsure if they sell it as a sealer, but it seemed to protect the DIY chalky paint primer.
Watch my video on How To Glaze Painted Furniture
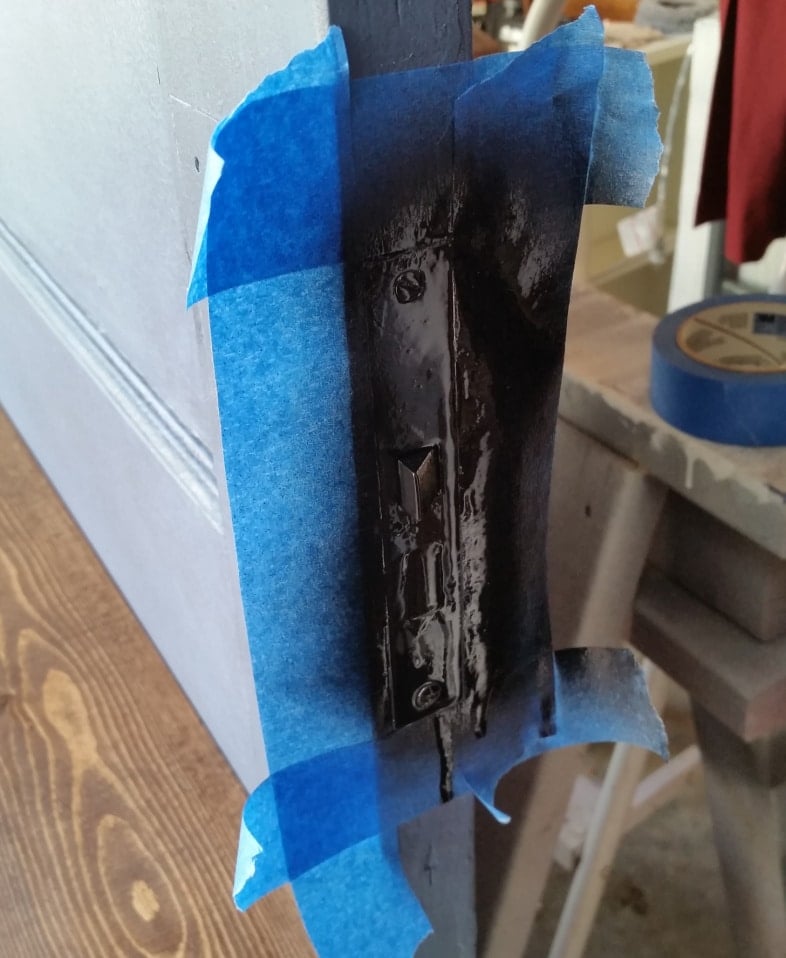
I thought I would add the hinges and all the hardware back to the door. Ultimately, I decided to use everything except the hinges. I had taped off the hardware on this side when I painted the door blue. Now I’ve used painter’s tape to spray-paint the piece black.
Spray Paint the Original Hardware
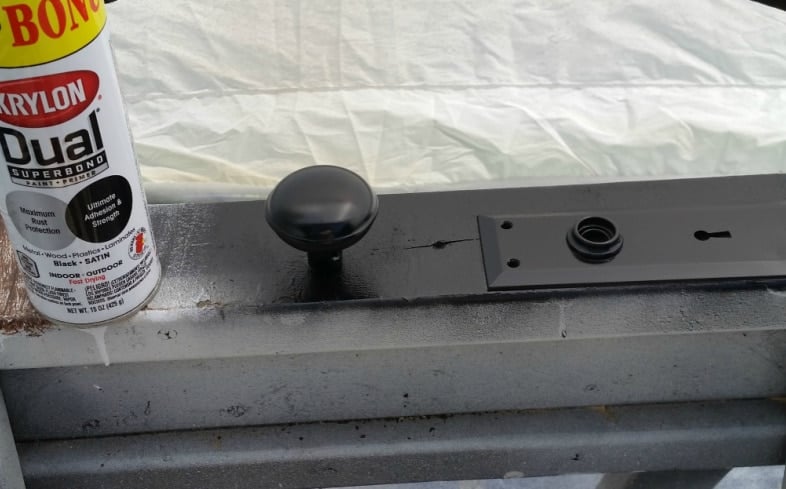
I used the same black spray paint on the doorknob and plate while I had my Homeright Spray Shelter set up for another project.

Here’s the “after”! Do you love it as much as I do? How about the blue? I know Mindi will love it! She paints everything Blue. ![]()
I truly wish I had a place to put this. Every time I make a hall tree, I think it’s my favorite—until I make the next one.
Styling Suggestion for an Old Door With a New Purpose
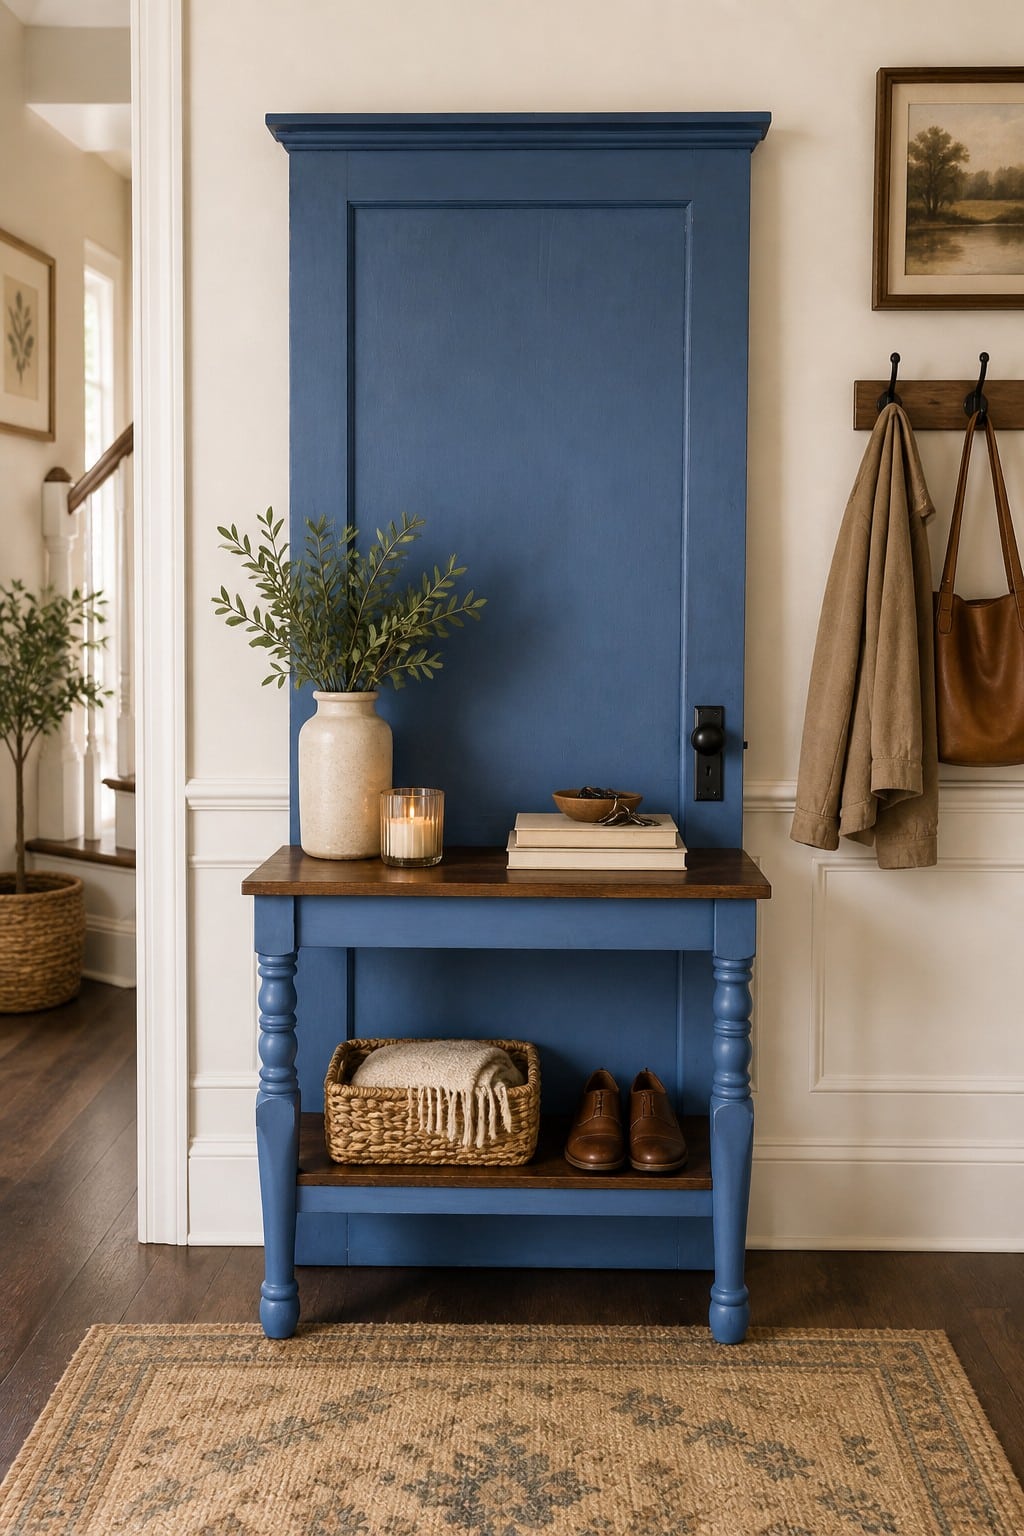
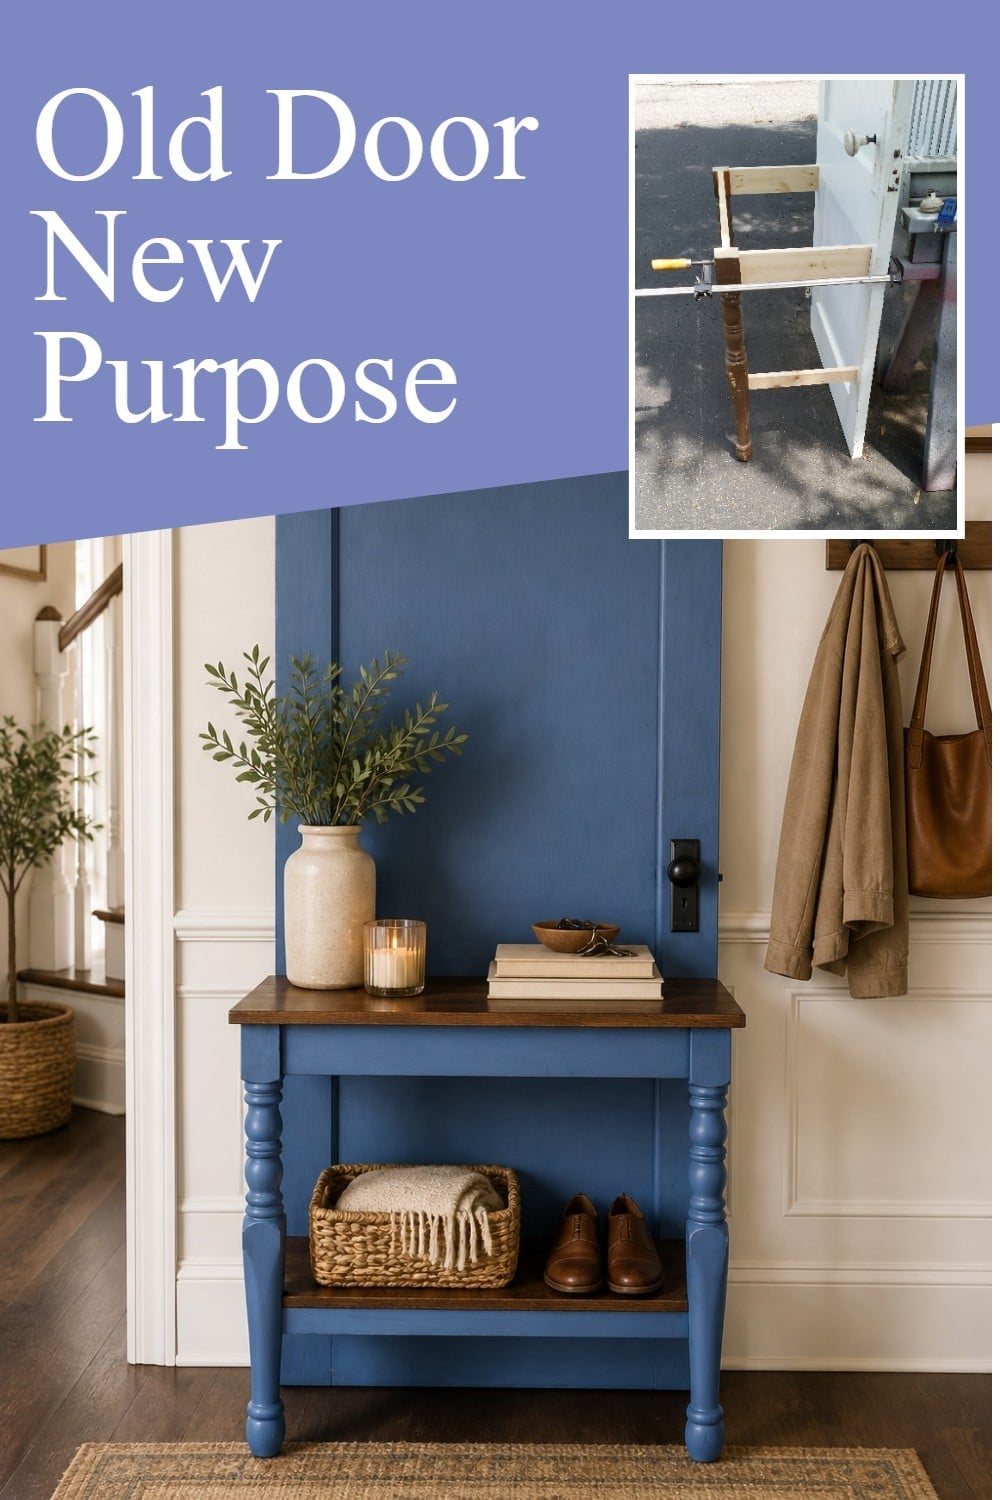
This DIY entry table is exactly why I have a hard time passing up old doors and lonely table legs. They may not look like much on their own, but together they made a useful piece with storage, character, and a little personality. Whether you use it in an entryway, hallway, mudroom, or porch area, it is a great reminder to look twice before tossing those odd pieces into the scrap pile.
Do you have a favorite? You can see all of my Repurposed Door Projects by clicking that link. Get the details on the easy oval frame chalkboard makeover here.
See More Hall Tree Project Ideas Here Reclaimed Wood Foyer Table
gail