• Skip to primary navigation
  • Skip to main content
  • Skip to primary sidebar
  • Start Here
  • Shop Favorites
  • About
    • Welcome To My Repurposed Life Home of Repurposed Furniture
    • More About Gail
    • Disclosure
    • Privacy Information
  • Gallery
    • Repurposed Furniture
  • Repurposed Items
    • Building Supplies
    • Miscellaneous Household Items
    • Picture Frame/Chalk Board
  • DIY
    • Home Reno
    • outdoor living
    • Painting
    • Shop Talk
    • Tips for Around the House
    • Build It
      • Furniture
      • Home Decor
      • Storage
    • Crafts
      • Dollar Store
      • Easy
      • Holidays Seasonal
  • Furniture
    • Chair
    • Desk
    • Dresser/Chest
    • Headboard | Bed Parts | Cribs
    • Kids Furniture
    • Table
    • Kids Furniture
My Repurposed Life® Rescue Re-imagine Repeat
menu icon
go to homepage
subscribe
search icon
Homepage link
  • About
  • Start Here
  • Project Index
  • Furniture
  • Subscribe
    • Email
    • Facebook
    • Instagram
    • Pinterest
    • RSS
    • Twitter
  • ×

    Home » DIY » Build It » DIY Kitchen Island (top)

    DIY Kitchen Island (top)

    Published by Gail | Published November 4, 2010 | Updated February 11, 2022
    As an Amazon Associate I earn from qualifying purchases.

    Pin
    Share
    Tweet

    I’ve had this jig for a few months now. I love the things I can do with it. You saw that I used it yesterday to attach the desk to the base to make my kitchen island.
    100_7916

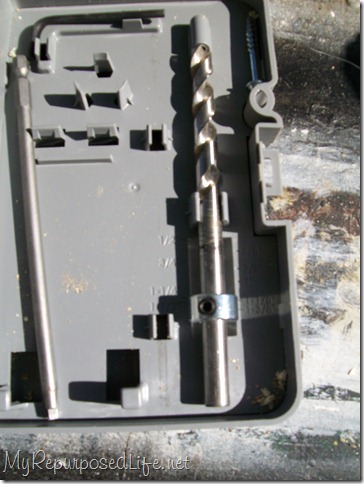
    The first thing I do is set the drill bit to the proper depth. That little collar makes sure that you don’t drill too deep.

    *this post contains affiliate links*
    100_7917

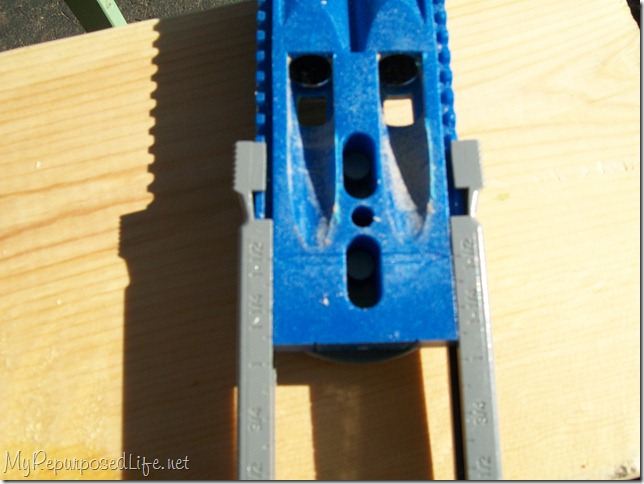
    Then you set the Kreg Jig to the proper thickness of the wood you are drilling.
    100_7919

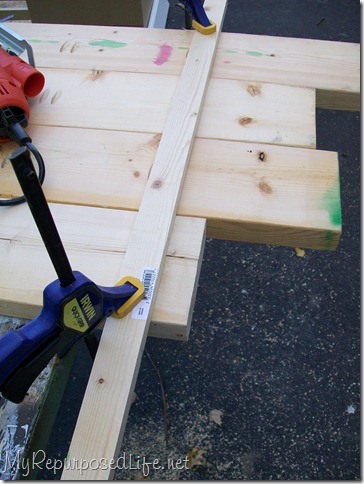
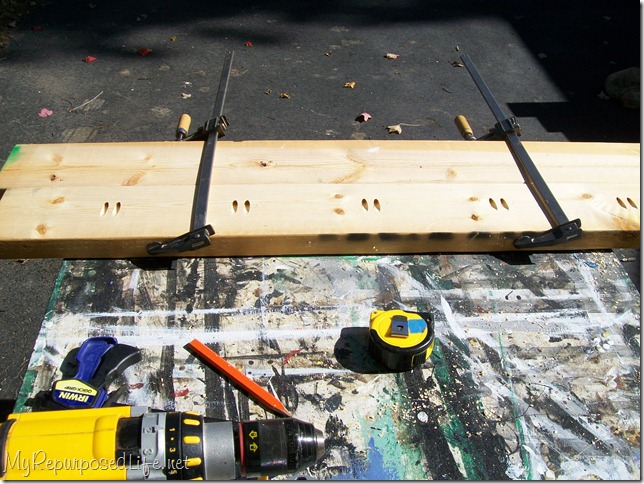
    There are a few things to notice in this picture. First if you look at the longer board you will see the infamous green paint. .51 cents at Home Depot! I measured approximately every 8 inches and clamped and drilled my pocket holes. I then used my bar clamps to hold the two boards together while I screwed in some 2.5 inch Kreg screws. What you won’t see is glue. This makes such a tight fit there is no need for glue.
    100_7920

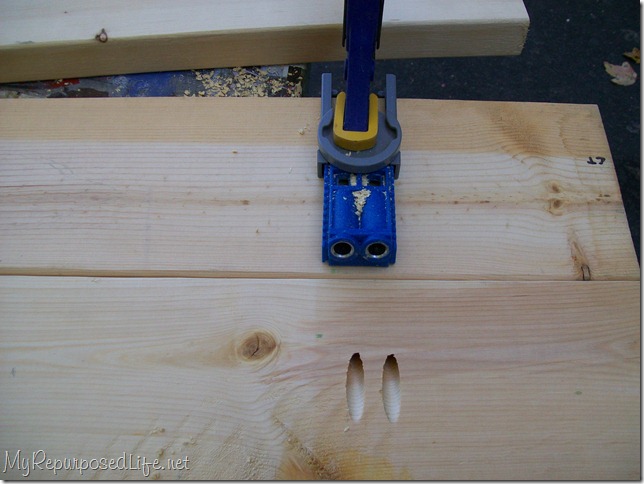
    Now this part is off the top of my head. Hindsight 20/20 this may not be the way to go. I didn’t stop to read up on this,  but looking back it seems like maybe I should have staggered the holes in between the set on the first board.
    100_7921

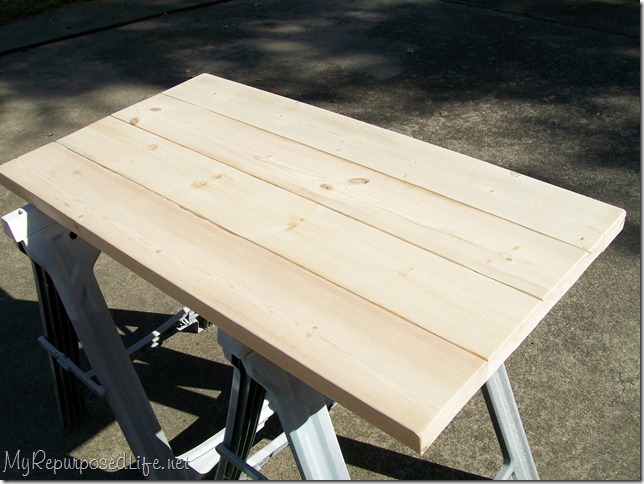
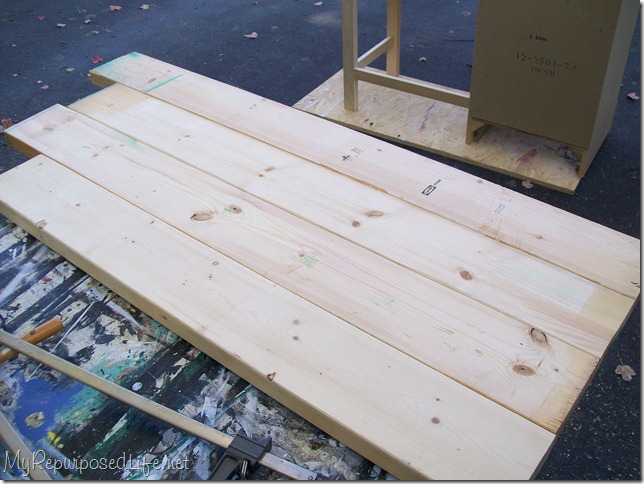
    Here are my four boards attached.

    100_7922

    Another view.

    100_7926

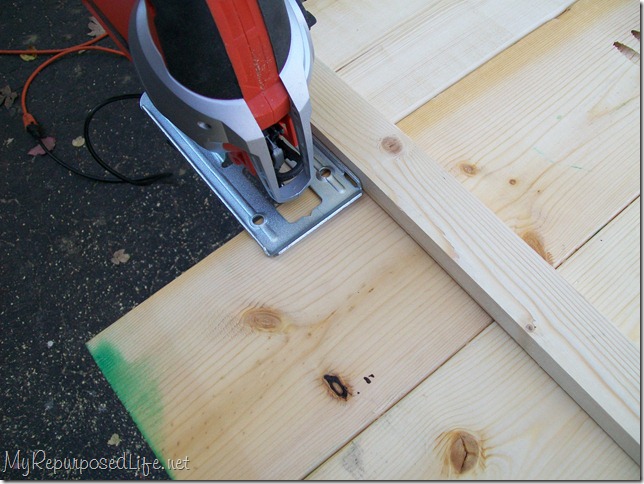
    I have showed you this technique before. Clamping a piece of lumber to keep the shoe straight as you cut.
    100_7927

    I don’t have a circular saw that works. Although, I do have a battery operated one but it will not run long enough to cut. I used my jigsaw.
    100_7928

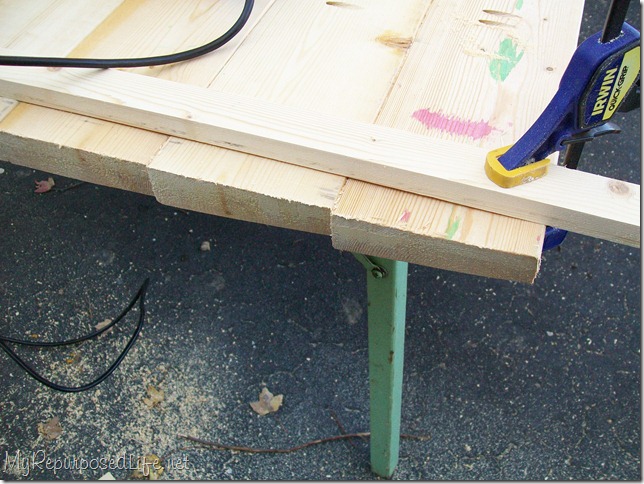
    Things don’t always go as planned! You thought I was perfect? Than I never make mistakes? nah! I make plenty of mistakes! But,I just don’t get all of them captured with the camera. I know WHAT happened (the blade leaned)  I’m just not sure HOW it happened. The first board cut perfectly!
    100_7929

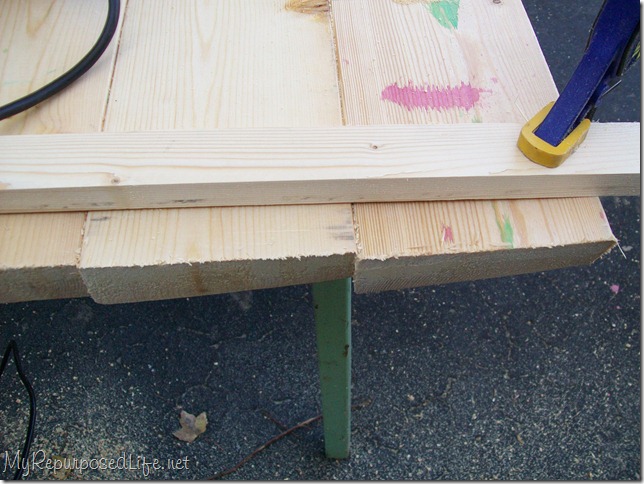
    This clearly would not work. When I left the boards varying lengths, my intent was to put the entire piece on the table saw and make them all exactly the same. Bad idea. The piece was too heavy and cumbersome for me to handle alone. That’s why I used the jigsaw.

    Long story short, I ended up having to draw a line and cut on the table saw freehand (without the fence). Which by the way I’m really good at. It just makes me nervous when cutting a large (heavy) piece.
    100_7949

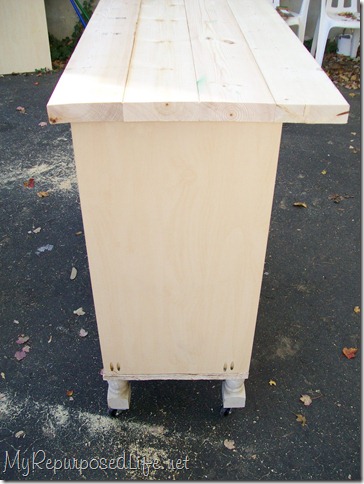
    Testing to see if it’s too big or if I need to rip some off of it. Works for me! Look! There are the all too pretty pocket holes that helped me attach the desk to the base.

    EDITED TO ADD:  turn your boards one up, one down, one up, one down (end wood grain) to make it lay flatter than this one. Live and learn! 🙂

    You can pick up a Kreg Jig on Amazon. I will earn a little commission,  but you won't pay any extra money.

    100_7956

    I used my orbital sander to smooth it all pretty! The sanding also removed some black printing on the boards and some green paint.
    100_1208

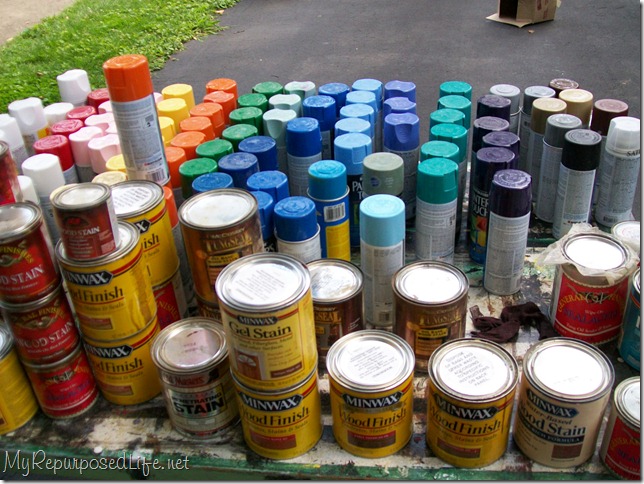
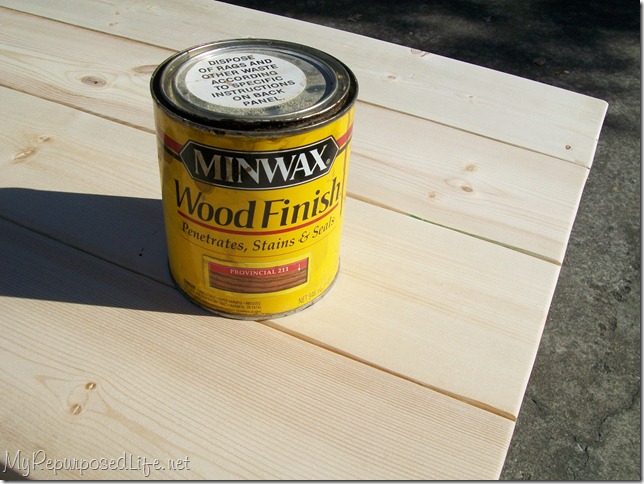
    I was ready to stain the top. This picture is from a couple of years ago when my sister gave me all these cans of spray paint and stain. As you can see, I have several choices of stain! It was hard to narrow it down. I wanted something dark, but not a shade of red.
    100_7959

    So, I settled on this stain by Minwax.
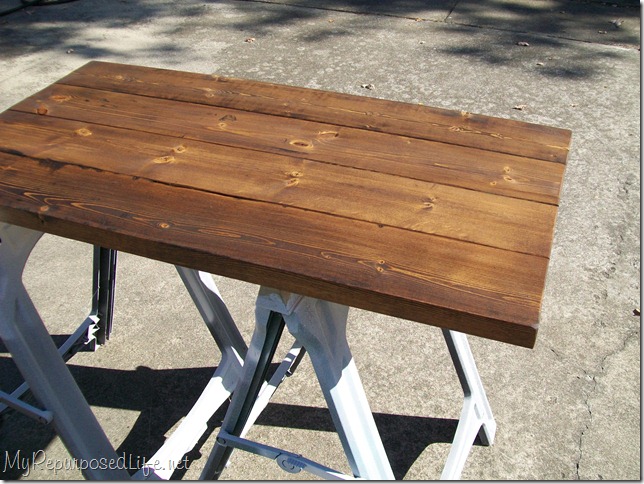
    100_7960

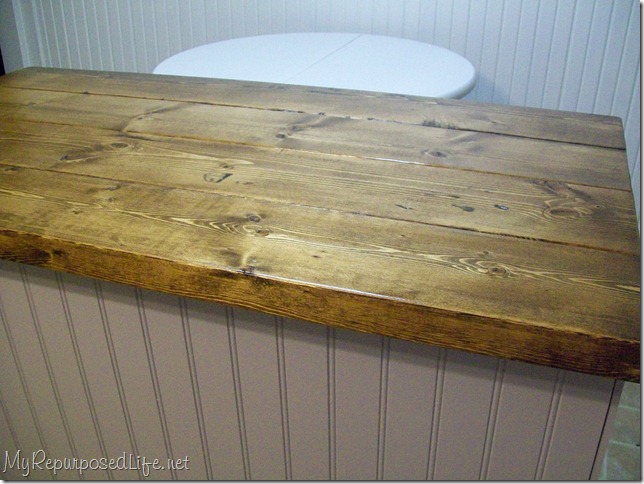
    I actually used just one coat of stain. After the stain dried I applied 3 coats of Polycrylic, sanding in between coats.
    100_7976 a

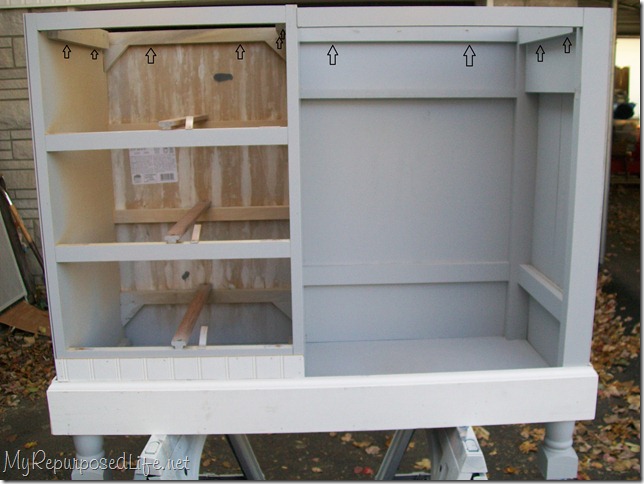
    Edited to add:  When I removed the original top I saved all the screws and reused them to screw the new top on right in the original holes.
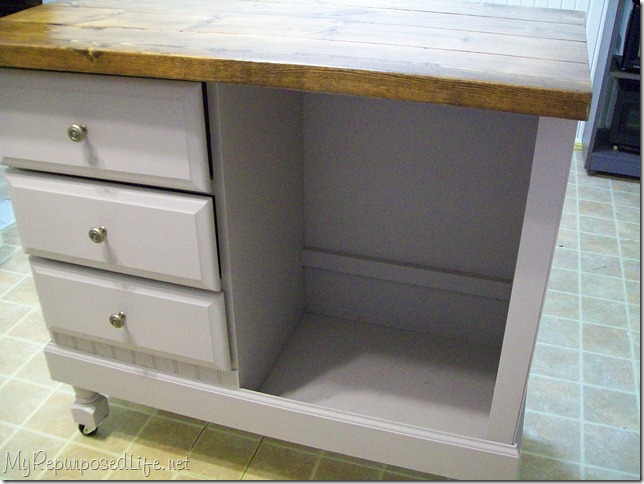
    100_7996

    And here is the top on my kitchen island/bar.
    100_8005

    Not bad for $2.04, huh?

    The total cost of the island is as follows:

    desk-free

    beadboard $1.01 (cull bin)

    osb .51 cents (cull bin)

    Luan .51 cents (cull bin)

    casters a couple of bucks each

    legs/feet $2.00  (they cost $4.00, but I still have half left)

    island top $2.04

    baseboard $15.00  OUCH! that was tough!

    less than $30.00. Most of the material I already had on hand. (previously purchased)  I only bought the casters and the baseboard for this project.

    The Kreg company did not compensate me in any way, nor did they furnish me with any product. I simply LOVE their jig, and I’m sure you would too if you put it on your “wish list”.

    gail

    Related Content:

    DIY Kitchen Island

    I Painted the Kitchen Island

    New Floor in my Kitchen (finally)

    Print Friendly, PDF & Email
    Pin
    Share
    Tweet

    Related Content:

    • Kitchen Island Table Top and More
      Kitchen Island Table Top and More
    • How To: Turn a desk into a tall chest | Before and After Photos
      How To: Turn a desk into a tall chest | Before and After…
    • Craft Station made from kitchen cabinet
      Craft Station made from kitchen cabinet
    • Antique Sewing Machine New T.V. Table
      Antique Sewing Machine New T.V. Table
    • How to Use a Kreg Jig Pocket Hole System
      How to Use a Kreg Jig Pocket Hole System
    • DIY Kitchen Island
      DIY Kitchen Island

    Reader Interactions

    Comments

      See comments Cancel reply

      Your email address will not be published. Required fields are marked *

      This site uses Akismet to reduce spam. Learn how your comment data is processed.

    1. Barbara garza

      April 27, 2015 at 5:52 pm

      If I wanted to make the top wider on the back side to fit a stool could I just add another board or would I have to include another support underneath.?

      Reply
      • gail@myrepurposedlife.com

        April 28, 2015 at 9:27 am

        Barbara,

        I just posted a new project that will help you with this question. Check out this project: https://www.myrepurposedlife.com/2015/04/craft-table.html

        You will see that I added some metal brackets to this project because the top extends quite a bit.

        gail

    2. ArenaCreative.com

      June 21, 2012 at 4:24 pm

      Awesome JOB! I want to do something similar for our kitchen, because $400 for an IKEA island is way overpriced, for what it is.

      Reply
    3. ✿ⒹⒺⒺ✿@ A Lapin Life

      June 13, 2012 at 7:22 pm

      Hi Gail,

      I love all the step by step details you posted. Your kitchen island looks FANTASTIC!

      Dee

      P.S. I now know what to get my husband for Father's Day! 🙂

      Reply
    4. Corn in my Coffee-Pot

      December 20, 2011 at 1:09 am

      Hey there Gail~ was scrolling through some old post ...well, clicking away from your recent post about your greatest accomplishment...fireplace surround... anyway~
      I have a question about this Kreg Jig. I looked at them at Lowe's and I'm wondering with this jig are you pigeoned holed into using the Kreg brand screws and the longer screw tips to get into the holes? Or can you use your own tips in your drill and any ol' screw with the longer neck and less threads?

      I may copy this comment and email you. Because inquiring minds wants to know~

      thanks a bunch~ Pat

      Reply
    5. Holly

      November 12, 2010 at 2:50 am

      I am more and more impressed with your mad skills every time. This is gorgeous and the inspiration I need to do this. I need an island badly! I am tickled pink!

      Reply
    6. Becky@Beyond The Picket Fence

      November 11, 2010 at 9:57 pm

      Beautiful Gail--thanks so much for linking up, and I am thrilled if projects are way under $100--I rarely spend more than $10 on mine :).

      Reply
    7. Chris

      November 07, 2010 at 3:59 pm

      It looks so great! I can't get over the small amount you paid, nor can I get over all that paint and stain! 😉 Well done!

      Reply
    8. Stephanie

      November 06, 2010 at 5:34 pm

      Seeing how you actually made this makes me more in awe of your talent. I can't even put up a curtain rod without making LARGE holes too big to hold a screw. I can't even imagine using a jig saw. A-mazing Gail.

      Reply
    9. Tru@TRU TALES FEATS

      November 06, 2010 at 12:31 pm

      Here's a thought for Angela Darling. Have you considered getting a piece of decorative molding to apply to the space? You could even use several pieces and build it up to look like back splash (not sure if that's the words I'm looking for). Or you could build a small shelf and use the space to anchor it. If you're not sure what I mean, you can email me and I'll send some pics.

      Reply
    10. Sarah @ Sugar Bananas!

      November 05, 2010 at 1:53 pm

      No way! This is amazing! ...and look at that paint/stain stash. What a huge J.O.B. and you made it look easy 😉 I'd love for you to add this to my ”Sweets This Week” Link Party.

      Reply
    11. EmTea Designs

      November 05, 2010 at 3:59 am

      This is completely AMAZING! It looks gorg!

      Reply
    12. ~ Regan

      November 04, 2010 at 9:22 pm

      Simply gorgeous!!! I love it! I have been looking around for new countertop ideas (on the cheap- I have a small budget.) And I just love this idea! THanks so much for sharing it, I think that jig WILL be on my christmas list!

      Reply
    13. Paige (Final Clothes-Out)

      November 04, 2010 at 7:04 pm

      That's so pretty! IKEA sells a similar version, but I honestly like yours better.

      Also, what the heck was your sister doing with all that spray paint?!

      Reply
    14. Amanda@The Hand Me Down House

      November 04, 2010 at 4:48 pm

      I absolutely LOVE your island, Gail! You definitely chose right on the stain -- I love the tone! And the beadboard is just perfect too!

      Reply
    15. Angela Darling

      November 04, 2010 at 4:26 pm

      Completely random question that has NO relation to this post - I recently inherited a waterfall vanity (I saw you had a post about one before)... the top of the vanity near the back has about an inch gap with no wood - I'm assuming this was where a mirror was probably attached... any ideas on how to cover those gaps? As of now you can look down and into the very back of the drawers (I don't know if that makes any sense or not)... any thoughts?

      Reply
    16. Barbara

      November 04, 2010 at 3:38 pm

      I so want a Kreg jig. I think I'm going to ask for it for Christmas!!

      Reply
    17. Reenie

      November 04, 2010 at 2:40 pm

      Looks great!!

      haha......I thought I had a lot of spray paint in different flavors....but you def have me beat!! 🙂

      Reply
    18. Christa @ Stories of a House

      November 04, 2010 at 1:42 pm

      What a great result, I love this!

      Reply
    19. Terri

      November 04, 2010 at 1:41 pm

      I can't believe you made this whole thing for about $30! Amazing!

      I am in need of a new jig saw and have never heard of this one...would love to know all the reasons you LOVE it!

      Reply
    20. Proper Prim

      November 04, 2010 at 1:08 pm

      Thanks for the tut with Mr. Kreg... I love that little tool, I just have to find something to use mine for. It took me awhile to figure out that you put the drill back in the case for the measurement, I thought I was losing it for a bit there. I hate reading instructions...lol

      You did an another amazing job on the top, it looks fabulous.

      I can't wait to see this piece in place in the kitchen... but I bet you can't wait either...lol

      Hope you have a great day.

      Hugs, Deb

      Reply
    21. Handbags*N*Pigtails

      November 04, 2010 at 1:02 pm

      And again you prove you are amazing! I cant believe that photo of all the paints and stains. Heaven to have so many choices:)
      Sarah

      Reply
    22. Cassie @ Primitive & Proper

      November 04, 2010 at 12:14 pm

      it really is the icing on the cake!

      Reply
    23. Cassie @ Primitive & Proper

      November 04, 2010 at 12:14 pm

      it really is the icing on the cake!

      Reply
    24. My Cottage Charm

      November 04, 2010 at 11:49 am

      Hey Gail! When TJ and I worked on our arbor, we ruined the first piece of 2 x 12 because we tried to cut it with a jigsaw. (we thought the jigsaw would work better for the curse of the arbor) That wood was $20 bucks a piece..that mistake hurt! lol We ended up using our circular saw and it cut it like it was no big deal. I think the jigsaw blades must be to flimsy to cut through thicker pieces of wood. Lesson learned for both of us. 🙂
      Still lovin' your island! (and love the price too! lol)
      Missy :0)

      Reply
    25. Homemade Quilts by Granny

      November 04, 2010 at 11:40 am

      The top is fabulous....I don't think you could have went to the store and got a prettier Island.God Bless Trish

      Reply
    26. Debilou~Mississippi Mama

      November 04, 2010 at 11:31 am

      Morning, Gail,, I was so curious to see how you put those boards together for the top,,and it looks fabulous. I really want one of those tools now. Uhm,but how is the top attached to the island?? Did I miss that? Anyway, I know you're so proud of it and will enjoy it for many years to come.. Thanks for sharing with us all you do, even the mistakes... I tried your cutting method using the board for a guide and that same thing happened to me, but I think my blade is old.
      I'm off to work,, have a good day!

      Reply

    Primary Sidebar

    Hi, there! I’m Gail Wilson, the author and mastermind behind My Repurposed Life. I’m obsessed with finding potential in unexpected places and believe that with a little hard work and imagination, any old thing can be made useful again—myself included! I hope you’ll enjoy the journey and pick up a few tools along the way… literally!

    More about me →

    Join Our Mailing List

    ​

      Click the topics you're interested in below:

      Subscribing above means you agree to our Privacy Policy​

      Footer

      ↑ back to top

      SEEN ON

      Might I Suggest

      • Start Here
      • Furniture Makeovers

      Newsletter

      • Sign Up! for emails and updates

      About

      • Gail's Favorites on Amazon
      • About

      As an Amazon Associate I earn from qualifying purchases.

      Copyright © 2023 My Repurposed Life · Privacy Policy · Disclosure