Dressing Table Repurposed Desk
As an Amazon Associate, I earn from qualifying purchases.
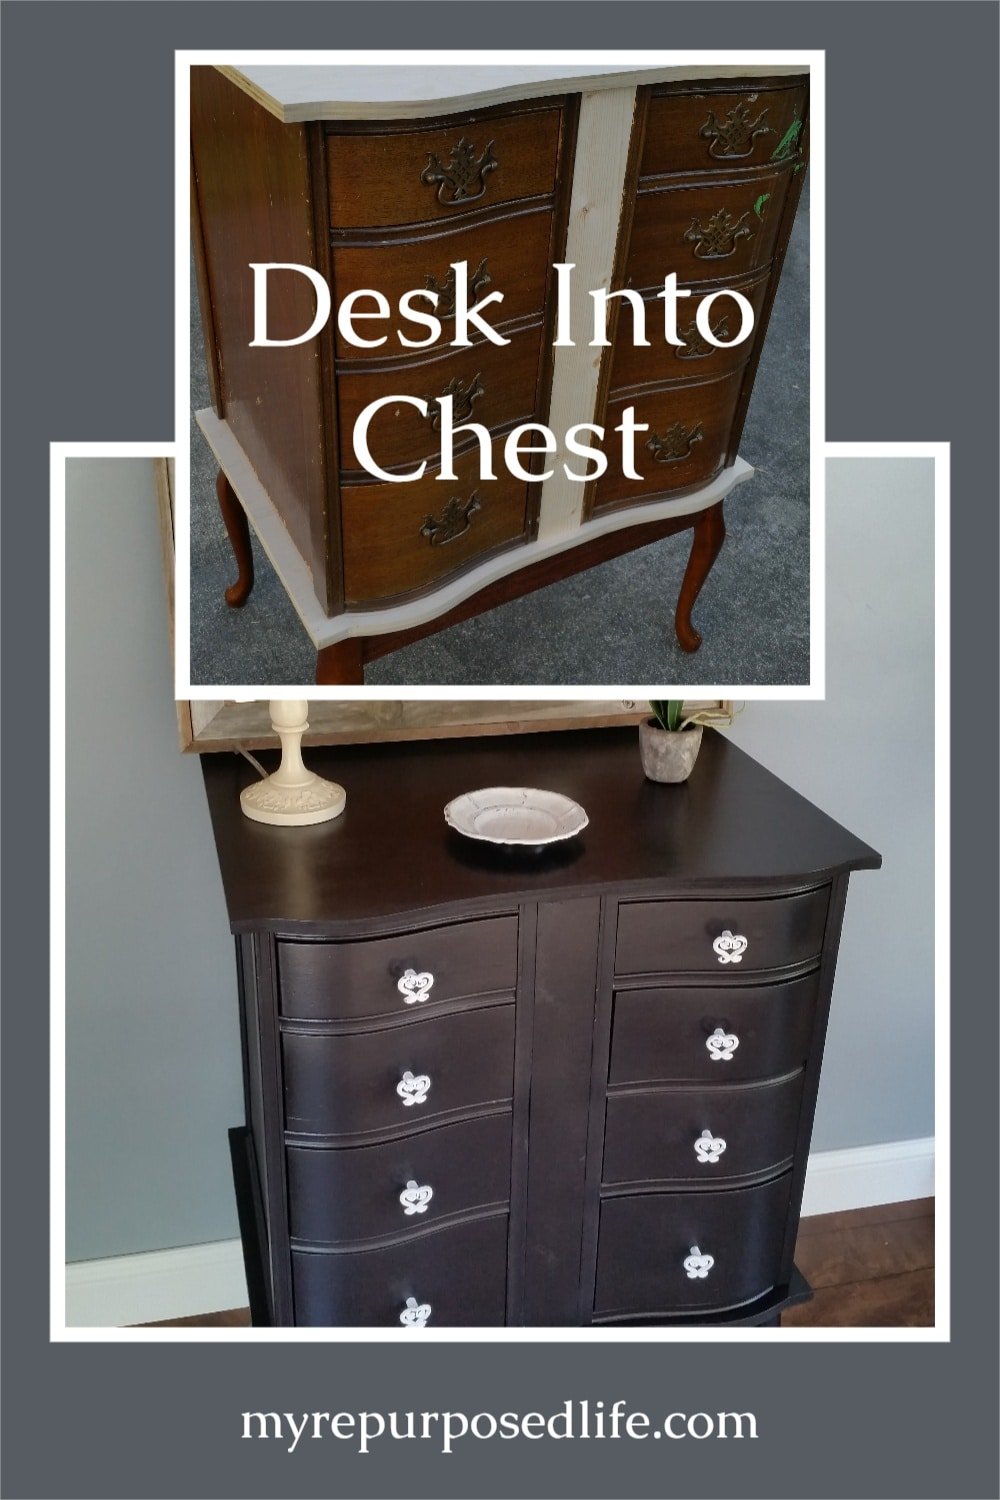
You’re going to love this upcycled desk project!
This month Homeright challenged the Brand Ambassadors to do a makeover on a thrift store find, preferably less than $20 to show our readers how easy it is to create great home décor on a tight budget.
In addition, I accepted another challenge with some blogger friends, to do a “Repurpose It” challenge. So this one project is going to serve for both challenges! (If I survive the project, that is)


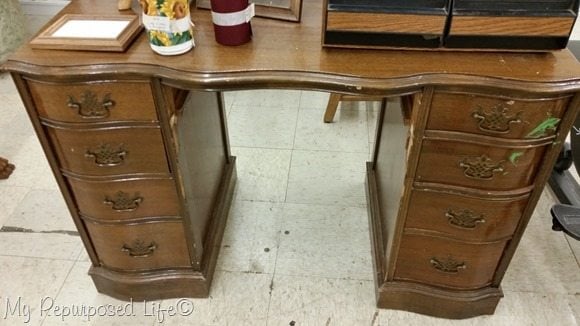
Initially, I thought I might just shop my own garage for both challenges. In the end I went shopping just to see what I could find. I found this desk for $15. The tag said “needs work”. Just what I was hoping for! The first thing I noticed was the missing middle drawer. No biggie, since I knew I was going to be deconstructing the piece to repurpose it. However, when I got it home, I took off my “rose colored glasses” and saw that it was indeed in rough shape. Someone apparently used it as an ironing board.
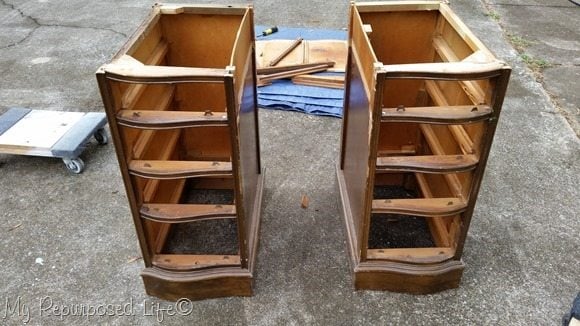
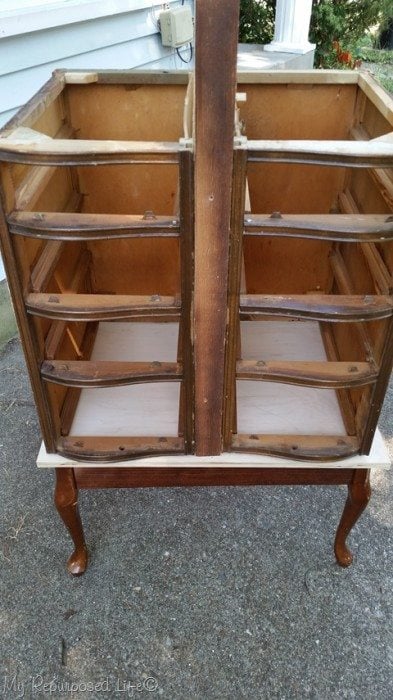
Deconstruct desk
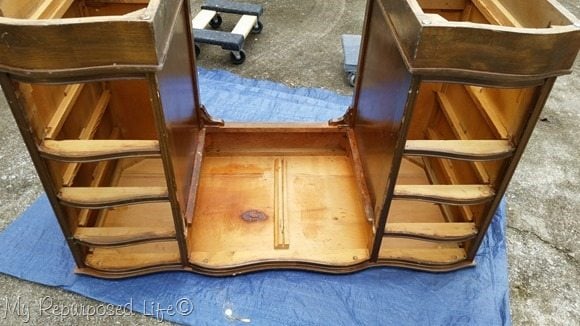
The first step was to start deconstructing the desk, so I could reconstruct it—into WHAT? That was the million dollar question. I really didn’t have a plan at all. FYI, I have been looking for a great deal on a desk for years so I could make another tall chest by stacking the drawer sections like I did with my Tower of Terror. However, as soon as I got it home, I tried to switch out the drawers and realized that stacking was not going to be an option.
I worked on prying off the top. It was secured with screws and glue. The best way to do this successfully is to take your time.
 Okay, the top is off! I started collecting all the parts and screws on the tarp, since I didn’t know what I would be reusing.
Upcycled Desk drawer sections
So, if I wanted to take the easy road, I could make them into 2 nightstands or side tables.
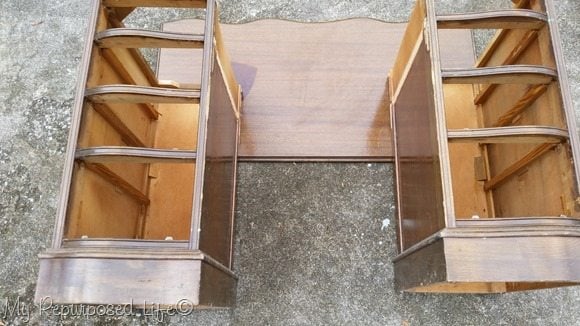
Maybe I could fashion some sort of bench out of the pieces? Nah, not working…
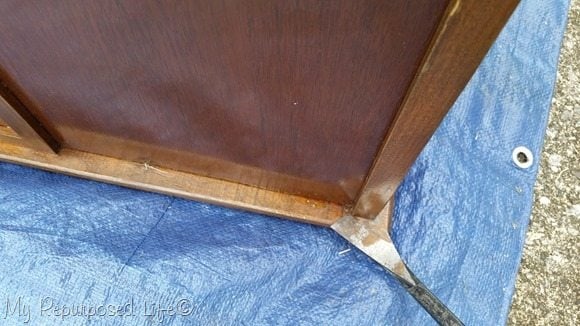
Remove lower trim
 So, I considered putting the two drawer sections side by side, but the bottom trim didn’t allow them to set flush. Off it comes! This deconstruction involved some blood, sweat and tears. At this point I spoke to my daughter Jamie on the phone and told her I think I’ve done all this work for nothing. Her POSITIVE response was “At least you’ll have 8 drawers to repurpose if it doesn’t work out”. Love that girl! I decided that after taking the trim off it they needed some height-some kind of legs.
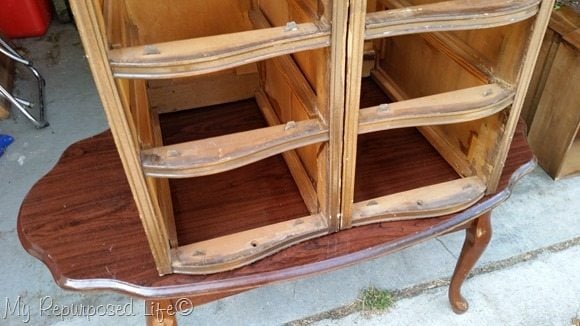
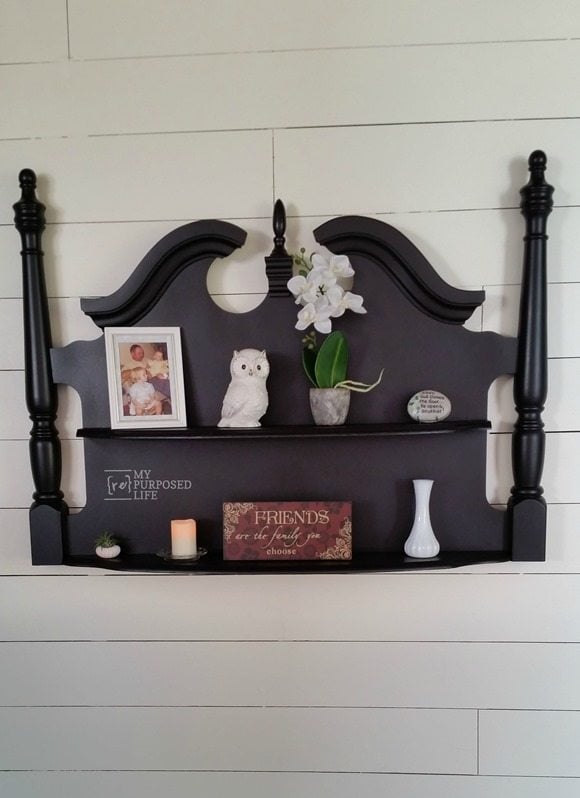
Then I happened to notice that $1 coffee table I got at a recent yard sale. Be sure to check out how I used the top of this coffee table in my post Black Headboard Wall Shelf AND the White Headboard Shelf Coat Rack
Match drawer sections to table base
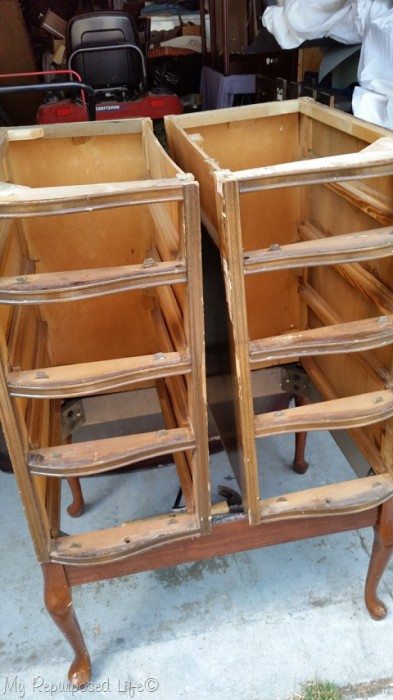
After MORE deconstruction—this time on the coffee table, I rest the drawer sections of the old desk on the frame. Are ya still with me? Be sure to see the end of the post so you can find out about the other bloggers doing the Thrift Store Challenge AND the Repurpose IT Challenge.
 The new chest need a top, and maybe a base to rest on the coffee table. I used a piece of plywood that I got at the Peddler’s Mall for $10. It was definitley too long for me to handle on the table saw. I’ve never really liked using a circular saw, until I bought this small one from Ryobi. It’s so incredibly easy to use.
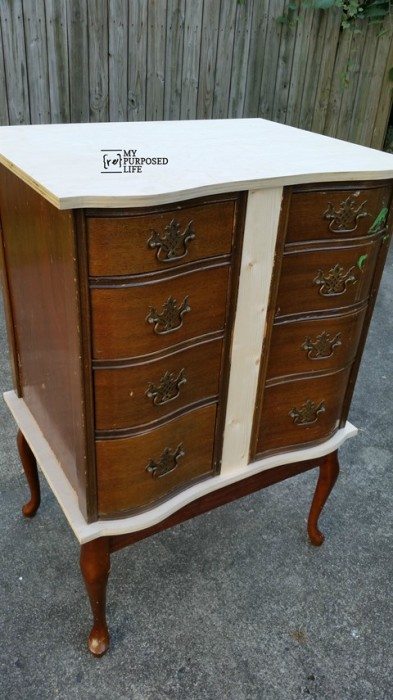
A scrap wood was used to see how it looks with a separator in between the two drawer sections of the upcycled desk.
.  I cut two pieces out of the long sheet of plywood, slightly larger than the table base. The pattern of the upcycled desk drawer sections was traced on the plywood and cut it with a jig saw. I’ve been replacing some of my older tools, and this Ryobi jig saw was one of my most recent purchases. I used a small scroll blade, and my new saw worked so much better than my old saw. I traced the bottom onto the other square and cut it out as well.
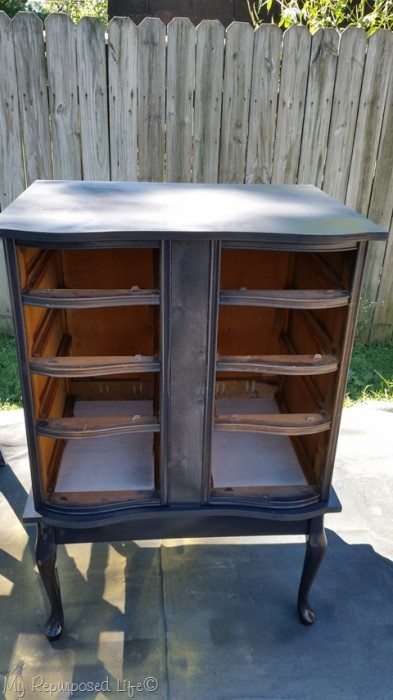
Trim out new chest with plywood
 This is a dry fit to see if it’s all going to come together. Remember, when I started, I really had NO idea what this upcycled desk was going to be.
 ![]()
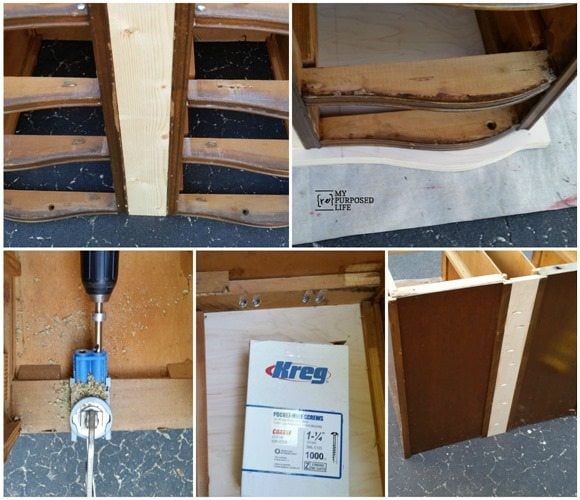
I’ll try to explain how I connected all the pieces. Top left-front spacer was Gorilla Wood glued and nailed (nail gun) Top right-the top was attached using the original screws and holes in the frame of the drawer sections. In the Bottom left image-I added Kreg Jig pocket holes to the bottom of the drawer sections to secure them to the lower base. Bottom middle- I use so many pocket hole screws, I buy them by the 1000’s on Amazon. Bottom right-I used my Kreg Jig to make pocket holes to get a really secure connection on the back spacer. (I didn’t want to try to make the front spacer pretty after filling holes, that’s why I used Gorilla Wood Glue and nails on the front) I took advantage of all the original holes and screws that I could.
Whoa! This upcycled desk project is better than I imagined it would be. Earlier in the day, I seriously considered scrapping this project, and worried what I was going to do for my Thrift Store Challenge!
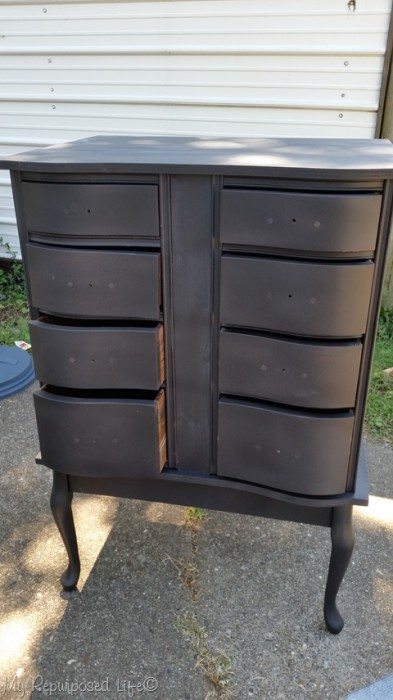
Paint newly constructed lingerie chest made from an upcycled desk
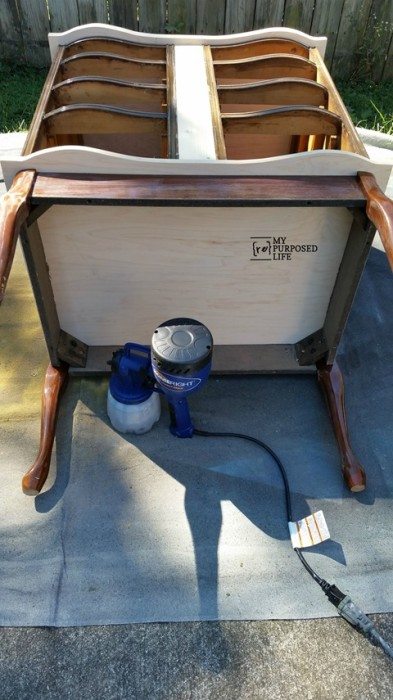
Now, a Homeright thrift store challenge has to include a Finish Max, right? This upcycled desk project is perfect to show you how little overspray is involved with the Finish Max.
Notice how overspray is kept to a minimum. Very little paint on the drop cloth and minimal on the inside of the drawer sections. This is after one coat of my infamous DIY chalky paint primer.
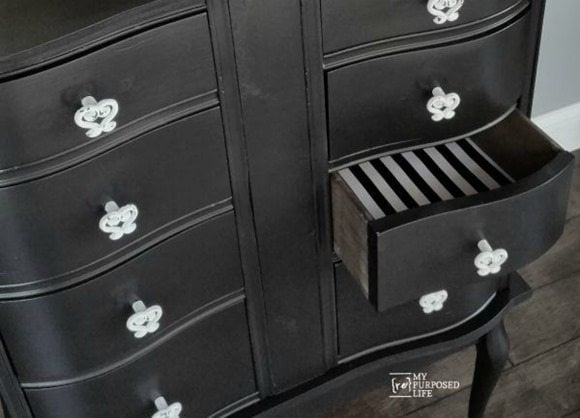
 This is how I painted the top of the upcycled desk drawers. I used a piece of scrap luan to keep the spray from getting inside the drawers. Not shown, I also used this method for the sides of the drawers by holding the scrap piece vertically. Also not shown, I patched the original holes and drilled a single hole for knobs.
This is after two light coats of the DIY chalky paint primer. I had to tackle those original holes again with some more mud and sanding. Well, truth be told, I struggled with getting them filled in properly. I used wood filler, but ran out, so then I switched to spackling. Was thinking I need to try something else. I used the Finish Max to do two light coats of the same paint, except this time it was semi-gloss without any Plaster of Paris. This is my favorite way to paint.
Finish Max-2 light coats of semi-gloss WITH Plaster of Paris
Finish Max-2 light coats of semi-gloss WITHOUT plaster of Paris. Which means no need to seal with wax or poly.
Add knobs and cute paper
I picked up some knobs at Hobby Lobby and lined the drawers with some cute paper.

Please Save & Share on Pinterest
As always, I like to make my pieces multi-functional. This little lady stands tall at 40” The EIGHT drawers offer a great deal of storage.
I can see this used as a make-up, dressing type table or even in a hallway/entryway for those last minute-run out the door items.
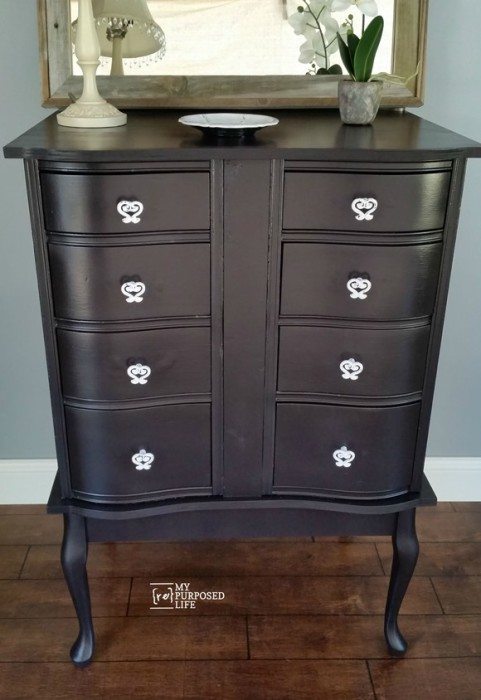
This is where I’m suppose to tell you how much I love it, and it’s my favorite ever! Although it took some time to grow on me with the color, I do LOVE it so much.
You may enjoy these other repurposed desk projects:
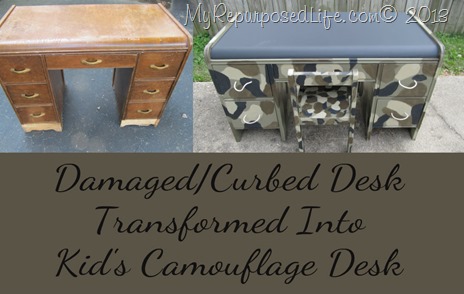
Cut Down a Damaged Desk to make it “Kid Sized”

Old desk Made into a Lingerie Chest
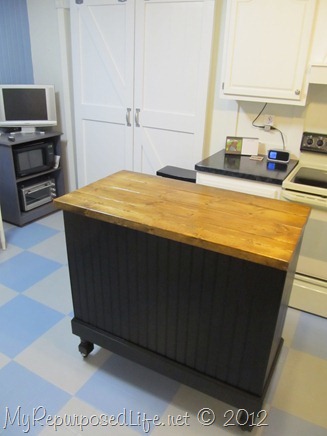
Turn an old desk into a kitchen island
More Repurposed Projects
Remember I said this project was in TWO challenges.
If you LOVE repurposed projects, make sure you check out the sites below:


Rustic Arrow from Her Tool Belt
Reclaimed Farm Tray from Funky Junk Interiors
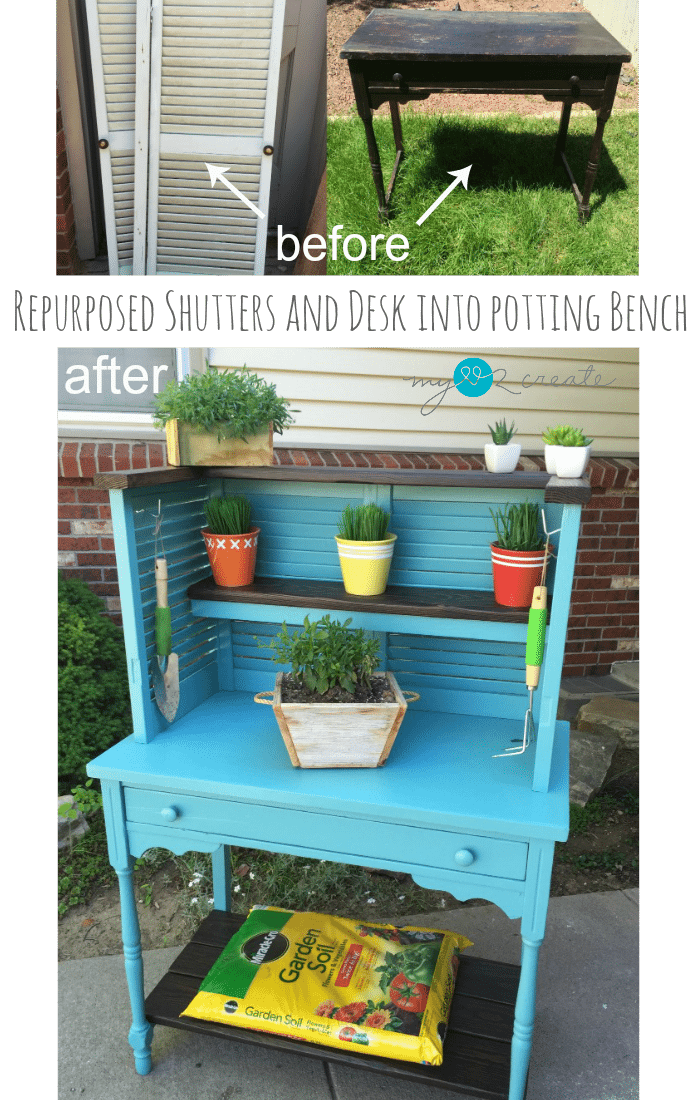
Repurposed Light Fixture Planters from My Love 2 Create
Jewelry Holders from Crafty Chica
Repurposed Desk from My Repurposed Life
Coat Rack made from Hammers from The Kim Six Fix
Repurposed Dresser from Sawdust 2 Stitches
Fun Card Catalogue from That’s My Letter
Here’s the break down of my costs:
- Desk $15, but we’re going to say $10 because I still have the top for another project.
- Lumber 6.65 (for the top and base)
- Table .50 the cost was $1, but I only used half of it.

- Knobs 10.88
- paint (on hand)
- That’s a grand total of $28.03 oops! I went over with the supplies because I was just counting the $15 desk!
I really hope you find some inspiration in all of the projects shared among these two challenges.
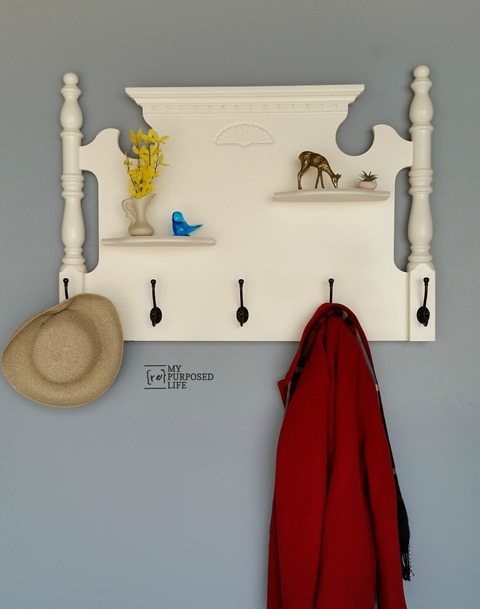
This White Headboard Shelf Coat Rack used the ends of the $1 coffee table.
This Black Headboard shelf utilizes the two long sides of the $1 coffee table.
gail
Related Content: See More Desk Projects Here
sharing at Inspiration Monday (you will definitely be inspired) and Best of 2015 Vintage Inspiration Party
Hi Gail, that is a fantastic makeover! I learn so much from your blog. Thanks!
Thank you so much Debra! Your comments make my day!
gail
Susan,
Thanks for your sweet comment. That’s a great question about the feel of the finished project. In my opinion any and all chalk paint is very flat and rough feeling, that is why it needs to be sealed in some way–to keep it from scratching off. I painted my cabinets FIVE years ago and used semi-gloss paint and have loved them ever since. So, that tells you that I am a big fan of a semi sheen. I’m not a glossy person at all.
The best advice I can give you regardless of what road you take is PATIENCE. Paint takes a long time to fully cure. I left my cabinet doors off for a long, long time to allow that natural process to take place.
As far as I know, wax over chalk(y) paint would get you back in business the fastest, but it’s a LOT of work. I would recommend using a buffer instead of doing it by hand.
Poly would be great too, but it’s a little tricky and may yellow the color slightly. (if a light color is done)
If I were to do cabinets again, I would probably do them the same way I did back in the day. It was a lot of work, but it’s held up soooo well. You can see my tutorial here: https://www.myrepurposedlife.com/2010/12/how-to-paint-oak-cabinets.html
I sure hope some of this rambling helps you make a decision.
good luck!
gail