Repurposed Vintage Coffee Pot Lamp
As an Amazon Associate, I earn from qualifying purchases.

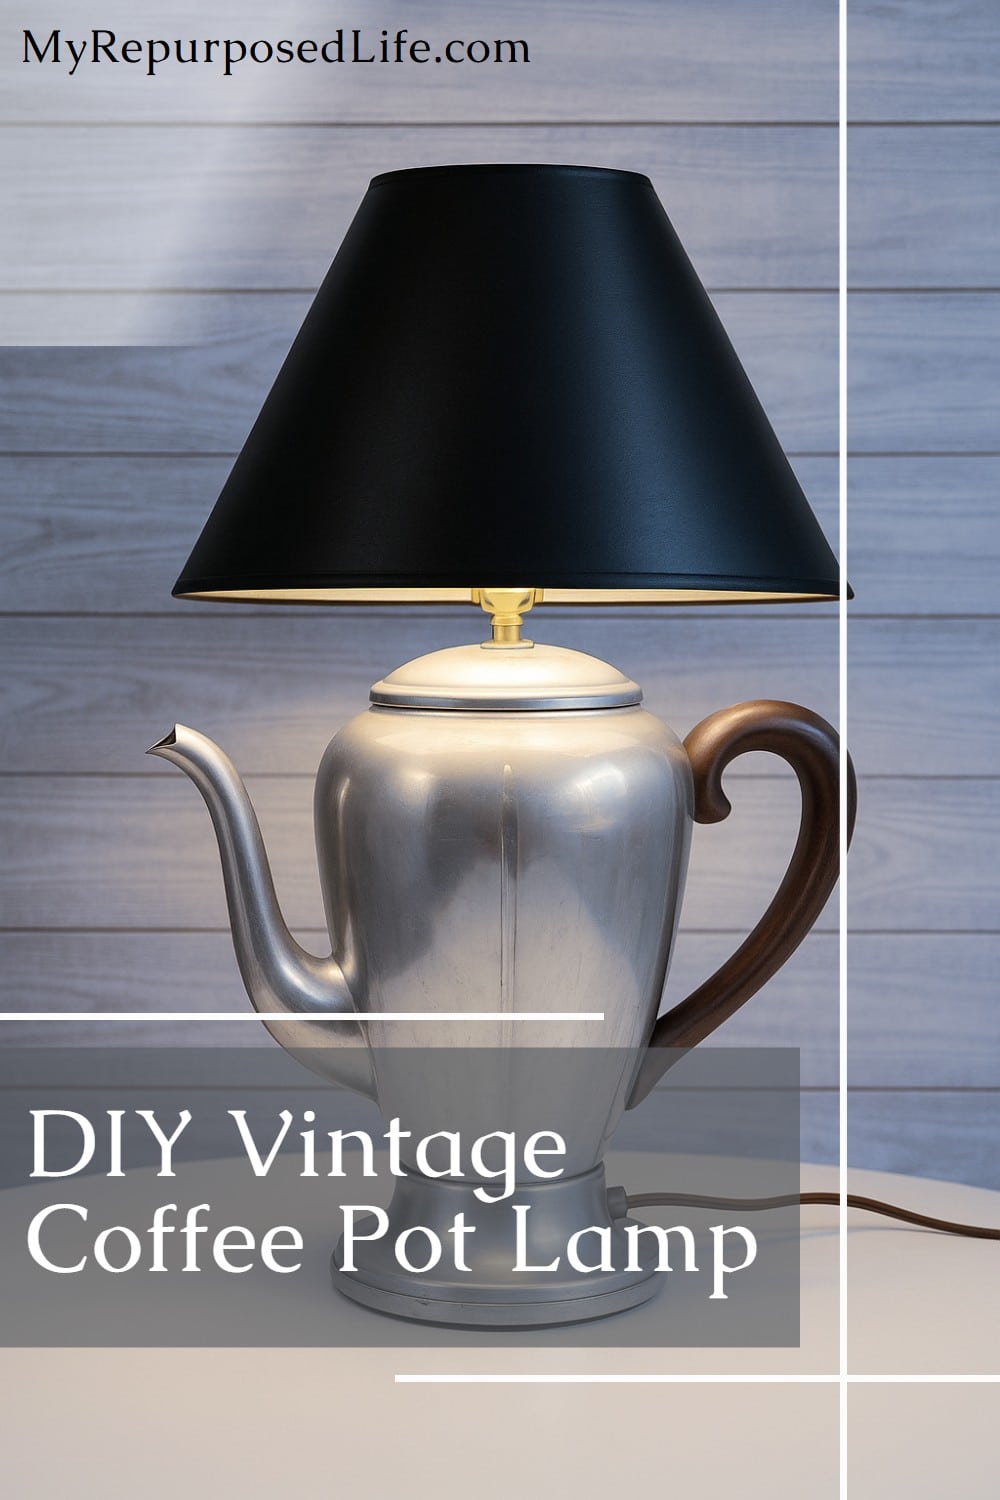
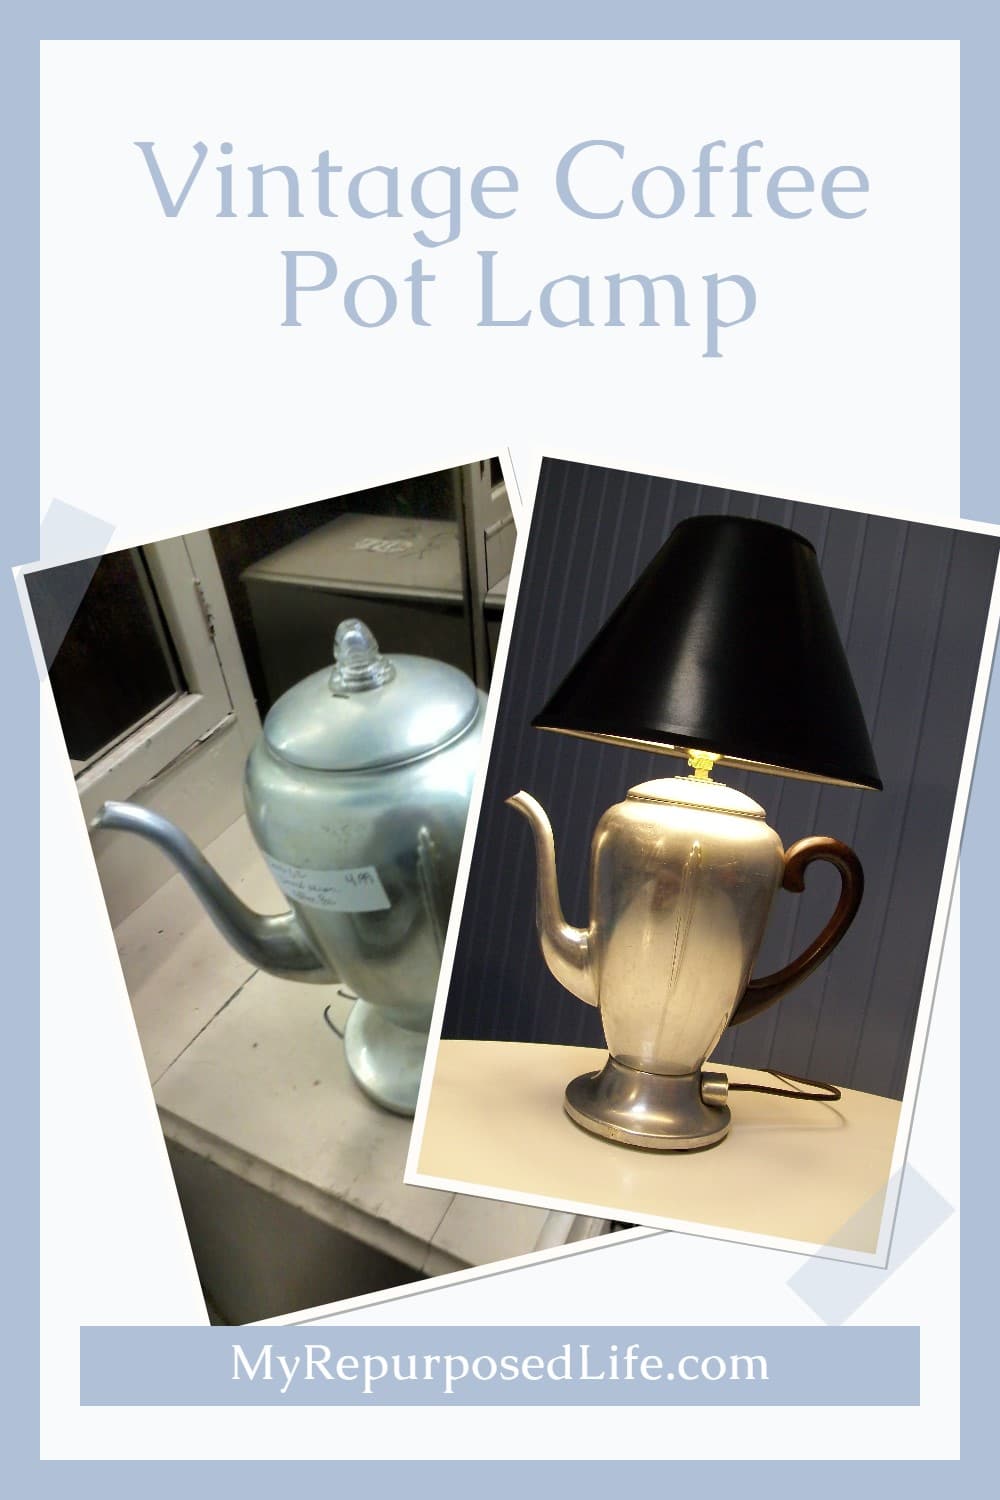


A vintage coffee pot can easily be transformed into a unique table lamp with just a few simple supplies. What was once a kitchen staple becomes a conversation piece, combining nostalgic charm with practical lighting. This clever repurpose shows how a little creativity can turn an old coffee pot into something truly special.
Have you ever wanted to know how to make a coffee pot lamp? With these step-by-step directions and a little patience, you can repurpose a thrift-store coffee pot in no time!
Repurposed Vintage Coffee Pot Lamp
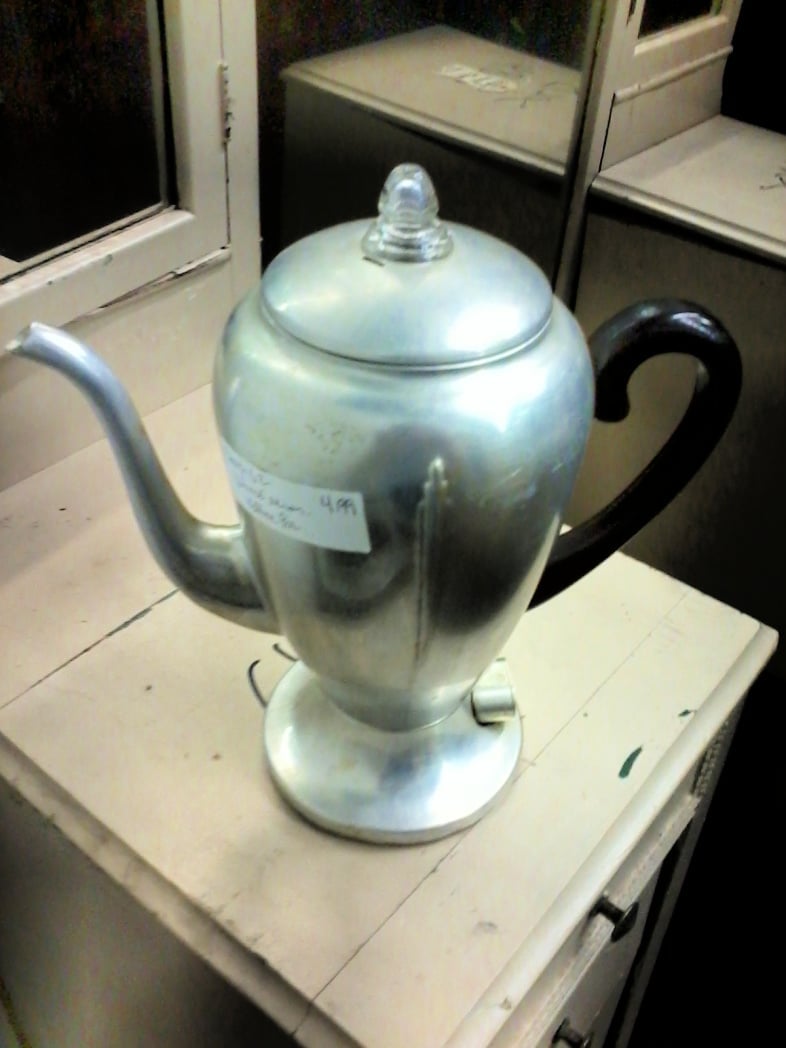
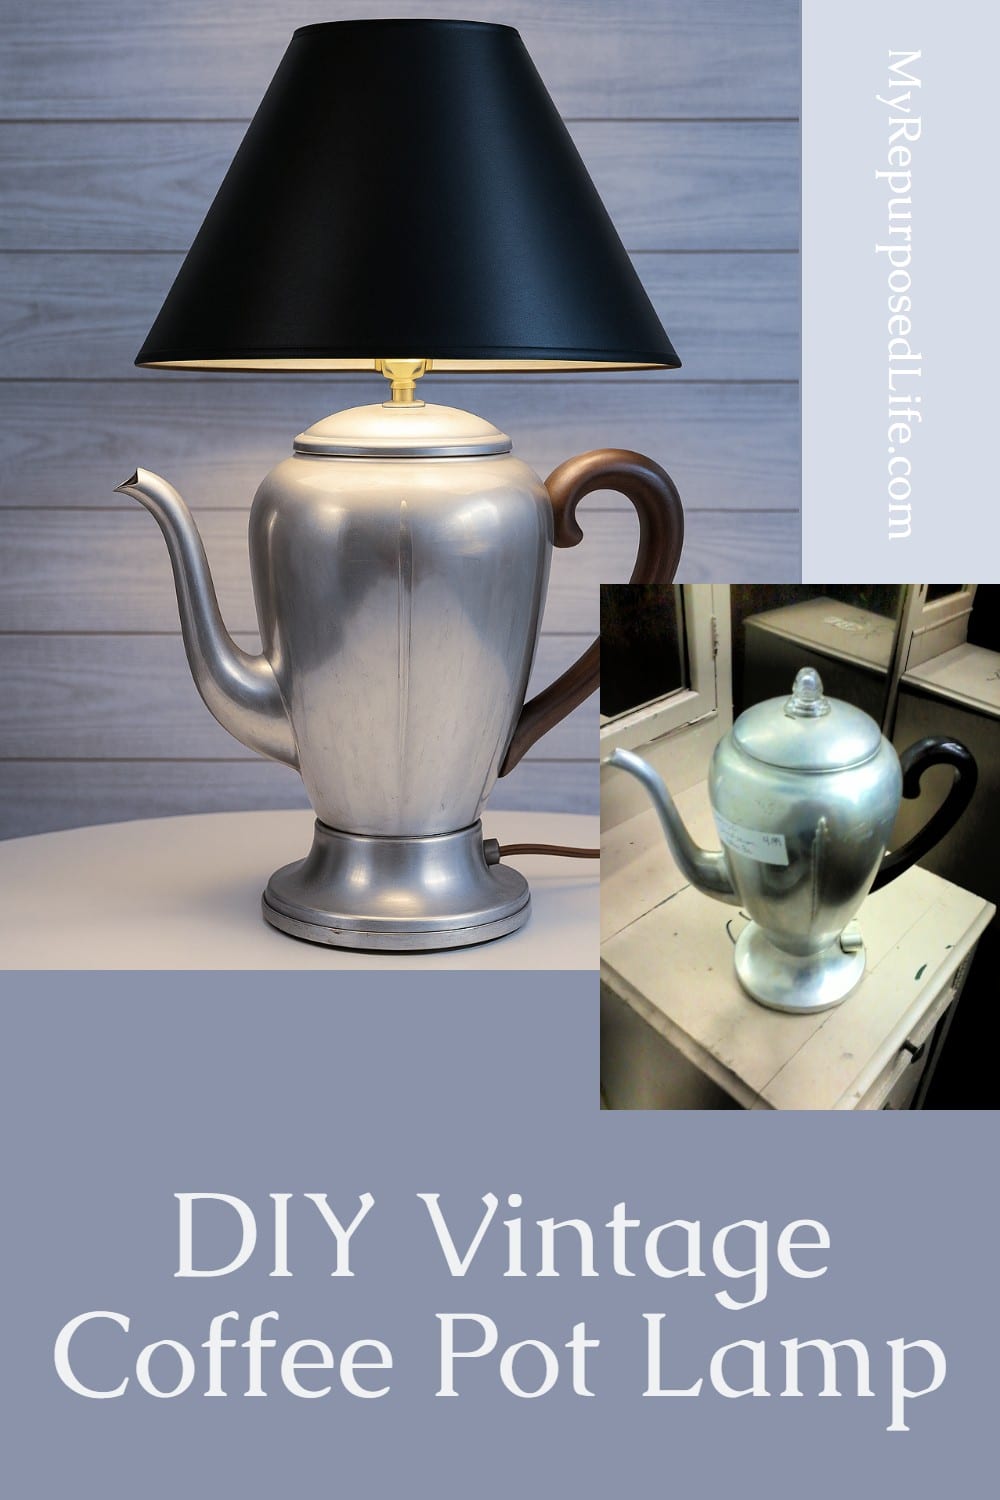
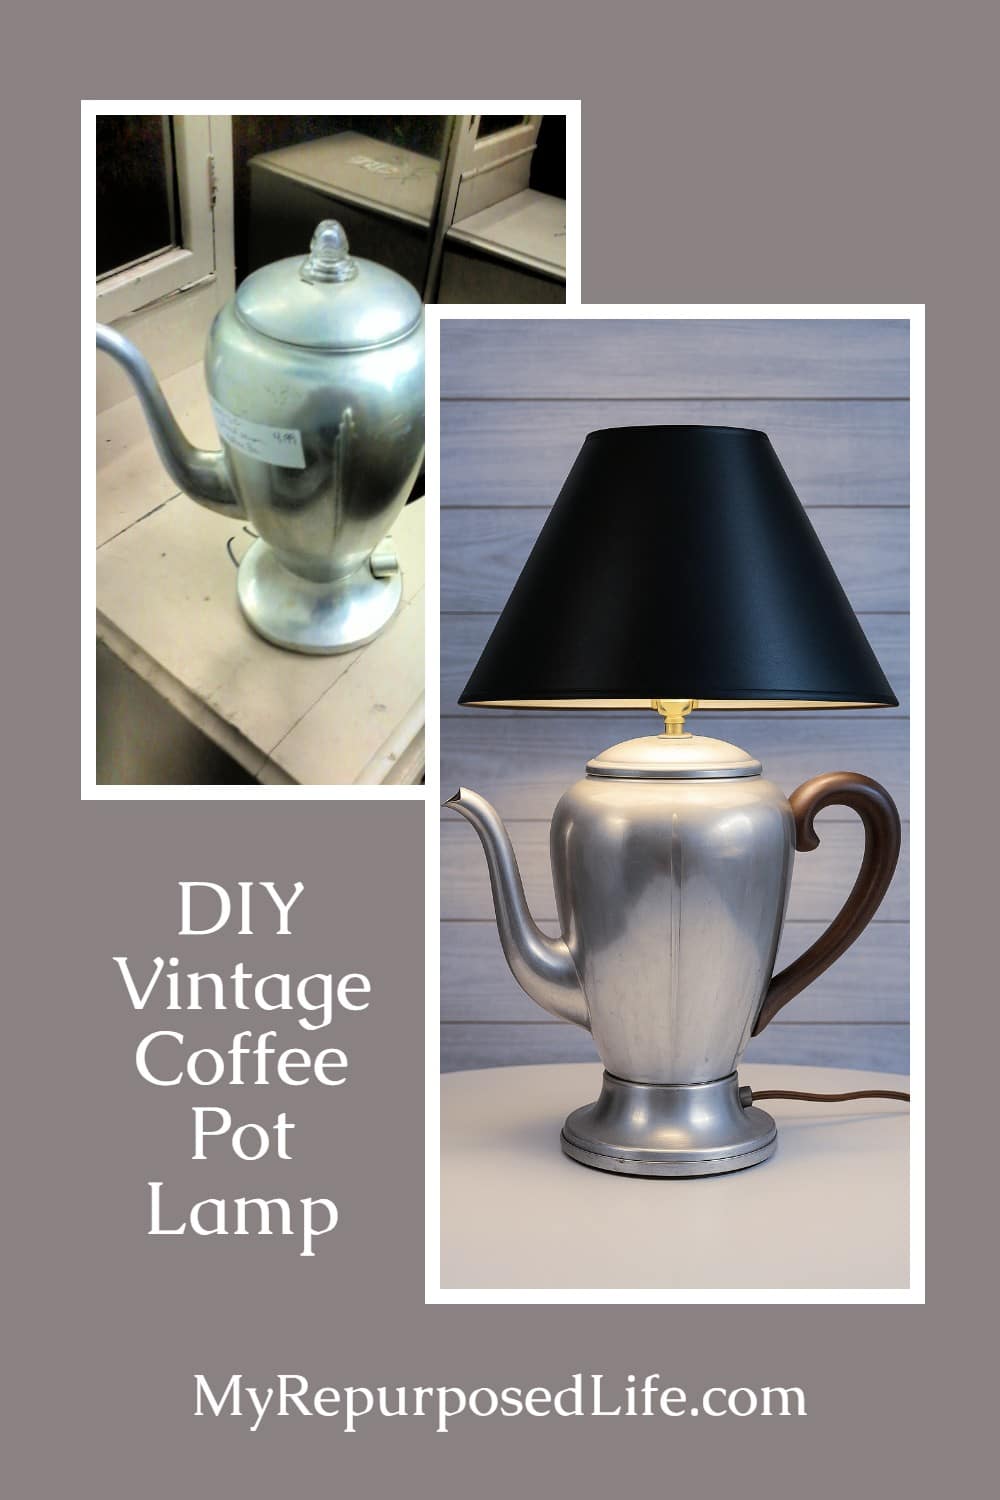
Do you remember this coffee pot I just had to have? If you’re new around here, I saw this at a local Peddler’s Mall, and I didn’t get it. I kept thinking about it and returned to get it a week later. See the sticker? $4.99. I have a $5.00 limit on my thrift finds. Having that limit keeps me from “impulse” buying. If it’s more than $5.00, I don’t even have to think about it. NOTE: I will generally go up to $7.00 if it is a purchase for me personally.
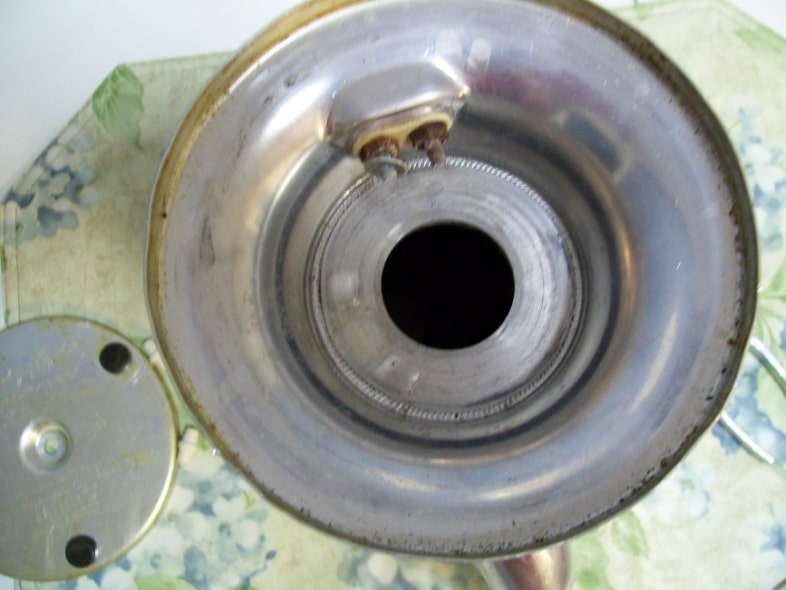
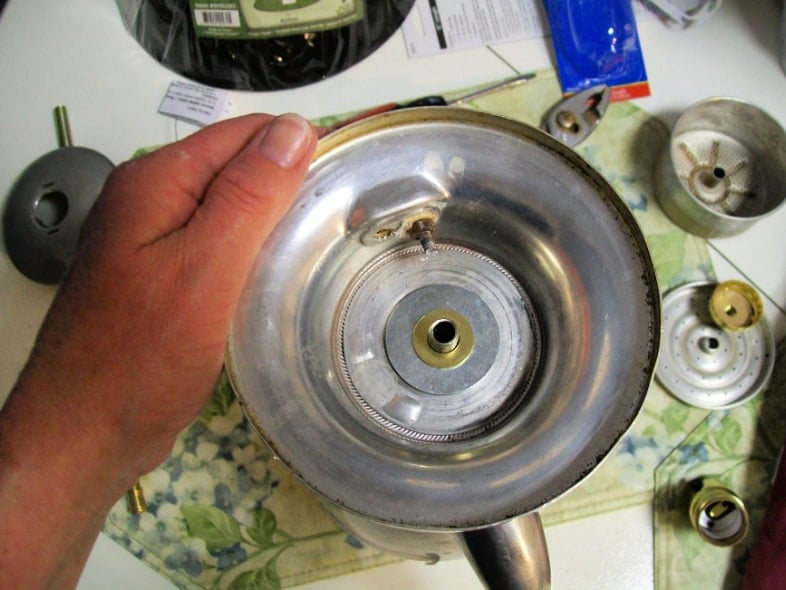
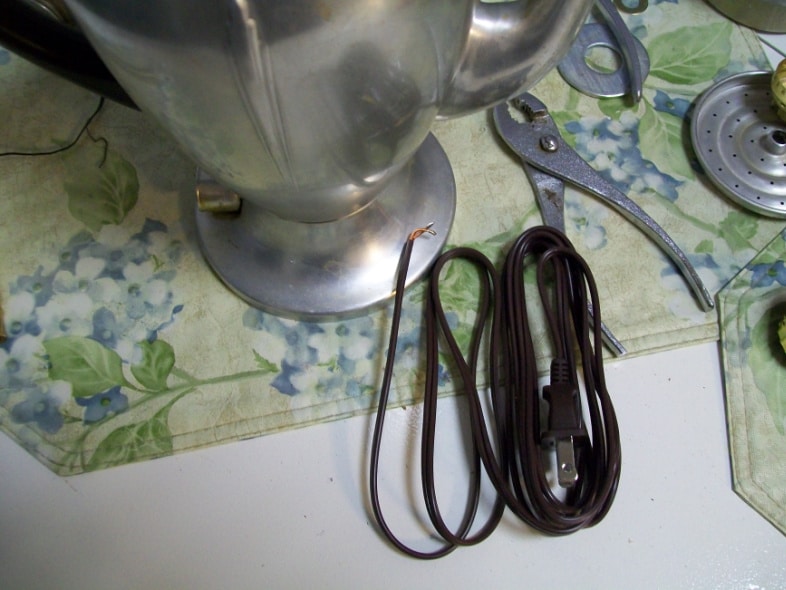
Dismantle Vintage Coffee Pot
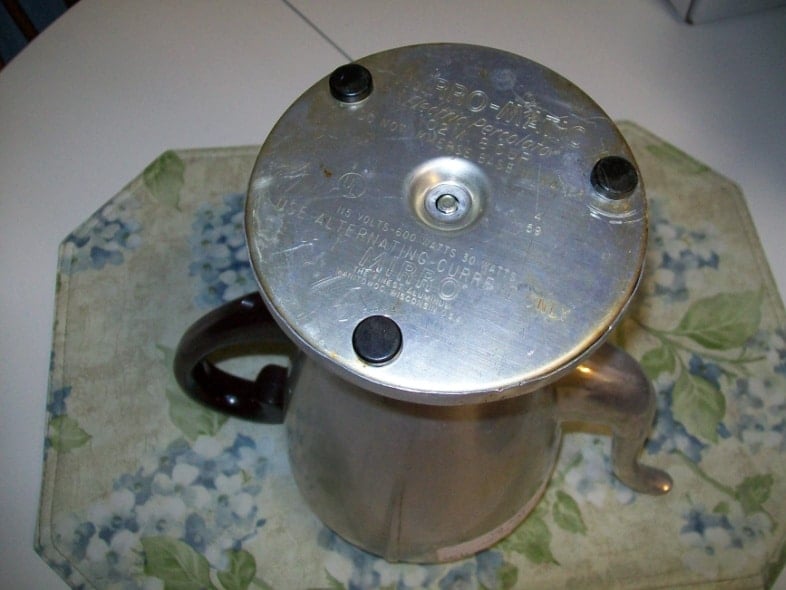
The first step is to dismantle the vintage coffee pot. At first glance, I thought it would be pretty simple.
Remove The Base

Then I ran into all of these connectors and electrical parts at the base when I removed the base plate.
Dismantle Electrical Parts
No match for Gail!
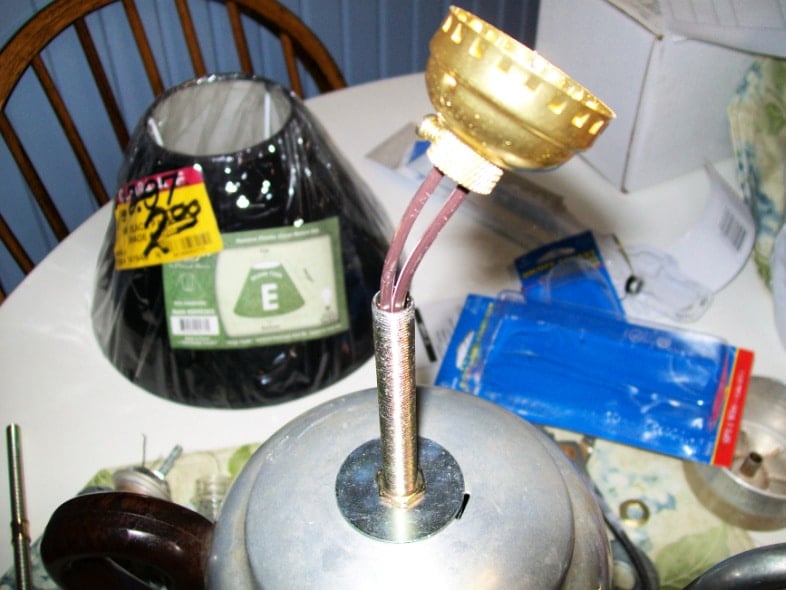
Lamp Kit Parts
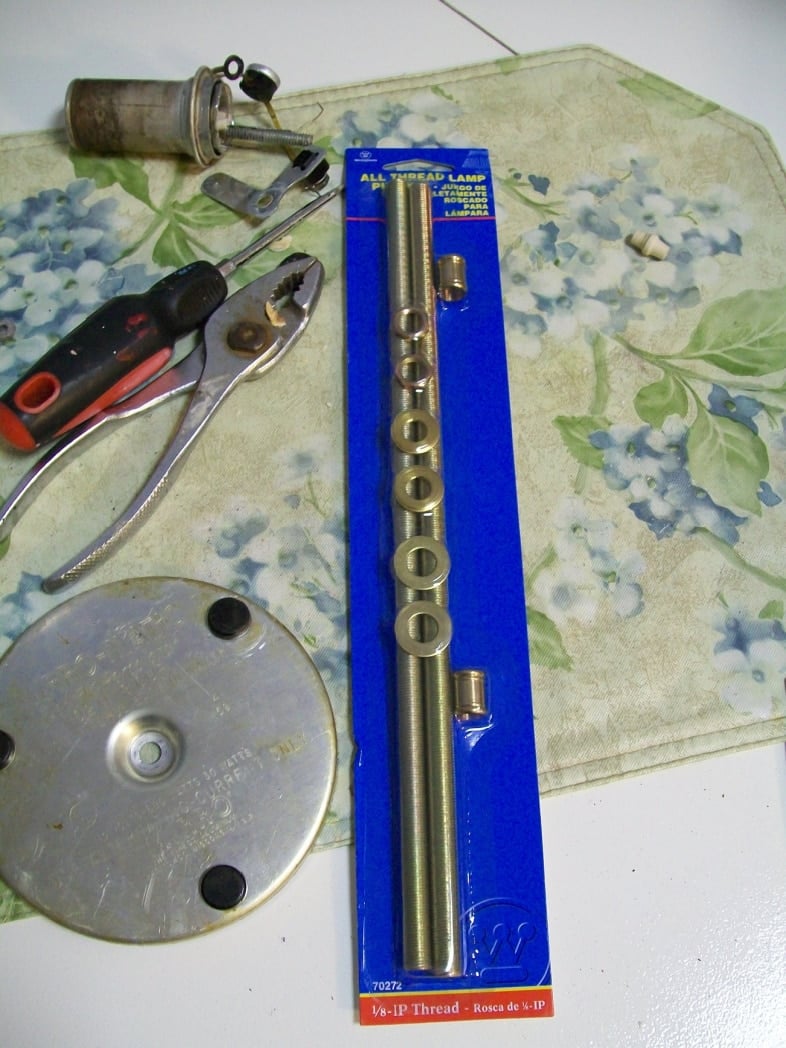
I decided to go all out and buy new parts for this makeover. You could easily use old lamp parts. Buying lamps at yard sales or thrift stores is a great way to collect all the parts you need for this coffee pot lamp.
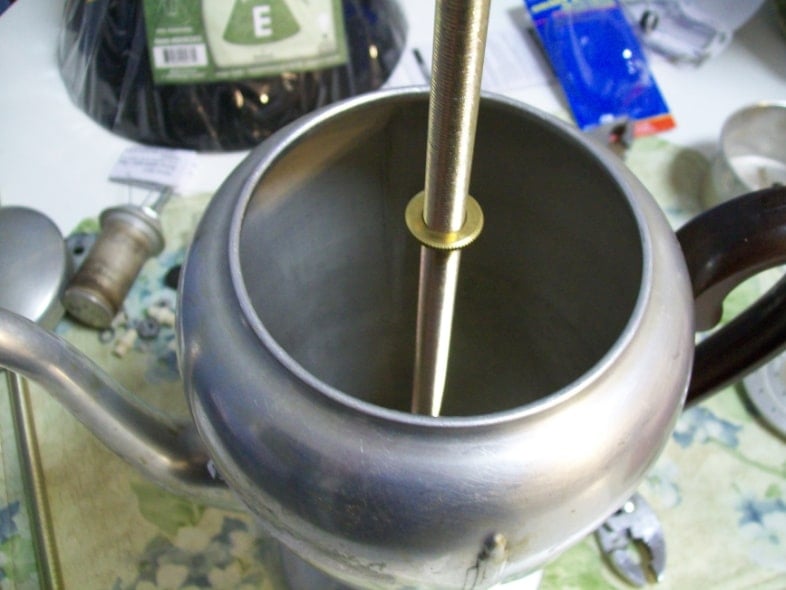
Thread Spacers And Washers On The Lamp Kit Rod
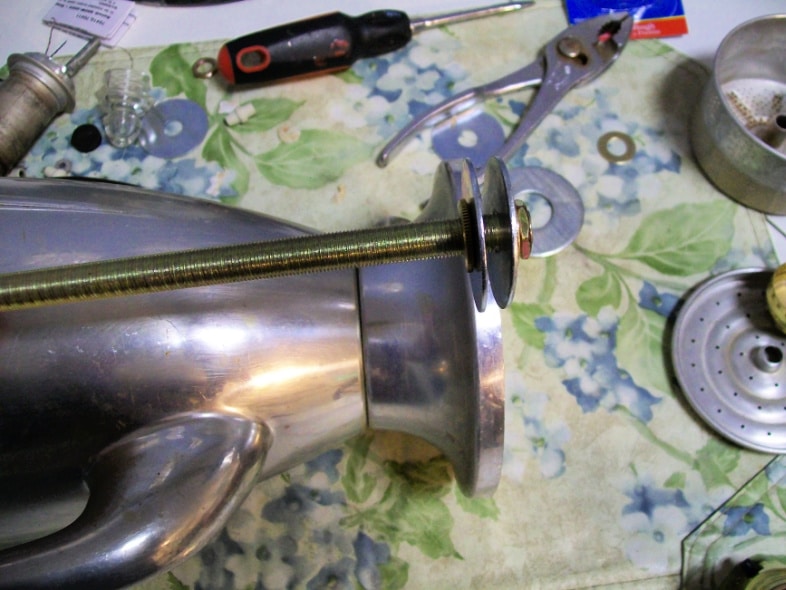
This is threaded to show you how I got it to stay in place. Imagine the bottom of the coffee pot is actually between the two washers.
I like the lamp kits with threads all the way down the rod. The nice thing about a continuous thread lamp kit rod is that you can thread parts anywhere and cut off the excess.
Insert Lamp Kit Rod Into Vintage Coffee Pot
You can see that the washer keeps the rod in place.
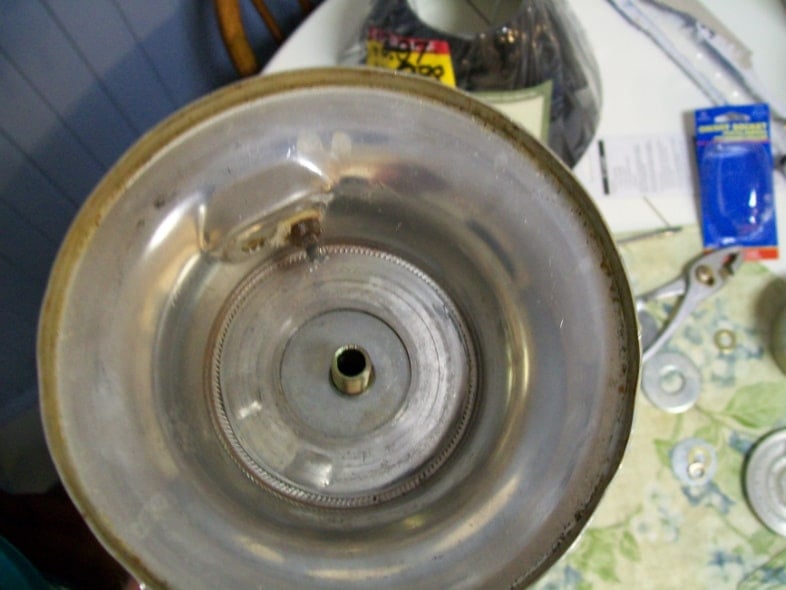
Add Washers As Needed To Reassemble Coffee Pot
I placed another washer and a smaller washer that came with the lamp kit. (not shown; I added a nut to hold it all in place.)
This threaded washer will hold the rod in place on the inside bottom of the coffee pot.
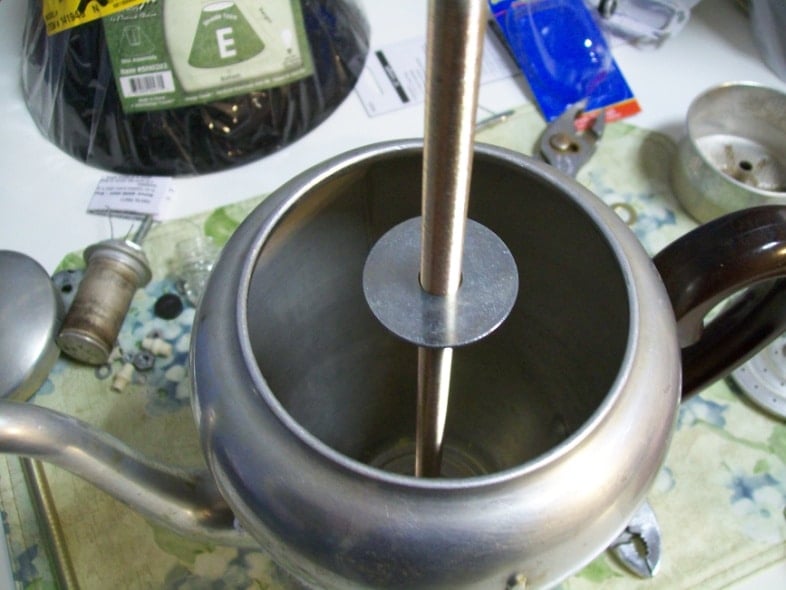
These large washers were handy to secure the lamp kit rod.

This allowed the pot’s top to rest on said washer.
Another large washer and a nut were added to secure everything in place.
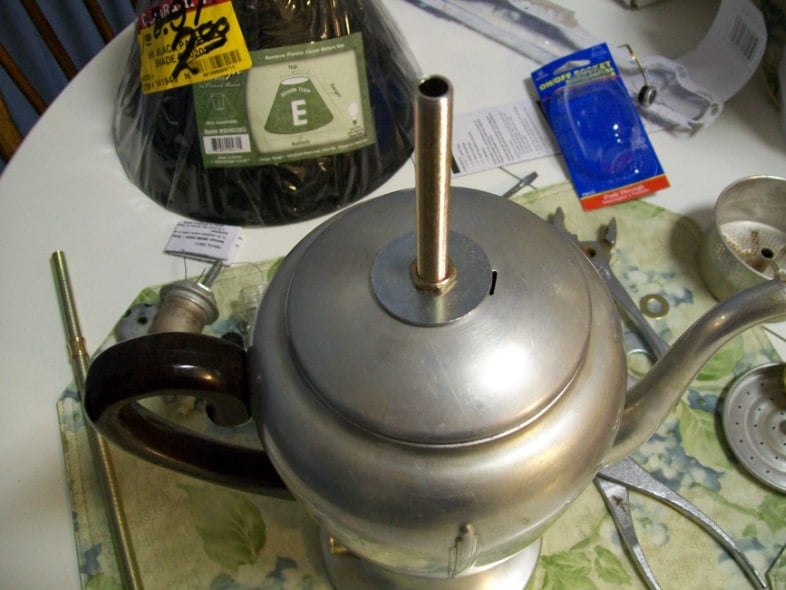
Wire Vintage Coffee Pot Lamp
A new wiring kit was used for this, but remember you can easily use reclaimed wiring from current lamps — nothing outdated or worn.
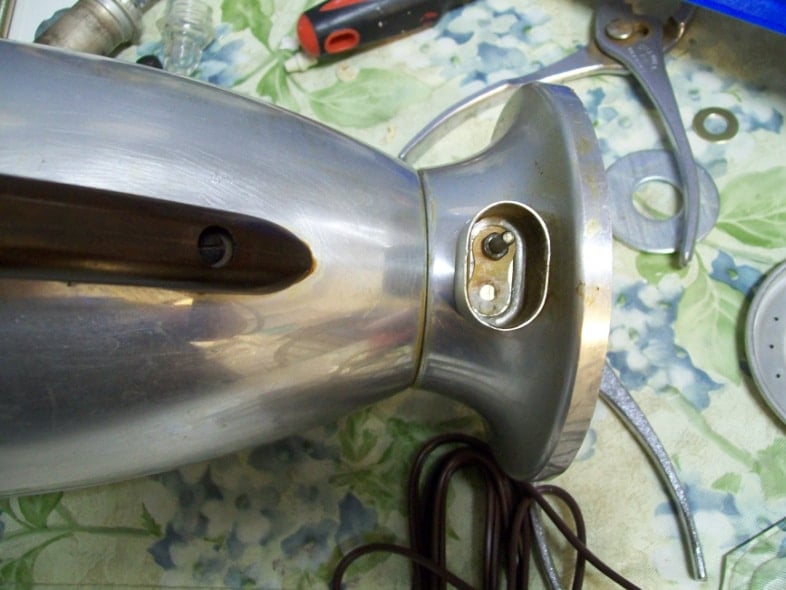
I was unable to get both of these “pins” out. I could tell you I left it on purpose, but I like to keep it real. It’s not shown here, but I drilled out that small hole to make it large enough for the cord to thread through.
In the spirit of “keeping it real,” I wired this lamp about seven times. Each time I wired it, the rod was too tall. I took it apart, trekked out in the 100+ degrees, and cut it again. I seriously can’t believe how many times I put the jigsaw away, KNOWING it was right THIS time! You can see that lampshade in the background. It wasn’t the best choice, but it’s really all I had. It was a yard sale find earlier this summer.
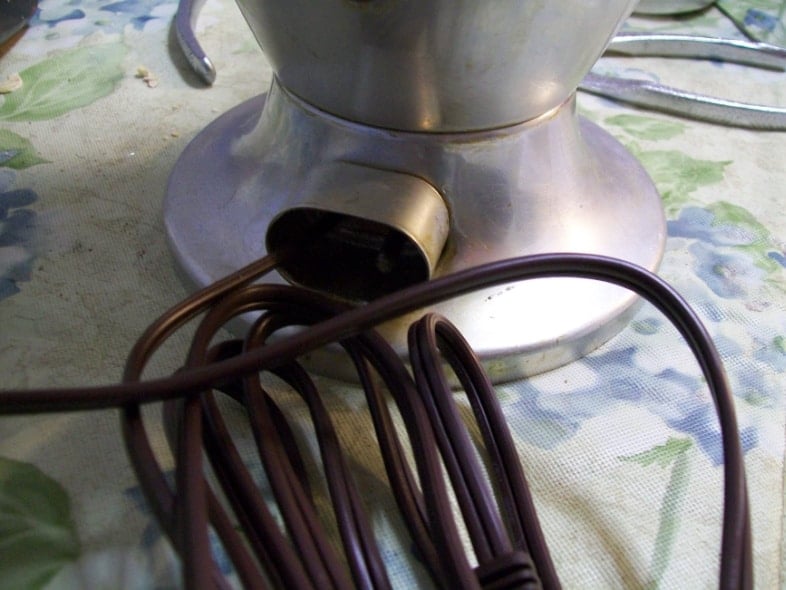
Isn’t it neat how the cord comes from the original cord area? It’s the little things that make me happy.
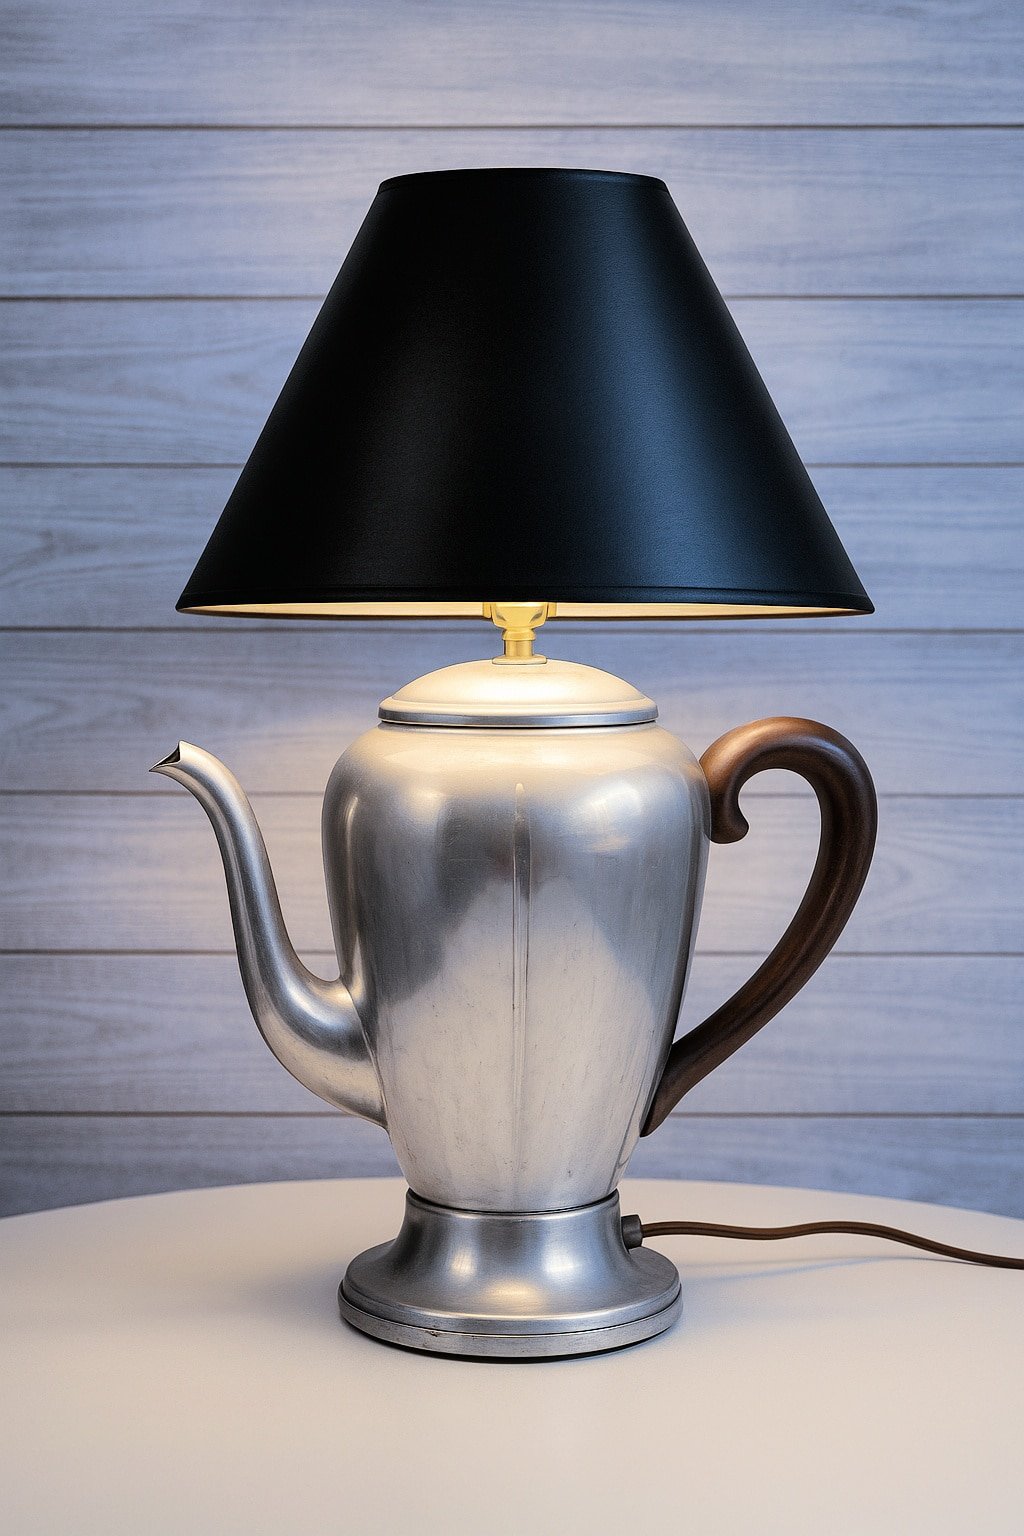
Vintage Coffee Pot Lamp
Isn’t she cute? I have no idea why I have such a love for this repurposed vintage coffee pot! I think it’s just too darn pretty! Would you like to know a piece of trivia about me? I have NEVER had a single cup of coffee. Can you believe that? I’m a Coca-Cola girl.
If you like unique lamps, check out my teapot/teacup lamps. I made one for myself and painted it with spray paint in the post “Teacup Lamp, How to Drill China.”
See more repurposed lighting ideas here
Check out Lindy’s Blog and HER coffee pot!
Related Content: Make a Railroad Tie Lamp
OMG! I”m in love with your coffee pot lamp! When you first showed the pot and said you didn’t get it I was so disappointed, then happy when you went back and got it. The lines of it are so pretty. I would probably just have set it on a shelf to look at, but seeing the lamp you made I can’t believe how perfectly cute it is! Never would have thought that coffee pot could be improved upon, but leave it to you to come up with a better use for it. This is my new all time favorite from you!
BTW I started drinking coffee the year I turned 30, figured I better start acting like a grown up at some point, lol.
Hi Gail,
This is my first visit here, I found your site through the Top40 Sil site.
What a terrific re-purpose, right up my alley – I do a lot of re-using, only not good with fiddling with innards of items and such. I’m going to follow you I think.
I also have begun giving away some templates for silhouette if you’d like, for free! I’m ♥ing my machine, only had it for a month and already can’t imagine what life was like before I had it.
Hope you have a great week!
~ Barb
lalalime.blogspot.com
I love this! It looks like it was always meant to be this way. Great tutorial!!
What a super adorable lamp. I need to make some thing like this for my scrap room.
Sharon
You rock Gail! This is sooooo awesome, I want one! I will have to find out, if I can get a good deal for the Silhouette in Canada, my birthday is coming up soon ;o)
Sue
That’s too funny. Now I know what to do with mine after the fire. I’m gonna update my post and link back to you. Hope that’s ok.
Lindy
That is the ooolest lamp! i do like coffee – but just one cup a day is good for me. After that it’s iced tea all the way, especially during these hot summer days.
No wonder this has shown up on Pinterest already…it is freakin’ adorable! I…must…have…one! It would go perfect on my kitchen hutch thingy. So add another thing to my “must find” list.
Seriously, you have out done yourself.
WOW! I’m not a coffee drinker either but I’m loving that lamp! Great job!
Holly
Ok Ms. Gail, you are the QUEEN of repurposing. I wish you lived next to me. I know I’ve said that to ya before. You have some MAD skills my friend : )
Great job, Gail!! I love doing the ‘lamp makeover’! For your future lamp projects: you only need about 1/2″ of lamp nipple (threaded rod) at the top to finish, but of course you know that now!! I pick up a lot of lamp parts and pieces at my local Re-Store, a veritable goldmine for stuff! The shade looks great, matches the handle.
I REALLY like this. My grandma has a handful of those (an no cord for any of them). Maybe I can sneak one to make her one of these 🙂
She’s a tea drinker and collects tea pots, but this is CUUUTE!