Repurposed Vintage Coffee Pot Lamp
As an Amazon Associate, I earn from qualifying purchases.

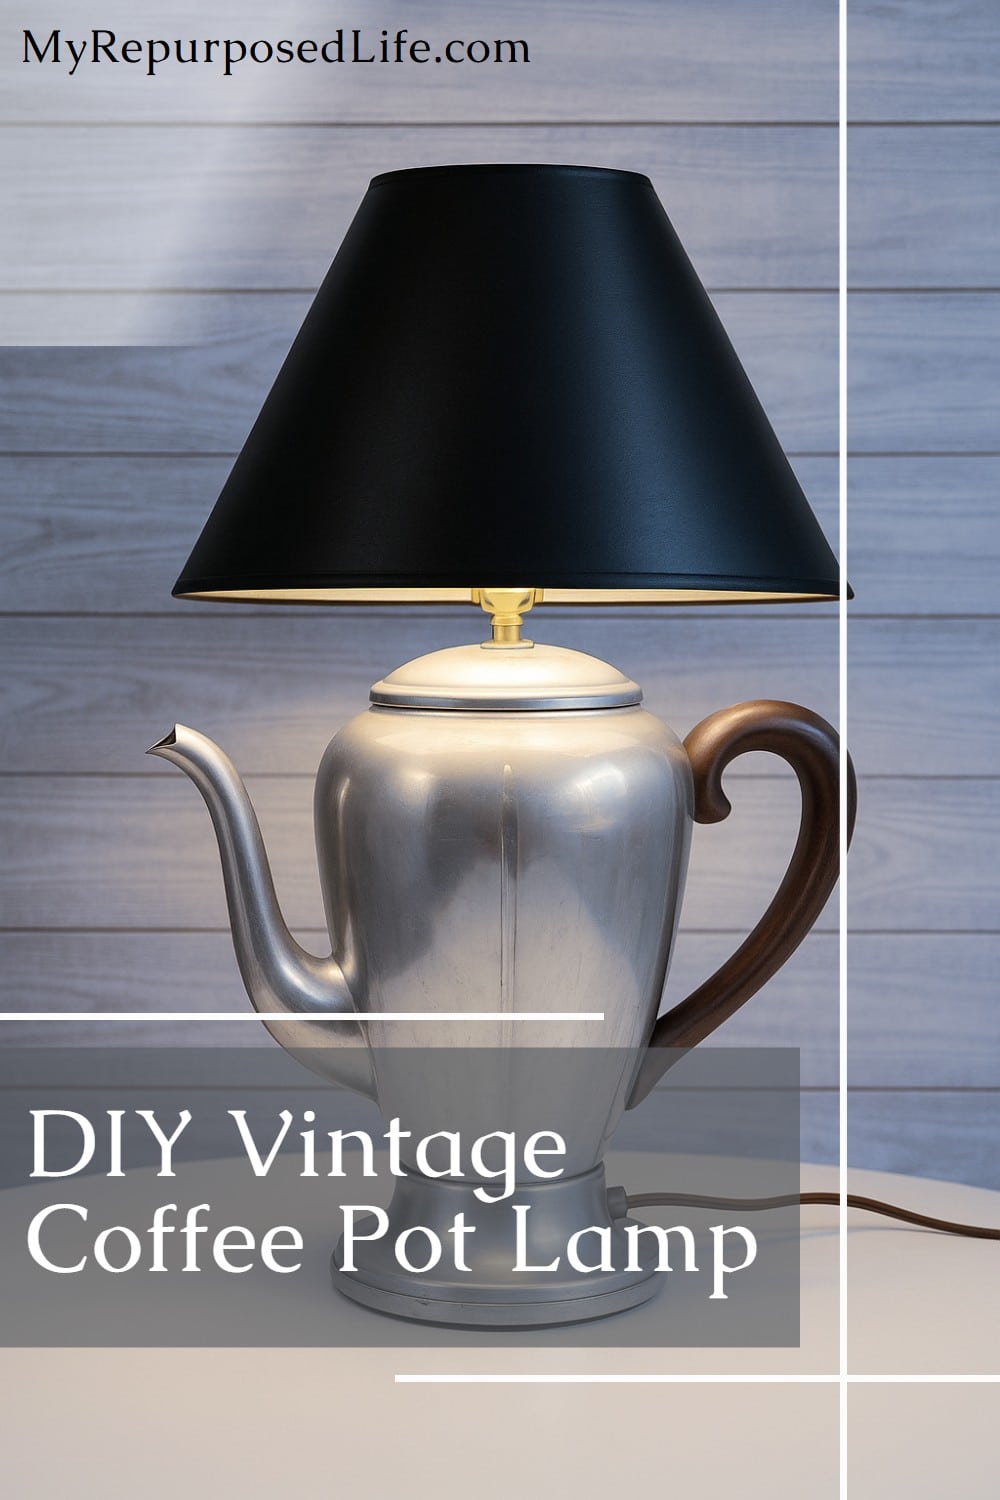


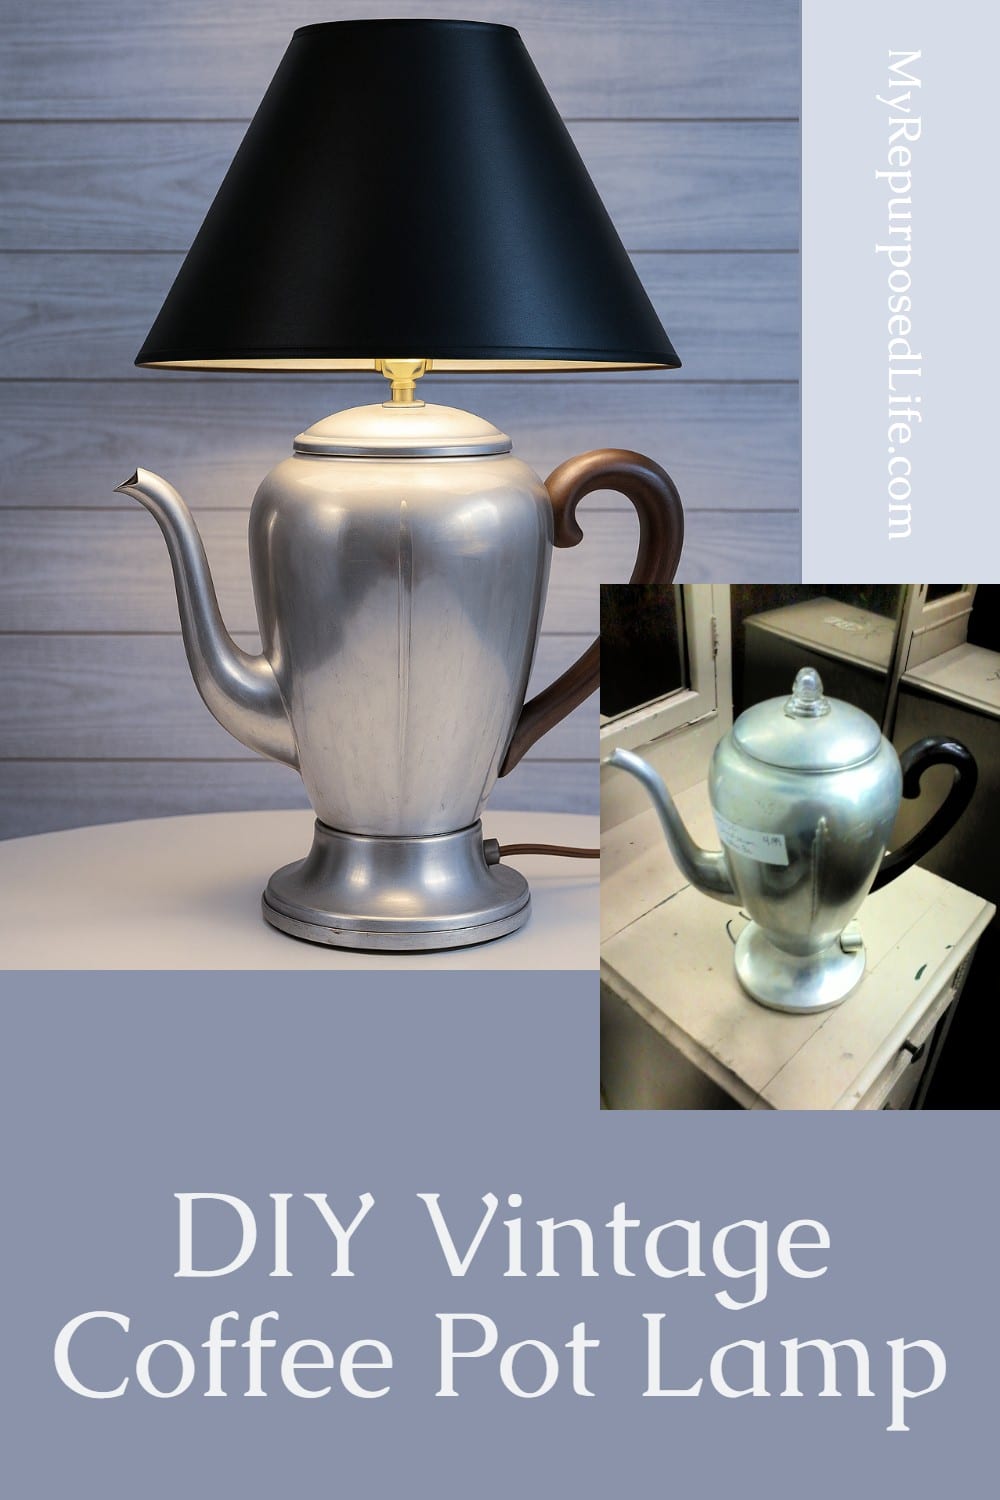
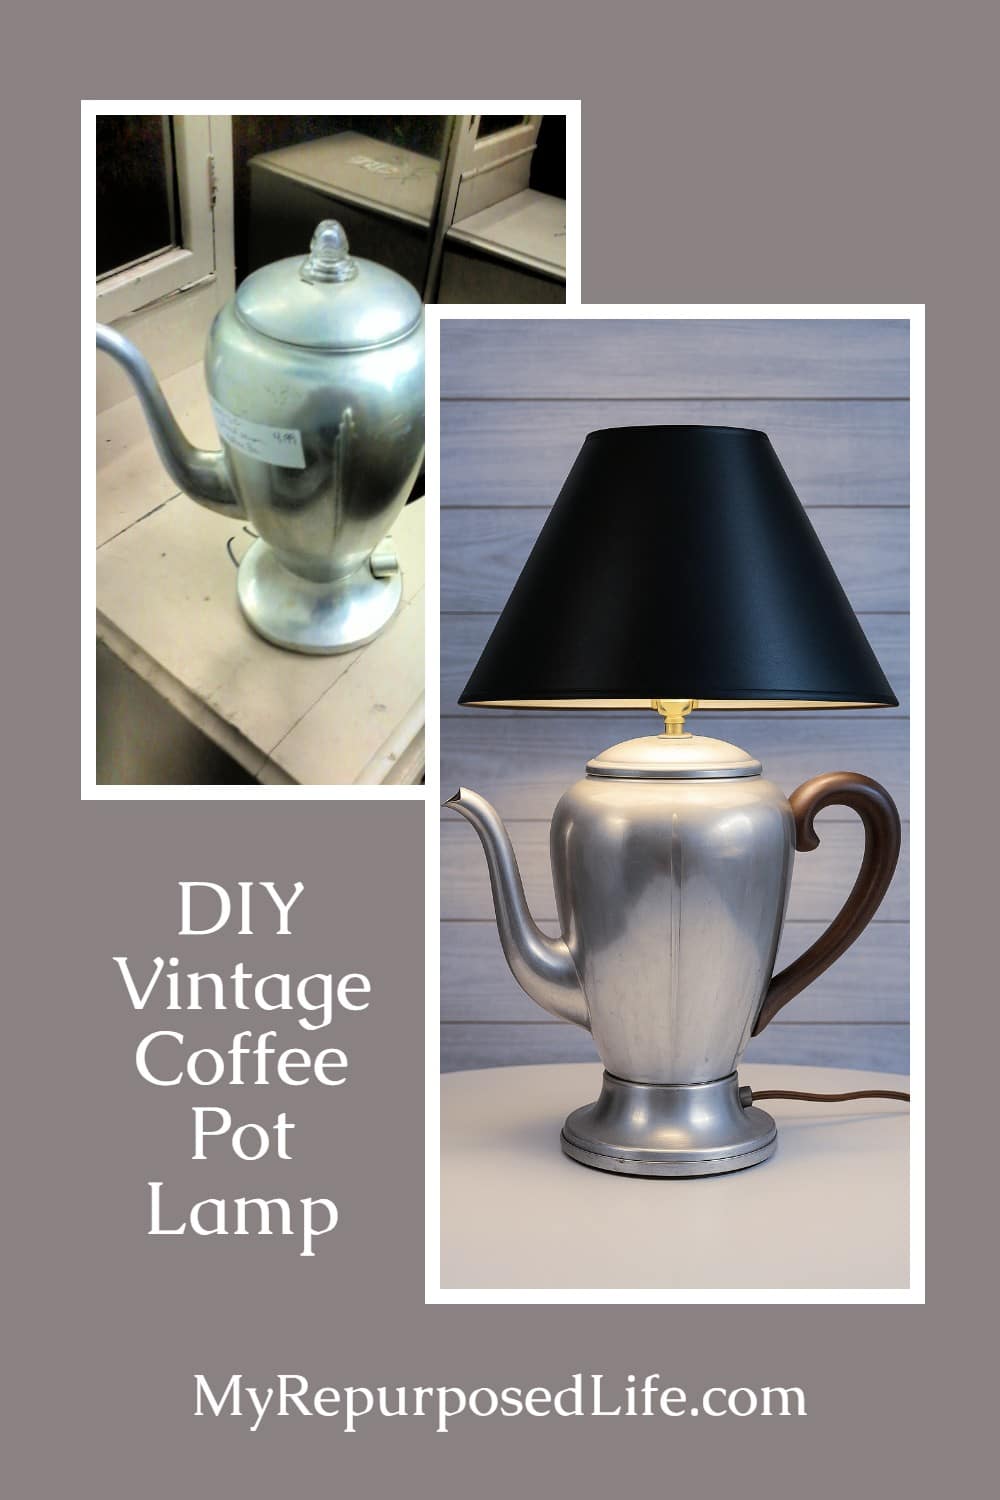
A vintage coffee pot can easily be transformed into a unique table lamp with just a few simple supplies. What was once a kitchen staple becomes a conversation piece, combining nostalgic charm with practical lighting. This clever repurpose shows how a little creativity can turn an old coffee pot into something truly special.
Have you ever wanted to know how to make a coffee pot lamp? With these step-by-step directions and a little patience, you can repurpose a thrift-store coffee pot in no time!
Repurposed Vintage Coffee Pot Lamp
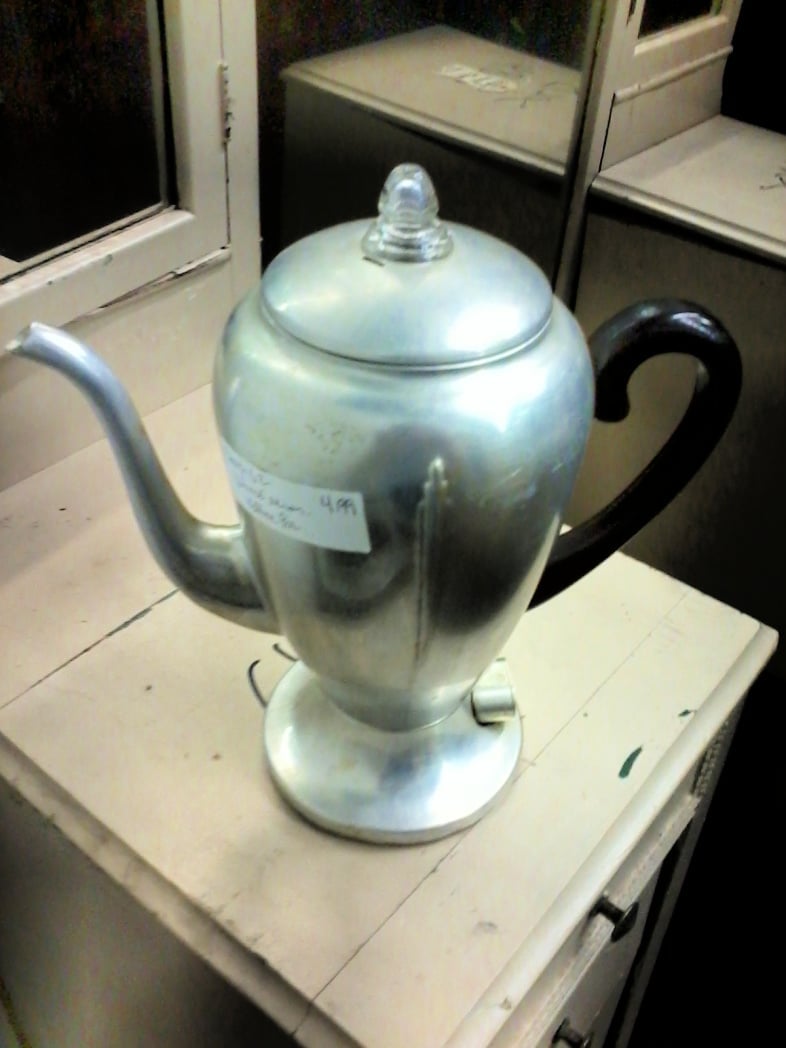
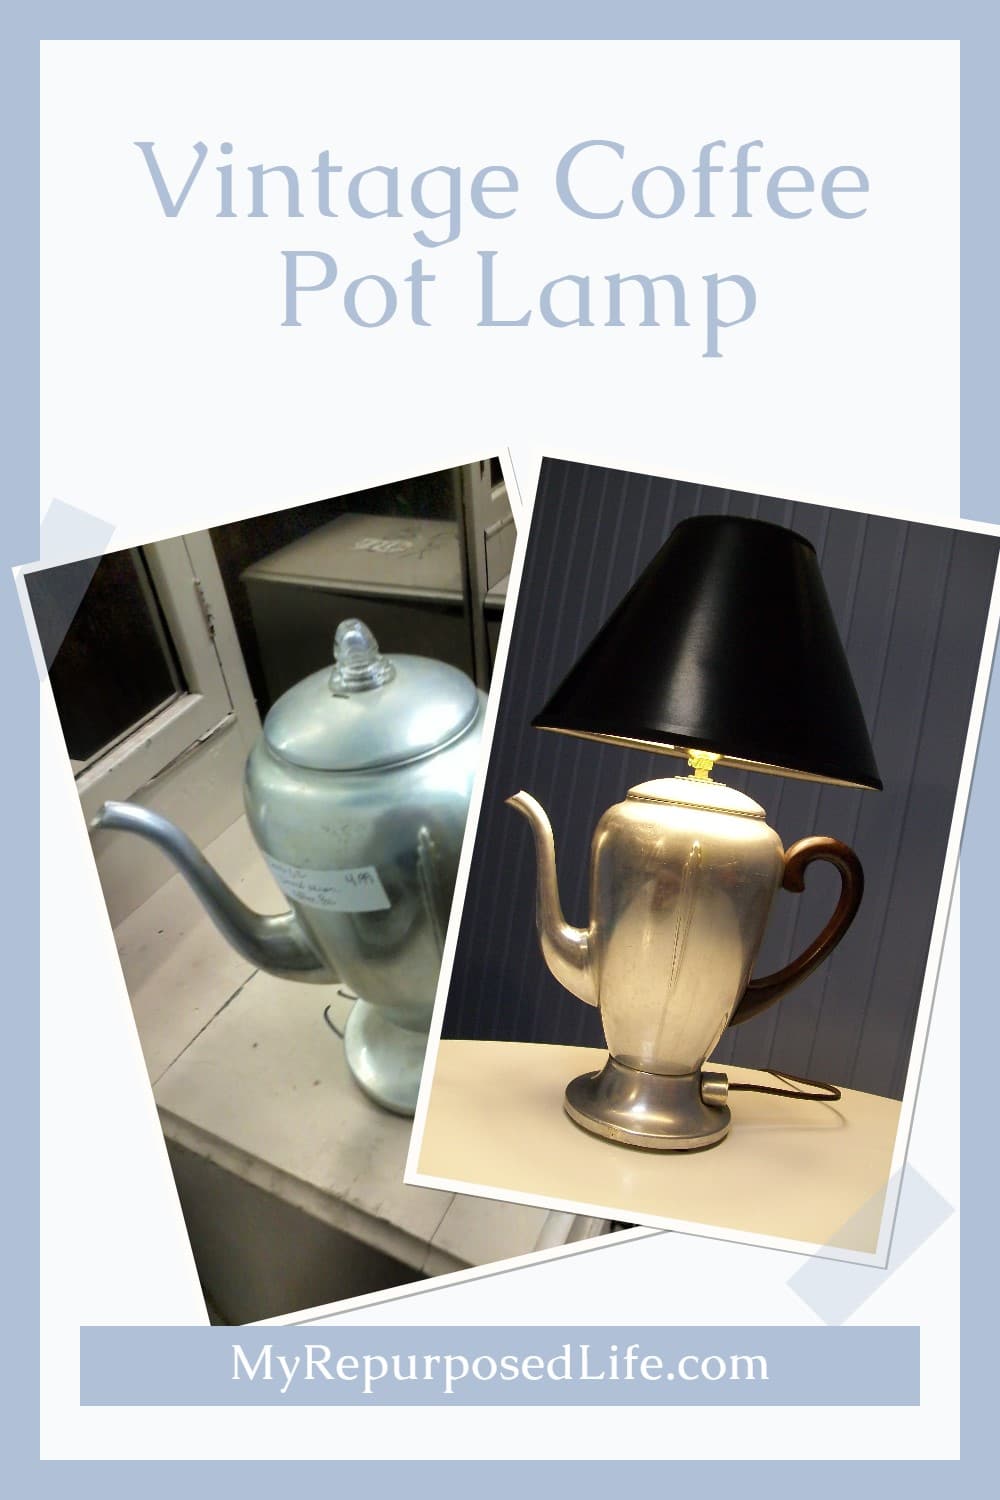
Do you remember this coffee pot I just had to have? If you’re new around here, I saw this at a local Peddler’s Mall, and I didn’t get it. I kept thinking about it and returned to get it a week later. See the sticker? $4.99. I have a $5.00 limit on my thrift finds. Having that limit keeps me from “impulse” buying. If it’s more than $5.00, I don’t even have to think about it. NOTE: I will generally go up to $7.00 if it is a purchase for me personally.
Dismantle Vintage Coffee Pot
The first step is to dismantle the vintage coffee pot. At first glance, I thought it would be pretty simple.
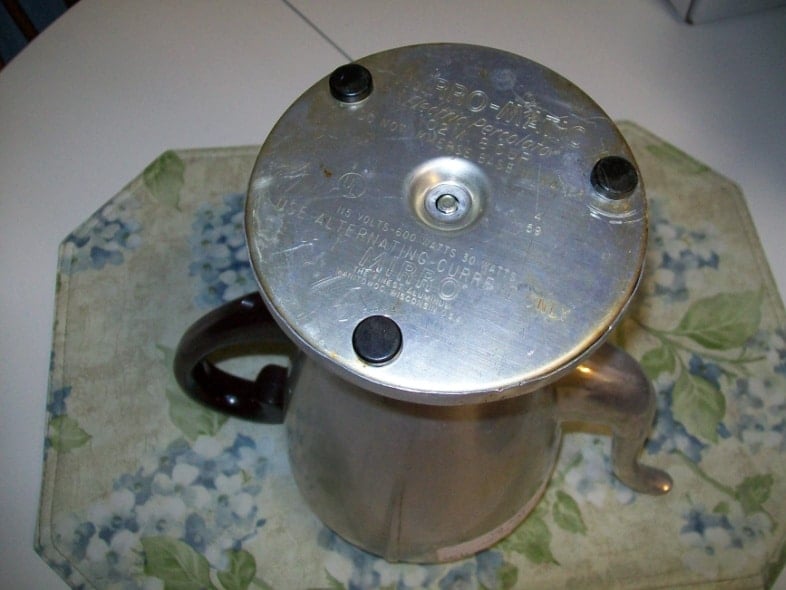
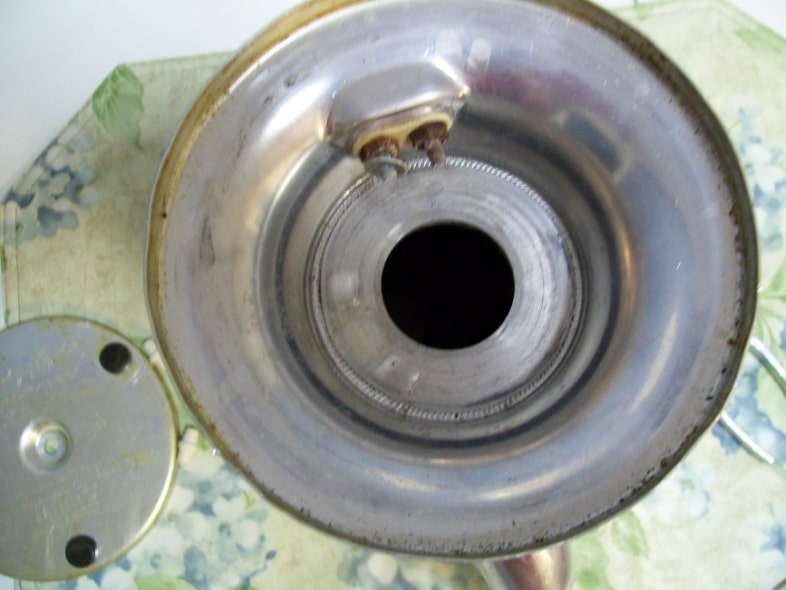
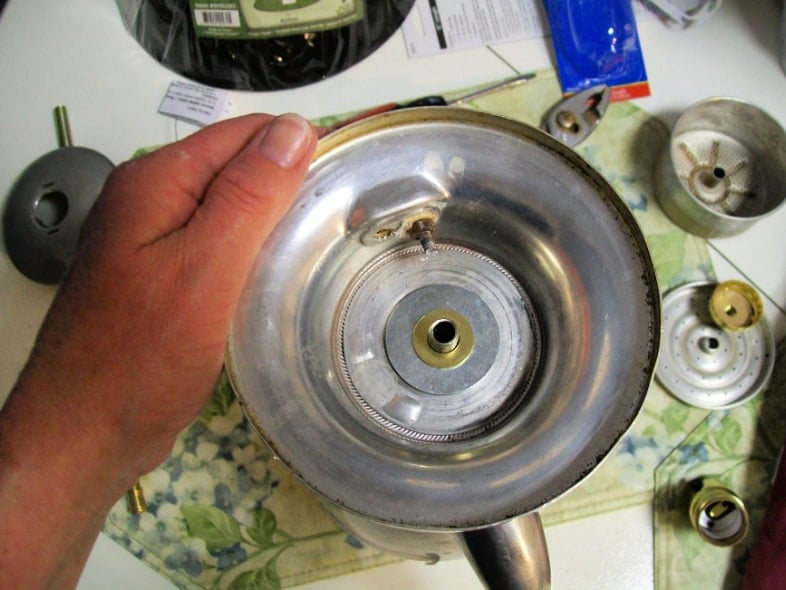
Remove The Base

Then I ran into all of these connectors and electrical parts at the base when I removed the base plate.
Dismantle Electrical Parts
No match for Gail!
Lamp Kit Parts
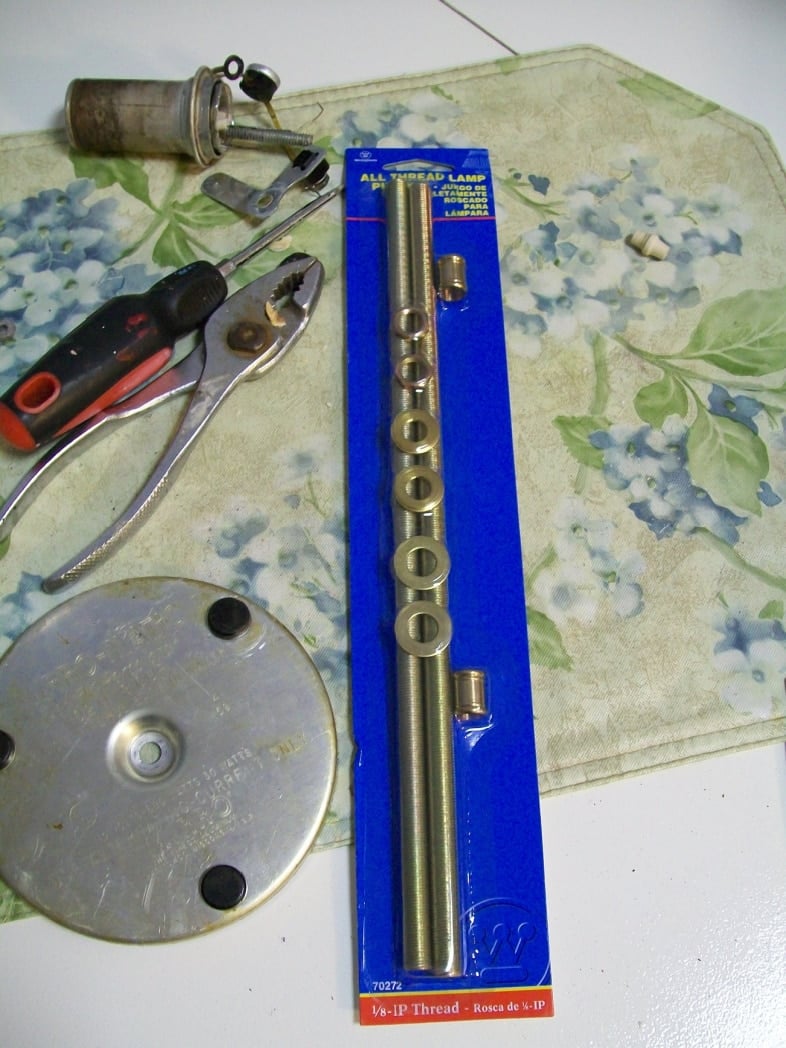
I decided to go all out and buy new parts for this makeover. You could easily use old lamp parts. Buying lamps at yard sales or thrift stores is a great way to collect all the parts you need for this coffee pot lamp.
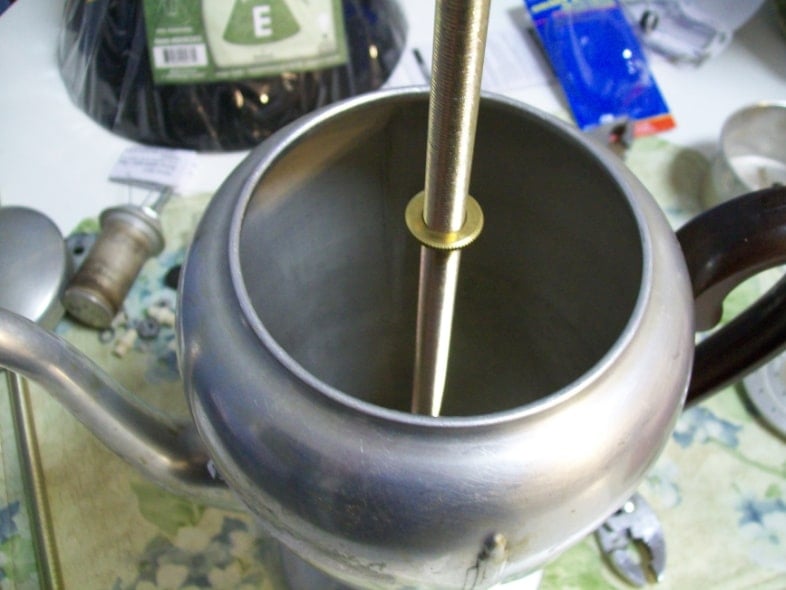
Thread Spacers And Washers On The Lamp Kit Rod
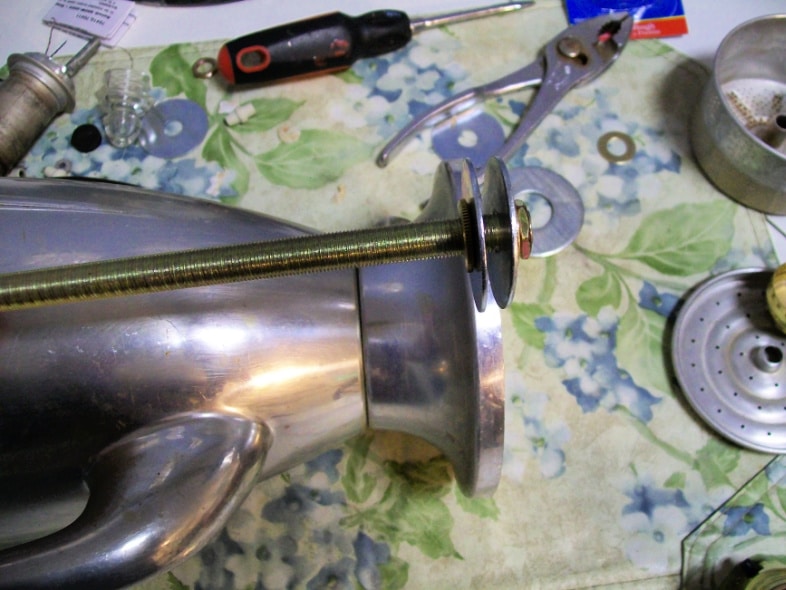
This is threaded to show you how I got it to stay in place. Imagine the bottom of the coffee pot is actually between the two washers.
I like the lamp kits with threads all the way down the rod. The nice thing about a continuous thread lamp kit rod is that you can thread parts anywhere and cut off the excess.
Insert Lamp Kit Rod Into Vintage Coffee Pot
You can see that the washer keeps the rod in place.
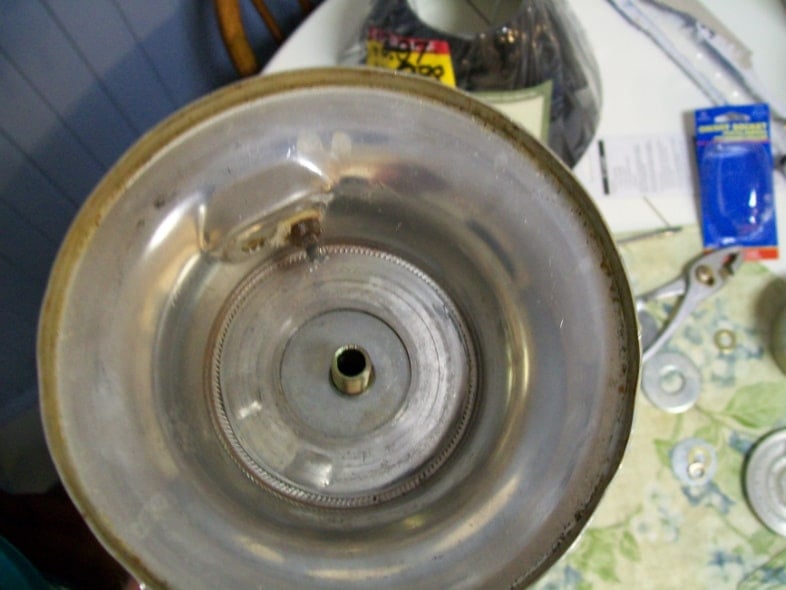
Add Washers As Needed To Reassemble Coffee Pot
I placed another washer and a smaller washer that came with the lamp kit. (not shown; I added a nut to hold it all in place.)
This threaded washer will hold the rod in place on the inside bottom of the coffee pot.
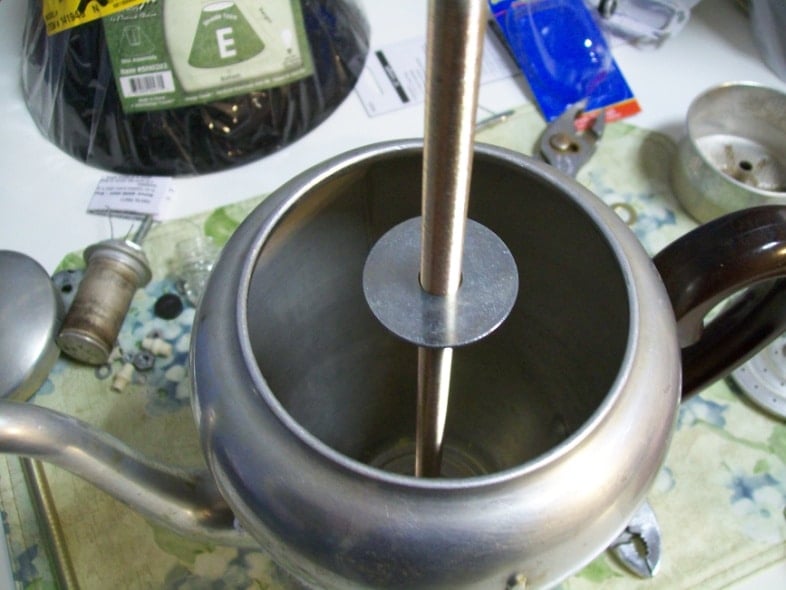
These large washers were handy to secure the lamp kit rod.

This allowed the pot’s top to rest on said washer.
Another large washer and a nut were added to secure everything in place.
Wire Vintage Coffee Pot Lamp
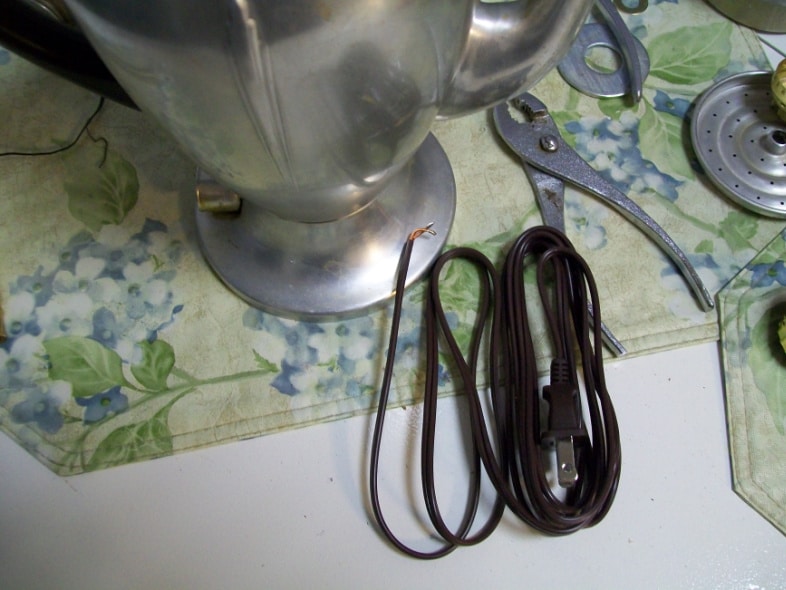
A new wiring kit was used for this, but remember you can easily use reclaimed wiring from current lamps — nothing outdated or worn.
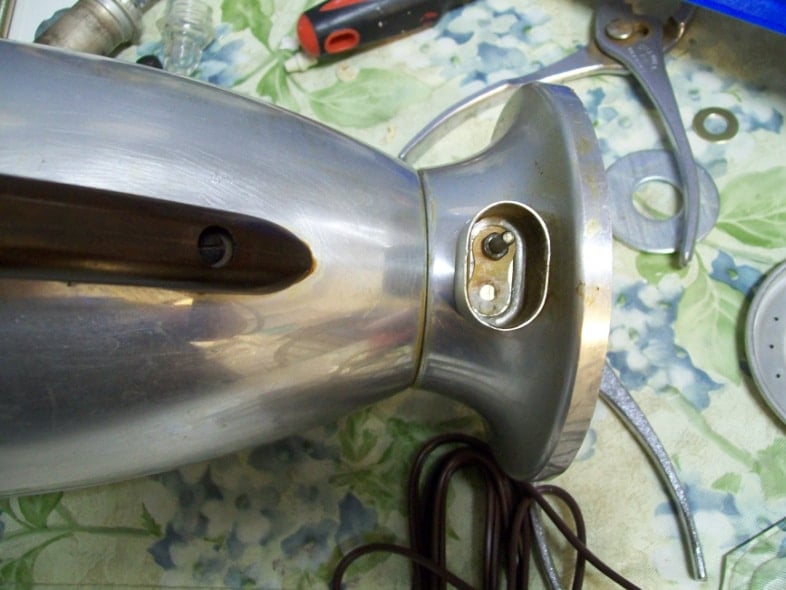
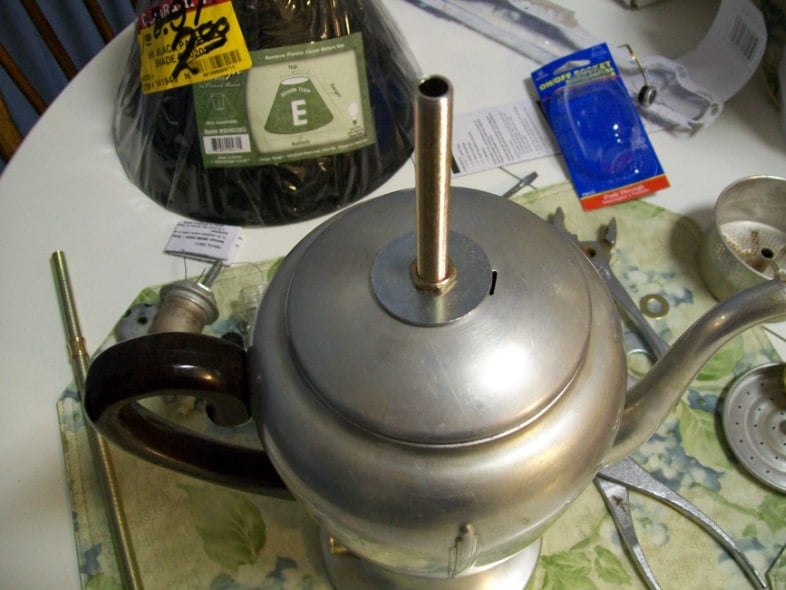
I was unable to get both of these “pins” out. I could tell you I left it on purpose, but I like to keep it real. It’s not shown here, but I drilled out that small hole to make it large enough for the cord to thread through.
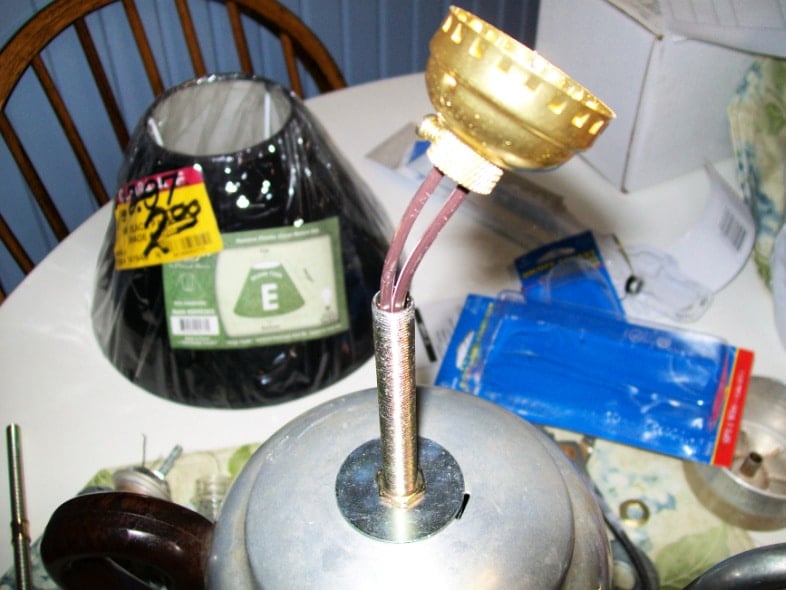
In the spirit of “keeping it real,” I wired this lamp about seven times. Each time I wired it, the rod was too tall. I took it apart, trekked out in the 100+ degrees, and cut it again. I seriously can’t believe how many times I put the jigsaw away, KNOWING it was right THIS time! You can see that lampshade in the background. It wasn’t the best choice, but it’s really all I had. It was a yard sale find earlier this summer.
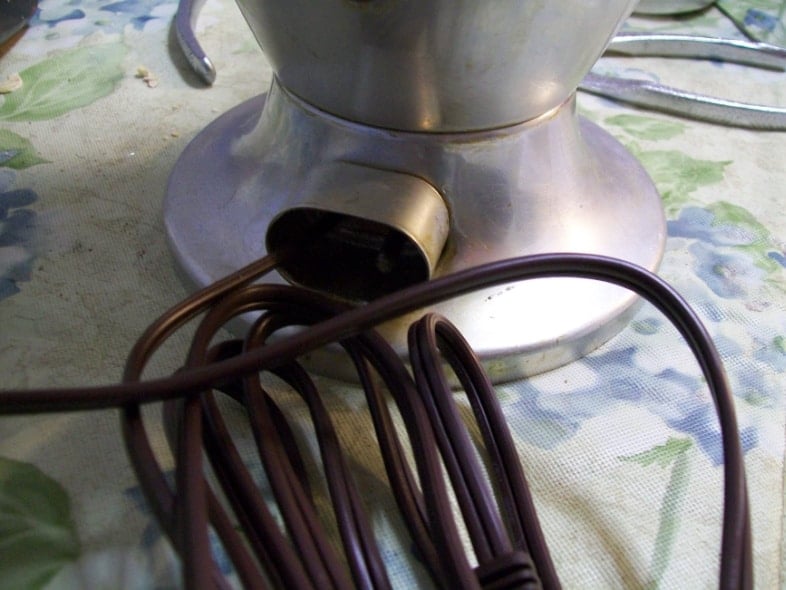
Isn’t it neat how the cord comes from the original cord area? It’s the little things that make me happy.
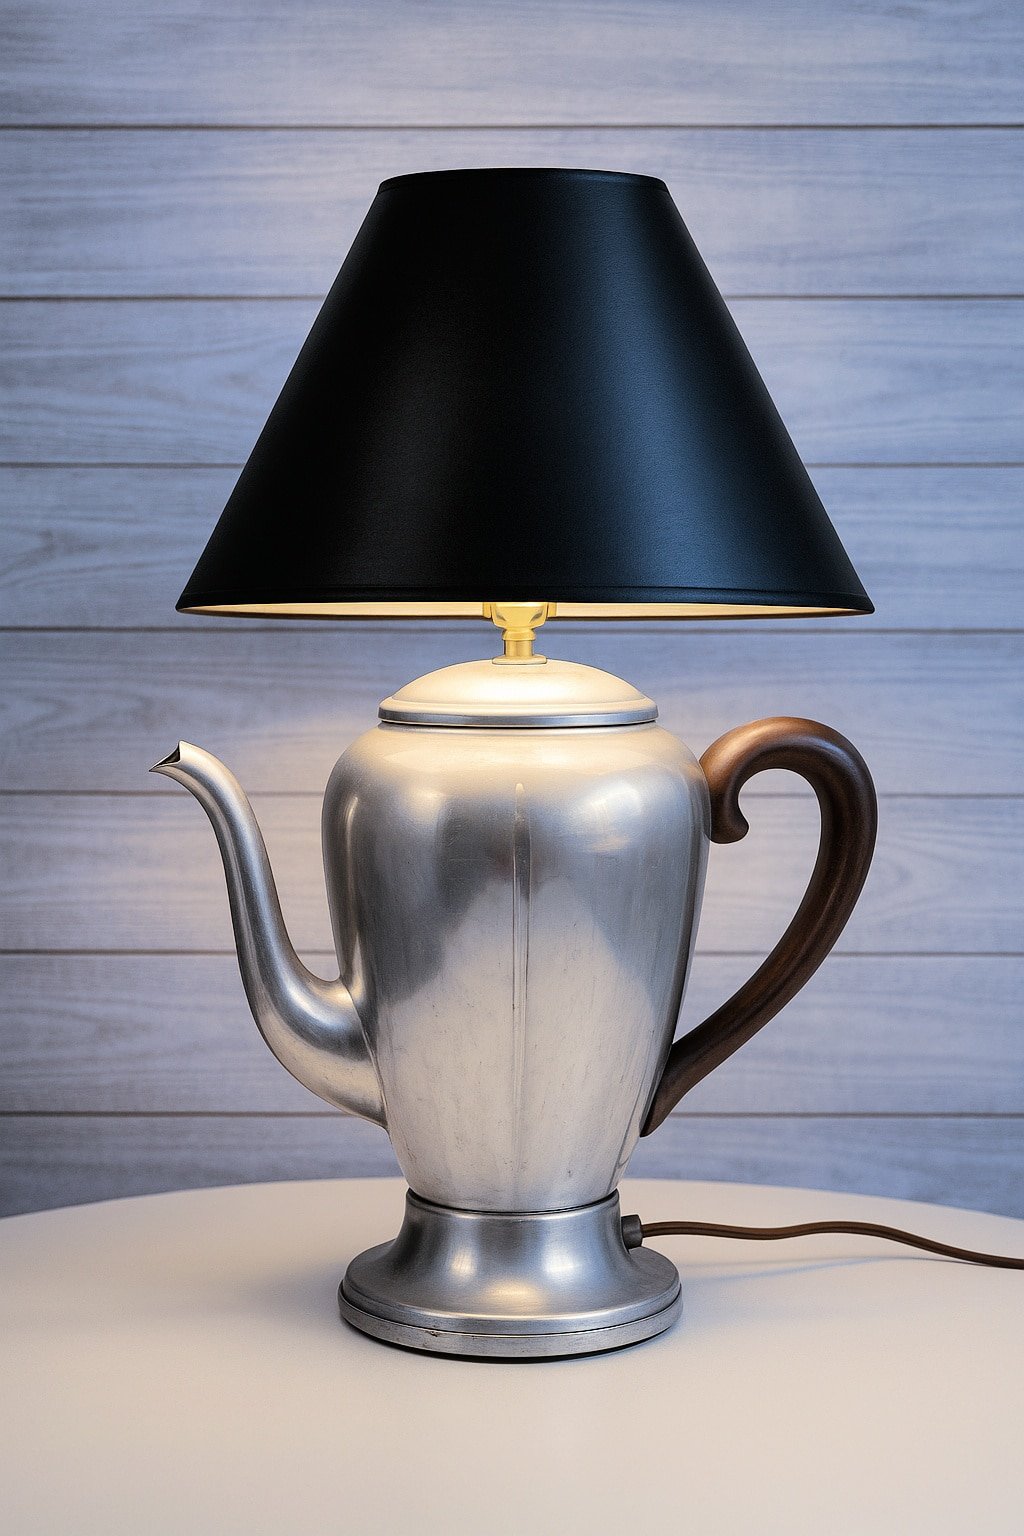
Vintage Coffee Pot Lamp
Isn’t she cute? I have no idea why I have such a love for this repurposed vintage coffee pot! I think it’s just too darn pretty! Would you like to know a piece of trivia about me? I have NEVER had a single cup of coffee. Can you believe that? I’m a Coca-Cola girl.
If you like unique lamps, check out my teapot/teacup lamps. I made one for myself and painted it with spray paint in the post “Teacup Lamp, How to Drill China.”
See more repurposed lighting ideas here
Check out Lindy’s Blog and HER coffee pot!
Related Content: Make a Railroad Tie Lamp
Yay! I have this pot as a lucky find as well. I started taking mine apart this evening so I can convert it to a lamp, too. I found out that it is best to leave at least one of the pins in the plug area. If you remove both, the sleeve would come off as well. I like that part. I think it shows that it is the real thing!
Soooo awesome! Good luck and have fun with your coffee pot lamp! Thanks for stopping by and taking the time to leave a comment.
It made my day!
gail
Hi Gail,
It’s beautiful! Too bad the little glass perculator part couldn’t easily be incorporated,that’s my
favorite part.
You did a great job on that old coffee pot!
My dad did a similar one many moons ago, but he left the electricity plug in the contcctpoint of the pot. Left the pins intact and drilled holes between the pins in the plug and the pot.
I now want one myself too, thanks for bringing back memories!
I’m so happy you stopped by to check out my coffee pot lamp! How fun to know your dad did one so many years ago.
gail
This is just beautiful and I can just see it on my dining room side-board! I am now on the hunt for a similar pot!
Thanks for yet another inspiring tutorial! You are amazing!
I’m so happy you stopped by to check out my coffee pot lamp! 🙂
gail
Is that not the cutest idea? I love how it turned out! You are so creative and imaginative.
How in the world did you get the nut around the ceramic “do-hickey” inside the pot off? We have a silver plate coffee pot from my grandmother that we’re trying to make into a lamp and are stalled at that point. Tried WD40 and vice grips, broke the ceramic piece out but stuck with the nut. Can’t uncover the hole to run the cord.
I’m not sure which you’re talking about? The one for the rod? or on the side for the cord? In either case, do you think you can drill out the area with a metal bit? I suggest securing the pot in a vice or workbench for safety. Never drill while you’re holding the project. Keep me posted, I’d love to see pictures when you get it finished.
gail
I love this lamp. My sister had one she bought at Hobby Lobby and eventually gave it away before I knew it was available for the taking! Will keep this as a future project. Love it!
Great Idea I have a Corning wear coffee pot almost gave it to Goodwill but now I’ll make a new lamp
thanks for the idea.
I really like the idea of the tea pot lamp. I’m all for recycle. I would love to receive tips from you any time. Thanks for sharing.
Hi Gail,
I love the coffee pot lamp. I would love to do one myself, but I have some questions.
1. Where do you get a “lamp kit”? I assume that is the thing with the threaded shaft and nuts of various sizes you showed in picture 6?
2. So you had to come up with the large silver washers from your “stash” ? (cause I didn’t see them in the package you showed.)
3. What comes in the wiring kit? The socket at the top (where the light bulb screws in), the cord & plug?
4. How did you get the plug through that little hole? (or does it attach to the cord after you run it through the hole?)
I’ve never done anything like this before, but I really like what you did. I look forward to your helpful guidance.
Hi there Taylor!
1) I got my lamp kit at Home Depot (in the lighting dept)
2) You’re so smart! Yes, I used the washers from my stash, but you can pick them up at your local store
3) I actually bought several items shown in the pictures. The socket, the rods (washers/nuts) and the wiring were all sold separately. (That’s why I would recommend buying a lamp at a thrift store and gutting it)
4) yep, I put the wires through the hole, up through the rod to the top, then attached the socket
I once followed a lady on a message board who made lamps out of everything, she made it look so easy! 🙂
hope some of this extra info helps.
gail
clever a always! I love it!!
Oh that is amazing! What a great job!