Antique Parlor Side Table
As an Amazon Associate, I earn from qualifying purchases.
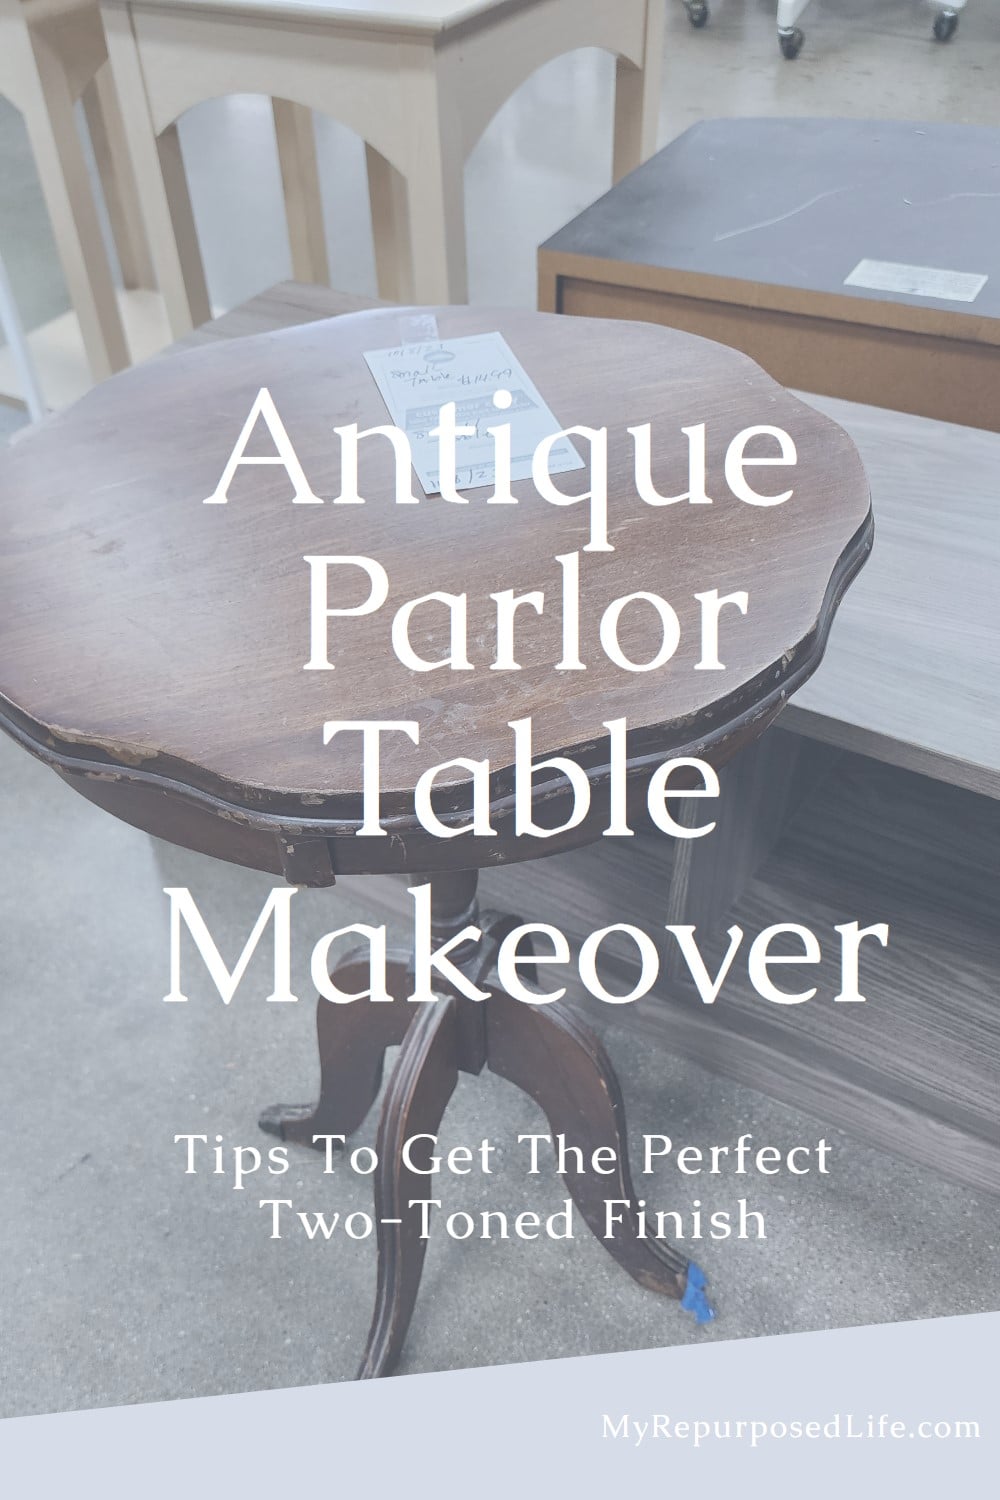
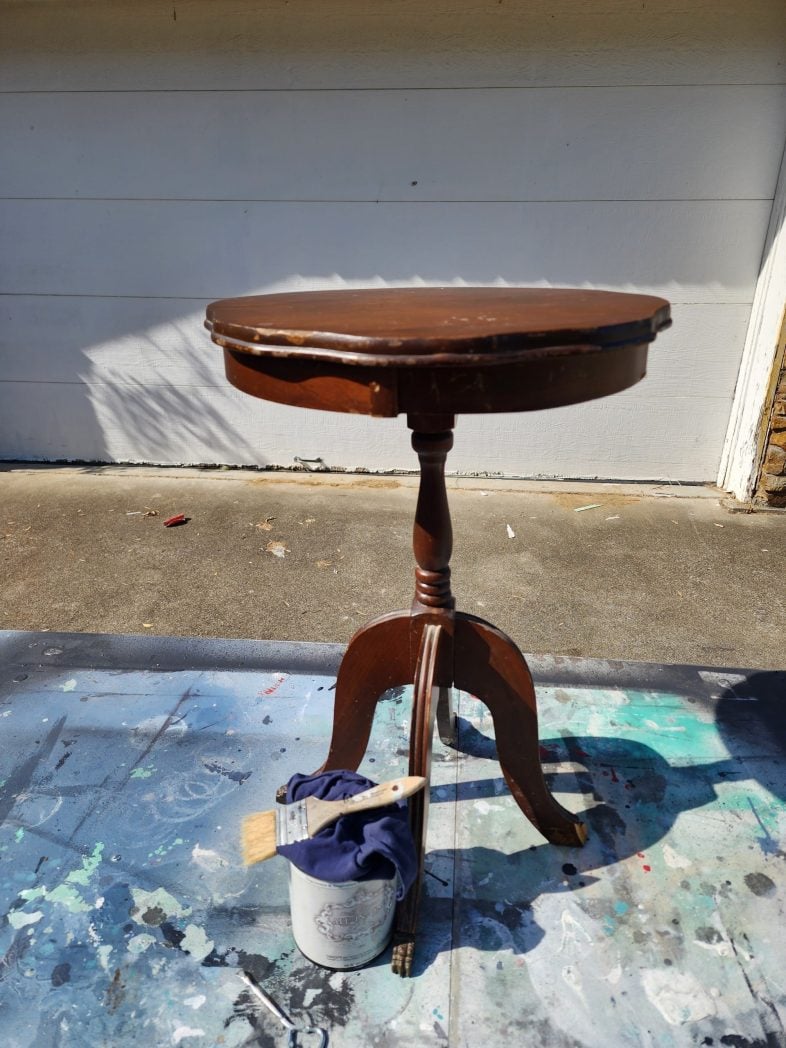
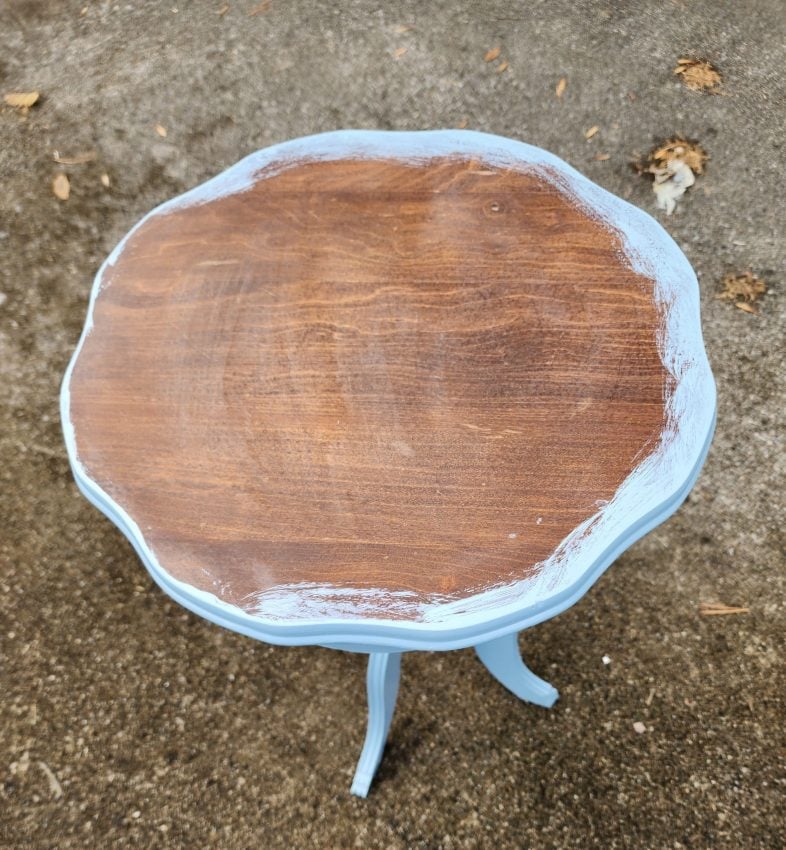
I love finding old, forgotten treasures and giving them a fresh purpose. When I came across this charming antique parlor side table, it had plenty of potential but needed a little TLC. I could transform it into a beautiful and functional piece with some repairs and a fresh coat of paint. This project will inspire you if you love budget-friendly makeovers and bringing new life to old furniture.
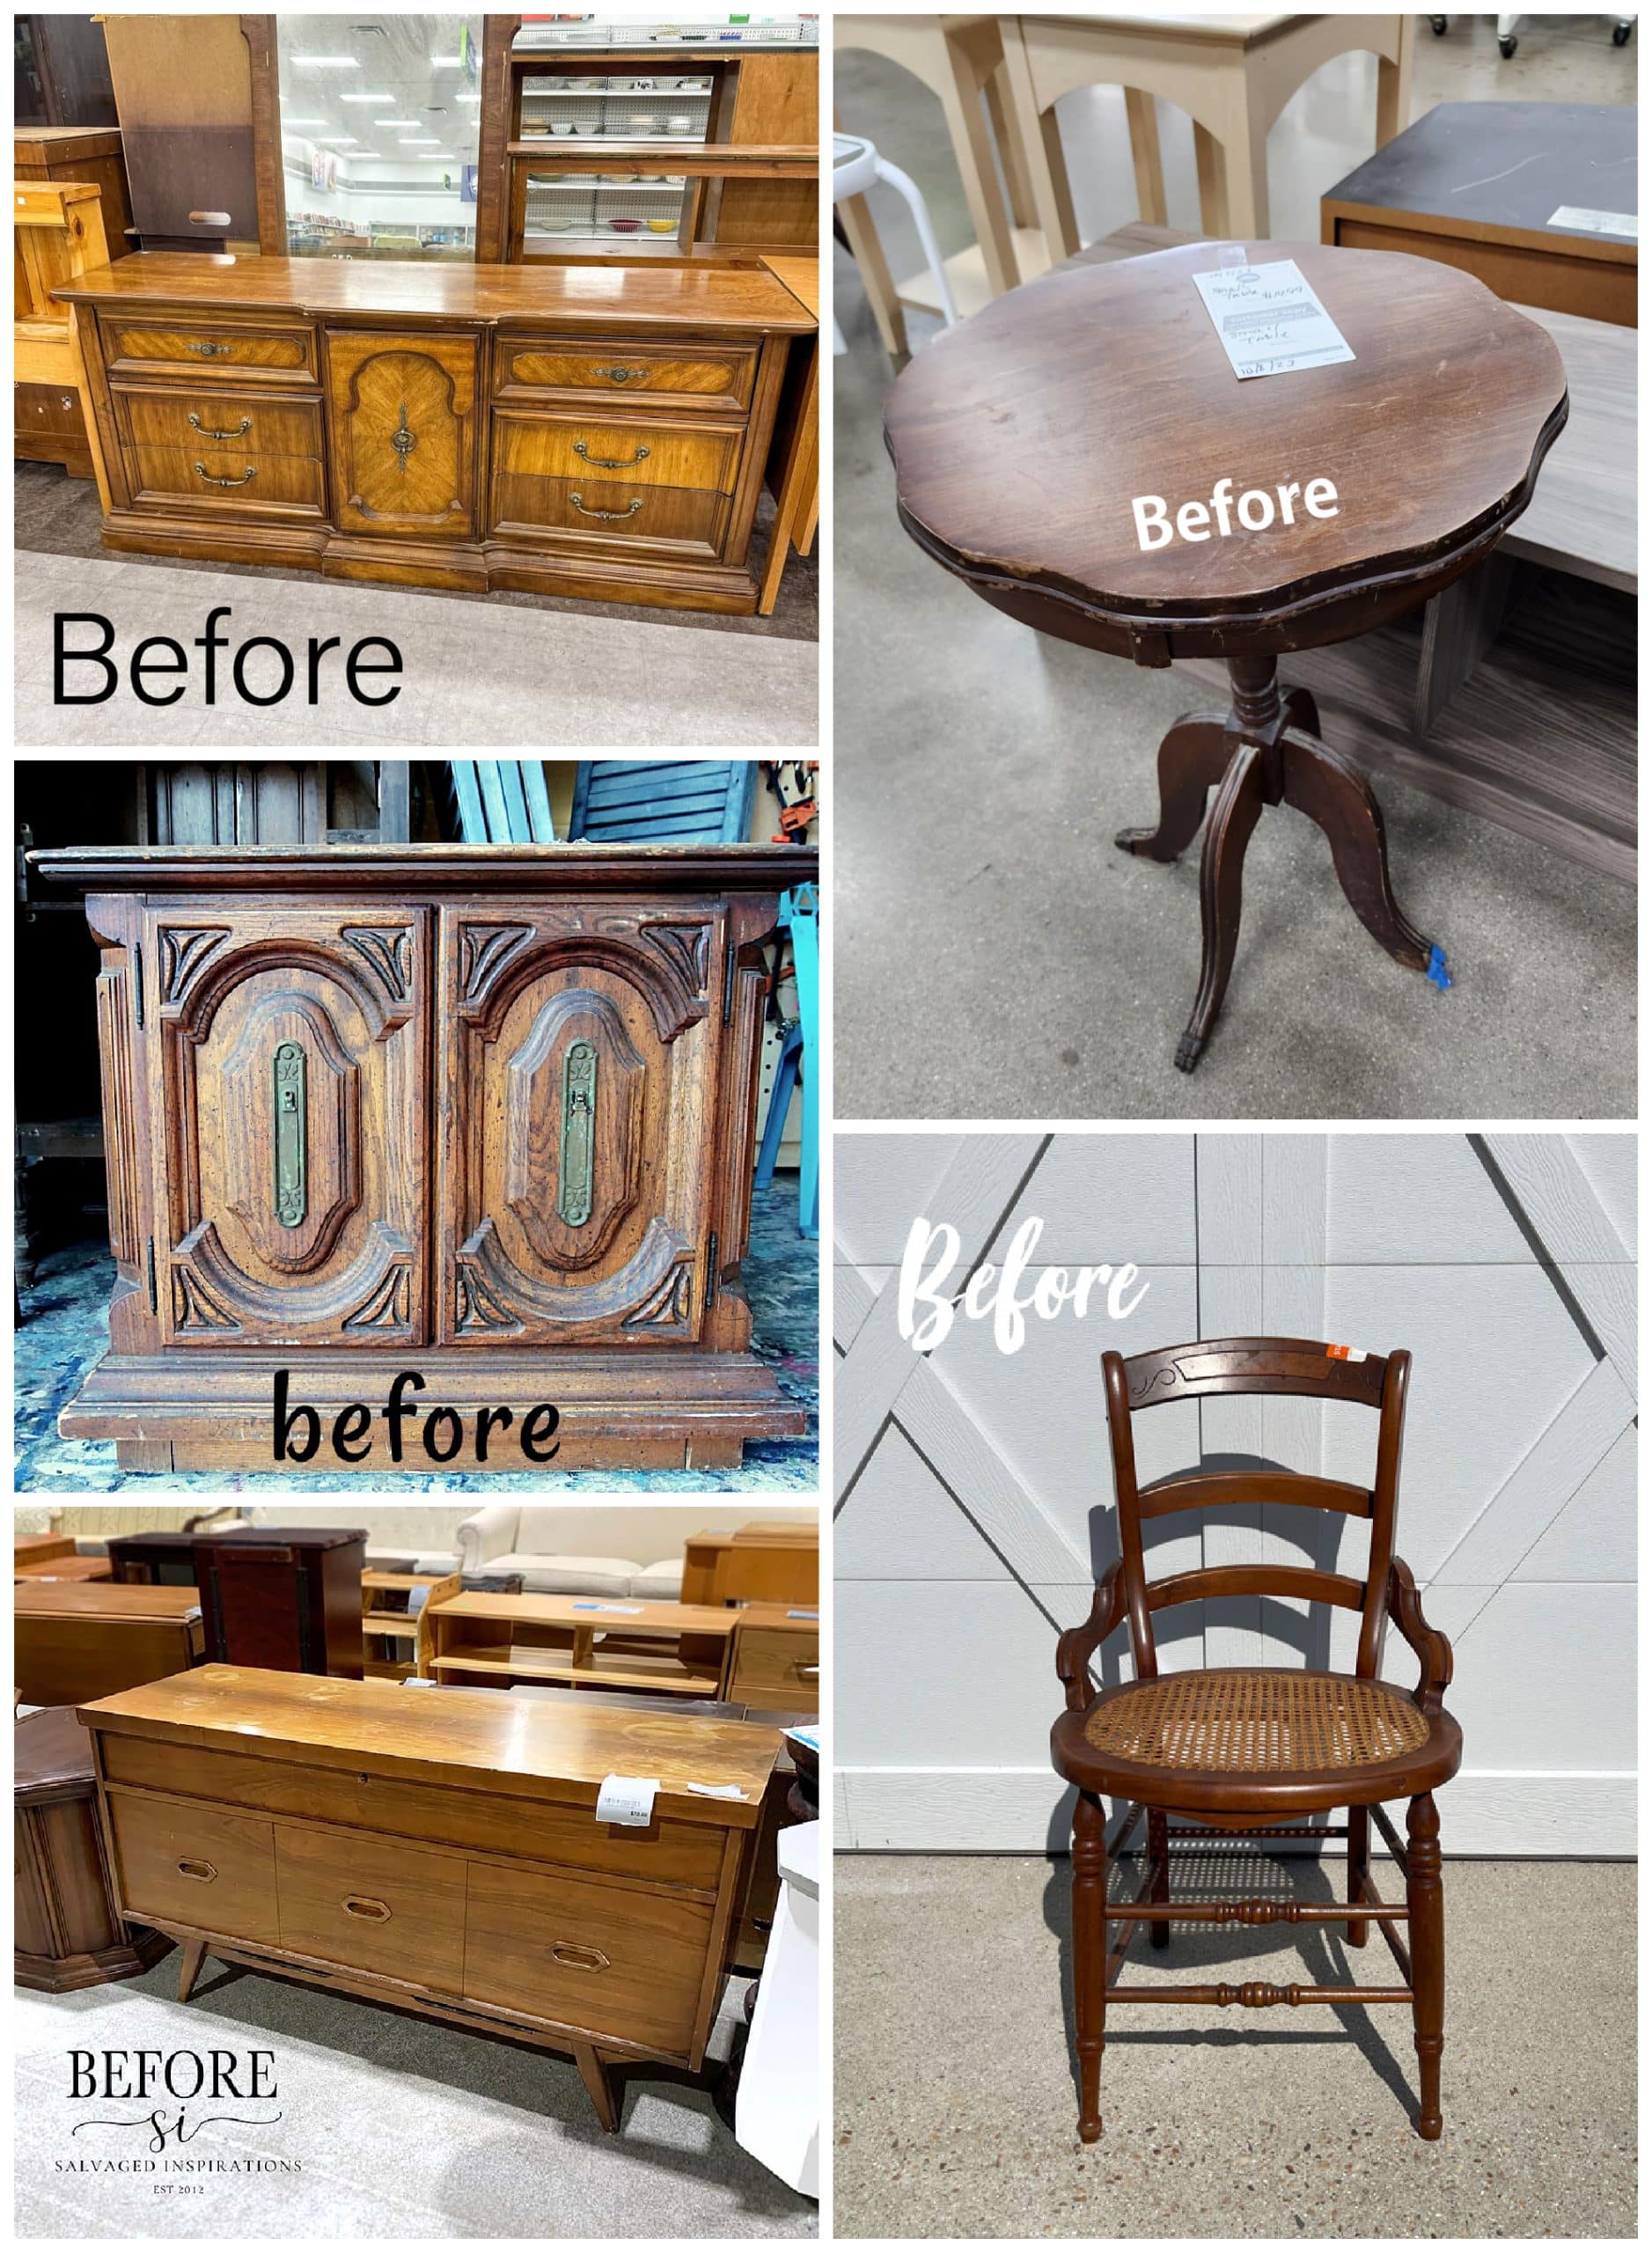
Here is its story: I walked by when I first saw the antique parlor side table at the thrift store. But then, my cousin Terry talked me into buying it. The small wooden table was in decent shape. However, one of the brass claw foot covers was missing, and the little foot was broken.
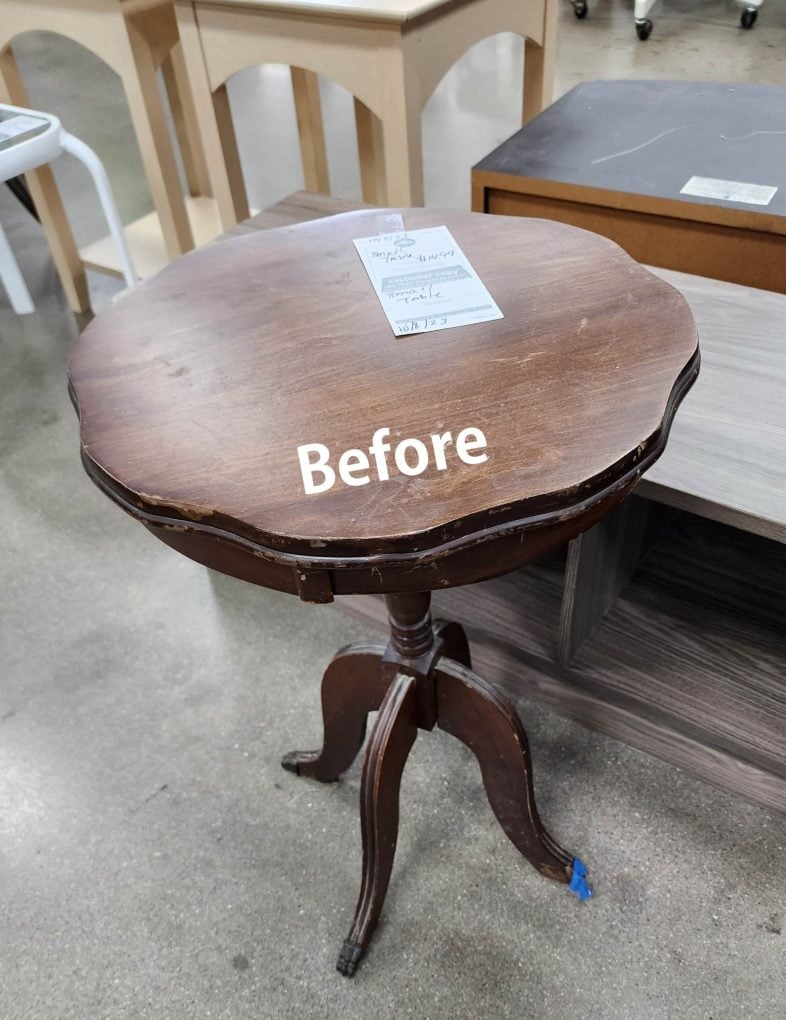
The side table reminds me of a drum table that I shared earlier this year. Did you notice that this little parlor table has four legs? While researching this table style, I noticed most had only three legs. Do you think it is worth the $10 price tag?
It’s Furniture Fixer Upper Tour Day! Be sure to visit my friends’ projects at the bottom of this post.
Clean And Prep Wooden Table For Painting
My favorite product for prepping wood furniture for paint is Surface Prep from Heirloom Traditions. Brush on, scrub if necessary, and wipe off. While preparing your project, this is an excellent time to inspect your thrift store purchase for needed repairs.

The surface prep cleans and deglosses in one easy step.
Use Heirloom Traditions Paint
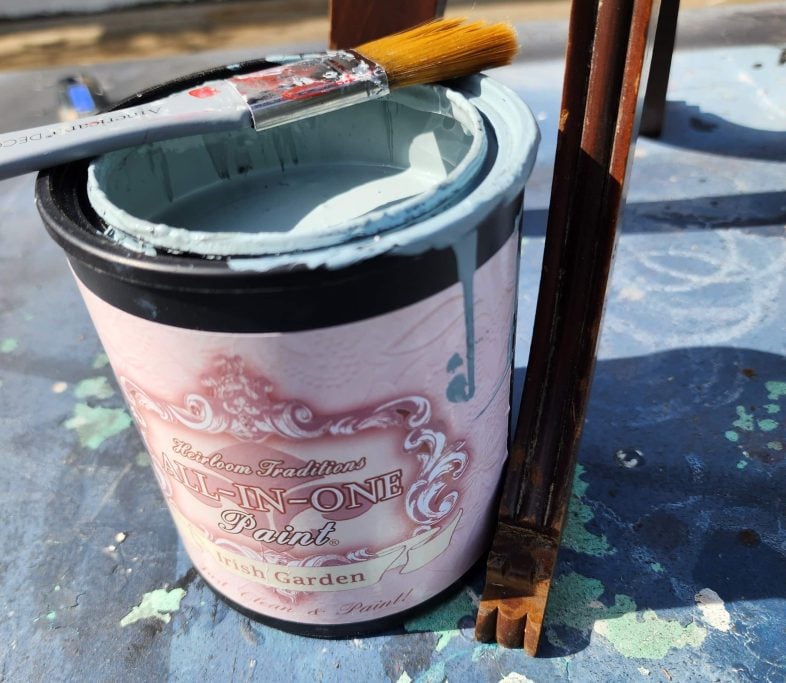
For the color, I chose HTP All-in-One Paint, Irish Garden. See more Irish Garden projects here. Typically, I use a small foam roller, but I use my favorite craft brush for this project.
Did you notice I removed the brass covers on the claw feet? I’ll be leaving them off. I think the wooden feet look okay without the brass covers, don’t you?
Begin Painting Project Upside Down
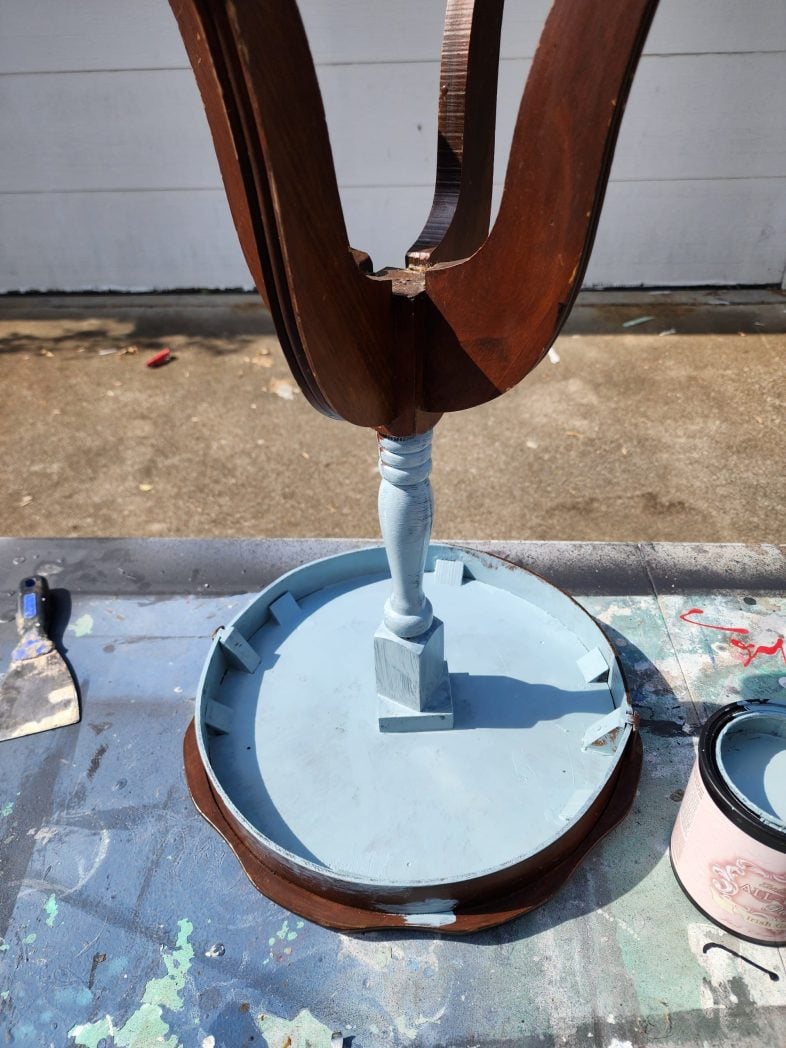
I began painting the parlor side table upside down. This photo may help you see how petite this little table is.

In all, I painted 2 and 1/2 coats. How can you paint half a coat? The first coat is the “ugly” light coat. The second coat is equally light but makes the wooden table beautiful. That last half coat is a touch-up coat to bring it all together.
Aren’t You Going To Paint The Top?
Good question. I decided to leave the top of the small parlor table natural. I’ll share a great tip I got from one of our FFU friends. Denise from Salvaged Inspirations paints first, then sands the top back to get a crisp edge.
We’ll see how it works for me.
Paint Everything Except The Top Of The Parlor Table
The rim of the parlor side table was painted, including over the edge of the tabletop.
Sand The Tabletop
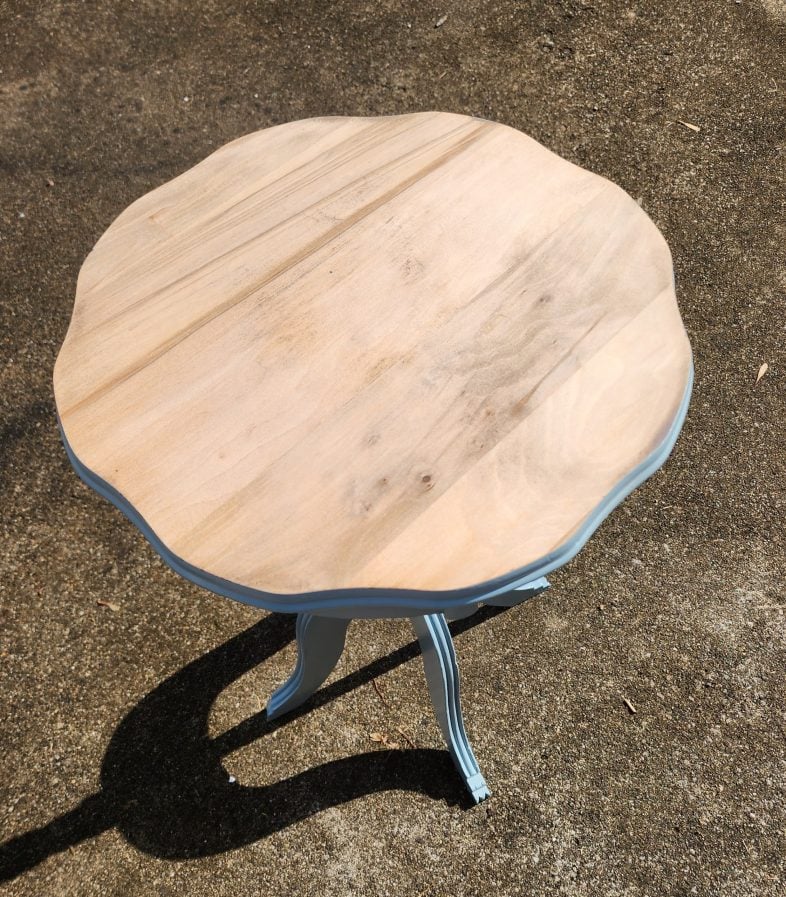
An orbital sander made getting a nice, smooth finish quick and easy.
PolyShades Stain For The Parlor Side Table
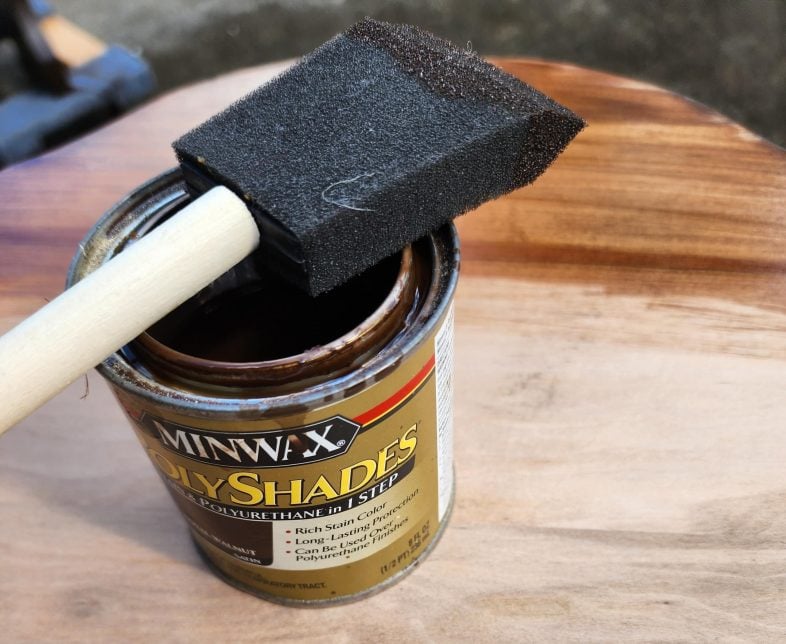
Because I hadn’t planned on staining this project, I had to use something I already had. The color of the Minwax stain is Royal Walnut.

I like the colors together, don’t you? I decided to give it a topcoat to give some added protection to the top of the parlor side table.
Add A Topcoat Of HTP Satin Coat
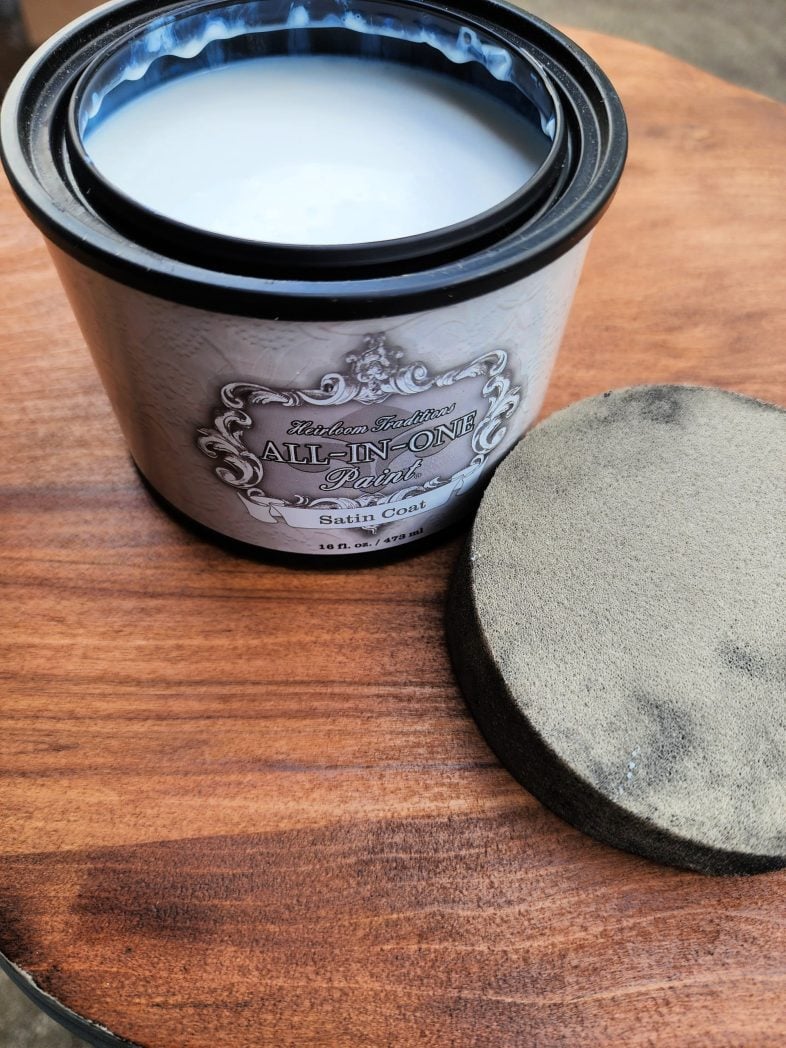
The topcoat was easy. I applied the HTP Satin Coat with a sponge.
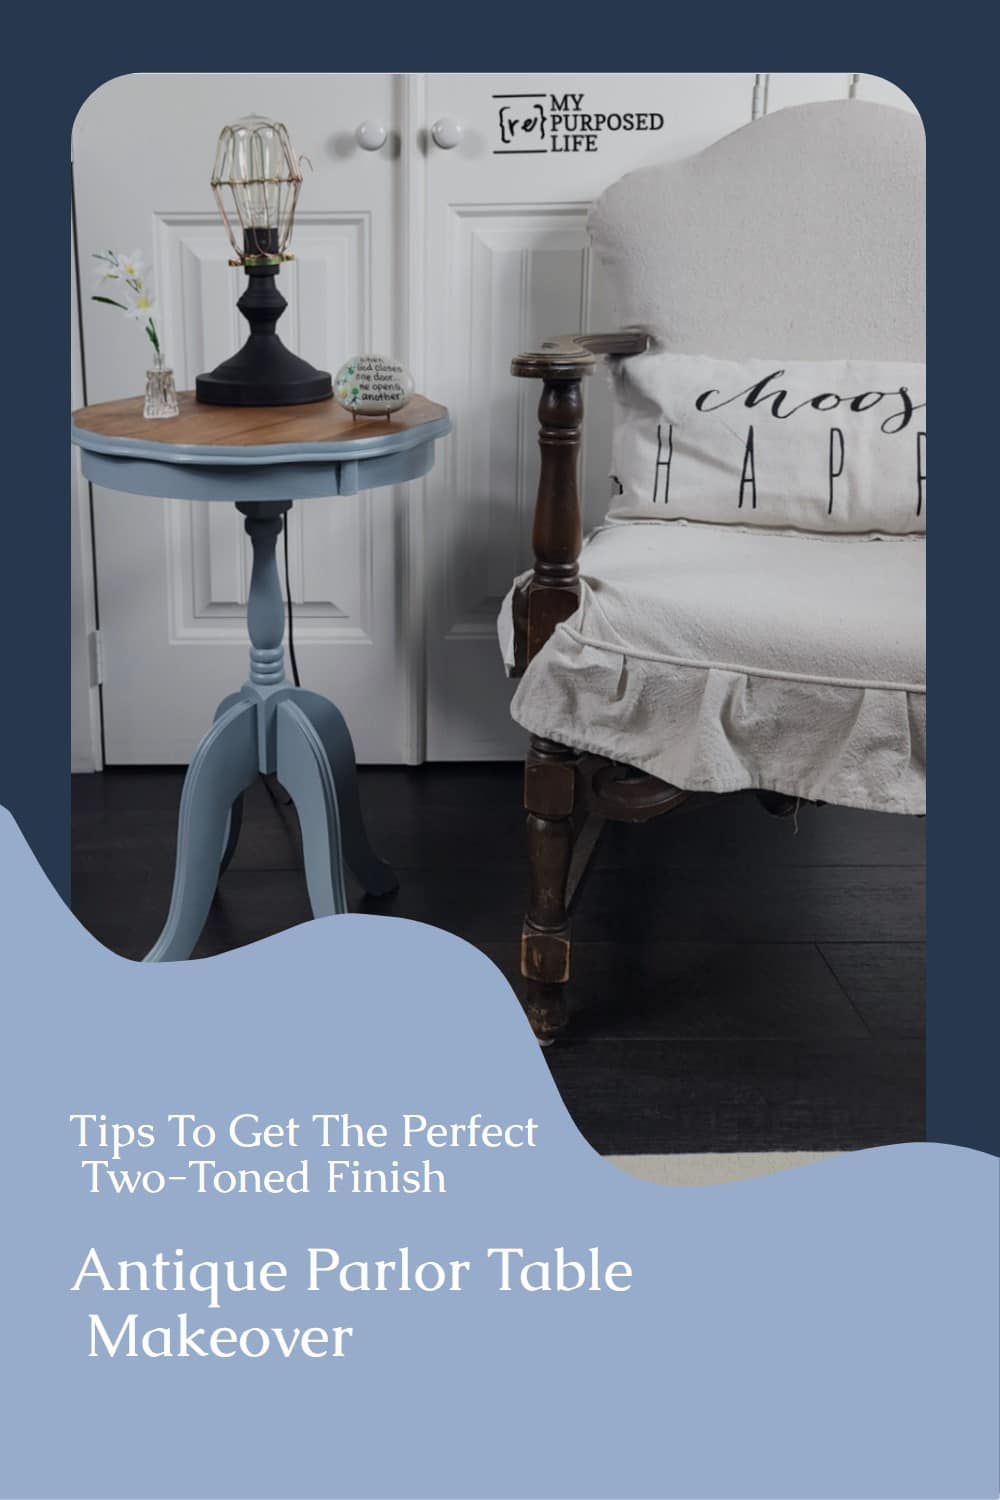
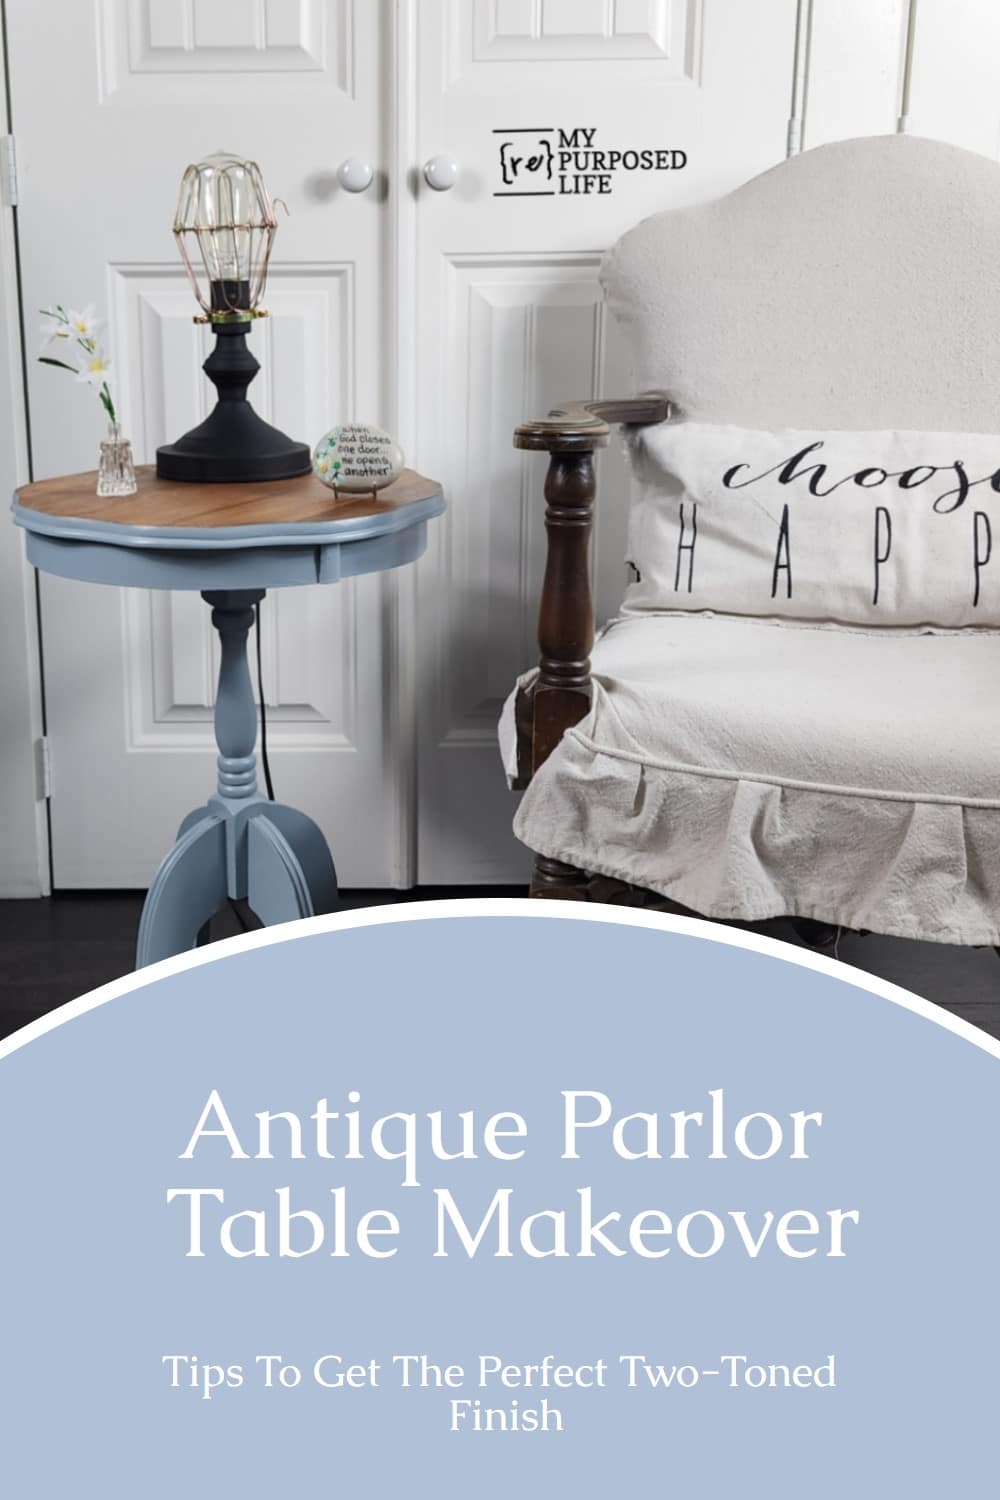
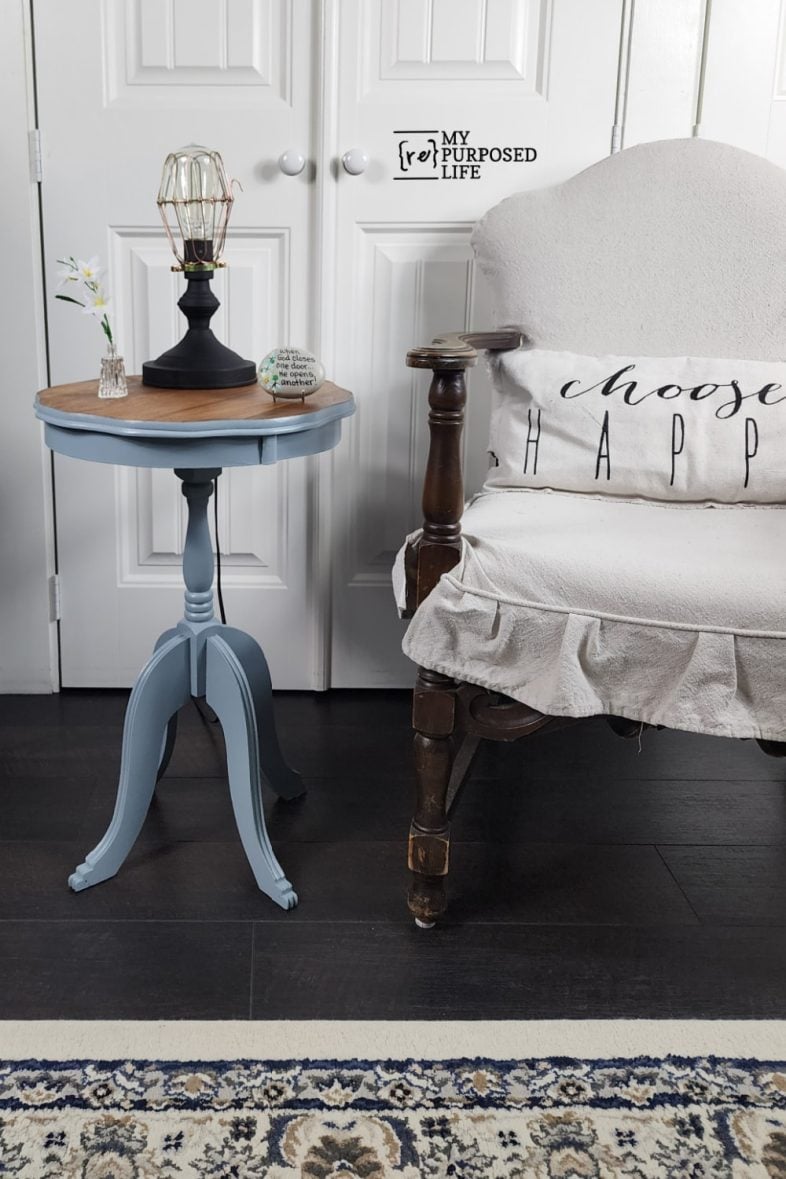
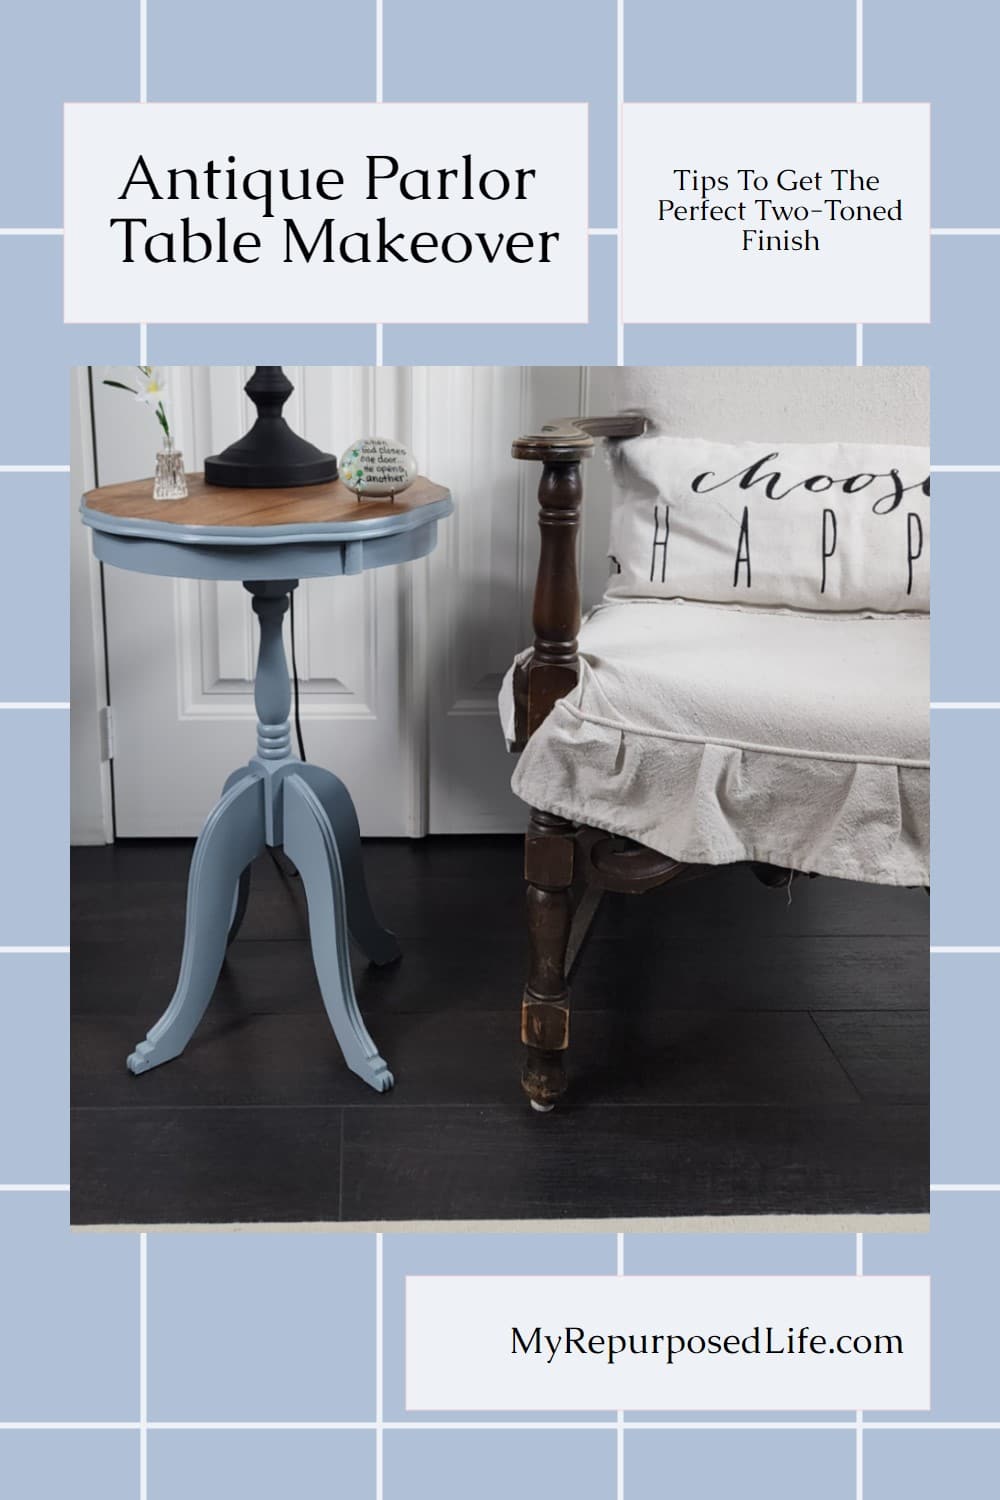
Blue Parlor Side Table

I love how this thrift store furniture project turned out. Blue is my favorite color, and this shade is perfect.
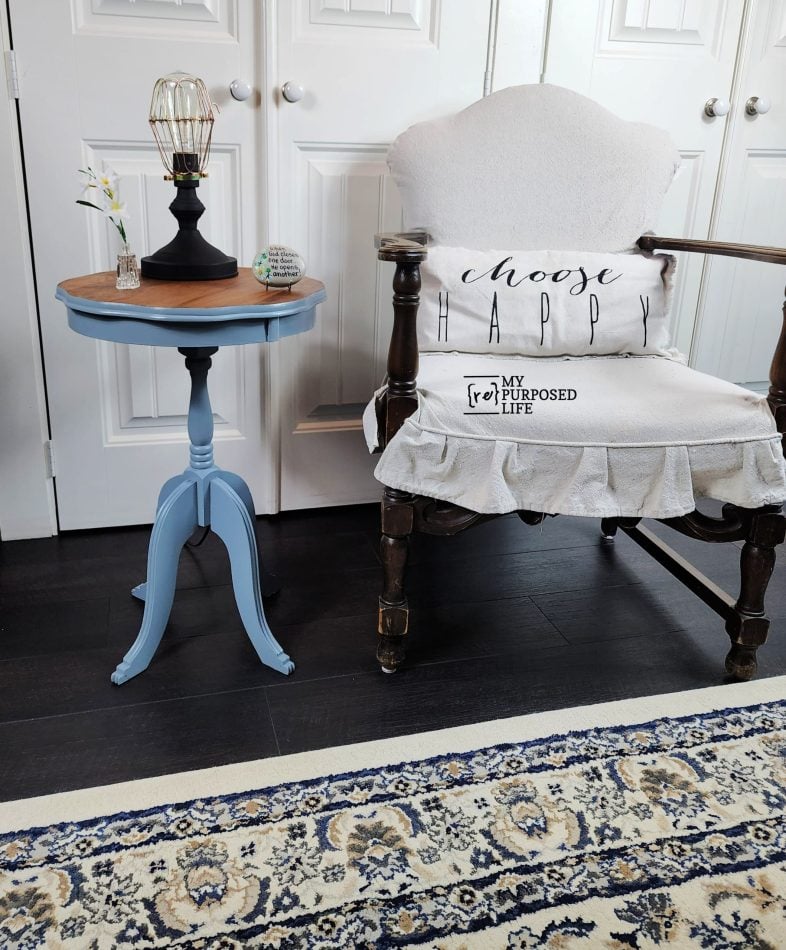
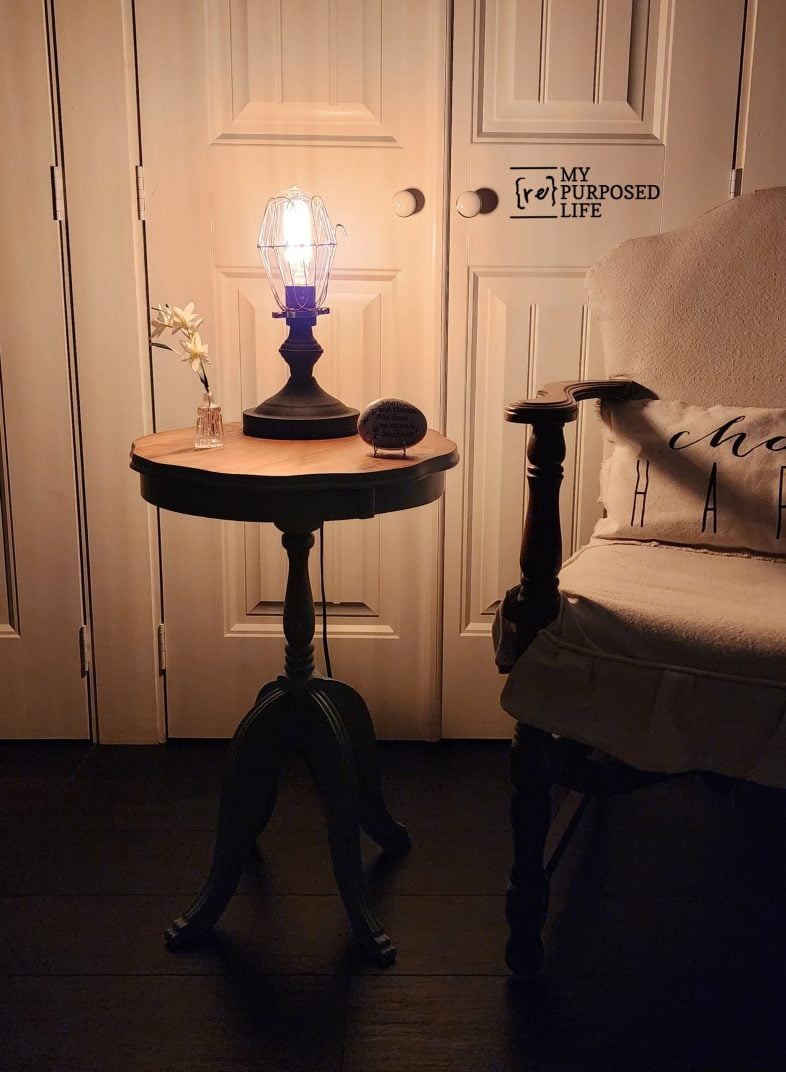
This photo shows my DIY wall-to-wall closet and an antique chair for which I made a drop-cloth slipcover. Sometimes, the parlor side table is called a lamp table. So, I had to put a lamp on it, so why not my Edison Bulb Touch Lamp?
Now you know Denise’s secret to getting a clean, crisp look when doing a two-toned paint and stain project.
It’s time to check out the other great projects for this month’s Furniture Fixer Upper tour!
- Modern Gray Dresser A Ray of Sunlight
- Parlor Side Table Makeover (You are here, thank you)
- Black Side Table With Elegant Knobs Petticoat Junktion
- Faux Wood Painted Cedar Chest Salvaged Inspirations
- Super Easy Chair Makeover Confessions Of A Serial DIYER
I know you’ll be blown away by the awesome furniture fixer-upper projects from my very talented friends.
Furniture Fixer Upper Tour Projects
If you love seeing old furniture get a second chance, be sure to visit more Furniture Fixer Upper Tour makeovers. Each project starts with good bones and ends with a fresh new story.
See more Furniture Fixer Upper makeovers here
You will find everything from small side tables to large statement pieces, all transformed by talented DIY bloggers who believe in saving furniture rather than replacing it.
I DO like the colors together ! The stained top is beautifullly done .
Thanks for sharing !
p
Thanks for stopping by to check out my latest project. I appreciate it.
gail
Hi Gail, I love this color and have a table like this except the 3 legs. I now think I will try the idea of the top and see how it goes.
One question, I see where you sealed the top but not the whole thing. Does furniture not need sealed or just the top? Thank You and great job.
Bonnie,
Good question! The HTP All-in-One Paint does not need to be sealed. After it’s cured, it’s very durable. Bonus! It has the perfect sheen.
Good luck with your project.
gail
Gail, this painted and stained drum table is soooo darn beautiful now. 😍 This seriously makes me want to sit in that comfy chair with a good book and steaming cup of tea and just relax there for a while! So happy the sanding ‘tip’ worked for you. Pinned! XOXO
Thank you for your kind words Denise. I’ve had that tip on my brain, and finally got to give it a try. Thanks so much!
gail
I love this color, Gail!! This little table looks so pretty now, and that is a great tip about the top from Denise! XOXO
Christy,
Thanks so much. I love being part of this group and sharing our tips with each other. YOU convinced me to try the transfers and now Denise helped me with the sanding trick!
gail
Love that you kept the top wood! And love the Heirloom Traditions Paint color! It turned out so cute! Pinned!
Thank you for Pinning Natalie! I love it when easy projects come together. Eventually, I’ll have enough claw feet in my stash to actually replace the missing one on a project down the road.
gail
Hi Gail. I LOVE this little table. Simple, yet very elegant and useful. One question – how did you deal with/fix the broken foot?
Jill,
Good question. I thought it was implied. I didn’t fix it. lol I removed the brass covers from the three good ones. It’s easily hidden by putting it in the back towards a wall.
gail