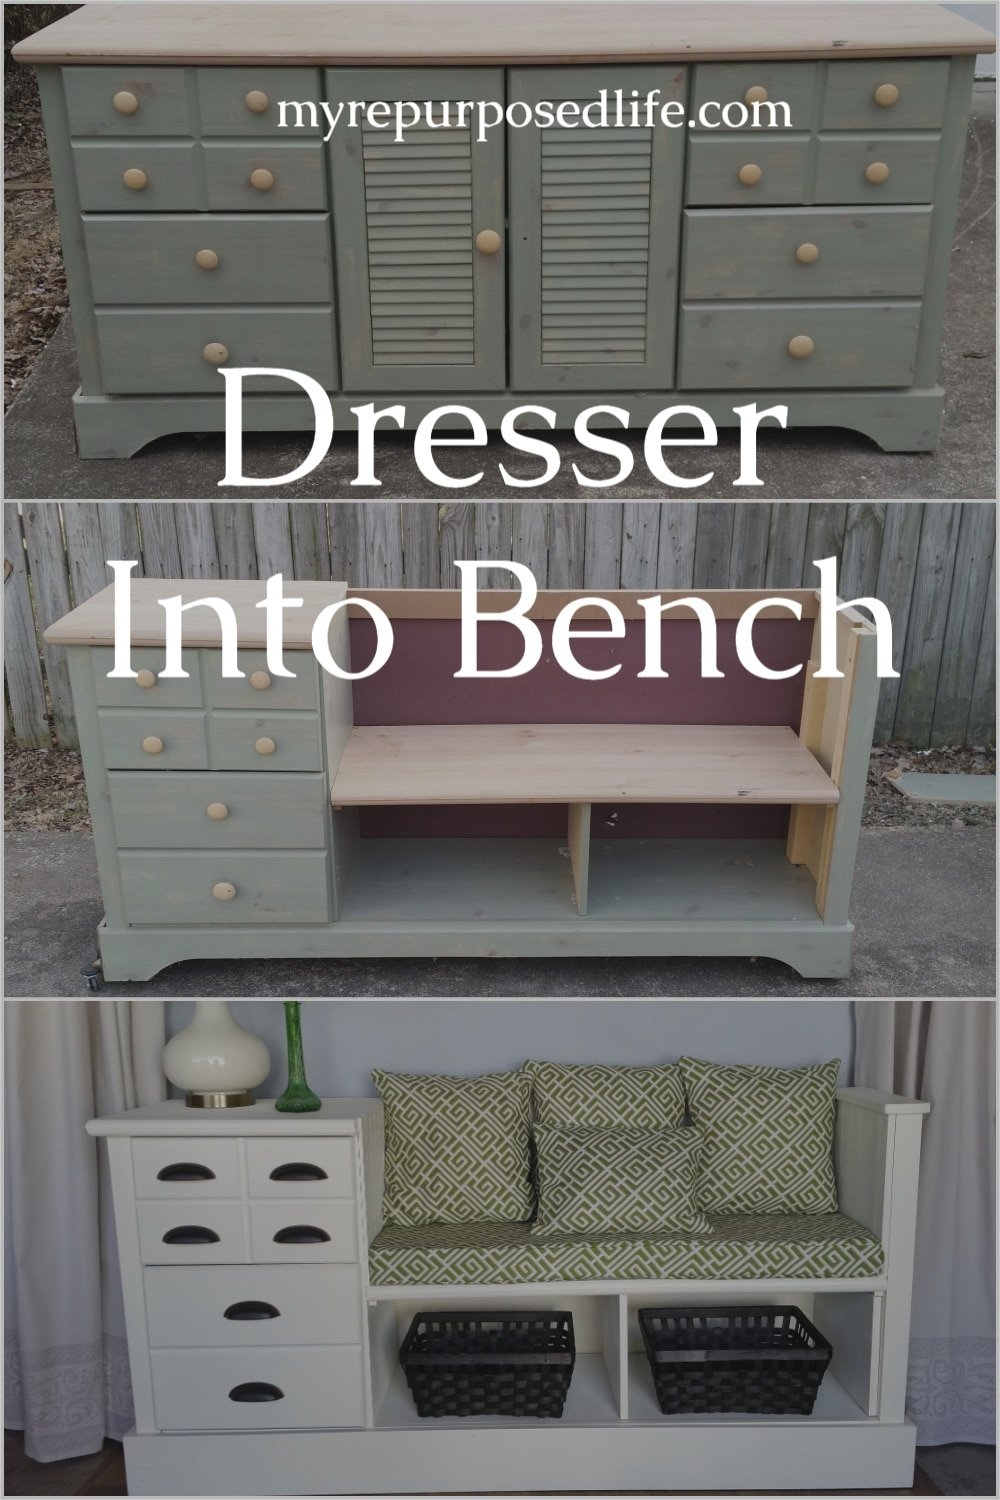
Storage Bench Made From A Dresser
As an Amazon Associate, I earn from qualifying purchases.
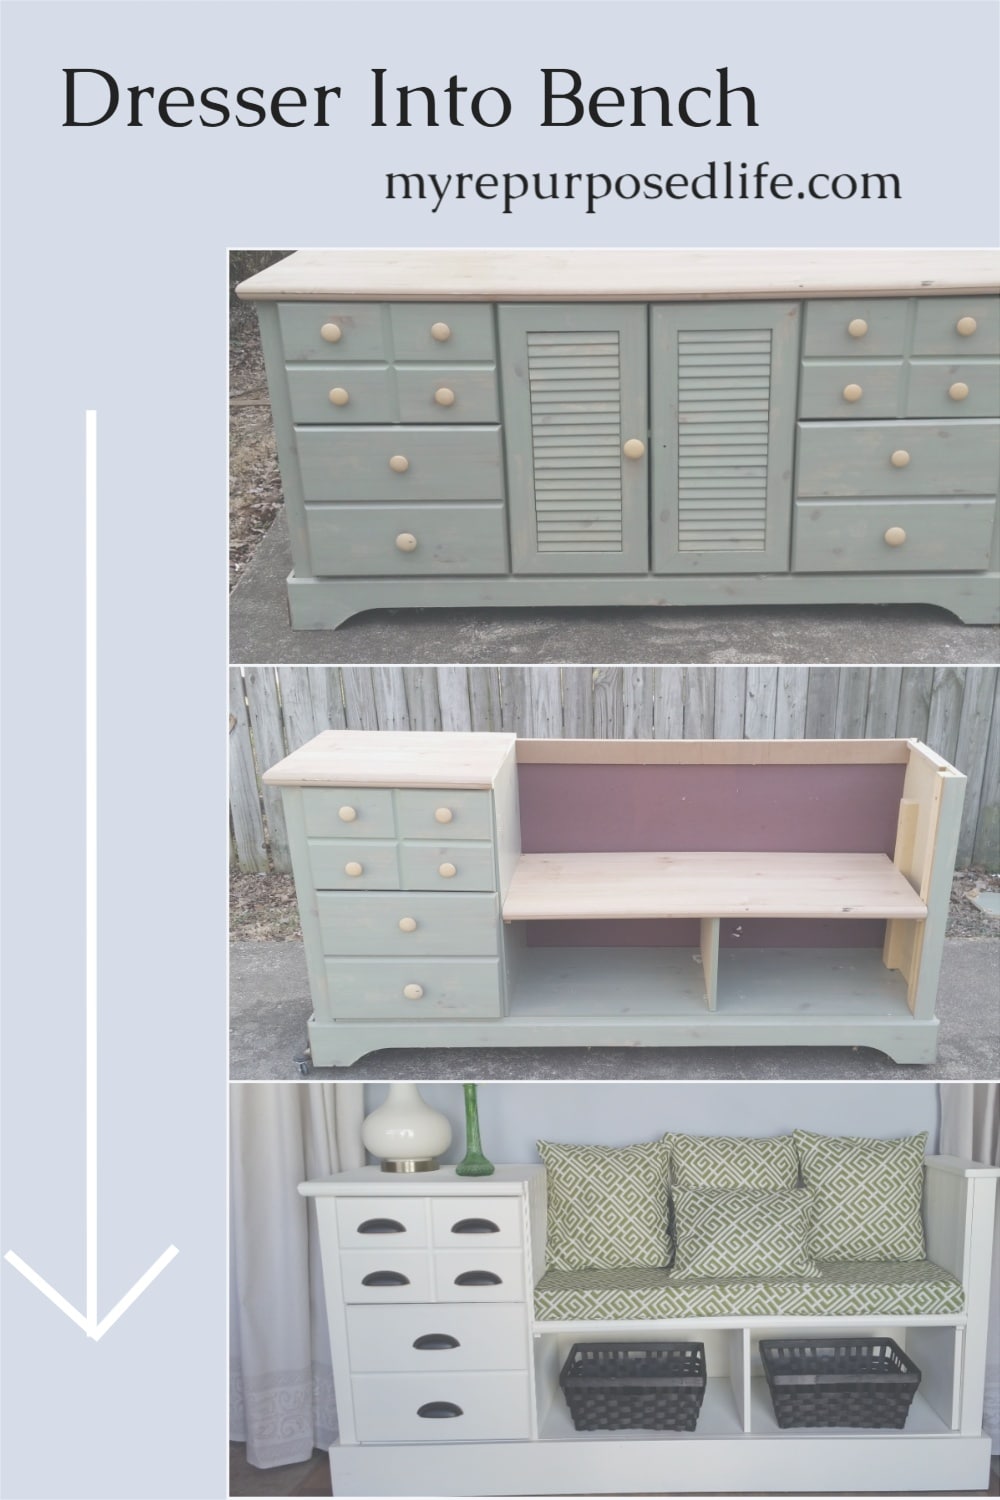
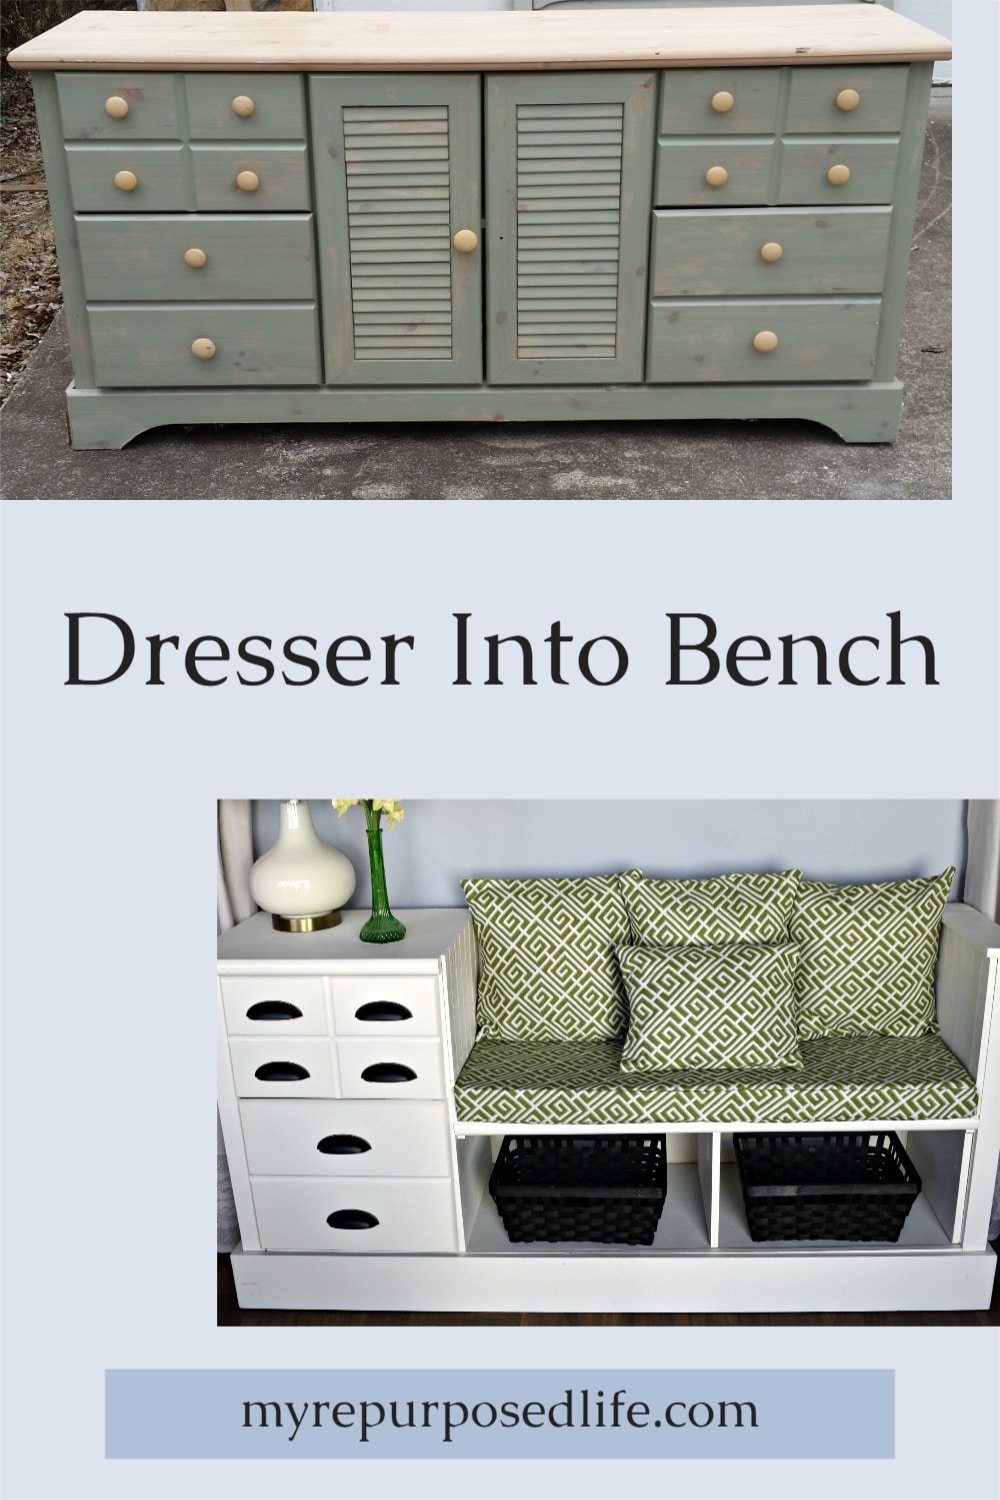
I have turned a few dressers into benches over the years, but this one has been on my wish list for a while. I wanted that old-time “gossip bench” look, the kind with storage and a little bit of armrest style built in. This project starts with a long, oversized dresser, then it gets reworked into a monster of a bench with drawers on one side and a wide seat on the other. It took a few workdays, a few course corrections, and a whole lot of “use what you have” materials, but the finished bench was worth the effort.
I have made several dresser benches over the years. My first dresser bench was many years ago, see the article here: Old Dresser Bench

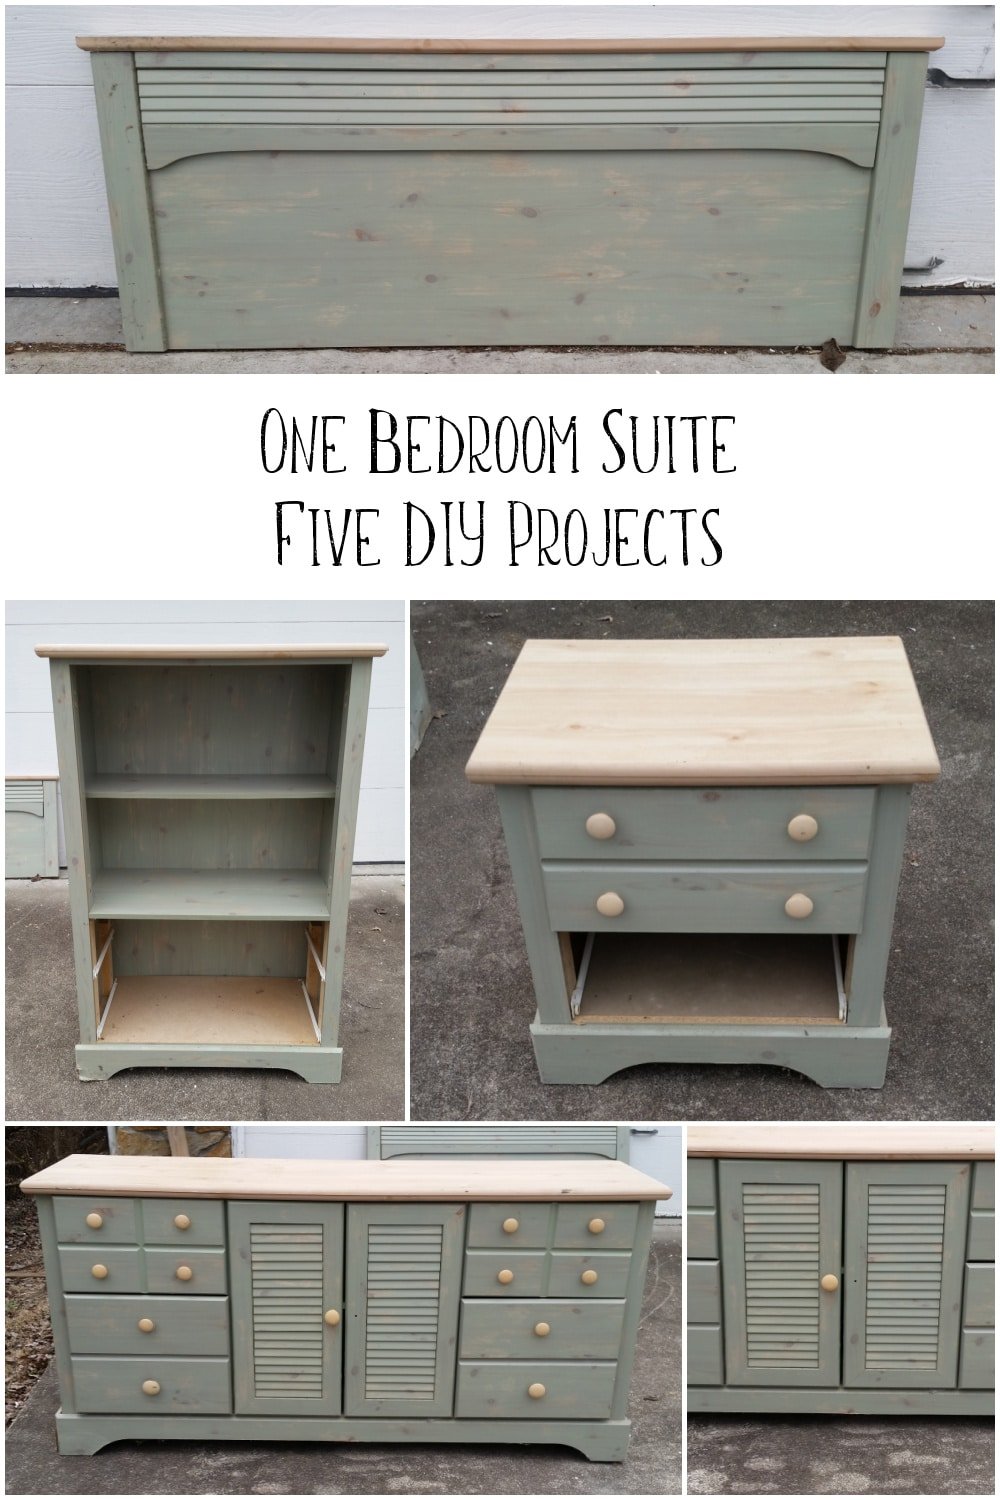
My neighbor Rodney promised me a bunch of furniture last summer, but I never really had room for it. Recently, he needed the space, so I made room for this dresser, a chest of drawers, a headboard, and a nightstand.
The Chest of Drawers is now a Coffee Station.
A large sign was made from the headboard.
The Nightstand is a Kid’s Desk.
How to Make a Storage Bench Out of a Dresser

I wish I could tell you how much I love the outcome; if you were here, you might see me doing a happy dance! This is a long, drawn-out process, so feel free to grab your favorite drink and a snack—or scroll through the pretty pictures. It’s your choice!
Remove Components You Don’t Need
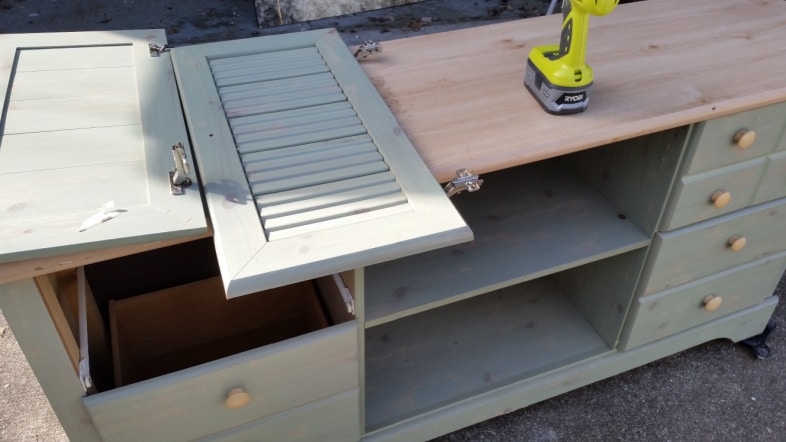
The first thing I did was remove the fake louvered doors from the middle of the dresser. You’ll see these doors used on a project very soon!
Next, I tackled removing the dresser top. If you’re doing a project like this, resist the urge to start hammering and look for any screws or fasteners that may be holding the top in place. In this case, there were screws along the side (underneath) and very long screws all across the back of the dresser. Be sure to keep all the screws in a safe place, as you will be using them later.
Start Design Process

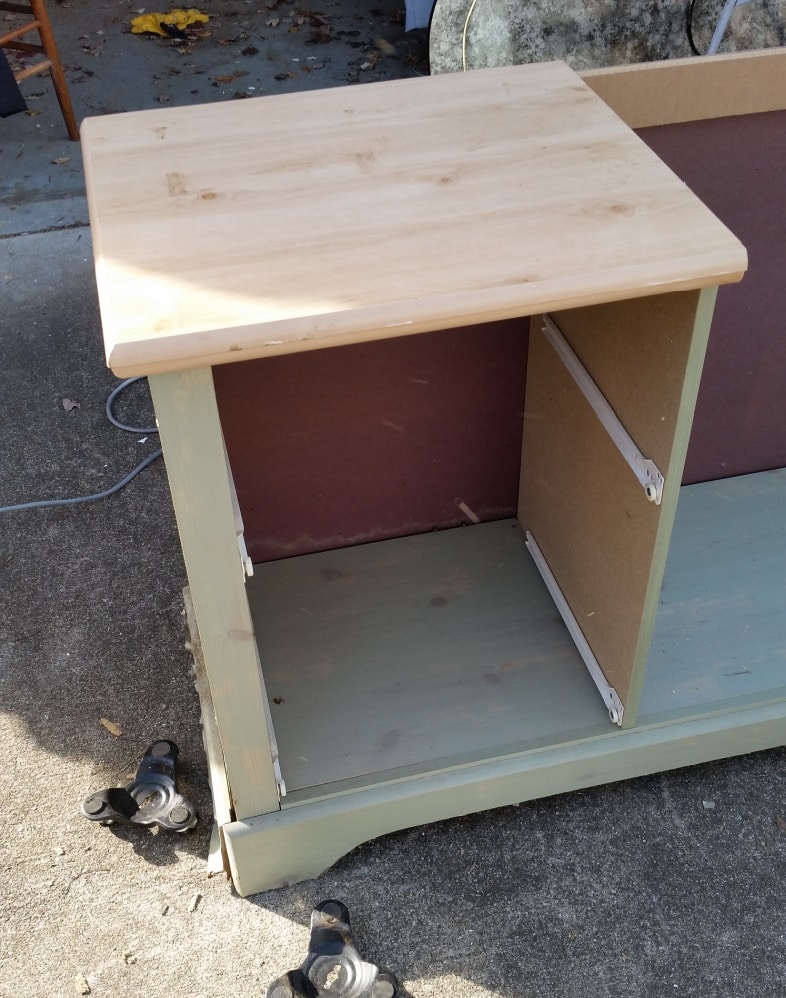
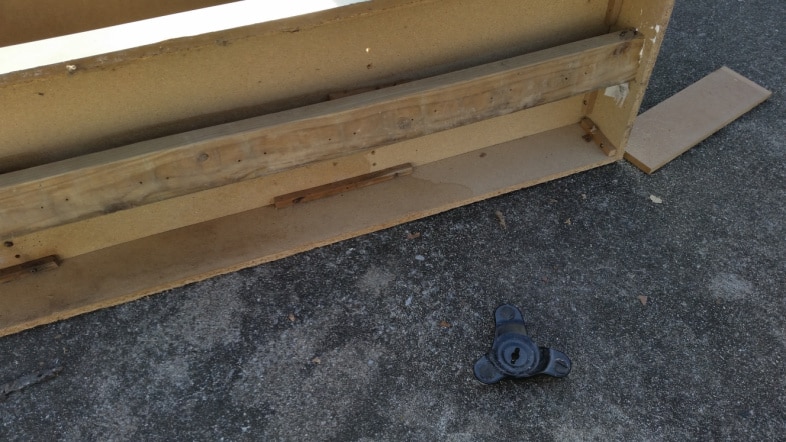
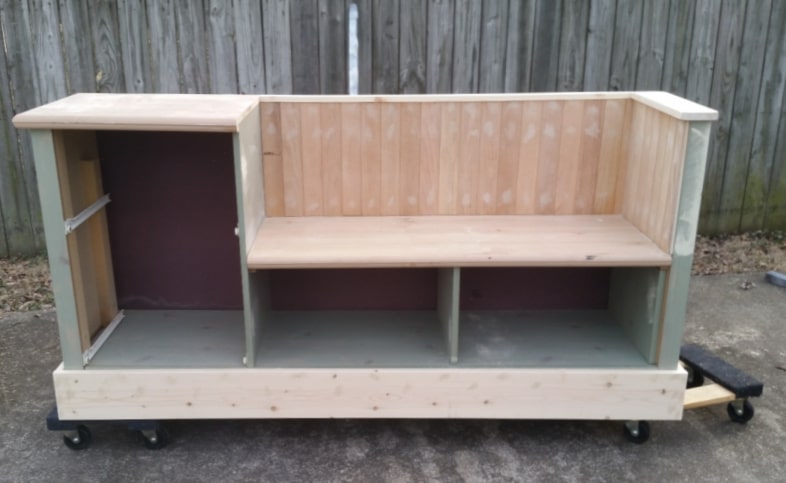
Once the top was removed, I had to decide whether to keep the left or the right drawer section. Because the dresser top was messed up on the right side, I chose to keep the left drawer section. I removed the partition that held the right drawer section in place, along with all the drawer guides. At this point, the dresser is pretty much an empty shell.
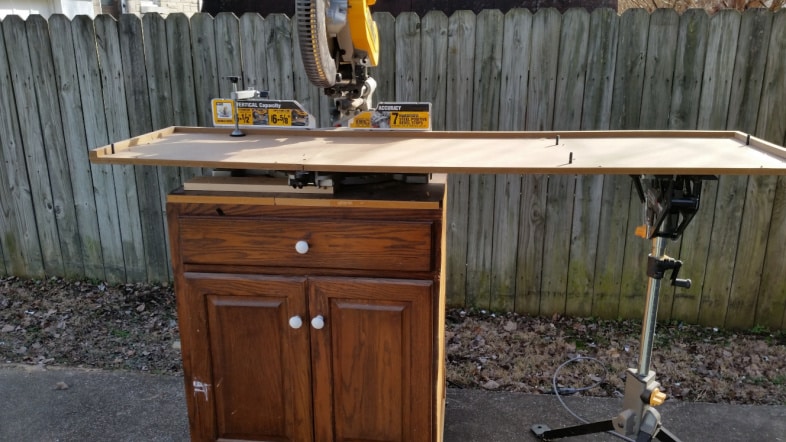
Being careful to remove all screws and fasteners where I needed to cut the top, I measured a section to replace on the left side, where the drawers would remain. I love this jaw stand for holding oversized pieces of lumber. This saw stand is way too tall to use sawhorses.
Using Wood Glue Will Add Strength

To replace the original top on the left side, I reused the plastic dowels and screws and used my favorite Gorilla Wood Glue.
Doesn’t it look great? It’s starting to come along, but it still needs lots of TLC.

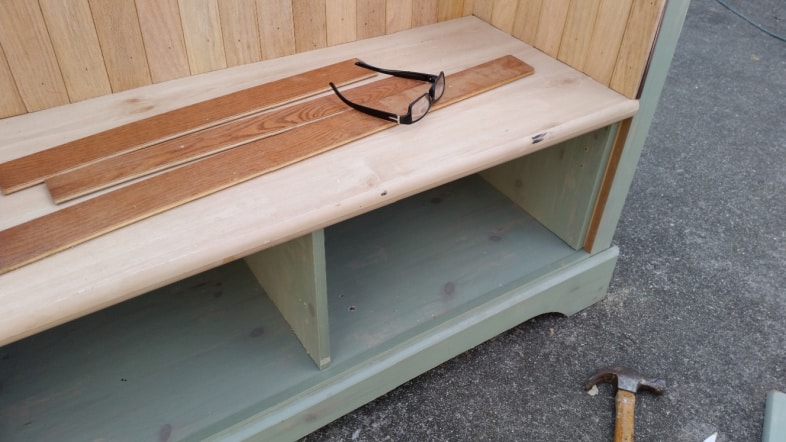
I measured the width of the open area to see how long I needed to cut the bench seat (out of the original dresser top)
Reuse as Many Parts as Possible

This is the dry fit of the dresser bench seat. I use quick clamps to support the seat while I make adjustments. The seat is too deep—you can see it extends beyond the front.
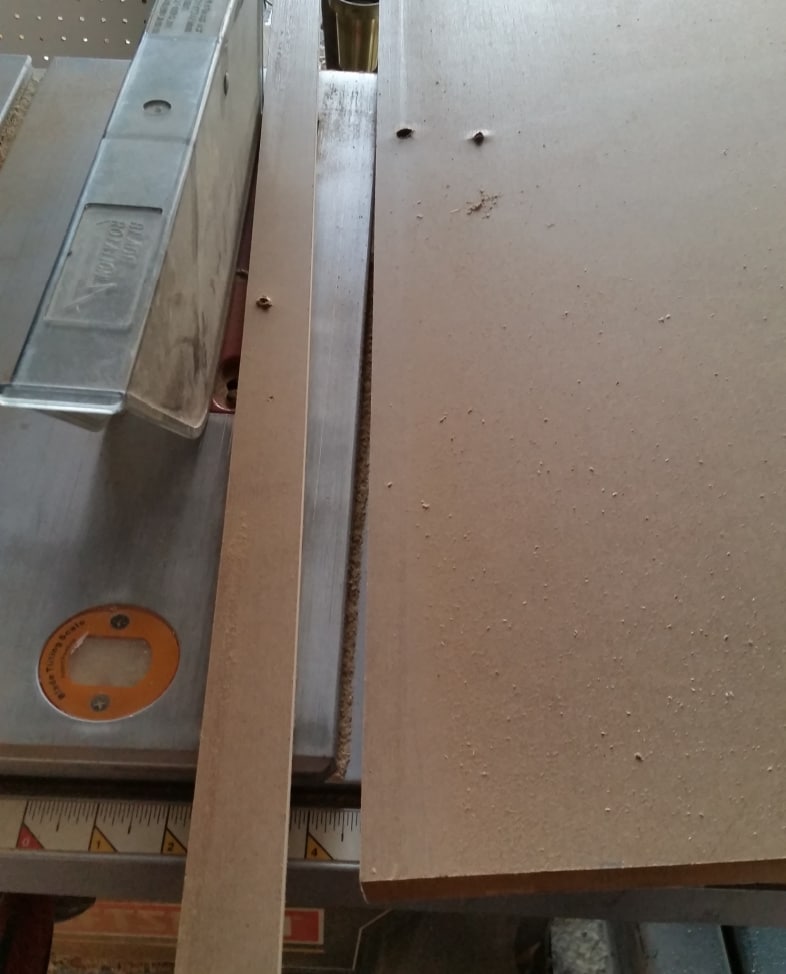
The depth was trimmed by ripping it on the table saw.
Wood Glue and Wood Screws
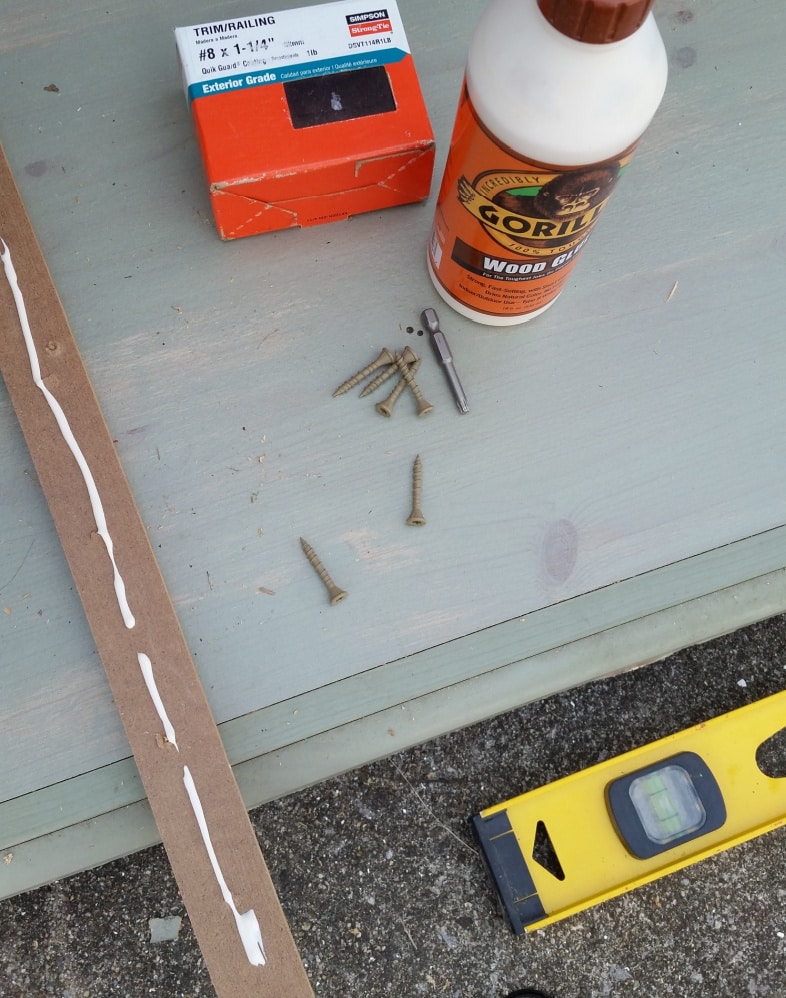
To hold the seat in place, I cut cleats from some of the dresser’s original pieces, securing them with Gorilla Wood Glue and wood screws.
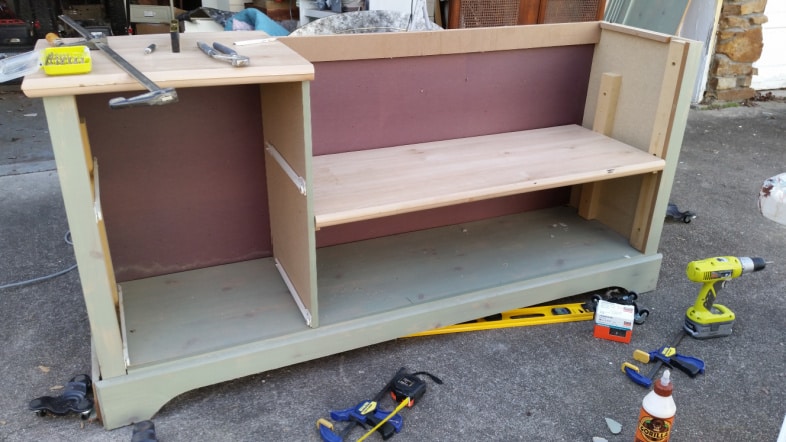
The seat is quite wide and not very sturdy, so it will need support in the center.
Does YOUR work area look like this when you’re busy working on projects?
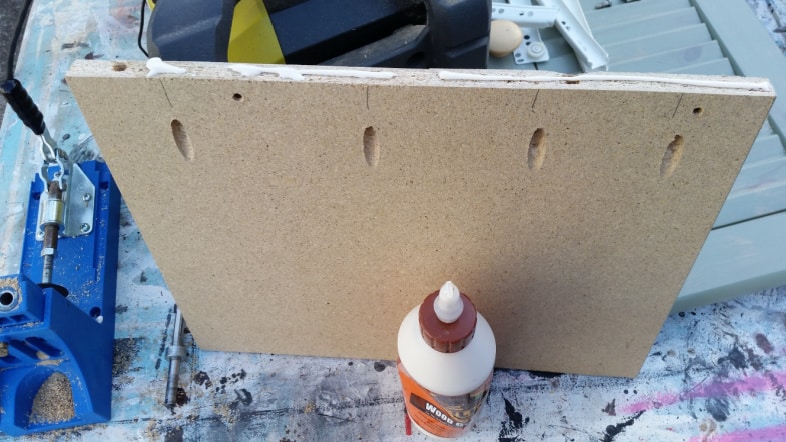
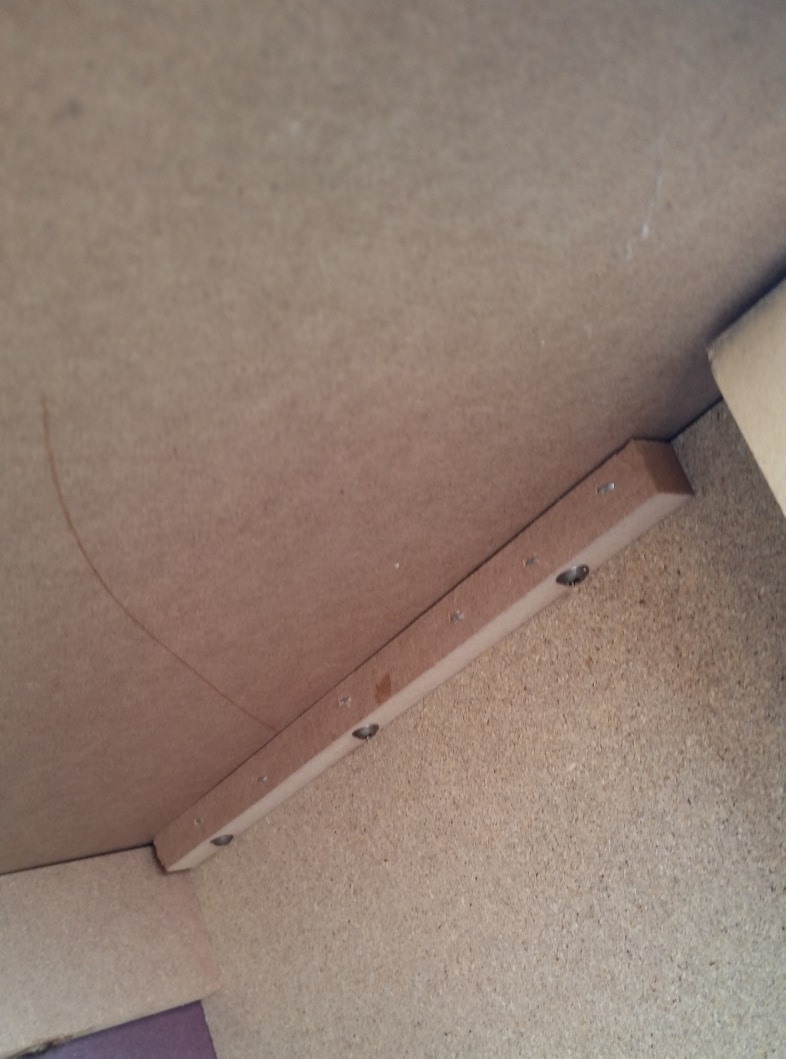
Another scrap piece of the original dresser was used for said support. Kreg Jig pocket holes will make installation easier with pocket-hole screws and additional wood glue.
If you don’t have a pocket hole jig, you can use “L” brackets. However, if you work on many projects, I highly recommend investing in one of these jigs. For more details, see my post How To Use A Kreg Jig.
Evaluate Your Progress

The pocket holes go up into the seat and down into the bottom of the dresser. Truth in blogging here… The dresser was lying on its back when I installed the center brace, and the seat was not resting on the cleats. Therefore, I cut the brace too tall, and you can see a slight bow in the seat. The next day I worked on this project, I removed the center brace and trimmed it to fit better.
Here’s where I tell you you could get the same results with the top-left if you used a jigsaw or a circular saw to cut the top while it’s in place. But—look how nice that cut is that I got using the compound miter saw.
Scrap Lumber helps Support Cheap Parts.
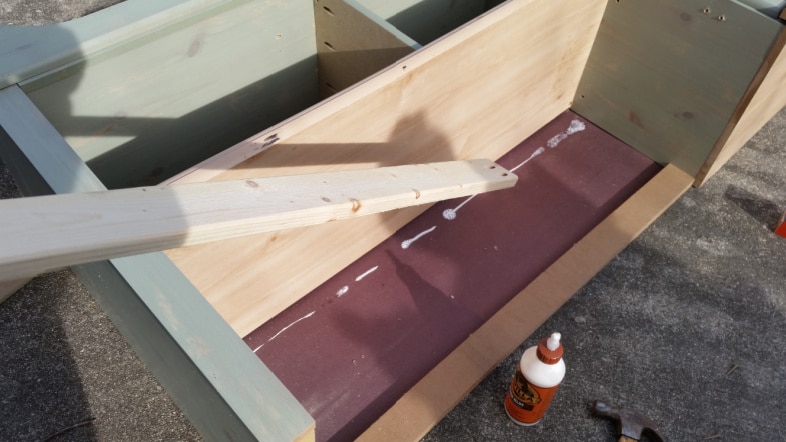
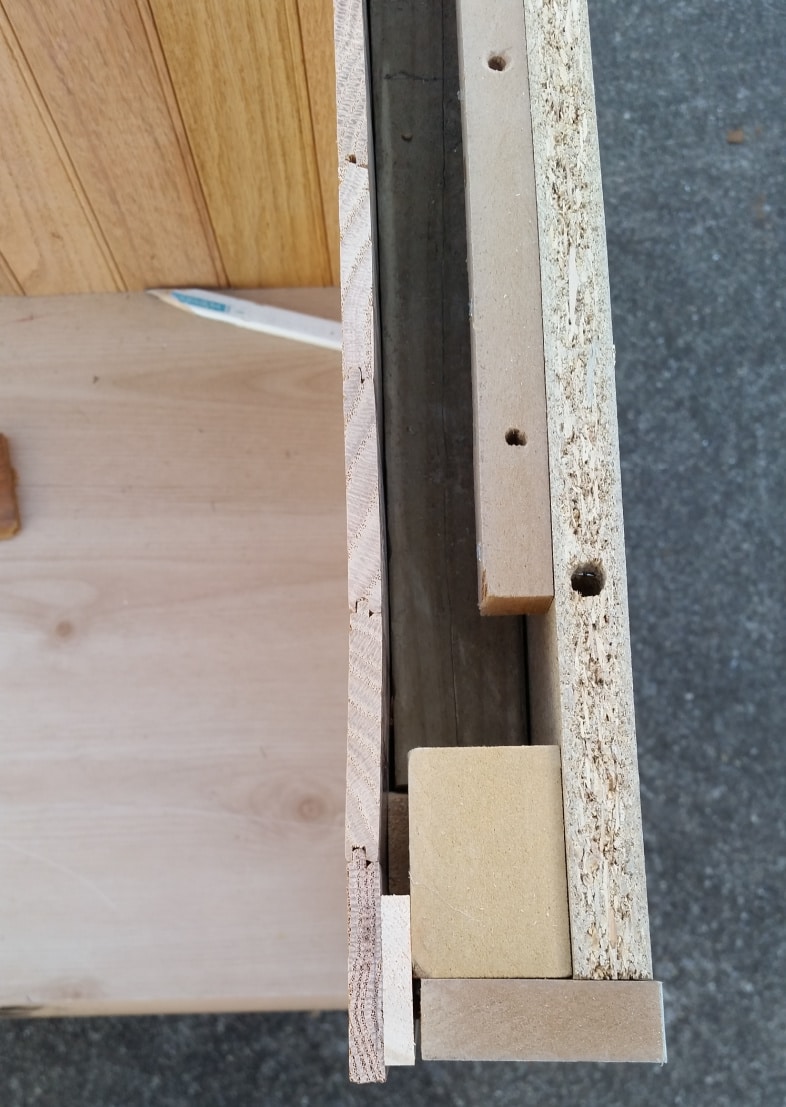
The backs of these cheap dressers are usually cardboard. It’s okay for looks, but it’s not strong enough to attach a back to the bench. I used some scrap 1x2s to support the back. More wood glue and pocket holes made a strong support.
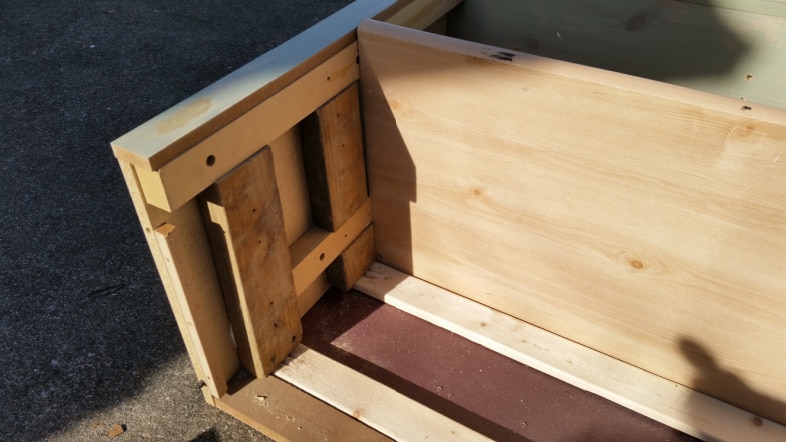
You can see the 1x2s in place (back) and 2x4s added to have something to secure the side boards.
I used the drawer fronts for the back of the original dresser bench I made. On another, I used beadboard. I checked my scraps and didn’t have anything big enough for this project.
Scrap Hardwood Flooring Mimics Beadboard
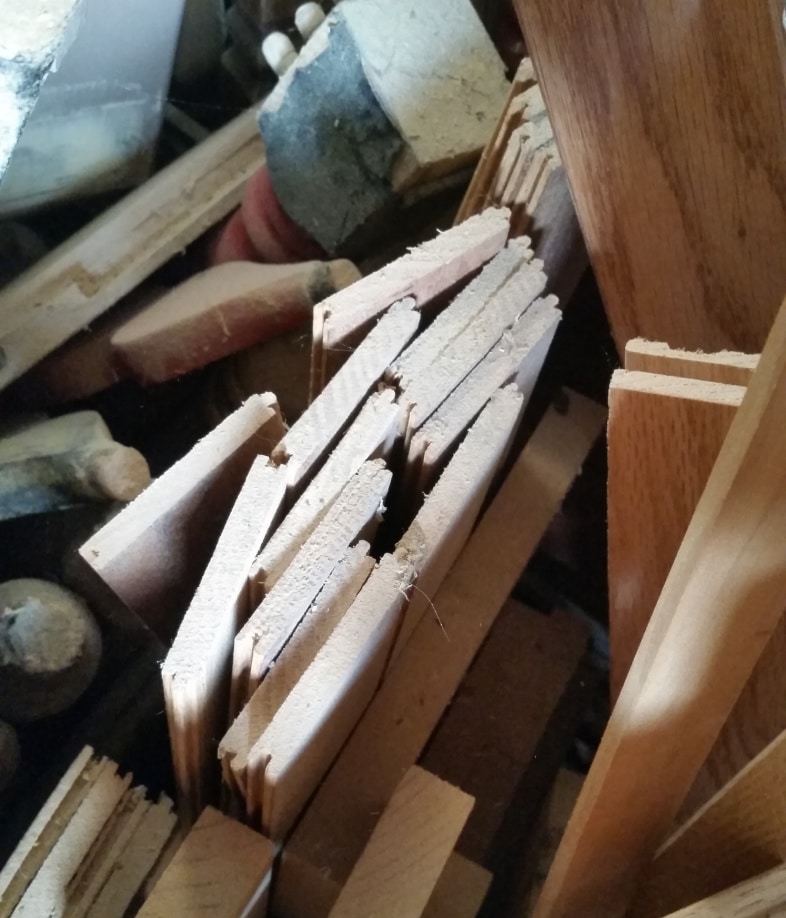
Enter PLAN B! I was in good shape because I never threw anything away, including small scraps of hardwood flooring. I think I originally cut them as bench seats, but chose not to use them because they weren’t strong enough. I picked them all out of the milk crate and hoped for the best!
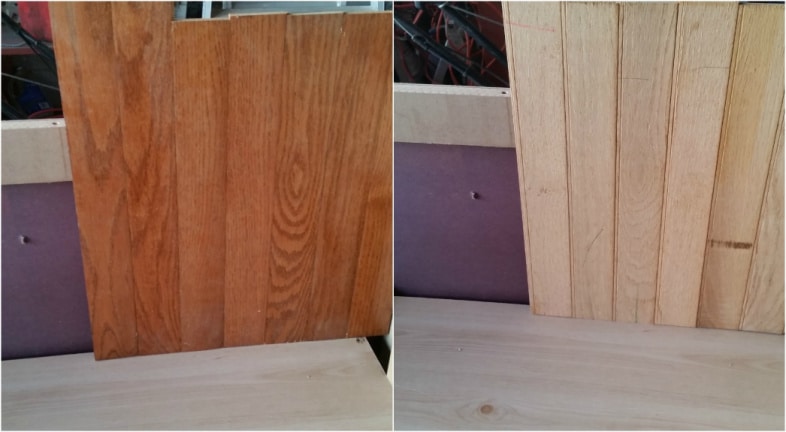
At the end of the second workday, I laid them all out on a porch to see if I had enough pieces, and decided I did. I set forth, trying to decide which way I wanted to use the hardwood floor scraps. It looks a little plain on the left, so since I wanted a beadboard, I decided to go with the style on the right.
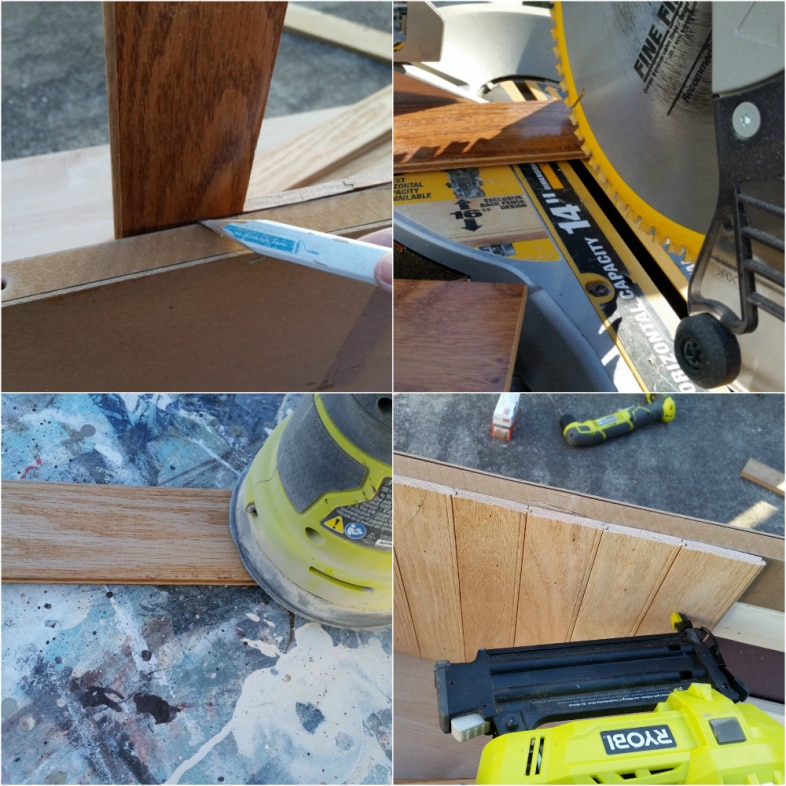
On the third workday, I marked each board individually, cut it, sanded it, and nailed it. After placing each board, I repeated the sequence on all remaining boards.
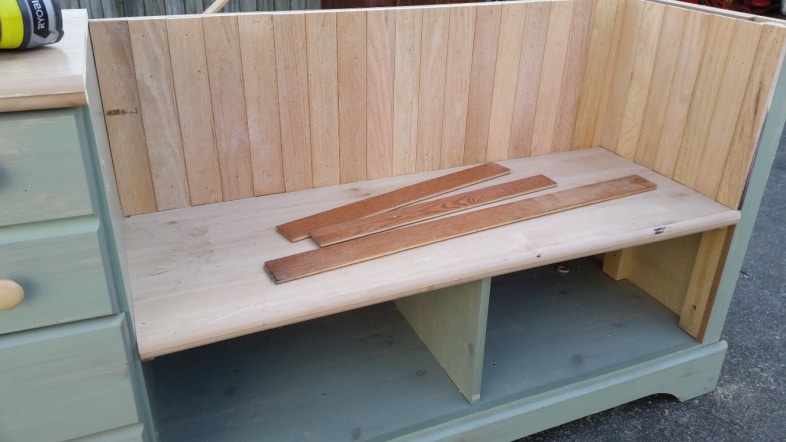
I did have to rip the last board on the back (far right) and the front and back boards on the side. Look at how many pieces I had to spare when I was finished. THREE! (more on this later)
Be Creative When Filling Gaps
This photo may be difficult to figure out. The 2x4s extended slightly beyond the original boards on the side of the bench. When I got to the front of the bench, I had to add a paint stick to match the distance with the 2×4’s. Oops! The floorboard and the paint stick protrude a little . . .

. . . It was quickly taken care of with my rasp or pocket plane. After removing the difference, I sanded it smooth with my orbital sander.
Look at the bottom right of this picture. You can see the original boards where the drawer glides were attached. It needs a little bit of cosmetic work.
I was able to use yet another original piece of the dresser to cover up that gap on the bottom right.
Add Bottom Brace Support
This dresser had water damage, and the bottom brace was a mess. I removed it and used an old 2×4 secured with wood glue and wood screws (inserted from the side into the 2×4).
Adding Trim For a Finished Look
I ripped a 1×4 to trim the back of the dresser bench and a full-sized 1×4 for the armrest.
See the patch on the left side, toward the front? More on that later as well.
I patched all the nail holes and the holes left from removing the original parts of the dresser. Because the trim around the bottom was in such bad shape, I replaced all of it with 1x6s.
This storage bench is a monster! The only way I can move it is with small furniture dollies.
This is where things get a little wordy. You can learn from my mistakes by reading the details, skipping the text, and looking at the pictures. ![]()
It’s all in the color.
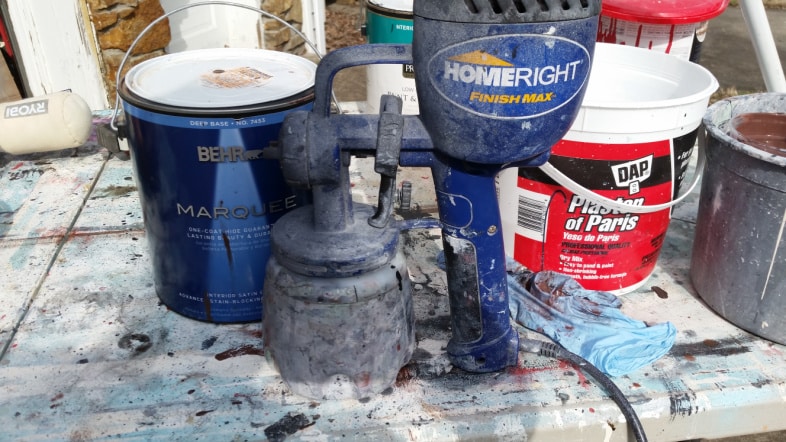
As usual, I mixed some DIY chalky paint primer with Behr Marquee brown and Plaster of Paris for my Homeright Finish Max.
After one light coat of the DIY chalky paint primer.
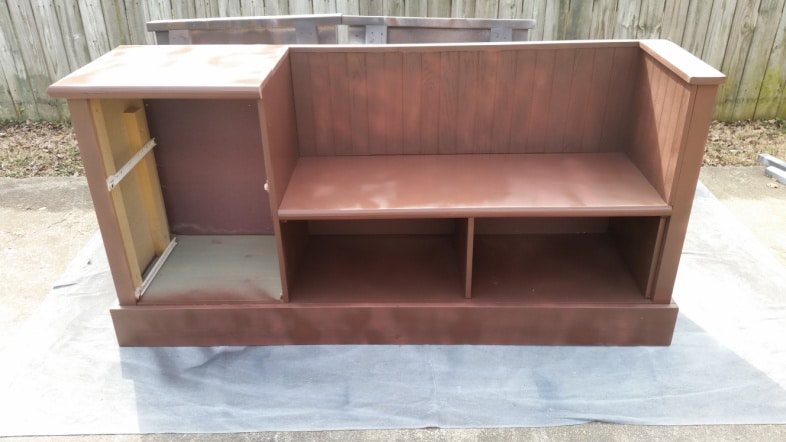
This is after two light coats of the chalky paint primer and two light coats of the Marquee paint straight from the can. (satin)
The WRONG color
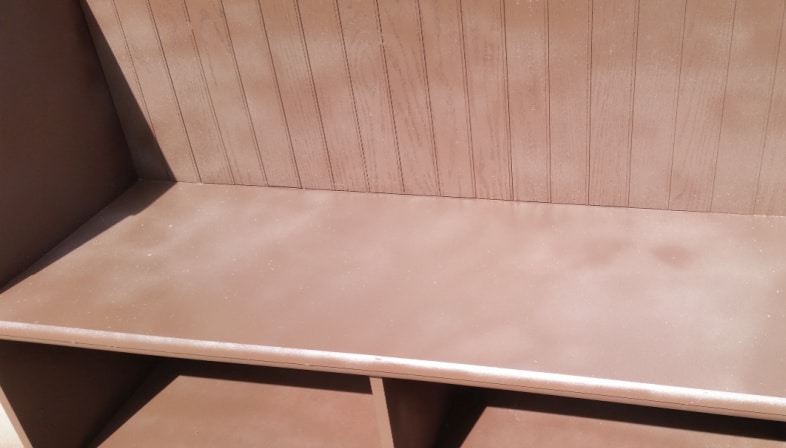
Here’s where it went wrong. I didn’t want to wax this massive piece, so I tried to take the easy way out and use a spray sealer. It left it splotchy and overall a MESS!
I sanded it all over with brown craft paper before repainting it.
Don’t get discouraged.
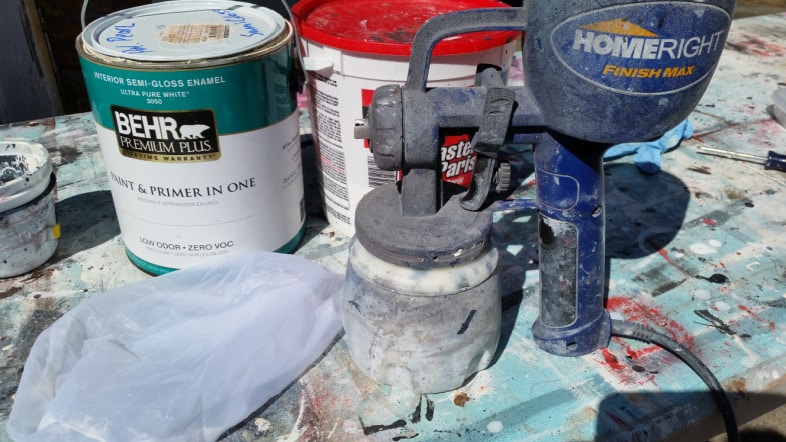
More DIY chalky paint primer. Note the new mesh paint strainer. I lost the old one and had to break out a new one. I used the plaster of Paris with my favorite Polished Pearl (semi-gloss).
After the first light coat of chalky paint primer, I did a very light sanding to smooth the surfaces. Remember earlier when I told you about that patched place? It’s so noticeable! I realized I should also try to add more hardwood flooring (beadboard) to cover that side.
It added more work, but I had to dig into a different old hardwood flooring stash to find matched pieces. I found just enough to cover that left side. As I said, it was a lot of trouble, and I did NOT want to do it, but I knew that blemish would haunt me if I didn’t.
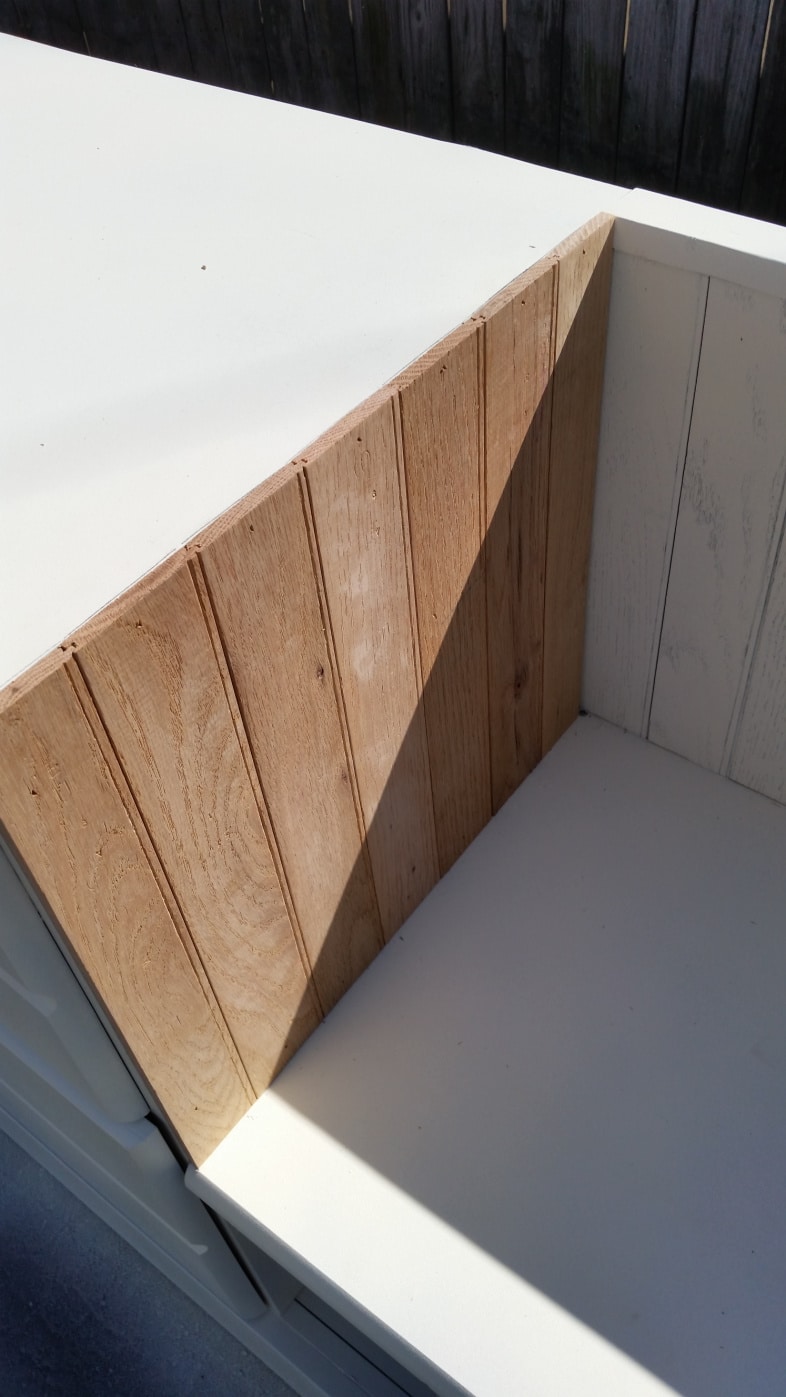
I attached this side as I did with the earlier hardwood beadboard. ![]()
Because color can make or break a great project.
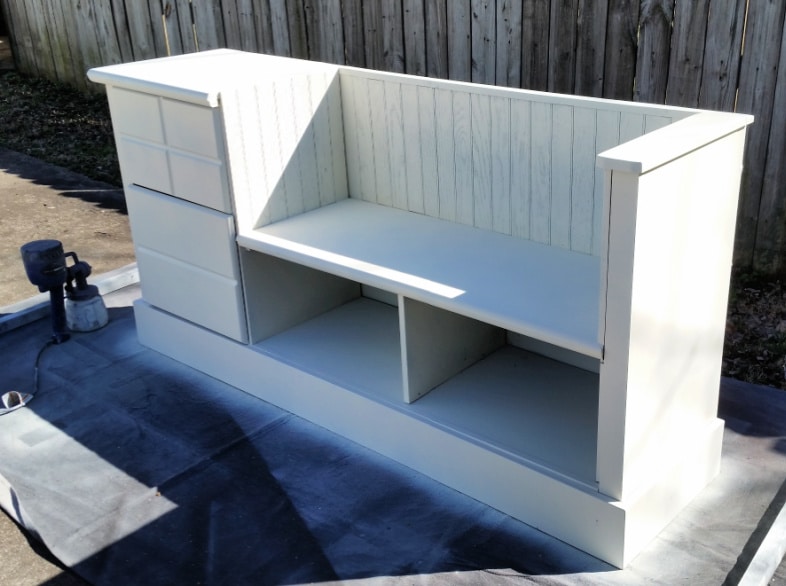
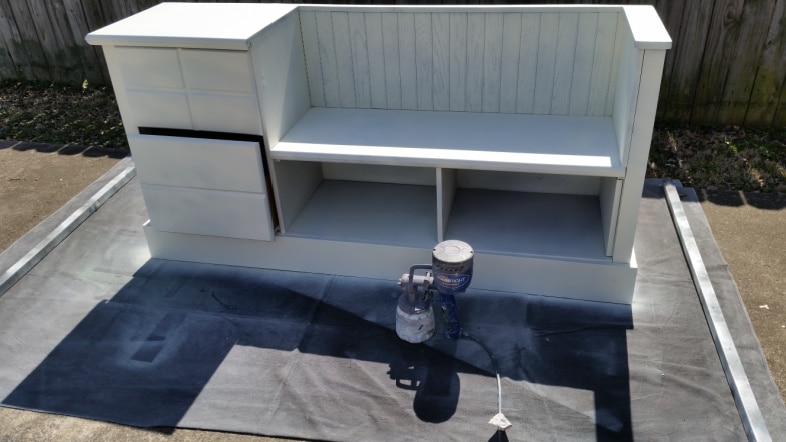
It was time to finish the project with more DIY chalky paint primer and three light coats of the Polished Pearl Semi-Gloss.

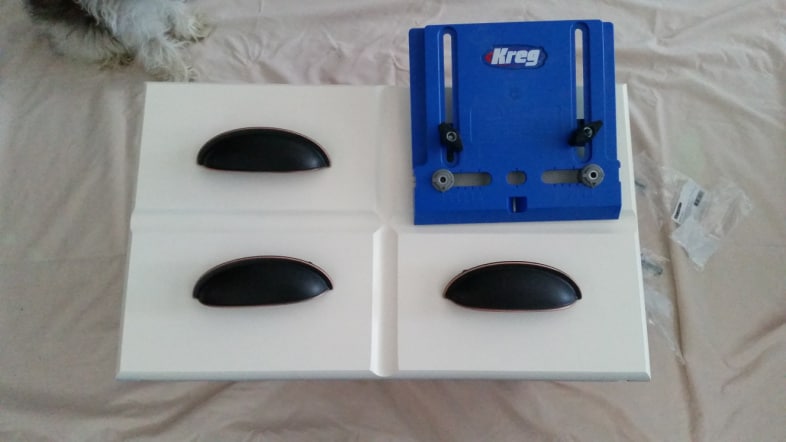
It’s getting there! Now it’s time to add new hardware!
Easy Hardware Installation
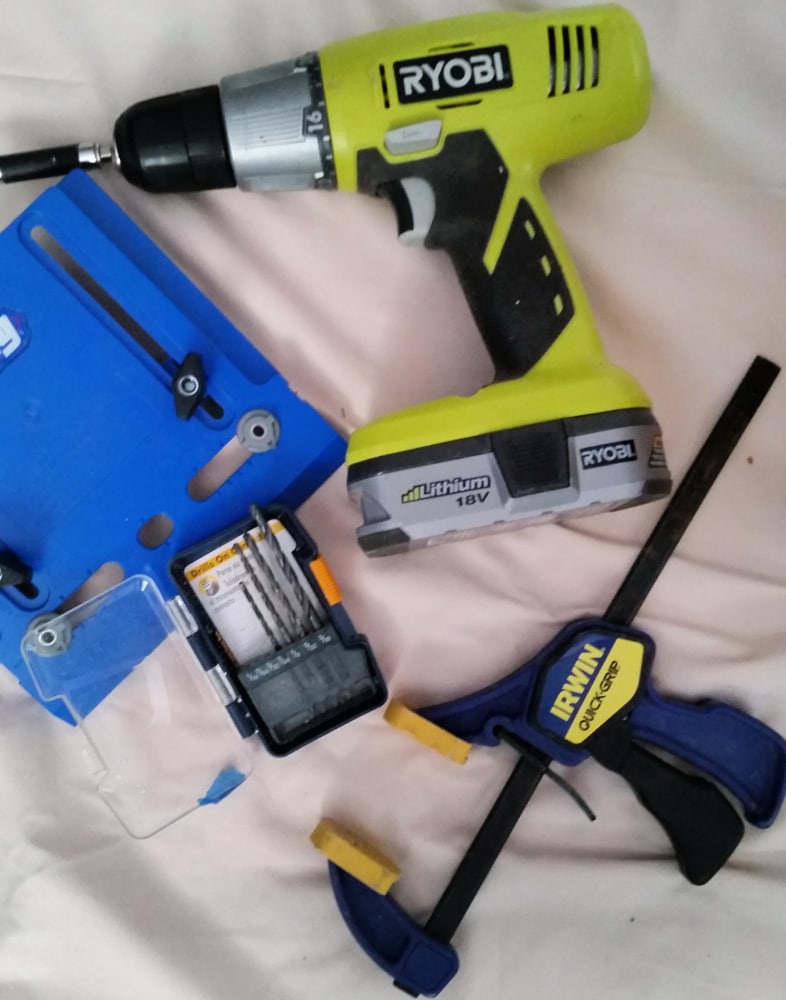
This kind of cup pull can be difficult to line up just right.
See my post, Apple Caddy, for a great video on how to use this fabulous jig.
This Kreg hardware installation jig is a dream for installing any hardware, but as I said, there is no leeway on these cup pulls.
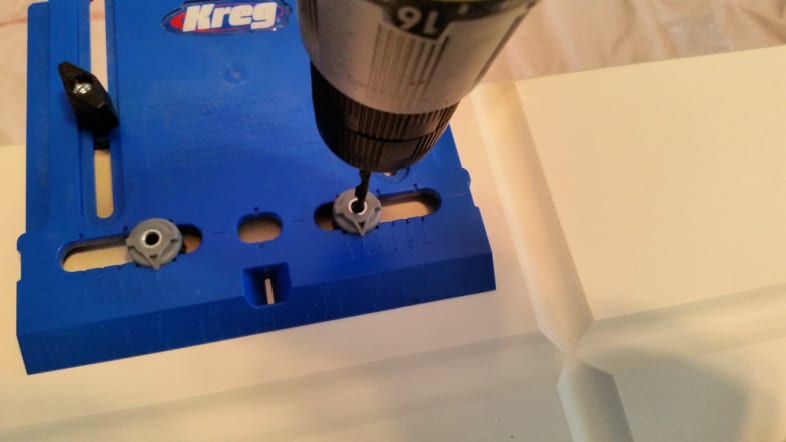
The best thing about this hardware jig is that you drill your pilot hole right through the guides.
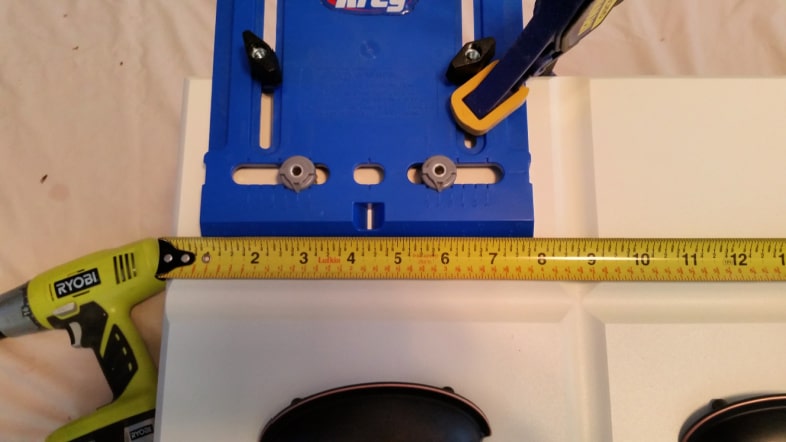
I used my self-centering tape measure to find the center of the drawer areas. I matched it up with the center of the jig. Full Disclosure–I love, love, love the way these pulls look, but they accidentally have packaged the wrong screws with them. My drawers are pretty standard, but the screws were too long. I contacted D. Lawless, and they sent me the appropriate screws. They are taking action to ensure that, going forward, the appropriate screws are included with each order. I love those guys!
Buying Upholstery Foam
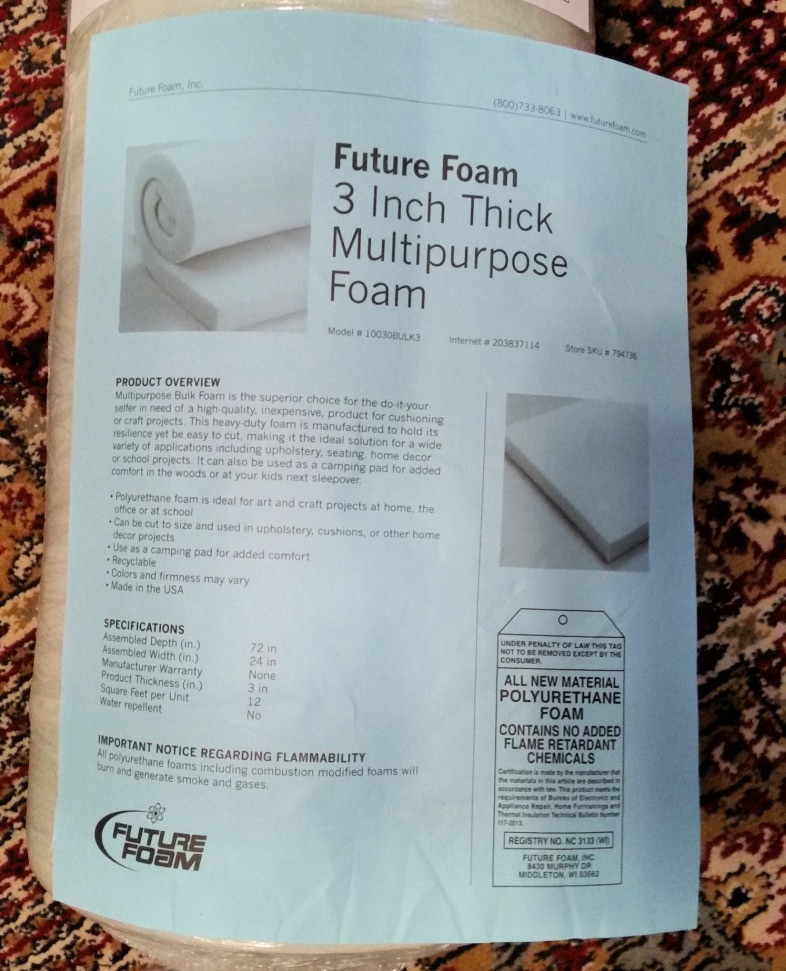
This 3″ foam is a great deal at Home Depot online. I ordered it and picked it up at my local store.
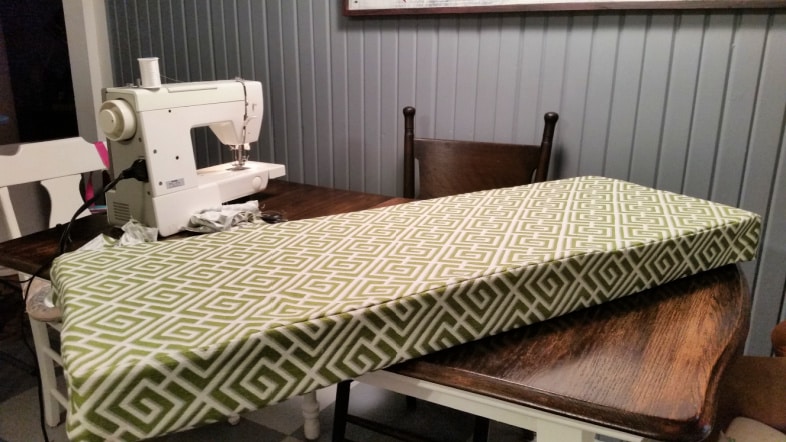
I won’t give you a tutorial on upholstery or making cushion covers. After searching online, I found some tips and combined them to make this boxy cover envelope style, so the cover can be removed.
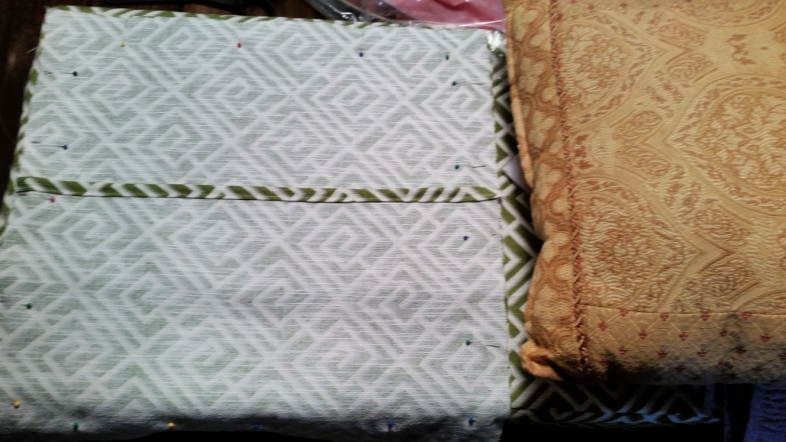
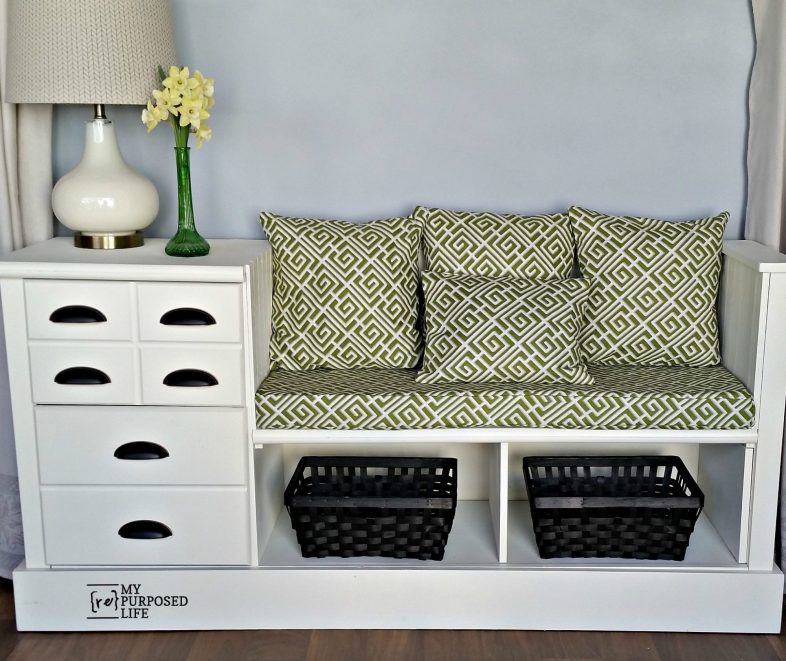
I got this Greek key fabric on clearance at Hobby Lobby for $4 a yard. There were three yards left on the bolt, so I just bought it all. Initially, I didn’t plan to make pillows, but since I had fabric left over, I thought they would make the storage bench look better. I made envelope covers and inserted thrift store pillows to keep costs down.
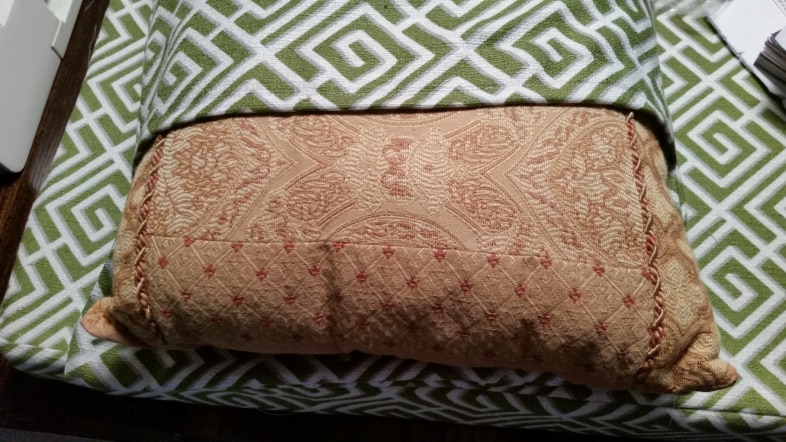
Because I don’t enjoy sewing, I don’t sew a lot. The cushion covers were a struggle for me, but I knocked out four in no time. I inserted the thrift store pillow backward so the braiding wouldn’t show through. It wasn’t until I got the fabric home that I noticed the gray shadowing. I LOVE it!
Storage Bench Seat made from a Dresser
Who would have thought this would all come together and look so good after that brown paint debacle? You probably know I go into most projects without a plan. I never intended to make cushions and pillows.
It looks okay without the cushions and pillows . . .

. . . but I love, love, love the look of the storage bench with the cushion and pillows. The fourth pillow? It’s a small travel pillow. They are an inexpensive option for buying pillow forms.
Wow! Are you tired of just reading all of this? This project dragged on longer than most of my projects. I suppose a lot of that had to do with the weather. Because it was so cold, I had to bring the drawers in to work on the hardware installation.
If this dresser bench proves anything, it’s that a beat-up piece with a damaged top can still turn into a hardworking showpiece. Between the drawers, the big open storage, and the cushioned seat, it’s the kind of bench that can actually earn its keep in a mudroom or hallway. If you try your own version, do not stress about making it perfect on day one. Keep adjusting as you go, and let the hardware and cushion do some of the heavy lifting at the end. If you have questions, drop them in the comments, and be sure to check out my other dresser makeovers for even more “what else can this become?” ideas.
I hope I’ve inspired you to look at junky furniture in a whole new way. Aren’t I lucky that I get to do what I love?
gail
Sharing at Creativity Unleashed and Inspiration Monday
See MORE dresser ideas
More excellent storage seating options: Mission Style Bed Bench with Storage. Cheap Cabinet Into a Nice Bench
This bench is wonderful! I love that you were able to use the dresser rather than put it in the landfill. Do you know that if you are buying fabric from the end of the bolt and there is more than you need left on the bolt, you can ask for a remnant price on the remainder of the fabric and I have always gotten the lesser price. Make a pillow, or arm covers for chairs or sofas, a plant pot cover, or many other things you can think of.
Kay,
Thanks for stopping by to check out my dresser bench. No, I had no idea about an “end of the bolt” remnant price! Thank you for that tip!
gail
Great job. I get how long it can take to do a project like that!