How To: Peel and Stick Backsplash
As an Amazon Associate, I earn from qualifying purchases.
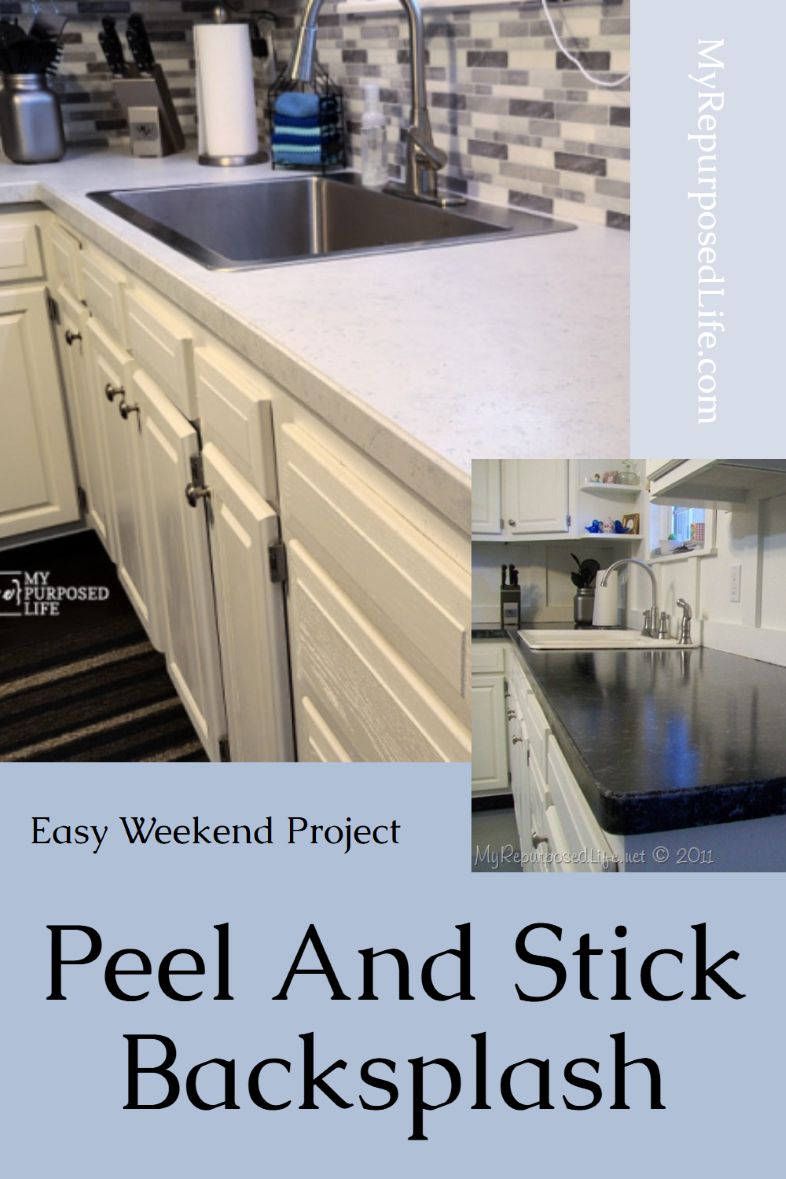
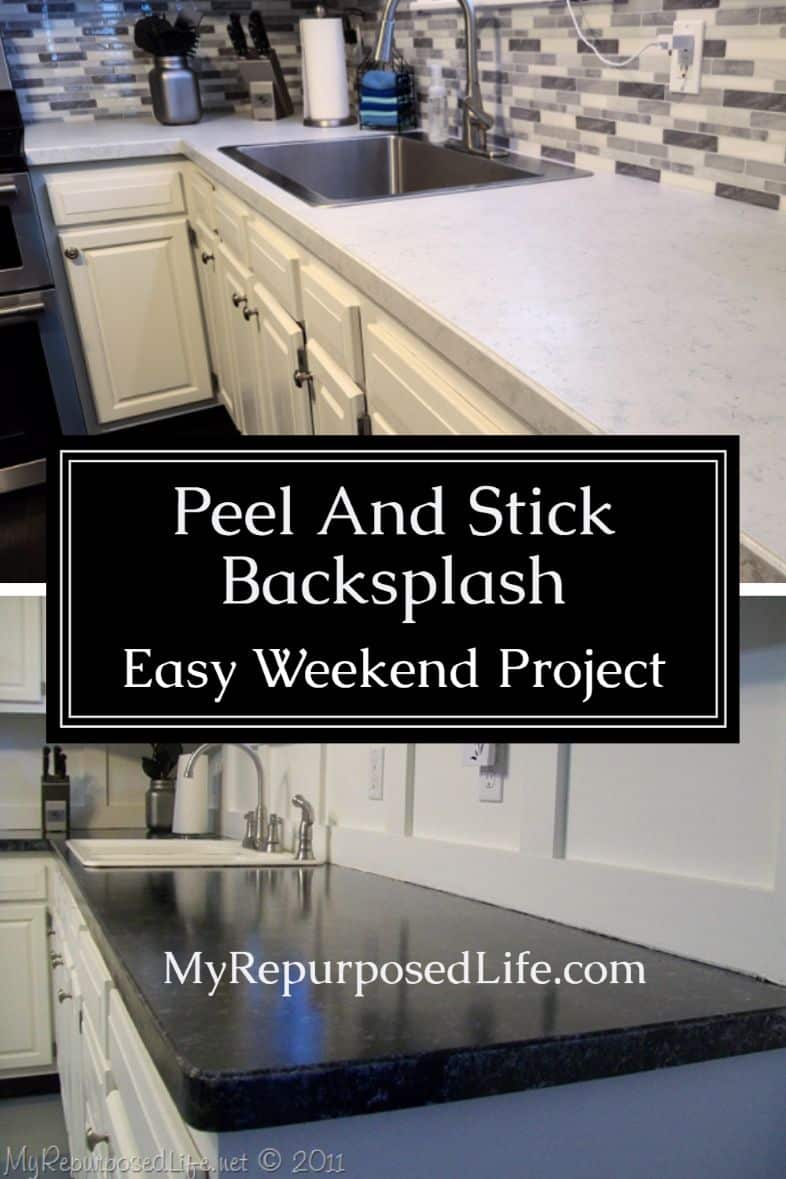

Looking to give your kitchen or bathroom a quick, stylish upgrade without the hassle of grout and tile saws? Peel-and-stick backsplash tiles are an easy, budget-friendly way to transform your space in one afternoon. Whether you’re a seasoned DIYer or a beginner, this project offers a big impact with minimal effort — and I’m here to walk you through the process step by step!
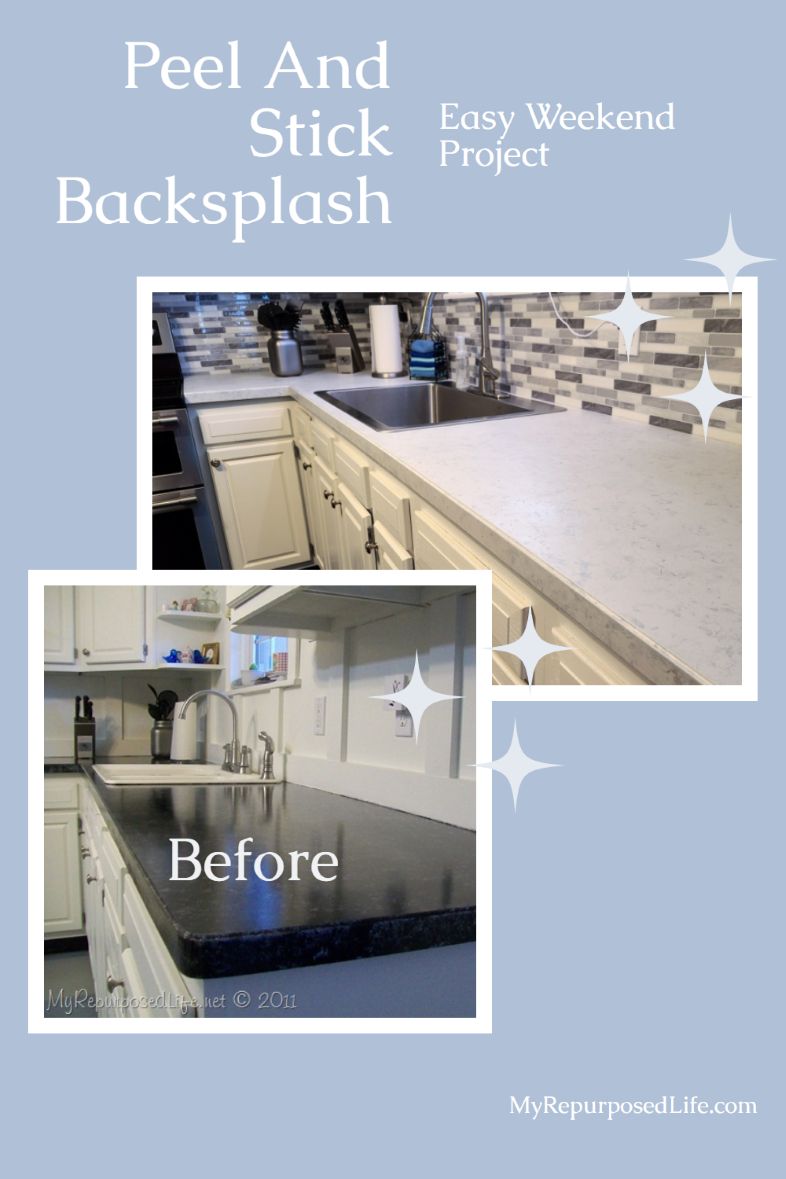
Did you see my newly painted countertops? I put off doing that project because I didn’t know how easy a peel-and-stick backsplash is. Yes, the backsplash was holding up the entire project. I’ve never done this before, but I have some tips for you.
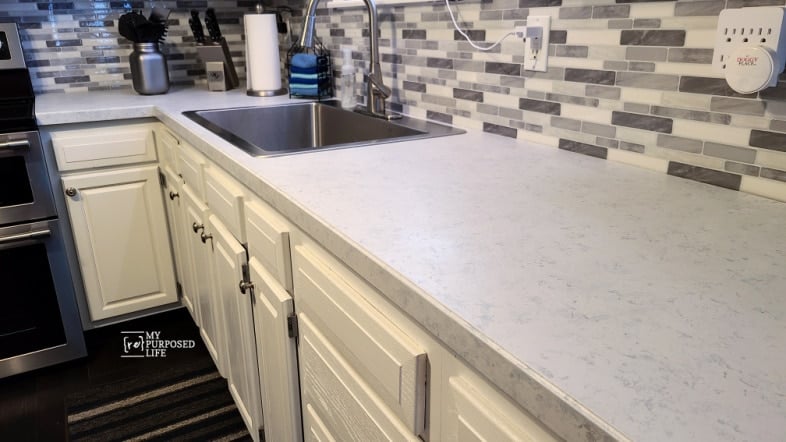
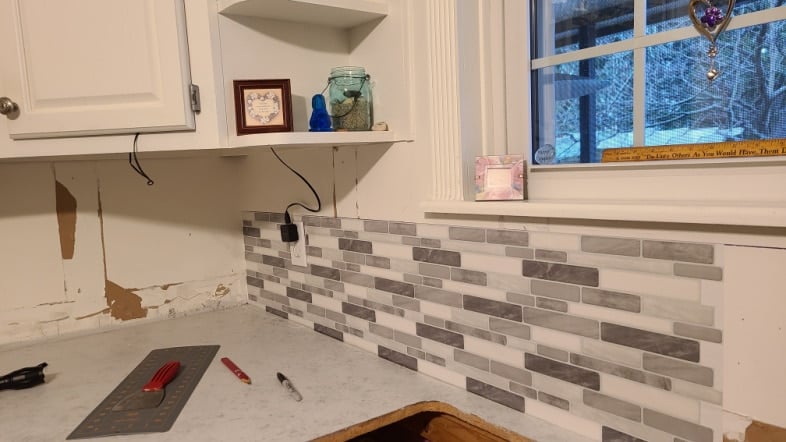
Here are the painted countertops along with the new peel-and-stick backsplash. I started the project on the long wall back in the corner where the paper towel holder is.
What Do You Do to Prep for Peel and Stick Backsplash?
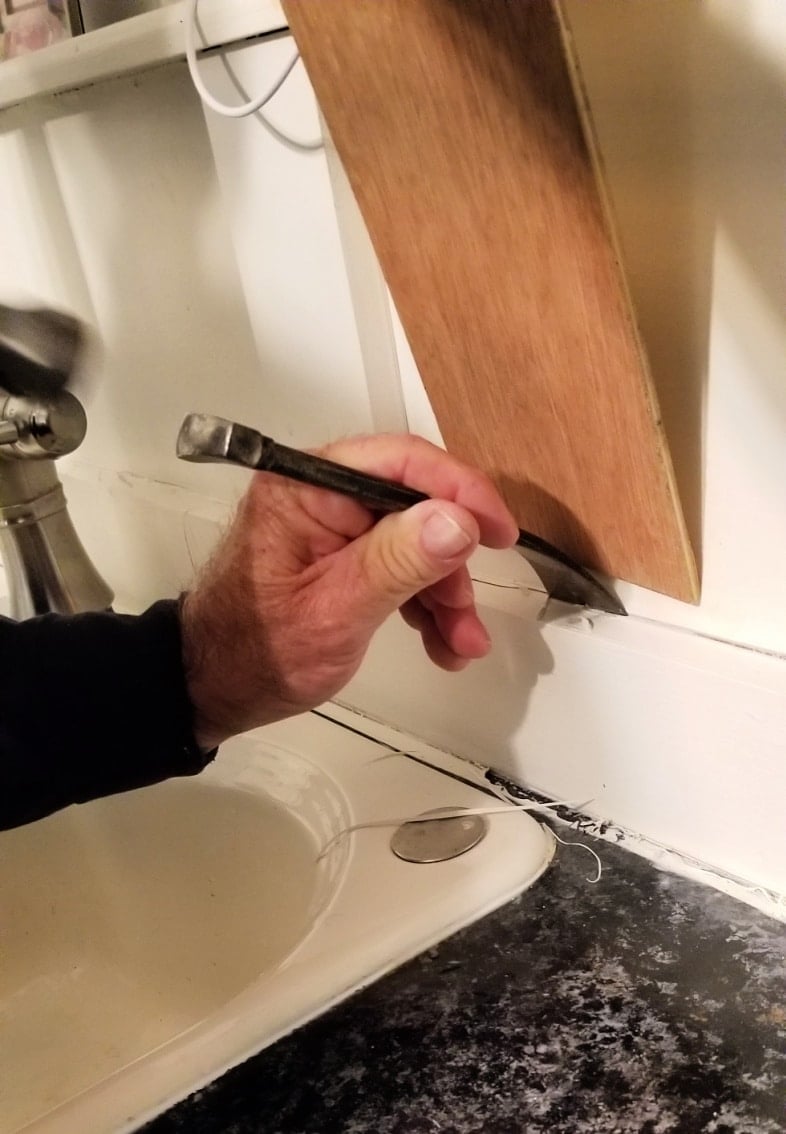
First, remove your old backsplash. In this case, it was board and batten. A scrap piece of thin plywood was used to pry the boards away from the wall.
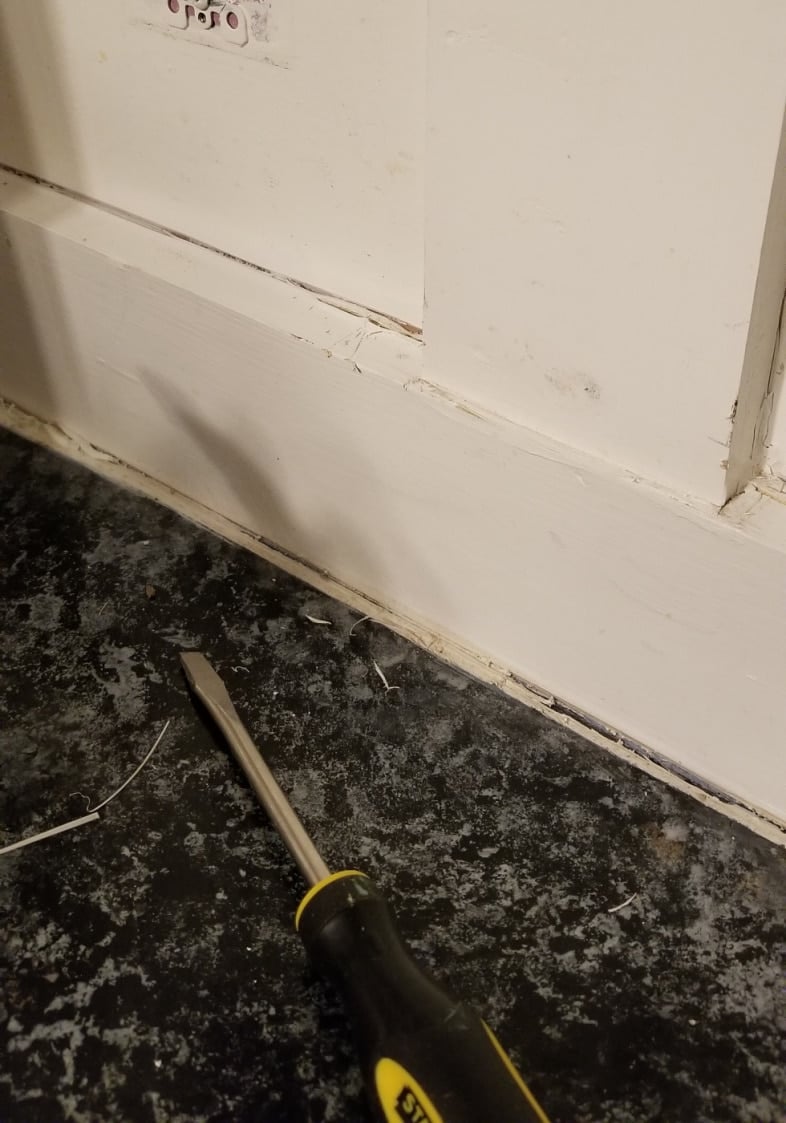
It may be necessary to break the seal of the caulk with a razor knife or screwdriver.
The leftover liquid nails had to be removed. The peel-and-stick backsplash is rather thin, and any large imperfection may show through.
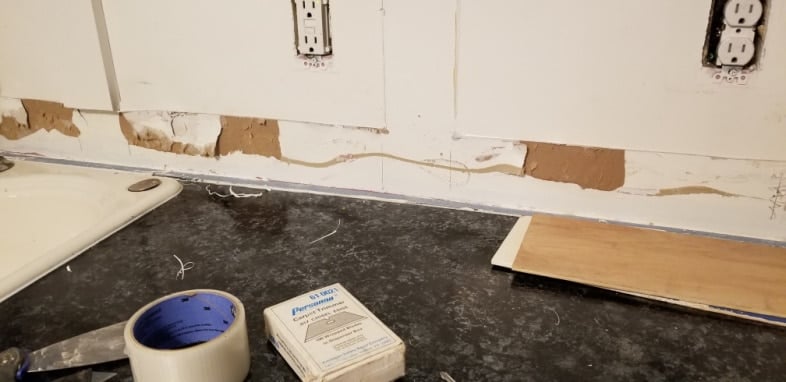
Next, thoroughly clean your wall and allow it to dry completely. Then, remove the outlet covers.
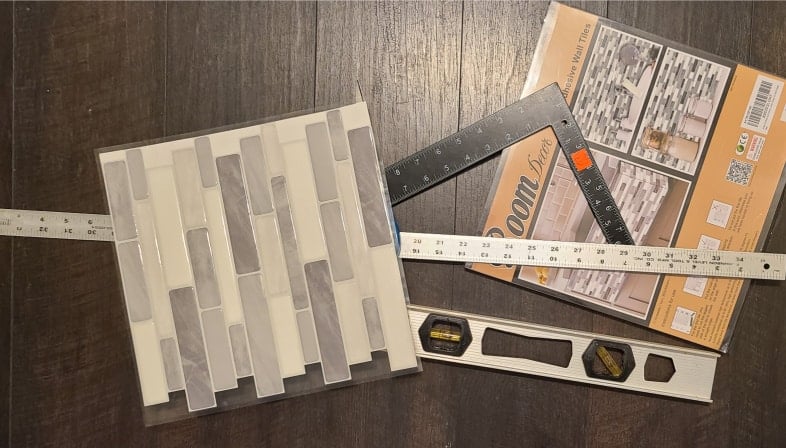
Materials Needed
Carefully measure and calculate your square footage. You will NOT want to stop in the middle of your project to wait for another package of peel-and-stick backsplash to be delivered.
All in all, these are the tools I found helpful for the peel-and-stick backsplash project.
- Carpenters square (optional)
- Metal yardstick (optional)
- Level (a MUST)
- Paper cutter (optional)
- Scissors
- Rotary cutter (optional)
- Cutting mat (if you choose to use the rotary cutter)
- Pencil or Marker
Directions for Installing Peel and Stick Backsplash Tiles
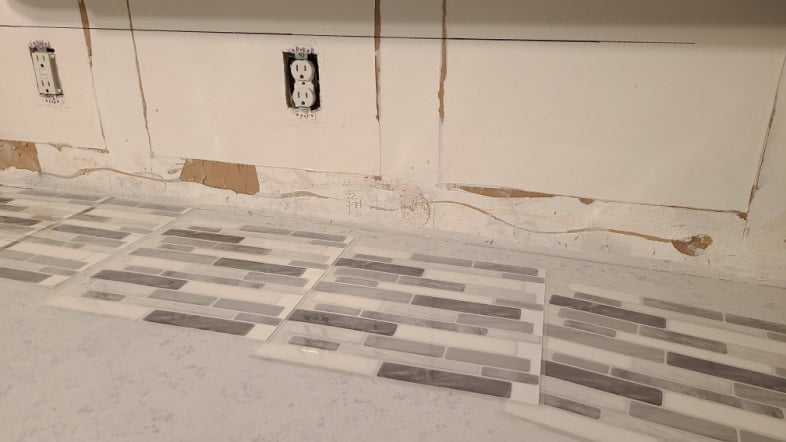
Using the level and a yardstick, I marked a line where the top edge of the peel-and-stick backsplash tiles would line up. There is a definite starting point on the backsplash. I laid my tiles out so I wouldn’t get mixed up.
First, you need to cut the little “tabs” off your first tile to get a straight edge. If you live in an old house, do not expect anything to be straight or even. As you can see, I did the entire bottom row of tiles before adding 1/2 sheets to the top row. My counter has a dip in it. I chose to keep the tiles level and allow them to dip down behind the countertop.
Sometimes, getting the tiles lined up can be a little challenging, especially in this corner where I had to stand on my tippytoes! After applying each tile, press it down firmly with your hands. Then, remove the protective film before adding the next tile.
TIP: I chose to DRY FIT every tile before revealing the sticky back.
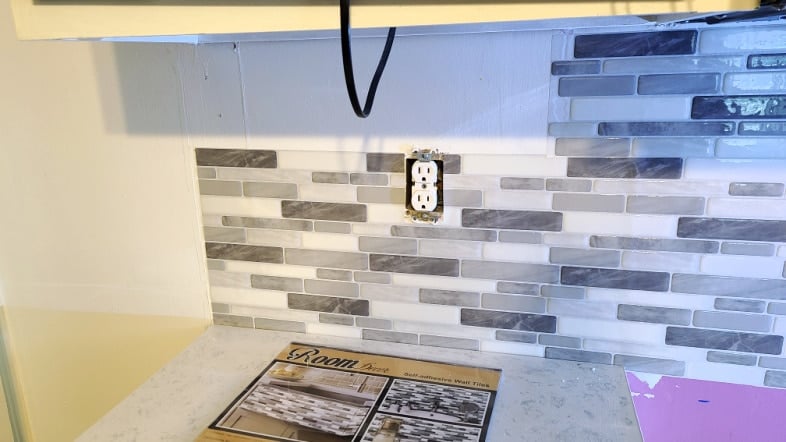
How to Cut for Outlets
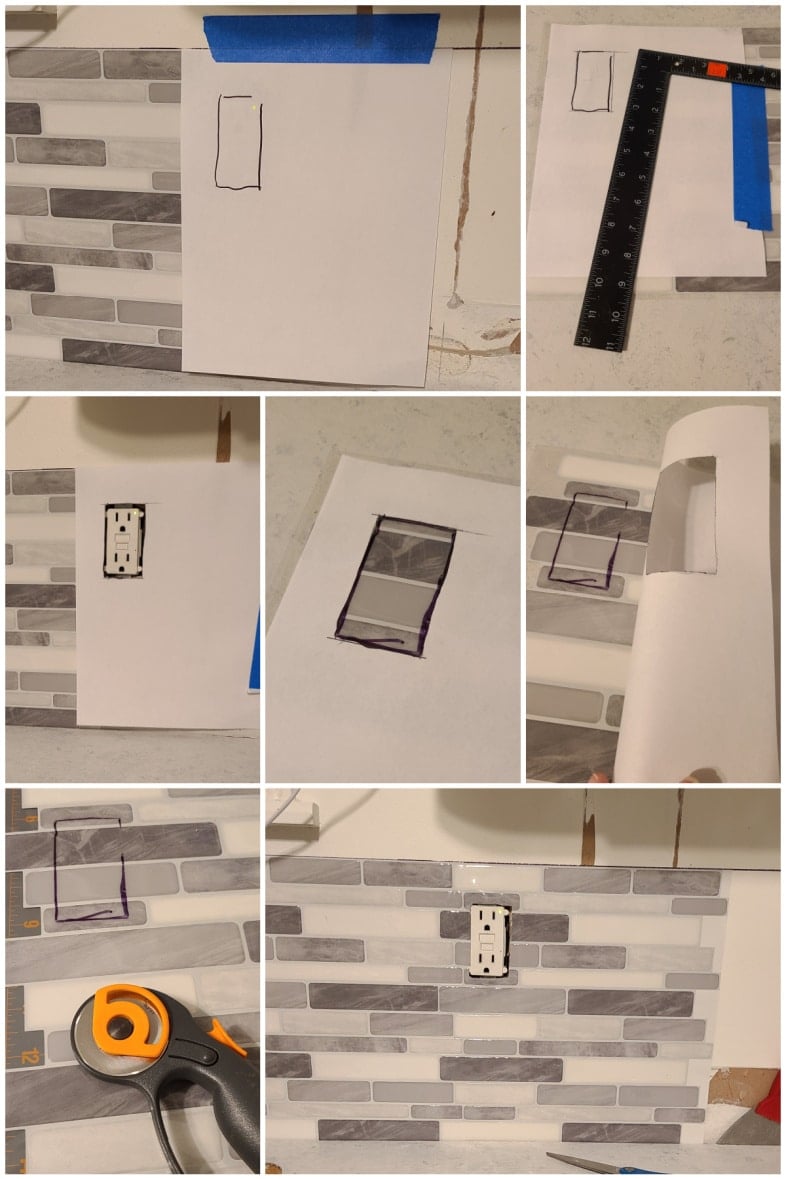
This is how I cut out the holes for the outlets.
- Place a piece of paper against the edge of the previous tile. Draw a rough outline.
- Straighten out the lines with a square.
- Cut out the rectangle with scissors.
- Trace the rectangle onto the peel and stick the backsplash tile.
- Use a box knife or rotary cutter to cut on the lines.
- Test for fit before peeling off the backing.
Use a Paper Cutter for Straight Cuts
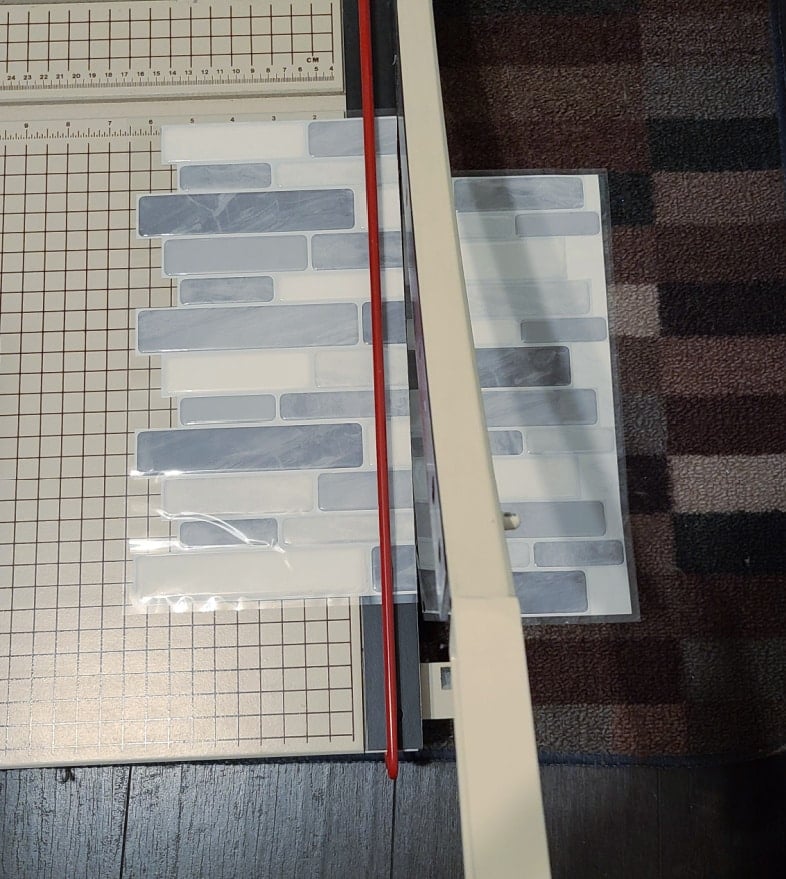
Using a paper cutter for straight edges worked well for me. Scissors cut through the peel and stick backsplash easily, but if you’re like me, it’s hard to cut a perfectly straight line.
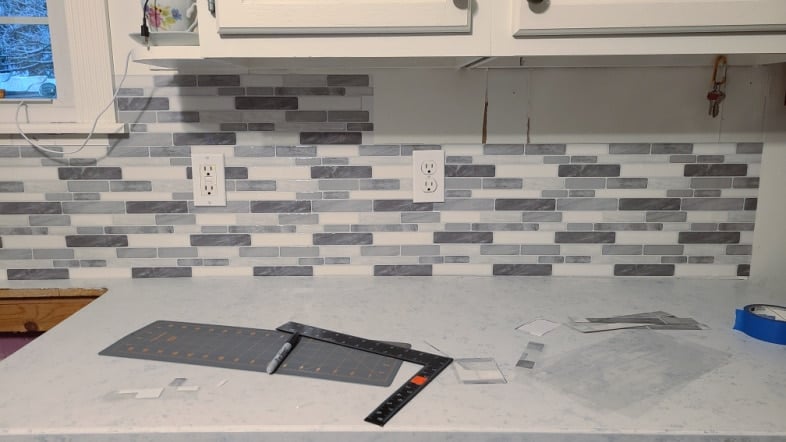
Adding the second row was easy for me. I cut the tile in half lengthwise. When you do this, use the top, bottom, top, and bottom as you go across the pattern. I did it on this wall but got confused on the other wall, and the pattern got messed up.
There is about a one-inch void from the tile square to the bottom of the cabinet. I left it, and it’s not even noticeable because the wall color matches the cabinets pretty well.
I did have to use a thin row of the tile pattern to fill in under the window. In the image above, that had not been done yet.
Matching the Corner
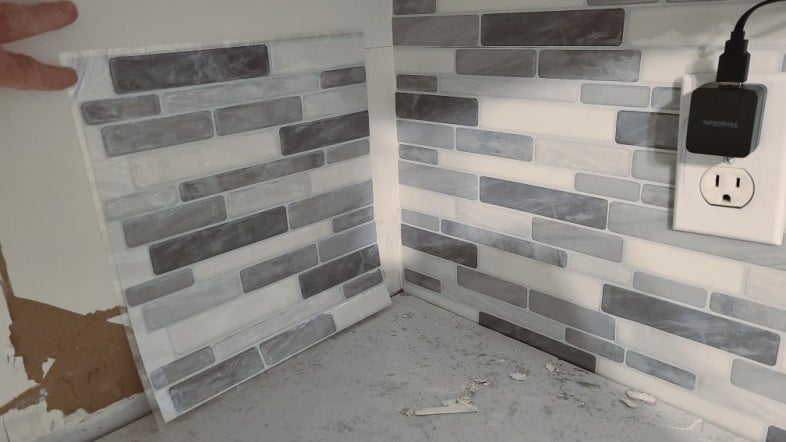
I went back to the original corner to do the other wall. This is where I made my only mistake. When cutting off the straight edge, I cut the wrong side of the peel-and-stick backsplash tile. This is the correct way. For some reason, I was unable to get the pattern to match.
TIP: You may want to cut that first tile in half and put them back together in the corner. Does that make sense? Then, you would work your way out from the corner on both walls.
This is to the left of the stove (which spent a few days in the middle of the floor while I painted the counters). I had to open the last package for ONE TILE to cut in half to go right here.
Pros and Cons of Peel and Stick Backsplash Tile
Pros
- It’s cheaper than real tile
- You can do it yourself in a few hours
- It looks nice enough
- Peel and Stick Backsplash Tile comes in a variety of designs
Cons
- Although it’s cheaper than tile, it’s not inexpensive
- It has a funny waxy-like texture/feel
- You may be disappointed at how thin it feels
- Some reviews on Amazon may doubt yourself for choosing this option
Am I Happy with my Peel and Stick Backsplash?
Oh, yes, I am! Adding a new sink and faucet is the icing on the cake! Ten years later, I’m still using my stainless steel-painted accessories. If you check out how I painted the countertops, you will see that they are a very light gray with a darker gray highlight and a light coat of the base coat gray atop of that. Oh, and the kitchen cabinets? I painted those 10 years ago. See details here: How to Paint Oak Cabinets.
Wow, this kitchen has seen a LOT of changes over the last 20 years.
Save & Share on Pinterest
gail
Related Content:
How to DIY Barn Doors on a Budget
Covering Popcorn Ceiling with Wood Planks
How to Remove Multiple Layers of Vinyl Flooring